18 Personalized Initial Hair Pin Ideas for Chic Custom Detail
Personalized initial hair pins add a custom jewelry-like touch to everyday hair, making simple waves, ponytails, braids, and updos feel instantly more distinctive.
The easiest way to make an initial pin look intentional is to treat it as part of the hairstyle rather than an accessory added at the last second. It can anchor a side section, decorate a ponytail base, sit beside a braid, or become the focal point of a polished bun.
Think about pin size, weight, hair density, placement, and how much of the letter should remain visible. Fine hair may suit smaller lightweight pieces, while dense hair can support bolder designs. The hairstyle itself should remain securely held with elastics, pins, or clips so the personalized piece can stay primarily decorative.
Quick List
- Pearl Initial Side Pin Hairstyle
- Crystal Initial Low Bun Hairstyle
- Gold Initial Soft Waves Hairstyle
- Silver Initial Sleek Bob Hairstyle
- Stacked Double Initial Hair Pin Hairstyle
- Monogram Side Twist Hair Pin Hairstyle
- Initial Hair Pin High Ponytail Hairstyle
- Velvet Ribbon Initial Pin Hairstyle
- Braided Crown Initial Hair Pin Hairstyle
- Curly Updo Initial Hair Pin Hairstyle
- French Twist Initial Hair Pin Hairstyle
- Half Up Initial Barrette Hairstyle
- Side Swept Initial Pin Waves Hairstyle
- Pixie Cut Initial Hair Pin Hairstyle
- Afro Puff Initial Hair Pin Hairstyle
- Low Ponytail Initial Hair Pin Hairstyle
- Bridal Chignon Initial Hair Pin Hairstyle
- Minimalist Initial Pin Straight Hairstyle
1. Pearl Initial Side Pin Hairstyle
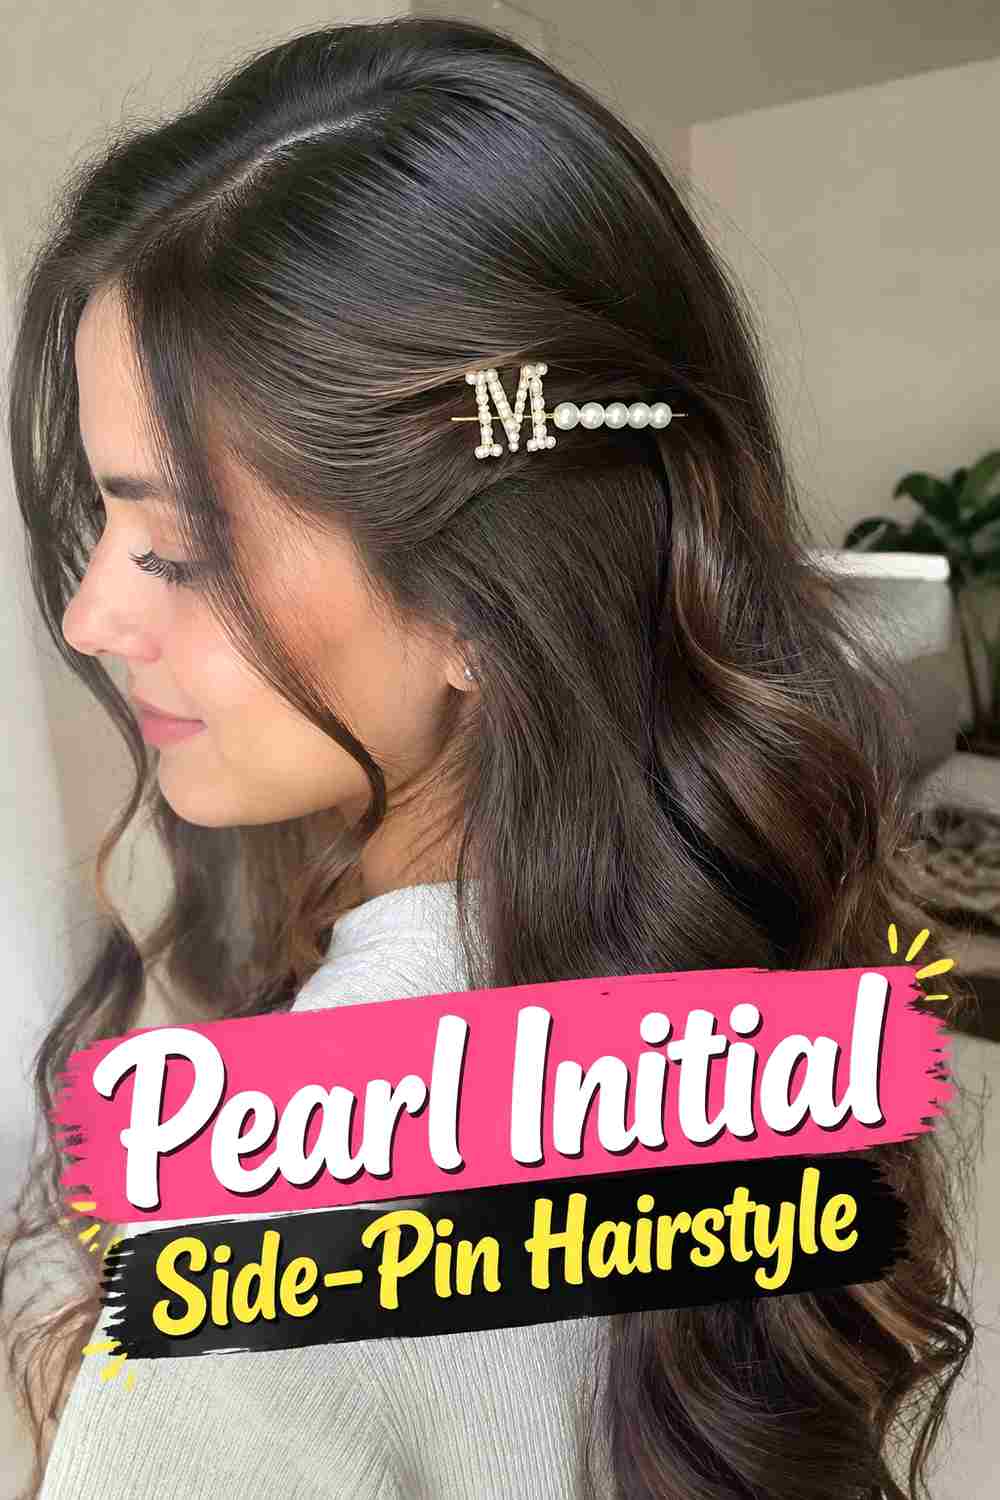
A pearl-trimmed initial pin looks especially elegant when used to secure one side of softly styled hair. Create a center or side part, sweep a small section back from the temple, and fasten it above or slightly behind the ear so the letter remains clearly visible. Loose waves, soft curls, or smooth straight lengths can all work because the accessory sits away from the main body of the hair. The pearl detail adds a classic finish without requiring a formal updo. Keep the section beneath the pin relatively smooth so the personalized letter does not disappear into excess texture or become tilted as the hair moves.
Styling Notes
Secure the section with a hidden pin first if the decorative initial piece is lightweight or not designed to provide strong hold.
Best For
Medium and long hair where a side section can be pulled back without disturbing the overall shape.
2. Crystal Initial Low Bun Hairstyle
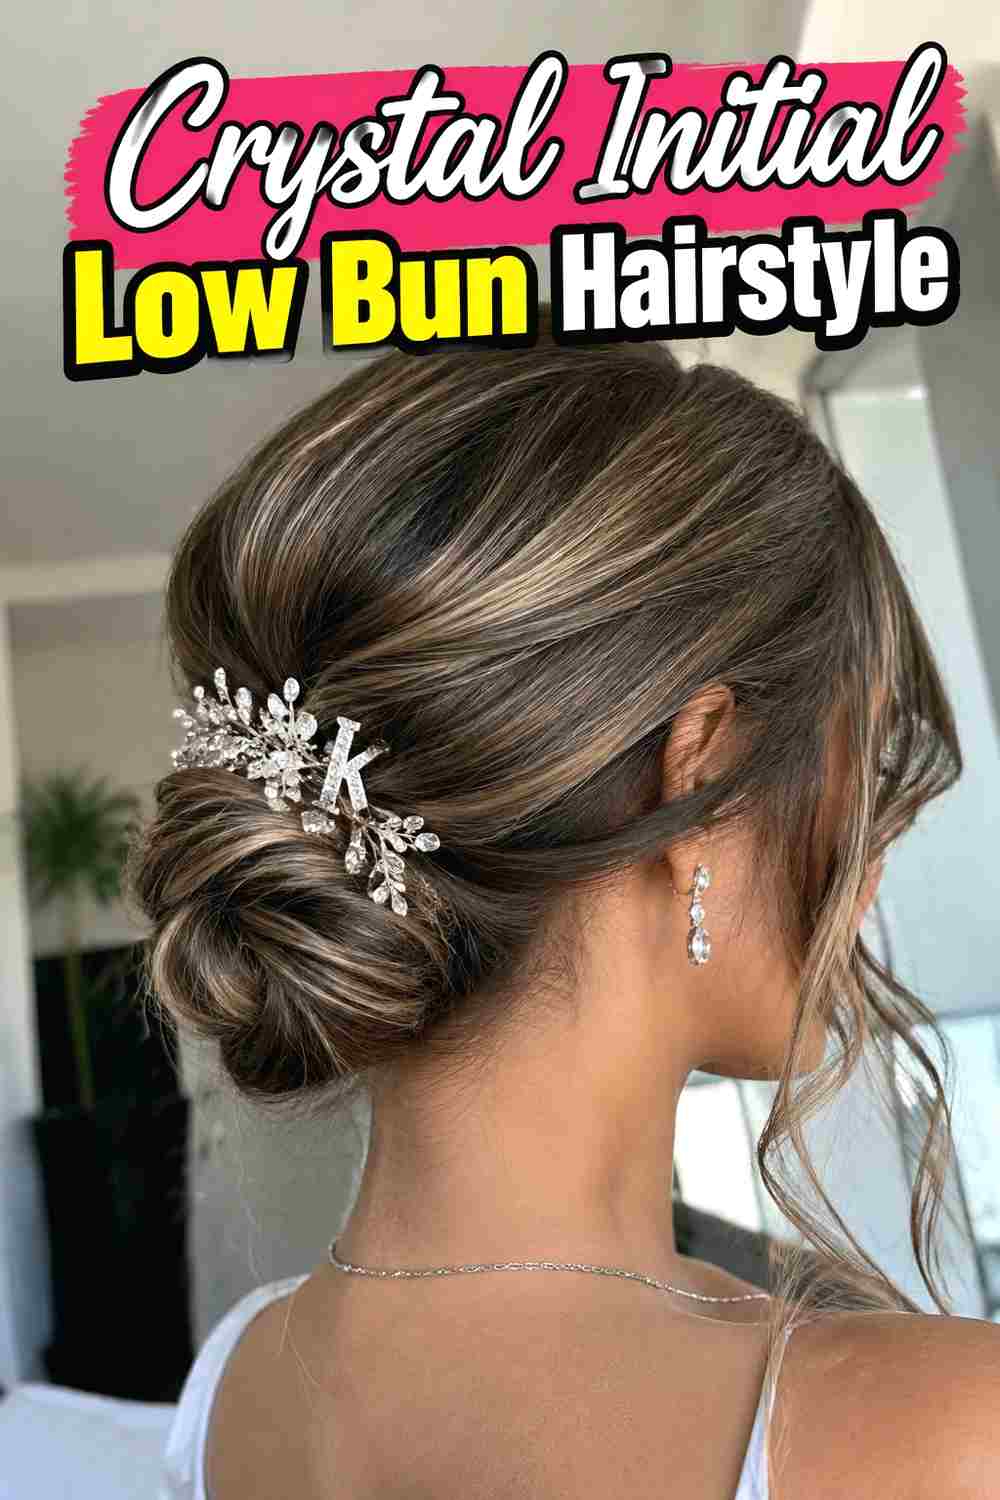
A crystal initial pin gives a low bun a small focal point that catches light without overwhelming the updo. Form the bun at the nape and secure it independently with pins or an elastic, then position the initial at one side of the bun or just above its center. A smooth middle part creates a clean, modern base, while a softer crown gives the style a romantic feel. The crystal piece should be proportionate to the bun so it reads as an accent rather than covering the entire shape. This look works beautifully for dinners, celebrations, or dressier occasions where a customized detail feels special.
Why It Works
The compact bun creates a clean backdrop that keeps the initial readable and gives the crystal finish room to sparkle.
Wear & Maintenance
Attach the decorative piece to a stable section rather than depending on it to hold the bun together.
3. Gold Initial Soft Waves Hairstyle
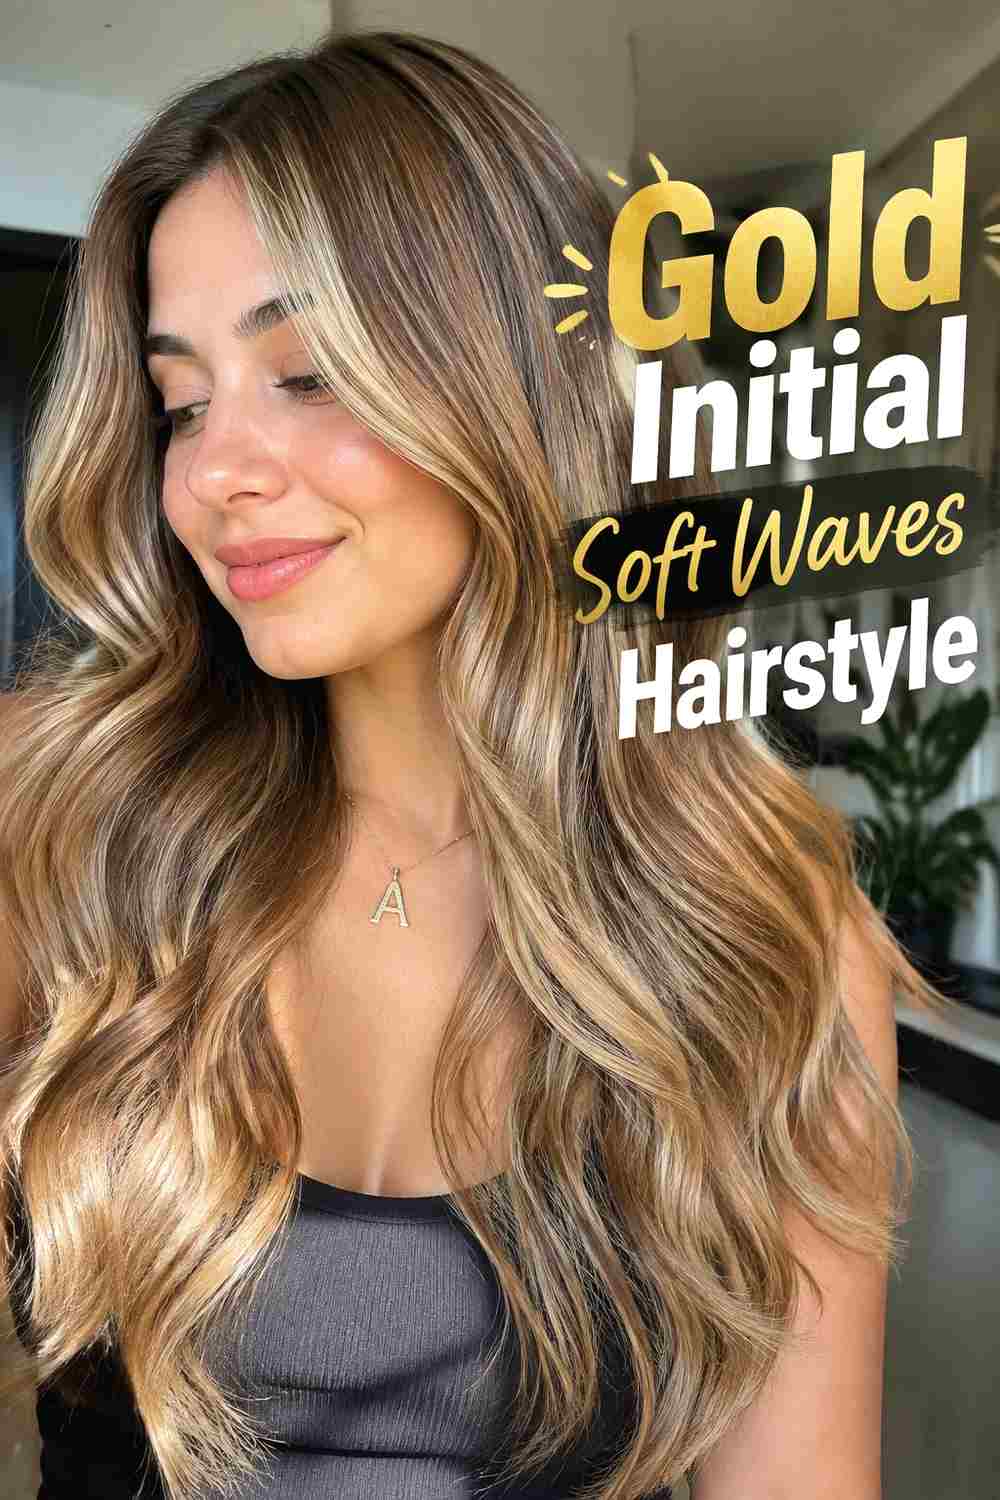
Warm gold initials pair naturally with loose waves because the smooth metal creates contrast against flowing texture. Style the hair into broad, soft bends, then use the pin to hold one side slightly away from the face. A deep side part can make the accessory more visible, while a center part keeps the finish balanced and understated. The waves should remain touchable rather than stiff so the overall look feels modern despite the jewelry-like detail. A single medium-size initial is usually enough, especially when the gold tone already stands out clearly against the hair. Position it where light can reach the accessory without covering the wave pattern.
Styling Notes
Set the waves first and add the pin afterward so you do not repeatedly remove the accessory while adjusting the texture.
Why It Works
The metallic initial provides structure and shine while the waves add softness and movement.
4. Silver Initial Sleek Bob Hairstyle
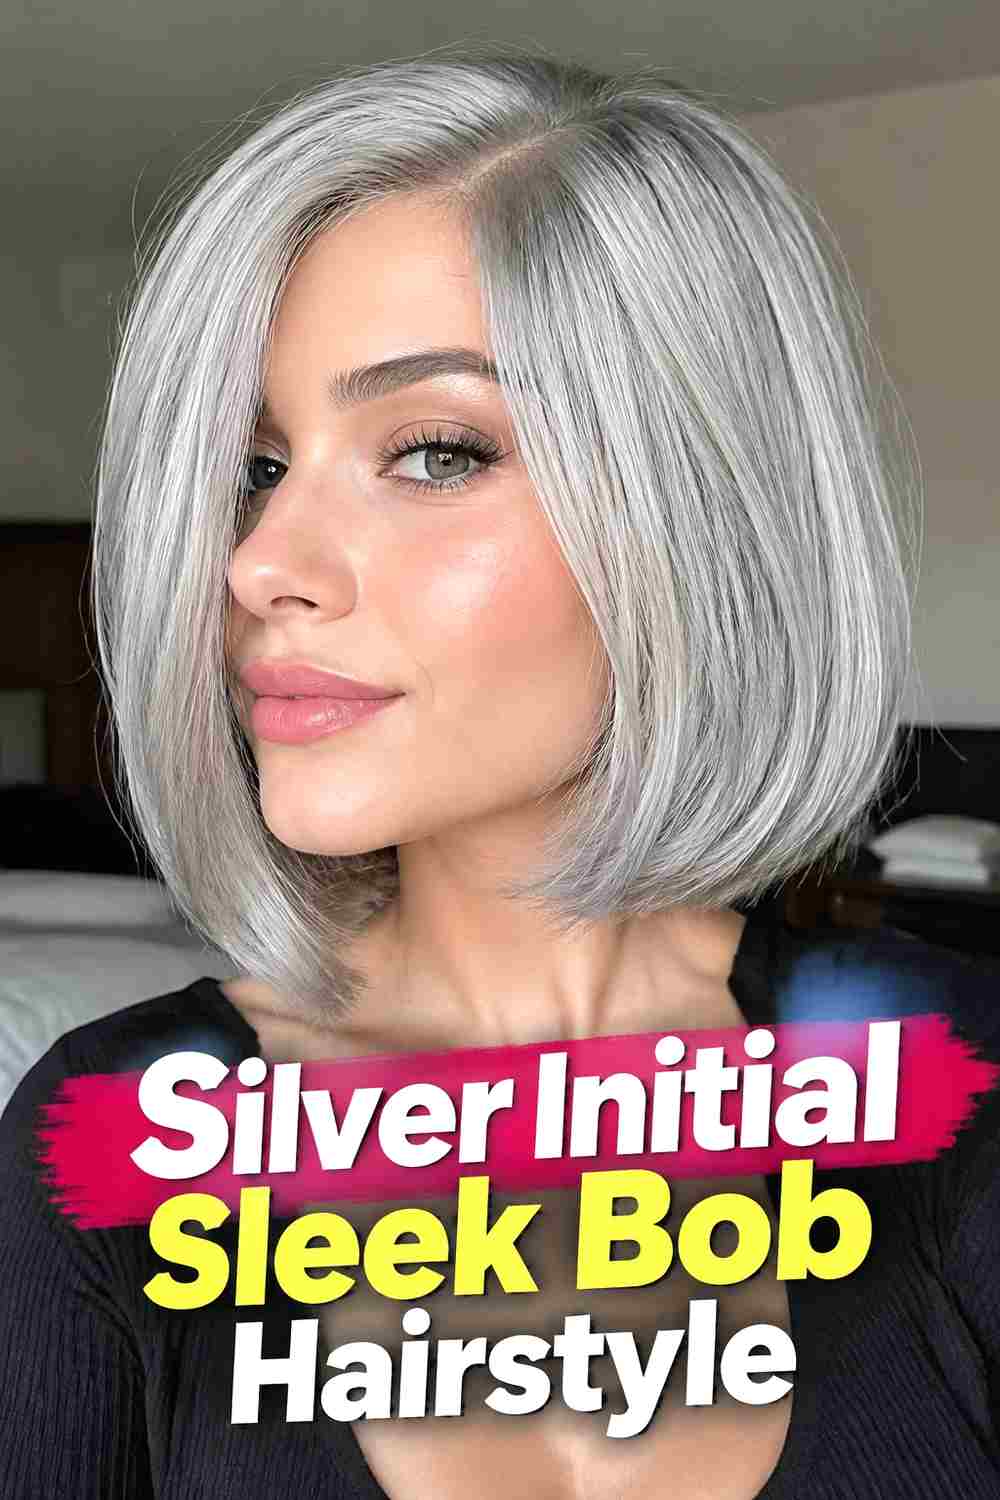
A sleek bob gives a silver initial pin a clean, graphic background. Straighten or smooth the bob while preserving natural strand detail, then tuck one side behind the ear and secure a small initial near the temple. Because the haircut is compact, accessory scale matters—a narrow or medium-size letter usually looks more balanced than an oversized piece. Silver works particularly well with the polished surface because both elements feel minimal and modern. The opposite side can remain untucked to preserve movement around the jaw. This is an easy way to personalize a short hairstyle without adding curls, braids, or complicated styling.
Best For
Jaw-length to chin-length bobs where the accessory can remain visible near the front rather than disappearing beneath longer hair.
Pro Tip
Place the initial slightly above the ear instead of directly on it for a cleaner line and more comfortable wear.
5. Stacked Double Initial Hair Pin Hairstyle
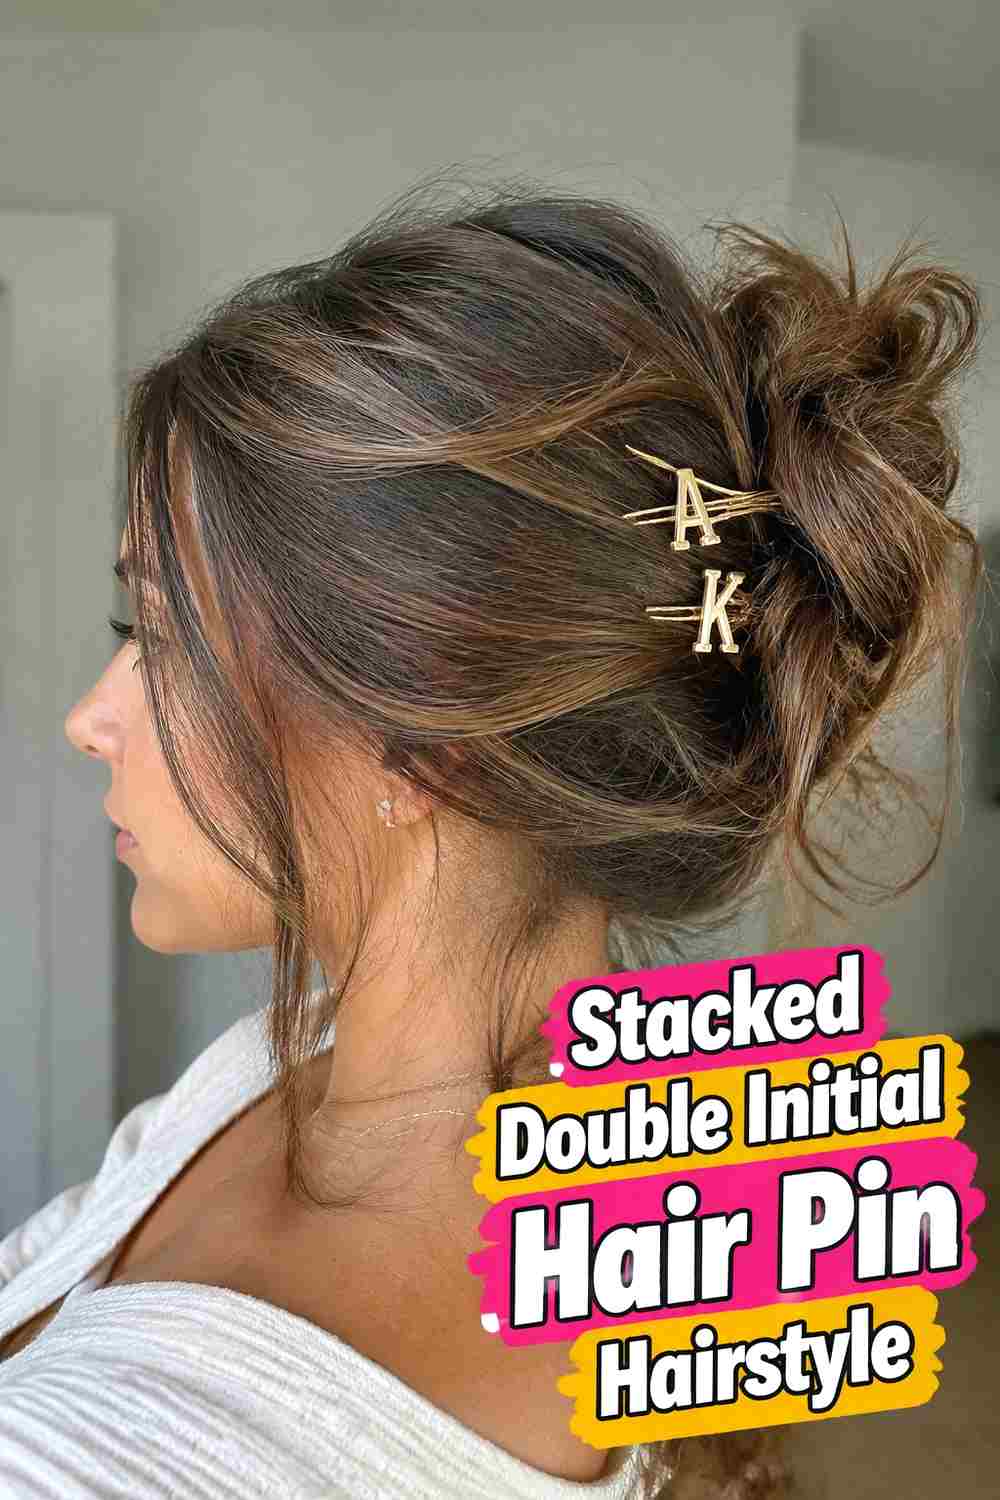
Two small initial pins can create a personalized stacked arrangement with more impact than one oversized accessory. Use matching initials, two different letters, or a pair that represents meaningful names, then place them parallel or slightly offset above one ear. Keep the surrounding hair smooth or softly waved so both letters remain easy to read. The pins should be spaced closely enough to look intentional but not overlap so much that the shapes become confusing. This style works especially well with long loose hair or a simple half-tucked look because the rest of the hairstyle stays understated and lets the double monogram detail become the focal point.
Styling Notes
Lay out the spacing before fastening both pieces permanently so the letters appear balanced from the side.
Best For
Simple loose hairstyles where there is enough flat surface near the temple to display both pins clearly.
6. Monogram Side Twist Hair Pin Hairstyle
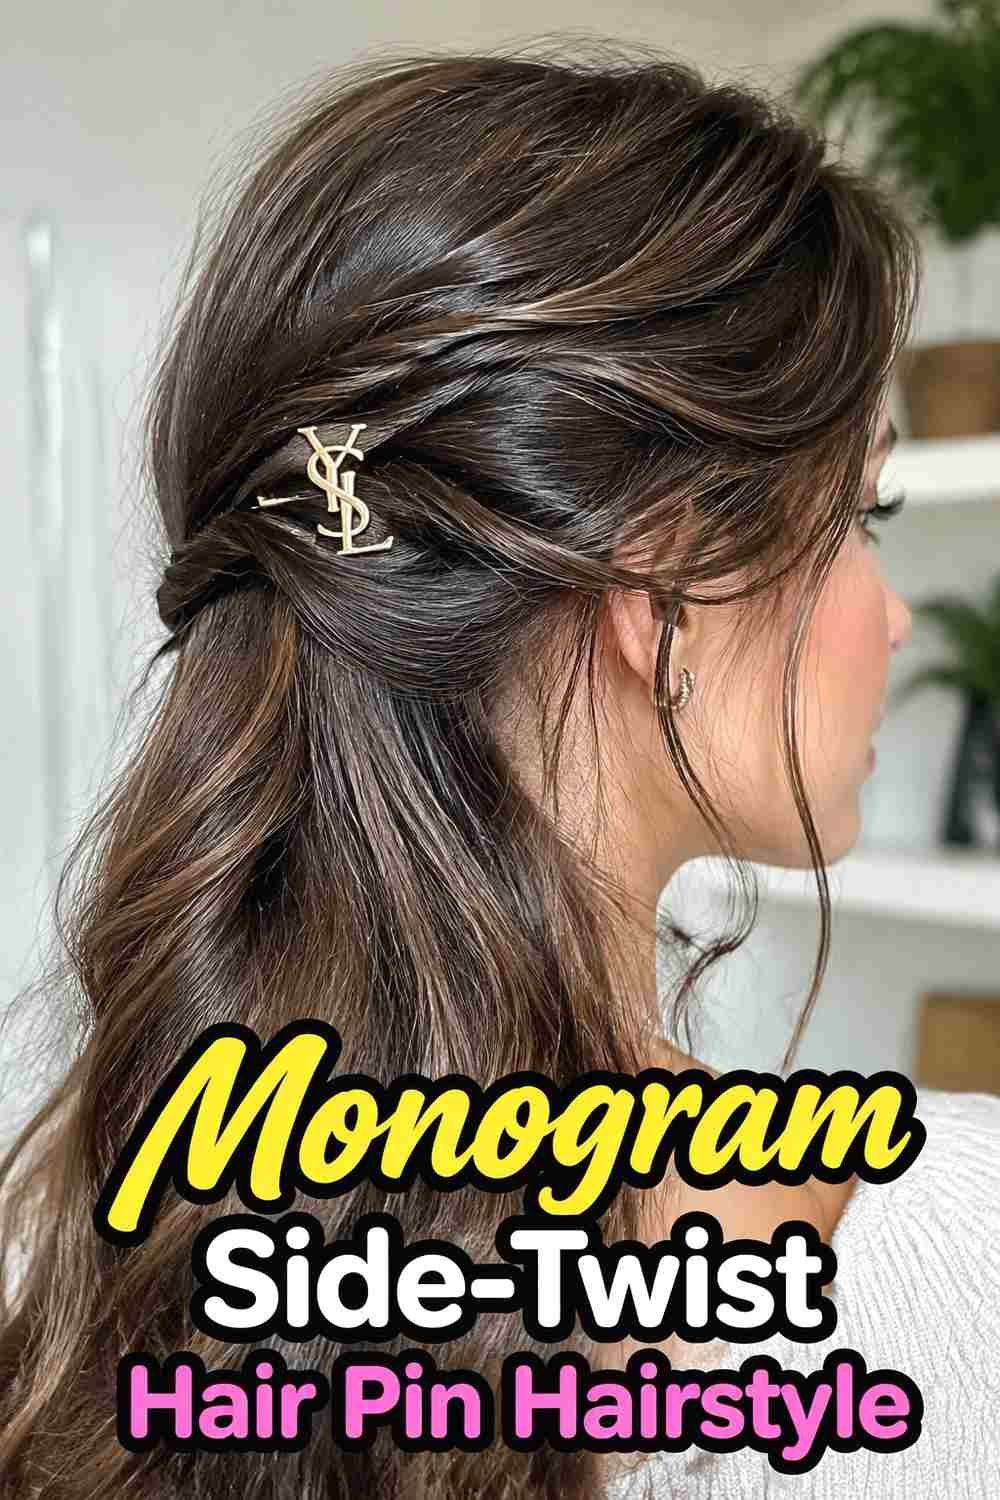
A soft side twist creates a natural place for a monogram pin to sit. Take a section from the temple, roll it gently backward, and secure the twist near the side or back of the head. Add the initial pin over the attachment point so it acts like a decorative clasp rather than the main source of support. The remaining hair can stay straight, curled, or softly waved. Keeping the twist slightly dimensional makes the style feel romantic without looking overly formal. This option is especially useful when you want the personalized detail visible from both the side and a three-quarter angle instead of positioning it directly behind the head.
Why It Works
The twist naturally leads the eye toward the initial, making the accessory feel like the finishing point of the design.
Pro Tip
Secure the twist with a hidden pin first, then add the monogram piece over it for better stability.
7. Initial Hair Pin High Ponytail Hairstyle
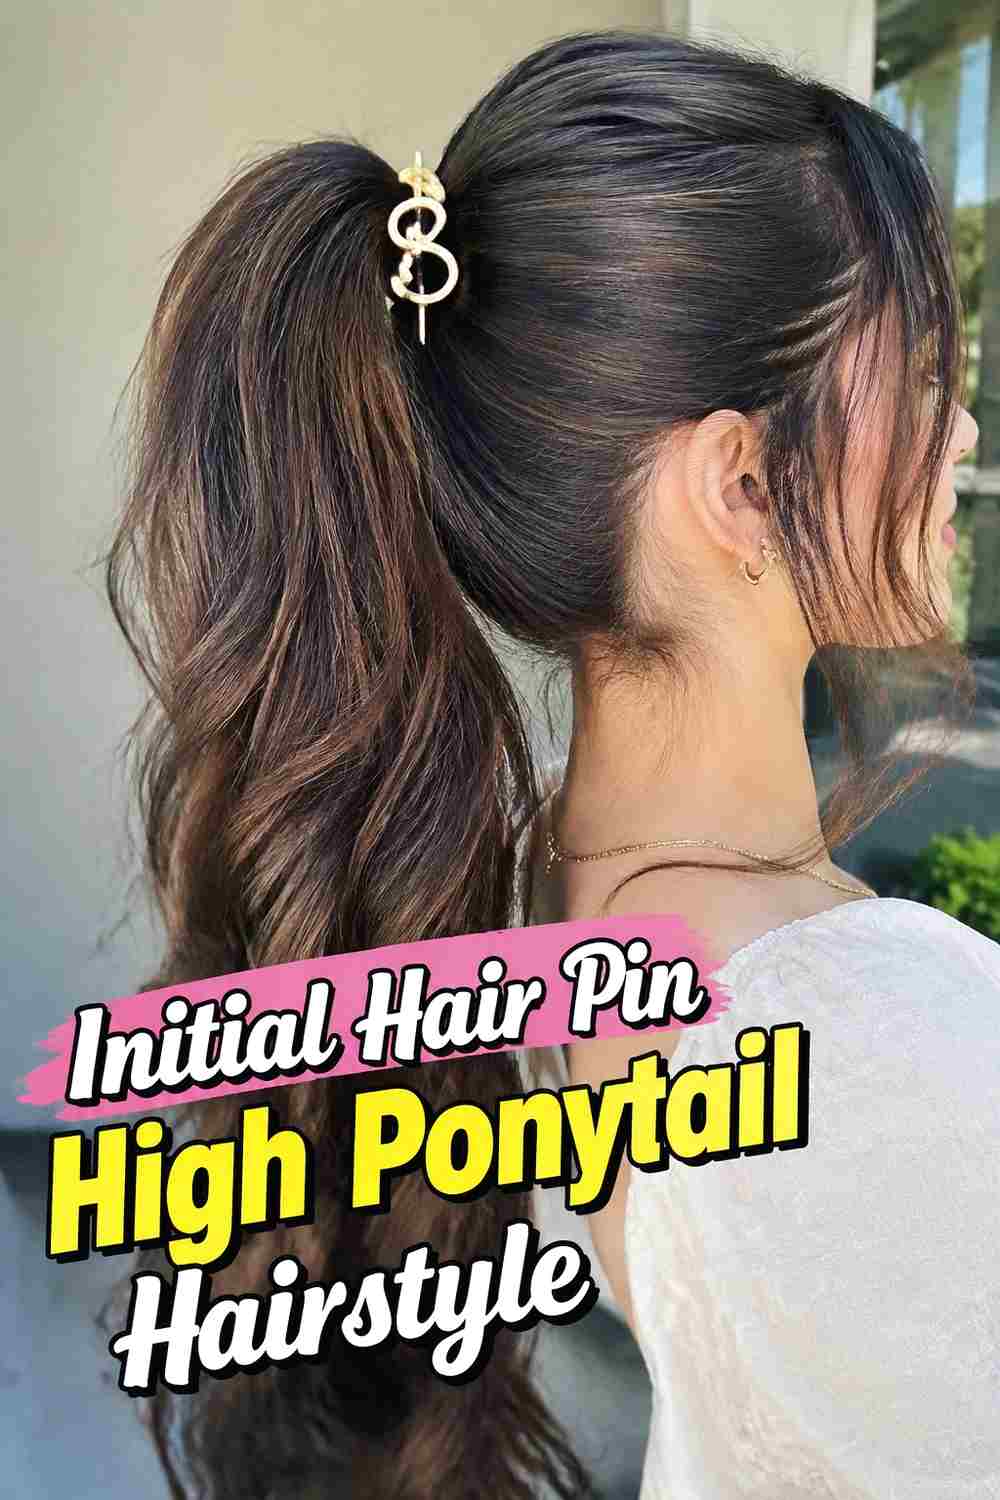
A high ponytail creates a lively setting for a personalized initial pin. Secure the ponytail firmly near the crown, then place a small initial beside the base or attach it to a wrapped section that covers the elastic. Straight, curled, or textured ponytail lengths can all work, but keeping the base clean helps the letter remain visible. Because high ponytails move more than low styles, lightweight accessories are usually easier to wear. A sleek front creates a sharper finish, while a slightly softened crown makes the look more relaxed. The personalized detail should enhance the ponytail rather than interfere with its natural swing.
Styling Notes
Anchor the initial to a wrapped base, ribbon, or stable clipped section instead of relying on loose moving strands.
Wear & Maintenance
Choose a lightweight piece so ponytail movement does not cause the pin to shift or tug.
8. Velvet Ribbon Initial Pin Hairstyle
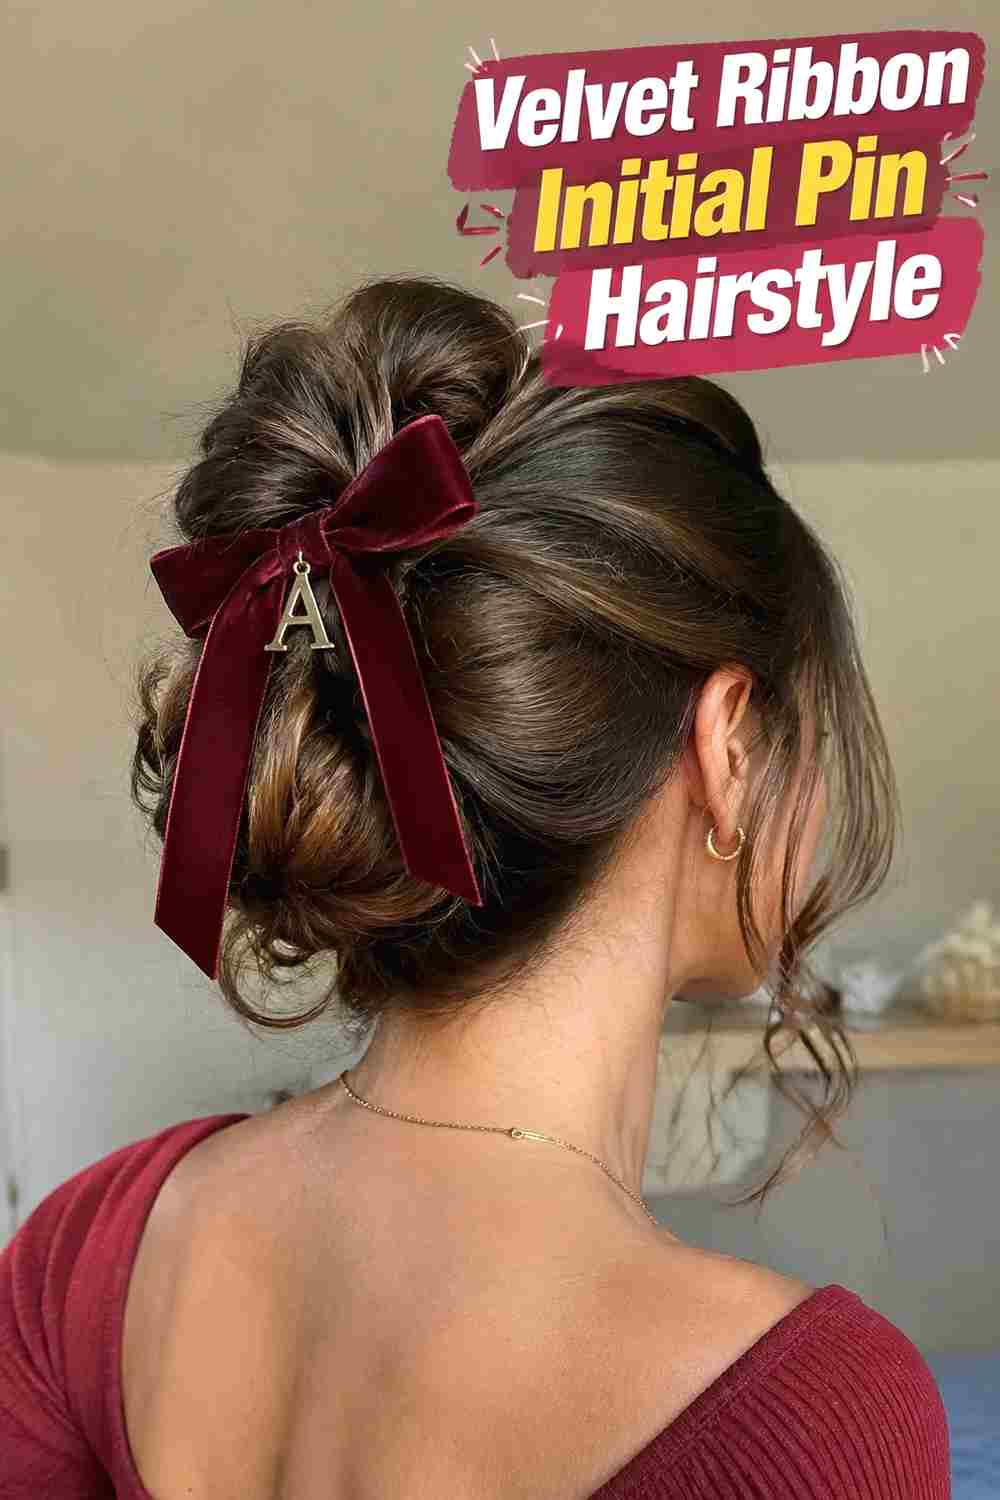
A velvet ribbon provides a soft, secure-looking surface for displaying an initial pin. Tie the ribbon around a low ponytail, small half-up section, or bun, then place the personalized pin at the center of the knot or slightly to one side. The contrast between plush fabric and polished metal or crystals makes the initial stand out clearly. Keep the ribbon proportions moderate so the bow does not hide the letter or overwhelm the hairstyle. This version works especially well for cooler-season events or evening looks, but a slim neutral ribbon can also feel appropriate for daytime. The hair itself can remain smooth or softly waved.
Why It Works
The fabric creates a visible frame around the initial and separates the decorative piece from the hair texture.
Styling Notes
Secure the ribbon independently before adding the initial so the pin does not need to hold the bow together.
9. Braided Crown Initial Hair Pin Hairstyle
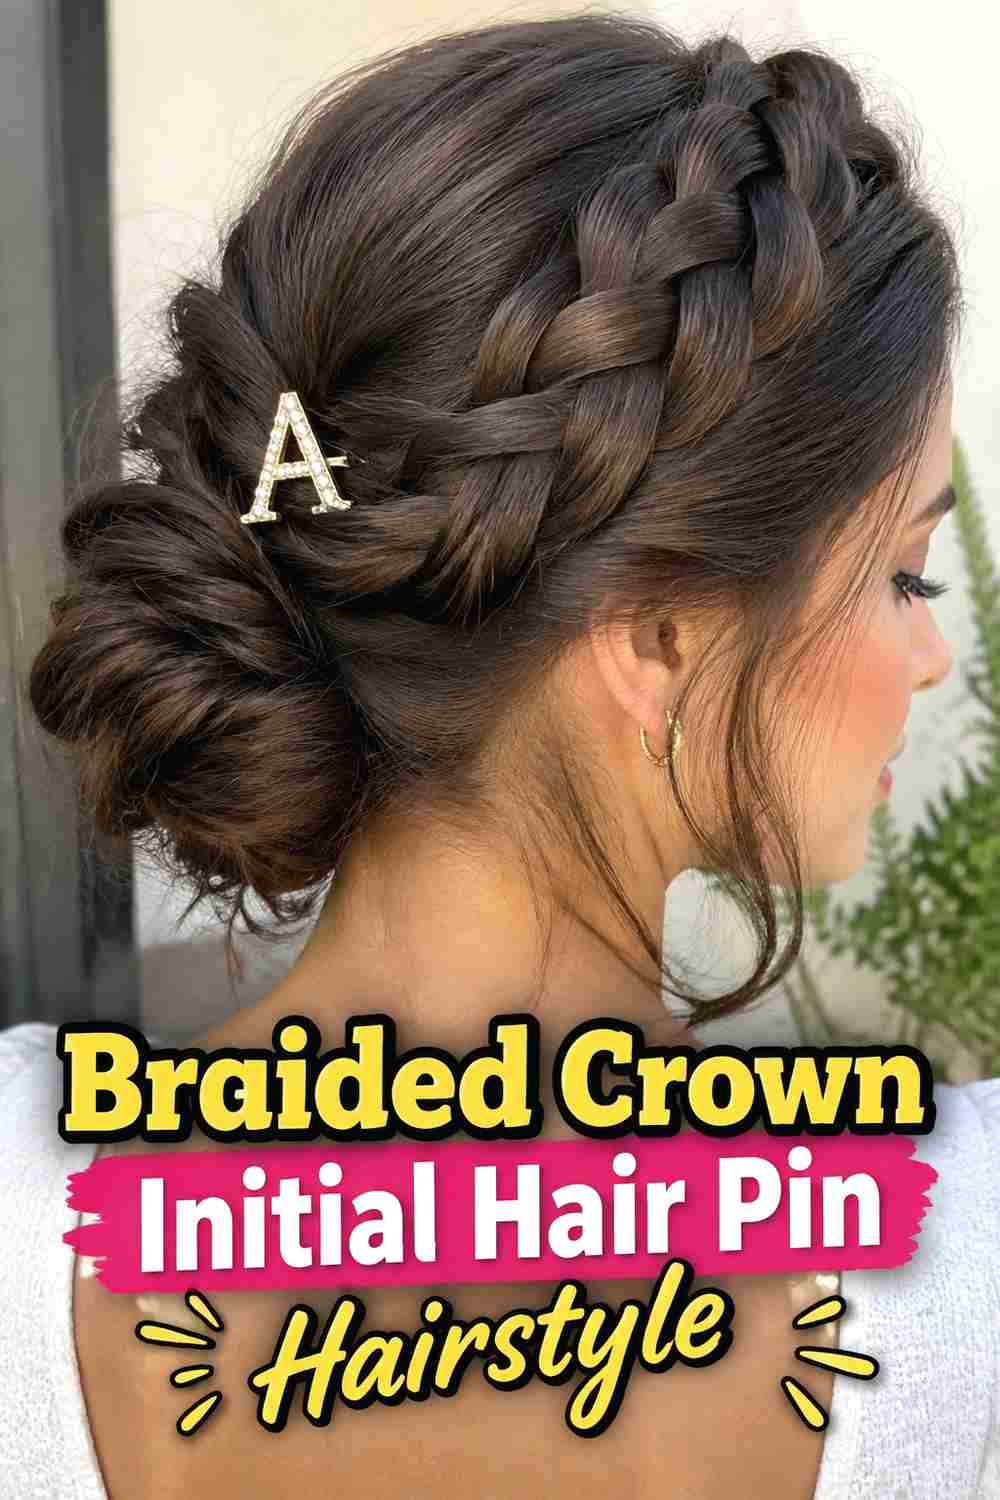
A braided crown gives a personalized pin an elegant path to follow. Create one or two braids that curve around the side or upper back of the head, pin them securely, then place the initial near the point where the braid ends or overlaps. The letter should sit on a relatively stable section so it remains readable rather than turning with loose braid movement. Slightly relaxed braid edges keep the finish soft, while loose curls or waves below can add extra movement. This style feels decorative enough for events but still lets the customized pin remain the main jewelry-like accent instead of competing with multiple accessories.
Best For
Medium-long and long hair that can form a substantial braid while leaving enough volume for a balanced overall style.
Pro Tip
Position the initial near a braid intersection or end point to make the accessory feel structurally connected to the hairstyle.
10. Curly Updo Initial Hair Pin Hairstyle
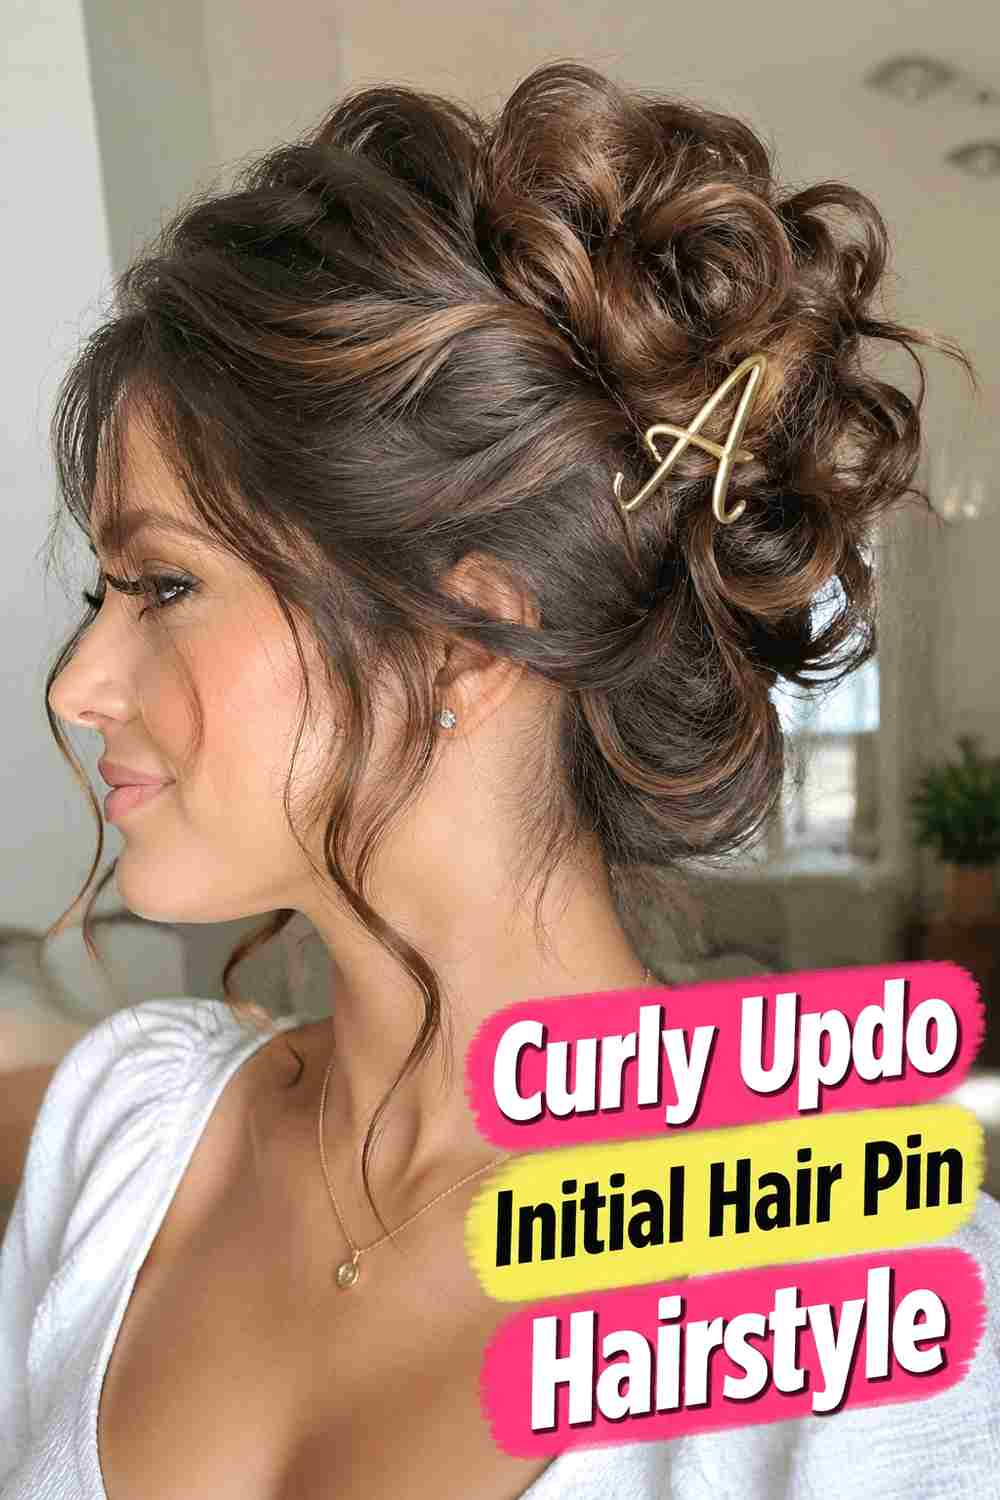
A curly updo creates plenty of dimension around a personalized initial pin while keeping the accessory visible against gathered texture. Pin curls loosely at the back or crown, allowing natural variation in shape, then add the initial beside the updo rather than directly on top of the fullest section. This placement prevents the letter from disappearing into the curls. A few face-framing pieces can soften the front, while the main updo stays secure with hidden pins. Crystal, pearl, or metallic initials all work well, provided the piece is lightweight enough not to pull on individual curls or disturb the finished shape.
Styling Notes
Choose a flatter, stable section near the edge of the updo for the initial rather than fastening it through a loose curl.
Why It Works
The smooth personalized accessory contrasts with the rounded curl texture and creates a clear focal point.
11. French Twist Initial Hair Pin Hairstyle
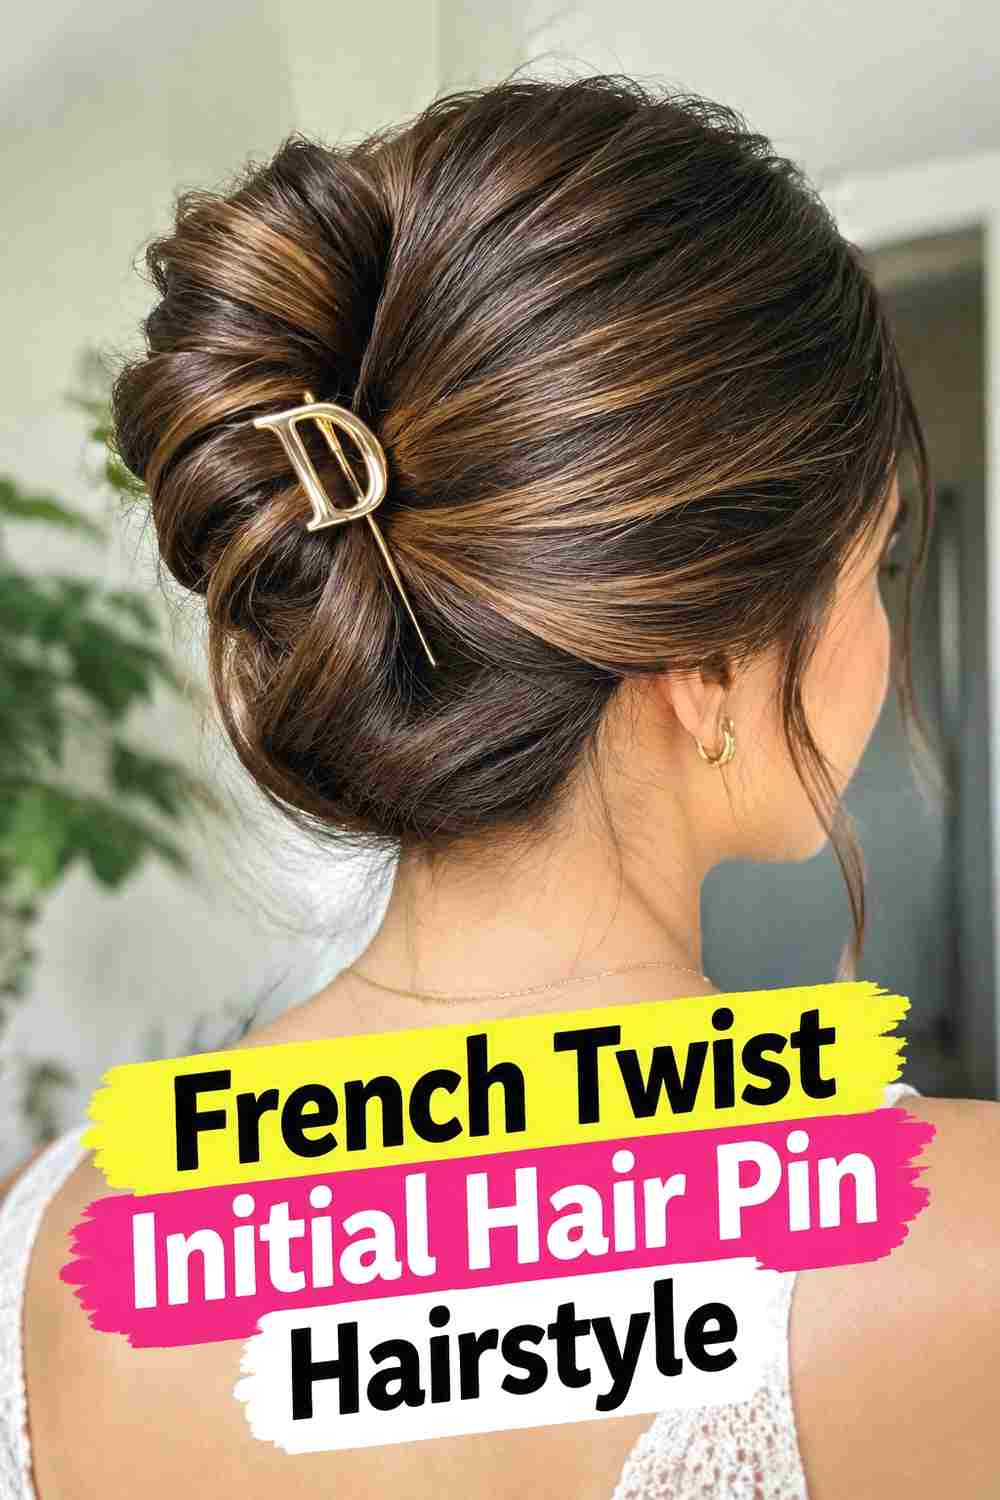
A French twist offers a polished vertical shape that pairs beautifully with a single initial pin. Roll the hair inward along the back of the head, secure the twist with hidden pins, and place the personalized piece along one side of the seam or near the upper finish. The initial should accent the curve rather than interrupting the clean silhouette. A slightly softened crown keeps the look wearable, while sleek sides make the accessory easier to see. This variation feels refined enough for formal occasions but remains personalized through the small letter detail. Metallic finishes work particularly well against the smooth surface of a French twist.
Why It Works
The clean vertical roll gives the initial plenty of visual space and makes a small accessory feel intentional.
Wear & Maintenance
Build a secure French twist first and use the initial only as decoration so the hairstyle remains stable.
12. Half Up Initial Barrette Hairstyle
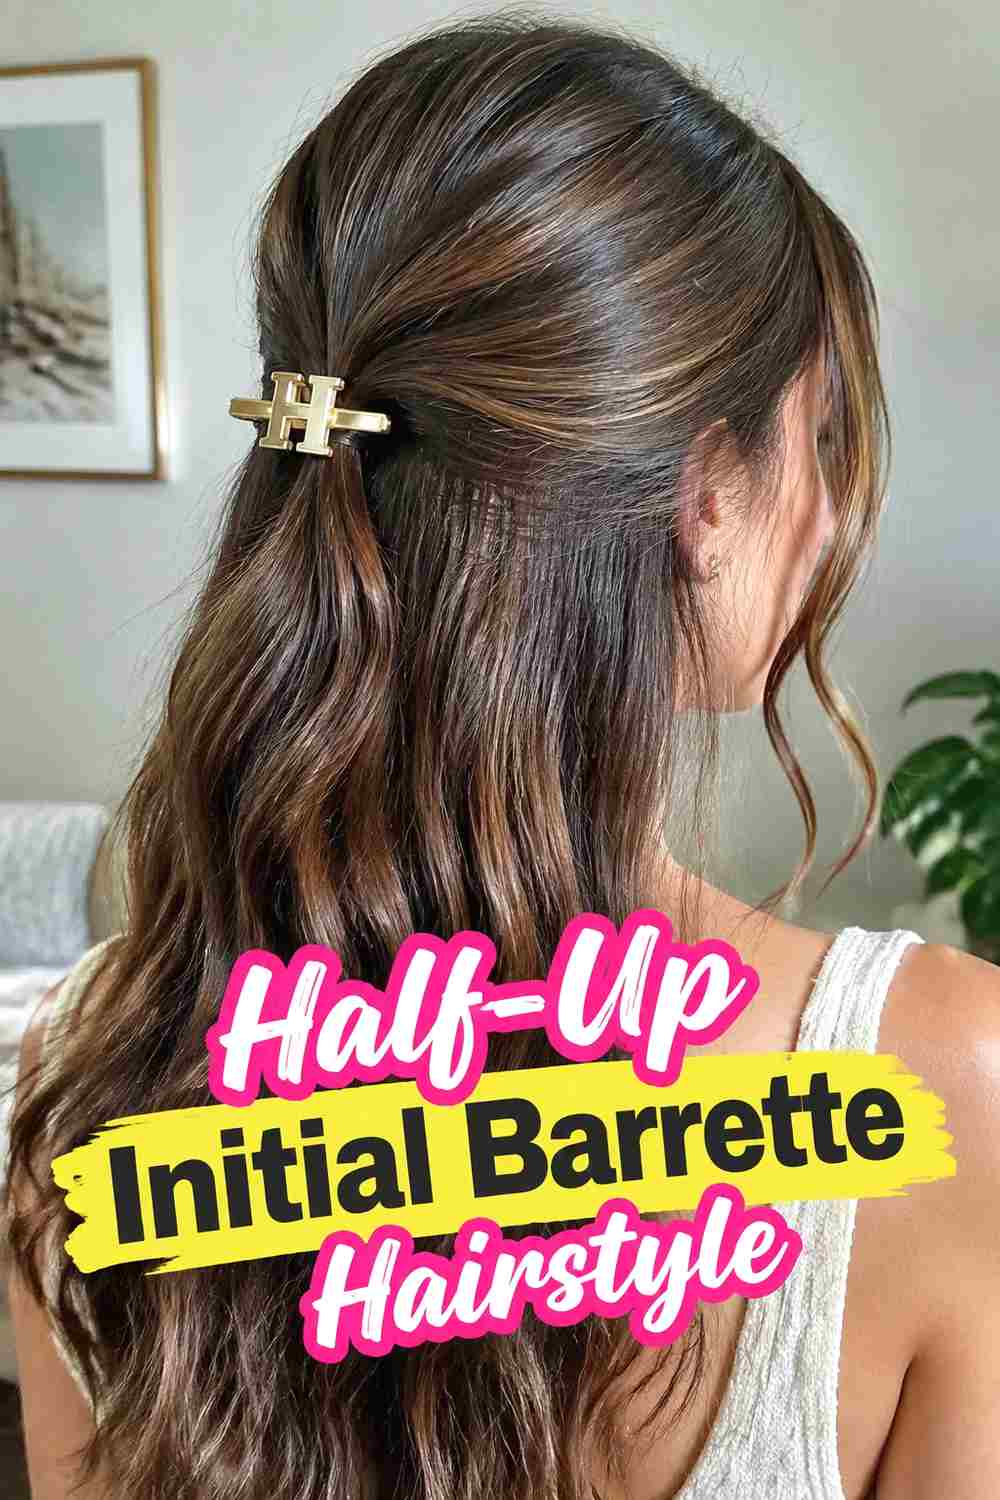
A half-up barrette with an initial is one of the easiest ways to make personalized hair jewelry practical for everyday wear. Gather sections from both temples and secure them at the back with a letter-shaped or monogrammed barrette, leaving the lower lengths loose. Soft waves, natural curls, or straight hair can all work because the accessory sits against a clear central section. The half-up placement keeps hair away from the face without hiding most of the length. Choose a barrette large enough to hold the gathered section comfortably but small enough that the initial still looks refined instead of dominating the back of the head.
Best For
Medium and long hair where a small upper section can be gathered without making the lower lengths feel thin.
Styling Notes
Match the barrette capacity to your hair density so it closes securely without forcing too much hair into a small clasp.
13. Side Swept Initial Pin Waves Hairstyle
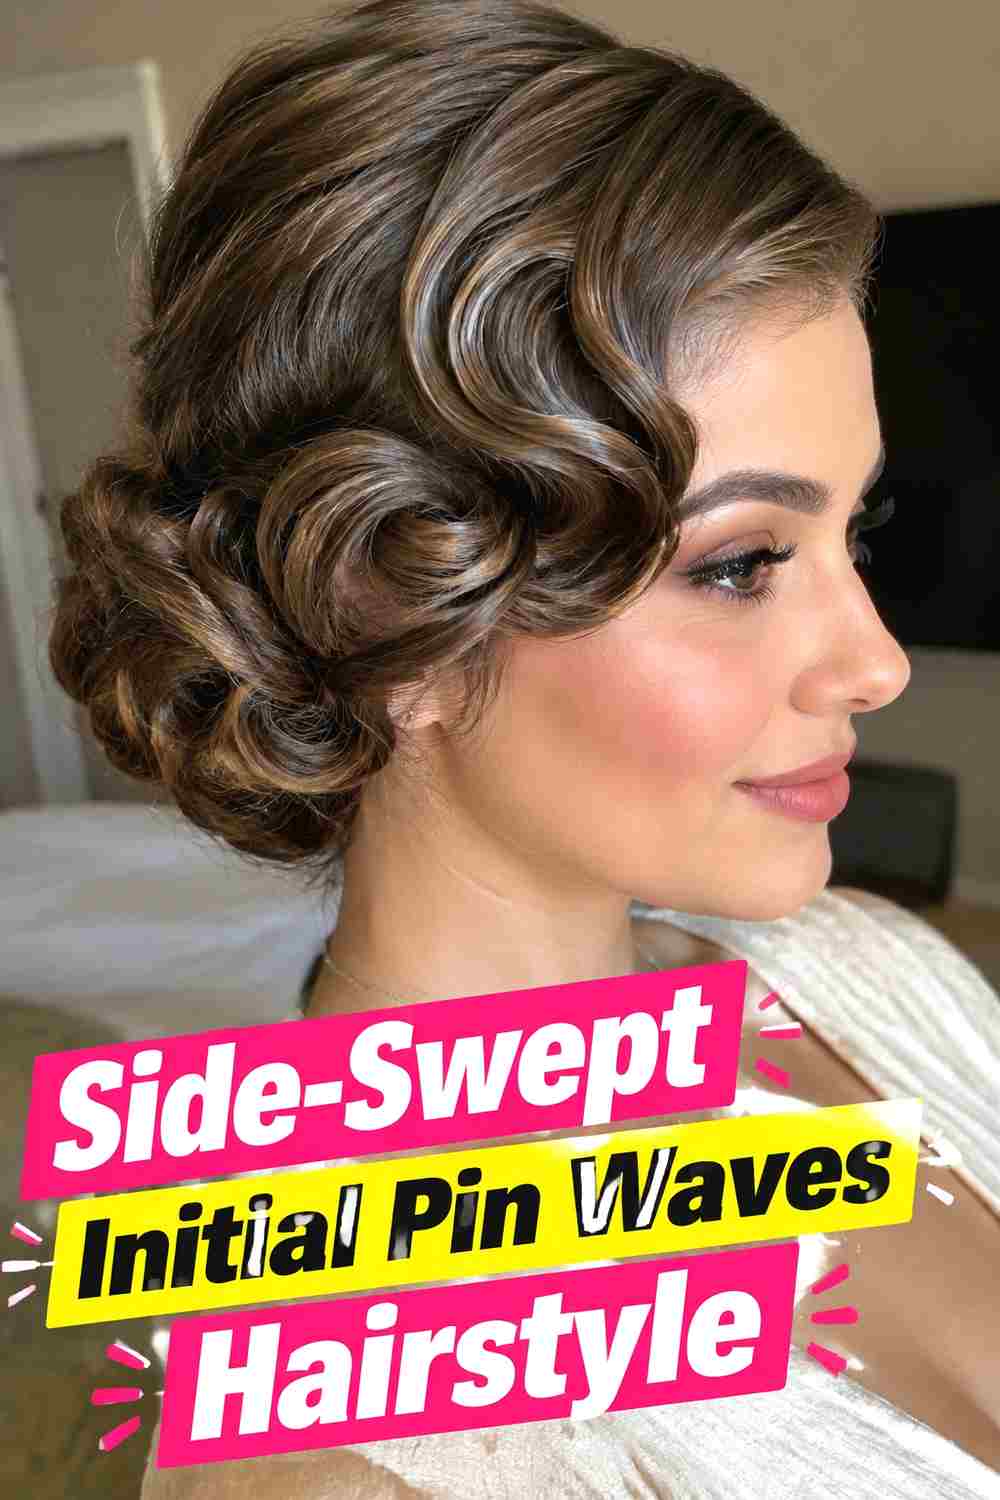
Side-swept waves keep a personalized initial pin highly visible by concentrating most of the hair over one shoulder. Create a deep side part, sweep the lighter side neatly behind the ear, and use the initial pin to hold that section in place. The fuller side can fall in soft waves over the opposite shoulder, creating a dramatic but balanced silhouette. Because the accessory sits on the exposed side, even a small initial can become noticeable. This works particularly well for events, photos, or evening styling when you want the personalized detail to be seen from the front instead of hidden at the back.
Why It Works
The swept-back side creates open visual space around the initial while the opposite side provides soft movement and volume.
Pro Tip
Use a hidden pin under the decorative piece if your waves are heavy enough to pull the side section forward.
14. Pixie Cut Initial Hair Pin Hairstyle
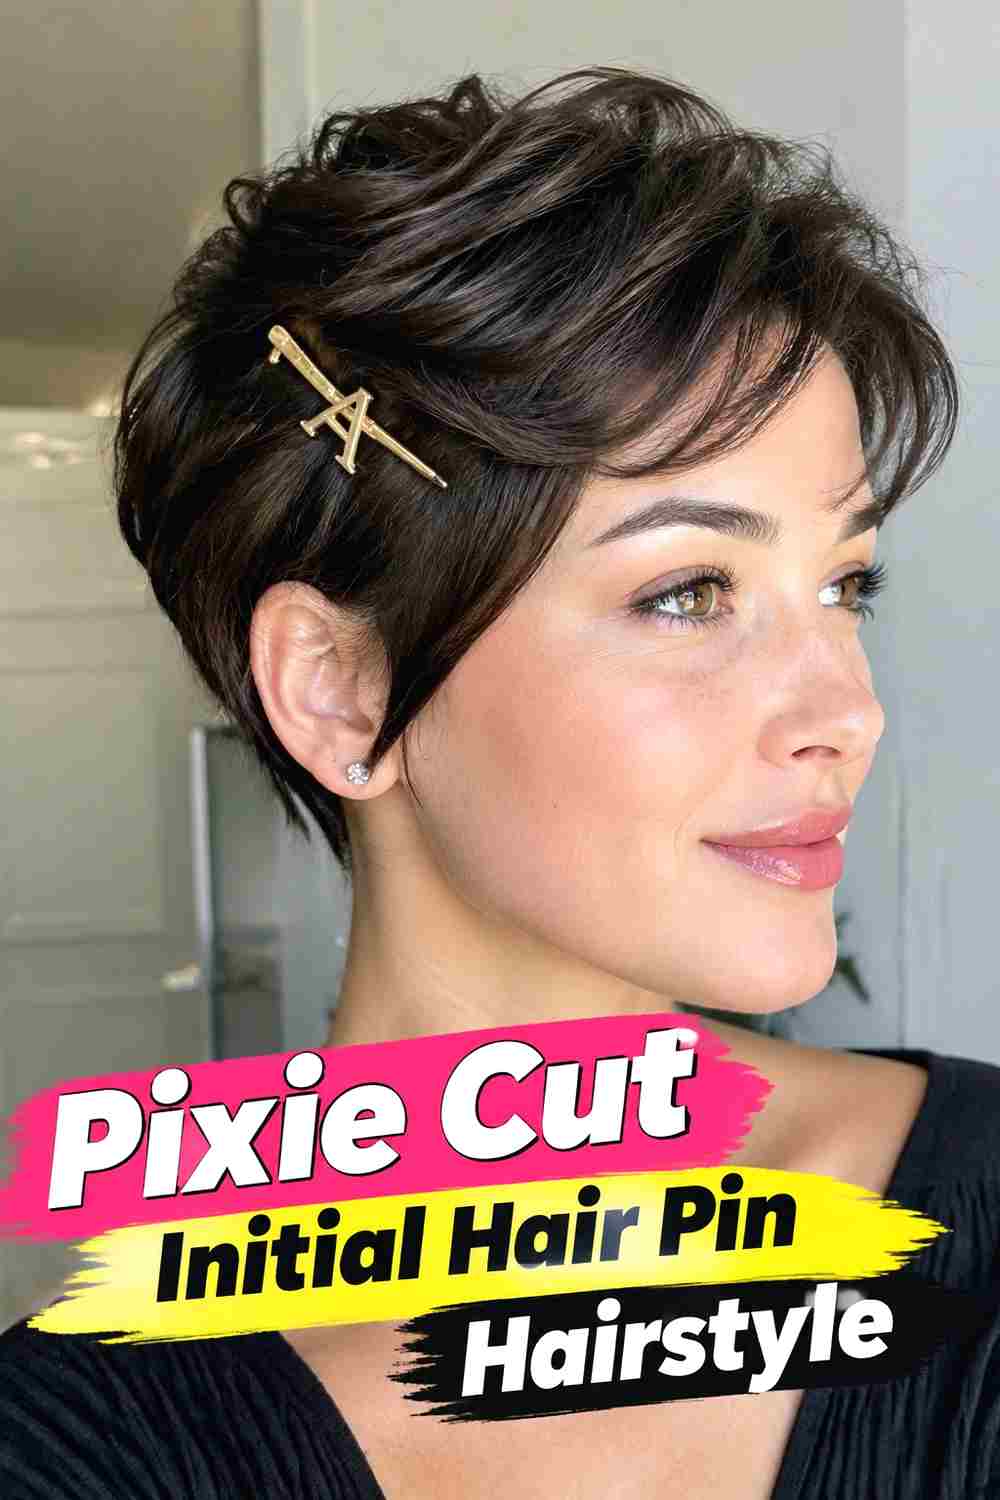
A personalized pin can make a pixie feel especially intentional because the accessory remains easy to see against the shorter silhouette. Sweep longer top sections to one side, add soft texture through the crown, and place a small initial near the temple. The pin should be scaled to the haircut; a delicate letter generally looks more balanced than a large statement piece. Smooth sides create a clean background, while a slightly tousled top prevents the style from feeling too rigid. This option is also useful for growing-out pixies when front pieces need light control but are not yet long enough for a braid or tucked style.
Styling Notes
Choose a lightweight pin with secure grip so it stays in short hair without needing a large amount of hair underneath.
Best For
Pixies and short crops with enough side or top length for a small decorative pin to anchor securely.
15. Afro Puff Initial Hair Pin Hairstyle
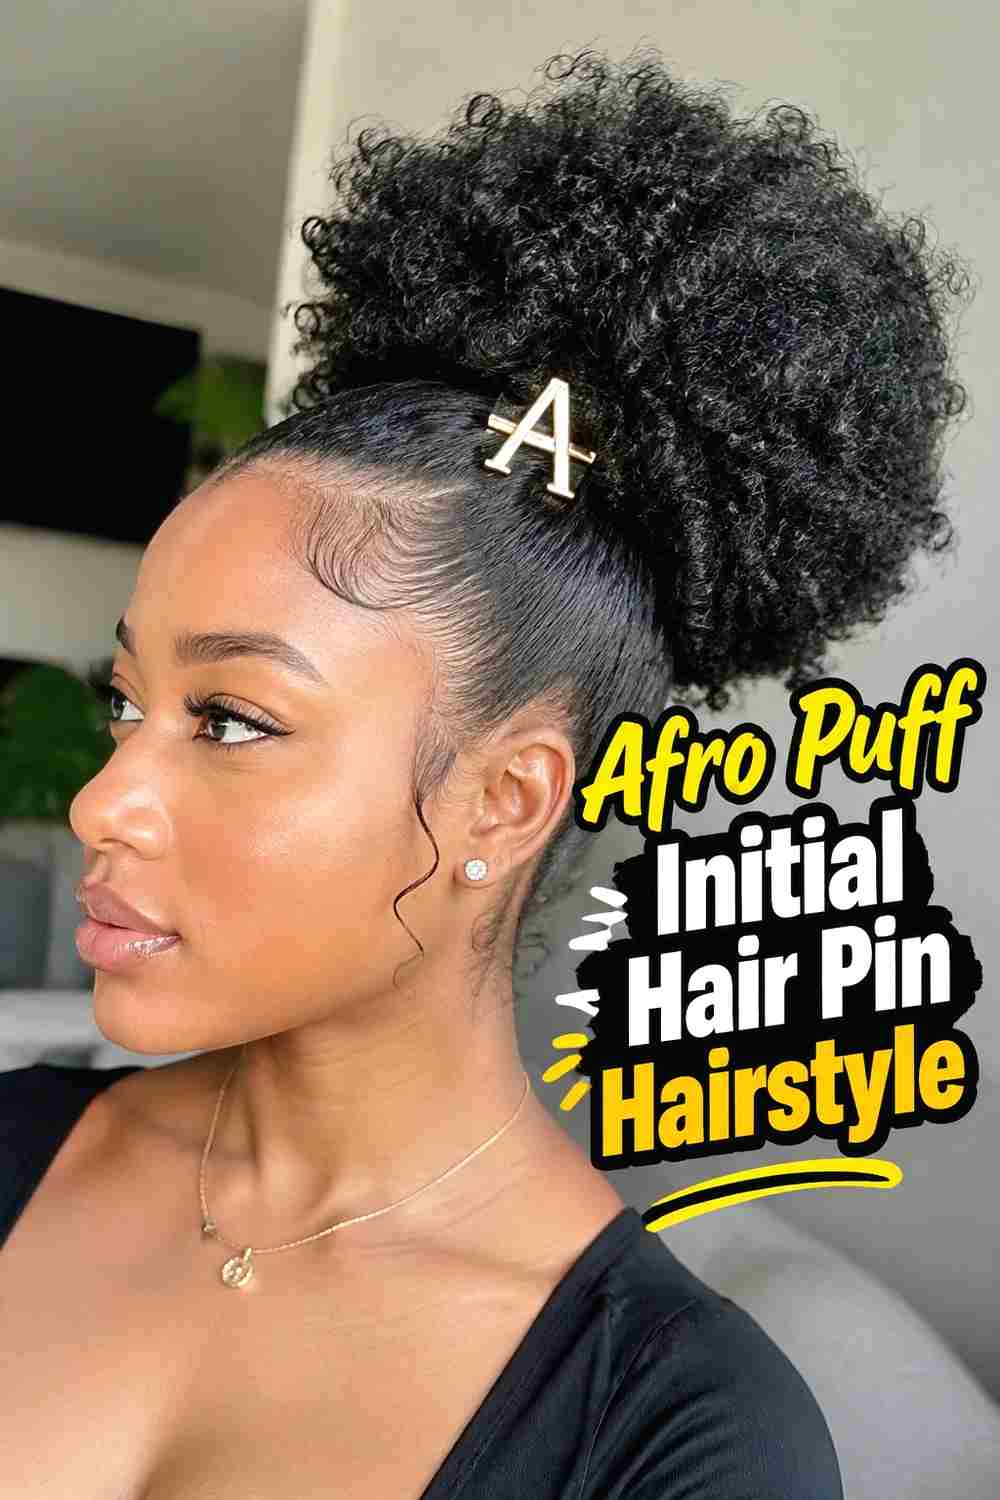
An Afro puff can carry a personalized pin beautifully when the accessory is placed near the base rather than pushed into the fullest curls. Gather the hair into a high or mid-height puff, secure it comfortably, and add the initial along a smooth side section or on a decorative band near the gathering point. The puff should remain full and textured, with natural curl variation and soft movement. A gold or crystal initial can provide striking contrast without covering the hair. Keep the pin away from delicate loose curls so it does not snag or become hidden inside the puff’s volume.
Why It Works
The smooth base provides a clear place for the initial while the puff keeps natural texture and volume as the main hairstyle feature.
Wear & Maintenance
Attach the accessory to a stable base or band rather than catching it directly through loose curls.
16. Low Ponytail Initial Hair Pin Hairstyle
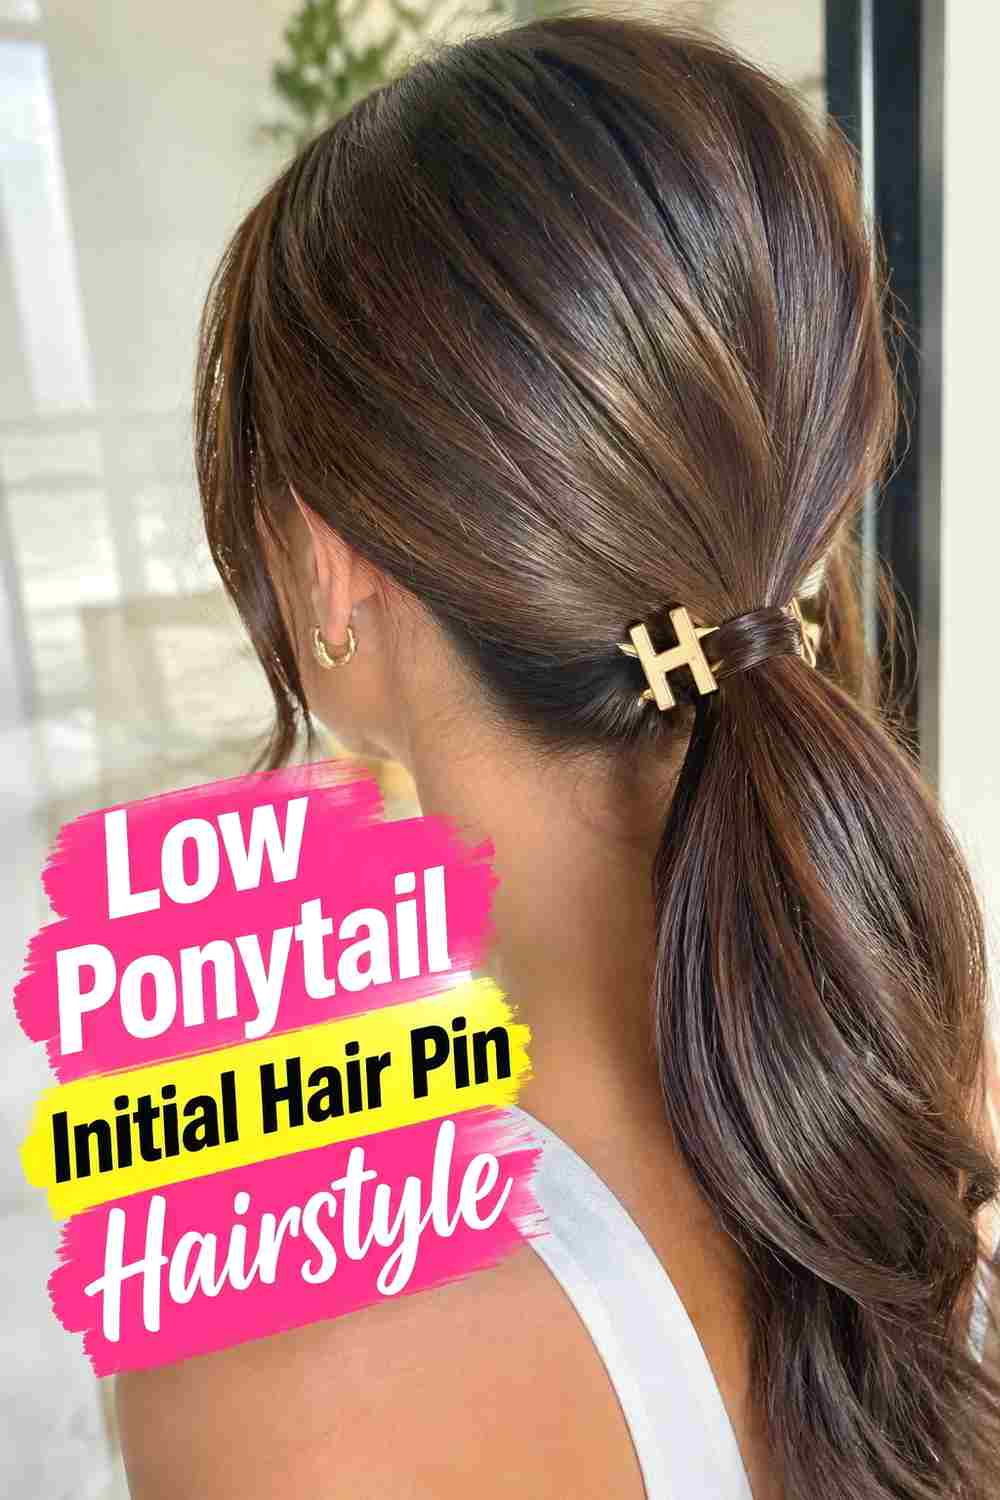
A low ponytail offers a simple, polished base for displaying a personalized initial. Secure the hair at the nape, wrap a small section around the elastic if desired, and place the initial pin just above or beside the ponytail base. A center part creates a clean symmetrical finish, while a side part gives the look more movement. The ponytail can stay sleek, softly waved, or naturally textured, depending on the occasion. Because the accessory sits low and close to the head, it is less likely to shift dramatically than on a high ponytail, making this a practical option for longer wear.
Styling Notes
Secure the ponytail completely before adding the initial so the accessory can remain decorative rather than structural.
Best For
Medium-long and long hair where the low base creates enough visible space to display the pin.
17. Bridal Chignon Initial Hair Pin Hairstyle
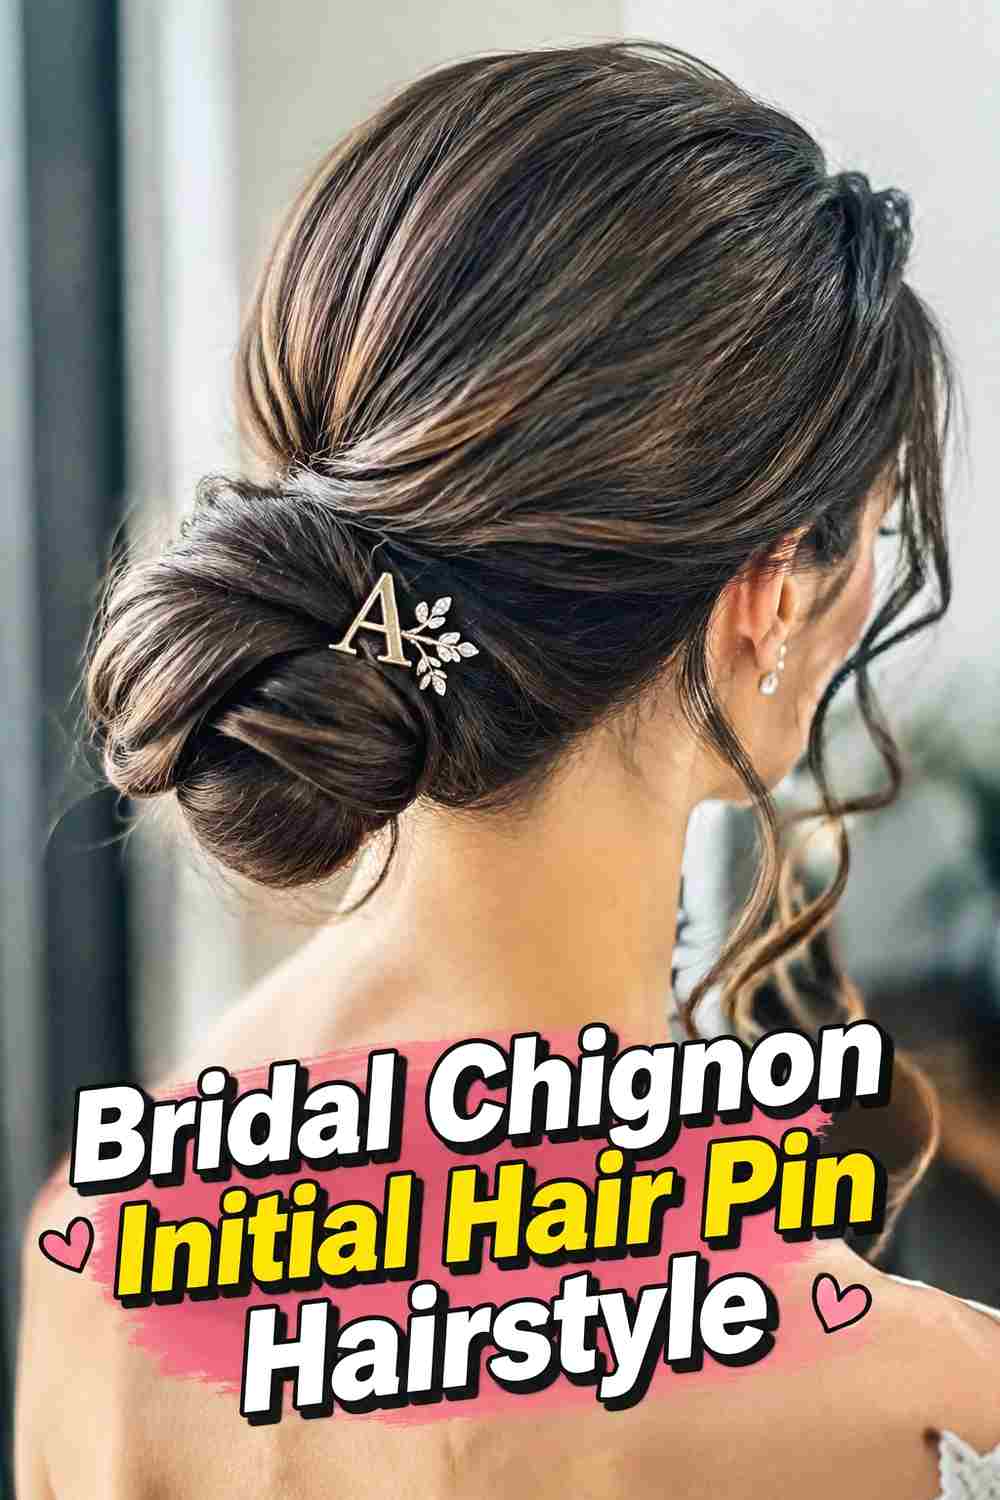
A personalized initial adds a meaningful detail to a bridal or formal chignon without requiring an oversized accessory. Form the chignon low at the nape and secure it thoroughly, then place the initial at one side of the bun or just above the curved edge. Pearl, crystal, or polished metallic finishes can all work depending on the rest of the accessories. The letter may represent the wearer’s own initial, a shared monogram, or another personally meaningful detail. Keep the surrounding hairstyle refined and avoid crowding the chignon with too many decorative pieces if you want the customized pin to remain easy to notice.
Why It Works
The simple chignon provides an elegant background that lets a meaningful personalized detail stand out.
Pro Tip
Test the pin placement from multiple angles before finalizing it so the initial remains readable in photographs.
18. Minimalist Initial Pin Straight Hairstyle
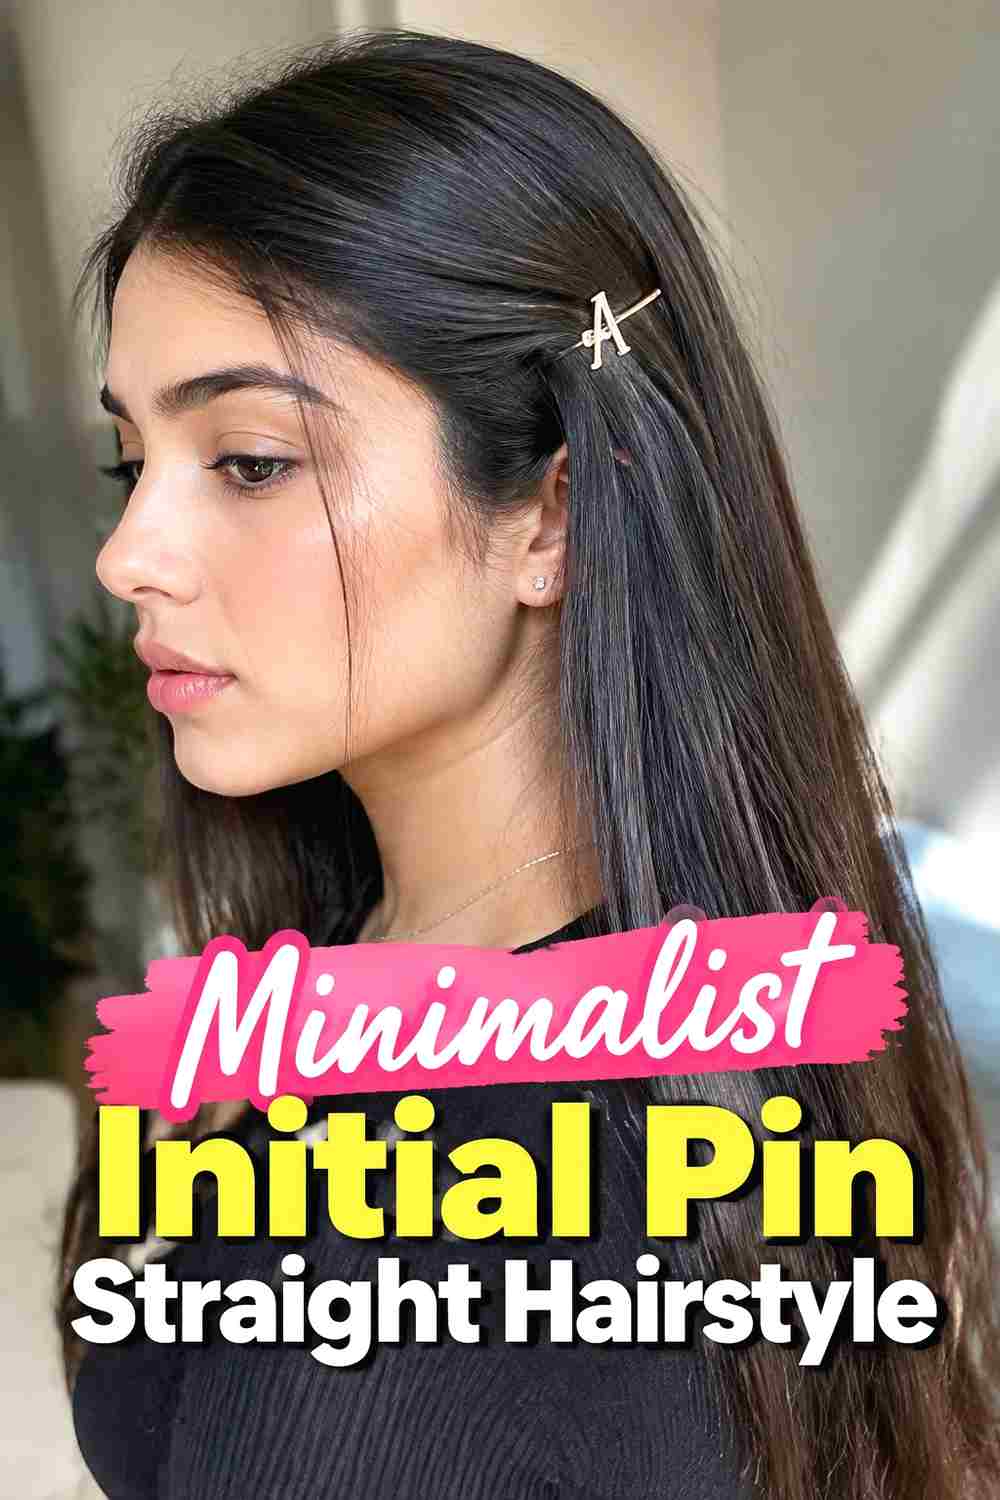
A minimalist initial pin looks especially modern against straight, softly polished hair. Wear the lengths loose with a center or side part, then tuck one section behind the ear and secure it with a small clean-lined letter pin. The hairstyle does not need extra curls, braids, or volume because the simplicity helps the personalized accessory become the focal point. Maintain natural movement through the ends and realistic shine so the finish stays soft rather than overly flat. A single gold, silver, or enamel initial works best when it contrasts enough with the hair to remain visible without becoming a large statement piece.
Styling Notes
Keep the section beneath the pin smooth and relatively thin so the letter sits flat instead of tilting outward.
Why It Works
The pared-back hair creates visual space for a small customized accessory to feel distinctive without looking overly decorated.
How to Choose the Right Look
Start with where you want the initial to be visible. Side pins, pixie placements, and side-swept waves make the personalized detail easy to see from the front. Low buns, chignons, half-up styles, and ponytails place the initial farther back for a subtler effect.
Accessory size should match both your hair density and the hairstyle. Small lightweight initials suit pixies, sleek bobs, and fine hair, while medium pieces can work well with braids, curls, buns, and thicker textures. The decorative pin should not be responsible for holding a heavy updo together.
Consider finish as well. Pearls and crystals feel dressier, while simple gold or silver initials can work for everyday styling. Velvet ribbons and braided details add texture around the accessory without requiring multiple pieces.
Finally, prioritize comfort and secure attachment. Use hidden pins, elastics, barrettes, ribbons, or stable sections to support the hairstyle first, then position the initial where it will stay visible without snagging hair.
Final Thoughts
Personalized initial hair pins can make even a very simple hairstyle feel more distinctive. The key is choosing a placement that keeps the letter visible, using a size that suits your hair density, and letting the hairstyle provide the structure while the initial adds the custom finishing detail.
FAQs
1. Where should I place a personalized initial hair pin?
Popular placements include above the ear, beside a bun, near a ponytail base, at the end of a braid, or in the center of a half-up style. Choose a stable area where the letter stays visible.
2. Can initial hair pins work on short hair?
Yes. Pixies, short bobs, and cropped styles can work especially well with small lightweight initial pins placed near the temple or above the ear.
3. Should an initial pin hold the hairstyle in place?
Usually, the hairstyle should be secured independently first. The personalized pin can then function mainly as decoration, reducing strain on both the hair and accessory.
4. Can I wear more than one initial pin?
Yes. Two coordinating letters can be stacked, placed parallel, or arranged together as a monogram-style detail. Keep spacing clear so both initials remain readable.
5. What finish works best for personalized hair pins?
Gold, silver, pearl, crystal, enamel, and mixed-metal finishes can all work. Choose one that contrasts with your hair and complements the overall styling and occasion.
Save your favorite personalized initial hair pin ideas and explore more hairstyle inspiration for elegant ways to add custom detail to everyday and special-event hair.