14 Moonlit Pearl Waves Hairstyle Ideas
Luminous pearls, silvery accessories, and flowing waves give these moonlit hairstyles a soft glow that feels romantic, polished, and quietly ethereal.
Moonlit pearl waves combine flowing texture with delicate light-catching details, making them especially effective when you want hair that feels dressed up without becoming heavily structured. Loose bends, polished Hollywood waves, half-up sections, and softly gathered ponytails all provide enough movement for pearls to sit naturally between strands.
The key is choosing accessories that complement the scale of the waves. Small scattered pearls create subtle detail, while vines, clips, halos, and jeweled pieces make a stronger focal point. Hair length, wave size, accessory weight, placement, and desired formality should all guide the final look.
Quick List
- Pearl Studded Moonlit Waves Hairstyle
- Silver Pearl Side Swept Waves Hairstyle
- Moonlit Half Up Pearl Cascade Hairstyle
- Deep Side Part Pearl Waves Hairstyle
- Pearl Halo Loose Waves Hairstyle
- Moonstone And Pearl Beach Waves Hairstyle
- Midnight Ribbon Pearl Waves Hairstyle
- Pearl Clip Hollywood Waves Hairstyle
- Celestial Pearl Center Part Waves Hairstyle
- Pearl Vine Waterfall Waves Hairstyle
- Low Ponytail Pearl Waves Hairstyle
- Twisted Crown Pearl Waves Hairstyle
- Soft Bob Pearl Waves Hairstyle
- Jeweled Moonlit Pearl Waves Hairstyle
1. Pearl Studded Moonlit Waves Hairstyle
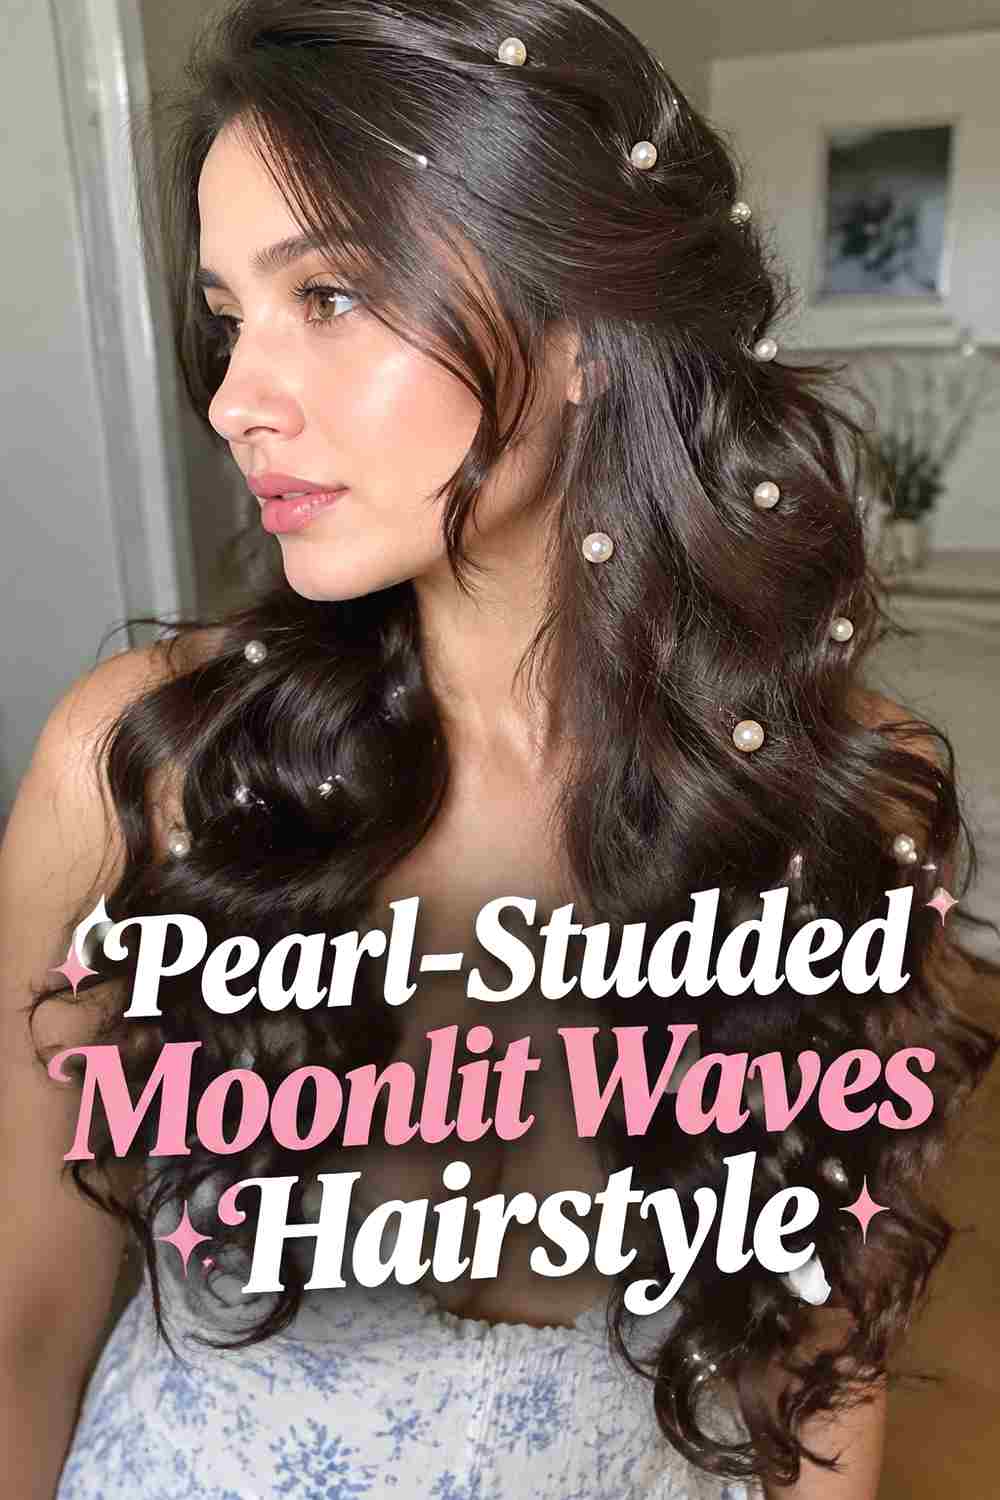
The Pearl-Studded Moonlit Waves Hairstyle uses tiny individual pearls to create points of light across soft, flowing lengths. Broad waves work especially well because the accessories can sit in the natural valleys between bends instead of competing with tightly curled texture. Rather than spacing the pearls evenly, scatter them more densely around one side or through the upper half of the hair for a natural, constellation-like effect. Medium and long hair offer the most room for this placement, although a few pearls can also work on shorter lengths. Keep the crown relatively simple so the eye moves toward the luminous details scattered through the waves, and use lightweight pins or twist-in accessories that will not drag the hair downward.
Styling Notes
Shape the waves completely before adding pearls. Insert each accessory into stable sections rather than repeatedly adjusting it after placement, which can disturb the finished wave pattern.
2. Silver Pearl Side Swept Waves Hairstyle
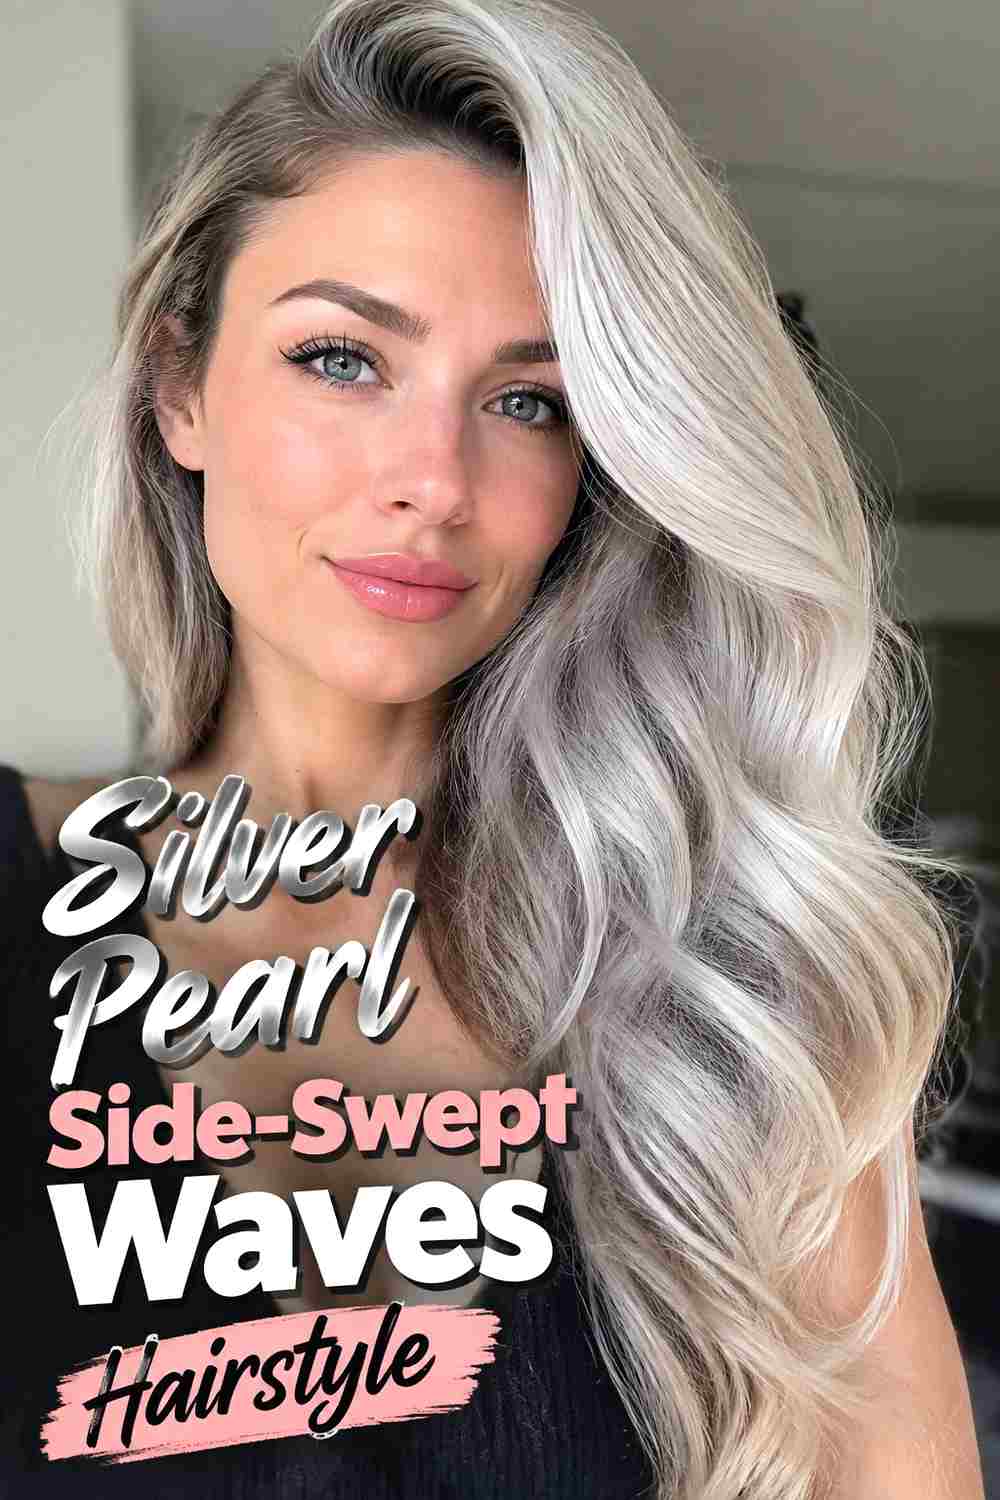
Side-swept waves create an elegant foundation for a silver-and-pearl accent because most of the texture remains visible over one shoulder. The opposite side can be tucked neatly behind the ear and secured with a slim pearl comb, silver barrette, or small clustered pins. Larger waves give the hairstyle a formal, glamorous silhouette, while softer bends make the same placement feel more relaxed. Keeping a little lift at the crown helps balance the weight of the swept lengths and prevents the style from appearing flat on one side. This option works beautifully when you want hair jewelry to remain visible from the front without decorating the entire hairstyle.
Best For
Choose this style for evening events, weddings, dinners, or photographed occasions where you want both the waves and the pearl detail clearly visible from a three-quarter angle.
3. Moonlit Half Up Pearl Cascade Hairstyle
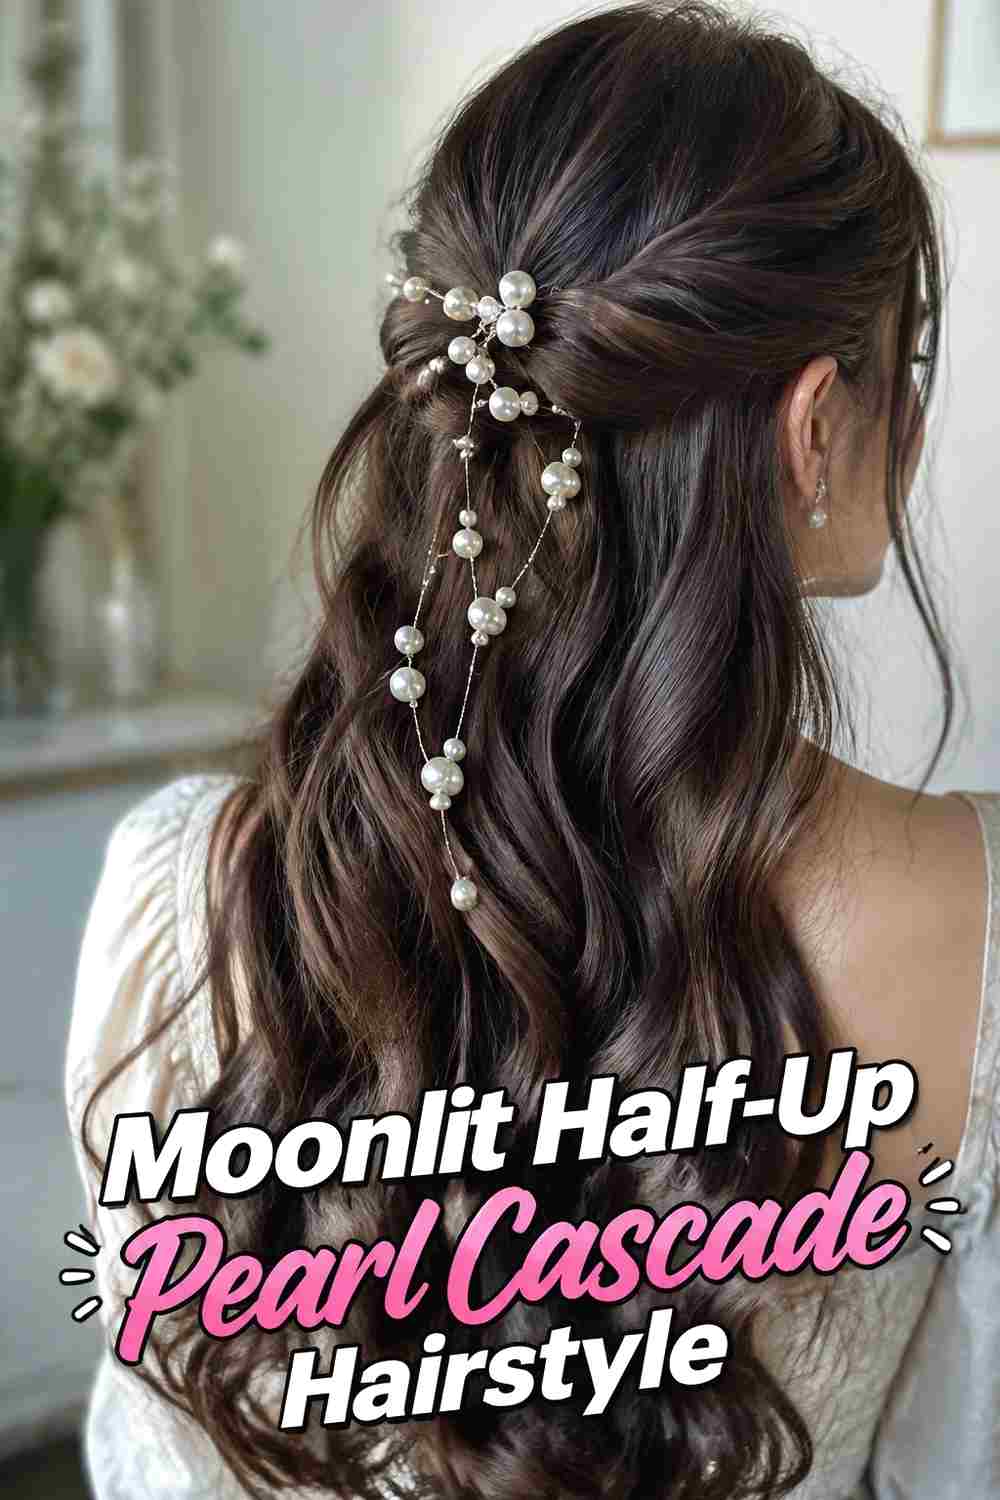
A half-up structure creates the perfect anchor for a cascade of pearl pins trailing gently into loose waves. The upper sections are gathered at the back without pulling them excessively tight, creating a small elevated base from which the pearls can appear to flow downward. Use several sizes and place the larger pieces nearer the attachment point before tapering into smaller pearls through the upper lengths. This keeps the cascade visually balanced and avoids a heavy look. The loose hair beneath can remain softly waved with plenty of natural movement. The style works best on medium or long hair, where the gradual transition from secured crown to free-flowing waves has enough space to develop.
Pro Tip
Build the pearl cascade from the top downward. Establish the largest focal pins first, then fill smaller gaps rather than trying to create the entire pattern at once.
4. Deep Side Part Pearl Waves Hairstyle
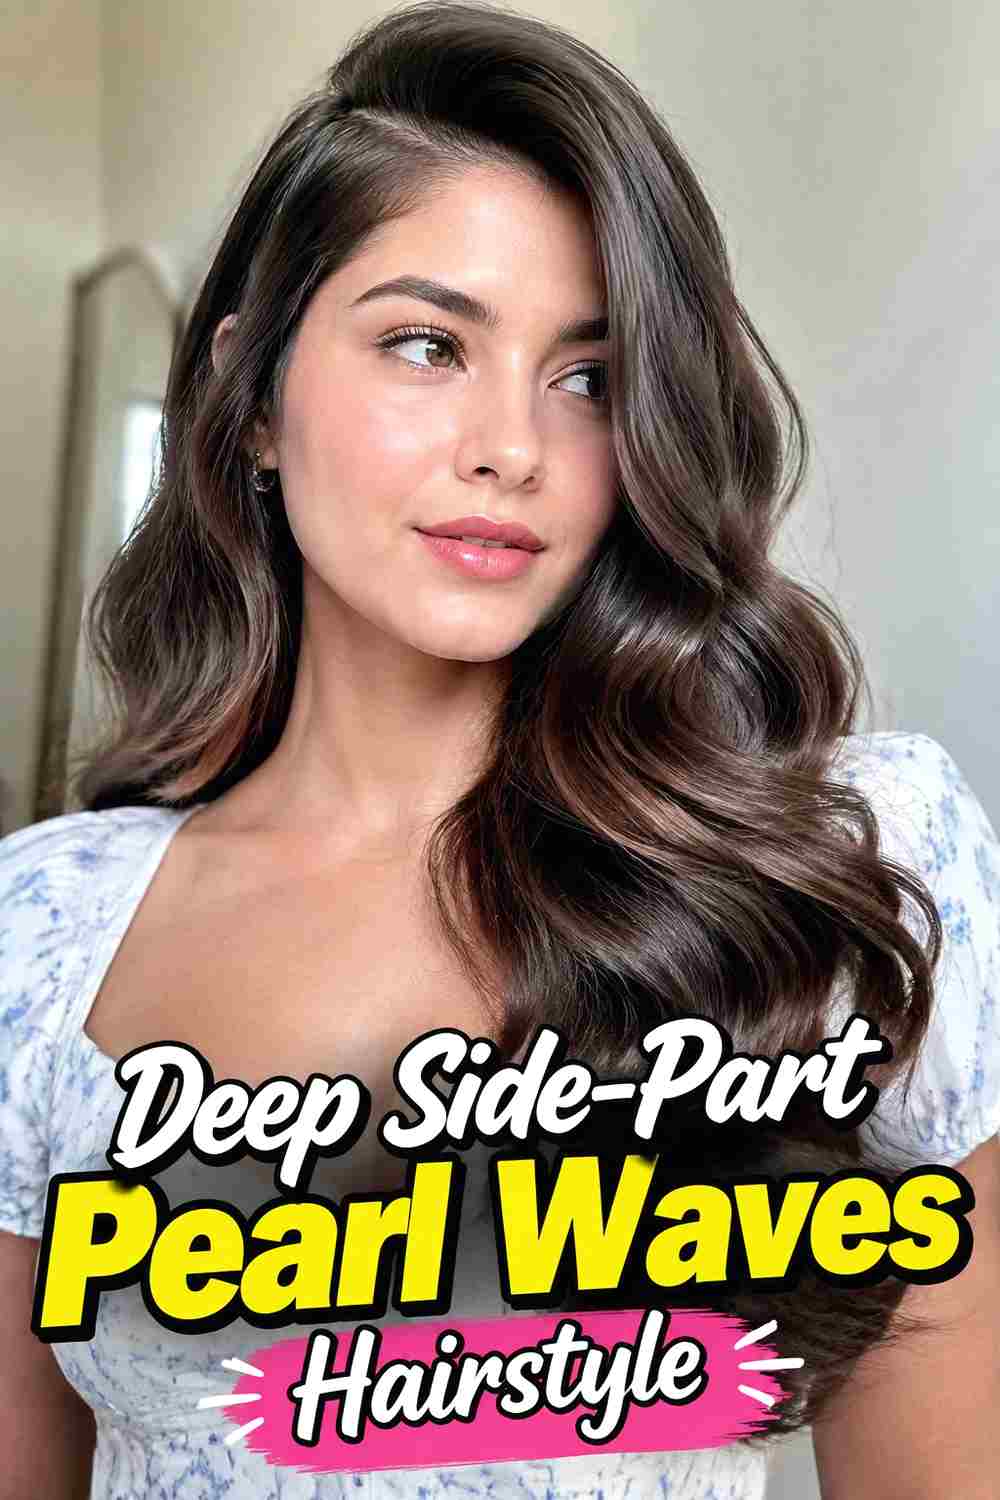
A deep side part brings instant drama to loose pearl waves without requiring an elaborate updo. The heavier side falls in broad, glossy bends, while the smaller side can be pinned close to the head with two or three pearl barrettes. The asymmetry makes the accessories easy to see and gives the waves more visual movement across the shoulders. Keep the part precise enough to create structure but avoid flattening every root; a little natural lift keeps the style soft. This look can work on several hair lengths, although shoulder-length and longer cuts show the sweeping wave pattern most clearly. Pearls with a silvery or cool-toned setting reinforce the moonlit effect.
Styling Notes
Set the part before curling so the waves fall in the intended direction. Add the barrettes only after the hair has cooled and the final shape is established.
5. Pearl Halo Loose Waves Hairstyle
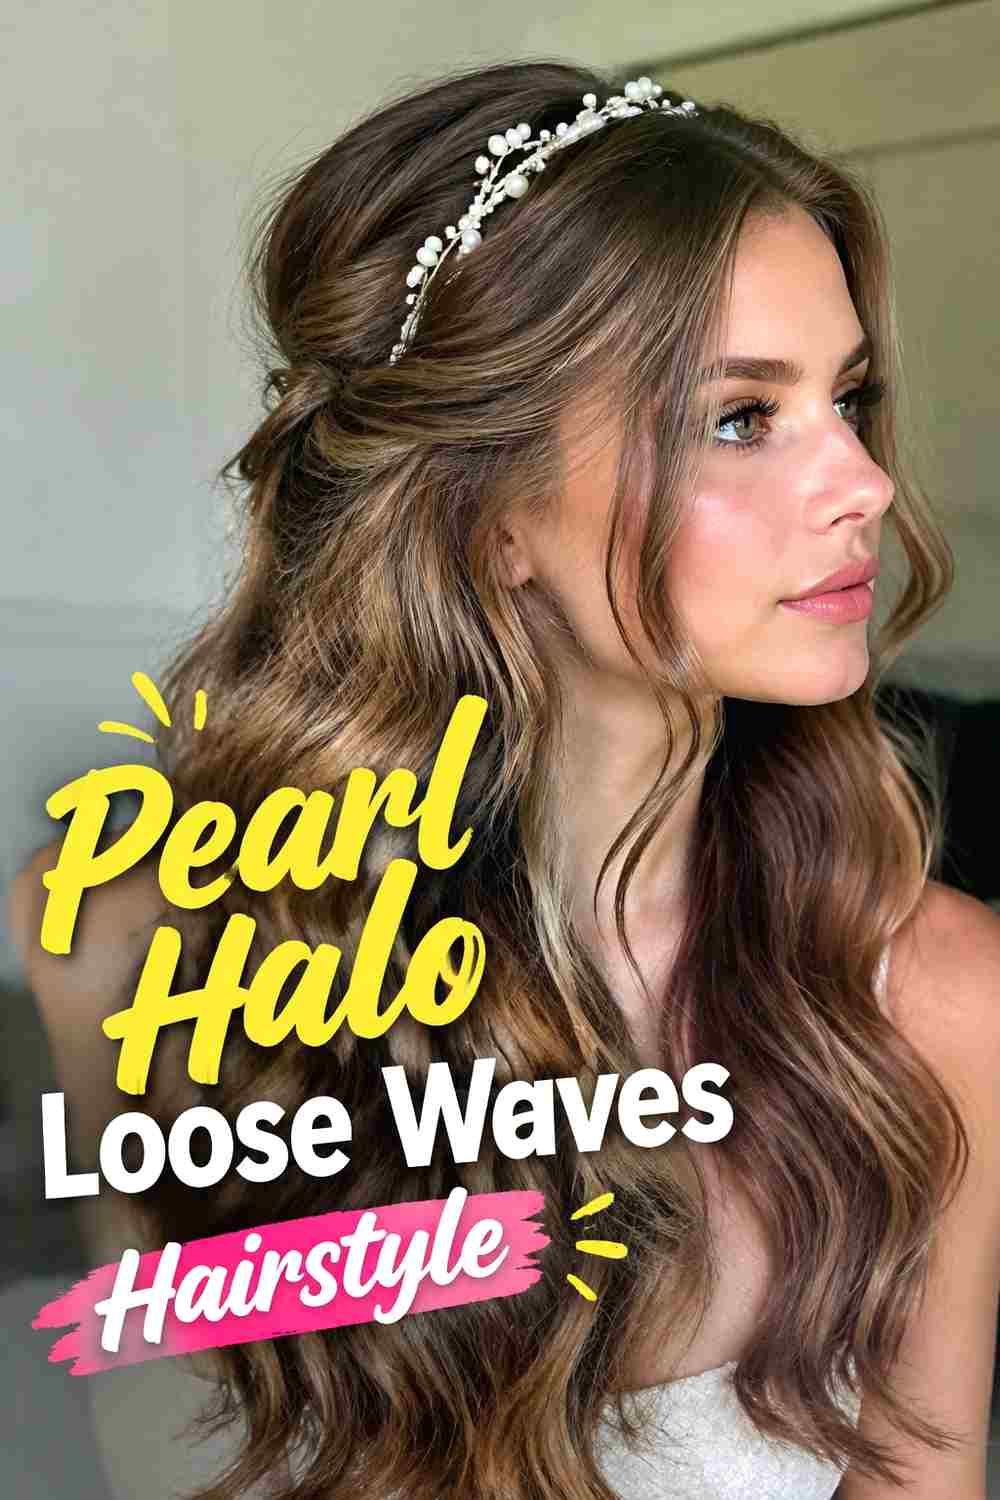
The Pearl Halo Loose Waves Hairstyle frames flowing hair with a flexible pearl vine positioned slightly behind the highest point of the head. Unlike a rigid headband, the halo follows the crown gently and can be secured at several discreet points, allowing the hair underneath to retain softness and movement. Loose, irregular waves keep the look romantic and stop the accessory from appearing overly ceremonial. Small pearls mixed with delicate silver leaves or crystal details can create extra dimension while preserving the moonlit theme. The hairstyle looks especially beautiful from the back, where the curved halo sits above the cascading waves without covering their texture or shine.
Wear & Maintenance
Use several lightweight anchor points rather than relying on pressure at the temples. This keeps the halo comfortable and helps maintain its curved placement throughout longer events.
6. Moonstone And Pearl Beach Waves Hairstyle
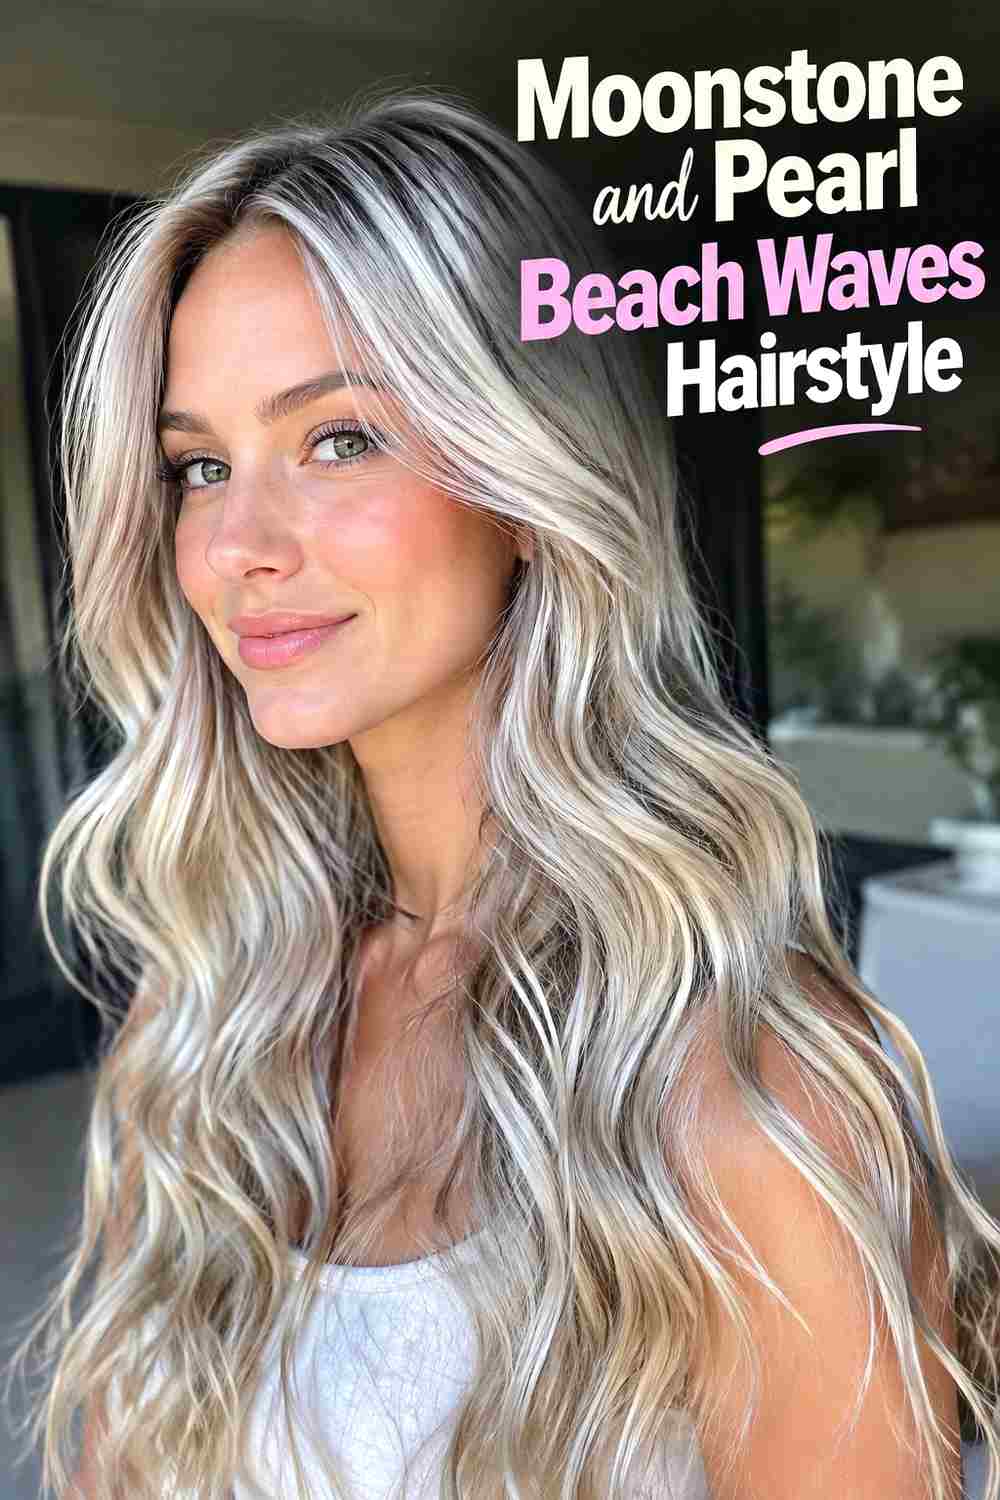
This style combines relaxed beach waves with moonstone and pearl details for a softer, less formal interpretation of moonlit hair. The wave pattern should remain loose and irregular, with straighter pieces mixed among the bends to keep the texture natural. A few tiny moonstone-like pins and pearls can be placed near one temple or scattered through a half-up section, adding subtle flashes of pale blue, cream, and silver. Keeping the accessories small prevents the casual texture from becoming overly ornate. This option suits medium and long hair particularly well and can work for outdoor weddings, summer evenings, or anyone who wants a celestial effect without polished ballroom-style curls.
Why It Works
Relaxed texture keeps the glowing accessories from feeling too formal, while the combination of pearls and moonstone tones adds dimension without requiring a large statement piece.
7. Midnight Ribbon Pearl Waves Hairstyle
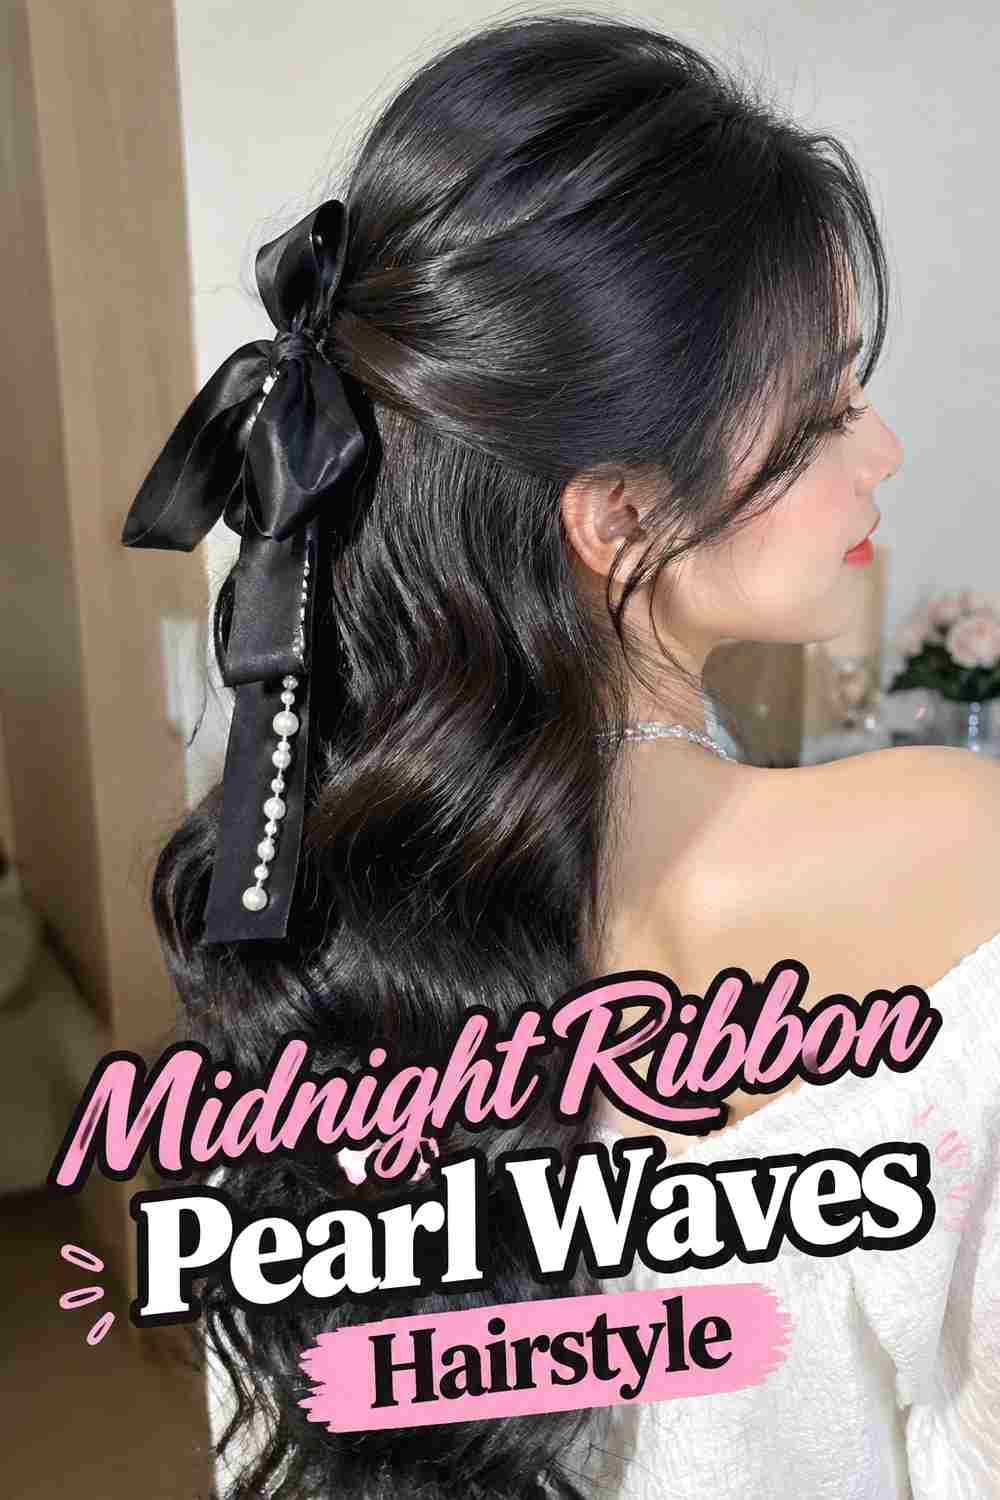
A dark ribbon provides striking contrast against luminous pearls and soft waves. Gather a small half-up section or low ponytail and secure it properly before tying a navy, black, deep plum, or midnight-blue ribbon around the base. A few pearl pins near the knot connect the fabric accessory with the moonlit theme while keeping the design refined. The waves underneath should remain soft and touchable, giving the structured bow a flowing background. Velvet creates a richer finish, while satin feels sleeker and more reflective. Keep the bow proportional to the hair volume so it does not hide too much texture or make the pearl accents difficult to see.
Styling Notes
Treat the ribbon as decoration rather than support. A concealed elastic underneath keeps the hairstyle secure and prevents the bow from loosening as the waves move.
8. Pearl Clip Hollywood Waves Hairstyle
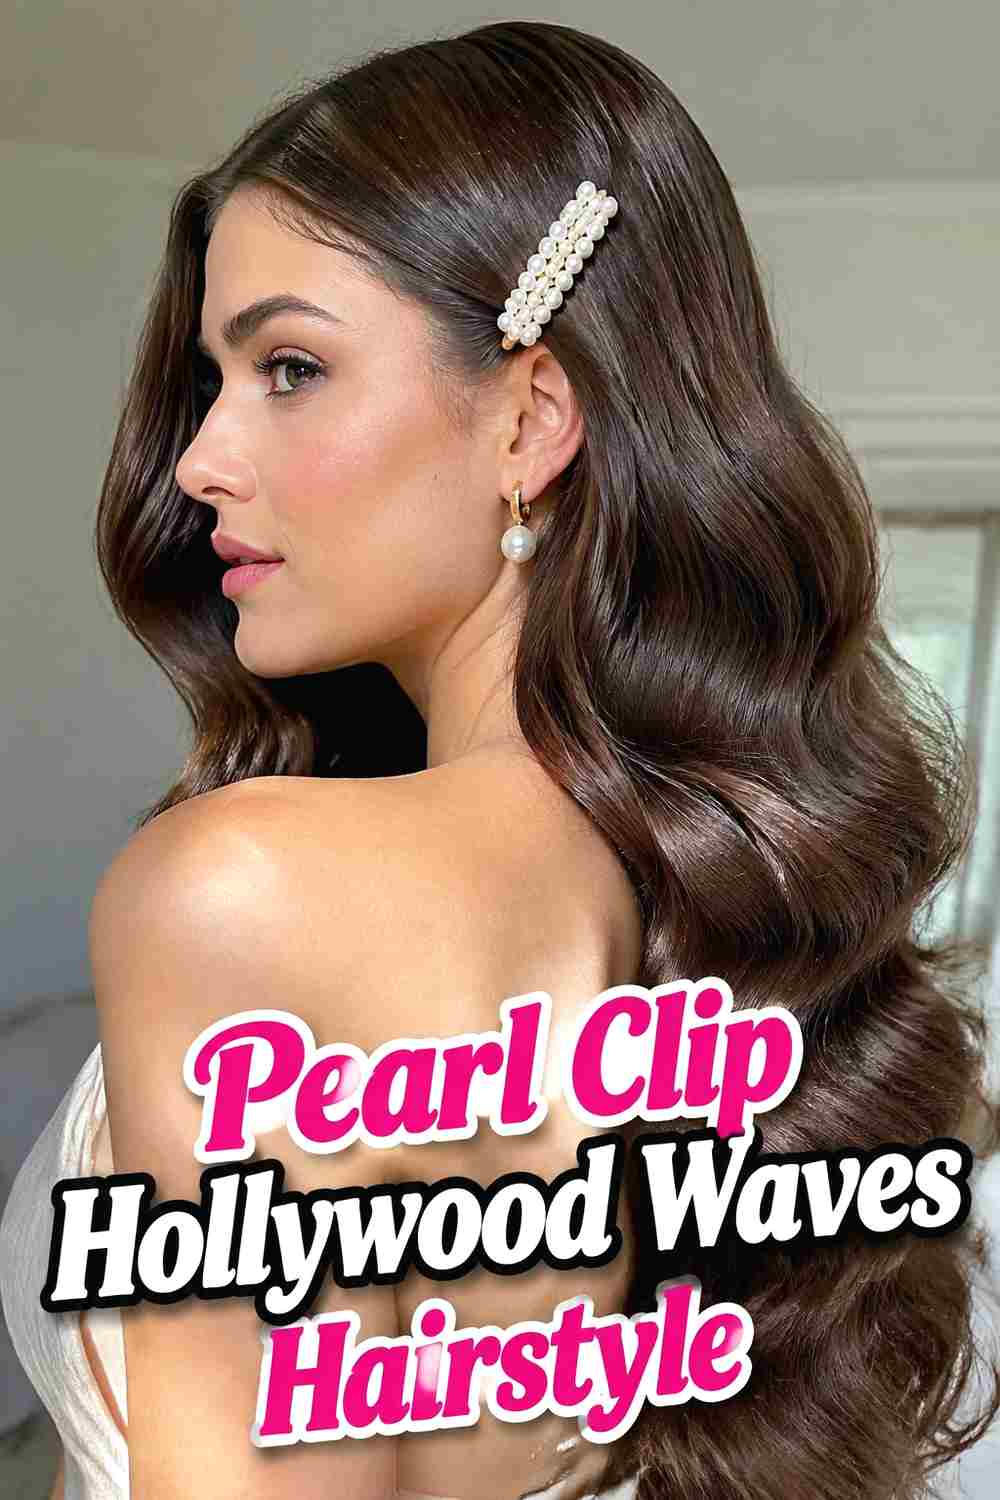
Polished Hollywood waves create a glamorous setting for a single statement pearl clip. The hair is shaped into broad, connected S-waves with a deep side part, then tucked behind one ear to expose the accessory. A rectangular pearl barrette, curved clip, or small clustered design can sit just above the ear without interrupting the smooth wave pattern on the heavier side. This look relies on controlled shine rather than excessive volume, so the waves should remain glossy but still show individual strand detail. Medium and long hair work best because the repeating pattern needs enough length to develop clearly. The result feels classic, formal, and particularly suited to evening styling.
Best For
This option is ideal for weddings, formal dinners, receptions, and vintage-inspired events where a polished silhouette feels more appropriate than loose, beachy texture.
9. Celestial Pearl Center Part Waves Hairstyle
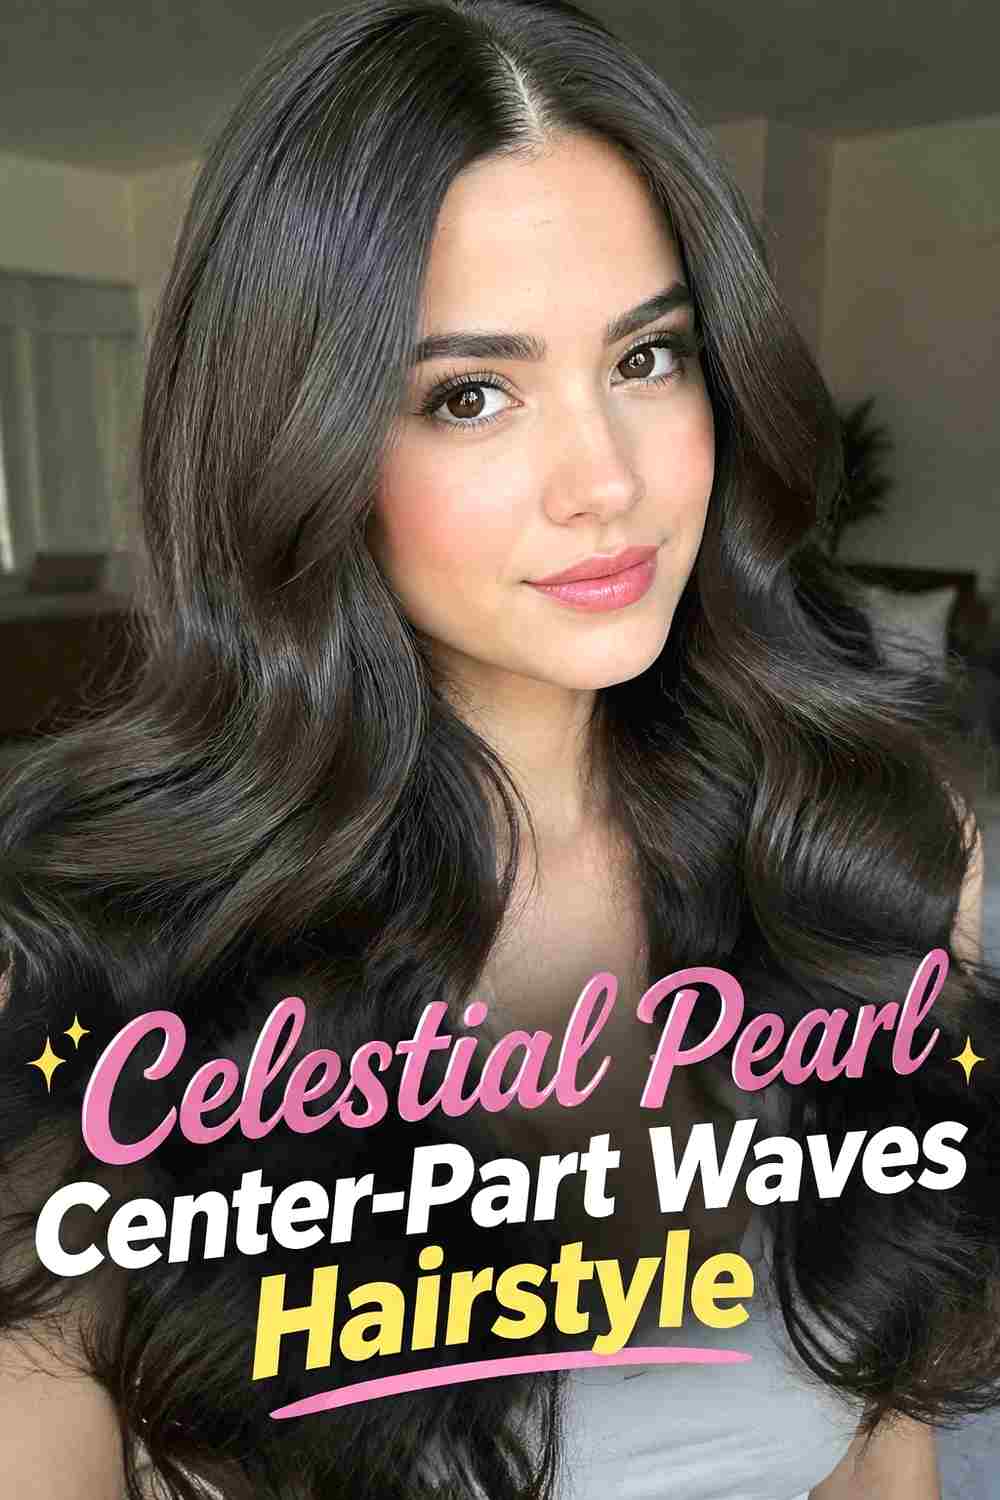
A center part gives moonlit pearl waves a balanced, ethereal front view. Long sections fall evenly on both sides of the face, with soft waves beginning below the cheek or jaw area so the crown remains relatively clean. Tiny pearls can be placed symmetrically near both temples or scattered more naturally through the upper lengths. Mixing a few subtle star-like or silvery pins with the pearls adds a celestial note without turning the hairstyle into a heavily themed look. Long layers help the waves move more naturally and prevent the bottom from forming one dense shape. The final result feels light, luminous, and modern while still carrying a romantic evening mood.
Pro Tip
Keep accessories slightly smaller near the face. Larger pieces are easier to balance farther back, where they will not compete with facial features or dominate the parting.
10. Pearl Vine Waterfall Waves Hairstyle
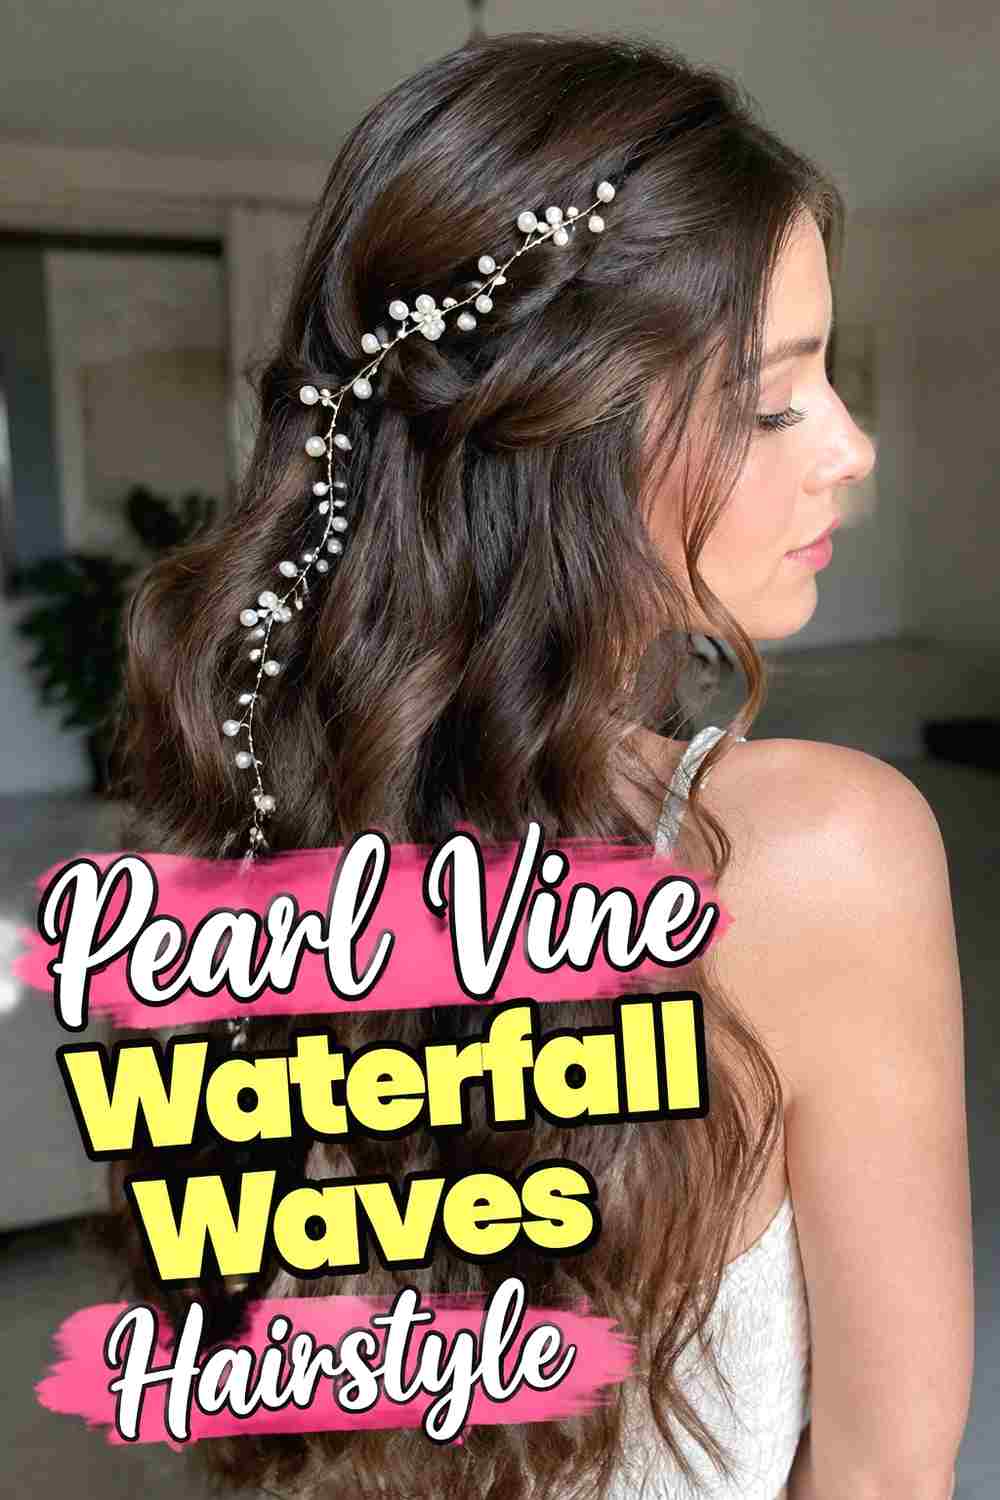
A flexible pearl vine can follow the curve of a waterfall braid or twisted half-up section before disappearing into loose waves. This placement creates the impression that the jewelry is woven directly through the hairstyle rather than sitting above it. The upper structure should remain secure enough to hold the vine at several points, while the released strands fall naturally beneath it in broad bends. A lightweight vine with small pearls and fine silver branches keeps the effect delicate. This style is especially effective on long hair because there is enough space to show both the detailed upper section and the flowing wave pattern below without one element overwhelming the other.
Wear & Maintenance
Anchor the vine to the braid or twist rather than loose falling strands. Stable attachment points help preserve the shape and reduce pulling as the hair moves.
11. Low Ponytail Pearl Waves Hairstyle
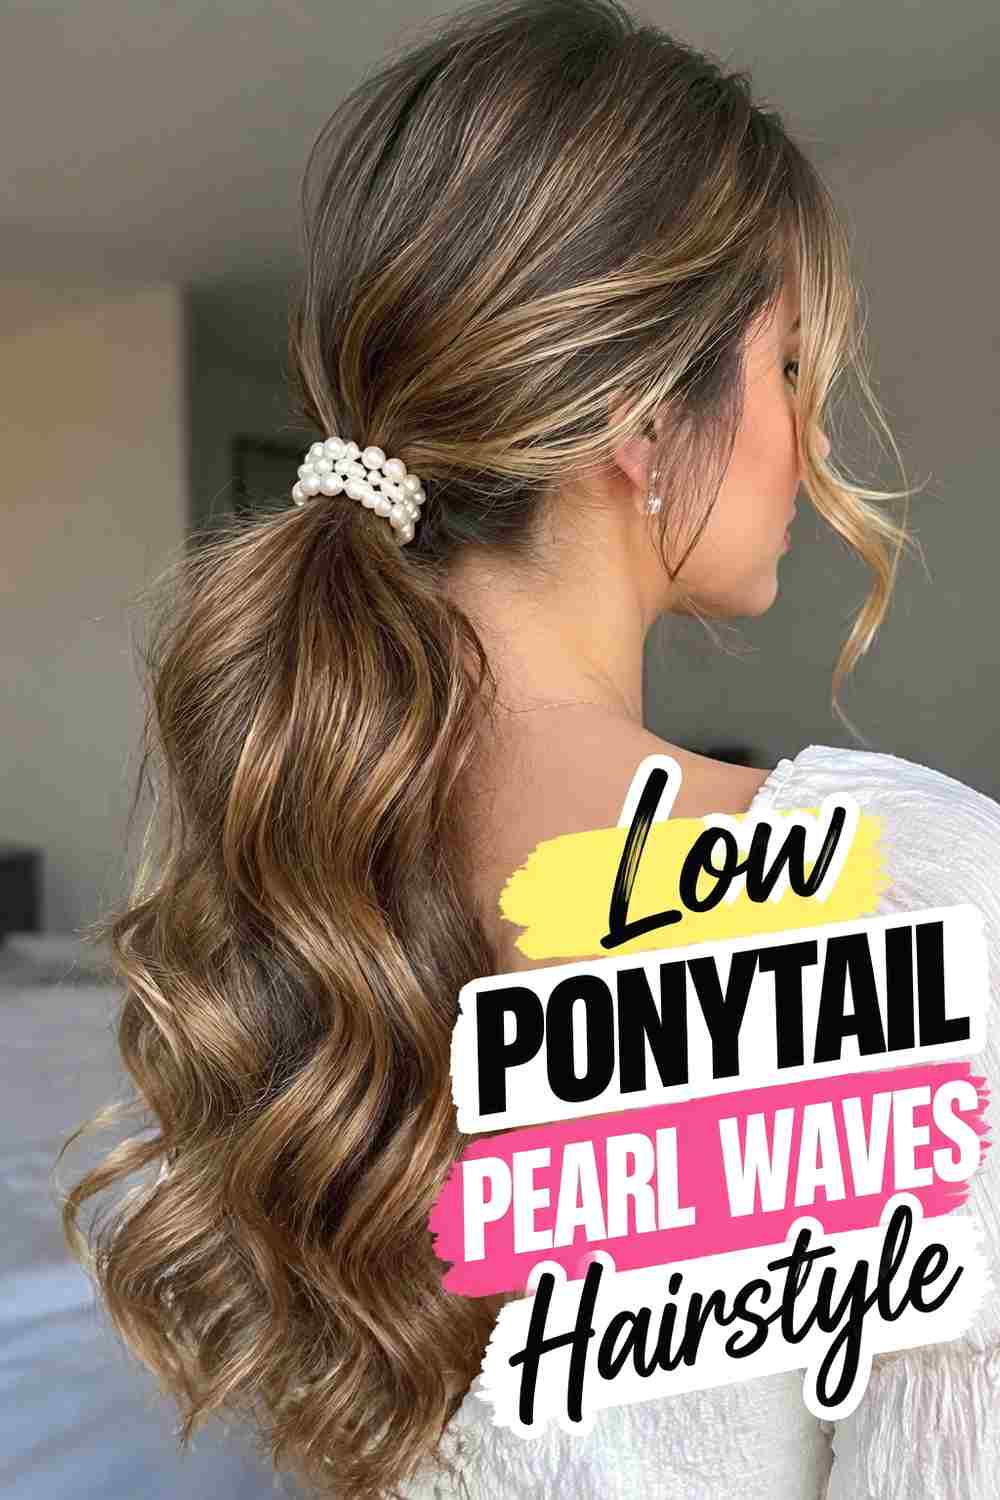
A low ponytail brings a clean, elegant structure to pearl waves while still allowing the curled lengths to remain visible. Hair is gathered near the nape with a center or soft side part, then the ponytail is styled into broad, glossy bends. A slim pearl cuff, clustered pin, or short strand of pearls can cover the elastic for a refined finishing detail. A few face-framing pieces can be left loose if you prefer a softer front. The low placement works well for formal wear because it feels polished without creating excessive height. Always secure the ponytail with a standard elastic before adding the decorative pearl piece so the accessory is not carrying the hairstyle’s weight.
Why It Works
The compact base keeps the silhouette sophisticated while the wavy ponytail provides enough movement to prevent the finished style from looking severe or overly structured.
12. Twisted Crown Pearl Waves Hairstyle
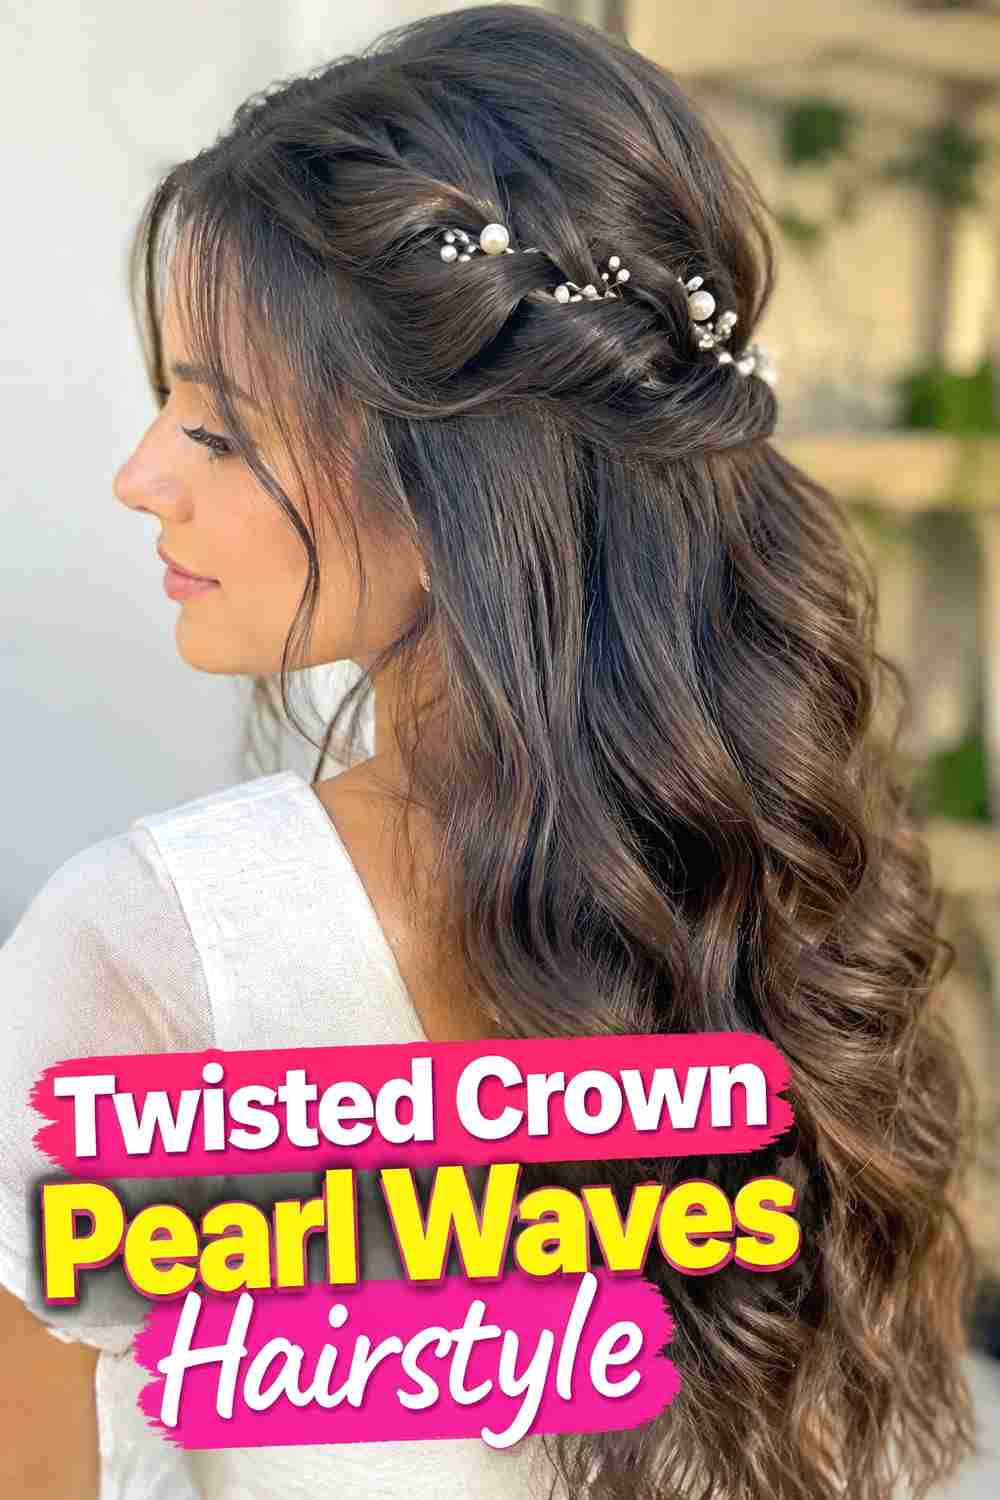
Two soft twists sweeping from the temples toward the back create a crown-like frame above long pearl-decorated waves. The twists provide useful anchor points for tiny pearls, allowing the accessories to sit securely without being scattered across completely loose hair. Keep the outer edges of each twist slightly relaxed so the structure remains visible but not rigid. The lower lengths can fall in soft waves with natural variation, creating contrast between the defined crown and flowing texture underneath. This option works beautifully for romantic events because it has enough structure to feel special while leaving most of the hair down. A few smaller pearls near the center-back can emphasize where the twists meet.
Styling Notes
Secure each twist before placing the pearls. This lets you adjust the crown shape freely without knocking decorative pins out of position.
13. Soft Bob Pearl Waves Hairstyle
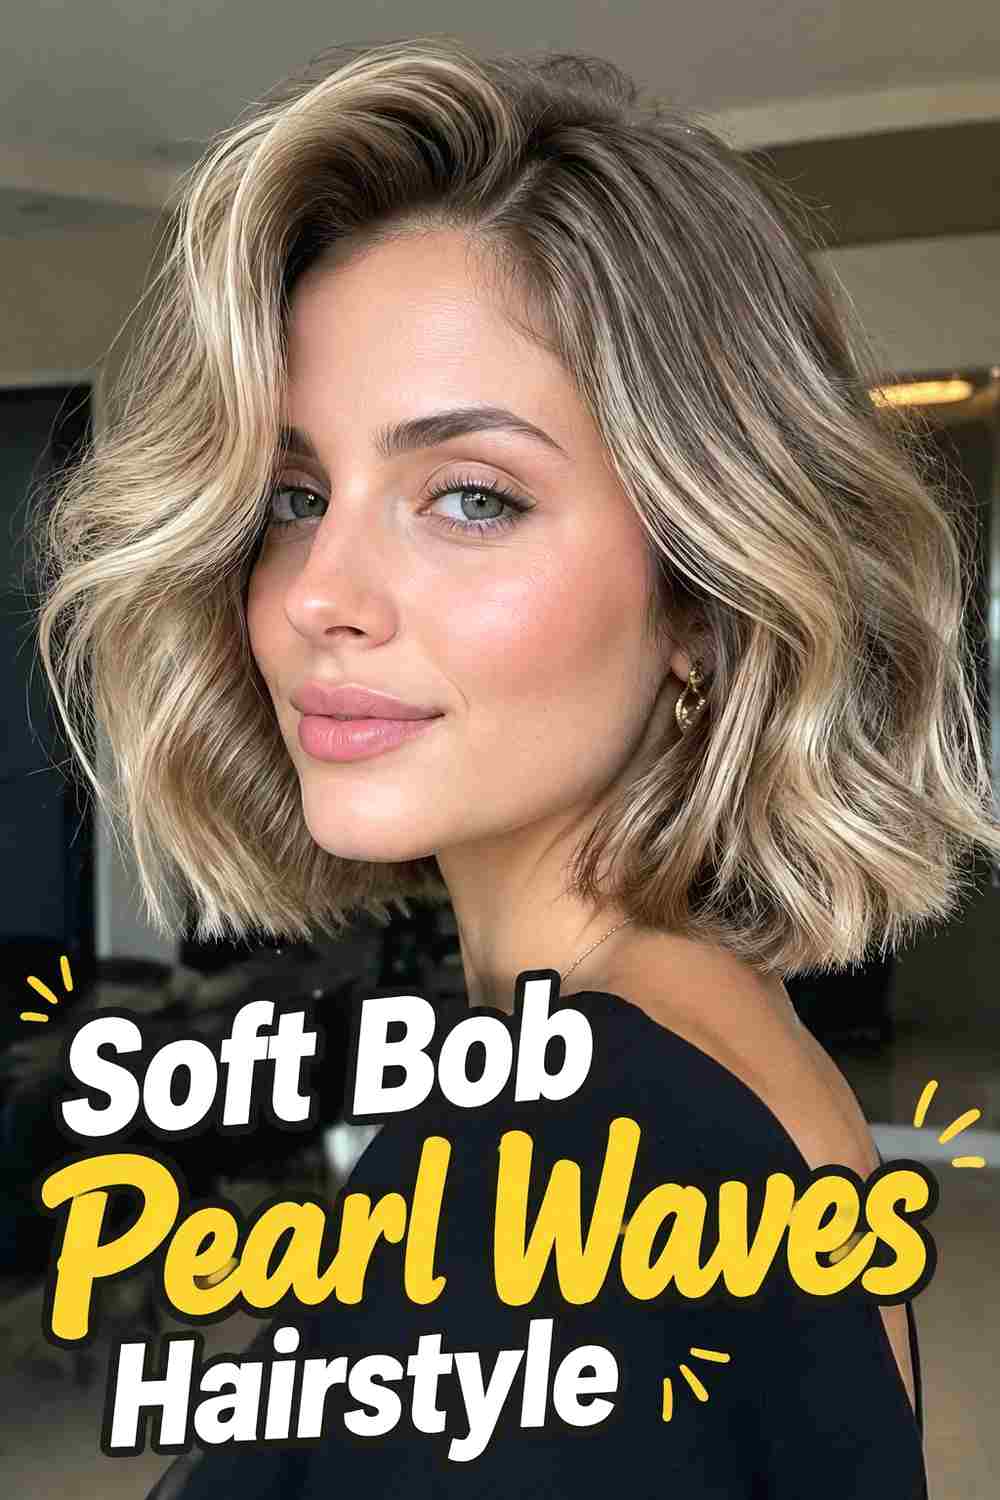
Pearl waves do not require long hair. A softly waved bob can carry the same moonlit effect when the accessories are scaled to the shorter silhouette. Broad bends through the mid-lengths create movement, while one or two slim pearl clips above the ear provide a clean focal point. Keeping the opposite side fuller balances the tucked section and prevents the bob from looking flat. A center part creates symmetry, while a side part feels more glamorous. Small accessories usually work better than long vines because shorter hair offers less space for complex draping. The result feels modern and polished while still capturing the luminous softness associated with pearls and moonlit styling.
Best For
This option suits chin-length to shoulder-length hair and is especially useful when you want elegant pearl detail without needing extensions, braids, or an updo.
14. Jeweled Moonlit Pearl Waves Hairstyle
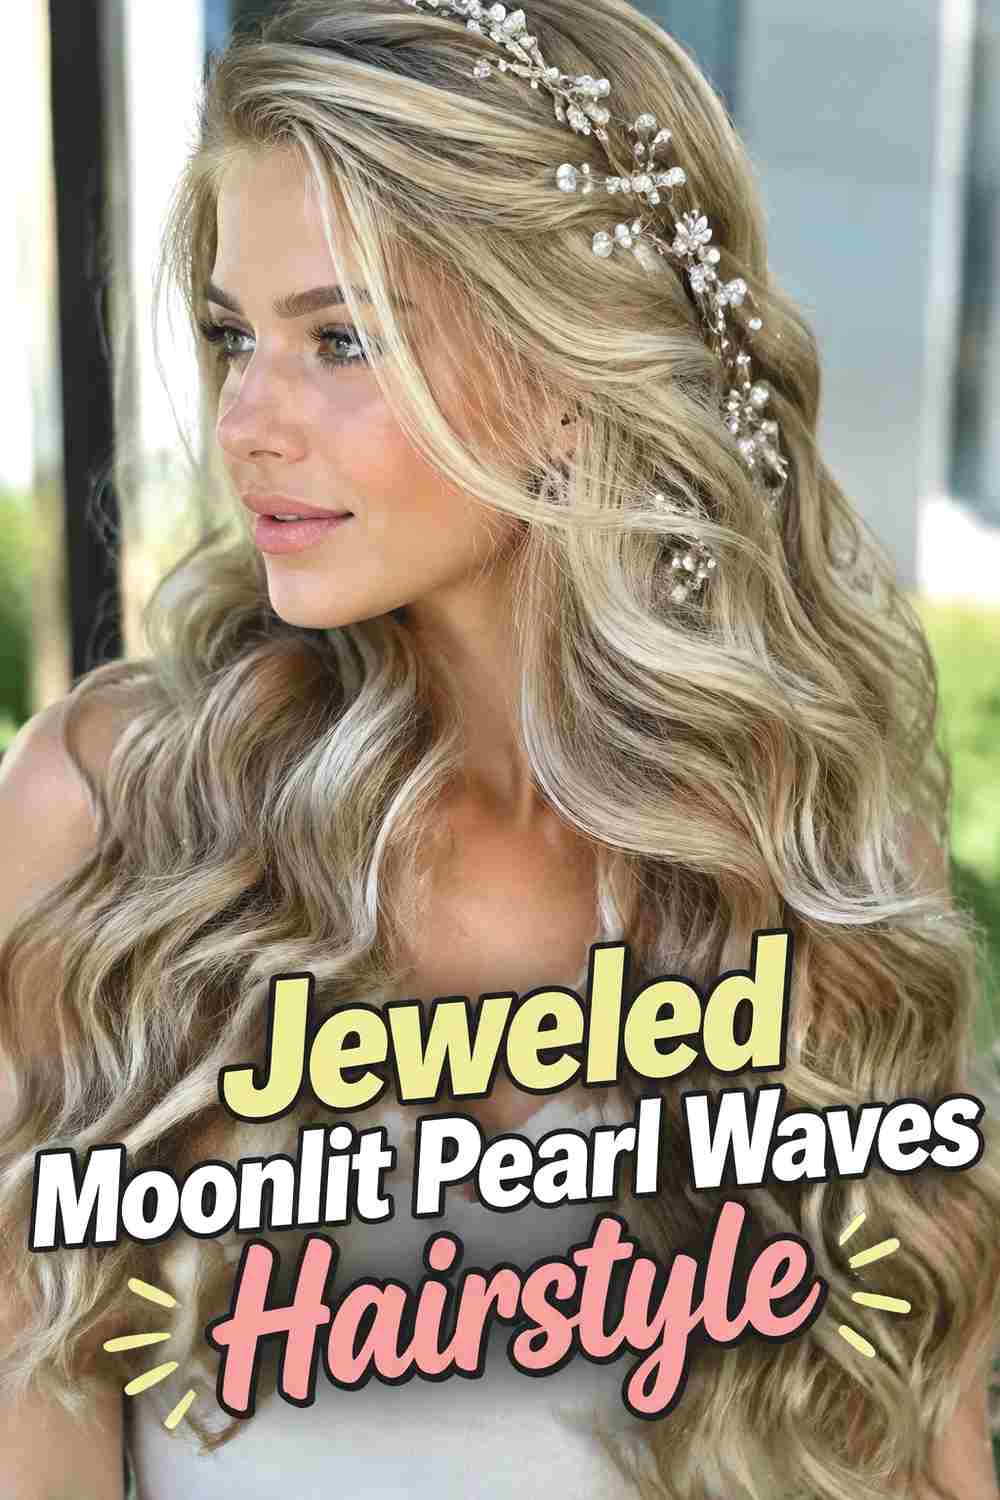
The Jeweled Moonlit Pearl Waves Hairstyle is the most embellished option, combining pearls with small crystals, moonstone-like accents, and delicate silver pieces. The decoration should concentrate around one side or through a half-up section so the hair itself still has room to breathe. Broad, glossy waves provide a smooth backdrop that allows each accessory to catch light without disappearing into excessive texture. Mixing accessory sizes creates depth, but keeping them within one cool-toned palette prevents the arrangement from becoming chaotic. The look works particularly well for formal celebrations, bridal styling, or photographed events where the hair needs a stronger focal point while remaining soft and romantic rather than heavily sculpted.
Wear & Maintenance
Place heavier pieces near stable pinned sections and use lighter pearls through the loose lengths. This keeps the jewelry balanced and reduces unnecessary pulling on individual strands.
How to Choose the Right Look
Start with wave style. Loose beachy bends create the most relaxed finish, while smooth Hollywood waves feel formal and glamorous. If you want something in between, broad brushed-out curls or soft S-waves provide polish without looking overly structured.
Next, consider where you want the pearls to sit. Individual pearl pins work well through half-up sections and loose waves, while larger clips suit side parts, bobs, and Hollywood waves. Flexible vines are better for crowns, waterfall sections, and halos because they can follow a curved line across the hairstyle.
Hair length influences the amount of decoration you can comfortably carry. Long hair gives you room for cascades, vines, ponytails, and layered waves, while medium lengths work beautifully with clips, half-up styles, and side sweeps. Short hair often looks strongest with one carefully scaled pearl accessory.
Keep weight in mind. Decorative pieces should sit on stable sections rather than depending on loose strands for support. If you are wearing the style for several hours, a few lightweight pearls may feel better than one heavy jeweled accessory.
Finally, choose the mood. Moonstone accents and celestial pins feel dreamy, ribbons add romance, pearl clips create classic polish, and jeweled arrangements make the biggest statement.
Final Thoughts
Moonlit pearl waves are versatile because the softness comes from both the hair texture and the accessories. A single pearl clip can make loose waves feel polished, while vines, halos, and jeweled cascades create a more elaborate evening look.
Choose a wave pattern that suits your length and styling time, secure any structural sections first, and then add pearls where they enhance the movement rather than covering it. The best result feels luminous, balanced, and naturally elegant.
FAQs
1. What type of waves work best with pearl hair accessories?
Loose waves, brushed-out curls, Hollywood waves, and soft S-waves all work well. Larger pearl pieces usually pair best with simpler wave patterns, while tiny pins can be scattered through softer texture.
2. Can short hair work with moonlit pearl waves?
Yes. Bobs and shoulder-length cuts can use small pearl clips, barrettes, or pins placed near one side while the rest of the hair remains softly waved.
3. How do I keep pearl pins from sliding out of waves?
Place them near secure sections, crossed hidden pins, twists, braids, or half-up attachment points rather than relying entirely on loose hair.
4. Can I mix pearls with moonstones or crystals?
Yes. Pearls combine naturally with pale moonstone-like accents and clear crystals. Keeping all the pieces within a cool or softly neutral palette helps the finished hairstyle look cohesive.
5. Are moonlit pearl waves suitable for weddings?
Yes. Half-up pearl cascades, Hollywood waves, pearl halos, twisted crowns, and jeweled wave styles can all be adapted for bridal, bridesmaid, or wedding-guest looks.
Save your favorite moonlit pearl waves hairstyle ideas and explore more ways to combine luminous accessories with soft, romantic movement.