12 Zigzag Headband Hairstyle Ideas
The zigzag headband is back with a playful retro feel, giving curls, straight hair, buns, ponytails, and short cuts an instantly recognizable pushed-back finish.
A zigzag headband is typically a flexible comb-like band with separated teeth that guides the front hair backward while creating visible ridges or sections near the hairline. The effect can feel sporty and casual on a ponytail, polished with straight hair, or bold against curls and natural volume. Because the accessory already creates texture at the front, the rest of the hairstyle can stay relatively simple.
When choosing a look, consider hair length, natural texture, headband flexibility, and how much volume you want behind the band. Positioning it close to the hairline emphasizes the zigzag pattern, while sliding it farther back exposes more of the front and creates stronger crown lift.
Quick List
- Sleek Straight Zigzag Headband Hairstyle
- Voluminous Curly Zigzag Headband Hairstyle
- Soft Wavy Zigzag Headband Hairstyle
- High Ponytail Zigzag Headband Hairstyle
- Low Ponytail Zigzag Headband Hairstyle
- Messy Bun Zigzag Headband Hairstyle
- Half Up Zigzag Headband Hairstyle
- Chin Length Bob Zigzag Headband Hairstyle
- Rounded Afro Zigzag Headband Hairstyle
- Textured Pixie Zigzag Headband Hairstyle
- Micro Braid Zigzag Headband Hairstyle
- Slicked Back Zigzag Headband Hairstyle
1. Sleek Straight Zigzag Headband Hairstyle
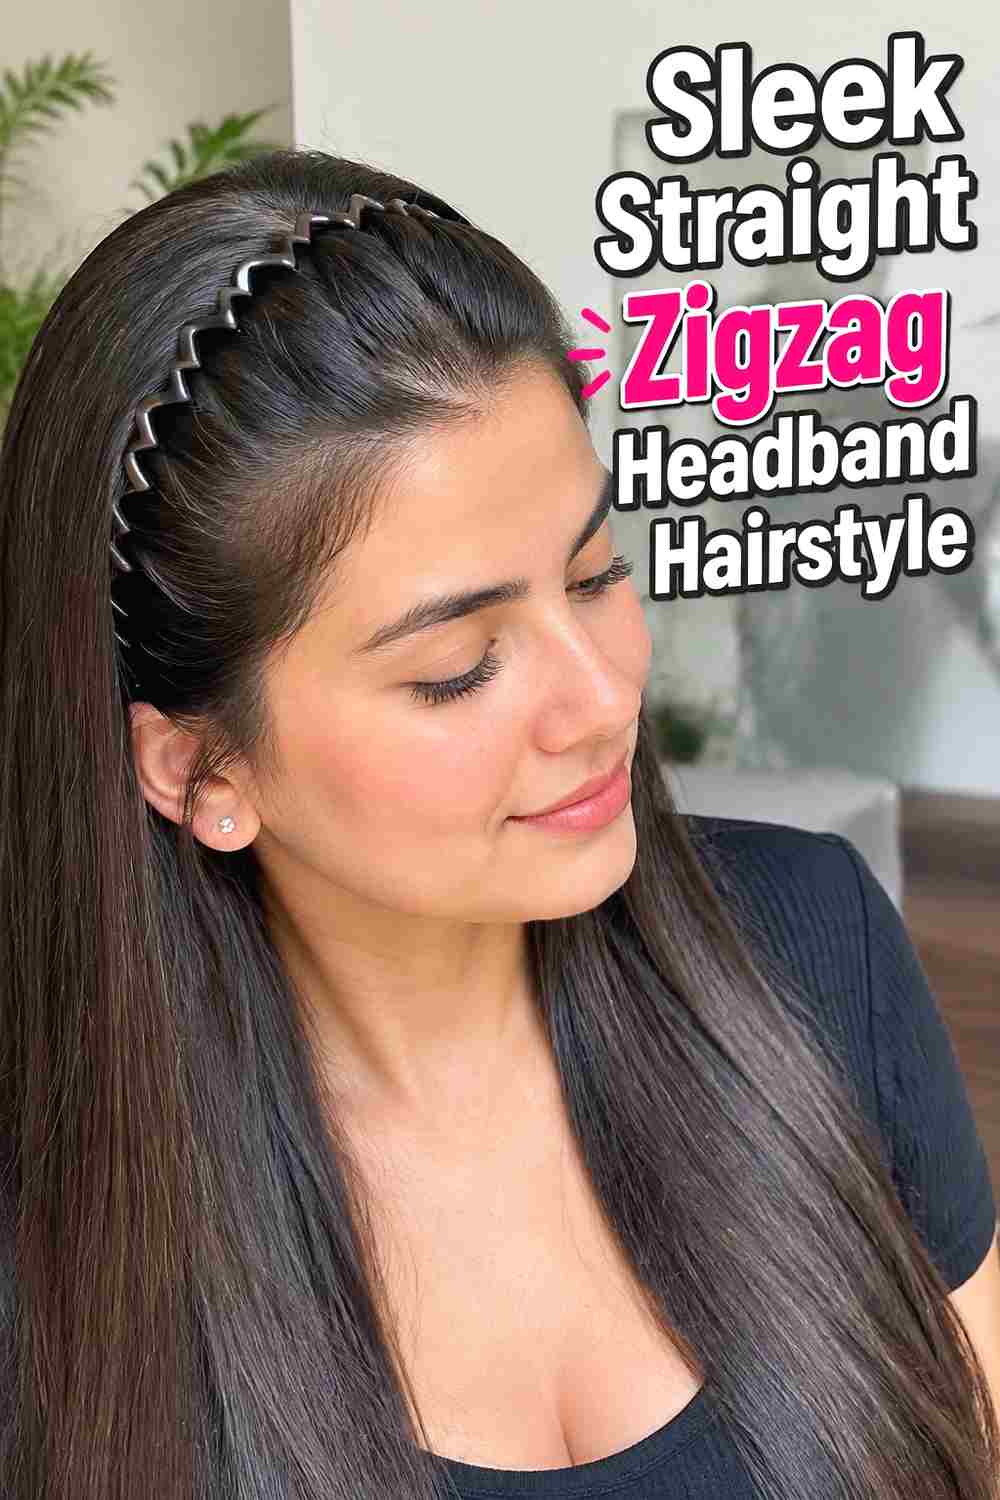
Straight hair creates a clean background that makes the ridged effect of a zigzag headband especially easy to see. Start with smooth lengths, position the band near the front hairline, and gently slide it backward so the teeth separate the surface into neat sections. Keep a little crown lift instead of pressing everything completely flat, which helps the style retain dimension from the side. The remaining hair can fall straight down the back or over the shoulders with soft movement through the ends. A black, tortoiseshell, or neutral headband keeps the look minimal, while a brighter band creates a stronger retro accent without requiring additional styling.
Styling Notes
Guide the headband backward slowly so the teeth separate the front evenly rather than catching random strands. Finish by adjusting crown height with your fingertips.
Best For
This version works well for casual outfits, workdays, errands, minimalist styling, and retro-inspired everyday looks.
2. Voluminous Curly Zigzag Headband Hairstyle
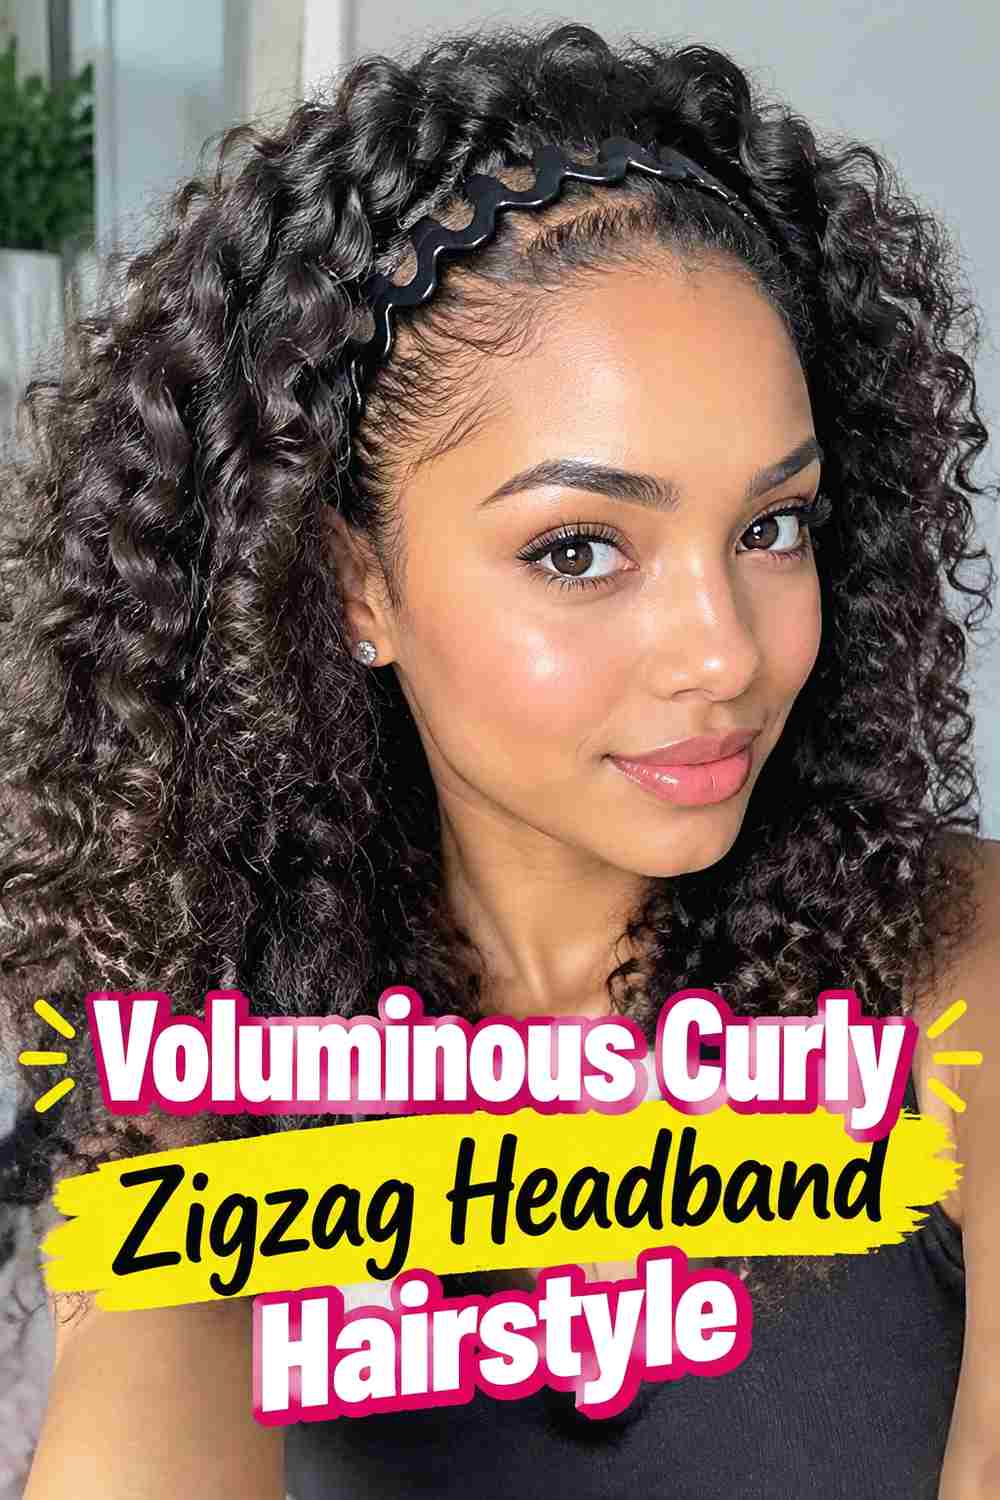
A zigzag headband creates an interesting contrast against full curls because it keeps the front controlled while allowing the crown and lengths to expand behind it. Position the band close enough to the hairline for the separated front sections to remain visible, then gently lift the curls at the crown so they do not become flattened. The sides can stay broad and textured, giving the accessory a practical role without reducing the natural volume. Keep curl groups intact through the ends rather than brushing through the entire hairstyle. If the hair is very dense, choose a sturdy but comfortable band that can sit securely without pressing too tightly against the scalp.
Hair Type & Length
Medium to long curly hair creates a particularly noticeable contrast between the structured front and the fuller texture behind the band.
Pro Tip
Arrange the curls after placing the headband rather than before. This makes it easier to restore volume where the accessory has compressed the roots.
3. Soft Wavy Zigzag Headband Hairstyle
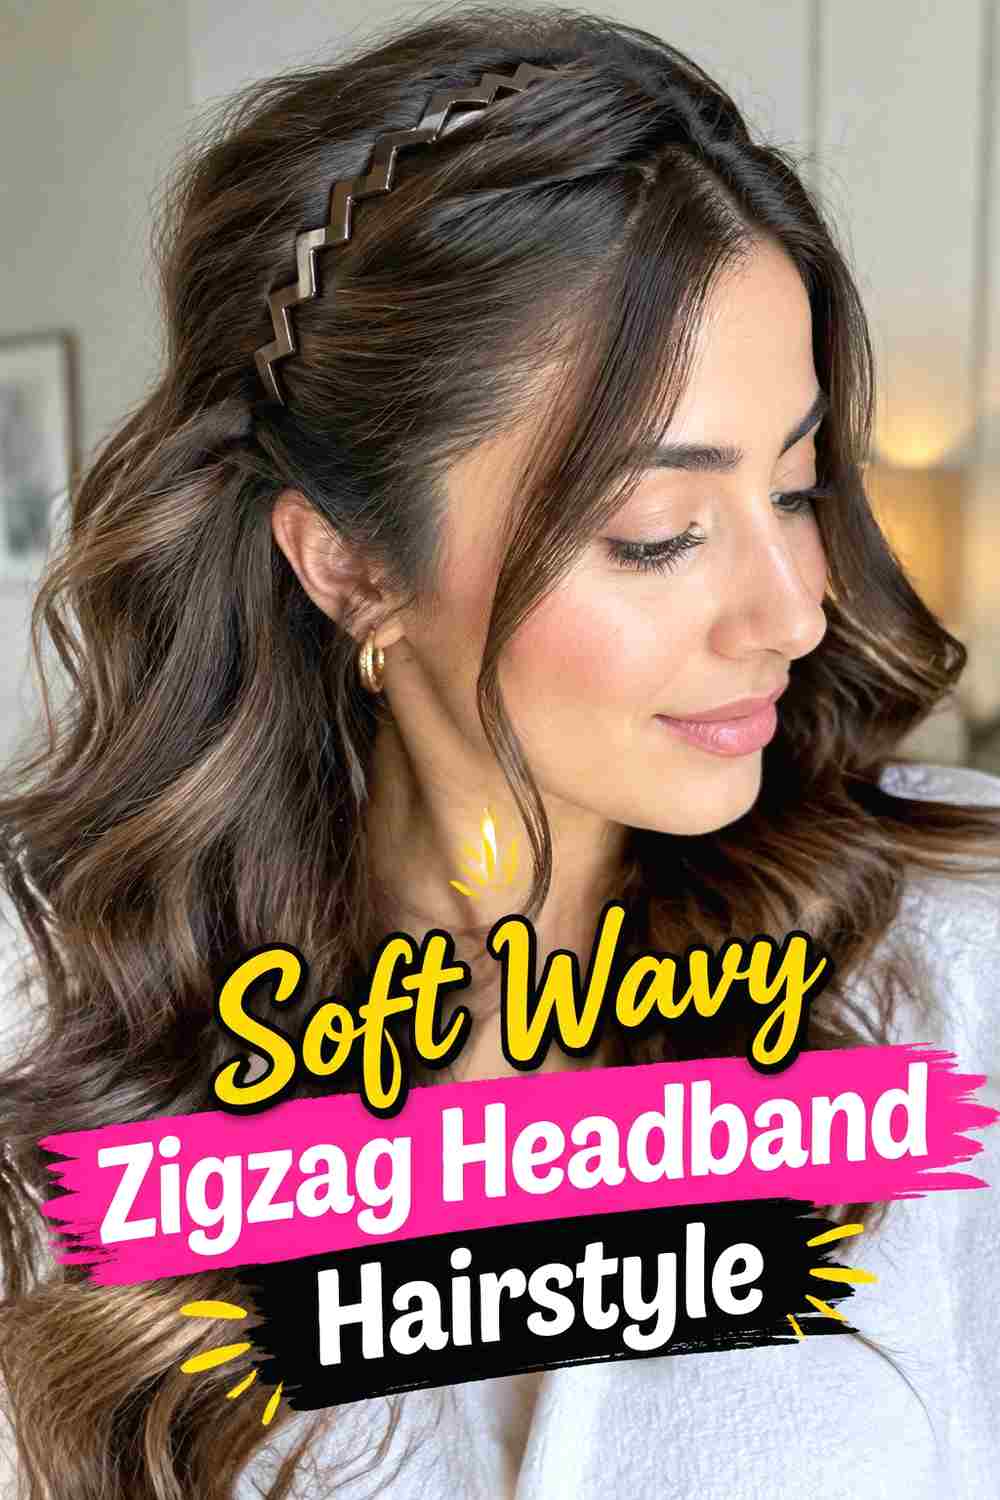
Loose waves give a zigzag headband a softer, more relaxed finish than pin-straight hair. Slide the accessory back from the hairline to create subtle ridges through the front, then leave the rest of the hair loose with broad bends and natural movement. Keep the crown gently lifted so the transition from the structured front to the waves does not feel too flat. This version works especially well with medium and longer lengths because the wave pattern provides texture without competing strongly with the accessory. A translucent, metallic, or tortoiseshell zigzag band can give the hairstyle a nostalgic touch while still feeling simple enough for everyday outfits.
Styling Notes
Use the headband to create the front pattern first, then reshape any waves that became stretched while the band was being positioned.
4. High Ponytail Zigzag Headband Hairstyle
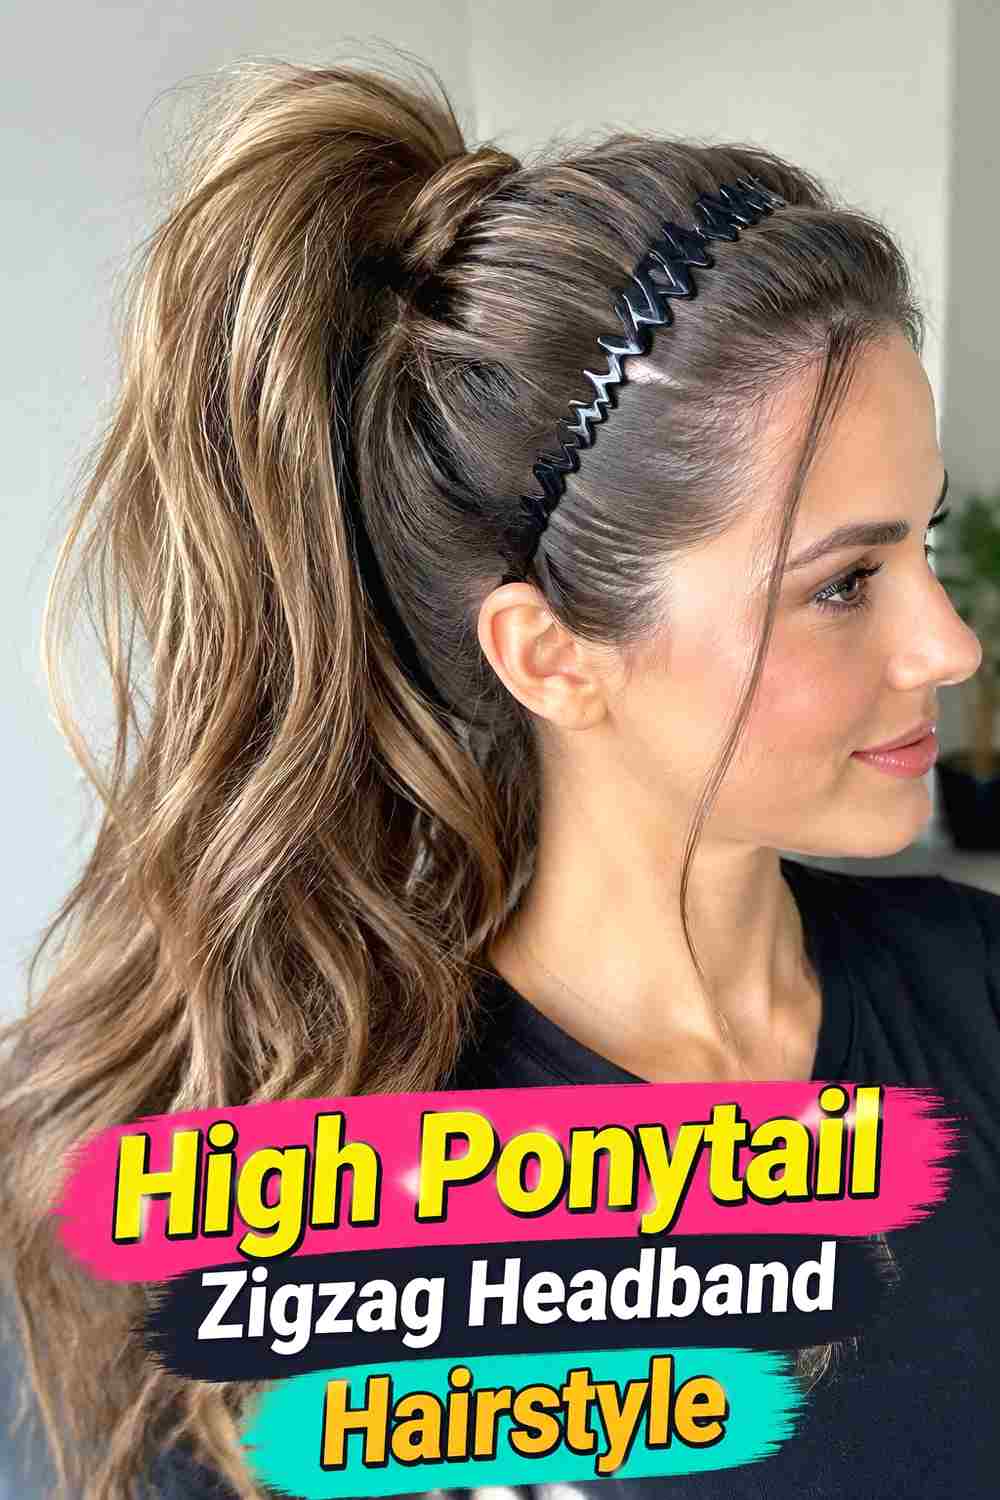
A high ponytail pairs naturally with the sporty, retro feel of a zigzag headband. Secure the ponytail near the crown first, then position the headband at the front and slide it back until it creates visible separation through the hairline. The band helps guide shorter front pieces away from the face while the ponytail supplies height and movement behind it. Keep the ponytail base firm but not overly tight, and allow the lengths to remain straight, wavy, curly, or textured depending on your natural finish. A little volume between the band and ponytail base prevents the top from appearing overly compressed and makes the silhouette more balanced.
Wear & Maintenance
Use the ponytail holder for the structural hold and let the zigzag headband control only the front. This avoids unnecessary pressure around the hairline.
Best For
Try this for workouts, casual days, concerts, travel, or easy throwback-inspired styling.
5. Low Ponytail Zigzag Headband Hairstyle
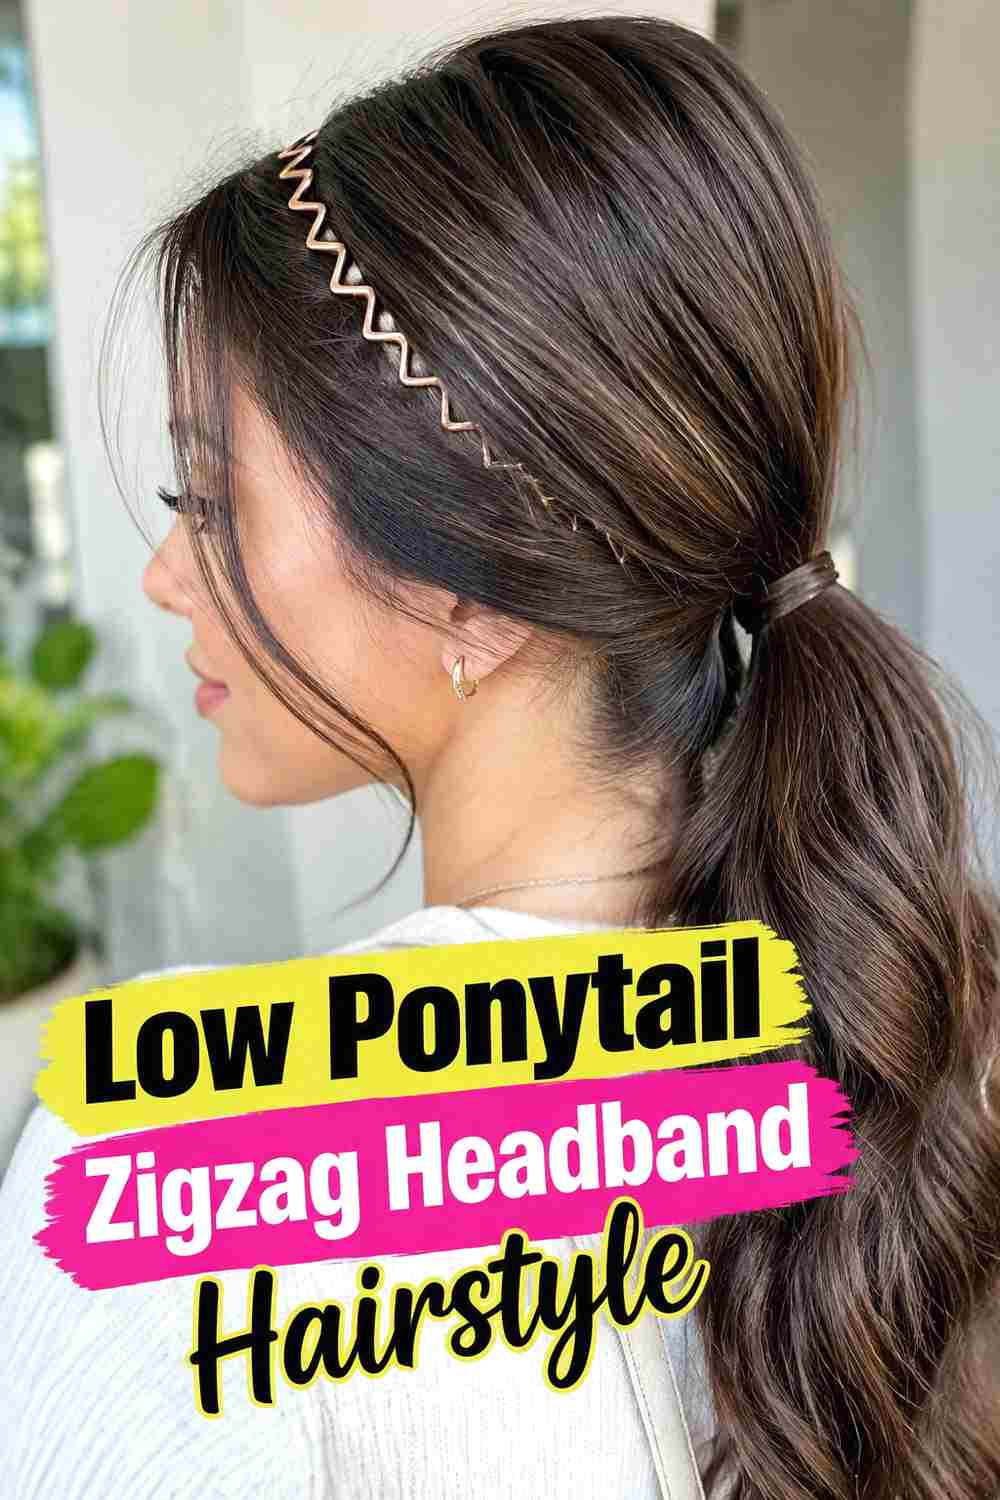
A low ponytail creates a more understated interpretation of the zigzag headband trend. Gather the hair at the nape, secure it comfortably, and add the headband near the front so the teeth guide the surface backward into narrow sections. Keep some natural lift through the crown instead of smoothing the entire head tightly toward the ponytail. The low placement makes the hairstyle feel cleaner and less sporty than a high pony, especially when the lengths are sleek or softly waved. A minimal black or neutral zigzag band can almost blend into darker hair, leaving the ridged texture at the front as the main detail.
Why It Works
The simple low ponytail provides a calm silhouette, allowing the patterned front created by the headband to become the distinctive feature.
6. Messy Bun Zigzag Headband Hairstyle
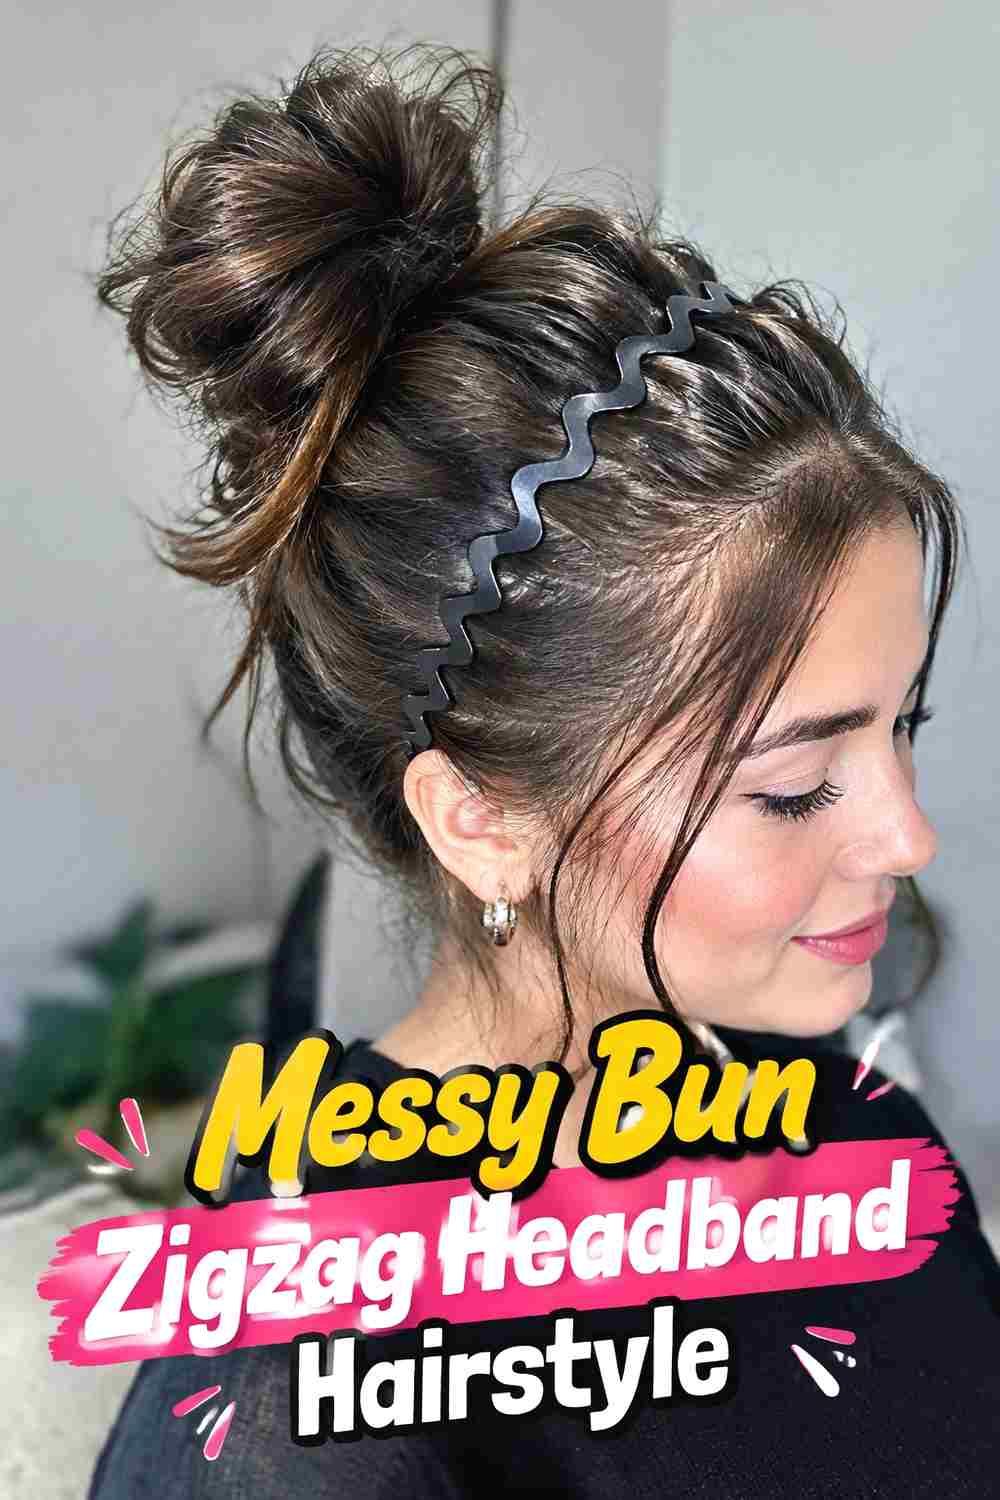
A messy bun creates a relaxed counterpoint to the graphic pattern of a zigzag headband. Gather the hair into a loose mid-height or high bun, leaving enough softness through the crown for the style to feel effortless. Then slide the headband backward from the hairline so its teeth create defined ridges through the front. Keep the bun secure at its center even if the outer loops are softly loosened. Small flyaways can suit this style, but avoid pulling too many strands forward or the zigzag effect may become difficult to see. The combination works especially well when you want a quick updo that looks more intentional than a basic bun.
Styling Notes
Build the bun first and add the headband second. This lets you judge how far back the accessory can sit without flattening the bun’s front profile.
7. Half Up Zigzag Headband Hairstyle
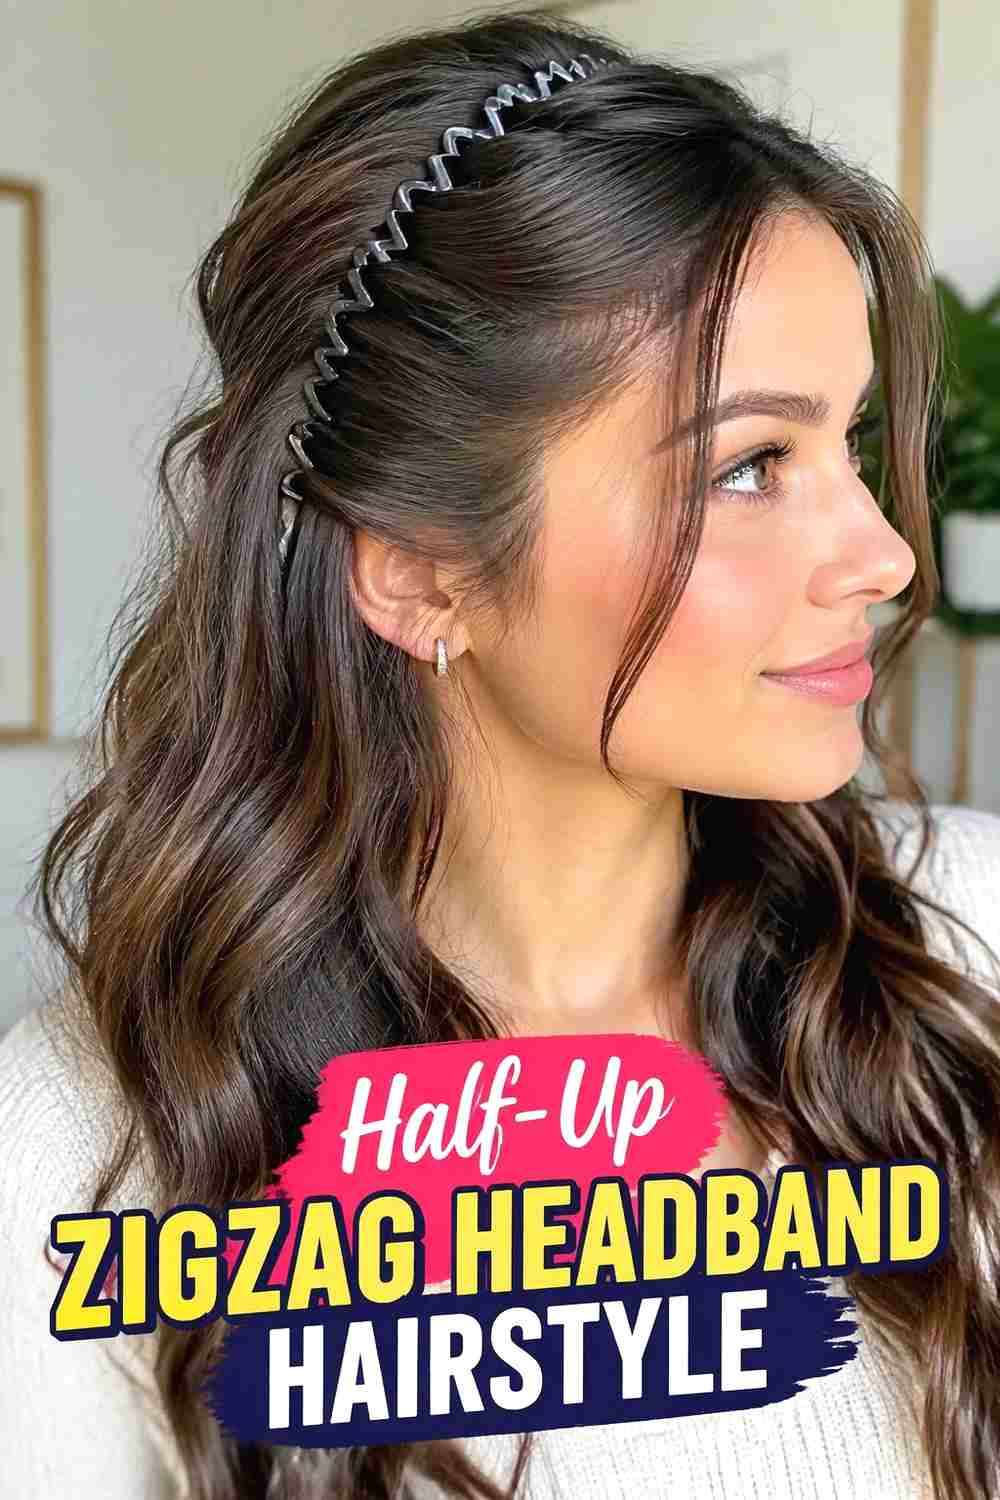
A half-up style lets the headband control the front while still showing plenty of loose length. Position the zigzag band first, then gather a moderate section from the crown into a small ponytail, clip, or compact bun. Leave the lower hair loose so the hairstyle retains movement and texture. The headband’s ridged pattern adds detail around the face, while the half-up section reinforces the lifted shape behind it. This combination works with straight, wavy, or curly hair and is especially useful when you want the face completely open without putting all of the hair up. Keep the crown section light enough that the top does not feel crowded.
Best For
This style suits casual gatherings, dates, brunches, school or workdays, and easy weekend looks where you want both structure and loose hair.
8. Chin Length Bob Zigzag Headband Hairstyle
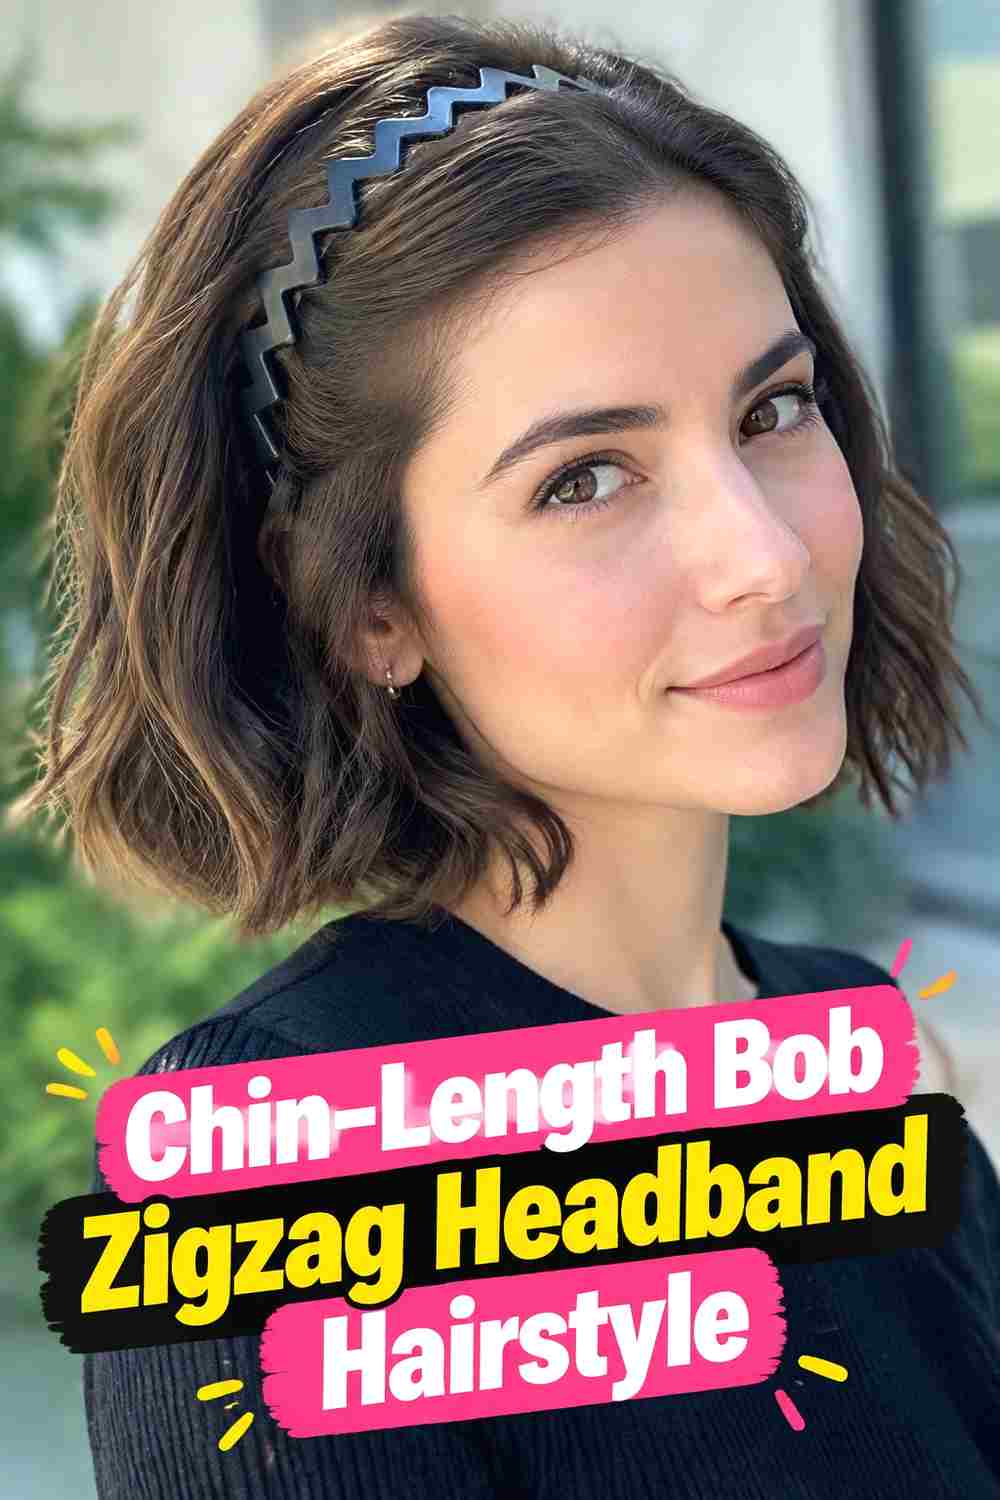
A chin-length bob gives the zigzag headband a crisp, compact silhouette. Slide the band backward from the front so the hairline develops its characteristic separated pattern, then let the short lengths frame the jaw naturally behind it. Straight bobs create a sharper finish, while softly wavy or curly bobs make the look more playful. Because there is less length to balance the accessory, keep the crown from becoming completely flat. A small amount of lift behind the band helps preserve the bob’s shape from the side. Thin black, translucent, or tortoiseshell zigzag bands usually work particularly well because they add detail without visually overwhelming the shorter cut.
Styling Notes
Position the band gradually and check the side profile before pushing it too far back. A small change in placement can noticeably alter the bob’s volume.
9. Rounded Afro Zigzag Headband Hairstyle
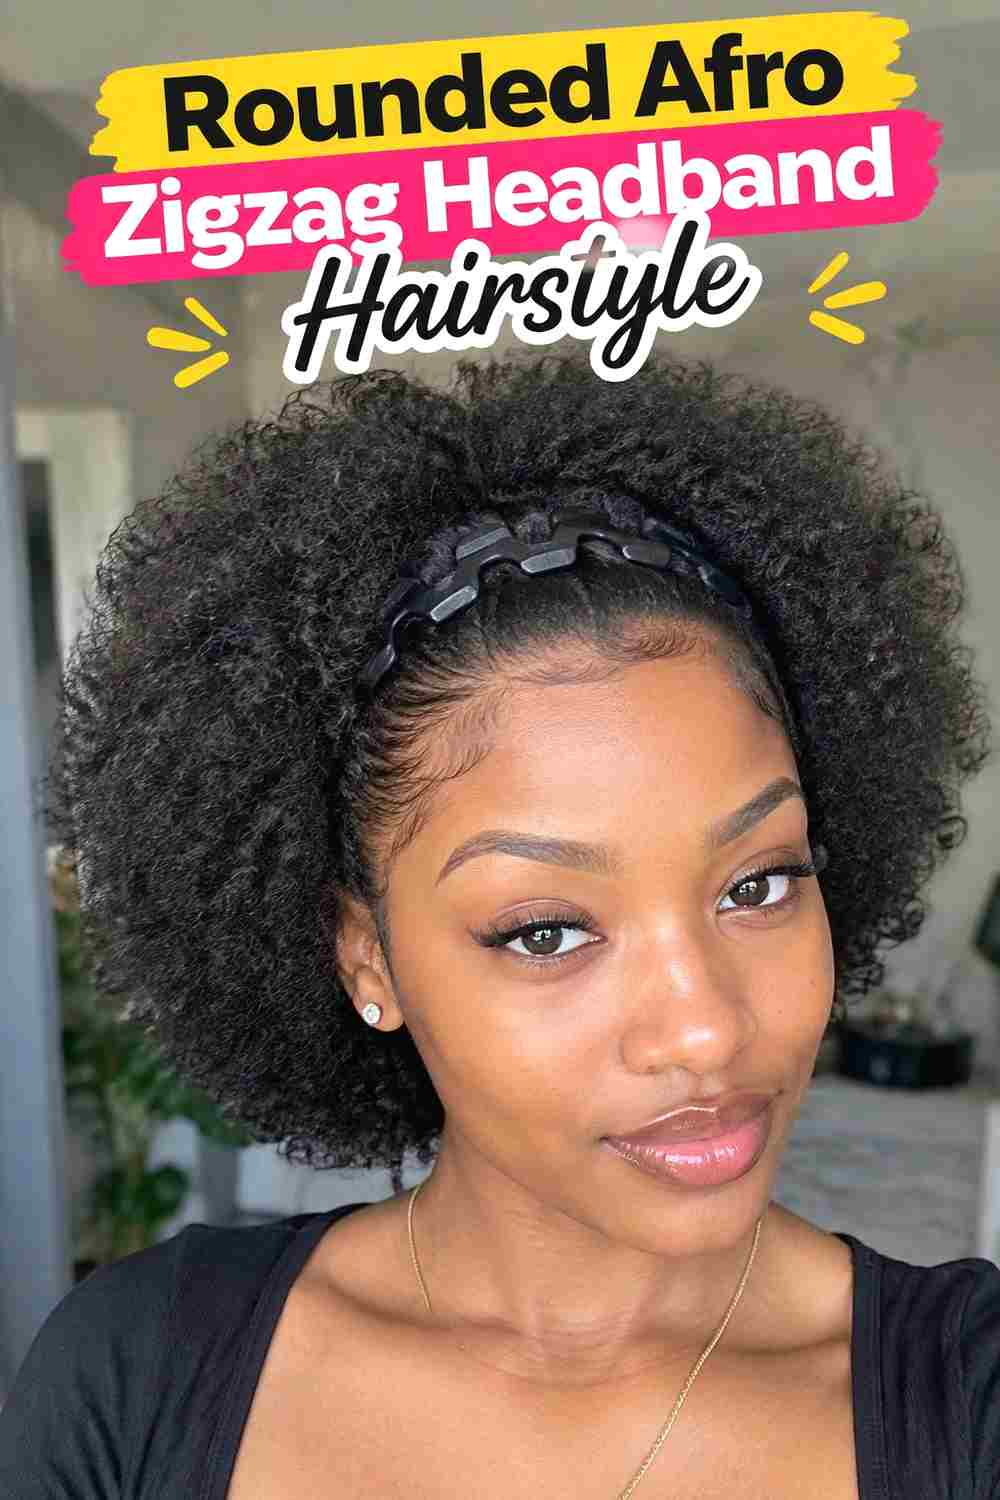
A rounded Afro makes the zigzag headband especially striking because the front becomes controlled while the rest of the texture stays expansive. Place the band near the hairline and guide it backward only far enough to create visible separation at the roots. Then restore width and height through the crown and sides with your fingers, keeping the overall Afro silhouette rounded rather than flattened behind the accessory. The contrast between the combed-back front and full coils gives the hairstyle a bold shape. Choose a headband with enough flexibility to sit comfortably against dense texture, and avoid forcing it too far back if the pressure changes the balance of the Afro.
Hair Type & Length
Dense curly and coily textures with enough length to create a rounded silhouette are especially well suited to this look.
Pro Tip
Lift the hair immediately behind the band after placement so the accessory defines the front without reducing the volume of the Afro.
10. Textured Pixie Zigzag Headband Hairstyle
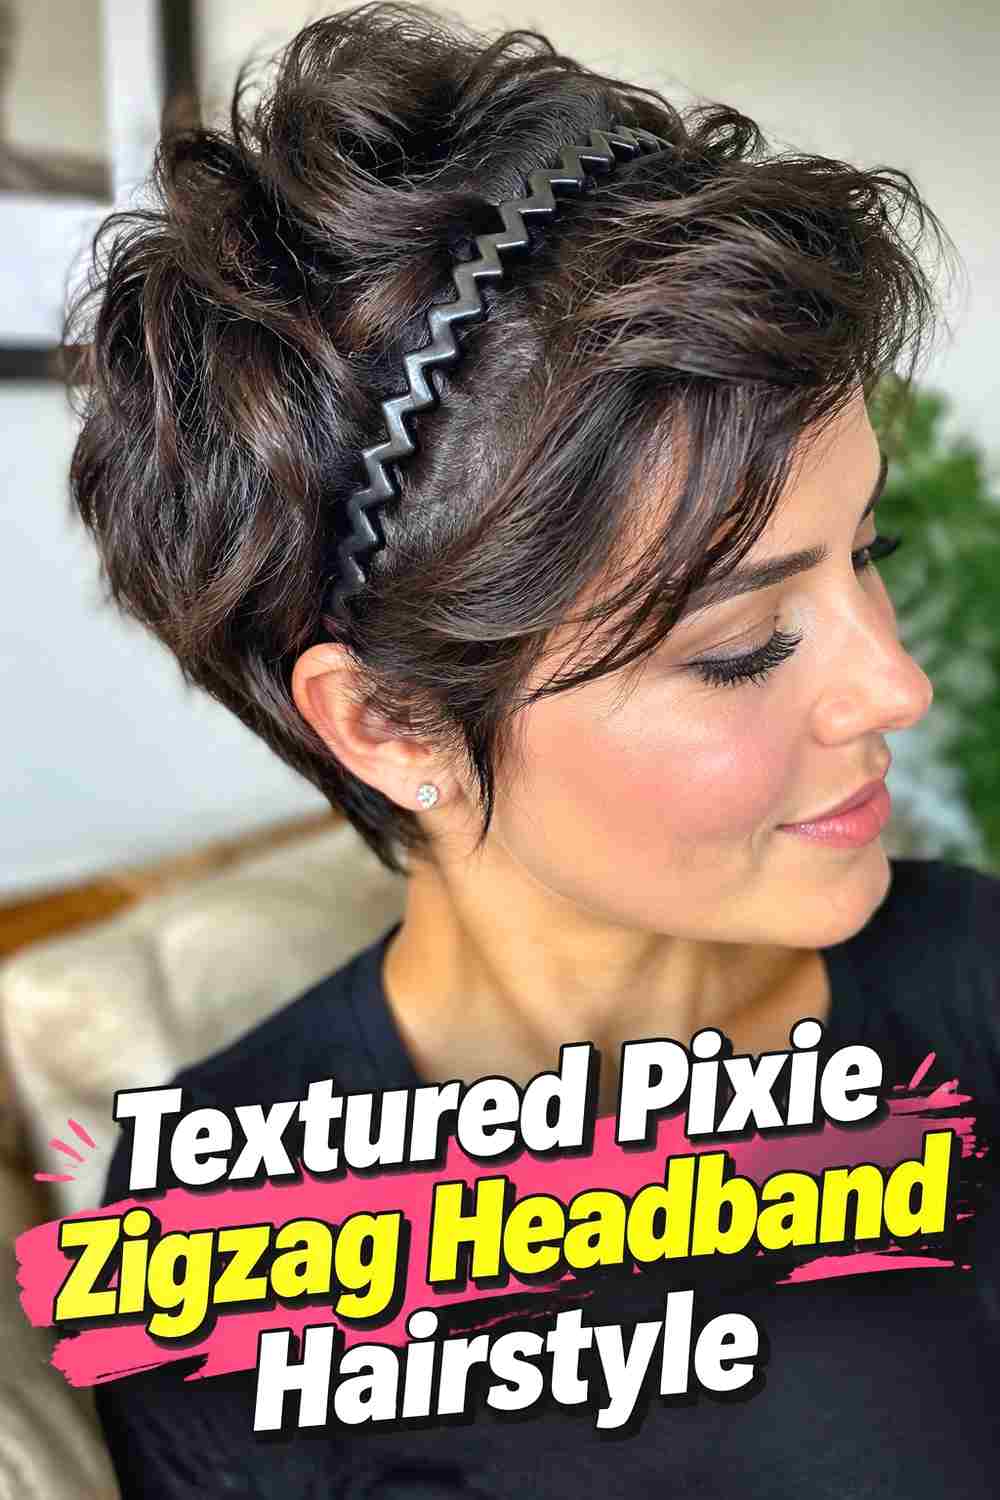
A textured pixie offers a short, modern way to wear the zigzag headband trend. Place a slim band close to the hairline and let it guide the longer top sections backward while the cropped sides remain clean and visible. The separated ridges created by the teeth can add interest even when the hairstyle has very little length. Keep the top slightly tousled or lifted so the accessory does not flatten the entire cut. This works particularly well on pixies with longer curls, waves, or choppy texture through the crown. A delicate headband is usually more proportional than an oversized version, allowing the haircut and front pattern to share the attention.
Best For
This look works well for short-hair styling when you want an accessory that changes the silhouette without requiring clips, braids, or extra length.
11. Micro Braid Zigzag Headband Hairstyle
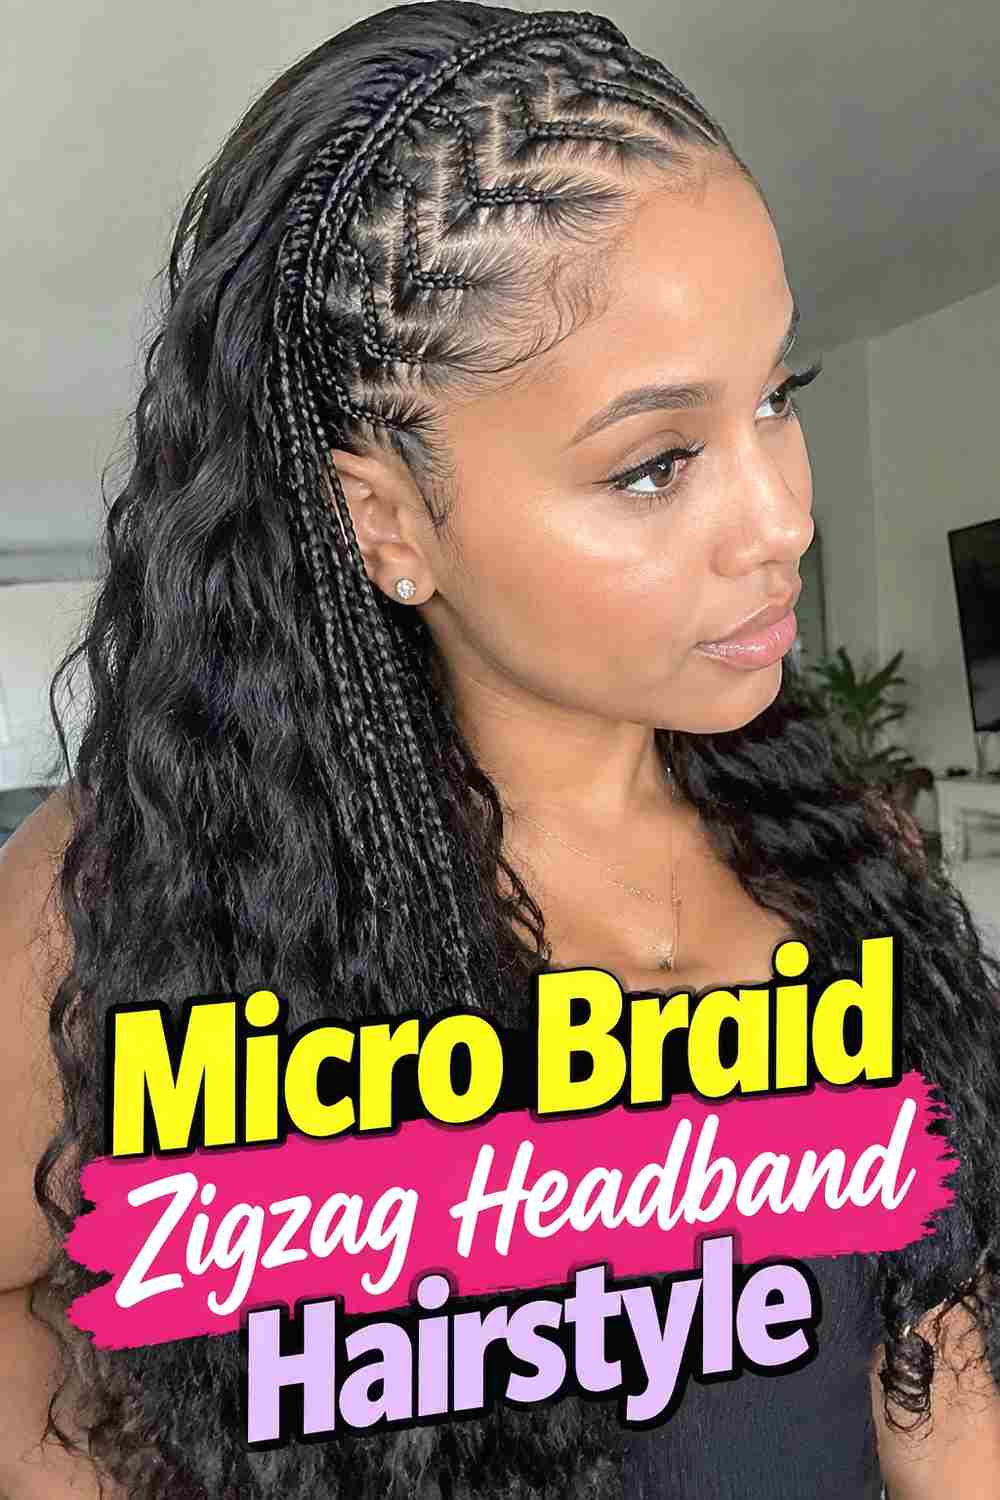
A zigzag headband can also be worn over micro braids, using the accessory to sweep the front braids away from the face while the lengths remain loose. Position the band close to the hairline and guide a controlled group of braids backward so the zigzag shape of the accessory stays visible. Because braided hair does not form the same root ridges as loose strands, the headband itself becomes the stronger graphic element. Leave the braid lengths straight down, over one shoulder, or softly spread through the back. A narrow metallic, neutral, or translucent band usually complements the fine braid texture without making the front look crowded.
Wear & Maintenance
Choose a flexible band that sits comfortably over the braids and avoid pushing it tightly against the scalp or braid roots.
12. Slicked Back Zigzag Headband Hairstyle
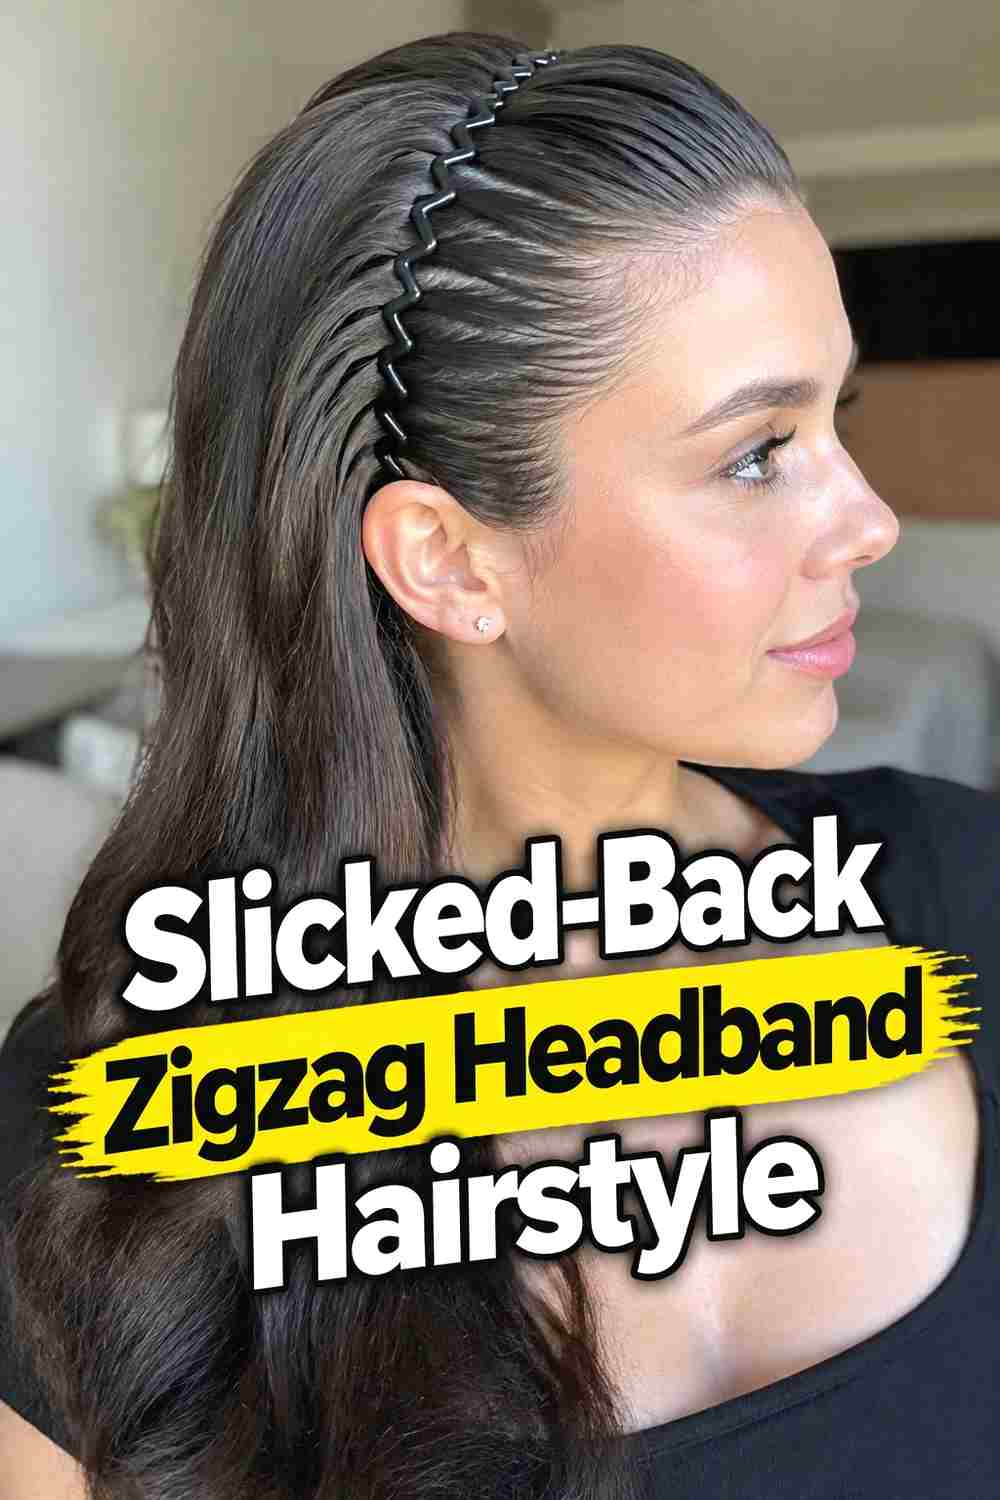
This version combines a smooth front with the visible teeth and ridges of a zigzag headband for a polished throwback finish. Direct the hair away from the face, then position the band close to the hairline and slide it backward just enough to form clean sections through the surface. The lengths can remain loose, gathered into a ponytail, or tucked behind the shoulders, but keeping them down makes the contrast especially clear. Use only enough control at the front to keep flyaways manageable; the hair should still show natural strand detail and movement. A glossy but believable finish works well with a simple dark or translucent headband.
Why It Works
The controlled surface highlights the geometric shape of the headband, making the accessory and its separated root pattern the main visual detail.
Styling Notes
Avoid applying so much product that the band slides. A secure but flexible surface usually gives the teeth better grip.
How to Choose the Right Look
Start with your natural texture. Straight and softly wavy hair show the ridged front pattern most clearly, while curls and Afros create a stronger contrast between the controlled hairline and fuller volume behind the band. Braids make the accessory itself more visible because the teeth do not separate the lengths in the same way.
Length also matters. Pixies and bobs create compact, accessory-focused silhouettes, while medium and long hair give you more options for ponytails, buns, half-up styles, and loose finishes.
Consider how much volume you want behind the headband. Sliding it only slightly backward keeps the shape closer to the head. Moving it farther toward the crown can create more lift, but pushing too far may flatten or pull the front unnecessarily.
For all-day wear, comfort should guide the final placement. Flexible headbands are usually easier to adjust than rigid styles, and the teeth should sit securely without causing persistent pressure.
Finally, match the finish to the occasion. Sleek straight hair and low ponytails feel polished, curls and Afros look bold and textured, while messy buns and half-up styles create a more relaxed retro feel.
Final Thoughts
A zigzag headband can change a hairstyle with very little extra work. Its comb-like shape creates instant detail around the hairline while also pushing hair away from the face, making it useful with everything from bobs and pixies to curls, buns, ponytails, and Afros.
Choose a placement that works with your texture rather than fighting it. Keeping some volume behind the band and adjusting the teeth gently will help the finished look feel balanced, comfortable, and intentionally retro rather than overly tight.
FAQs
1. What is a zigzag headband?
A zigzag headband is a flexible comb-like hair accessory with separated teeth or sections that pushes hair backward while creating a distinctive ridged or separated pattern near the front.
2. Do zigzag headbands work on curly hair?
Yes. They can control the front while leaving the crown and lengths curly and full. Restoring some root volume after placing the band helps keep the hairstyle balanced.
3. Can short hair wear a zigzag headband?
Yes. Bobs, pixies, and other short cuts can use a narrow zigzag headband to add texture and keep the front away from the face.
4. How far back should a zigzag headband sit?
That depends on the look you want. Keeping it near the hairline emphasizes the zigzag pattern, while moving it farther back can create more exposed forehead and crown lift.
5. Can a zigzag headband be worn with a ponytail or bun?
Yes. High and low ponytails, messy buns, and half-up styles all pair well with zigzag headbands. Secure the hairstyle separately and use the headband mainly to shape the front.
Save your favorite zigzag headband hairstyle ideas, share the looks you love, and explore more retro-inspired hairstyle inspiration for your next style.