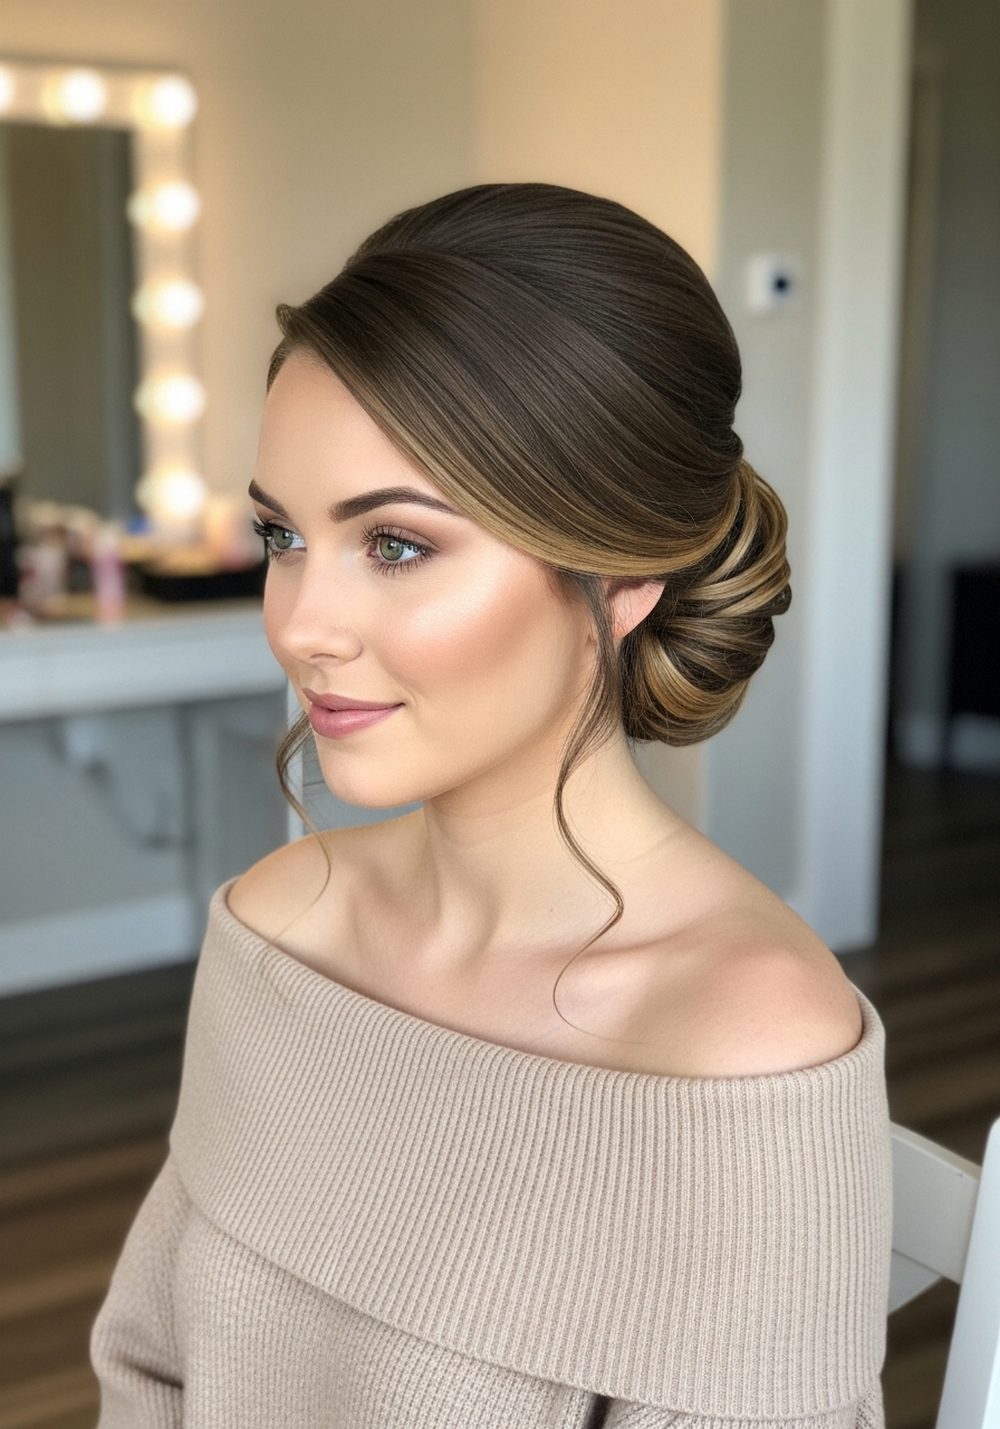
15 Bubble Ponytail Hairstyle Ideas
Bubble ponytails are playful, flattering, and surprisingly easy once you know the spacing. This list gives you 15 fresh ways to wear the look—high, low, side-swept, half-up, curly, braided, and more—so you can match the vibe to your outfit and event. You’ll find ideas that add height for round faces, gentle side volume for squares, and soft framing for hearts and ovals. Most styles work on straight, wavy, and curly hair; coily textures shine with stretched or defined sections. Prep clean, dry hair, add a heat protectant if you plan to wave or smooth, and keep on hand: snag-free elastics, bobby pins, a tail comb, and a flexible hairspray. A dab of mousse or texturizer helps hold each “bubble,” while a light serum keeps the surface sleek without weighing it down.
Quick List
- High Sleek Bubble Pony
- Mid Bubble Pony with Ribbon Tie
- Low Romantic Bubble Pony
- Side-Swept Bubble Pony
- Half-Up Bubble Pony
- Double Bubble Pigtails
- Curly Bubble Pony
- Braided-Base Bubble Pony
- Scarf-Wrapped Bubble Pony
- Chunky Spaced Bubble Pony
- Mini Micro-Bubble Ponytail
- Bubble Mohawk Pony
- Wrapped-Elastic Bubble Pony
- Bubble Pony with Curtain Bangs
- Festival-Ready Bubble Pony
High Sleek Bubble Pony

Set high at the crown, this sleek bubble pony lengthens the face and spotlights cheekbones. It’s gym-to-dinner friendly: smooth roots read polished, while rounded bubbles add fun. The clean base prevents rubbing on collars and keeps hair out of the way for dancing or busy days. For fine hair, keep bubbles closer; for thicker hair, widen the spacing for definition. Pro tip: place the first elastic just 2 inches below the base to keep the top bubble full and perky.
How To Style: Brush hair into a high pony, smooth with cream, add elastics every 2–3 inches, and tug each section outward evenly.
Best For: Round, oval; straight to wavy, fine to thick.
Tools & Products: Tail comb, soft elastics, smoothing cream, flexible hairspray, light serum.
Mid Bubble Pony with Ribbon Tie

A mid-height bubble pony feels balanced and wearable for work or brunch. A slim ribbon at the base adds a soft touch without stealing focus. Keep bubbles medium and symmetrical for a neat look; leave a few wisps near the ears for ease. It pairs well with button-downs and blazers since it sits off the collar line. Pro tip: tie the ribbon over a hidden elastic so the bow never loosens the pony.
How To Style: Secure a mid pony, wrap ribbon over the base, add elastics down the tail, and gently pancake each bubble.
Best For: Heart, oval, square; straight or wavy, medium density.
Tools & Products: Elastics, ribbon, light mousse, boar/mixed bristle brush, hairspray.
Low Romantic Bubble Pony

Resting just above the nape, this low bubble pony brings soft movement that suits dresses and knits. Curl ends lightly first for a plush finish, then form rounded bubbles down the tail. Face-framing pieces soften the jaw and complement strong necklines. Pro tip: angle the base slightly off-center for an effortless, romantic feel.
How To Style: Create a low pony, curl the tail, place elastics every few inches, expand with fingertips, and mist lightly.
Best For: Square, long, heart; wavy or straight, fine to medium.
Tools & Products: Curling iron, elastics, texturizing spray, light serum, hairspray.
Side Swept Bubble Pony

Worn over one shoulder, the side bubble pony opens one side of the neck and adds asymmetry that flatters round and square faces. Keep bubbles tighter near the base and fuller near the ends for a teardrop effect. It photographs beautifully and won’t fight with collars. Pro tip: anchor with two crossed bobby pins under the base elastic to stop sliding.
How To Style: Part deeply, sweep hair to one side, secure a low side pony, add elastics down the tail, then expand bubbles.
Best For: Round, square; straight to wavy, medium to thick.
Tools & Products: Bobby pins, elastics, tail comb, flexible hairspray.
Half Up Bubble Pony

Great for shorter lengths or layered cuts, the half-up bubble pony keeps the face open while leaving movement through the bottom. It adds crown height without feeling formal and works for day-to-night plans. Keep bubbles mini so they sit neatly above the loose hair. Pro tip: split the half-up into two small ponies stacked vertically for extra lift before joining into one tail.
How To Style: Take temple sections back, secure a half-up pony, add small elastics down the mini tail, expand gently.
Best For: Heart, oval; straight, wavy, or curly, fine to medium.
Tools & Products: Small elastics, texturizing powder or spray, light hairspray, tail comb.
Double Bubble Pigtails

Two mid-set bubble ponytails bring playful symmetry that’s still chic when kept sleek at the roots. Space the bubbles evenly and keep the tails parallel for a tidy look. Works well for workouts, festivals, or casual weekends. Pro tip: angle each base slightly back rather than out to avoid a “sticking out” effect.
How To Style: Part center, secure two mid ponies, place elastics down each tail, and puff out bubbles evenly.
Best For: Oval, heart; straight to wavy, medium to thick.
Tools & Products: Elastics, smoothing cream, fine comb, flexible hairspray.
Curly Bubble Pony
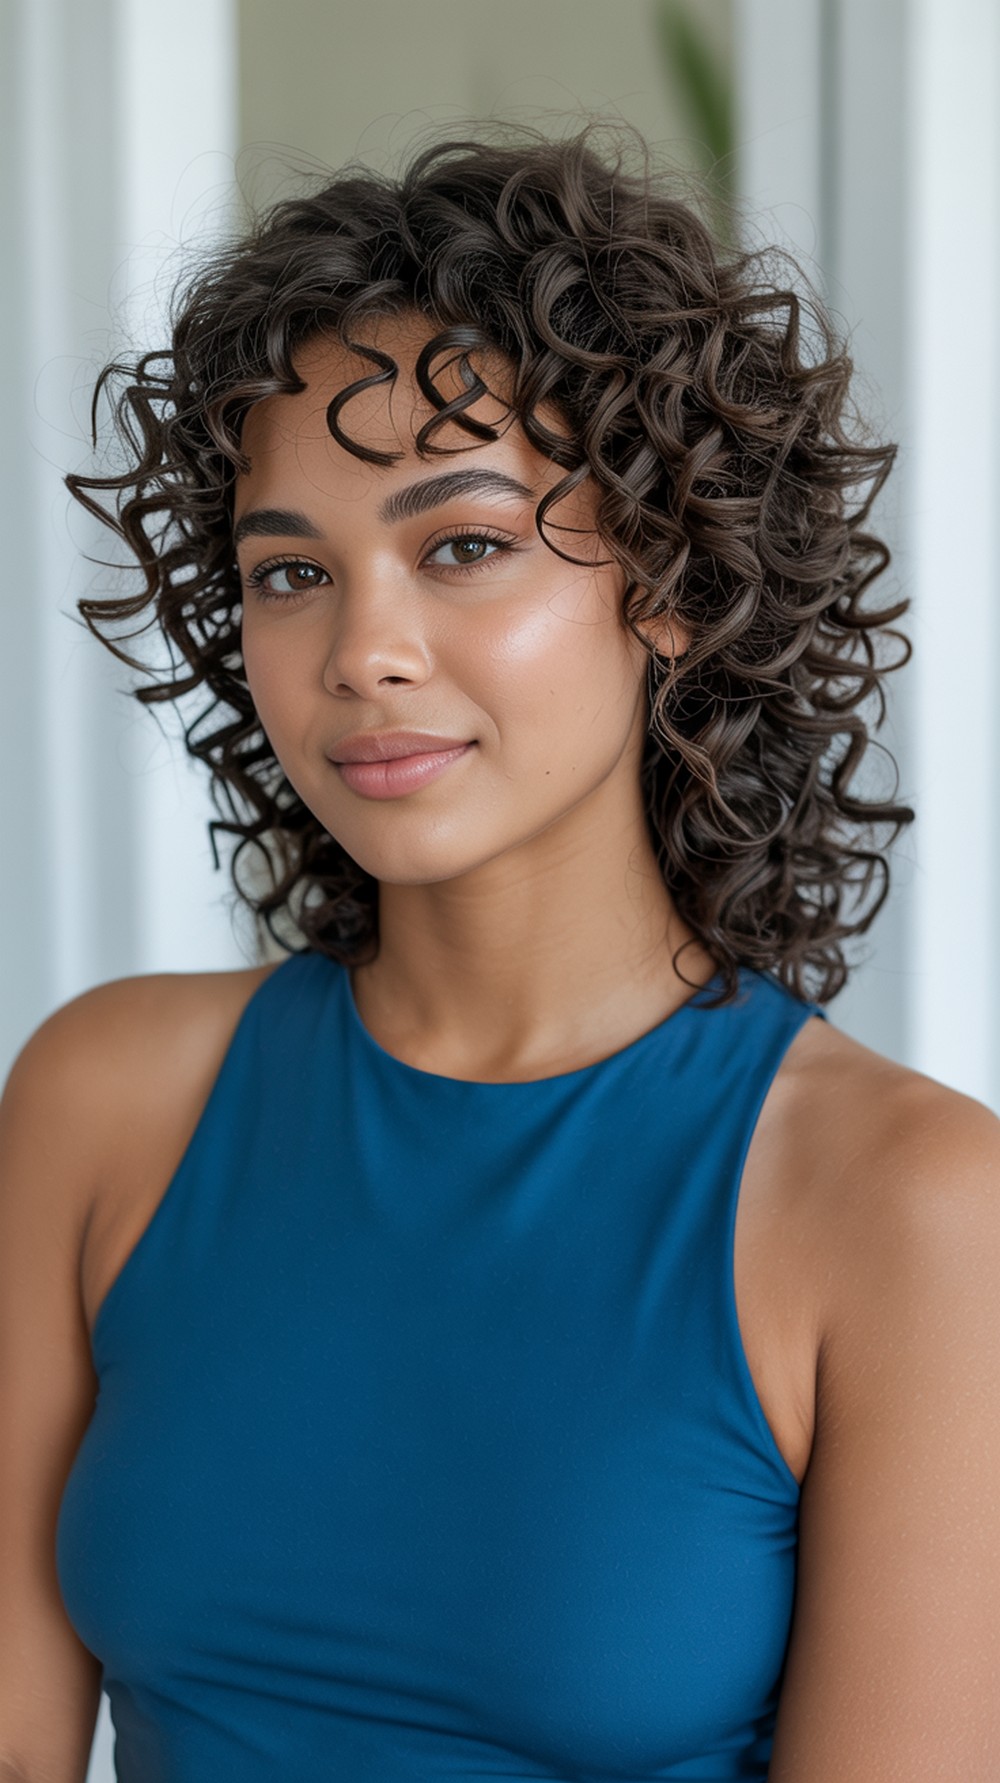
Defined curls make pillowy bubbles with minimal effort. Keep the base soft to avoid crushing texture and set the bubbles closer together for a rounded silhouette. Let a few curls fall around the face for balance. Pro tip: apply curl cream and diffuse first; once fully dry, form bubbles so you don’t disturb clumps.
How To Style: Define curls, gather a mid or high pony, add elastics every 2 inches, and fluff each bubble with fingers.
Best For: Round, oval; curly or coily textures.
Tools & Products: Curl cream, diffuser, soft elastics, lightweight gel, edge brush (optional).
Braided Base Bubble Pony

A tight braid at the base adds grip and a cool detail before the bubbles begin. It’s secure for long days and keeps roots sleek. Choose a simple three-strand or a Dutch braid leading into the pony for extra texture. Pro tip: stop braiding at the crown, secure, then continue with bubbles to keep the look clean.
How To Style: Braid from hairline to crown, secure a pony, place elastics down the tail, and expand each section.
Best For: Square, oval; straight to wavy, medium to thick.
Tools & Products: Elastics, dry shampoo (grip), bobby pins, hairspray.
Scarf Wrapped Bubble Pony
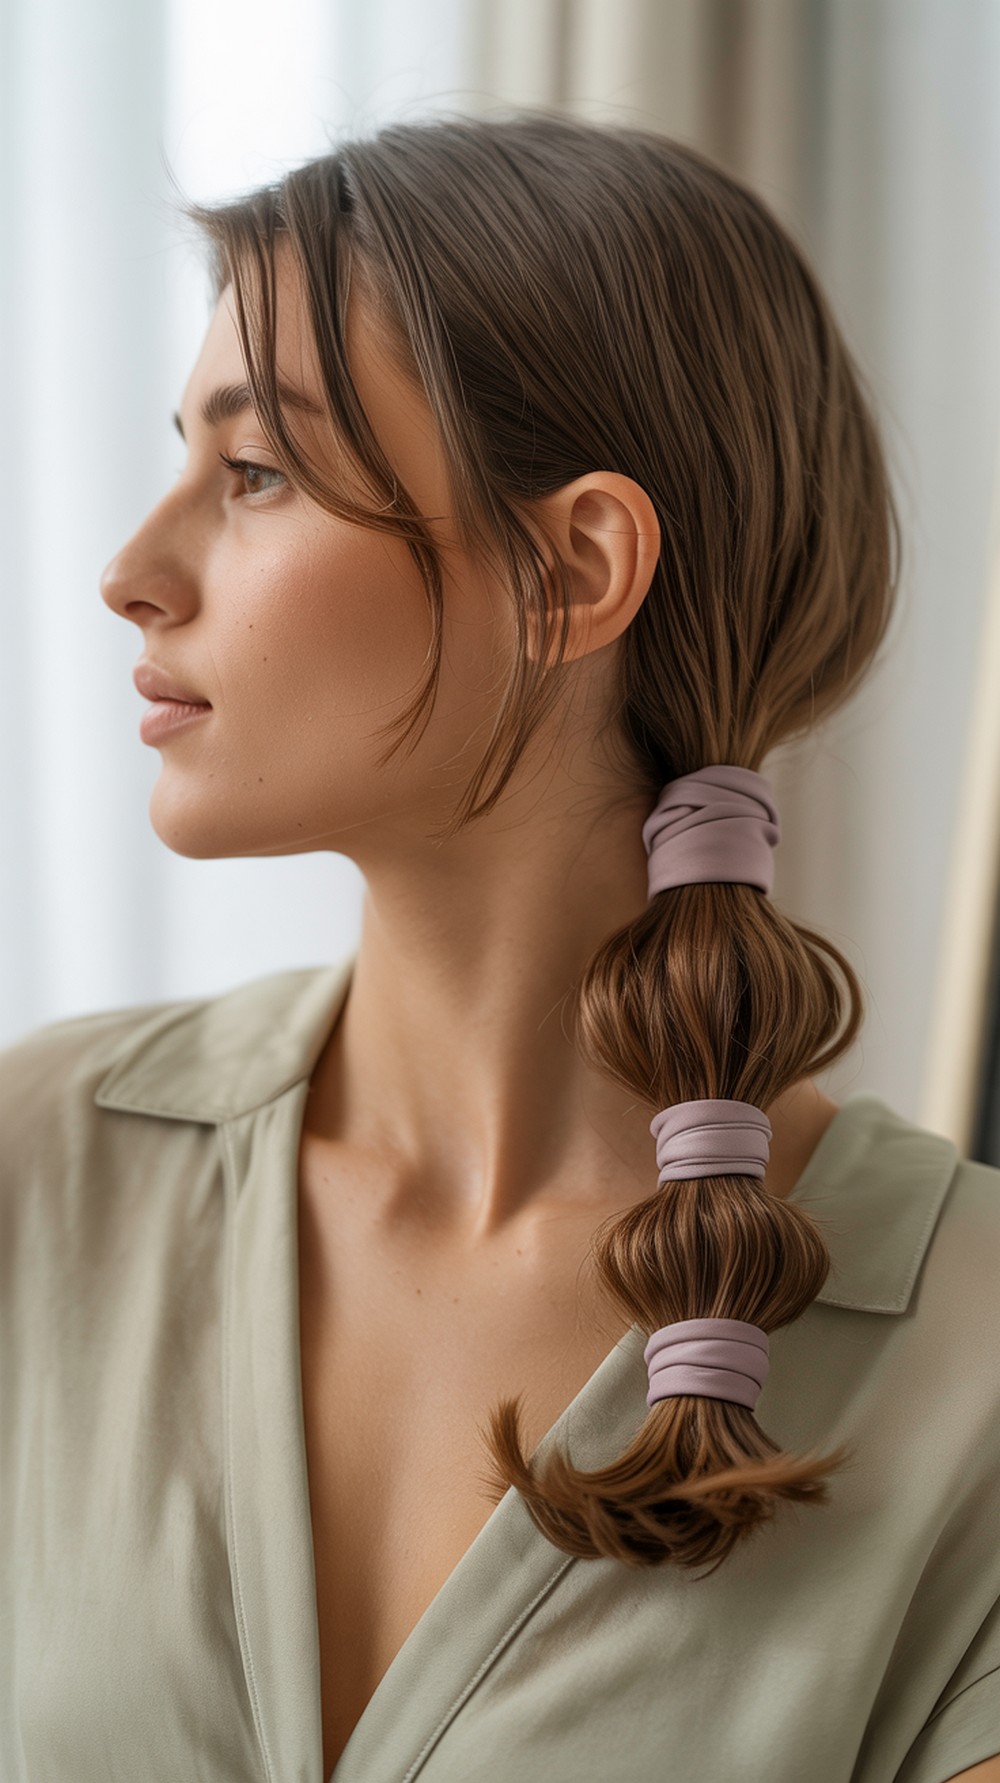
A slim scarf wrapped at the base—and optionally woven between bubbles—adds color and a soft, fashion-forward finish. Keep the scarf lightweight so it doesn’t pull. It’s great for brunches, vacations, and breezy days. Pro tip: knot the scarf under the base and tuck tails through an elastic so they don’t slip.
How To Style: Make a mid pony, wrap scarf around base, add elastics down the tail, optionally thread scarf through one or two bubbles.
Best For: Heart, oval; straight to wavy, all densities.
Tools & Products: Lightweight scarf, elastics, tail comb, light hairspray.
Chunky Spaced Bubble Pony

Wider spacing with generous tugging creates bold, chunky bubbles that read graphic and modern. This works best on thicker hair or with a volumized tail. Keep the surface smooth for contrast. Pro tip: backcomb inside each section before you puff it out for extra fullness that lasts.
How To Style: Secure a high or mid pony, add elastics 3–4 inches apart, gently tease inside each section, then expand and smooth.
Best For: Oval, long; straight to wavy, medium to thick.
Tools & Products: Elastics, teasing comb, texturizing spray, hairspray, smoothing brush.
Mini Micro Bubble Ponytail
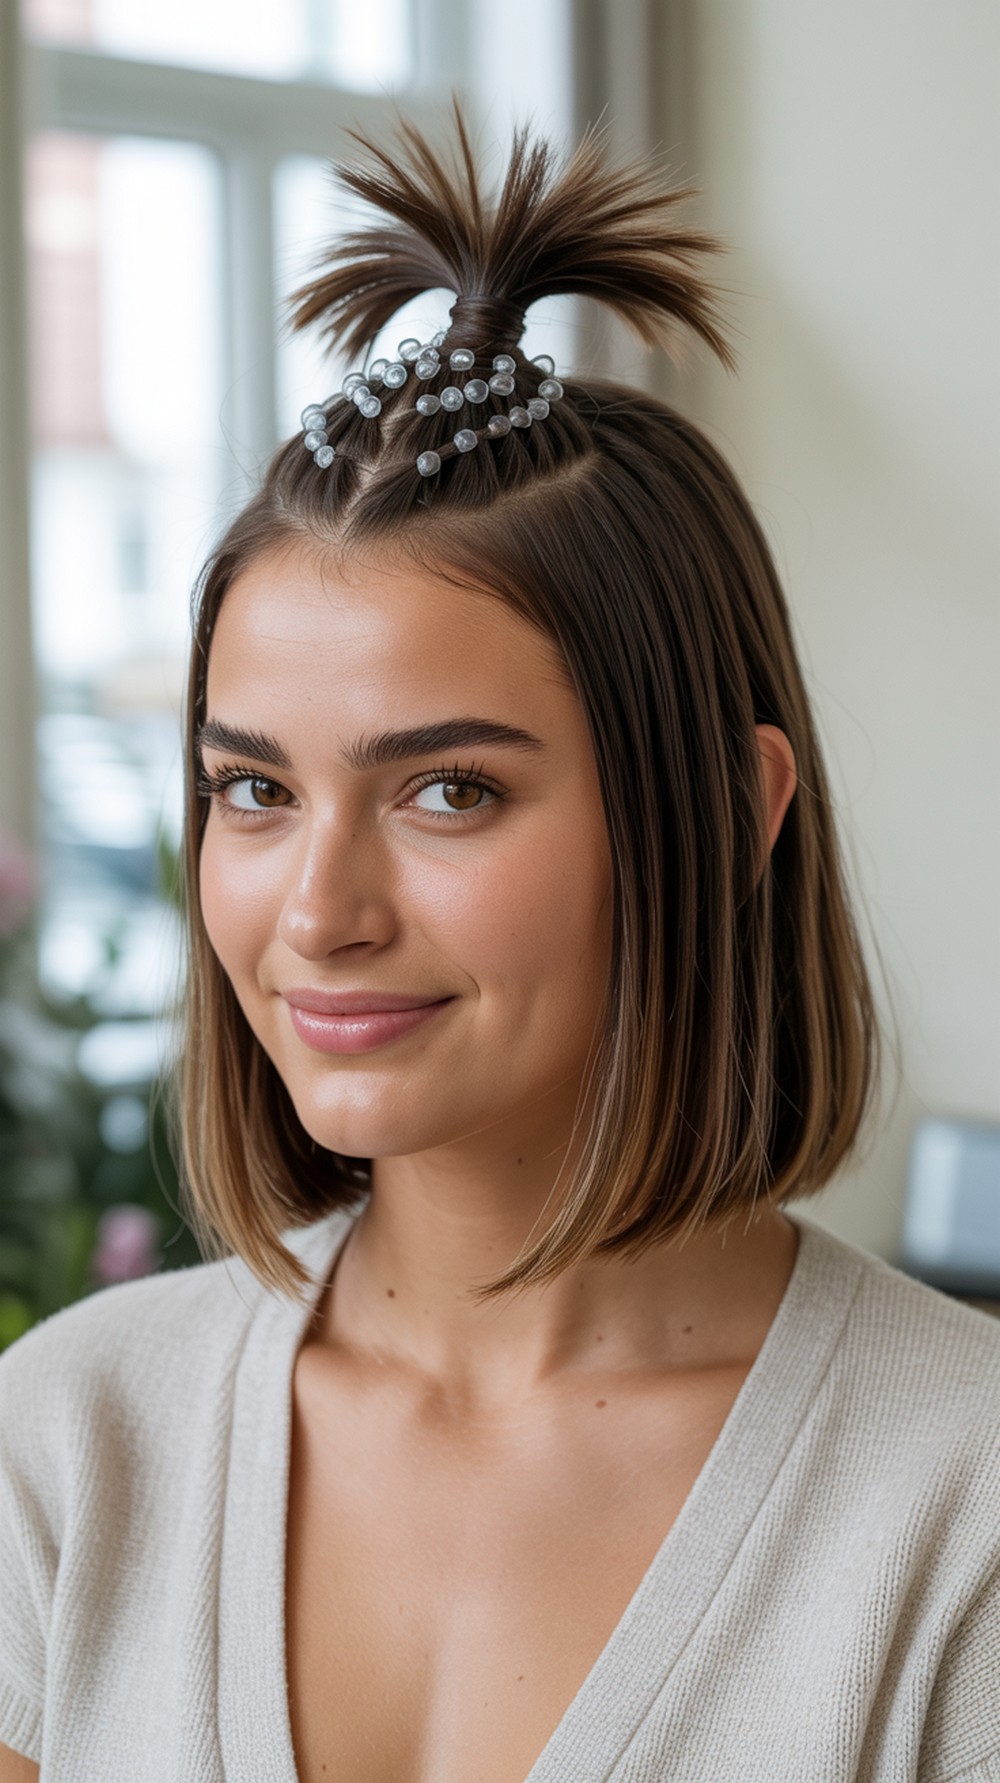
Short hair can play too—form tiny bubbles just an inch apart for a delicate chain effect. It’s quick, cute, and ideal for layered lobs or bobs. Keep tension light so the bubbles stay rounded. Pro tip: use clear mini elastics for a seamless look.
How To Style: Gather a low or mid pony, place small elastics every 1–1.5 inches, and tug lightly for micro-bubbles.
Best For: Heart, oval; straight or wavy, fine to medium.
Tools & Products: Clear mini elastics, light mousse, fine comb, flexible hairspray.
Bubble Mohawk Pony

Create a narrow, high strip of bubbles through the center with the sides smoothed close—edgy but wearable. The vertical line adds height that flatters round faces and pairs well with simple outfits. Pro tip: use a few discreet pins along the sides to keep them sleek without heavy product.
How To Style: Section out a center panel, clip sides away and smooth, secure a high pony in the panel, then build bubbles down the strip.
Best For: Round, oval; straight to wavy, medium to thick.
Tools & Products: Elastics, light gel, flat clips, bobby pins, hairspray.
Wrapped Elastic Bubble Pony

Hide every elastic with a tiny strand wrap for a refined finish that looks salon-done. This is perfect for events and photos where you want clean lines. It takes a few extra minutes but elevates the style instantly. Pro tip: prep a few micro sections with serum so they wrap smoothly and lay flat.
How To Style: After forming each bubble, wrap a small strand over the elastic, pin the end underneath, and repeat down the tail.
Best For: Square, heart, oval; straight to wavy, medium density.
Tools & Products: Elastics, bobby pins, light serum, tail comb, hairspray.
Bubble Pony with Curtain Bangs

Pair soft curtain bangs with a medium bubble pony for balance and movement around the face. The split fringe flatters most face shapes and keeps the style approachable. Keep bubbles medium and the surface softly glossy. Pro tip: style bangs first, then build the pony so they sit perfectly.
How To Style: Blow-dry bangs away from the center, gather a mid pony, add elastics, expand bubbles, and polish the surface.
Best For: Round, heart, oval; straight to wavy, fine to medium.
Tools & Products: Small round brush, elastics, light serum, flexible hairspray.
Festival Ready Bubble Pony

Think airy texture, playful spacing, and long-wear hold for a day outside. Keep roots lifted, alternate bubble sizes for interest, and leave two face pieces for softness. Skip messy glitter; focus on clean shape and sheen that photographs well. Pro tip: finish with an anti-humidity spray so bubbles stay rounded in heat.
How To Style: Mousse at roots, rough-dry, secure a high pony, vary elastic spacing down the tail, tug bubbles, and lock with spray.
Best For: Oval, heart; straight to wavy or curly, medium to thick.
Tools & Products: Mousse, elastics, texturizing spray, anti-humidity hairspray.
Conclusion
Bubble ponytails are all about even spacing, gentle expansion, and a clean surface. Choose a base height that flatters your face shape—high for lift, mid for balance, low for romance—and adjust bubble size to match your hair density. Prep with light grip, pull each section outward evenly, and finish with a quick mist so the shape lasts. Try two styles from this list this week and save a mirror selfie of the one that makes you feel the most “you.”
CTA
Want three bubble ponytail ideas customized to your hair length and texture? Tell me your hair type, face shape, and occasion—I’ll map out steps and a mini product plan.
FAQs
1) How far apart should the bubbles be?
Aim for 2–3 inches apart, adjusting for your length and density. Even spacing looks polished; closer spacing creates a fuller, playful effect.
2) Do I need very long hair for bubble ponytails?
Not necessarily. Medium lengths can still create 3–4 bubbles. If your hair is short, try a half-up version or add a small extension ponytail for length.
3) How do I keep bubbles from collapsing?
Gently tug each section outward after securing the elastic, then mist with flexible hairspray. A touch of mousse before you start adds grip.
4) Will bubble ponytails pull on my scalp?
They shouldn’t. Use soft elastics, avoid overtightening, and alternate pony position (high, mid, low) across the week to give your scalp a break.
5) Can curly or coily hair do bubble ponytails?
Absolutely. Define curls first or stretch the hair with a blow-dry/brush-out. Secure bubbles slightly closer together for a rounded, plush look.