12 Stylish Engagement Hairstyles For Long Hairs
Planning your engagement look and have long hair to play with? Here are 12 polished, photo-friendly styles that hold up through hugs, lights, and happy tears. You’ll find soft waves, chic buns, sleek ponies, and romantic braids—each with simple steps, a quick pro tip, and the tools you actually need. Most ideas suit oval and heart faces; round and long faces get lift at the crown, soft tendrils, or side-swept parts to balance features. Straight, wavy, and curly textures are all welcome—just tweak your prep: smoothing serum for frizz, mousse for body, curl cream for definition. Before you start, dry hair fully, mist heat protectant, and keep section clips, a tail comb, and bobby pins within reach. Finish with flexible-hold spray so hair moves but stays. Pick one, test it once, and you’ll feel engagement-ready from first photo to last dance.
Soft Hollywood Waves

Old-Hollywood waves are timeless for an engagement shoot or ceremony dinner. The look feels plush, glossy, and balanced—great for photos from every angle. A deep side part softens strong features, while the uniform “S” shape adds polish without feeling stiff. Wear it with a square-neck dress, saree blouse, or minimalist suit for instant glam. Pro tip: after curling, brush through with a paddle brush and press the bends with your palm while misting hairspray—this sets the wave pattern without crunch.
How To Style
Create a deep side part. Curl hair in uniform direction with a 1–1.25″ iron. Clip each curl to cool. Release, brush into waves, then tuck the lighter side behind the ear and pin.
Best For
Oval, heart, and round faces; straight or wavy hair.
Tools & Products
Heat protectant, 1–1.25″ curling iron, paddle brush, section clips, flexible-hold hairspray.
Low Twisted Chignon with Tendrils

A low twisted chignon is elegant, secure, and comfy for long events. Face-framing tendrils keep it soft while the bun sits neatly at the nape for a classic profile. It pairs with high necklines, dupattas, or delicate necklaces, and it won’t compete with bold earrings. Pro tip: build the bun on a small elastic pony first; twisting sections around the base keeps weight distributed so it won’t droop.
How To Style
Middle part. Tie a low pony. Split into two to three sections, twist each, then wrap and pin around the base. Pull a few soft pieces near the temples and curl lightly.
Best For
Heart, oval; straight, wavy, or lightly curly hair.
Tools & Products
Tail comb, clear elastics, bobby pins, light pomade, hairspray.
Half Up Floral Cascade
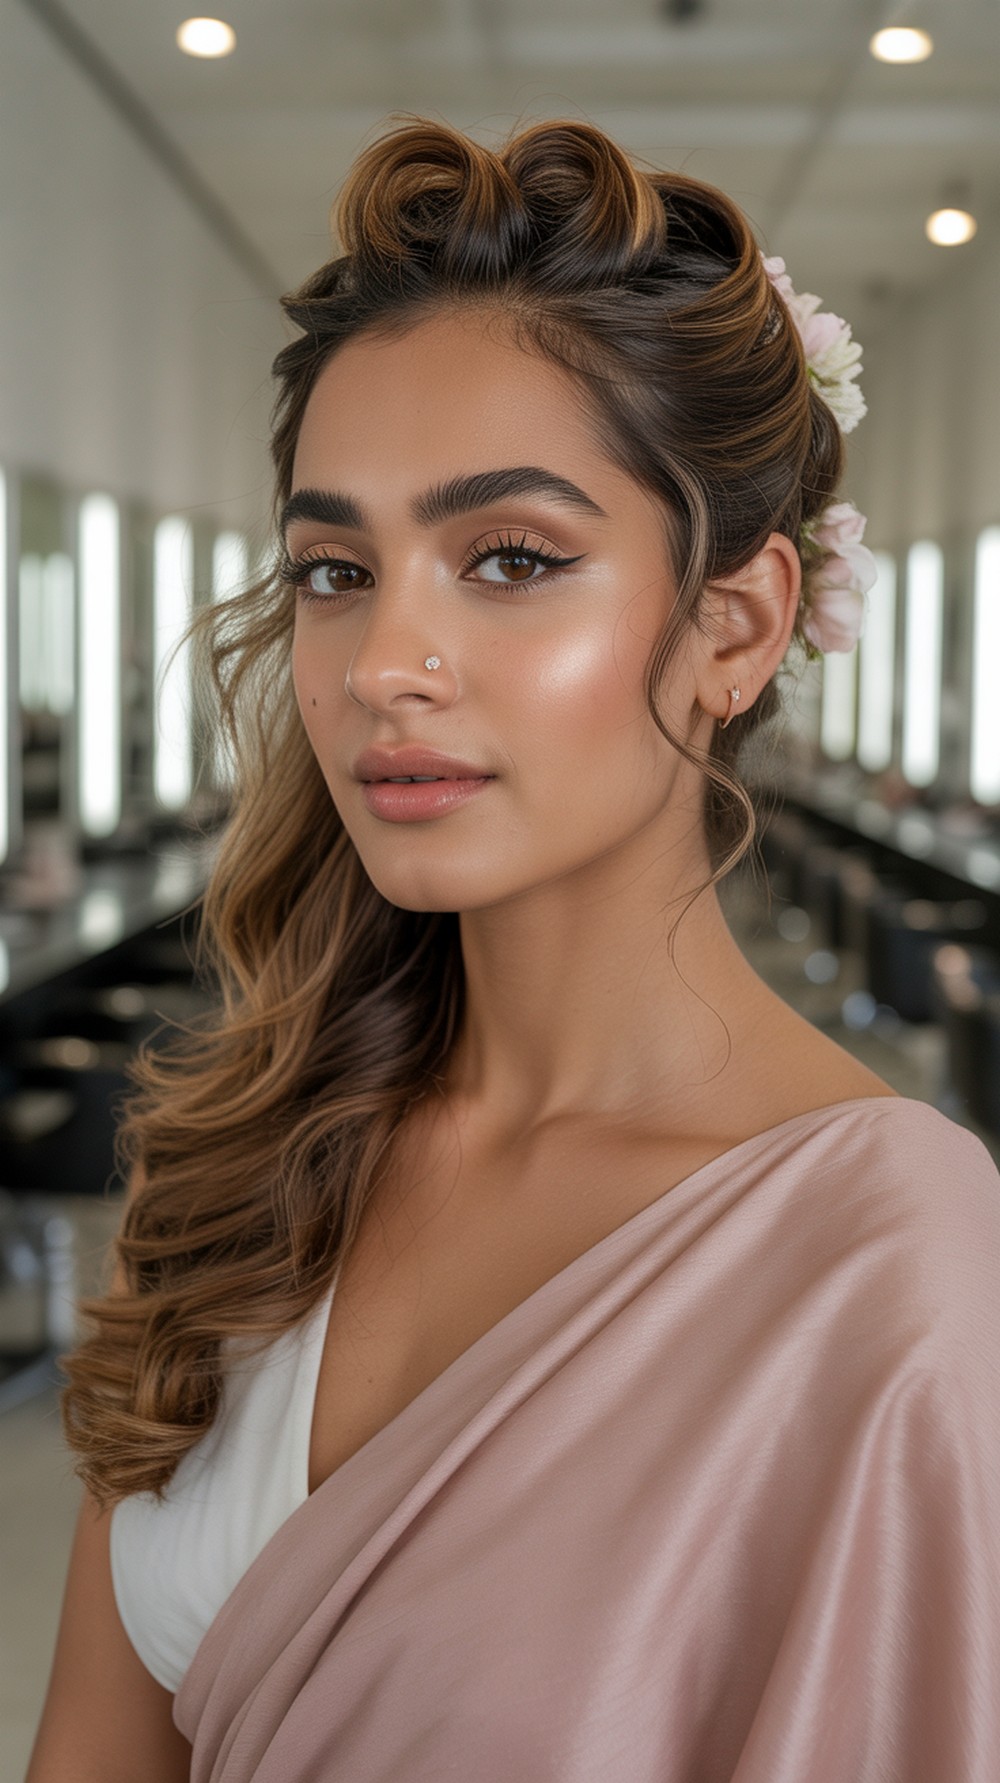
This half-up style combines height at the crown with flowing lengths—perfect if you want hair down without it in your face. A small cluster of fresh or faux blooms sits at the back, and gentle curls cascade over the shoulders. It reads romantic in photos and works with veils, dupattas, or minimal accessories. Pro tip: anchor a tiny braided section under the half-up area; slide floral pins into that braid so the weight doesn’t slip.
How To Style
Tease crown slightly. Take temple sections back, twist, and pin. Curl the remaining hair in large sections and brush out. Add small florals on the twist seam.
Best For
Round, oval; wavy or straight hair.
Tools & Products
Texturizing spray, curling wand, teasing brush, bobby pins, floral pins.
Sleek Center Part Ponytail
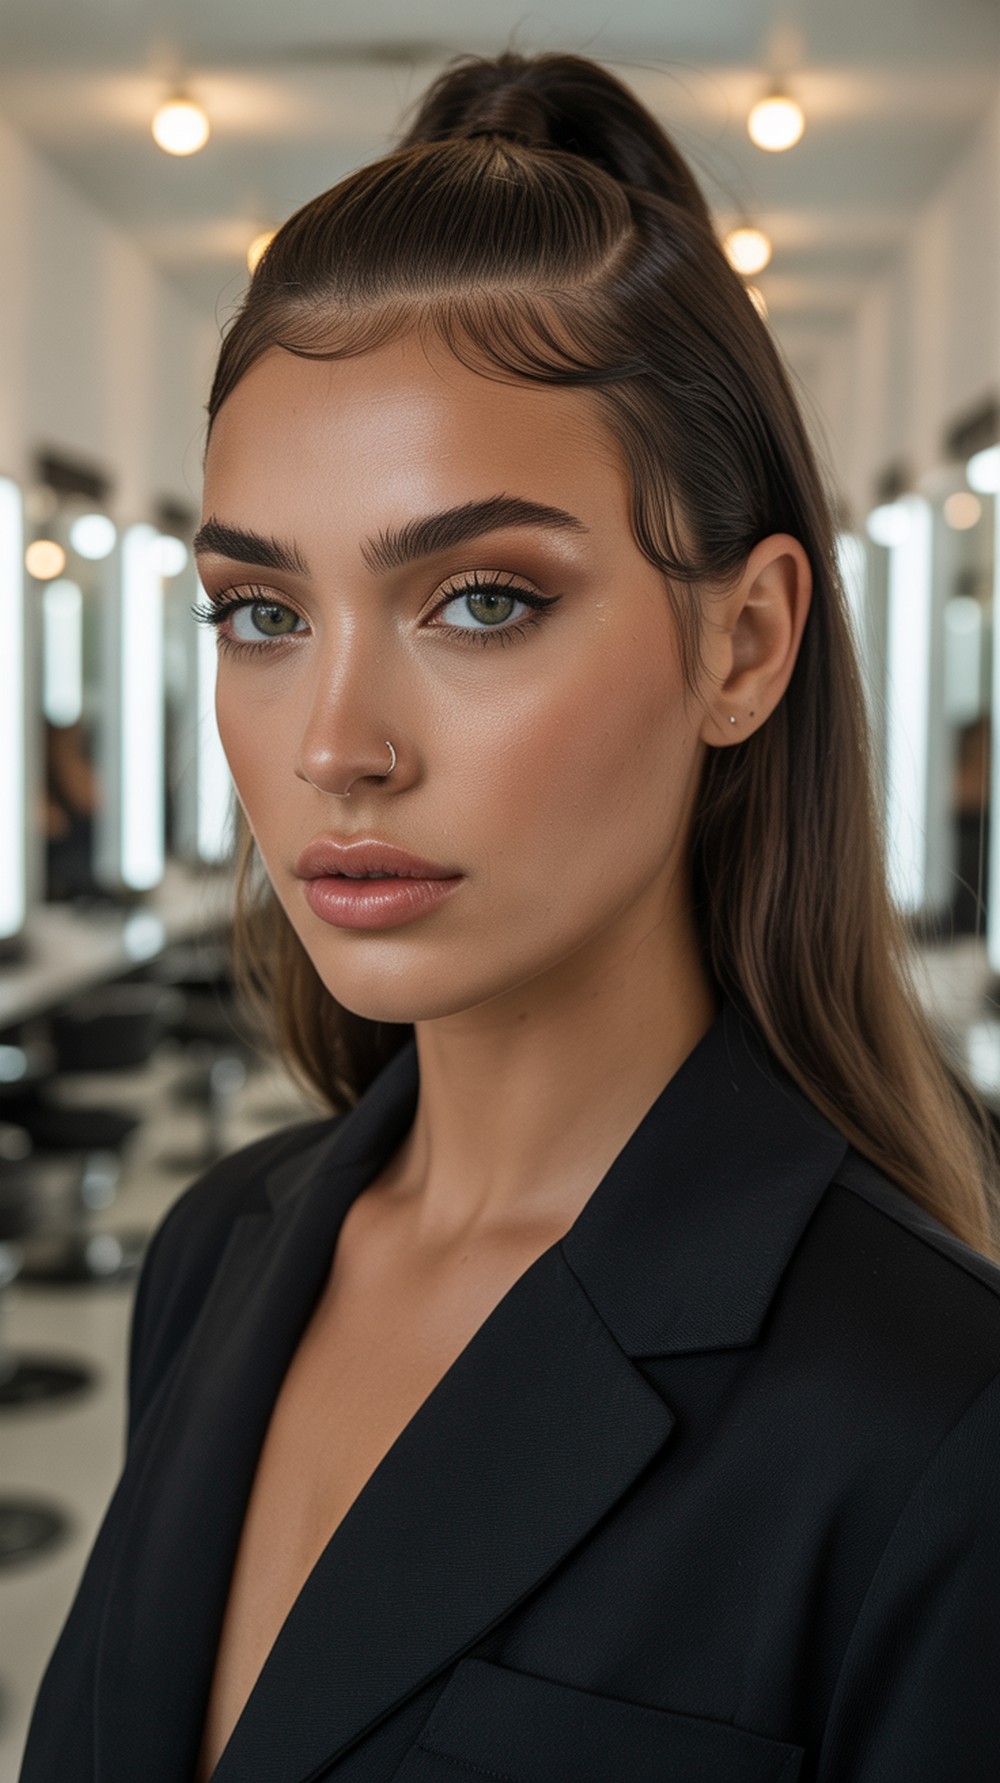
A sleek pony looks modern and lets your outfit shine. The center part creates symmetry, while a low-to-mid placement keeps it elegant. Wrap a small strand around the elastic for a clean finish. This is humidity-friendly when prepped right and works beautifully with statement earrings or a tikka. Pro tip: apply gel only near the roots and use a boar-bristle brush for a glassy surface without weighing down the tail.
How To Style
Create a sharp center part. Smooth hair with a brush and gather into a low or mid pony. Secure with a strong elastic. Wrap a small strand around the base and pin.
Best For
Oval, long; straight or relaxed waves.
Tools & Products
Heat protectant, blow-dryer + brush, light gel, strong elastic, shine serum.
Romantic Braided Crown

A braided crown frames the face and keeps hair off the neck while leaving length to flow. The woven detail photographs beautifully under warm lights and adds texture to fine hair. You can tuck small pearls or baby’s breath along the braid for a bridal touch. Pro tip: pancake the braid—gently pull at the edges—to make it look fuller and softer without extra weight.
How To Style
Create two loose braids from above each ear. Bring them across the top/back of the head and pin. Curl the remaining lengths, then mist with a flexible spray.
Best For
Heart, round; wavy or straight hair.
Tools & Products
Elastic minis, bobby pins, curling iron, texturizing spray, hairspray.
Side Swept Curls with Statement Pin
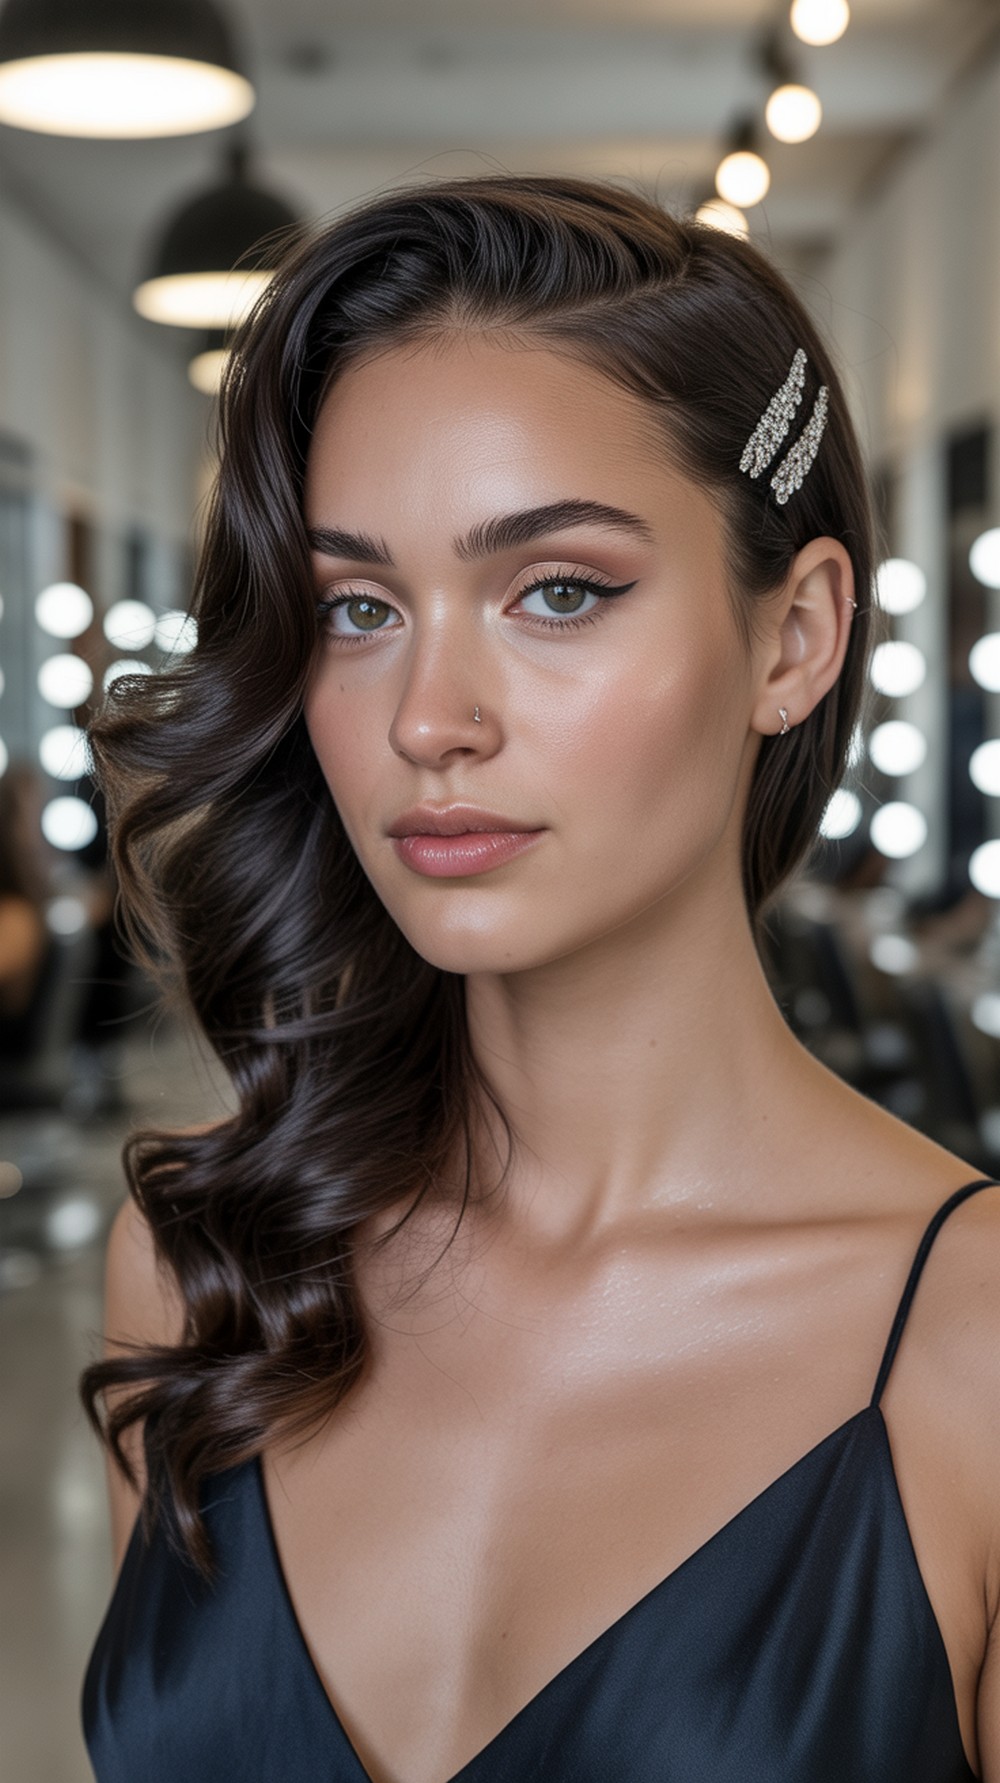
Sweep everything to one side for a romantic silhouette that flatters the jawline and shows off a beautiful neckline. Big, soft curls add movement, and a single jeweled or pearl pin anchors the heavy side. This style reads glamorous without looking overdone and stays comfortable for hours. Pro tip: secure hidden bobby pins in an “X” at the nape before adding the visible pin—this takes the weight off the accessory.
How To Style
Create a deep side part. Curl hair in alternating directions. Sweep all hair over one shoulder, secure at the nape with crossed pins, then place the statement pin above the ear.
Best For
Oval, square; wavy or curly hair.
Tools & Products
Curling wand, bobby pins, setting spray, shine drops.
Classic High Bun with Veil Loop

A high bun is sleek, elongates the neck, and stays put through photos and dancing. Building a small loop or space behind the bun makes veil placement easy without disturbing the shape. It’s minimal yet formal and pairs perfectly with bold eye makeup and a clean neckline. Pro tip: use a donut or padding to lighten the bun and pin into a teased anchor so it won’t slip.
How To Style
Brush hair into a high pony. Add padding if needed. Wrap sections around to form a smooth bun and pin firmly. Leave a small gap under the bun for the veil comb.
Best For
Long, oval; straight or wavy hair.
Tools & Products
Boar-bristle brush, strong elastic, hair donut/padding, bobby pins, strong-hold spray.
Fishtail Braid with Ribbon

A fishtail braid looks intricate yet is surprisingly secure for long hair. Threading a slim ribbon through adds a romantic touch that ties into your outfit colors. Wear it over one shoulder for asymmetric balance and pretty detail shots. Pro tip: after braiding, pancake gently from the bottom up to widen the braid without loosening the top.
How To Style
Part to one side. Gather hair over one shoulder and fishtail braid to the ends. Tie off, then weave a thin ribbon through the outer loops. Pull edges slightly.
Best For
Oval, square; straight or wavy hair.
Tools & Products
Clear elastic, ribbon, tail comb, texturizing spray, light hairspray.
Textured Low Bun with Pearl Pins
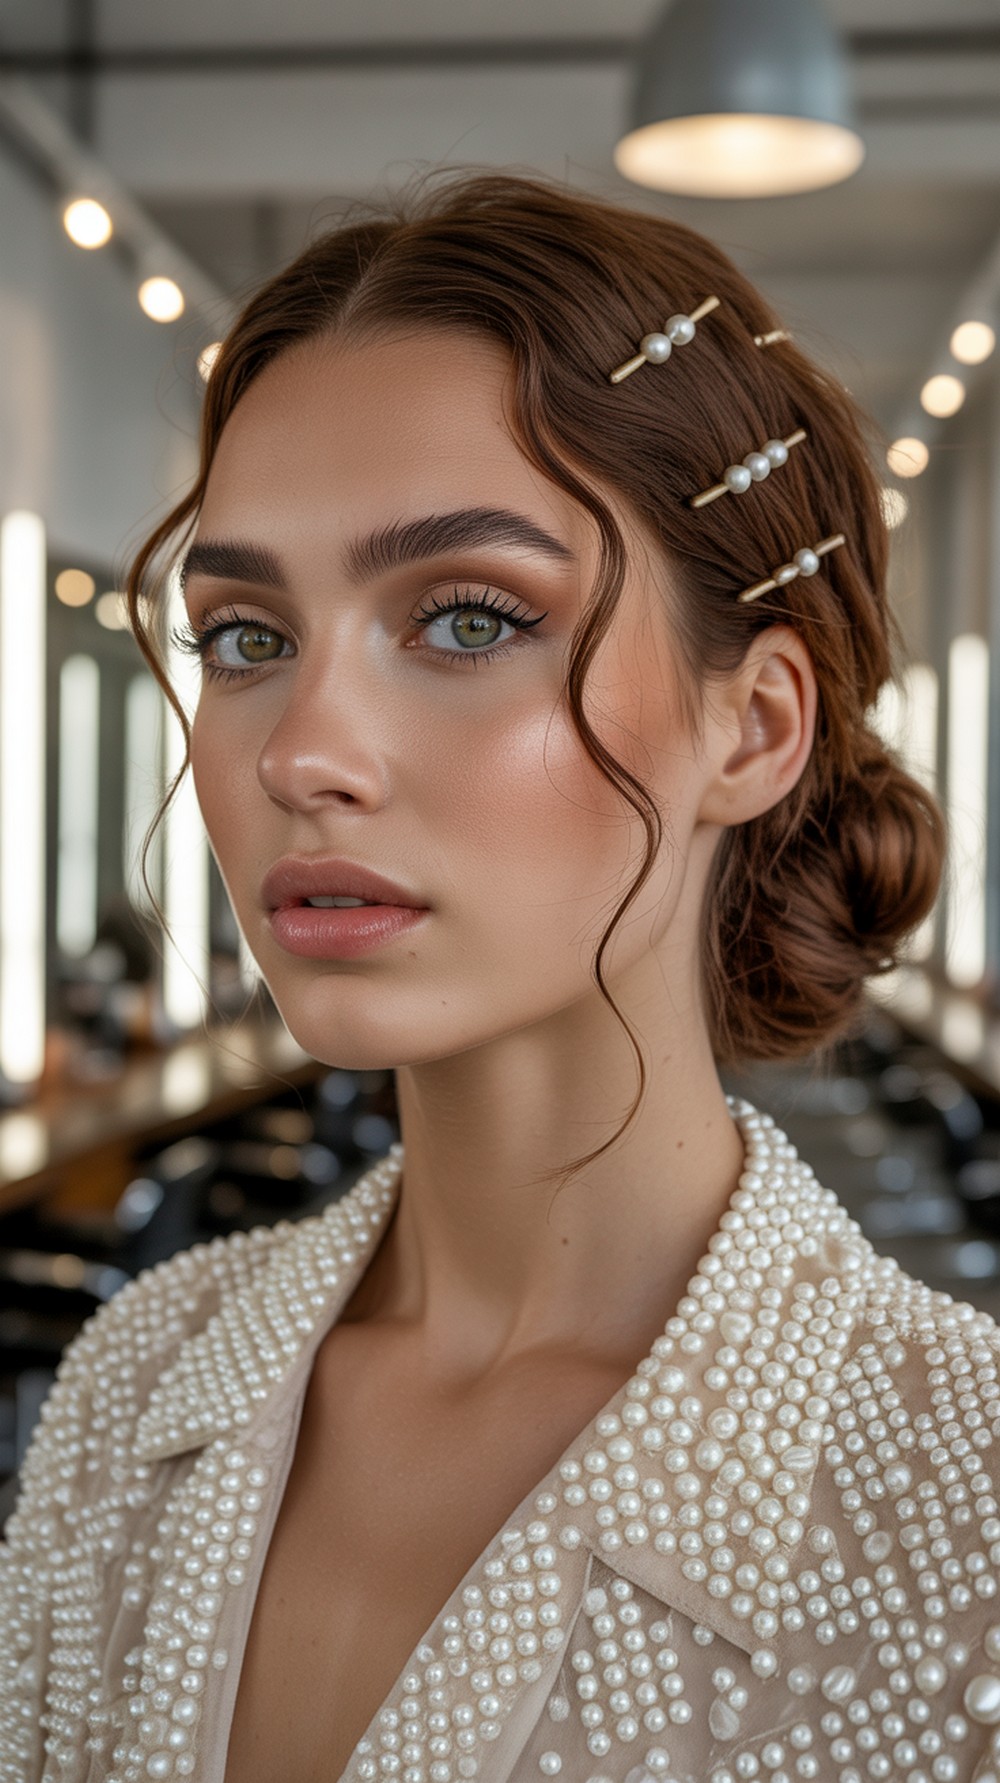
This textured bun feels romantic and luxe, especially with scattered pearl pins. The low placement is comfortable and works with veils or dupattas. Loose pieces around the hairline soften the look and flatter round or square faces. Pro tip: curl or wave the hair first; building the bun from textured sections gives instant fullness and grip.
How To Style
Curl hair, then gather loosely at the nape. Twist and pin sections to form a soft bun. Pull out fine pieces at the temples. Add pearl pins randomly for sparkle.
Best For
Round, square; wavy or curly hair.
Tools & Products
Curling iron, bobby pins, pearl pins, texture spray, medium-hold hairspray.
Glam Blowout with Lift
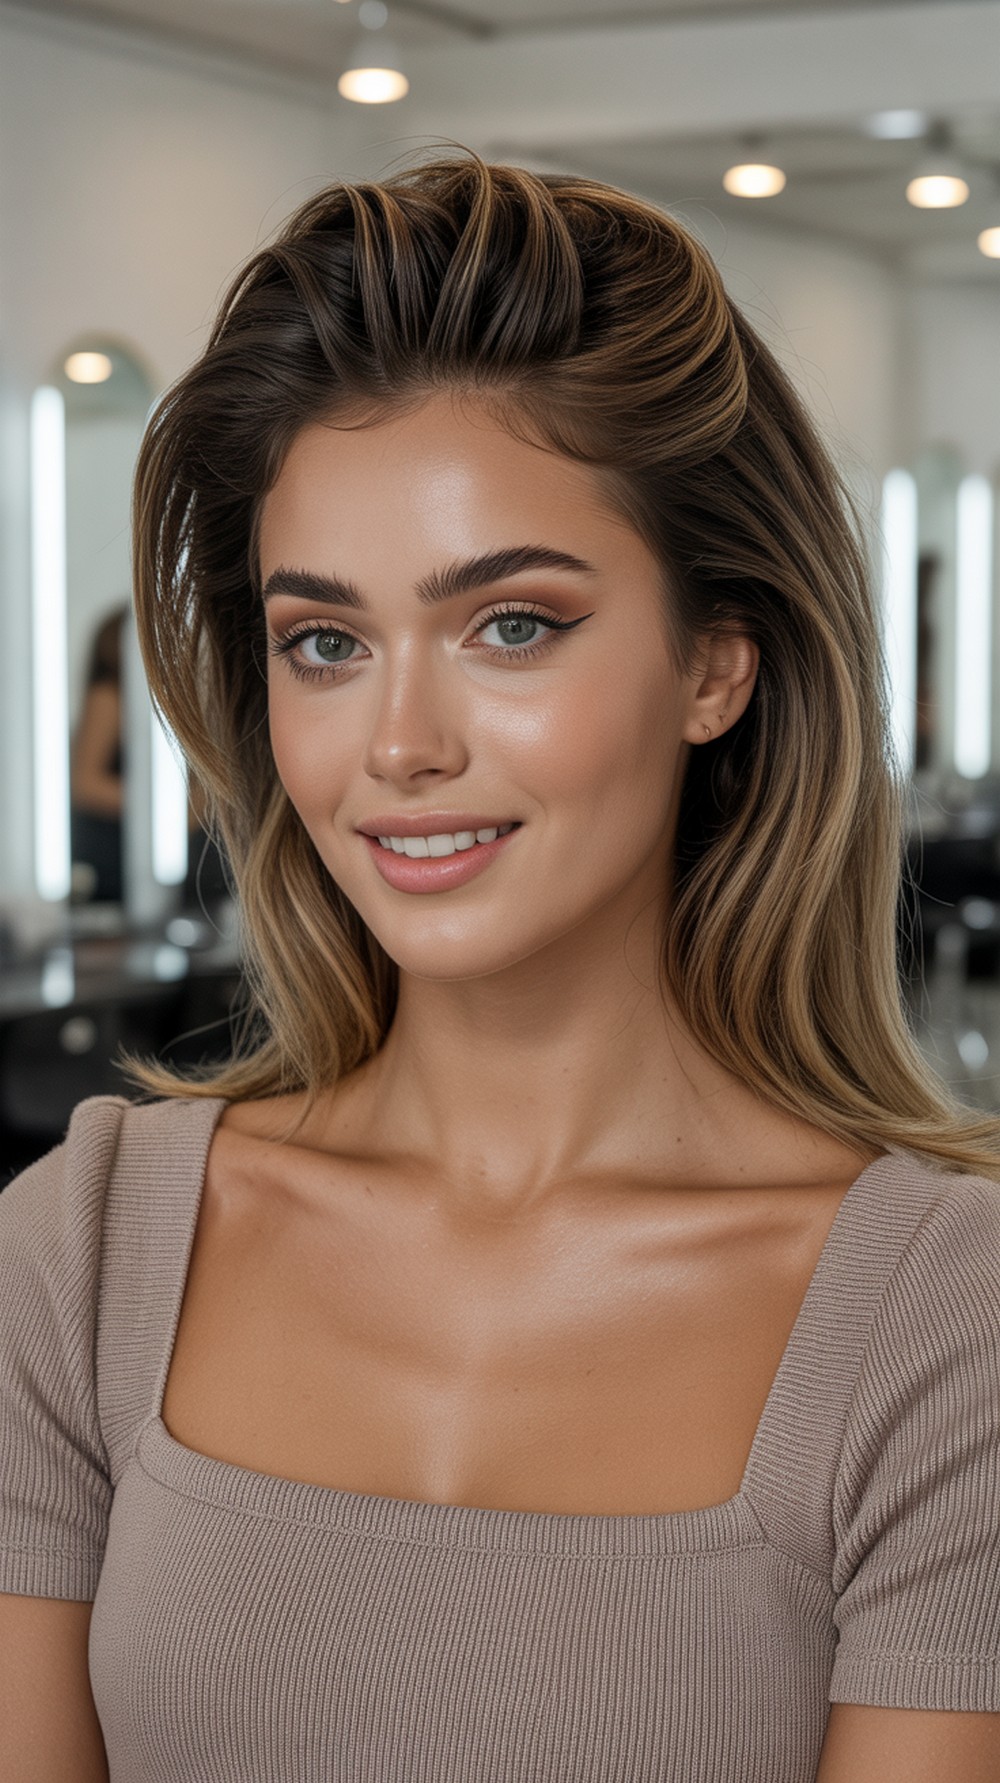
A classic blowout with lifted roots and polished ends looks expensive and effortless. It’s perfect if you want bounce without heavy product. The smooth surface photographs cleanly, and volume at the crown balances longer face shapes. Pro tip: set the top section in large Velcro rollers while it cools for long-lasting lift.
How To Style
Apply mousse. Blow-dry with a round brush, lifting at roots and beveling ends. Set the crown in large rollers for 10 minutes, release, and brush lightly.
Best For
Long, oval; straight or wavy hair.
Tools & Products
Heat protectant, round brush, blow-dryer with nozzle, Velcro rollers, lightweight hairspray.
Loose Boho Waves with Tiny Braids
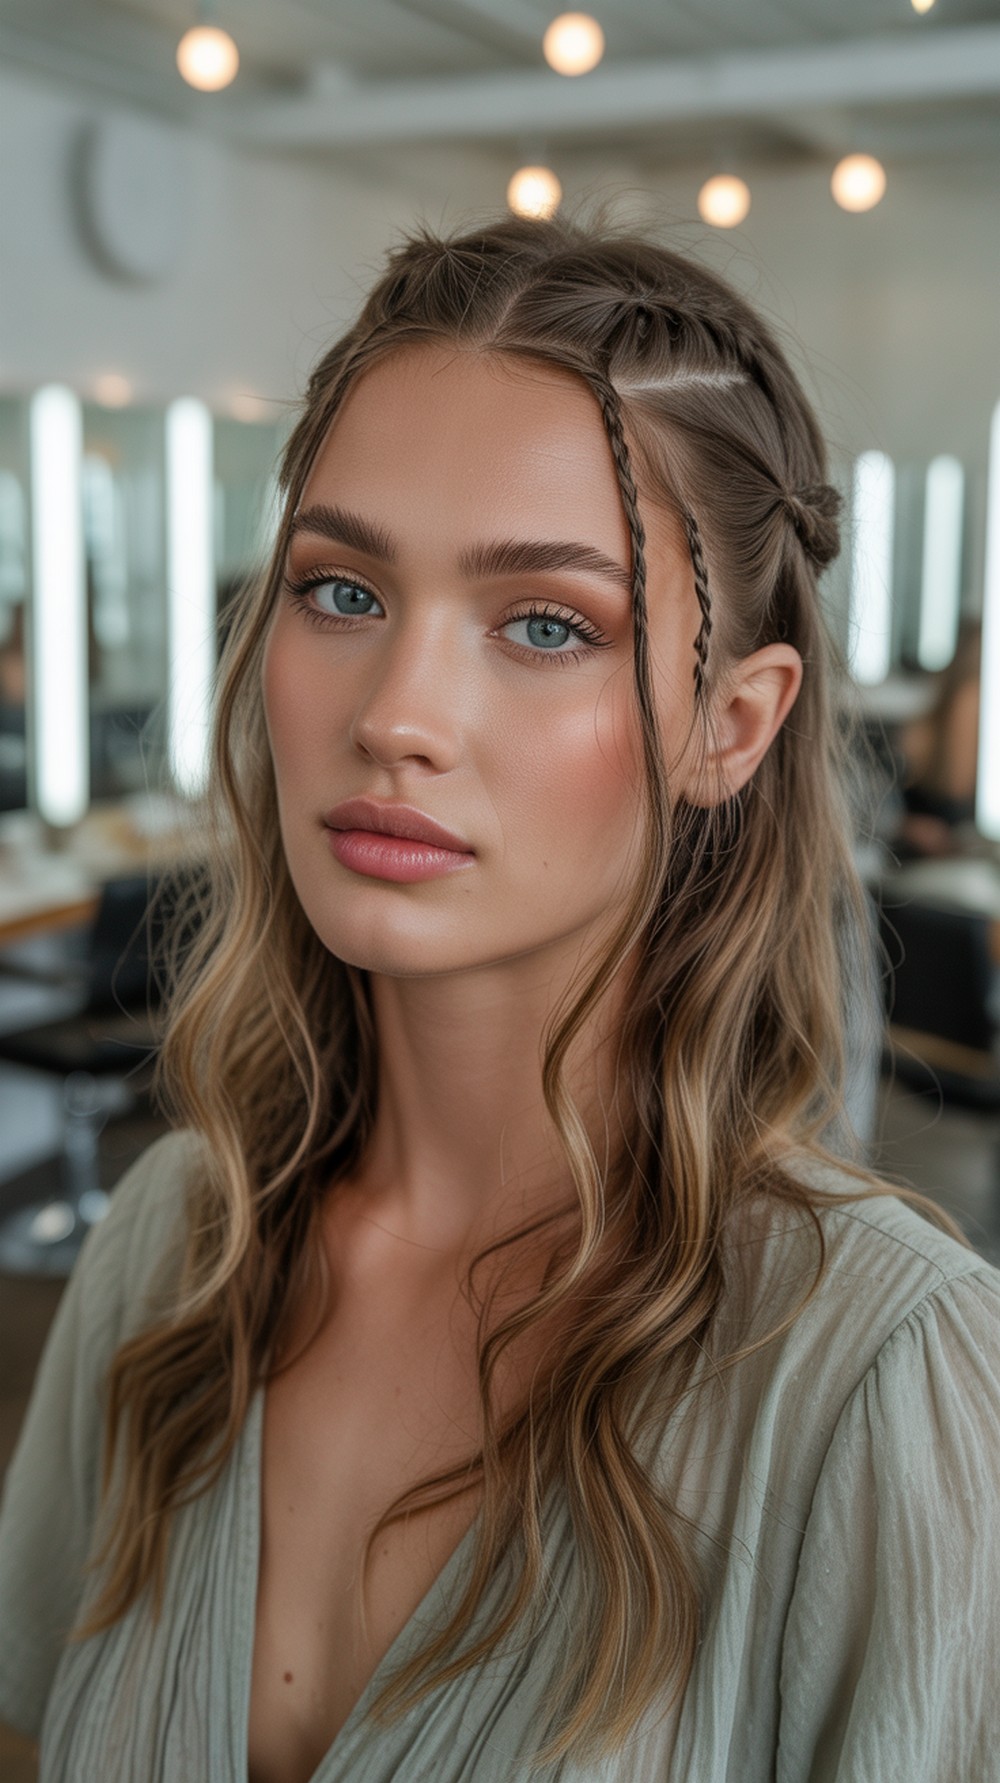
Effortless boho waves with a couple of micro-braids give movement and texture while keeping the vibe soft. It’s great for outdoor or daytime ceremonies and pairs with floral accessories or simple pins. The tiny braids add detail without overwhelming the face. Pro tip: scrunch a salt spray into mid-lengths before drying, then add a few wand waves and blend.
How To Style
Mist salt spray on damp hair and rough-dry. Create loose waves with a wand. Add two to three tiny face-framing braids, secure ends, and finger-comb to blend.
Best For
Heart, oval; wavy or curly hair.
Tools & Products
Sea salt spray, curling wand, clear minis, light serum, flexible hairspray.
Conclusion
Long hair gives you every option—from sleek and clean to textured and romantic. Choose a style that balances your face shape, supports your outfit, and feels secure when you move. Do one full trial with your exact accessories, then pack a tiny touch-up kit: pins, mini hairspray, and a comb. On the day, focus on shine, tidy parting, and clean finishes. The right prep turns any of these looks into a confident, camera-ready moment.
CTA
Ready to pick one? Tell me your outfit, hair type, and face shape, and I’ll tailor a perfect engagement-ready version with steps just for you.
FAQs
1) How far in advance should I trial my engagement hairstyle?
Do a full trial two to three weeks before the event. Wear it for a few hours to check comfort, longevity, and how it photographs under indoor lighting.
2) Will these styles work if my hair is very thick or heavy?
Yes—opt for anchored buns, braided bases, or low ponies to distribute weight. Use extra pins and a strong elastic, and set with a firm yet flexible hairspray.
3) What if my hair doesn’t hold curls well?
Prep with mousse on damp hair, blow-dry with a round brush, then curl smaller sections. Pin curls to cool for 10–15 minutes before brushing out.
4) Can I add a veil or tikka without ruining the style?
Place accessories after you finish the base shape. Slide the comb into a teased anchor section and secure with crossed pins hidden beneath.
5) How do I manage flyaways around the face?
Mist a clean spoolie or toothbrush with hairspray and sweep gently. For sleek looks, smooth a pea-size serum between fingertips and glide over the surface.