11 Finger Wave Ponytail Hairstyle Ideas
Sculpted finger waves give a classic ponytail an elegant twist, blending glossy curves with sleek bases, soft curls, and statement-worthy texture.
Finger wave ponytails combine the recognizable S-shaped movement of vintage-inspired waves with the versatility of a modern ponytail. The waves can stay concentrated around the hairline and temples or extend farther across the crown, giving each version a noticeably different character.
When choosing a look, compare ponytail height, wave placement, finish, and the amount of texture you want through the lengths. A sleek low ponytail feels refined, while a high ponytail creates stronger contrast against the sculpted waves. Pearls, crystals, curls, and softer volume can also shift the style from minimalist to formal.
Quick List
- Sleek Side Part Finger Wave Ponytail Hairstyle
- Glossy Low Finger Wave Ponytail Hairstyle
- Sculpted Temple Finger Wave Ponytail Hairstyle
- Deep S Wave High Ponytail Hairstyle
- Vintage Glam Finger Wave Ponytail Hairstyle
- Wet Look Finger Wave Ponytail Hairstyle
- Curly End Finger Wave Ponytail Hairstyle
- Pearl Accent Finger Wave Ponytail Hairstyle
- Soft Volume Finger Wave Ponytail Hairstyle
- Side Swept Finger Wave Ponytail Hairstyle
- Crystal Pin Evening Finger Wave Ponytail Hairstyle
1. Sleek Side Part Finger Wave Ponytail Hairstyle
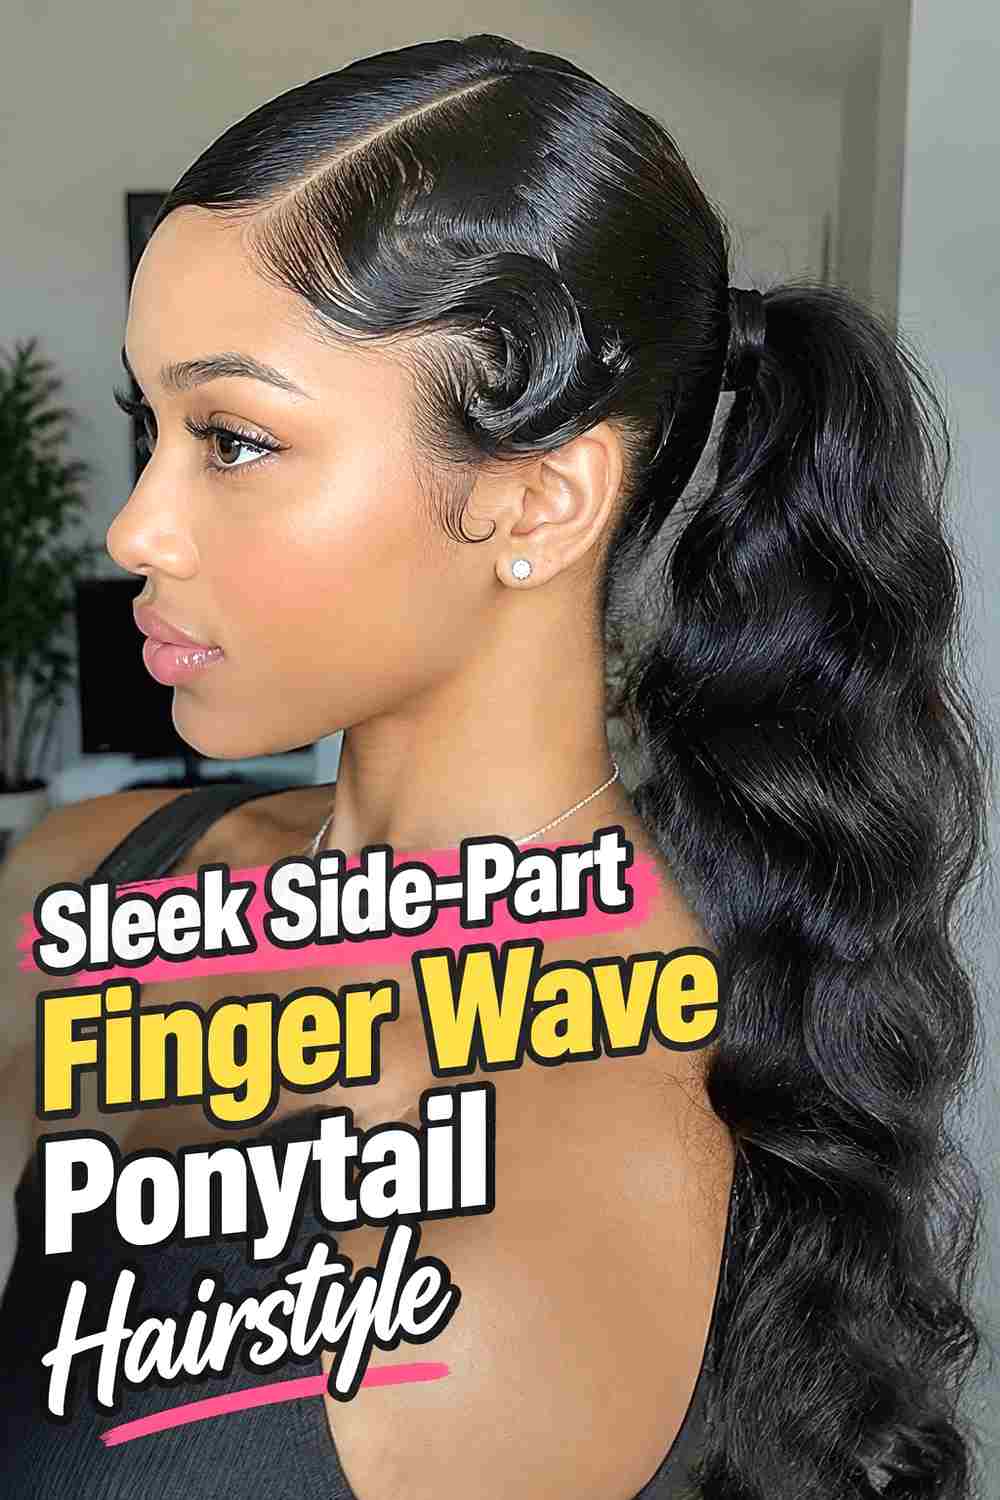
The Sleek Side-Part Finger Wave Ponytail Hairstyle combines a sharp side part with controlled waves that follow the front hairline before flowing into a polished ponytail. Keeping the waves concentrated near the forehead and temple gives the style recognizable finger-wave detail without making the entire crown overly sculpted. The ponytail can stay straight or softly curved through the ends, creating a modern contrast with the vintage-inspired front. A smooth mid-height base works particularly well because it keeps the silhouette streamlined while still displaying the wave pattern from the side. This look suits medium to long hair and works best when the wave ridges remain glossy, defined, and comfortably secured.
Styling Notes
Form the front waves before securing the final ponytail position so the side part and S-shaped ridges stay aligned.
Best For
This style works well for formal dinners, parties, weddings, photos, and polished evening looks.
2. Glossy Low Finger Wave Ponytail Hairstyle
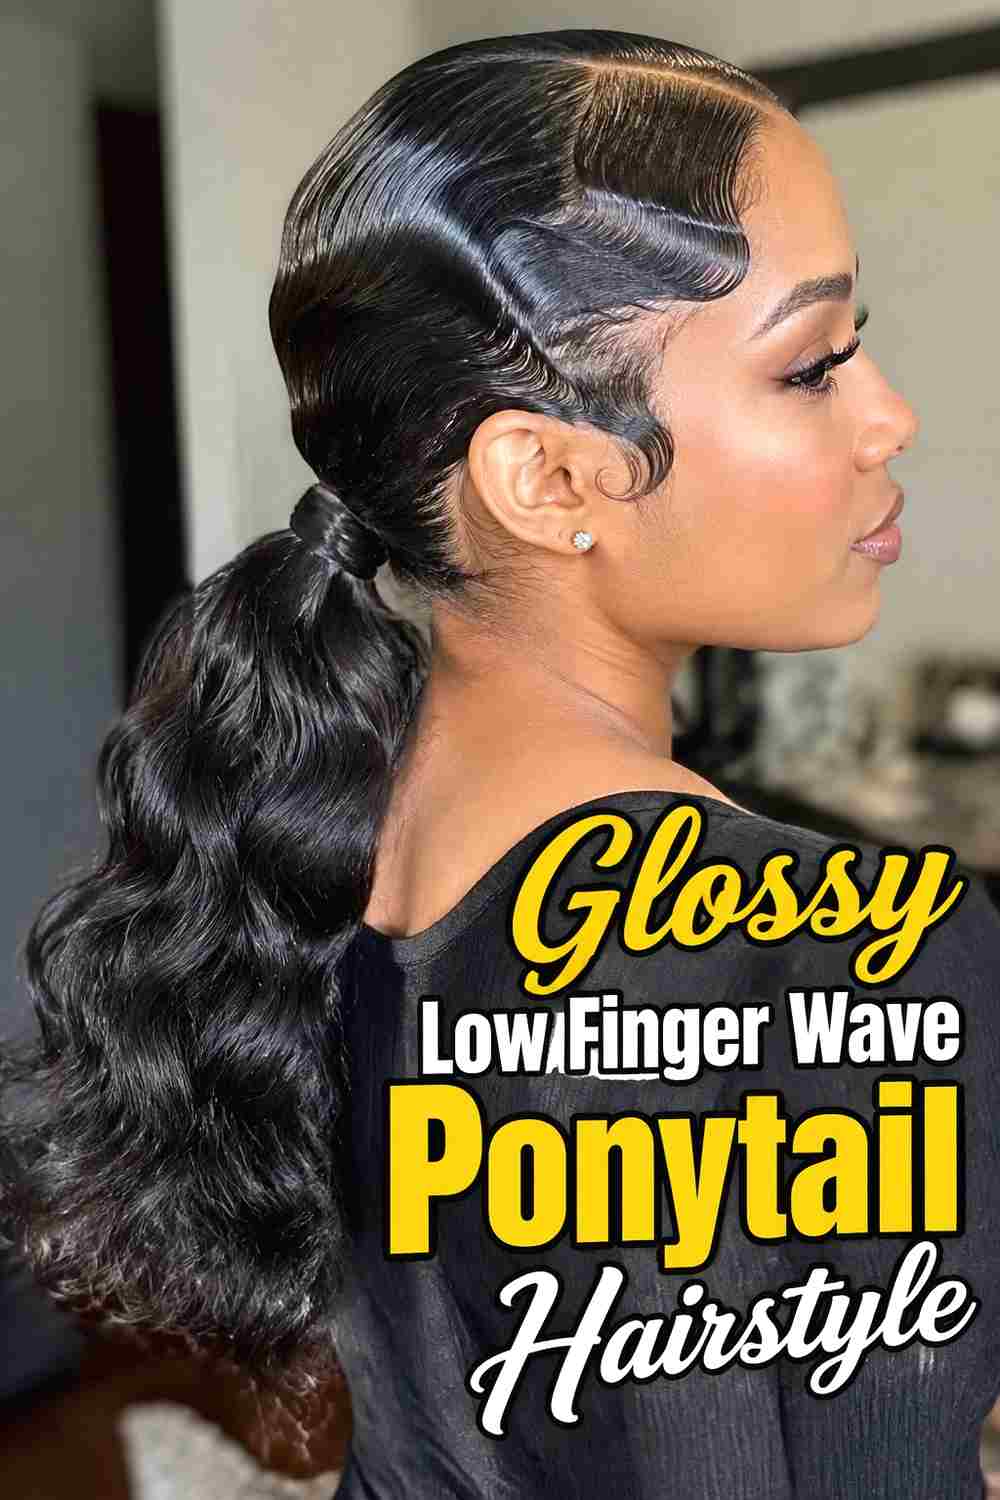
The Glossy Low Finger Wave Ponytail Hairstyle keeps the ponytail close to the nape and lets luminous, sculpted waves provide most of the detail around the front and sides. The low placement creates an elegant profile and reduces the visual competition between the ponytail and the finger-wave pattern. Straight, glossy lengths enhance the polished finish, although a soft bend through the ends can make the style slightly less severe. A clean side part helps guide the wave direction and creates a natural starting point for the first ridge. This look is especially effective when you want a sophisticated hairstyle that remains compact rather than building significant height or volume around the crown.
Why It Works
The low ponytail keeps the overall silhouette restrained, allowing the curved wave pattern and reflective finish to become the focal points.
Wear & Maintenance
Protect the sculpted front from excessive touching, and avoid placing accessories where they could disturb the wave ridges.
3. Sculpted Temple Finger Wave Ponytail Hairstyle
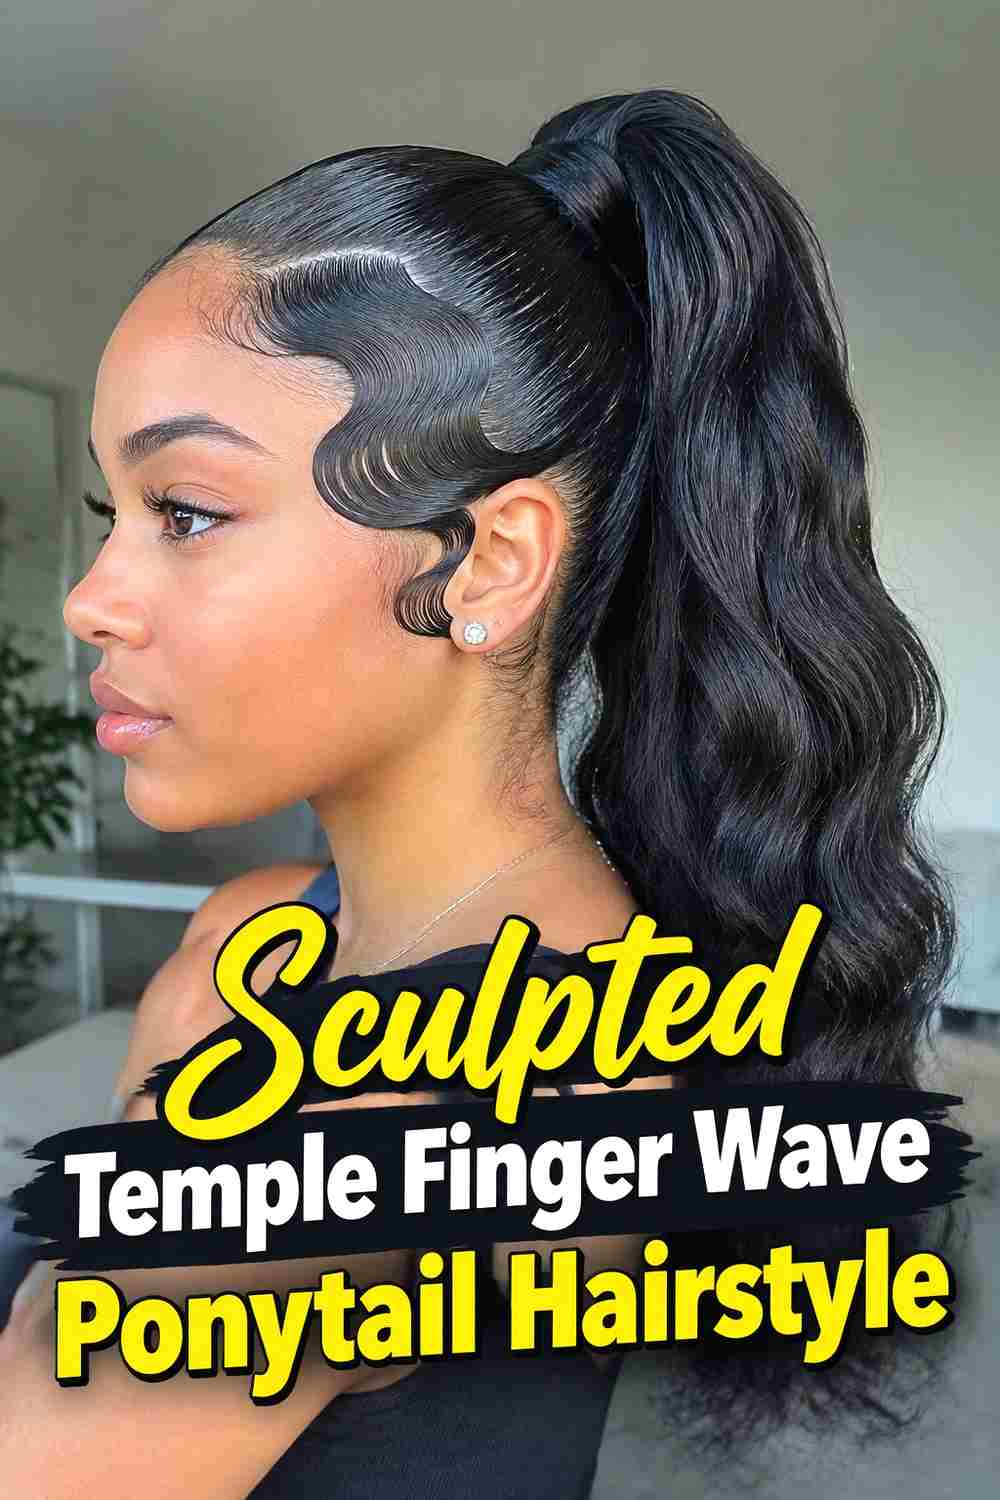
The Sculpted Temple Finger Wave Ponytail Hairstyle places the most detailed wave pattern along one or both temples instead of covering the entire front. This localized approach makes the hairstyle easier to balance with a fuller ponytail and gives the wave detail a modern, graphic quality. The crown can remain smooth and gently lifted while the ponytail falls in a straight, wavy, or naturally textured finish. Two or three clearly shaped curves near the temple are usually enough to establish the finger-wave effect. This variation works particularly well when you want the style to remain recognizable from the front while preserving a cleaner, less heavily molded appearance through the rest of the hair.
Styling Notes
Keep each temple wave narrow enough to sit close to the hairline. The defined ridges should flow naturally toward the ponytail rather than ending abruptly.
Pro Tip
Allow the waves to set fully before making final adjustments to the ponytail so the sculpted sections do not lose their shape.
4. Deep S Wave High Ponytail Hairstyle
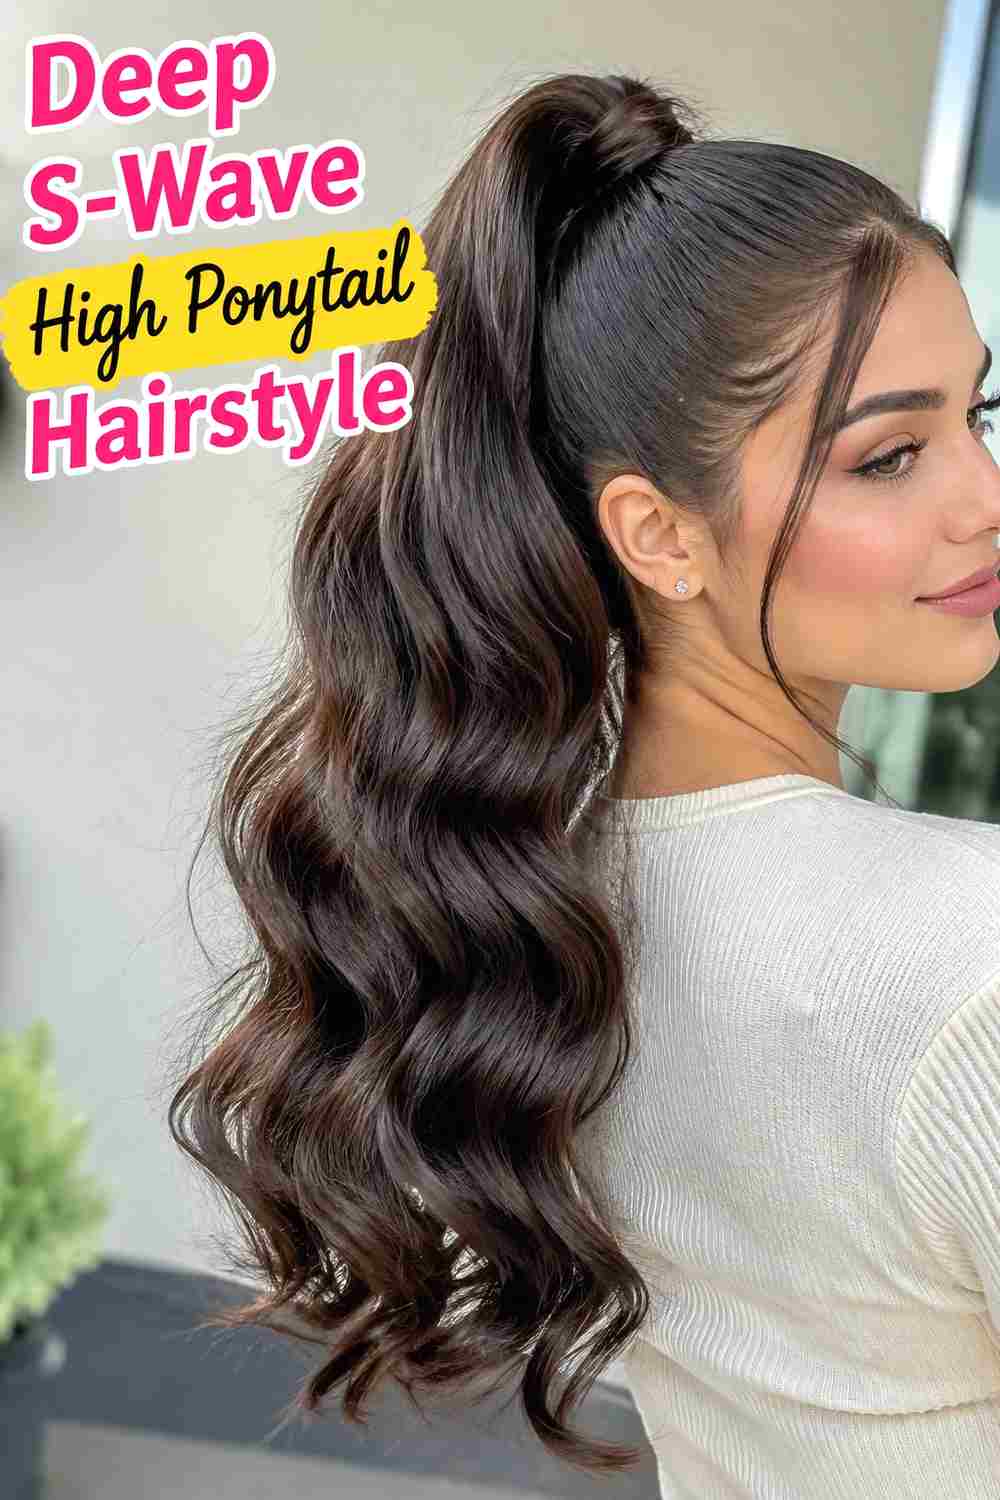
The Deep S-Wave High Ponytail Hairstyle pairs dramatic front curves with a lifted ponytail positioned near the crown. Wider S-shaped waves sweep across the front and sides, creating strong directional movement before the hair transitions into the high base. The ponytail can stay sleek for a sharp contrast or carry subtle waves through the lengths for a more cohesive finish. Because both the finger waves and ponytail have visual impact, keeping the accessory level minimal prevents the hairstyle from feeling crowded. Medium-long and long hair are especially suitable because the higher tie point still leaves enough length for the ponytail to fall clearly behind the sculpted crown.
Why It Works
The deep wave pattern creates horizontal movement around the head, while the high ponytail adds vertical lift and a completely different direction.
Best For
Choose this look for parties, fashion-forward events, celebrations, or photographs where a dramatic silhouette is desirable.
5. Vintage Glam Finger Wave Ponytail Hairstyle
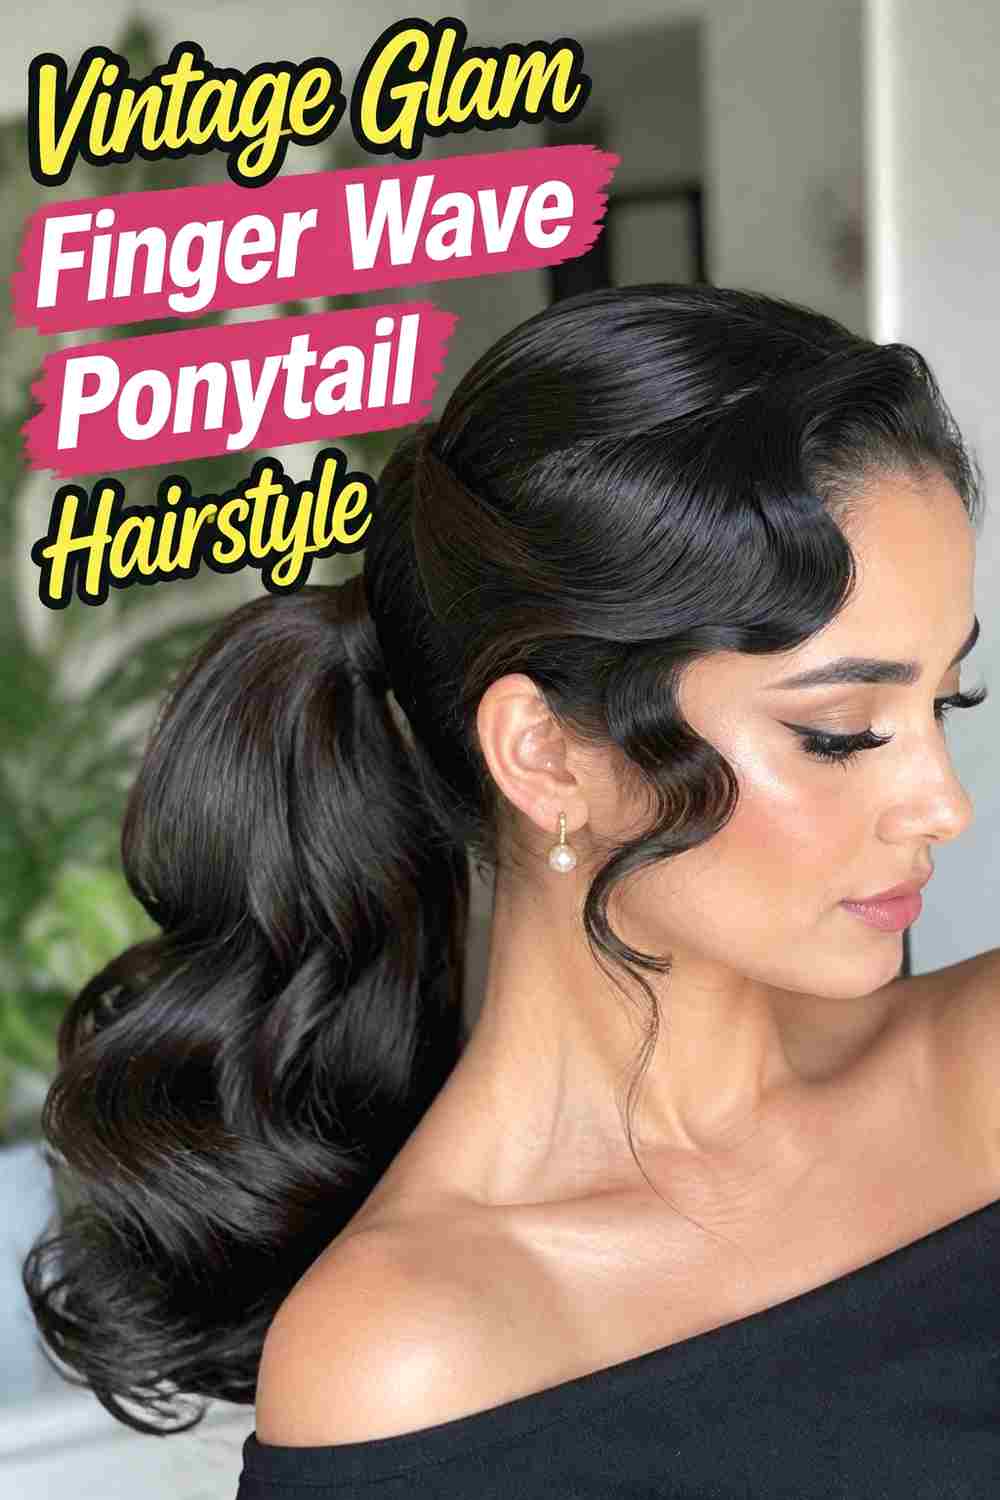
The Vintage Glam Finger Wave Ponytail Hairstyle leans into classic styling with polished S-curves, a defined side part, and an elegant low-to-mid ponytail. The waves can extend farther around the side of the head than in more minimalist versions, creating a continuous sculpted pattern before meeting the ponytail base. Softly waved lengths complement the vintage influence without turning the entire hairstyle into a rigid set. The finish should remain glossy and controlled, but a few natural strands in the ponytail keep it believable. This style is particularly effective with eveningwear because its shape feels deliberate from every angle while still allowing the length of the hair to remain visible.
Styling Notes
Keep the front sections smooth and work the wave pattern in one continuous direction so each ridge connects visually to the next.
Best For
This version suits vintage-inspired events, formal celebrations, weddings, evening parties, and glamorous photo sessions.
6. Wet Look Finger Wave Ponytail Hairstyle
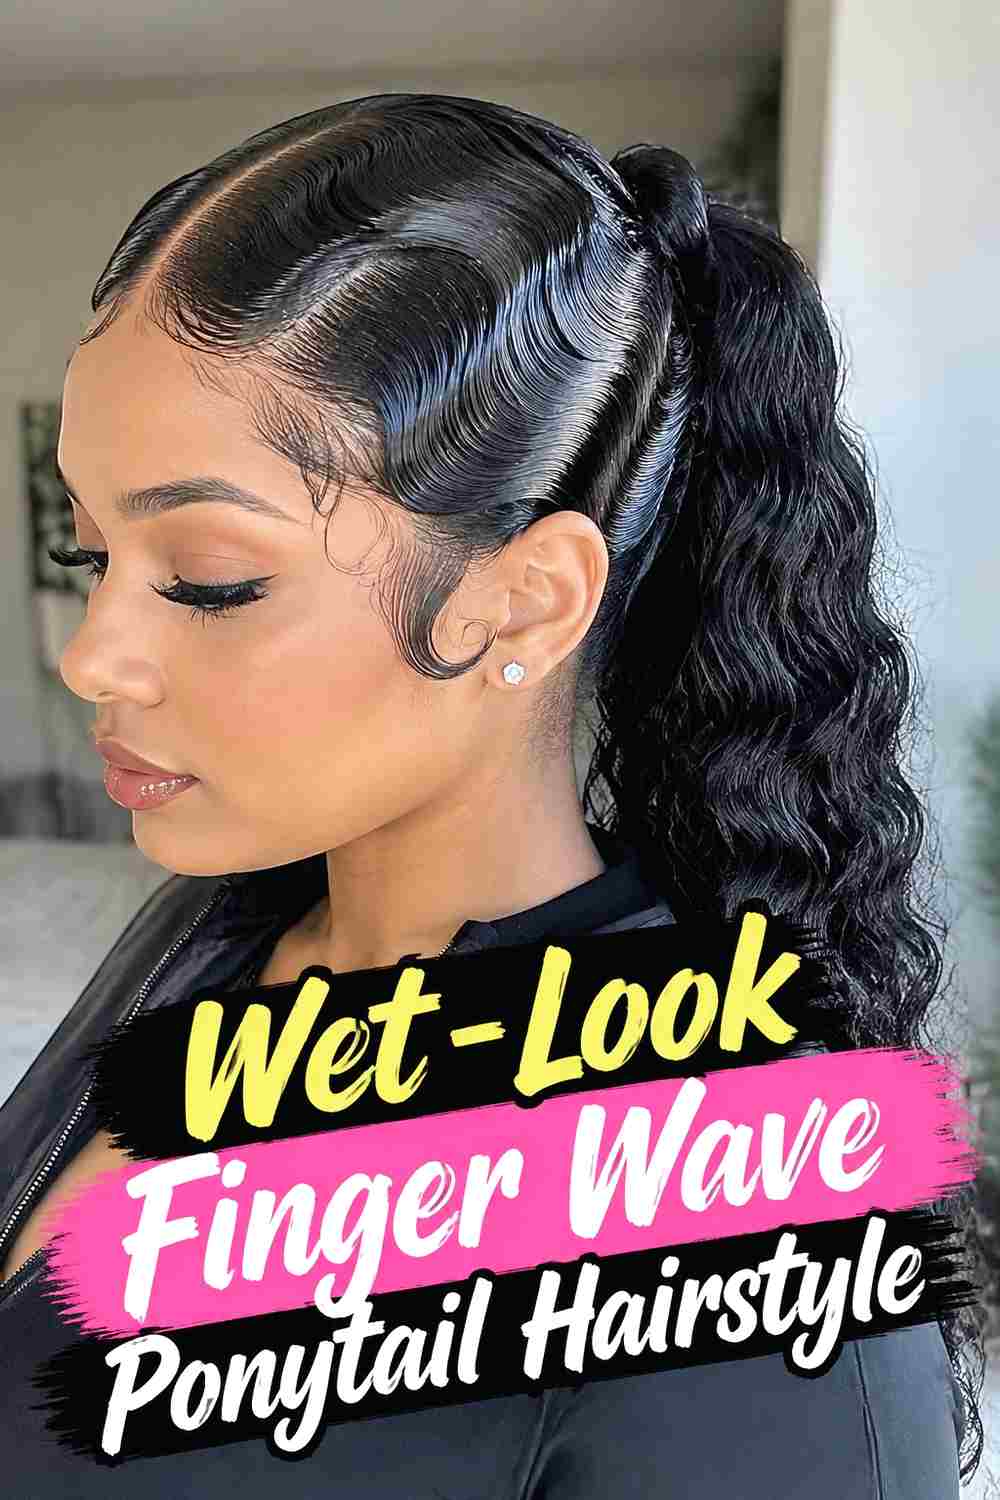
The Wet-Look Finger Wave Ponytail Hairstyle uses high shine and close-to-the-head definition to create a sleek, editorial finish. The finger waves appear especially crisp around the front because the hair stays controlled with minimal root volume. A mid or low ponytail continues the streamlined effect, while the lengths can remain straight or lightly textured for contrast. The goal is a glossy, freshly styled appearance rather than hair that looks saturated or heavy. Keeping the wave ridges clean and the ponytail base precise is important because the smooth finish makes uneven sections more noticeable. This style works well when you prefer sharp structure instead of soft, romantic volume.
Styling Notes
Apply styling product evenly in thin layers around the wave area so the finish stays glossy without looking overly coated.
Wear & Maintenance
Avoid brushing or repeatedly reshaping the wave ridges after they have set, as this can blur the defined S-pattern.
7. Curly End Finger Wave Ponytail Hairstyle
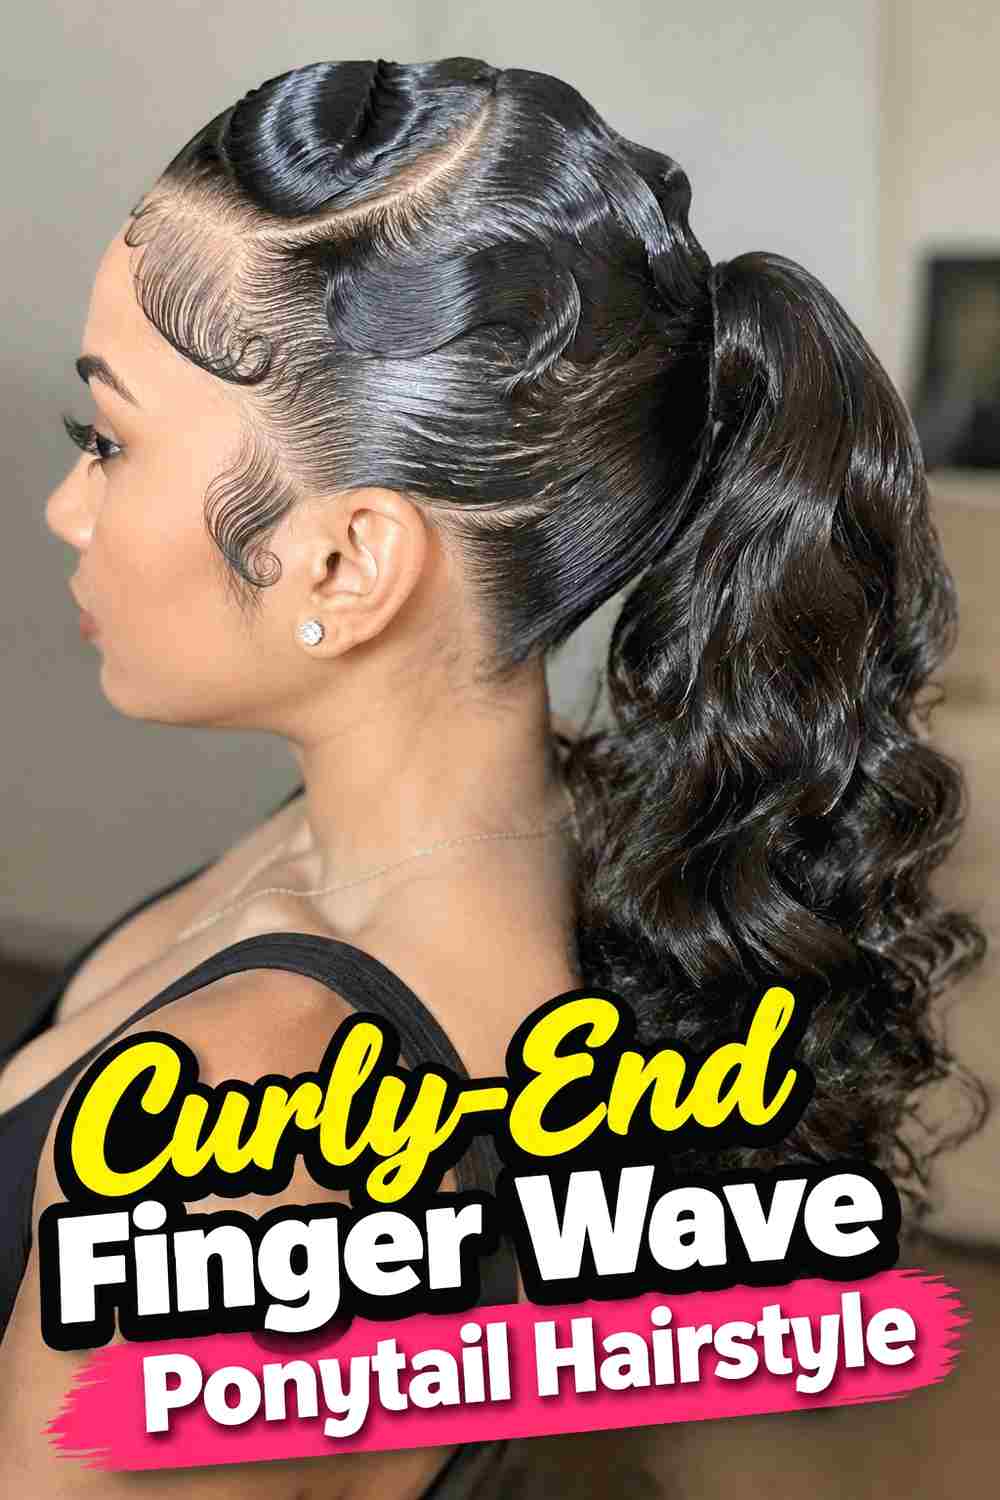
The Curly-End Finger Wave Ponytail Hairstyle blends a sculpted crown with a softer burst of curls through the ponytail. Finger waves near the front remain smooth and controlled, while the lengths transition into springy curls or loose ringlets below the elastic. This contrast makes the hairstyle feel less severe and adds movement from the back and side views. A mid-height ponytail usually gives the curls enough room to expand without overwhelming the wave detail near the scalp. The curl pattern does not need to be perfectly uniform; natural variation can make the ponytail look fuller and more believable while the polished finger waves provide the structural element.
Why It Works
The defined front establishes the vintage-inspired detail, while the curled ponytail adds volume, softness, and movement to the finished silhouette.
Pro Tip
Style the ponytail curls separately after the base is secure so you can preserve the finger-wave pattern while shaping the ends.
8. Pearl Accent Finger Wave Ponytail Hairstyle
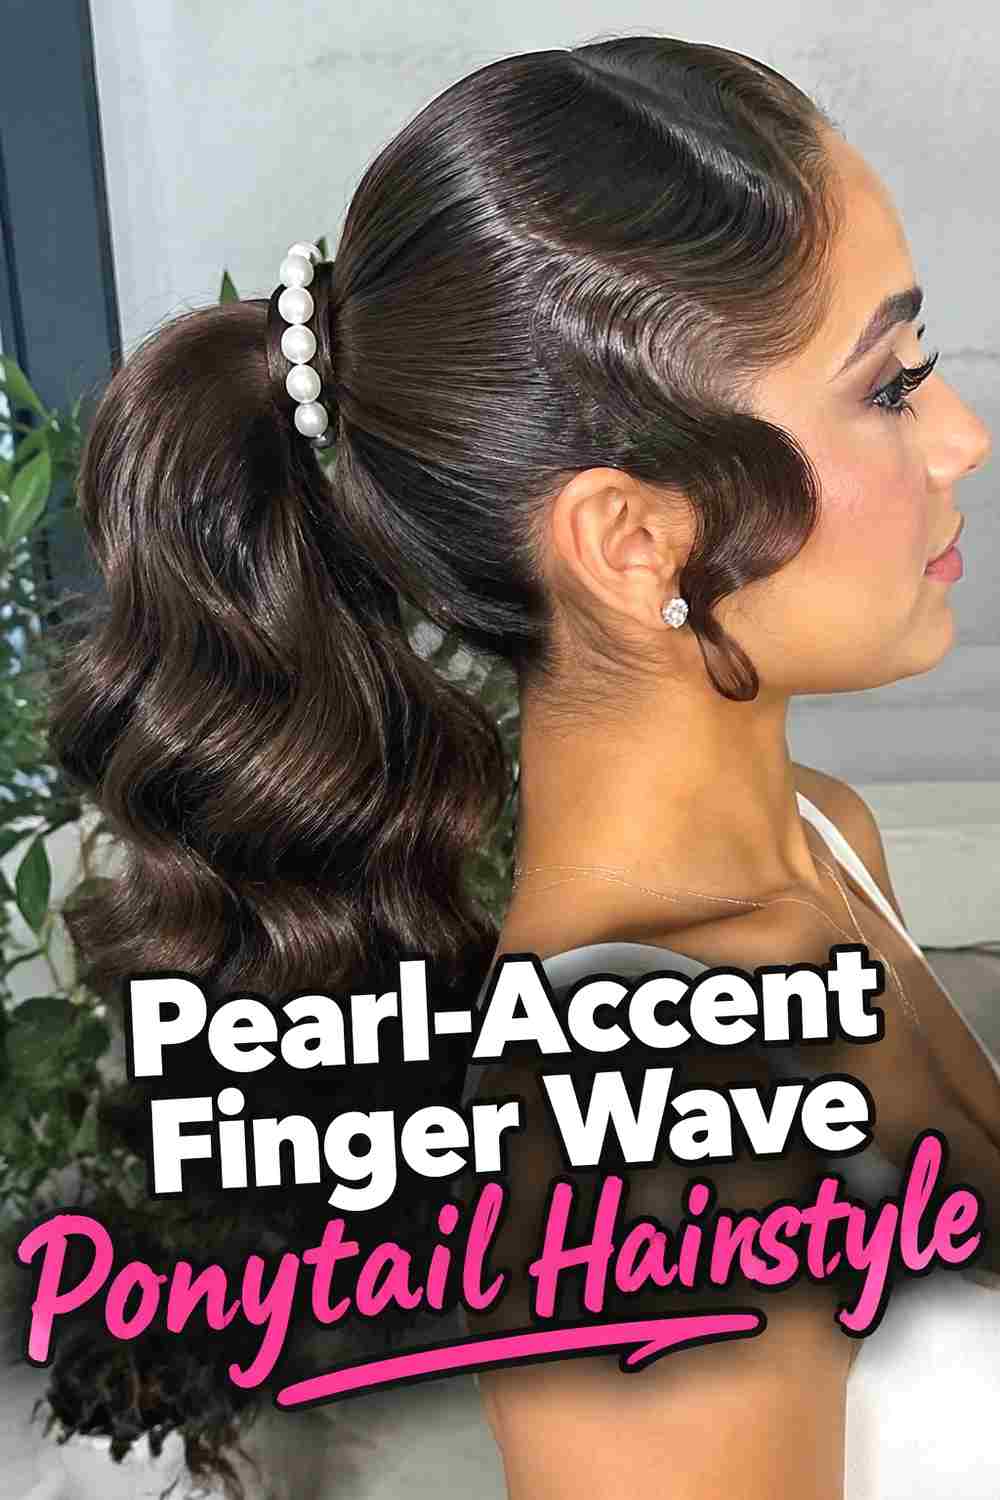
The Pearl-Accent Finger Wave Ponytail Hairstyle adds small pearl details alongside the curved wave pattern for a softer formal finish. Rather than placing pearls directly across every ridge, position a few pieces near one temple or along the transition into the ponytail. This keeps the wave structure visible and prevents the accessories from becoming visually heavy. A low or mid-height ponytail works particularly well because the jewelry remains easy to see from the side. The lengths can stay smooth or softly waved depending on the occasion. Lightweight pearl pins are preferable to bulky accessories because the front sections need to stay neat without being pulled away from their carefully shaped curves.
Styling Notes
Complete and set the finger waves before inserting pearls. Place each accessory where it can anchor without flattening the ridge beside it.
Best For
This variation is especially suited to weddings, engagements, formal dinners, celebrations, and romantic evening styling.
9. Soft Volume Finger Wave Ponytail Hairstyle
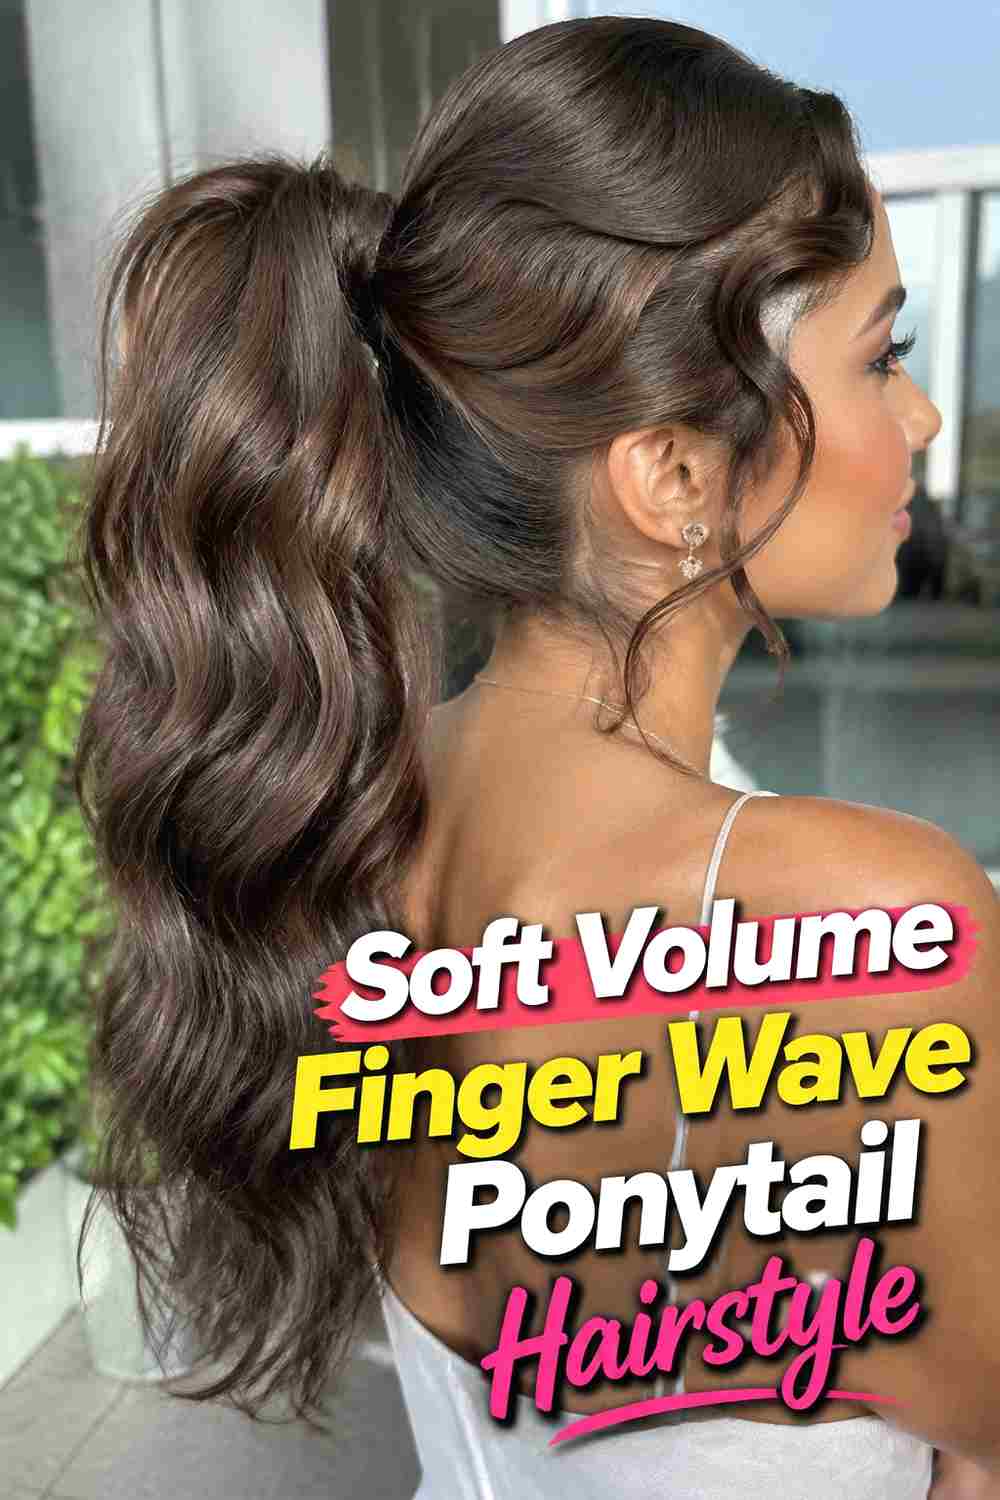
The Soft Volume Finger Wave Ponytail Hairstyle relaxes the usual sculpted effect by pairing defined front curves with gentle lift around the crown and a fuller ponytail. The wave pattern should remain recognizable near the part and temple, but the rest of the hair can transition gradually into softer volume instead of staying completely flat. This creates a romantic interpretation that feels less strict than a classic wet-look finger wave. The ponytail can include loose bends or airy curls to reinforce the softer silhouette. Medium to thick hair works particularly well, although carefully placed root lift can help finer hair achieve a similar effect without excessive teasing or heavy styling product.
Why It Works
The style preserves the graphic S-wave detail while introducing enough root lift and ponytail movement to make the overall shape feel lighter.
Styling Notes
Keep added volume behind the wave sections rather than lifting directly underneath them, which can distort the sculpted front.
10. Side Swept Finger Wave Ponytail Hairstyle
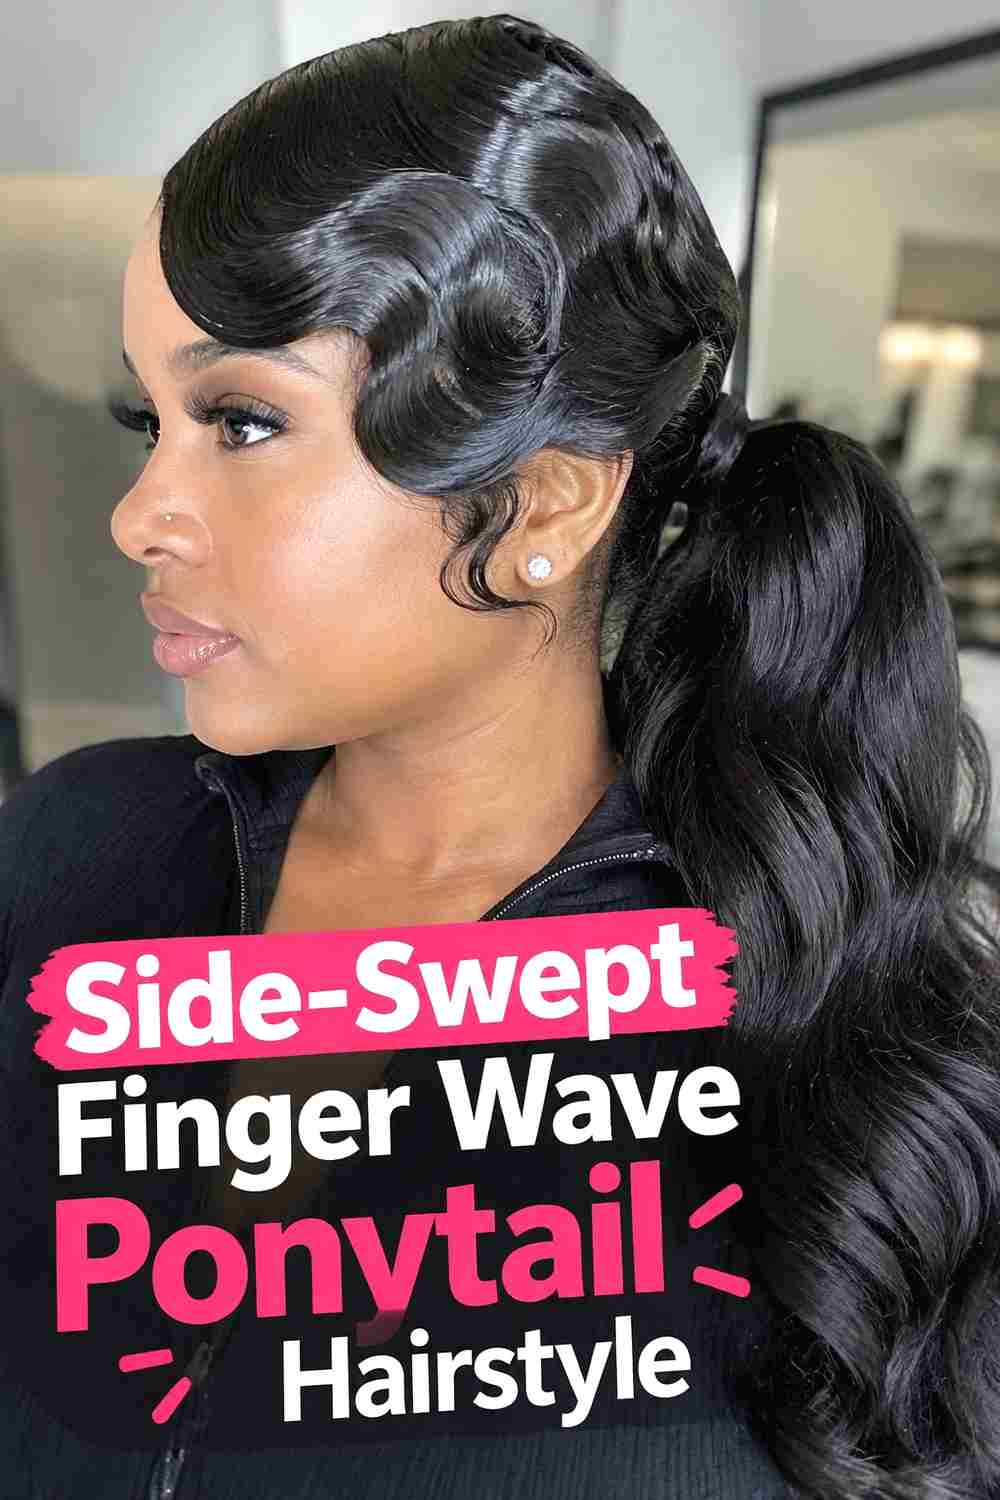
The Side-Swept Finger Wave Ponytail Hairstyle directs both the front wave pattern and the ponytail toward one side for a strongly asymmetrical finish. Sculpted waves follow the side part and curve neatly across the hairline, while the ponytail sits low enough to fall over one shoulder. This arrangement keeps the hairstyle visible from the front, making it particularly effective for photographs and statement earrings. The ponytail can remain smooth through the upper length before transitioning into loose waves at the ends. Medium-long or long hair provides the easiest side sweep because there is enough length to rest comfortably over the shoulder without pulling the base out of position.
Best For
This style works beautifully for date nights, formal events, weddings, dinners, or occasions where an asymmetrical silhouette complements the outfit.
Wear & Maintenance
A discreet pin near the nape can help keep the ponytail directed toward one shoulder without increasing tension at the main elastic.
11. Crystal Pin Evening Finger Wave Ponytail Hairstyle
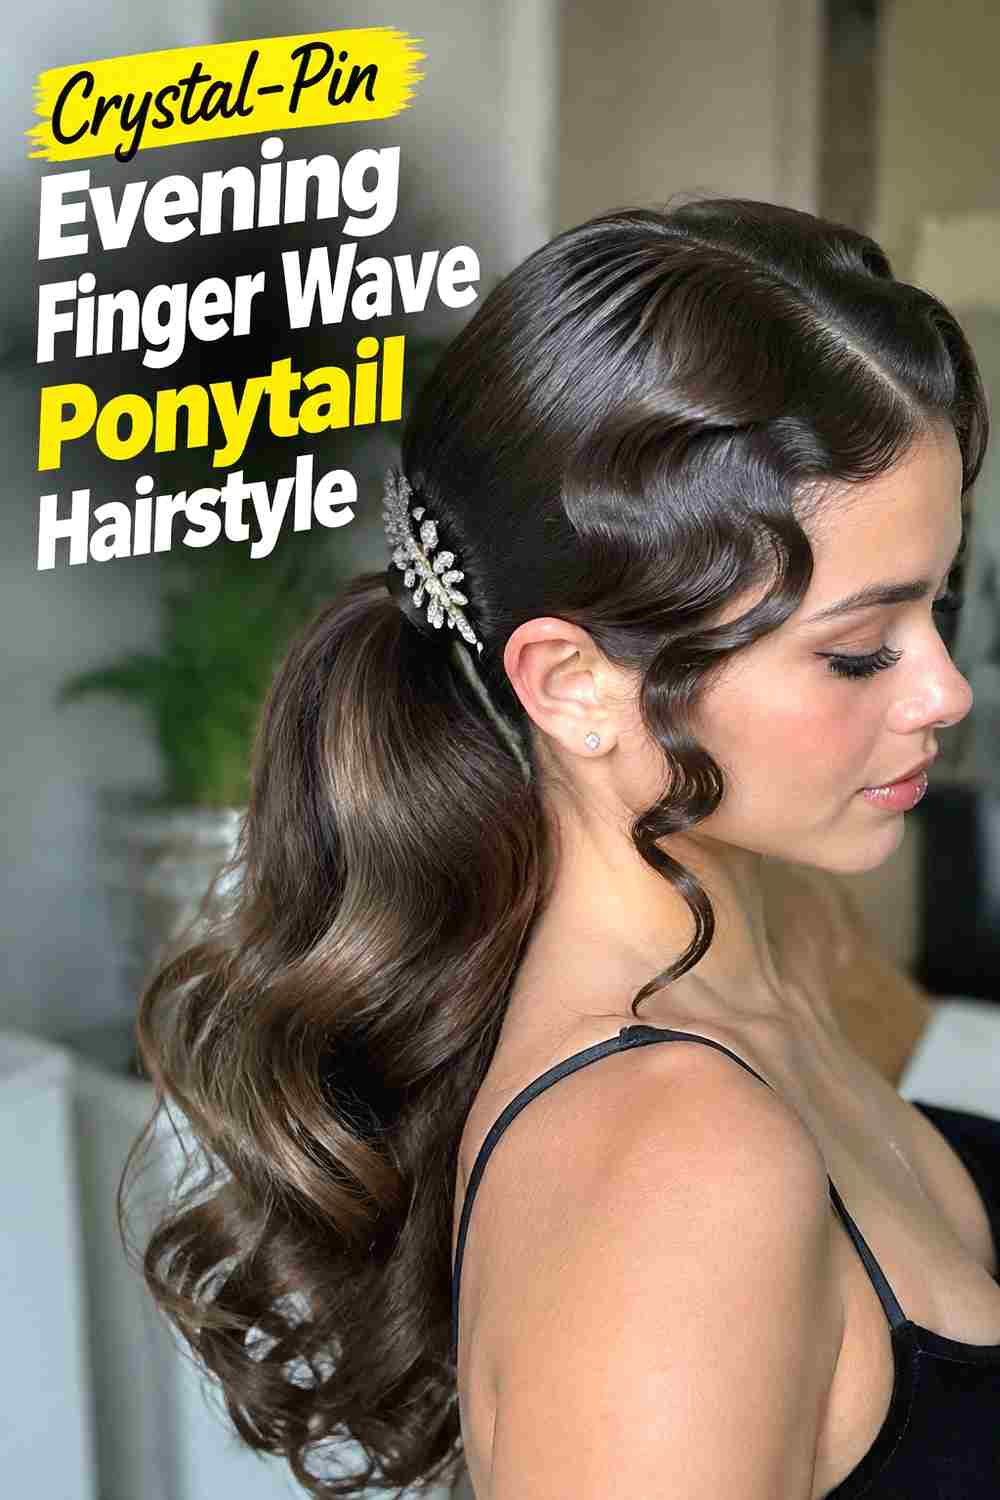
The Crystal-Pin Evening Finger Wave Ponytail Hairstyle combines polished finger waves with a small crystal accent for a glamorous but controlled finish. A few crystal pins can follow the curve above one ear or sit near the ponytail base, catching the light without hiding the S-shaped texture. A sleek mid-to-low ponytail keeps the design elegant, while softly curved ends prevent the silhouette from appearing too rigid. The jewelry should remain lightweight and concentrated in one area so the hairstyle retains a clear focal point. This variation works especially well when the front waves are sharply defined and glossy, creating a strong contrast between sculpted texture, smooth lengths, and subtle sparkle.
Styling Notes
Set the wave pattern and secure the ponytail completely before adding crystals. Decorative pins should not be responsible for holding structural sections in place.
Why It Works
The reflective crystals emphasize the shine already present in the finger waves while adding an evening-ready detail without requiring a heavily embellished style.
How to Choose the Right Look
Start with ponytail placement. Low finger wave ponytails create a refined, compact silhouette and generally feel more understated, while high versions produce stronger lift and make the contrast between the sculpted crown and loose length more noticeable. Mid-height ponytails offer a versatile balance between the two.
Next, decide how much of the hair should be finger-waved. Sculpted temple waves are a good option when you want only a small vintage-inspired detail, while deep S-waves and vintage glam versions make the wave pattern more central to the hairstyle.
Texture through the ponytail also changes the mood. Straight lengths feel sleek and editorial, loose waves create softer movement, and curly ends add noticeable fullness. If your outfit already has strong decorative elements, keeping the ponytail simple can help the overall look stay balanced.
For accessories, use pearls or crystals sparingly and attach them only after the hairstyle is secure. Finger waves depend on clean ridges and deliberate curves, so heavy accessories can interfere with their shape.
Finally, consider comfort and hold. Avoid creating unnecessary tension simply to keep the waves flat. A well-secured ponytail and properly set wave sections should provide structure without making the style uncomfortably tight.
Final Thoughts
Finger wave ponytails combine two very different styling ideas in a surprisingly versatile way. The sculpted waves bring polished, vintage-inspired detail, while the ponytail keeps the hairstyle modern and allows the length to remain visible.
Choose between a sleek, soft, curly, high, low, or embellished version based on your hair length and the occasion. Keeping the wave pattern clearly defined and the ponytail proportionate usually creates the most balanced result.
FAQs
1. What is a finger wave ponytail hairstyle?
It combines sculpted S-shaped finger waves, usually around the front or sides of the head, with the remaining hair gathered into a ponytail.
2. Can finger waves work with a high ponytail?
Yes. A high ponytail can create a dramatic contrast with smooth finger waves around the hairline and temples, especially when the wave pattern is kept clearly defined.
3. Can the ponytail itself be curly?
Absolutely. Finger waves can be paired with straight lengths, soft waves, curls, or naturally textured ponytails depending on the finish you want.
4. How can I keep finger waves looking defined?
Create the pattern on controlled sections, allow it to set properly, and avoid repeatedly brushing, touching, or repositioning the sculpted ridges afterward.
5. Can I add pearls or crystals to a finger wave ponytail?
Yes. Small, lightweight pearls or crystal pins can work beautifully when placed around the temple or ponytail base without covering the wave pattern.
Save your favorite finger wave ponytail hairstyle ideas, share the looks you love, and explore more polished ponytail inspiration for your next style.