17 Low-Tension Braids for Long Snowy Commutes
Softly secured braids can keep long hair controlled through snowy commutes without relying on painfully tight roots, rigid sections, or overly complicated styling.
Long winter commutes create a difficult balance between containment and comfort. Loose hair can rub against scarves, coats, backpacks, and damp outer layers, yet a tightly pulled braid may become uncomfortable after hours of wear. Low-tension styling aims for enough structure to keep lengths organized while allowing softness around the roots and hairline.
These ideas vary the braid placement, construction, texture, and amount of hair contained. Some sit low at the nape, some fall over one shoulder, and others use small accents while leaving much of the hair relaxed. The most wearable option will depend on your length, density, natural texture, outerwear, and how long you need the style to remain comfortable.
Quick List
- Loose Center Part Twin Braid Hairstyle
- Low Dutch Braid Hairstyle
- Relaxed French Pigtail Braid Hairstyle
- Soft Over The Shoulder Braid Hairstyle
- Low Twin Rope Braid Hairstyle
- Loose Fishtail Braid Hairstyle
- Scarf Wrapped Low Braid Hairstyle
- Soft Crown Accent Braid Hairstyle
- Loose Bubble Braid Hybrid Hairstyle
- Side Part Twin Braid Hairstyle
- Low Four Strand Braid Hairstyle
- Pancaked Three Strand Braid Hairstyle
- Low Braided Ponytail Hairstyle
- Soft Halo Braid Hairstyle
- Mini Front Accent Braid Hairstyle
- Relaxed Side Fishtail Braid Hairstyle
- Tucked Low Twin Braid Hairstyle
1. Loose Center Part Twin Braid Hairstyle
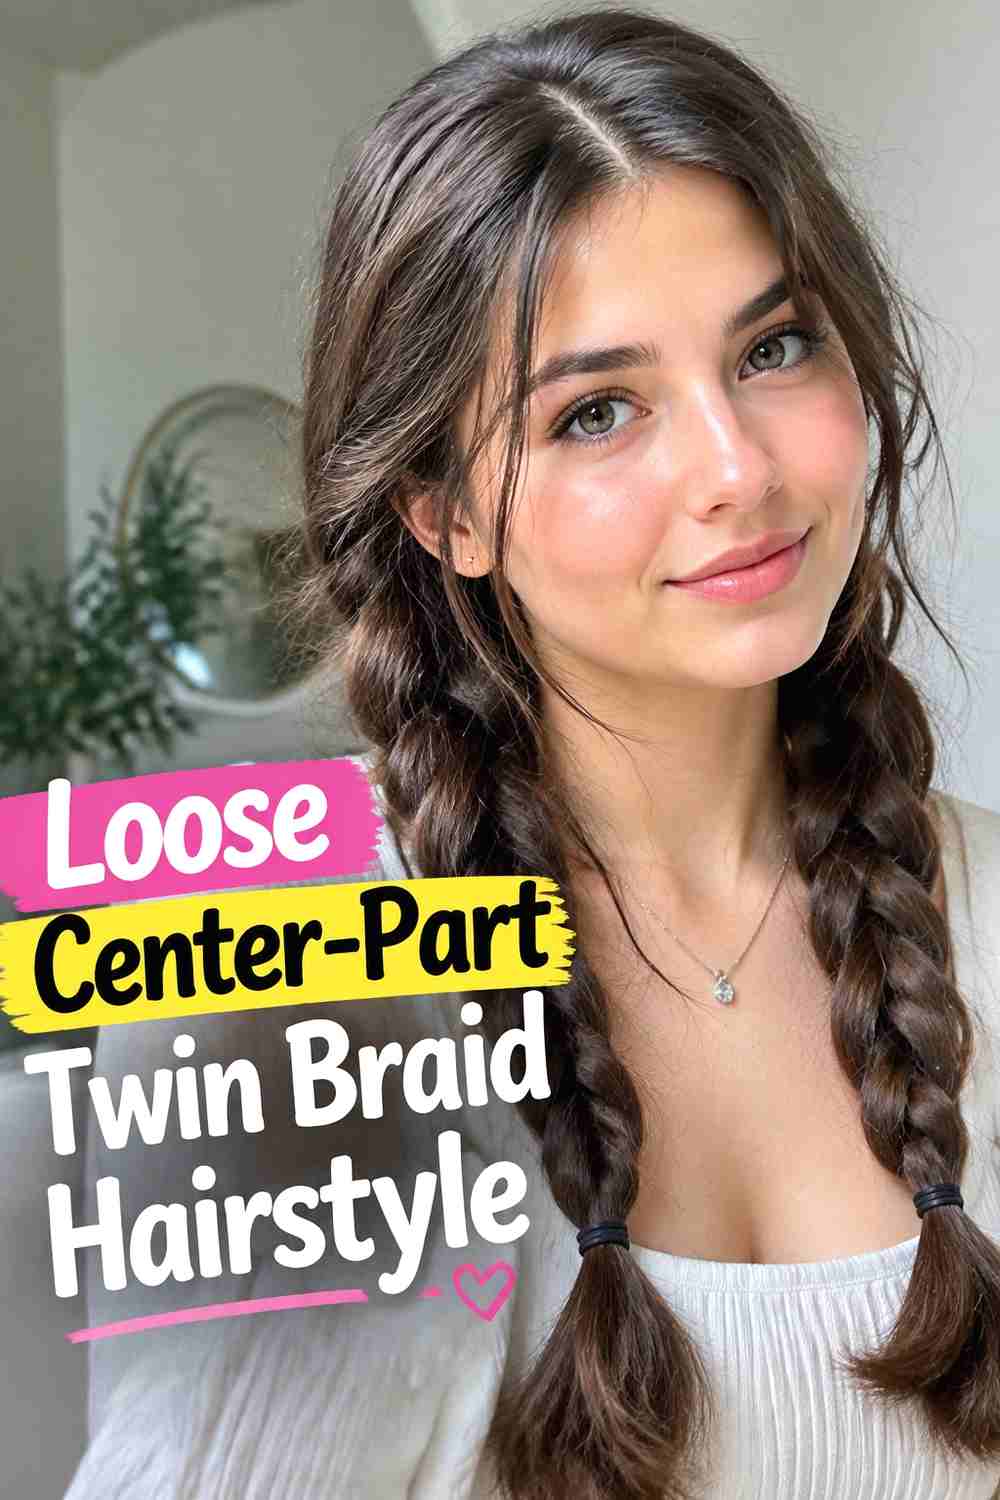
Loose center-part twin braids distribute long hair into two manageable sections without concentrating all the weight at one anchor point. Begin with a clean center part, but keep the roots naturally settled rather than pulling them firmly toward the ears. Each braid can start around jaw or shoulder level, allowing a little softness above the first crossover. This placement works particularly well with scarves because the braids can be brought forward instead of trapped down the back of a coat. For a long commute, secure the ends with small elastics and leave the braid body gently structured rather than tightly compressed. The finished shape should look controlled, symmetrical, and comfortable enough for extended wear.
Styling Notes
Start braiding lower than usual if your scalp feels sensitive. You can always tighten the lower sections slightly without increasing tension at the roots.
Best For
This style suits medium-long to very long hair and commuters who prefer to divide heavy lengths evenly between both shoulders.
2. Low Dutch Braid Hairstyle
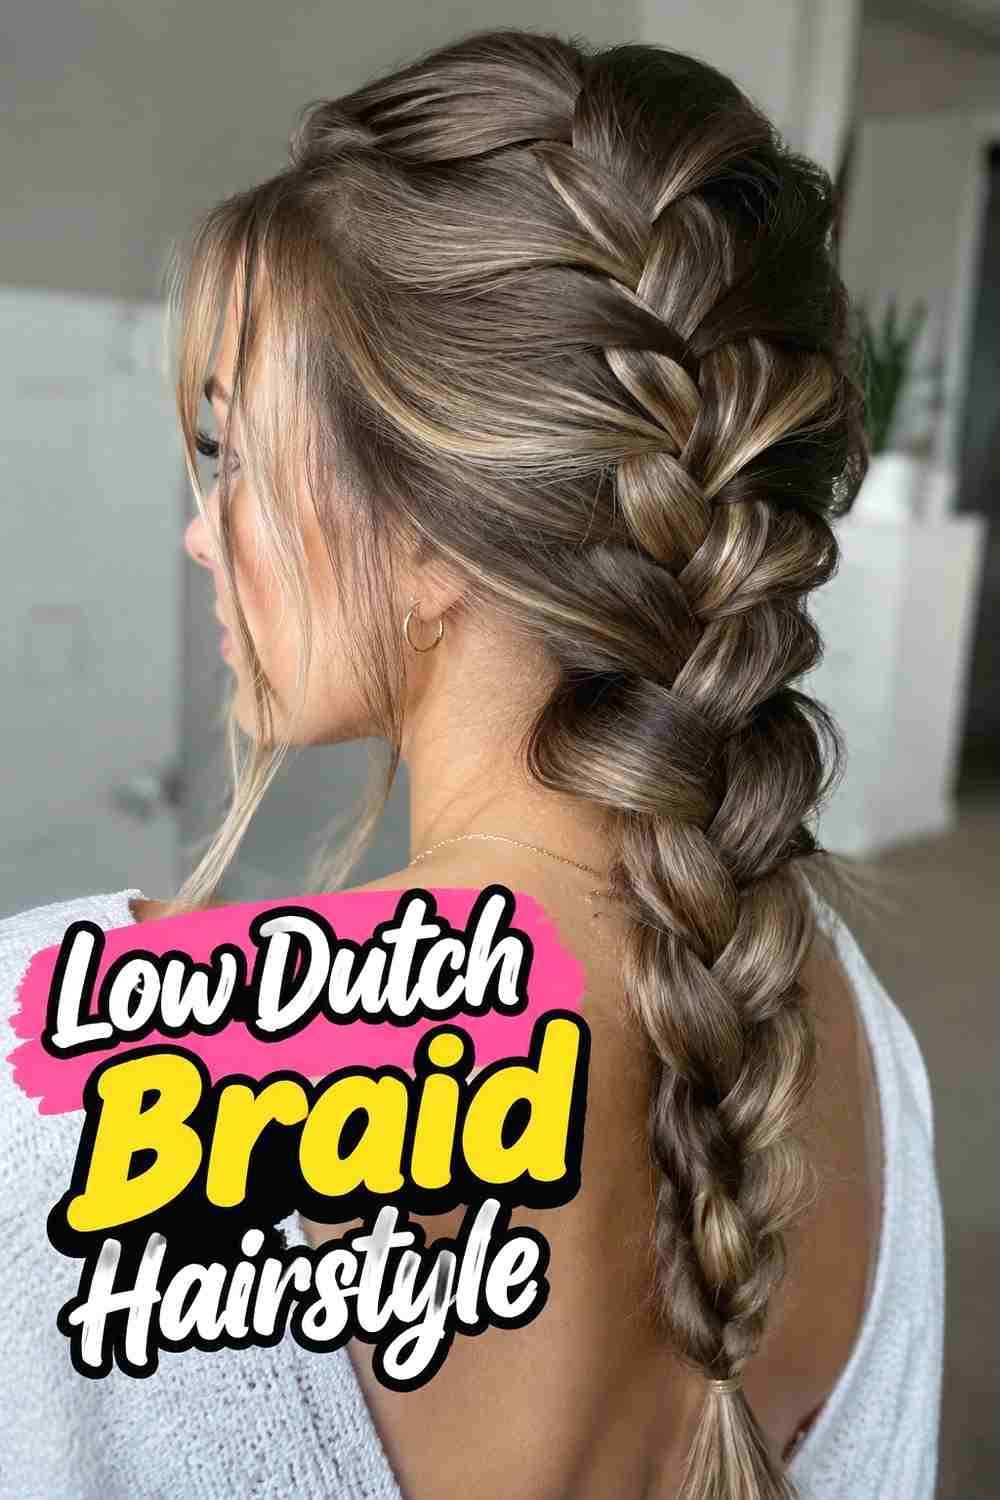
A low Dutch braid creates visible texture without requiring a tightly woven braid directly from the hairline. Instead of beginning at the forehead, gather the hair farther back and introduce the underhand braid around the lower crown or nape. The braid then sits close enough to remain secure but soft enough that the scalp is not pulled continuously during a lengthy train or bus ride. Slightly loosening the outer edges after braiding gives the style a fuller appearance and reduces the impression of rigid tension. This is especially practical when you wear a hat or roomy hood, since the upper head stays relatively smooth. Keep the lower braid compact enough that it does not spread excessively against a coat.
Wear & Maintenance
Check that the braid base is not sitting directly beneath a scarf knot, hood seam, or backpack strap before leaving home.
Pro Tip
Loosen only the visible outer loops rather than tugging at the root sections, which helps preserve hold without increasing scalp strain.
3. Relaxed French Pigtail Braid Hairstyle
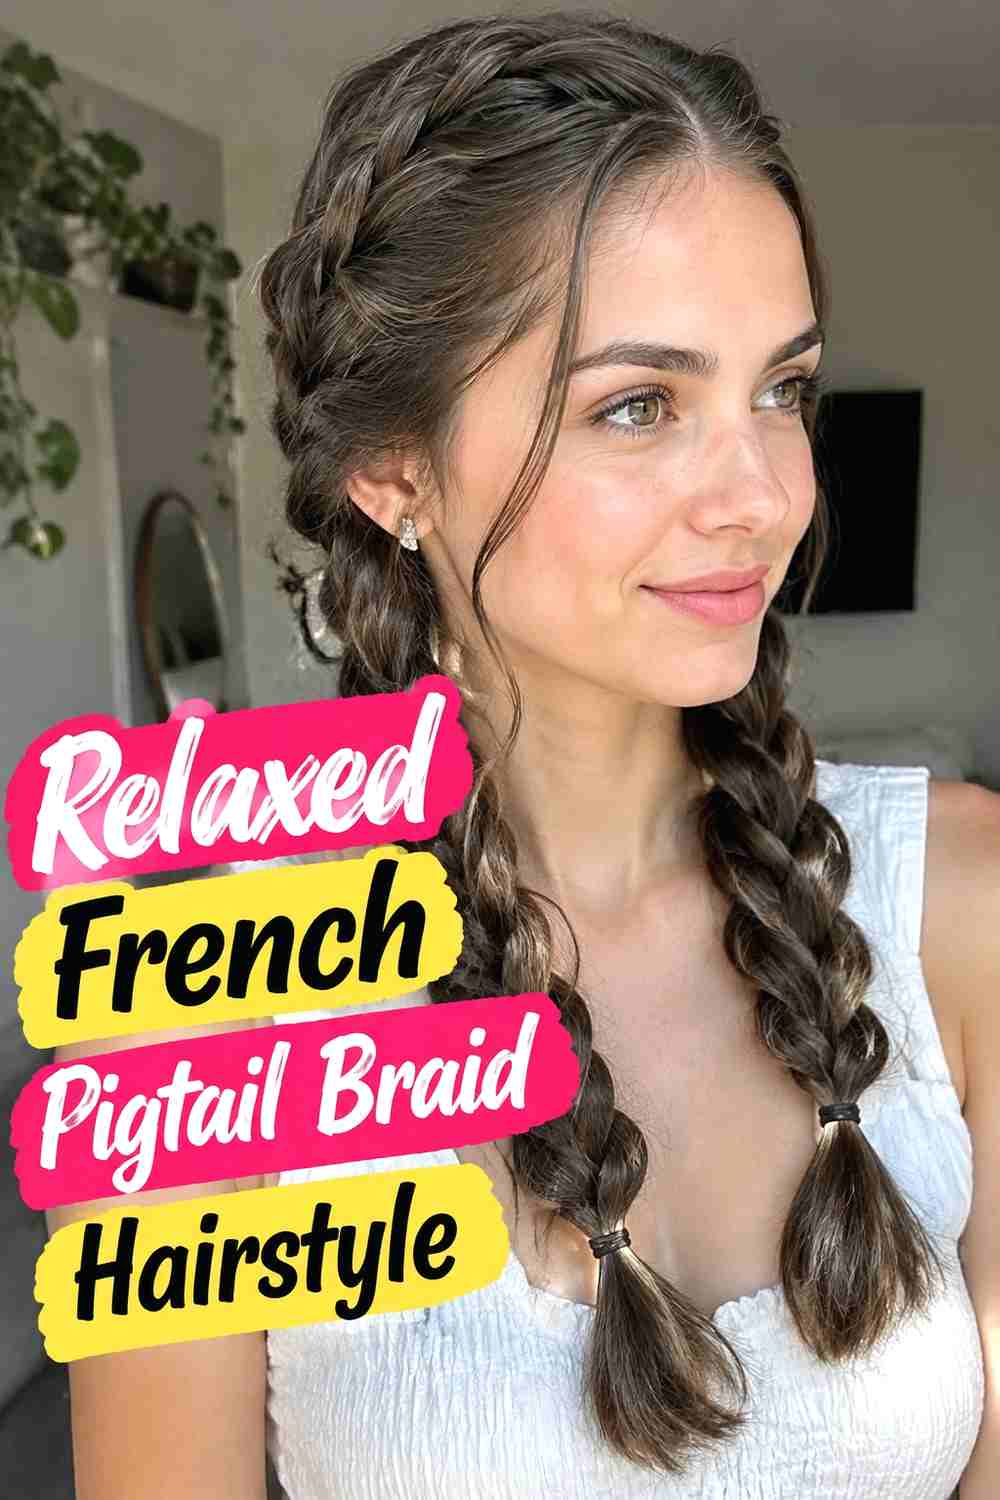
Relaxed French pigtail braids offer more control than loose twin braids while still allowing a softer root area. Divide the hair in two, then begin each French braid with broad sections and moderate tension instead of pulling every addition tightly against the scalp. The result follows the head gently before continuing into two traditional braids below the ears. This can be especially useful on snowy commuting days because fewer short strands are left free around scarves and coat collars. At the same time, the twin structure spreads the hair’s weight between two sides. Keep the braid additions even but not rigid, and allow a little natural movement near the temples for a more comfortable, wearable finish.
Styling Notes
Use larger sections as you French-braid downward. Tiny sections tend to encourage tighter hand tension and take longer to style.
Best For
This option is useful for long layered hair when you want more containment than a low braid without an aggressively tight finish.
4. Soft Over The Shoulder Braid Hairstyle
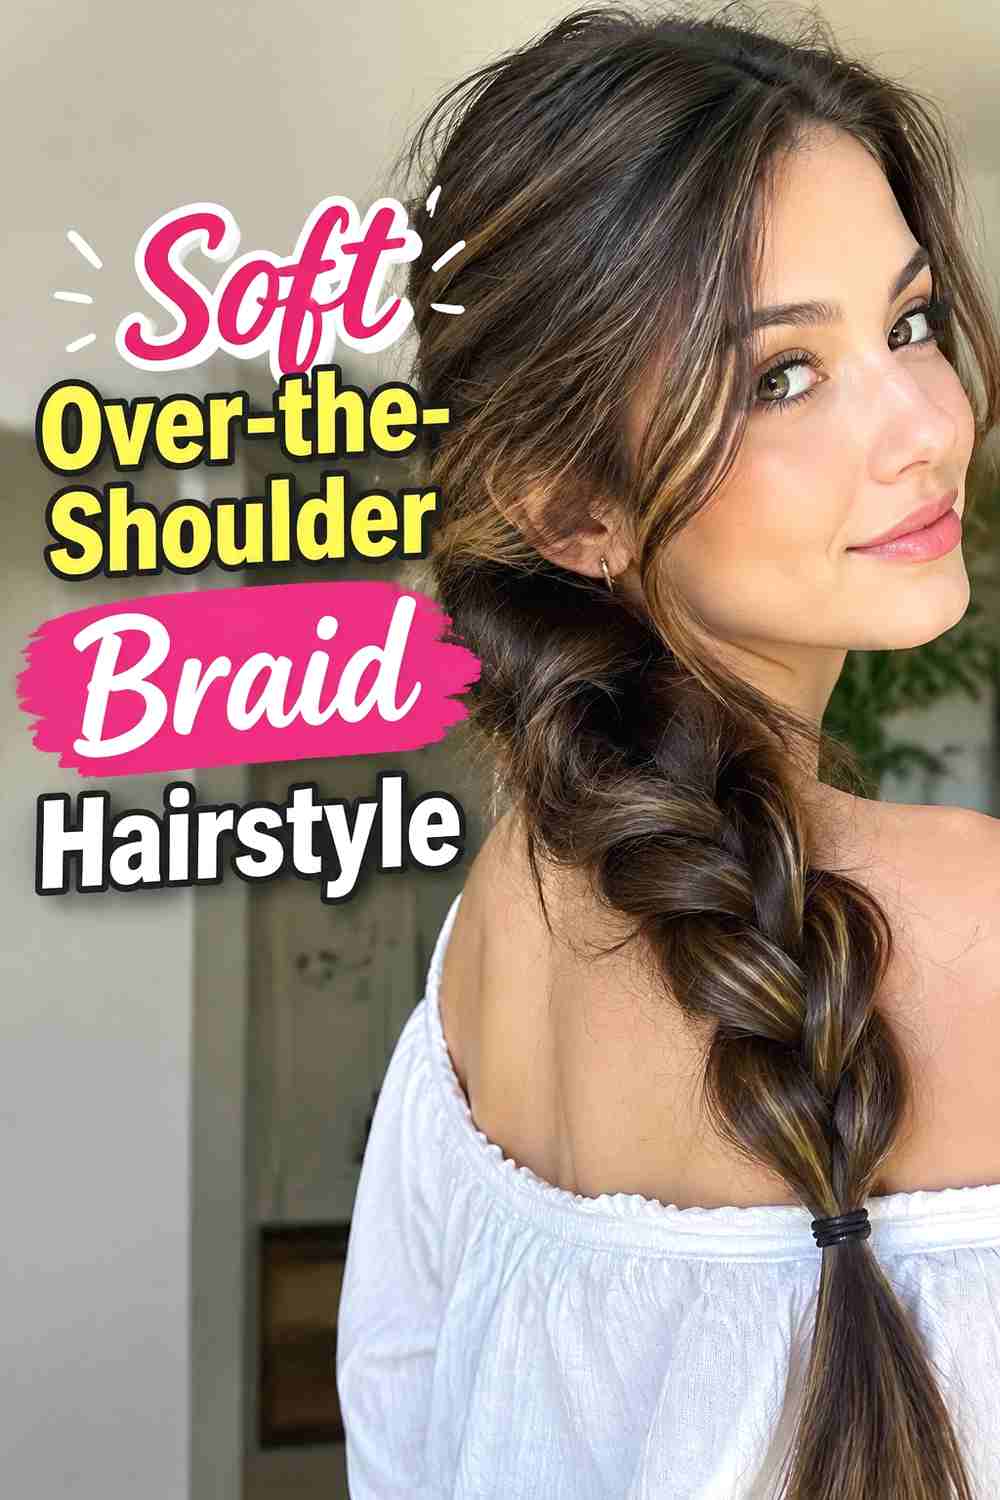
A soft over-the-shoulder braid is one of the simplest ways to keep long hair accessible during a lengthy commute. Gather the hair low and slightly to one side, then create a relaxed three-strand braid beginning around the collarbone. Because the braid starts well away from the scalp, the roots can remain almost completely tension-free. The side placement also lets you move the braid away from a backpack, high coat collar, or wet hood when necessary. Keep the upper lengths smooth enough to avoid tangling but not pulled flat. A few short face-framing pieces can remain loose if they do not become distracting in wind or snow. Secure the end firmly so the braid body can stay soft.
Why It Works
The braid’s main structure begins below the head, so most of the hold is placed on the length rather than concentrated around the scalp.
Wear & Maintenance
Switch the braid gently to the opposite shoulder if a bag strap or coat edge repeatedly rubs against it.
5. Low Twin Rope Braid Hairstyle
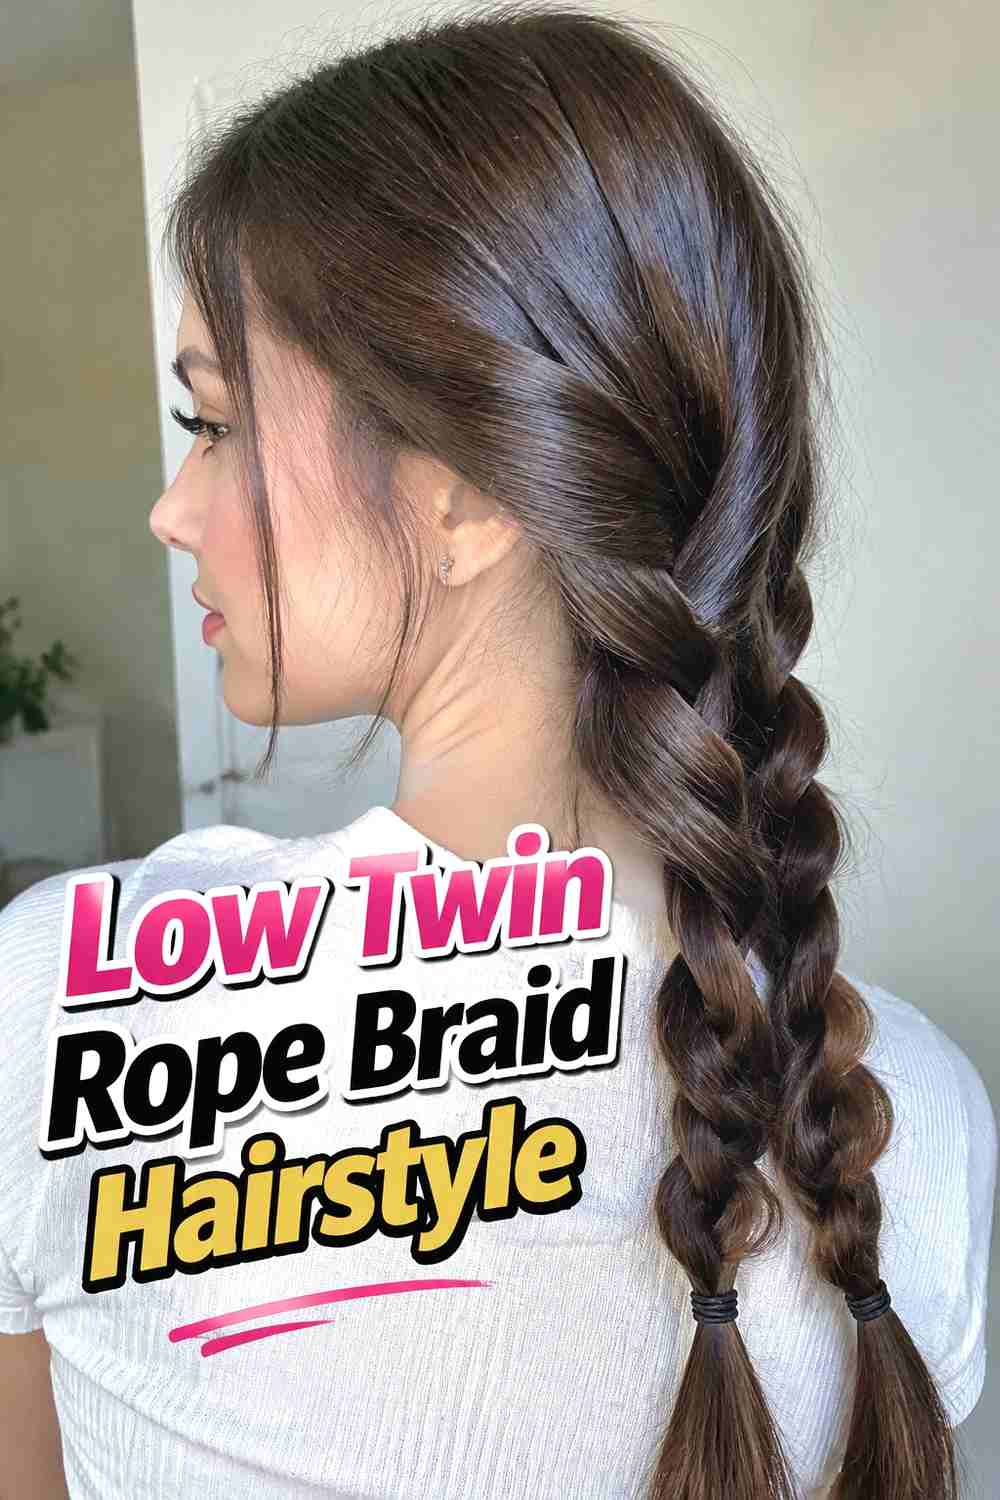
Low twin rope braids create a clean winter silhouette with relatively little manipulation near the scalp. Divide the hair into two sections, bring each one forward, and begin the rope construction below the ears or near the shoulders. Each side is split into two strands, twisted individually, and wrapped around itself in the opposite direction to help the rope hold. Because the starting point stays low, there is no need to pull the roots tightly toward the head. The twisting pattern also keeps long lengths contained without the multiple crossovers of a traditional braid. This option is especially helpful when you want a quick morning style that remains visually polished beneath a hood or alongside a thick winter scarf.
Styling Notes
Keep the twisting pressure consistent through the length, but avoid tightening upward toward the scalp as you work.
Pro Tip
A small elastic at the beginning of each low rope can provide stability if your hair is very smooth or slippery.
6. Loose Fishtail Braid Hairstyle
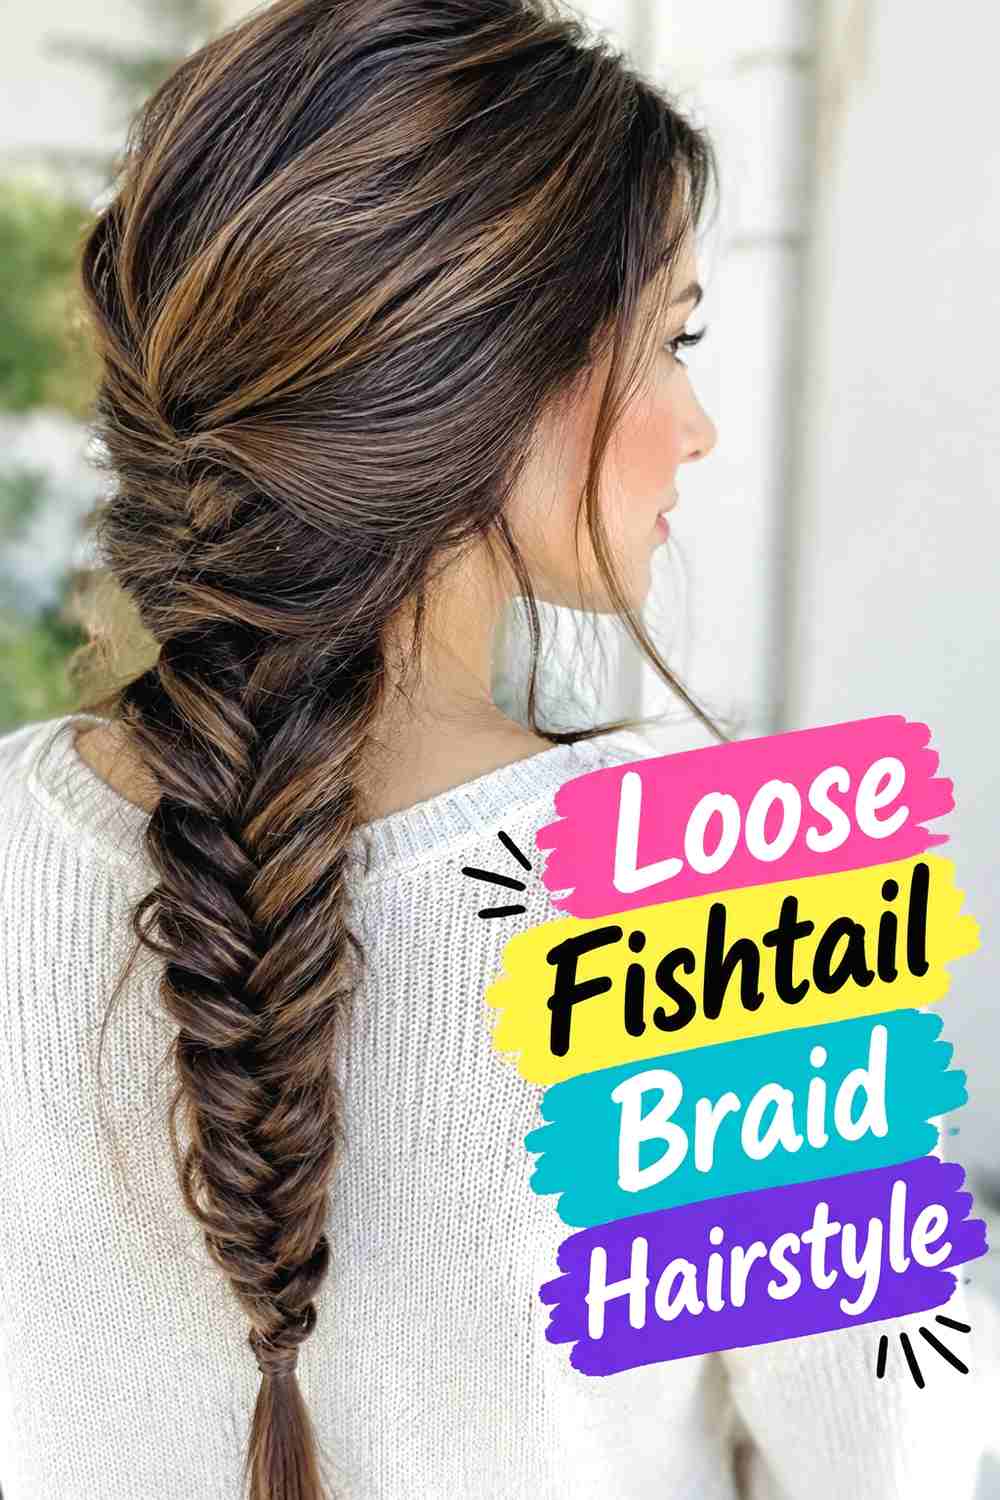
A loose fishtail braid gives long hair intricate-looking texture while allowing the base to remain soft. Gather the lengths low at the nape or over one shoulder, divide them into two sections, and transfer narrow outer pieces from side to side. The braid does not need to begin tightly; a slightly relaxed first few crossovers can make it considerably more comfortable for extended wear. Once finished, gently widen selected sections so the fishtail looks full rather than compressed. This style suits long commutes because the hair remains contained through the lower lengths while the crown stays relatively free of tension. For slippery hair, secure the braid first and then loosen it gradually instead of starting overly loose.
Best For
Long or very long hair gives the fishtail pattern enough length to become visible while still keeping the ends organized.
Wear & Maintenance
Avoid over-pancaking the section closest to your coat collar, where friction can loosen the braid faster.
7. Scarf Wrapped Low Braid Hairstyle
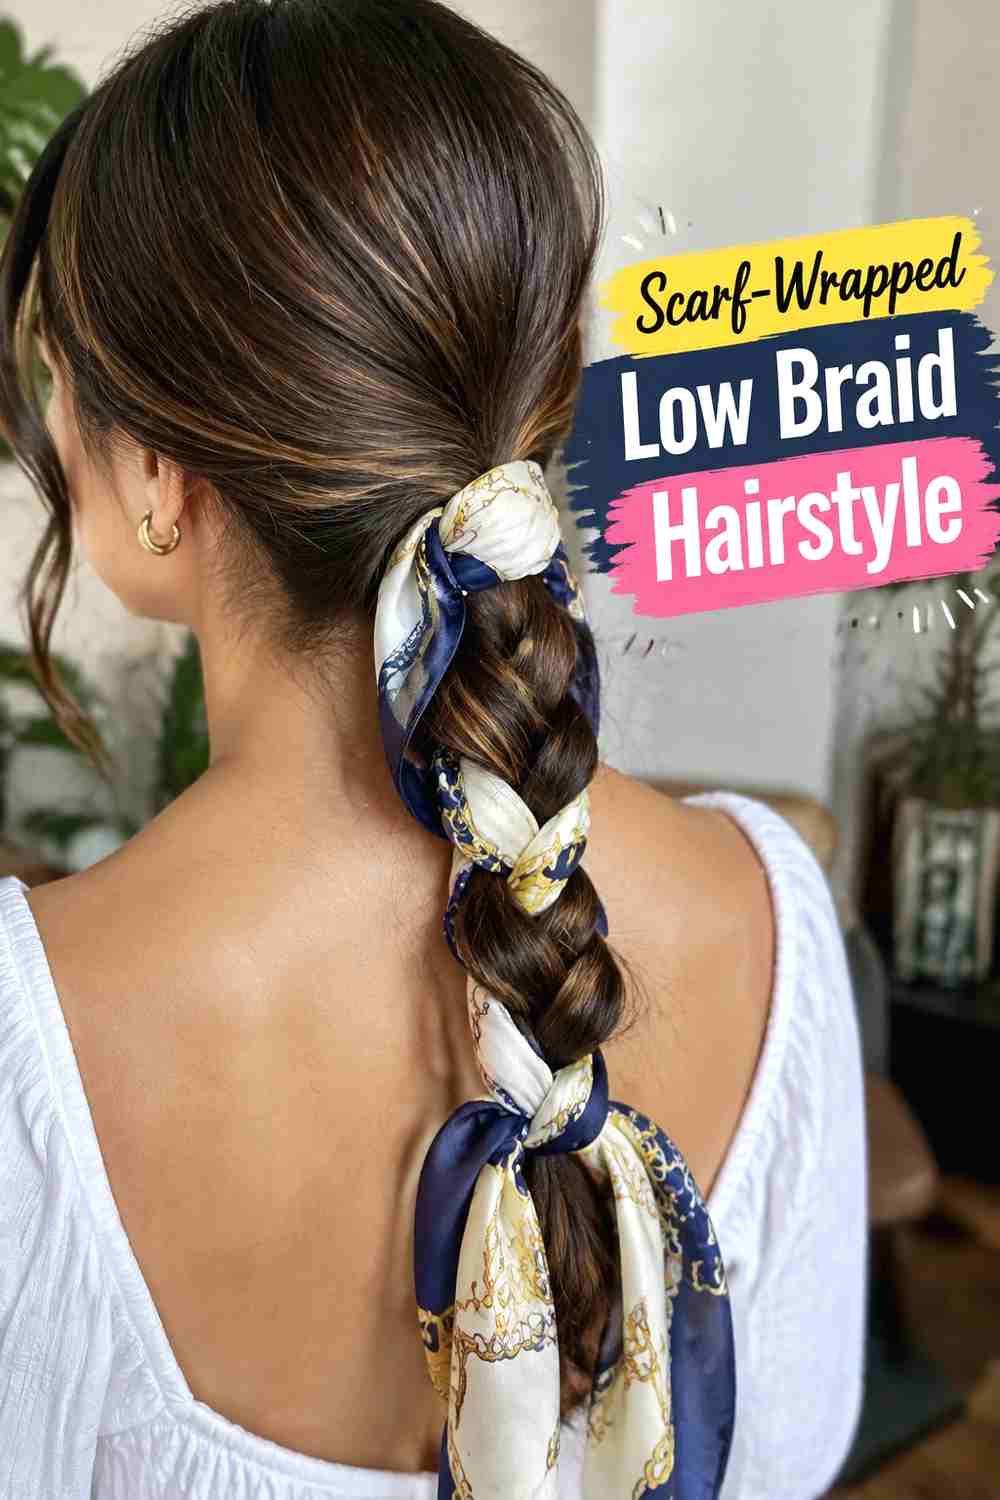
A narrow scarf woven through a low braid can add softness, color, and gentle support without relying on heavy clips or a tightly pulled base. Gather the hair at the nape with comfortable tension, then incorporate a lightweight scarf into a classic three-strand braid. The fabric adds visual thickness and can help the braid feel substantial without requiring the hair itself to be cinched firmly. Choose a scarf that is smooth, light, and short enough that the ends do not trail into a coat zipper or bag strap. This style looks especially natural with simple winter outerwear because the textile detail echoes the season without becoming bulky. Keep the top relaxed and let the decorative interest stay in the lower braid.
Styling Notes
Anchor the scarf gently near the braid base so it stays centered without requiring repeated knots around the hair.
Best For
This option works well when you want a decorative commute hairstyle but prefer to avoid rigid barrettes or heavy braid accessories.
8. Soft Crown Accent Braid Hairstyle
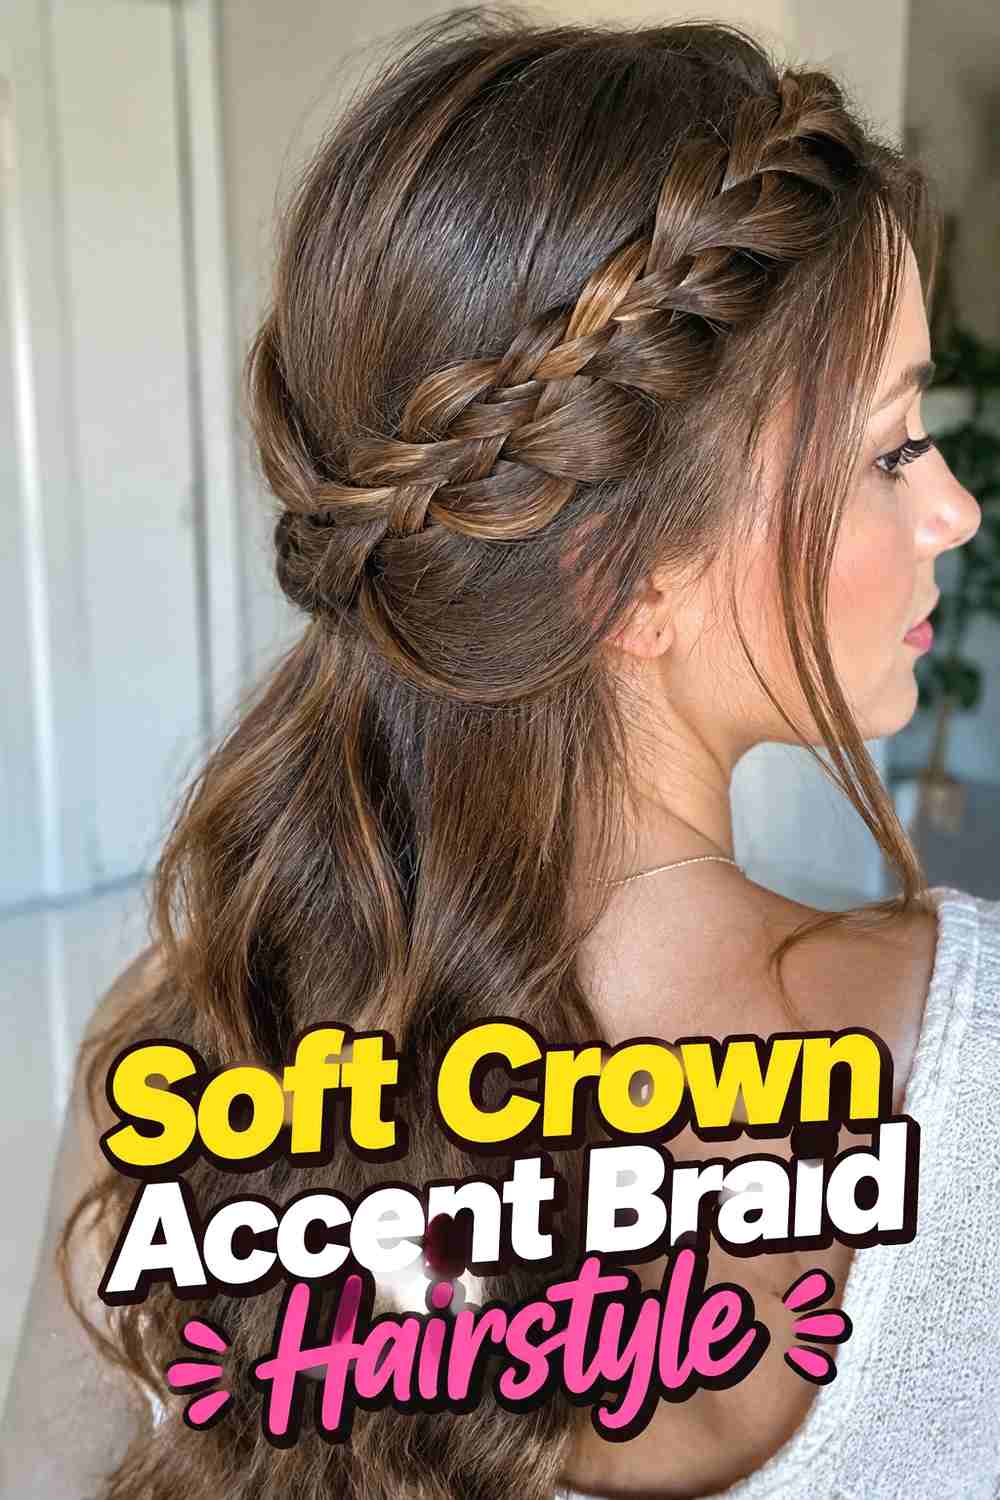
A soft crown accent braid controls only a portion of the hair, leaving the rest loose or lightly gathered. Take a modest section from one side of the front hairline, braid it loosely across or around part of the crown, and secure it discreetly behind the opposite side. Because the braid uses a limited amount of hair, it does not need to support the full weight of long lengths. The remaining hair can stay straight, wavy, or tucked inside a coat depending on conditions. This is a useful choice for commuters who dislike fully braided styles but still want front sections kept away from the face. Keep the braid broad and soft so it sits comfortably under a hood.
Why It Works
Only a small portion of the hair is anchored, reducing the amount of pulling compared with a full crown or scalp braid.
Wear & Maintenance
Use flat pins placed away from pressure points if you expect to wear a fitted hat or hood during the commute.
9. Loose Bubble Braid Hybrid Hairstyle
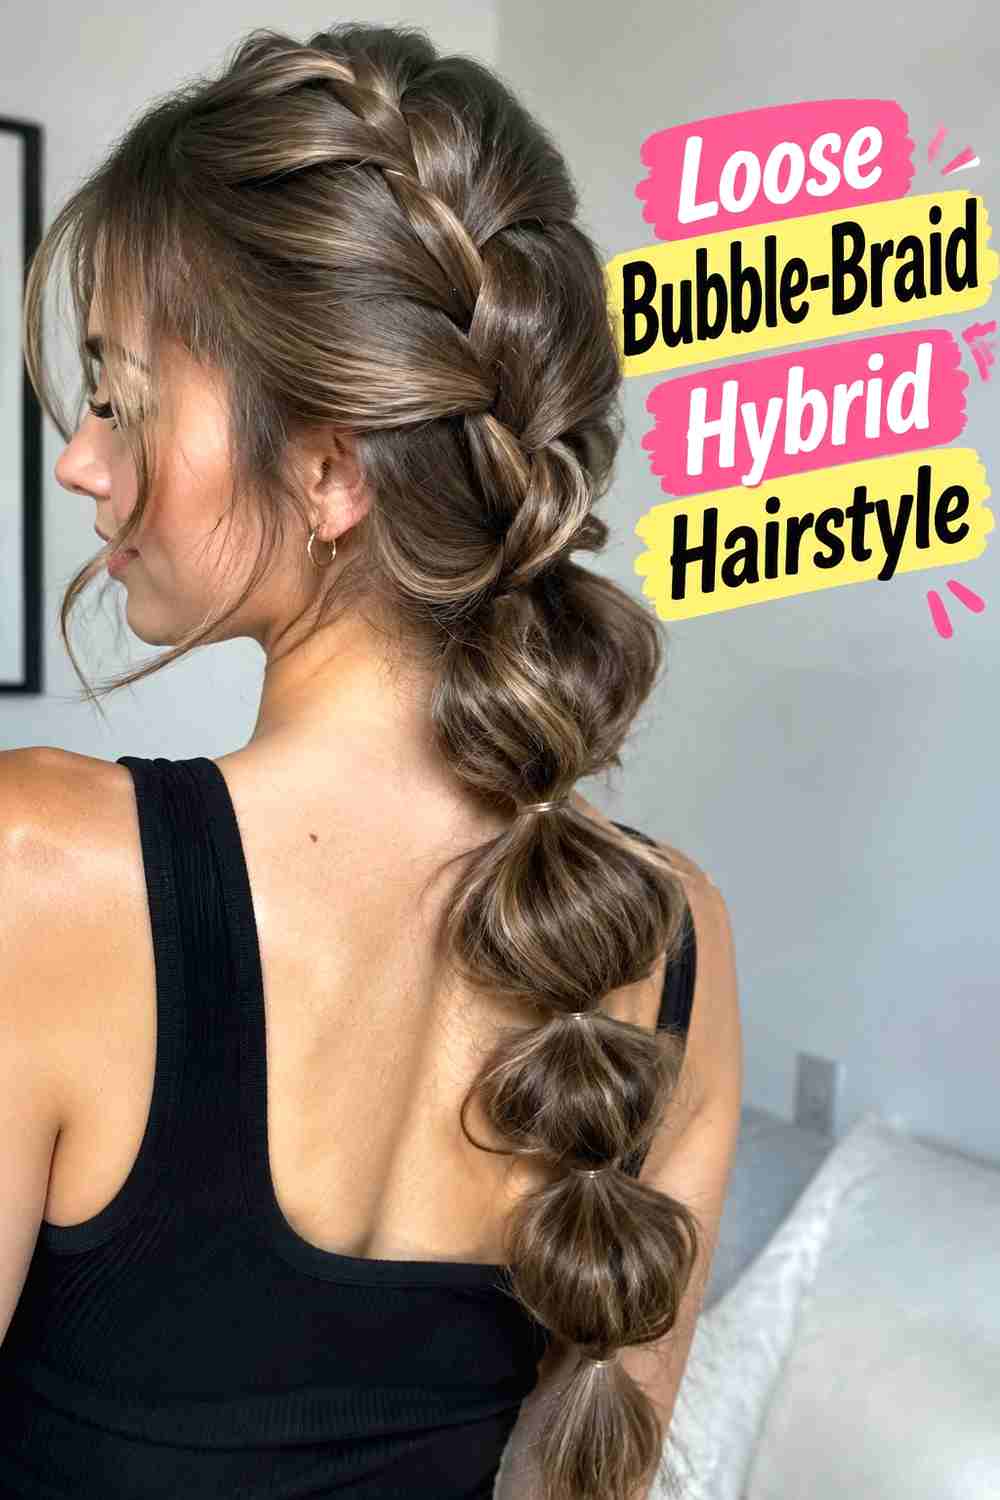
A loose bubble-braid hybrid offers braid-like structure without continuous woven tension from roots to ends. Gather the hair into a low ponytail with a comfortable elastic, then add additional elastics down the length at spaced intervals. Gently expand each section into a rounded bubble and add one or two simple braided sections between them for texture. The result keeps long hair segmented and controlled while avoiding the need for a tightly anchored scalp braid. It can be especially convenient on long snowy commutes because the separated sections are less likely to spread across a coat or tangle beneath a scarf. Keep each elastic secure but avoid cinching so tightly that individual sections feel rigid.
Best For
Very long hair benefits most because the repeated sections keep a large amount of length organized without complex braiding.
Pro Tip
Use smooth, snag-resistant elastics and keep the first section loose enough that the base does not pull at the nape.
10. Side Part Twin Braid Hairstyle
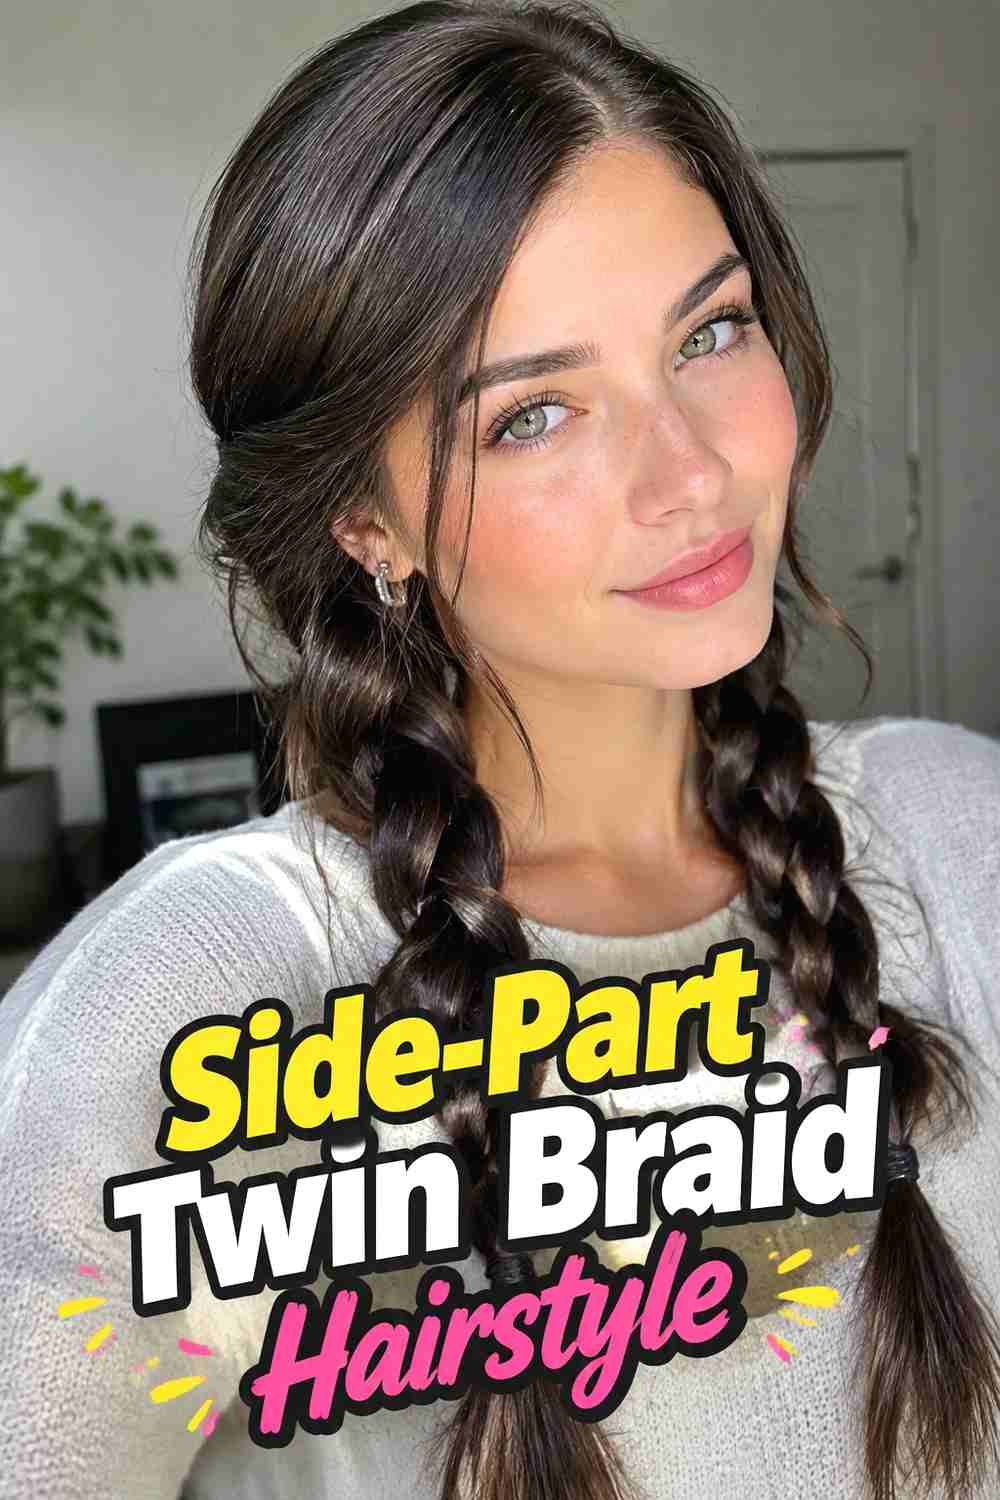
A side-part twin braid style adds asymmetry while preserving the comfort benefits of splitting long hair into two sections. Create a deep or moderate side part, then divide the lengths so one braid carries slightly more hair than the other. Begin the braids around ear or jaw level rather than tightly at the scalp. This produces a soft crown with two secure lengths that can be worn forward over a winter coat. The larger braid creates a fuller visual line on one side, while the smaller braid keeps the silhouette balanced without looking overly matched. This is useful when a strict center part feels uncomfortable or when your natural growth pattern already favors one direction.
Styling Notes
Let the side part follow your natural hair direction instead of forcing it sharply against the way the roots want to sit.
Wear & Maintenance
If one braid becomes heavier, rest it forward over the shoulder rather than allowing it to pull backward against a scarf.
11. Low Four Strand Braid Hairstyle
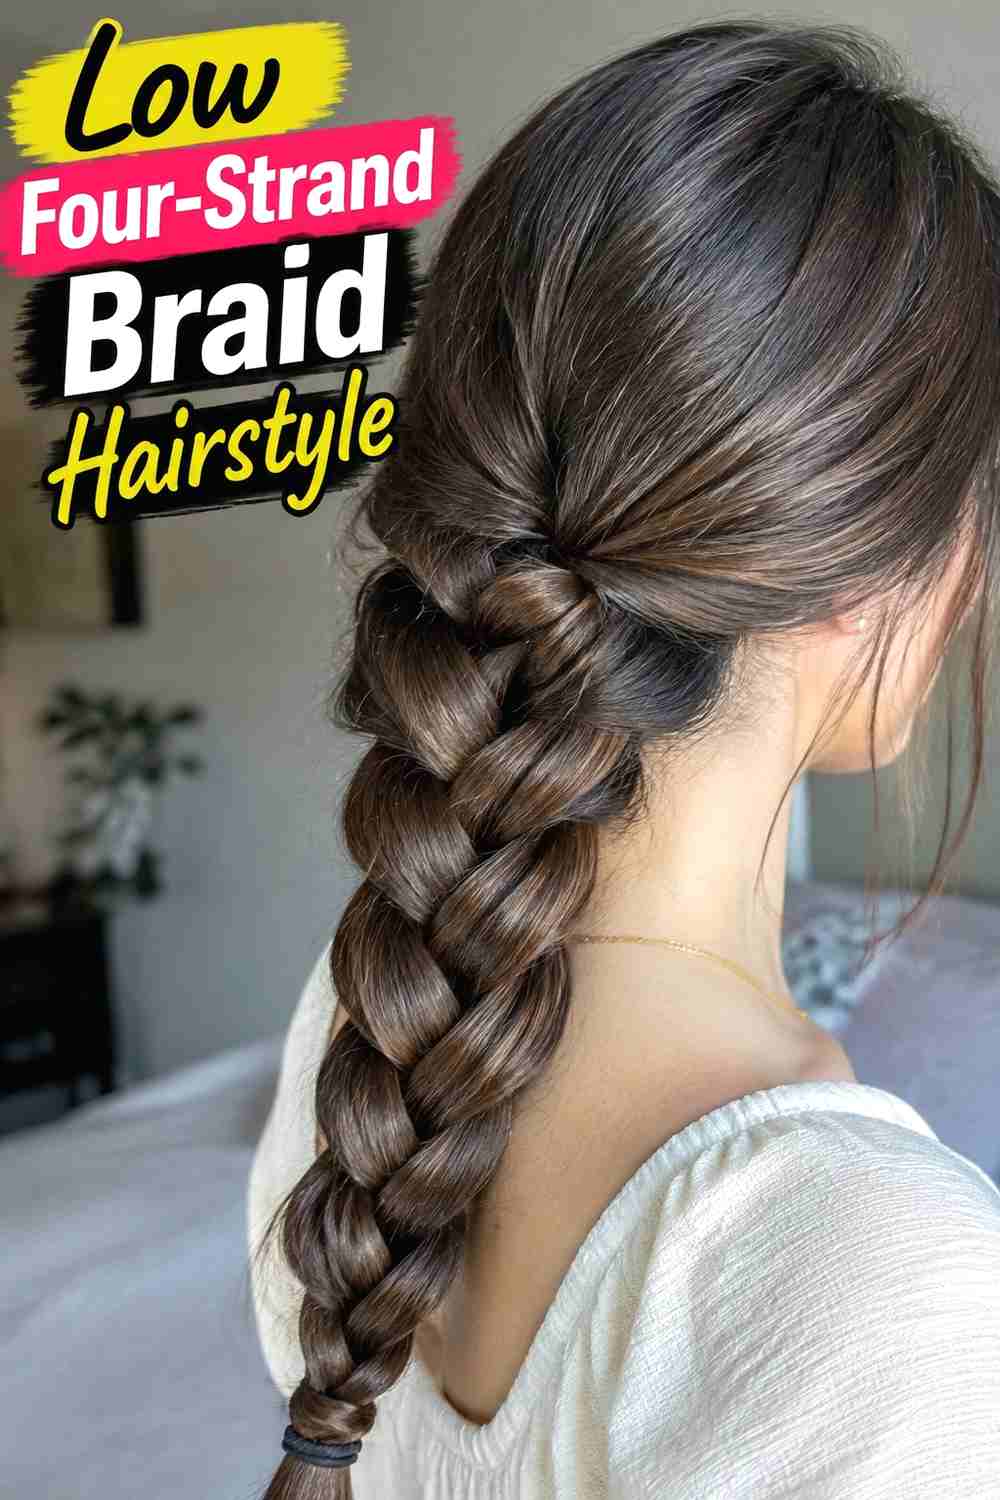
A low four-strand braid creates a wider, woven appearance while keeping the base comfortably away from the hairline. Gather the hair at the nape and divide it into four substantial sections, then weave them in a consistent pattern down the length. Because the style’s visual complexity comes from the lower braid rather than scalp-tight construction, the crown can remain smooth and relaxed. The finished braid tends to look broader than a standard three-strand version, which makes it especially attractive on long hair without requiring excessive pancaking. For commuting, keep the structure relatively compact near the coat collar and allow more width farther down. A firm end elastic is usually enough to hold the pattern securely.
Hair Type & Length
Medium-long to very long hair is easiest to work with because the four-section pattern needs enough length to become clearly visible.
Pro Tip
Practice the weaving pattern with relaxed hands; squeezing the sections unnecessarily tightly can make a low-tension style feel much firmer than intended.
12. Pancaked Three Strand Braid Hairstyle
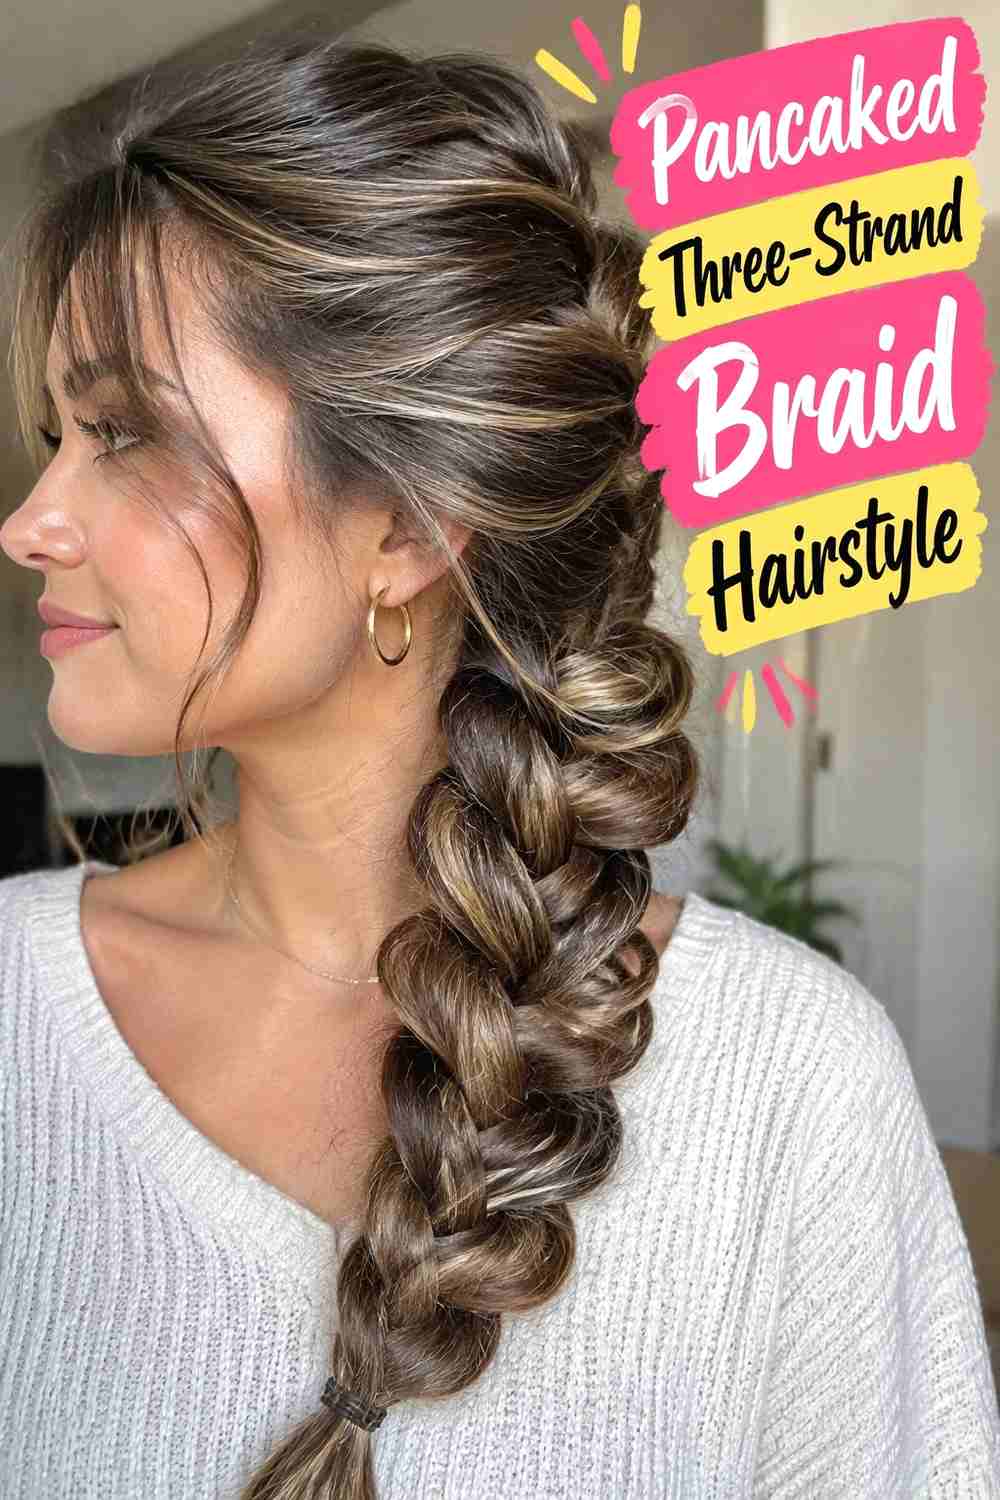
A pancaked three-strand braid uses a familiar braid structure but softens its appearance by widening the outer loops after the braid is complete. Begin low at the nape or over one shoulder so the roots remain relaxed. Braid the length securely without pulling upward, secure the end, and then gently tug the edges of selected sections outward. This creates a fuller shape without needing a tightly constructed scalp braid. The technique is especially useful for fine or medium-density long hair because it adds visual width while keeping styling relatively simple. For a snowy commute, leave the section closest to your coat more compact and create most of the softness farther down, where friction is less likely to disturb it.
Styling Notes
Secure the braid before pancaking so you can widen the loops gradually without losing the overall structure.
Why It Works
The fullness comes from loosening the braid body, not from pulling the roots tighter or adding extra weight at the scalp.
13. Low Braided Ponytail Hairstyle
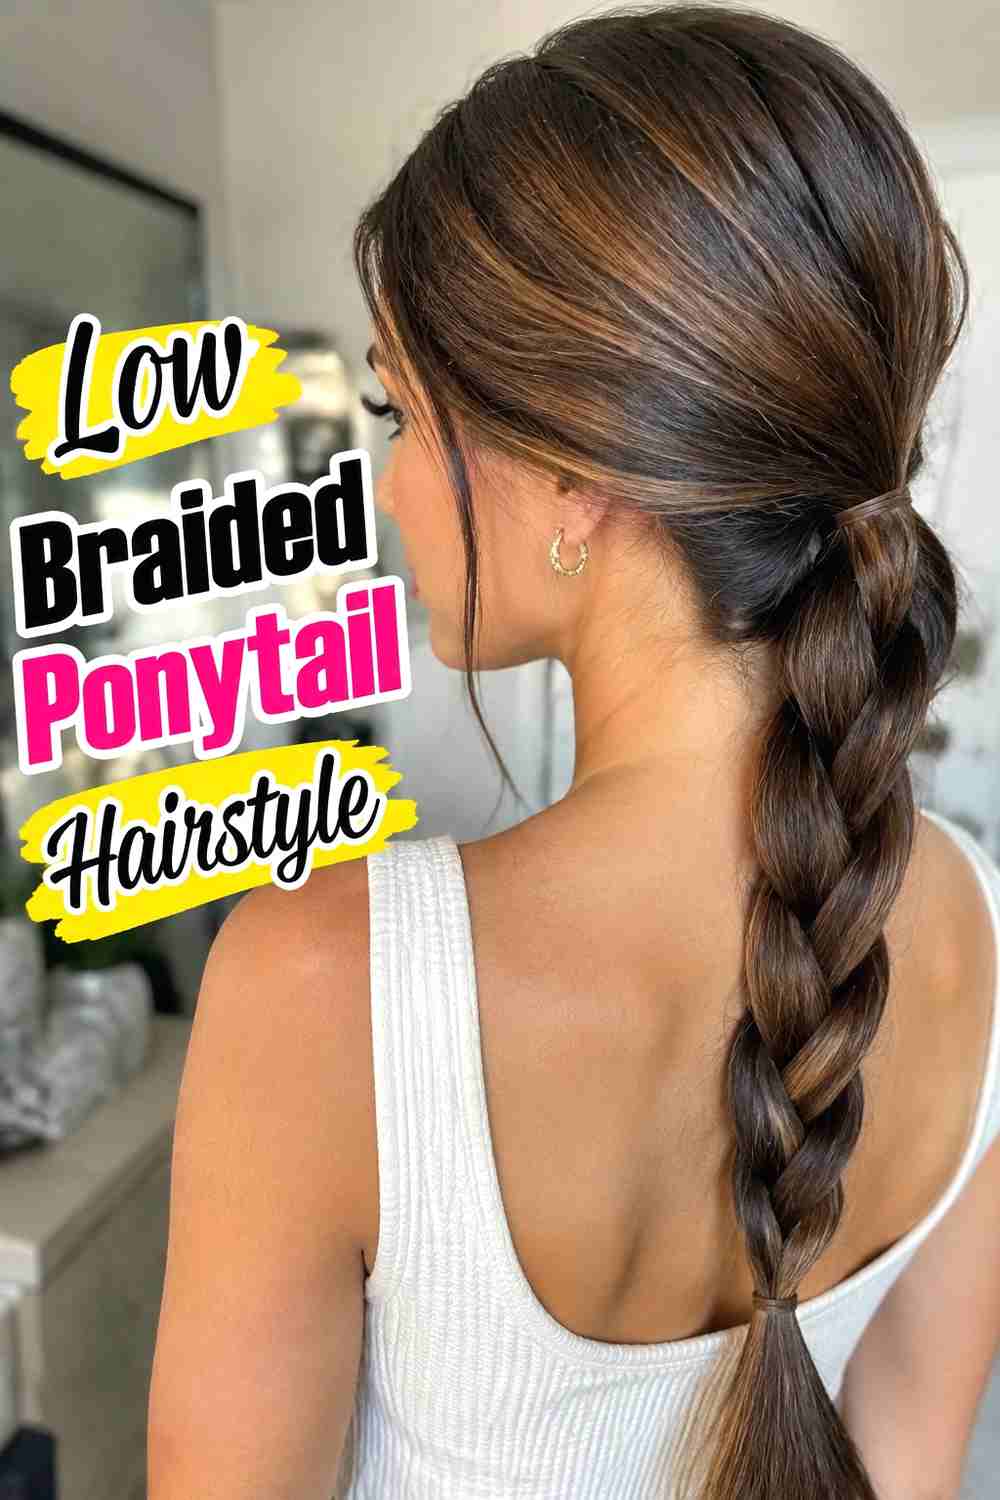
A low braided ponytail separates scalp hold from braid tension. First gather the hair into a low ponytail using a comfortable elastic, leaving a little softness at the crown. Then braid only the ponytail length into a three-strand, rope, or simple fishtail pattern. Because the braid begins below the anchor, you can control the lower hair securely without repeatedly tightening the roots. This makes the style convenient for commuters who want a defined braid but prefer a predictable, adjustable base. Position the elastic slightly above the coat collar so it is not pushed upward throughout the journey. The braid can stay down the back or be moved over one shoulder when sitting against a high seat.
Best For
This approach is helpful for dense or very long hair because the separate base gives you more control over how much tension reaches the scalp.
Wear & Maintenance
If the elastic starts feeling uncomfortable during the commute, loosen the base slightly without needing to undo the entire braid.
14. Soft Halo Braid Hairstyle
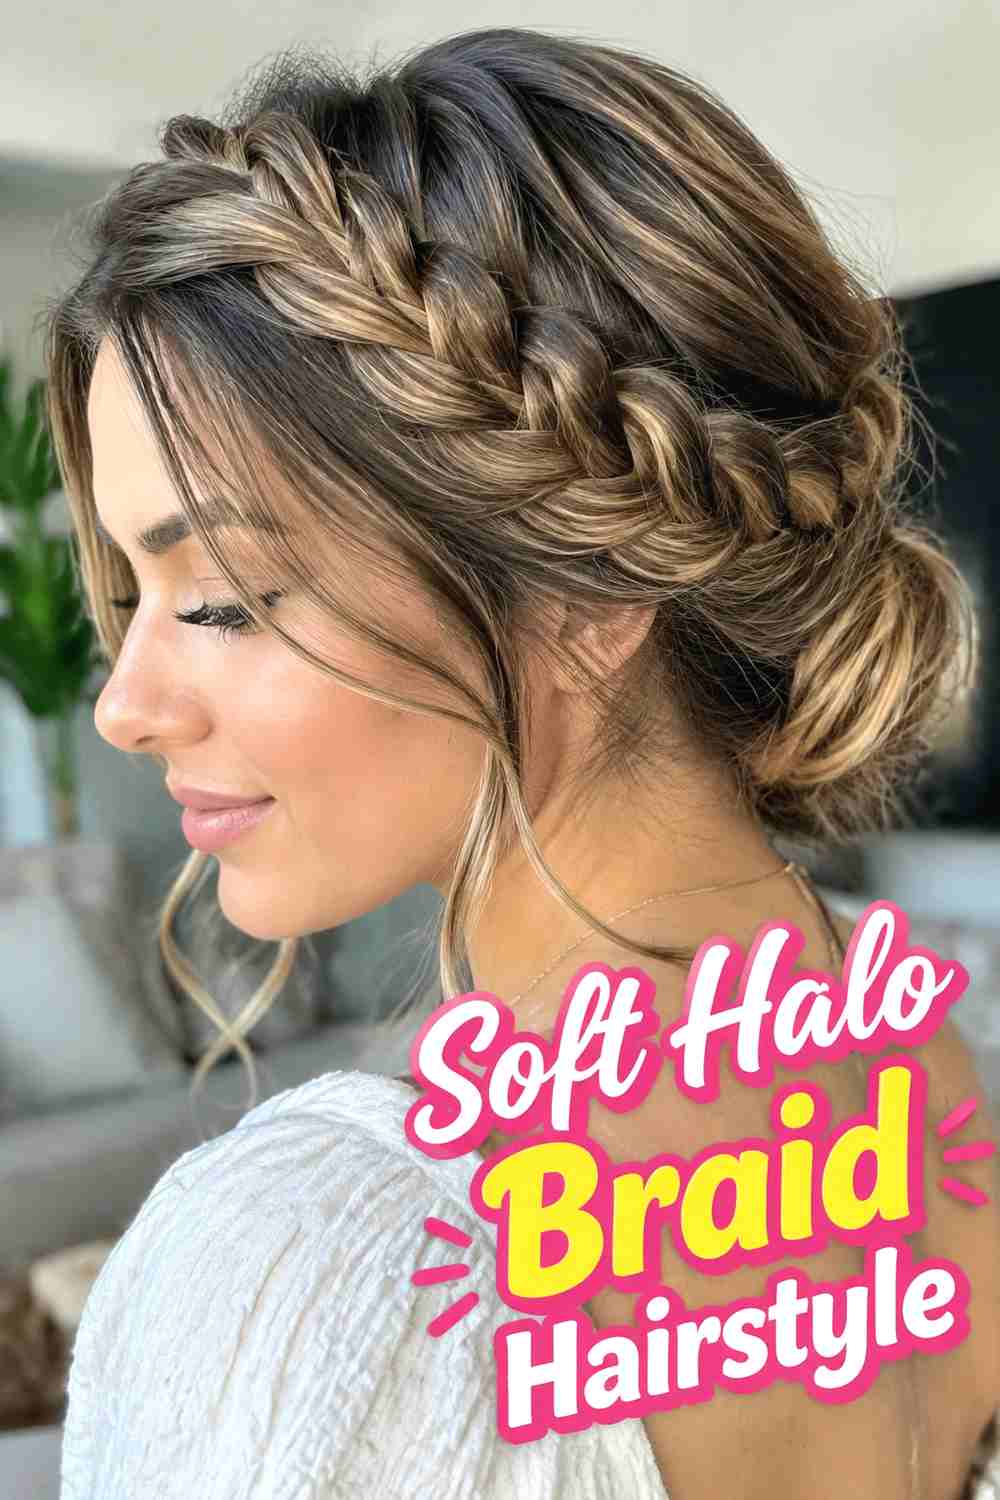
A soft halo braid can keep long hair fully contained while still avoiding an excessively tight finish. The braid wraps around the head in a broad, relaxed path, with the sections kept slightly loose rather than pulled firmly against the scalp. This makes it suitable for a long commute when you want the lengths off your shoulders and away from coat zippers. The finished halo should feel secure but not immovable; a few natural wisps around the hairline can soften the shape. Because the braid sits higher than a low winter style, test it with your usual hood or hat before leaving. Roomy headwear works best, especially if you want to preserve the braid’s width without compression.
Styling Notes
Use discreet pins to support the braid rather than relying on extra-tight weaving to keep the entire halo in place.
Best For
This option is useful when you want all long lengths lifted away from scarves, backpack straps, and damp coat collars.
15. Mini Front Accent Braid Hairstyle
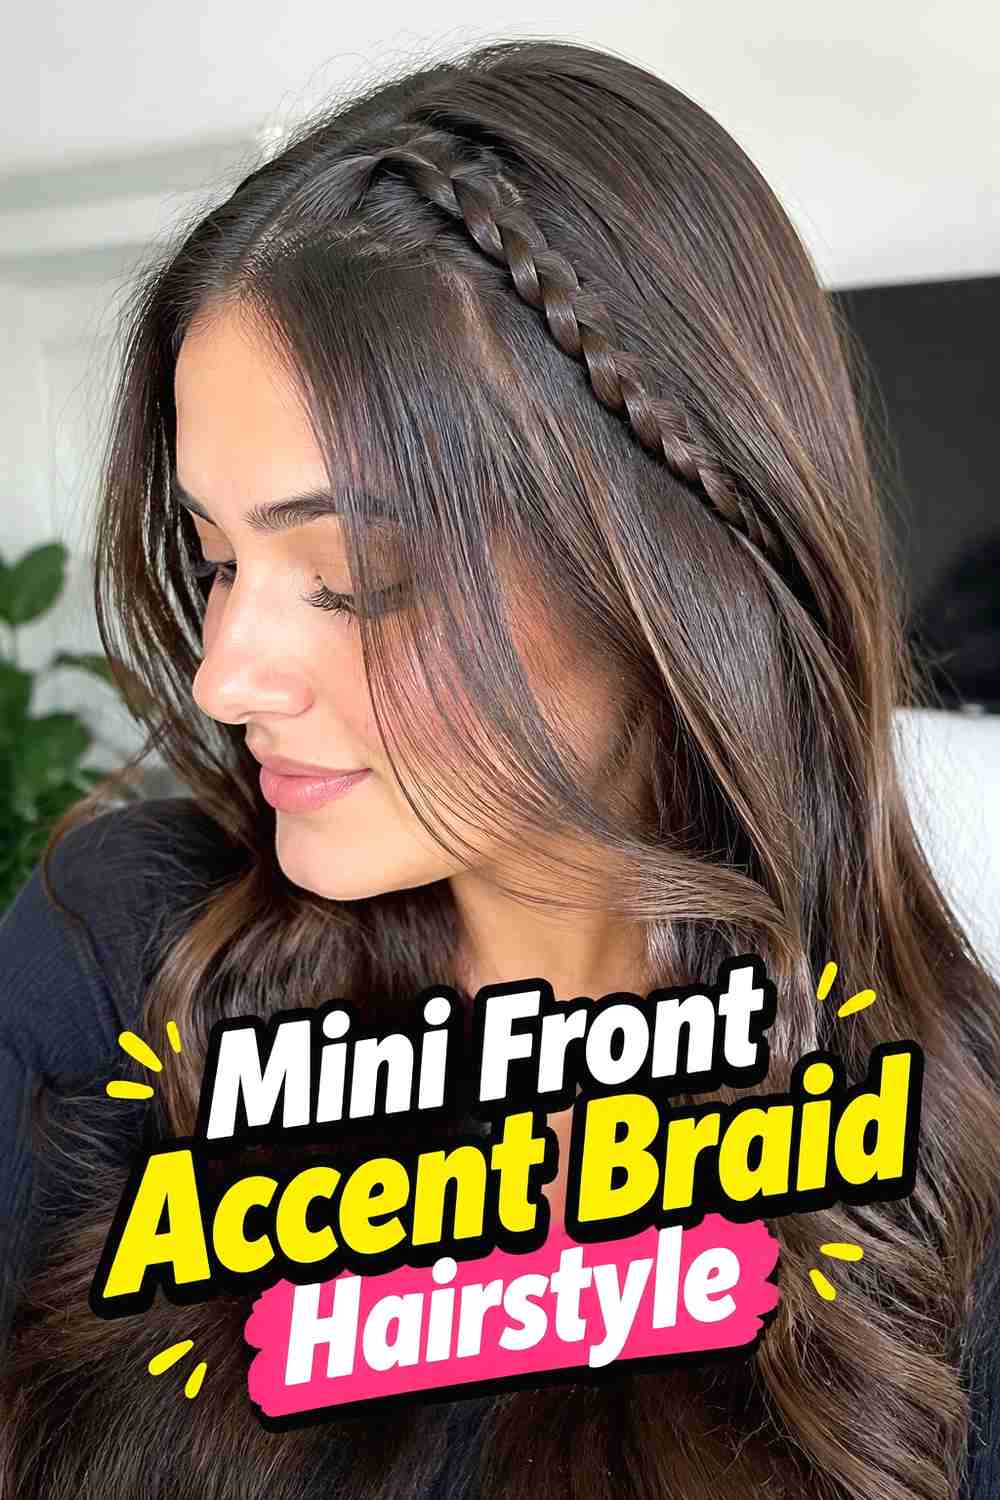
Mini front accent braids keep face-framing strands controlled while leaving the majority of long hair free or loosely gathered. Create one slim braid on each side of the part, beginning near the temple rather than pulling tightly from the center hairline. The small braids can end near the ears or disappear into the longer hair. This is a low-commitment option for commuters who prefer wearing their hair mostly loose but do not want short front sections blowing into their eyes in snowy weather. Because very little hair is involved, the braids should feel light and flexible. If conditions become windier, the remaining length can quickly be tucked into a scarf or gathered into a low ponytail.
Why It Works
The style controls the most mobile front pieces without placing the entire head of hair under braid tension.
Pro Tip
Keep the first crossover slightly away from the root so the accent braid follows the hair naturally instead of tugging at the temple.
16. Relaxed Side Fishtail Braid Hairstyle
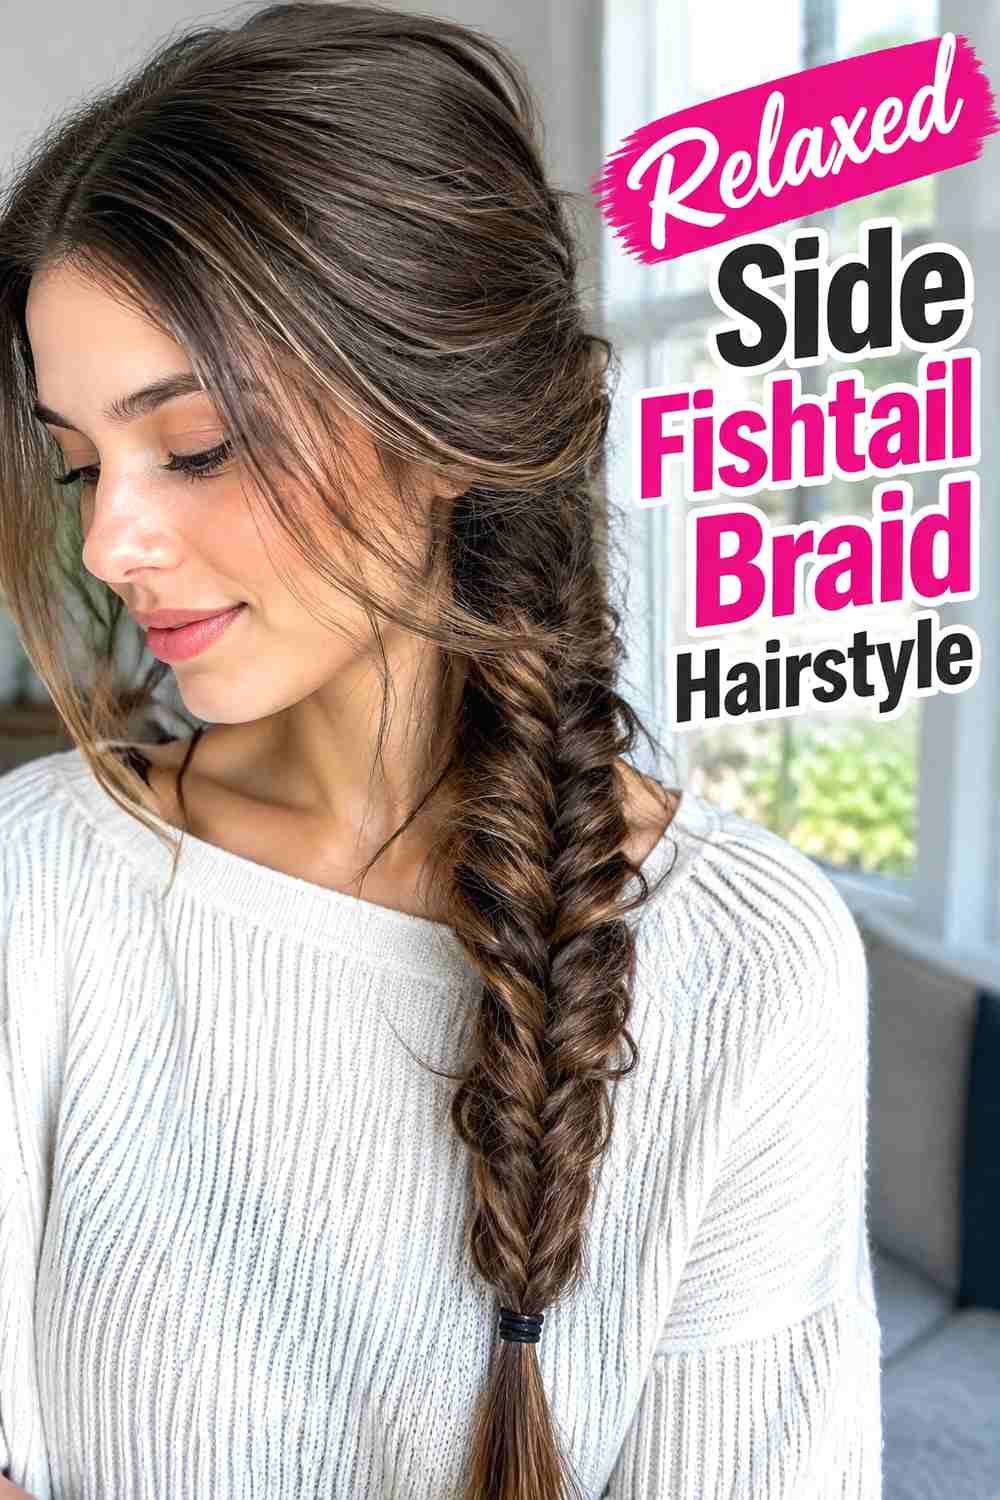
A relaxed side fishtail braid combines decorative texture with an easy, low-tension placement. Sweep all the hair gently over one shoulder without tightening the opposite side of the scalp, then begin the fishtail near the collarbone. Small sections are crossed from each outer edge toward the center, but the braid can remain moderately loose throughout. Once secured, widen a few segments for a softer finish. The side position keeps the braid visible and makes it simple to move away from a backpack or seat back during a long commute. It is particularly practical for very long hair because the woven lower section reduces tangling while the roots stay almost untouched.
Wear & Maintenance
Keep the braid completely outside your coat before closing the zipper so no loose edge becomes trapped in winter layers.
Best For
This style is especially comfortable for commuters who dislike nape elastics or any braid construction that begins close to the scalp.
17. Tucked Low Twin Braid Hairstyle

Tucked low twin braids are designed for long hair that needs maximum containment around heavy winter outerwear. Create two relaxed braids beginning below the ears, then bring them forward or tuck the lower lengths carefully inside a roomy coat opening after the jacket is fully arranged. The braids themselves should remain loose at the roots and secure through the lengths. Tucking can reduce movement in wind and keep the ends from rubbing against wet outer layers, but the braids should never be crushed into a tight collar. This works best with spacious coats and scarves that leave room for the braid shape. Once indoors, release the braids so they are not held against the neck unnecessarily.
Wear & Maintenance
Untuck the braids before removing your coat or backpack to reduce the chance of the ends catching on zippers, straps, or seams.
Pro Tip
Keep the braid bases outside the collar line and tuck only the lower lengths, preserving comfort around the neck and scalp.
How to Choose the Right Look
Start with where you usually feel tension. If tightness near the temples bothers you, choose braids that begin below the ears or shoulders, such as the Soft Over-the-Shoulder, Low Twin Rope, or Relaxed Side Fishtail Hairstyle. If the weight of very long hair feels tiring when concentrated in one braid, twin styles can divide that weight more evenly.
Your commute setup matters too. Backpack straps favor braids worn forward, while high scarves and coat collars work better with braid bases positioned above or below their edges rather than directly underneath them. If you use a hood or winter hat, flatter crown styles such as low Dutch, low ponytail braids, and twin braids are usually easier to accommodate than a halo.
Finally, compare styling time and maintenance. Three-strand and rope braids are fast, while fishtail and four-strand versions require more attention. Whatever you choose, comfortable roots, smooth elastics, secure ends, and enough flexibility to move naturally usually make the style more wearable over a long snowy commute.
Final Thoughts
A winter commute does not require a braid to be tightly pulled to stay useful. Low placement, broad sections, soft roots, secure ends, and thoughtful positioning around outerwear can keep long hair organized without making the style feel unnecessarily rigid. Choose the braid that works with your length, texture, coat, and commute time, then adjust the tension until it feels comfortable for extended wear.
FAQs
1. What makes a braid low-tension?
A low-tension braid avoids excessive pulling at the roots and hairline. It usually uses softer anchoring, broader sections, and a braid body that is secure without being aggressively tightened.
2. Which braid is easiest for a long commute?
A low three-strand braid, twin braid, or braided ponytail is usually easy to create and adjust during the day while keeping long lengths controlled.
3. Can I wear a low-tension braid under a winter hat?
Yes. Styles with smooth crowns and low braid starting points are generally easier to accommodate under hats because there is less braid bulk on top of the head.
4. How do I keep a loose braid from falling apart?
Secure the end firmly and keep the braid body moderately structured. You can loosen selected sections after finishing rather than making the entire braid extremely loose from the start.
5. Which low-tension braid is best for very long hair?
Twin braids, a low braided ponytail, a fishtail braid, or a bubble-braid hybrid can all help organize very long lengths while allowing you to keep the root area relatively relaxed.
Save your favorite low-tension braid and try it with your usual winter coat before your next long snowy commute.