12 Sleek Wet Side-Part Hairstyle Ideas
Sleek, glossy, and sharply parted, these wet-look hairstyles turn simple silhouettes into polished statement styles for evenings, events, and modern everyday inspiration. A wet side part combines clean direction with reflective shine, making it one of the easiest styling themes to adapt across short, medium, and long hair. The finish can range from lightly damp and touchable to sharply sculpted and high-gloss, so the effect does not have to look identical from one style to the next. When choosing your version, consider how much hold you want, where the wet finish should stop, and whether you prefer loose lengths or a secured ponytail, bun, or updo. Hair density and natural texture also matter, especially when deciding between a tightly controlled finish and one that keeps some movement through the ends.
Quick List
- Classic Deep Wet Side Part Hairstyle
- Slicked Back Wet Side Part Bob Hairstyle
- Glassy Wet Side Part Lob Hairstyle
- Sculpted S Wave Wet Side Part Hairstyle
- Tucked Behind The Ear Wet Side Part Hairstyle
- Wet Side Part Pixie Hairstyle
- Long Straight Wet Side Part Hairstyle
- Wet Side Part Low Ponytail Hairstyle
- Wet Side Part Low Bun Hairstyle
- Wet Side Part Finger Wave Hairstyle
- Wet Side Part Curly Hairstyle
- Wet Side Part High Shine Updo Hairstyle
1. Classic Deep Wet Side Part Hairstyle
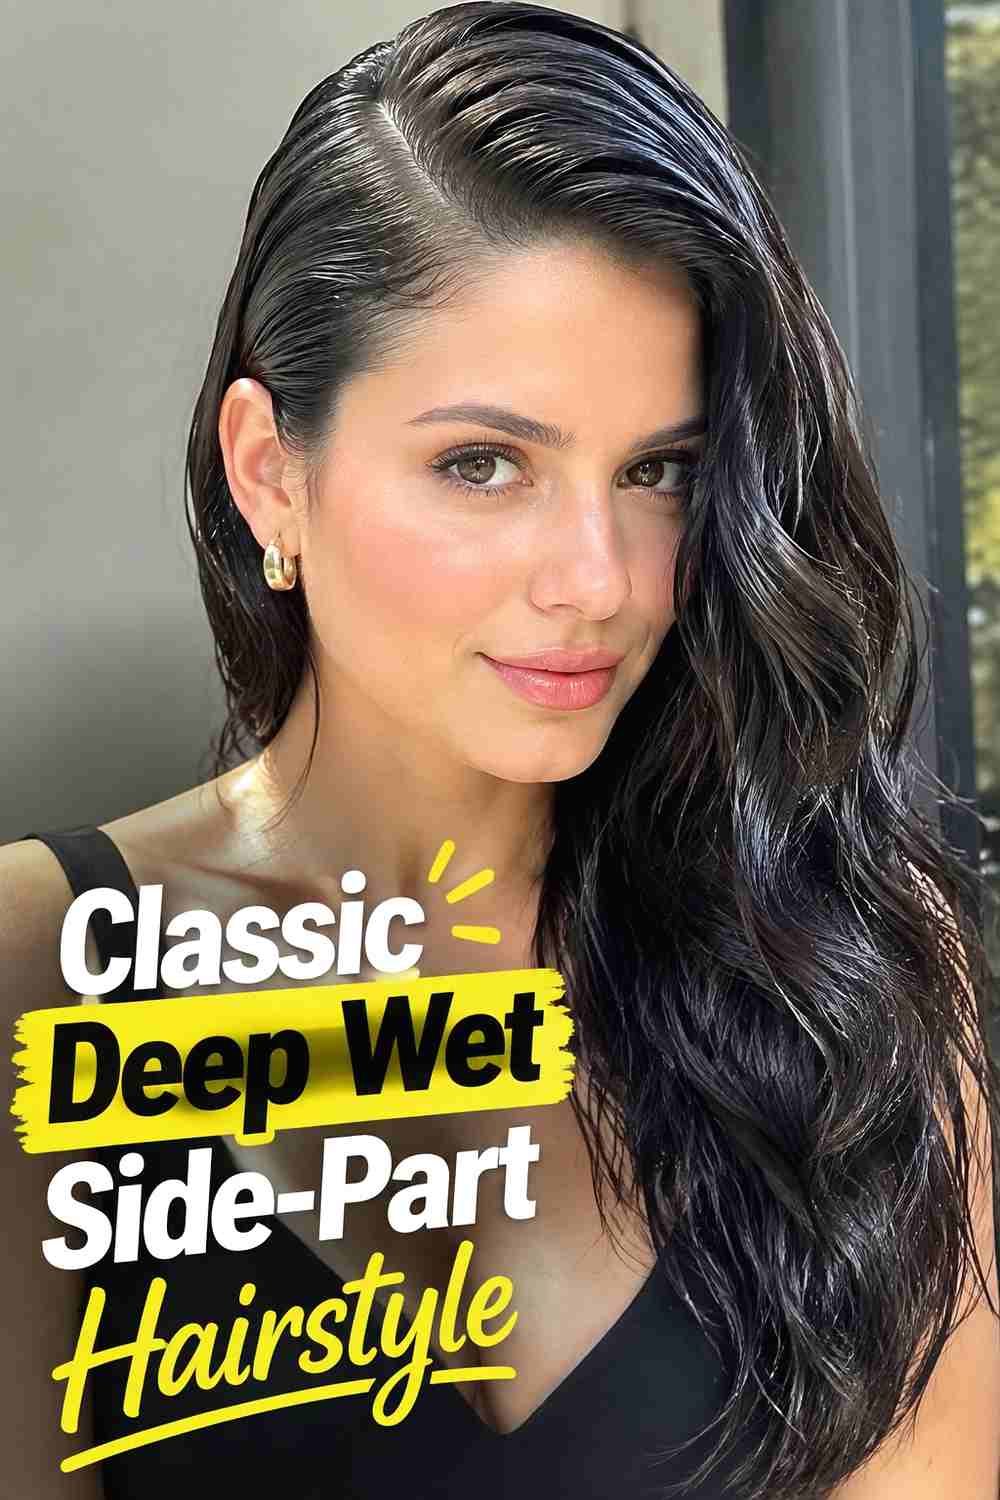
The Classic Deep Wet Side-Part Hairstyle keeps the concept clean and recognizable: a strong off-center part, smooth roots, and glossy lengths that appear freshly styled rather than soaked. The deeper part creates a dramatic sweep across the forehead while the controlled surface gives the hair a polished, evening-ready finish. It works especially well when you want your hair to frame one side of the face while keeping the opposite side more open. For a wearable result, concentrate the strongest gel or styling cream near the roots and upper lengths, then use less product toward the ends so the hair still has natural movement.
Styling Notes
Create the part first with a fine-tail comb, then smooth product outward from the part in the same direction the hair will sit.
Best For
This version suits medium to long hair particularly well and can be adjusted from softly glossy to highly sculpted depending on the occasion.
2. Slicked Back Wet Side Part Bob Hairstyle
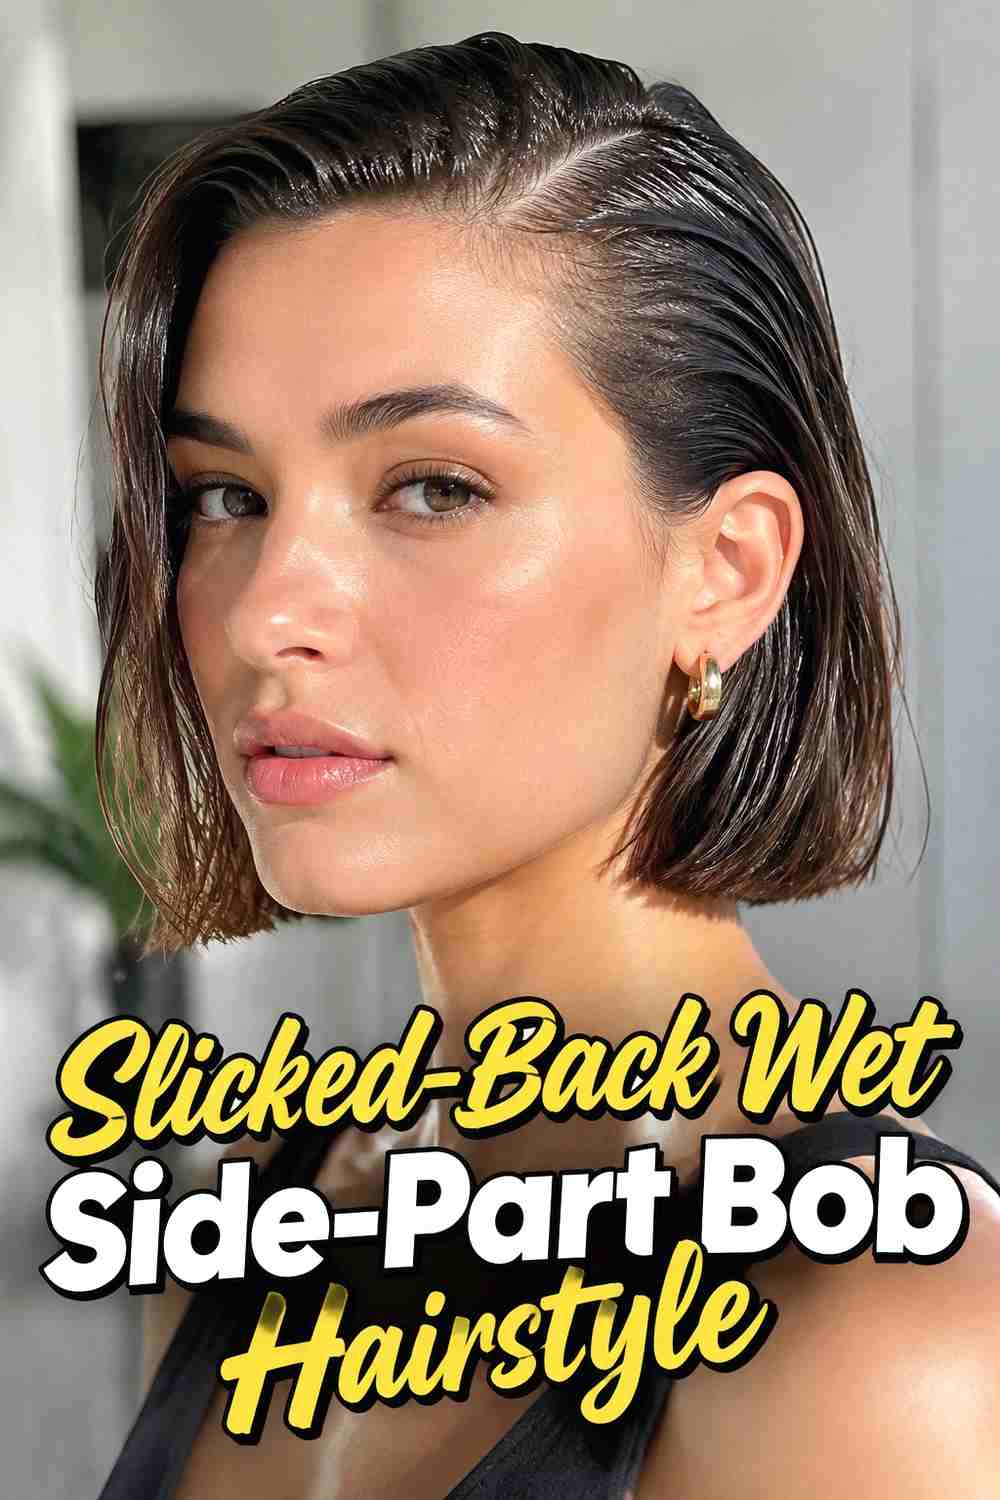
The Slicked-Back Wet Side-Part Bob Hairstyle gives a classic short cut a sharper editorial edge. Instead of adding airy volume, the roots sit close to the head while the side part creates a clear directional line. The bob’s ends can remain slightly straighter and freer, which keeps the style from looking overly rigid. This contrast between smooth roots and defined ends works especially well on chin-length or jaw-length cuts because the silhouette remains easy to see. A lightweight gel or glossy styling cream can provide control without making shorter hair look overloaded. Tucking the lighter side behind the ear can make the part appear even more deliberate.
Hair Type & Length
This look is easiest on bob-length hair with enough length at the front to sweep cleanly across the part.
Pro Tip
Apply shine product in thin layers. Short hair can become weighed down quickly if too much product is added at once.
3. Glassy Wet Side Part Lob Hairstyle
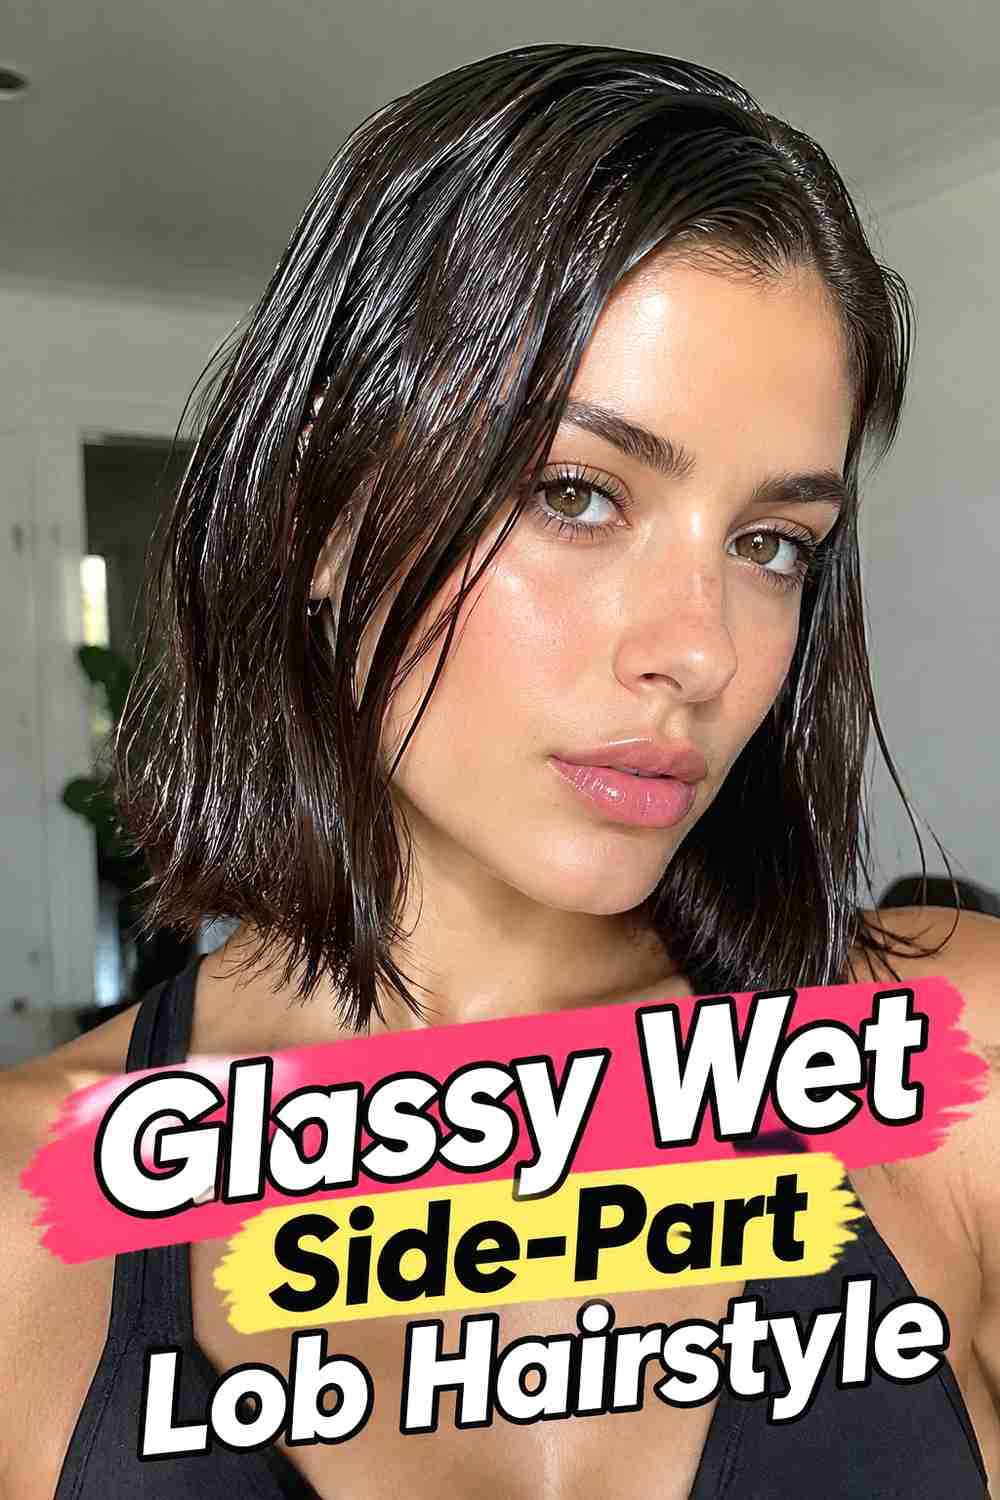
The Glassy Wet Side-Part Lob Hairstyle pairs shoulder-skimming length with an especially smooth, reflective finish. The long bob gives you enough hair to show sleek movement while remaining compact enough to keep the wet effect controlled. A crisp side part makes the surface look structured, while softly straightened lengths create a glass-like impression without needing every strand to be plastered flat. This style can work nicely for dinners, formal events, or minimalist outfits where the hair itself provides a polished finishing detail. Keep the roots neat, but allow the lob to retain a little natural separation through the ends so it still looks like real hair.
Why It Works
The lob length balances polish with movement, giving the wet finish enough surface area to shine without becoming visually heavy.
Wear & Maintenance
Keep a small comb nearby if you want to refresh the part or smooth the front section during a long event.
4. Sculpted S Wave Wet Side Part Hairstyle
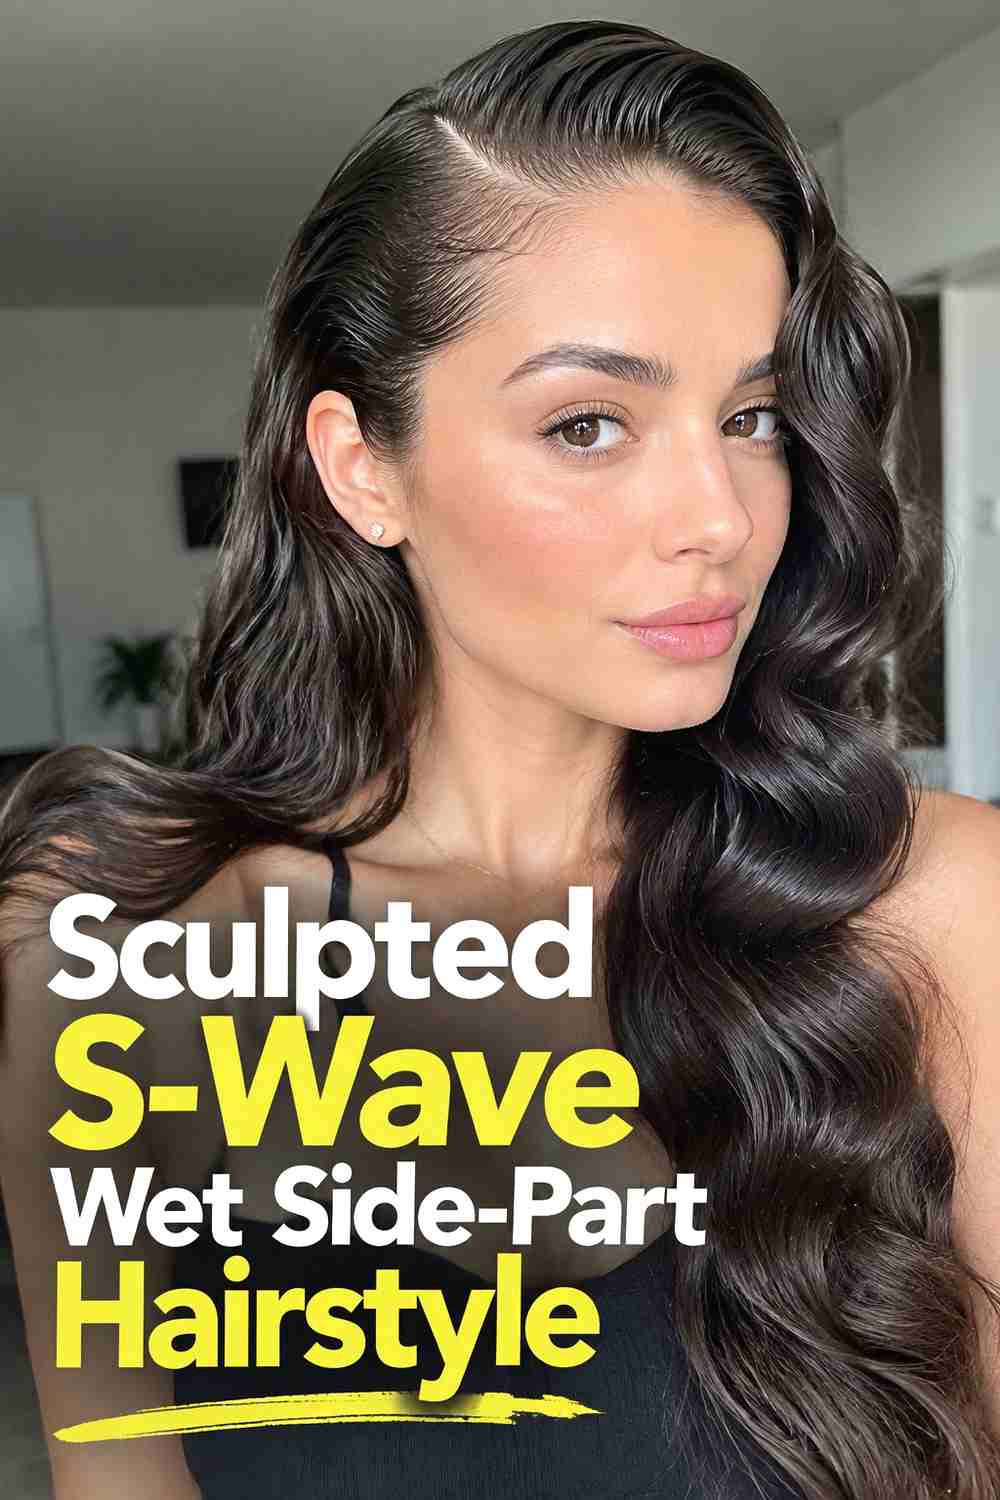
The Sculpted S-Wave Wet Side-Part Hairstyle brings controlled movement into the wet-look trend. A deep side part feeds into a visible S-shaped bend near the front, creating a glamorous wave that feels more dimensional than a fully slicked style. The wave can be concentrated around the hairline and temple while the rest of the hair stays smooth or softly waved. This approach is especially attractive when you want shine and definition without eliminating all texture. Use a workable gel or mousse rather than an extremely hard-setting product so the wave can be shaped carefully. Clips placed along the bends while drying can help preserve the curve.
Styling Notes
Shape the front section with a comb and fingers, forming alternating bends before allowing the product to set.
Best For
Medium and longer hair offer enough length to blend the sculpted front wave into smoother lengths behind it.
5. Tucked Behind The Ear Wet Side Part Hairstyle
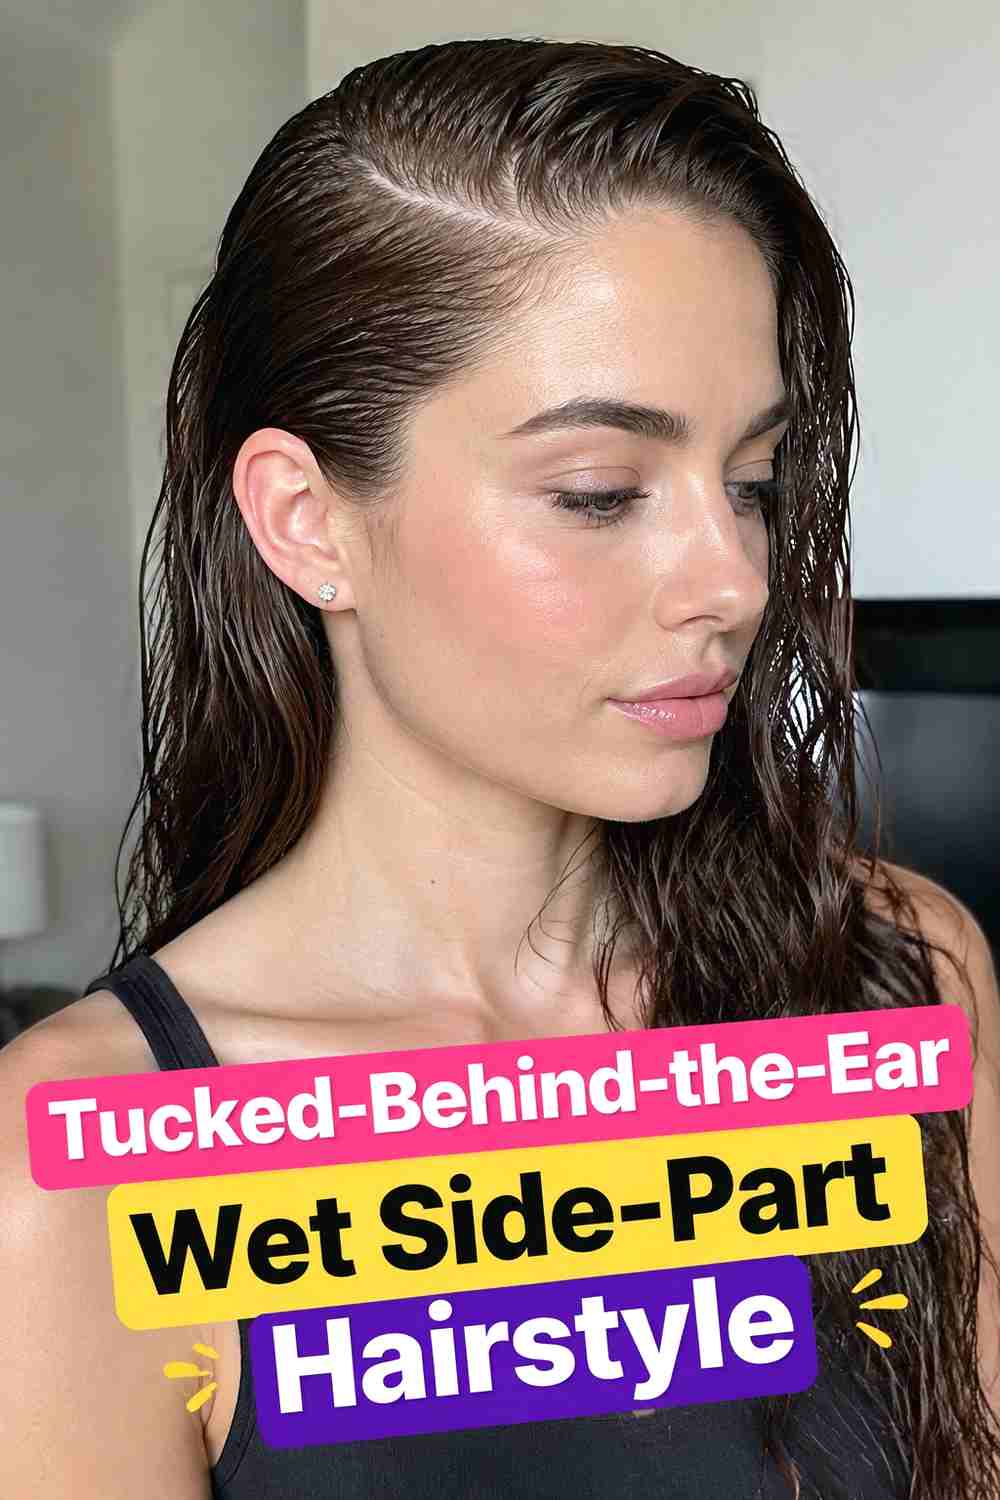
The Tucked-Behind-the-Ear Wet Side-Part Hairstyle uses asymmetry to make a simple glossy finish feel intentionally styled. The fuller side sweeps across the forehead from a deep part, while the opposite section is smoothed close to the head and tucked neatly behind the ear. That open side creates a clean profile and lets earrings or a strong neckline become part of the overall look. The hairstyle works with straight, softly wavy, or lightly textured lengths because only the upper section needs to appear especially sleek. Use enough product around the temple to control flyaways, but leave the lower lengths more flexible for a softer result.
Why It Works
The visible contrast between the sweeping side and tucked side creates definition without requiring a complicated updo.
Pro Tip
Use a discreet pin behind the ear if your hair naturally slips forward after being tucked.
6. Wet Side Part Pixie Hairstyle
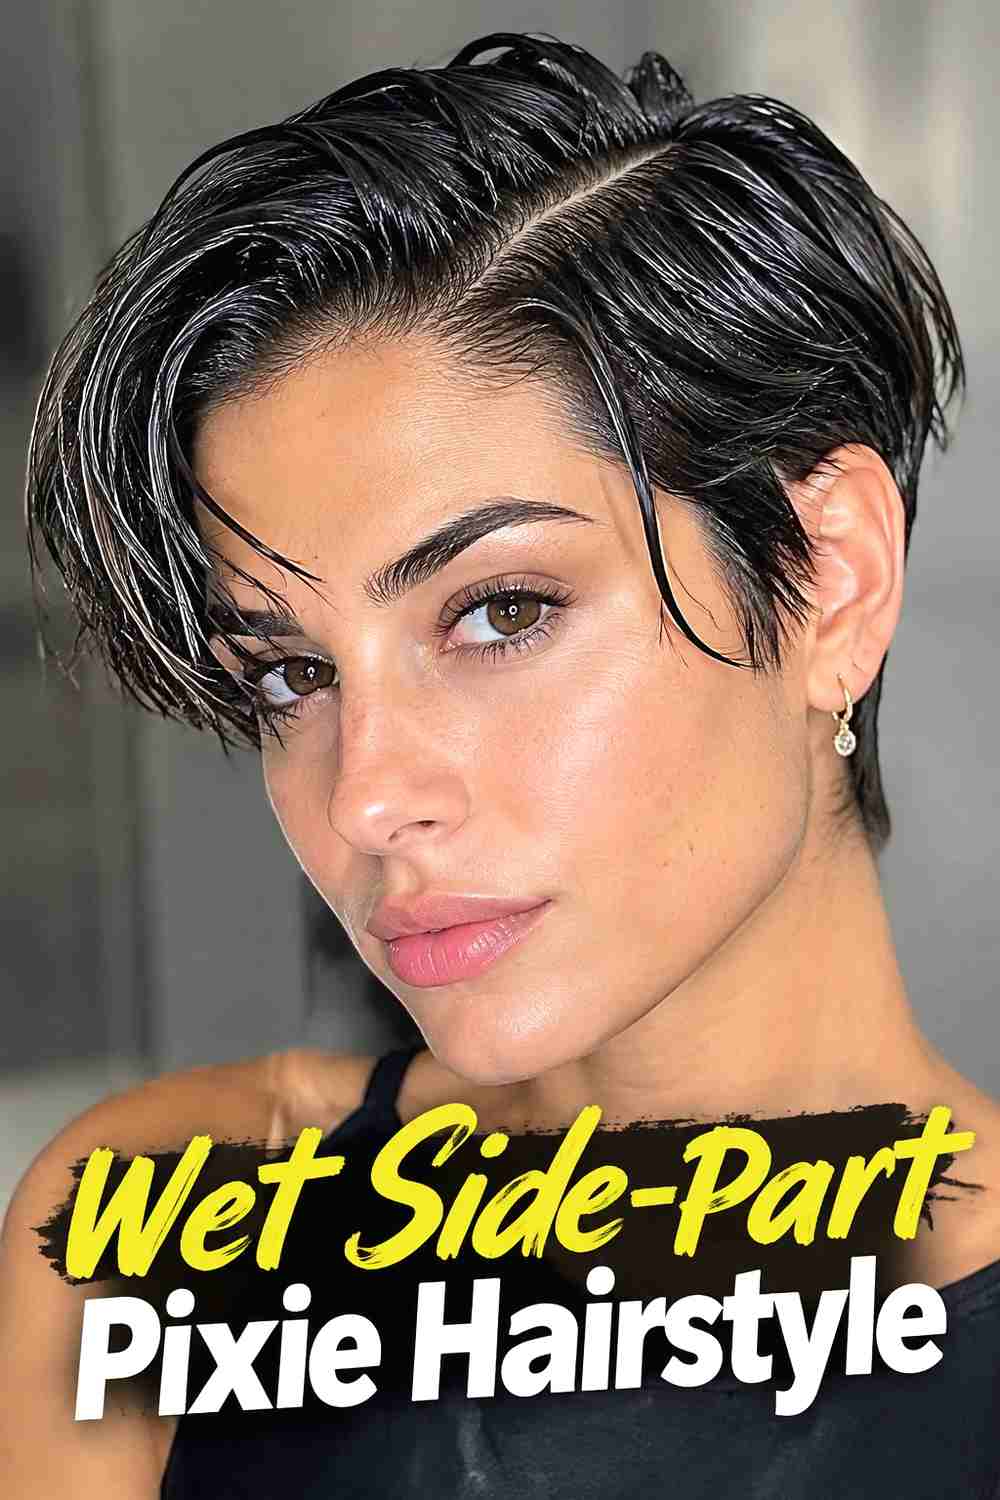
The Wet Side-Part Pixie Hairstyle turns short hair into a precise, glossy shape with plenty of visible direction. A side part separates the top into a smooth sweep, while the sides stay close to the head for a neat silhouette. Because a pixie exposes more of the hairline, even product distribution is important; you want realistic shine and separation rather than a solid layer of gel. Slightly defined pieces through the front can make the style feel modern and touchable. The look can be elegant with a smooth finish or a little edgier when individual strands are shaped around the forehead and temple.
Hair Type & Length
Pixie cuts with a slightly longer top section are especially adaptable because there is enough hair to establish a visible side sweep.
Wear & Maintenance
Short wet styles generally need very little restyling once the product sets, though the front can be reshaped with damp fingertips if needed.
7. Long Straight Wet Side Part Hairstyle
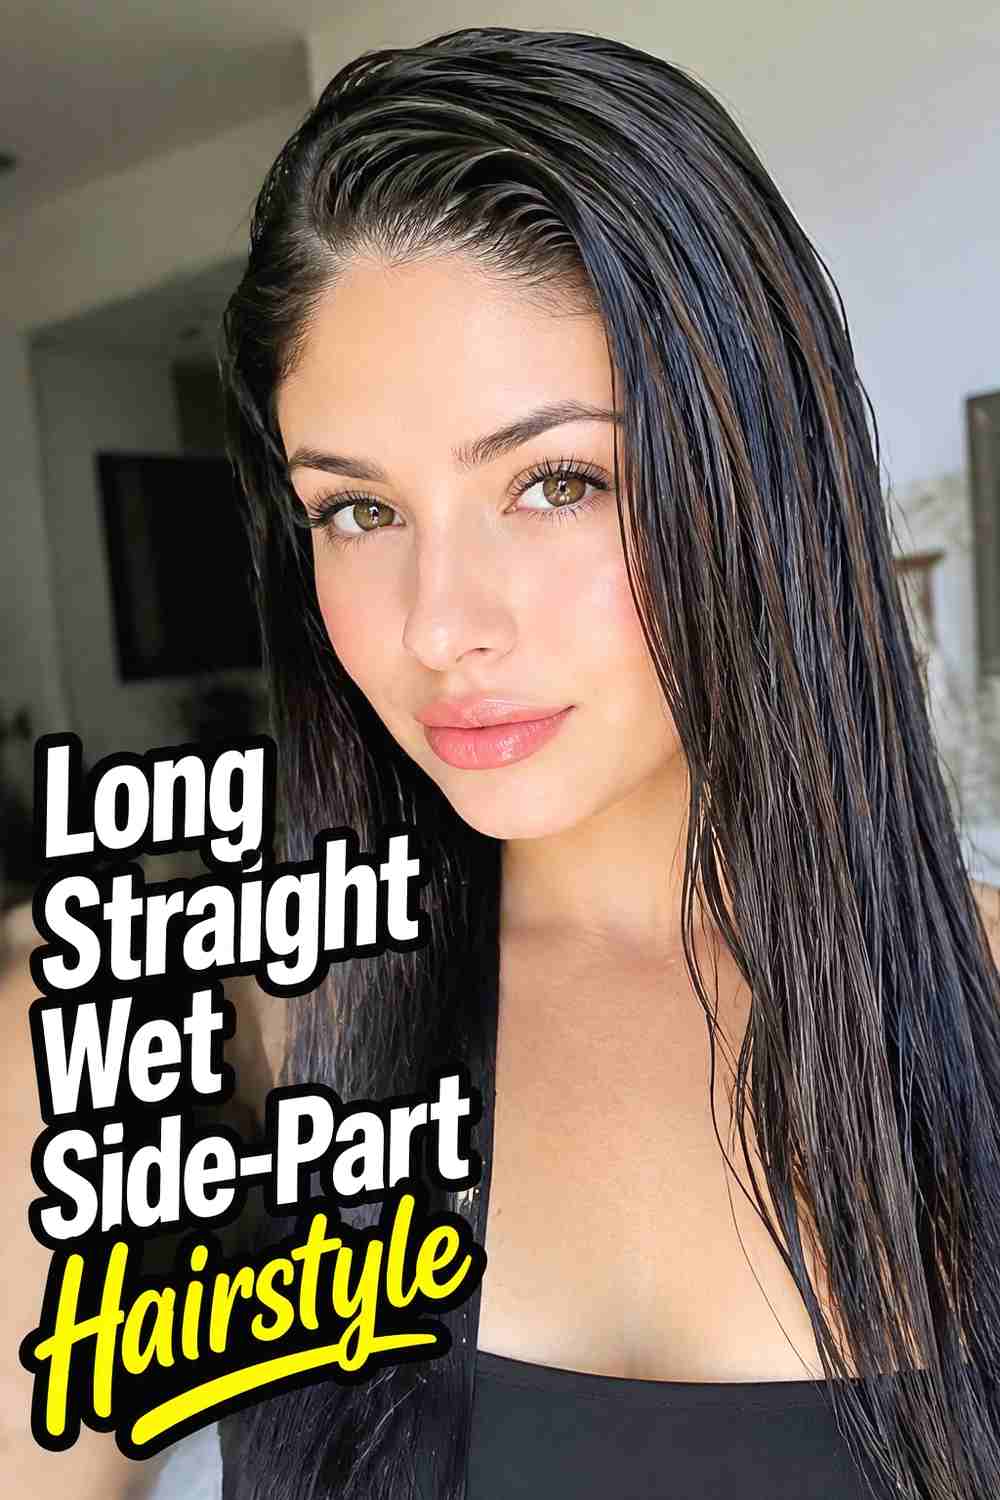
The Long Straight Wet Side-Part Hairstyle emphasizes length by combining sleek roots with smooth, uninterrupted lines through the body of the hair. A strong side part creates the focal point, while the straight texture allows shine to reflect clearly along the surface. For a modern finish, the hair does not need to look wet from roots to tips. Keeping the upper portion glossy and controlled while allowing the lower lengths to become progressively softer often looks more natural and wearable. This approach also preserves movement through long hair. Smooth the crown carefully and keep the ends aligned without making them stiff or overly coated.
Styling Notes
Work product through the top in sections rather than dragging a large amount down the entire length.
Best For
Long straight or straightened hair shows the clean side part and gradual change from wet roots to softer ends especially clearly.
8. Wet Side Part Low Ponytail Hairstyle
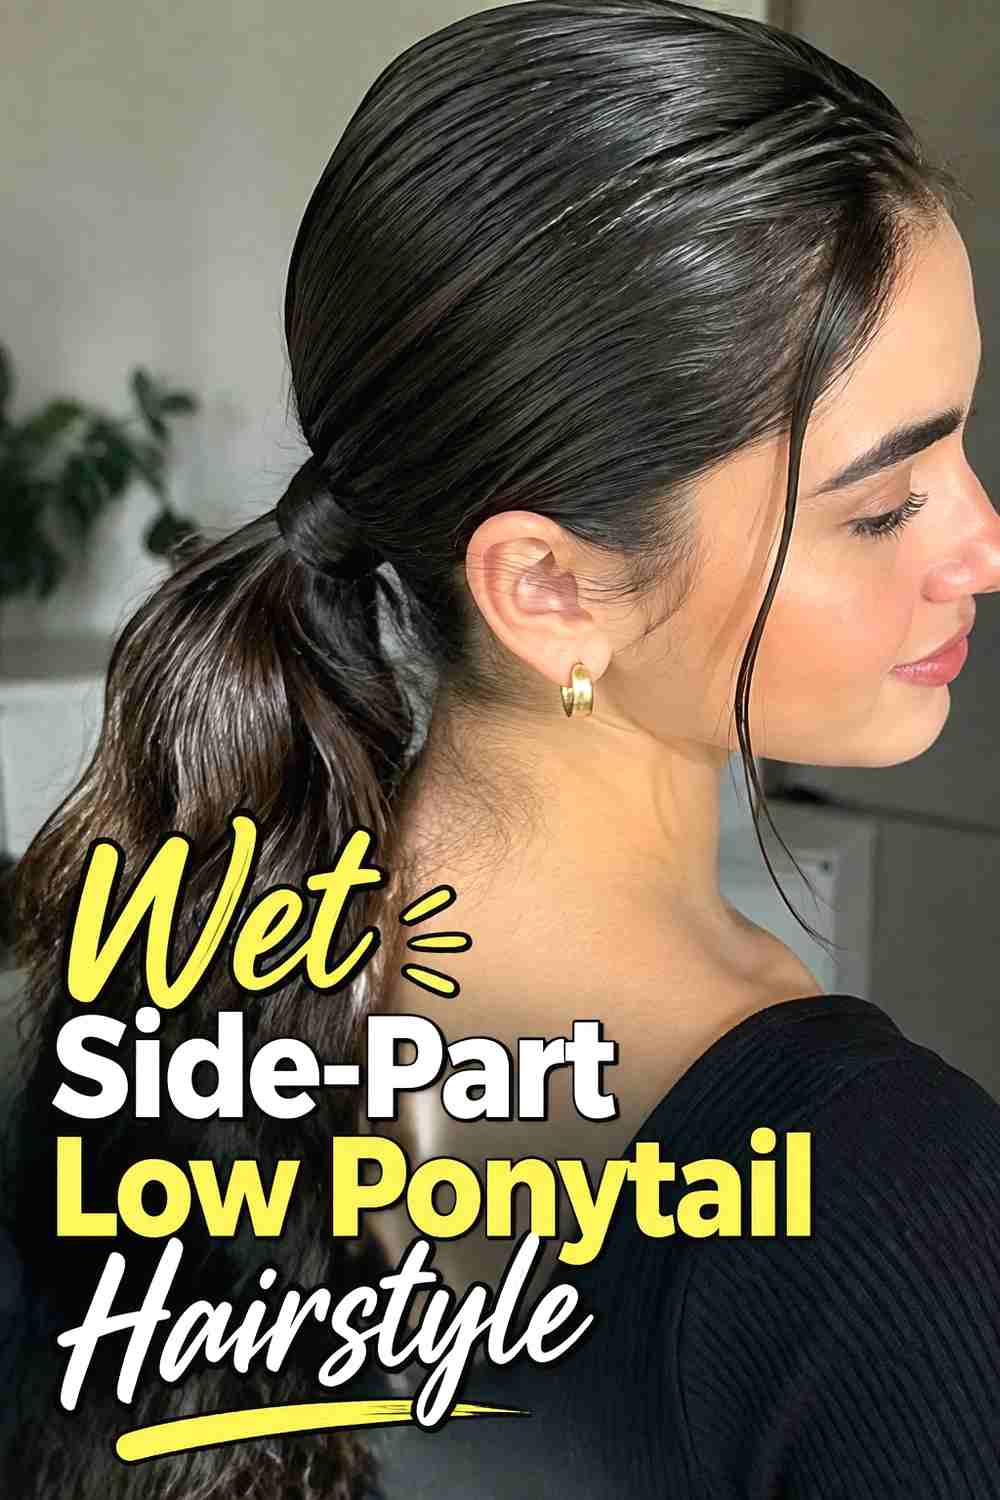
The Wet Side-Part Low Ponytail Hairstyle combines the shine of wet-look styling with the practicality of secured hair. The deep side part gives the front a refined sweep before both sides are directed toward a ponytail placed low at the nape. Keeping the base smooth makes the shape feel polished, while the ponytail itself can stay straight, softly waved, or naturally textured. This separation is useful because you can achieve a sleek appearance without coating every inch of hair in styling product. Wrap a narrow strand around the elastic for a cleaner finish, or keep the tie simple when you want a more minimal result.
Wear & Maintenance
Use firm control around the crown and temples, but avoid excessive tension at the ponytail base if you plan to wear the style for several hours.
Pro Tip
Finish the surface with a small amount of shine product applied with your palms rather than adding another heavy layer of gel.
9. Wet Side Part Low Bun Hairstyle
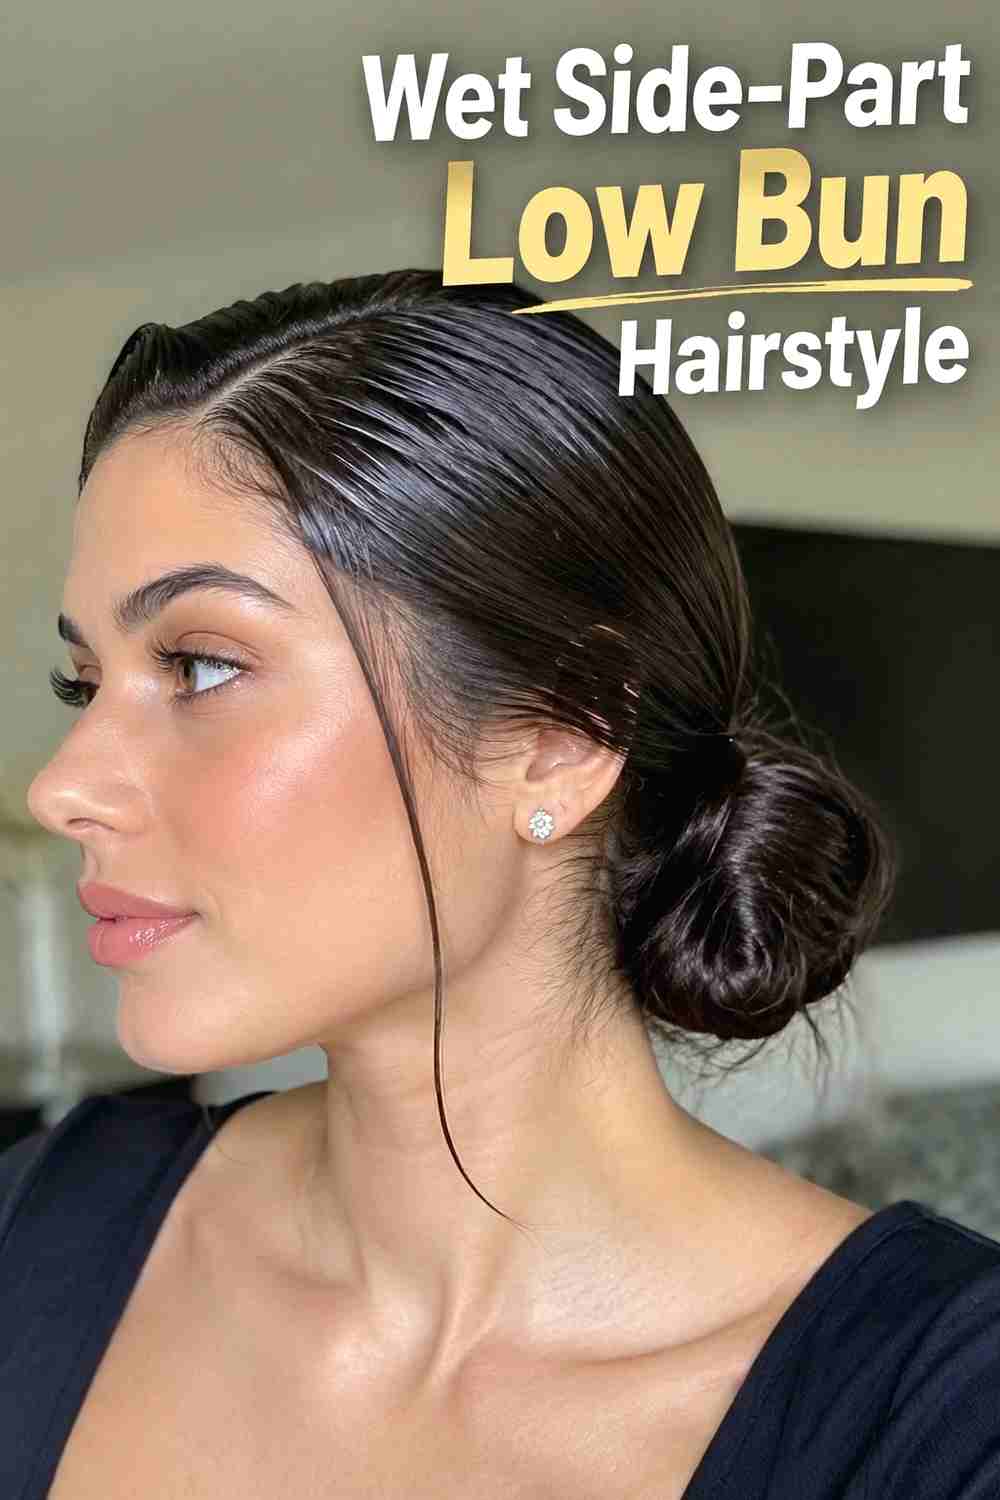
The Wet Side-Part Low Bun Hairstyle is a compact option when you want the wet finish to look especially neat and controlled. Hair is divided with a precise side part, smoothed closely around the head, and gathered into a bun at the nape. The bun can be twisted into a clean coil or shaped slightly flatter for a more understated silhouette. Because the lengths are secured, the glossy front remains the main visual feature. This makes the style useful for formal outfits, high necklines, and statement earrings. Keep the surface sleek without pulling every section excessively tight, and secure shorter pieces discreetly around the bun.
Best For
Medium to long hair usually provides enough length to form a stable low bun without requiring an oversized shape.
Styling Notes
Smooth the side part and crown completely before forming the bun; trying to correct bumps afterward can disturb the polished surface.
10. Wet Side Part Finger Wave Hairstyle
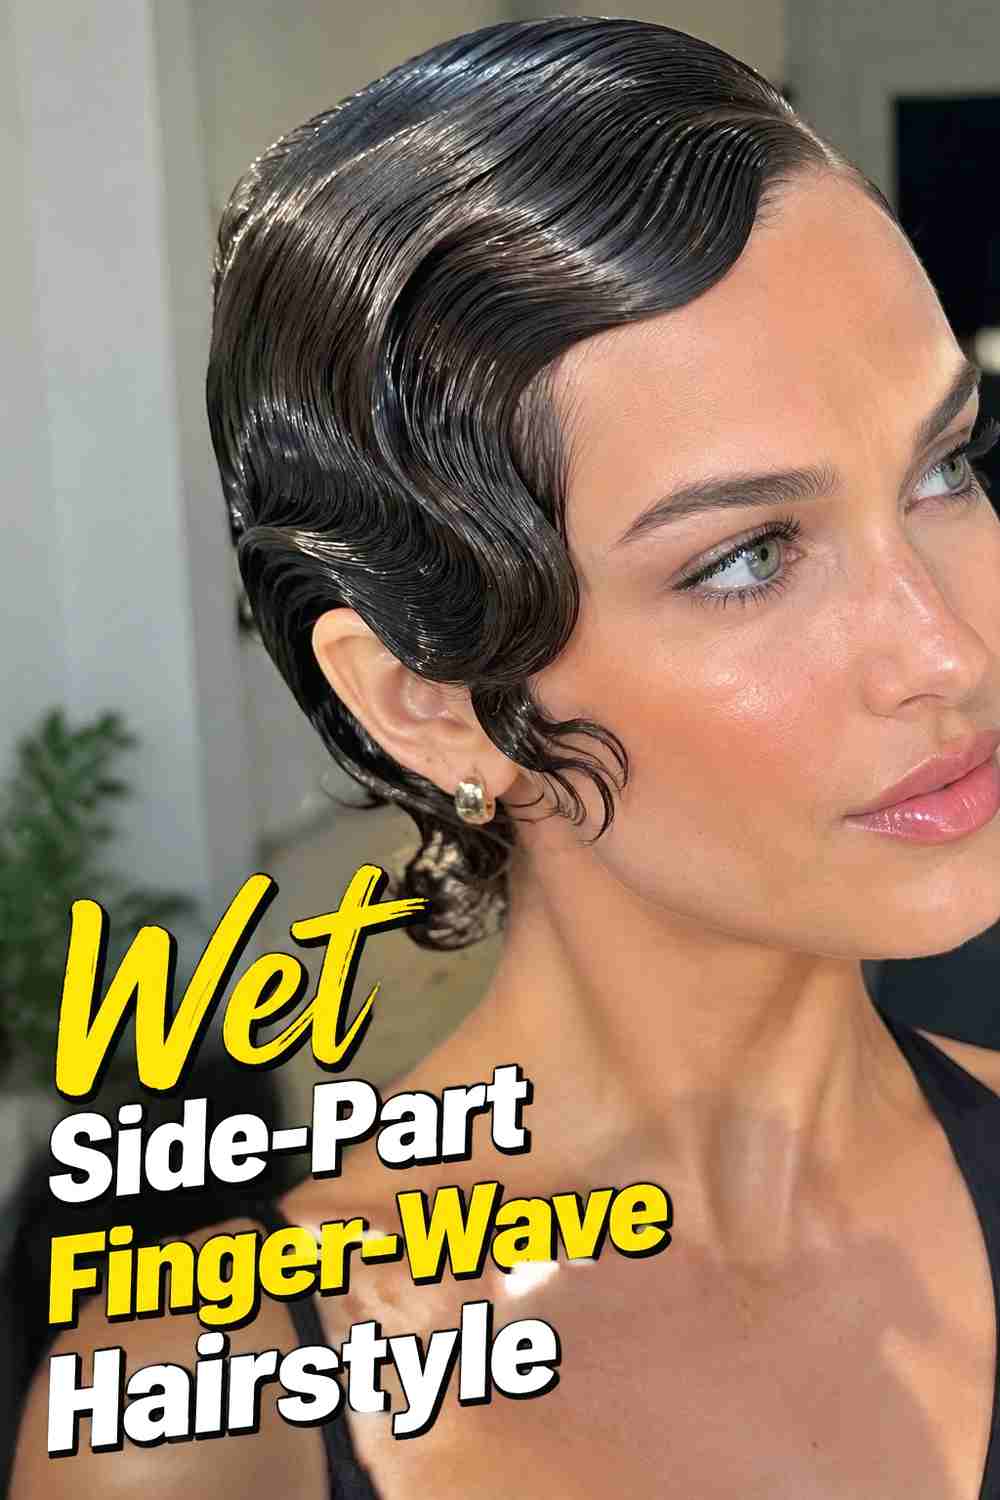
The Wet Side-Part Finger-Wave Hairstyle gives the glossy trend a vintage-inspired structure. A defined side part leads into close, sculpted waves that follow the head rather than creating loose volume. The curved ridges catch the light beautifully, making shine an essential part of the finished effect. Depending on hair length, finger waves can frame only the front section or continue farther around the head. The key is keeping each bend deliberate and connected instead of creating random ripples. A setting product with enough slip makes shaping easier, while clips can hold selected curves in place until the surface begins to set.
Styling Notes
Work on damp hair in small sections, using a fine comb and fingers to push the hair into alternating curved ridges.
Hair Type & Length
Short to medium lengths are especially suited to close finger waves, though longer hair can combine a waved front with a bun or tucked back section.
11. Wet Side Part Curly Hairstyle
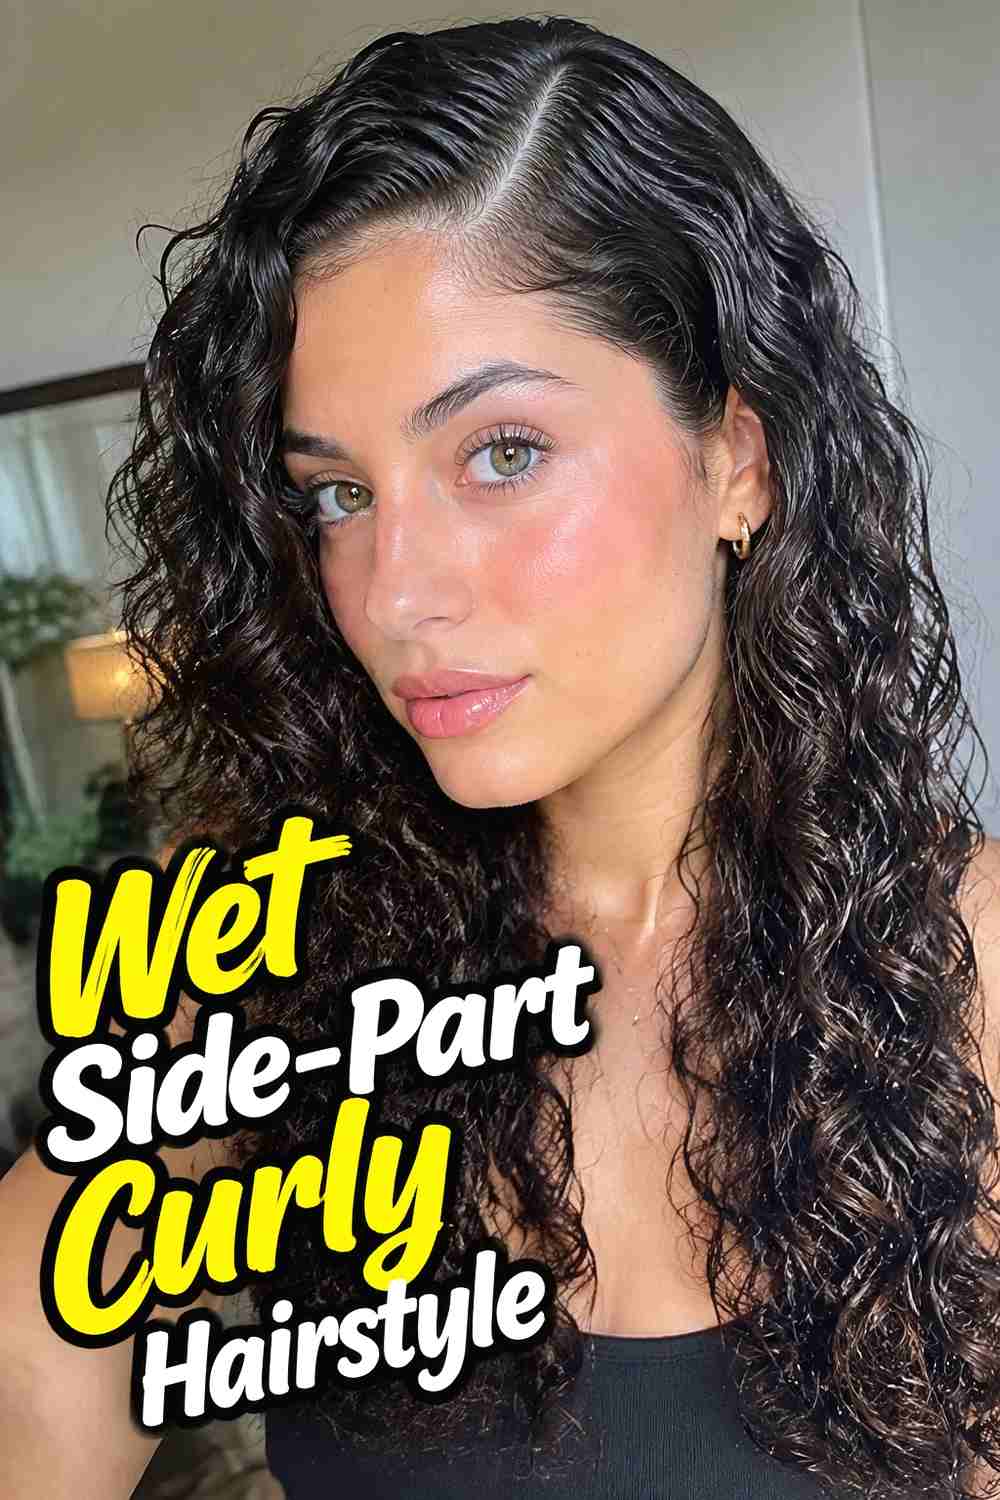
The Wet Side-Part Curly Hairstyle preserves visible curl texture while giving the roots a smoother, more controlled finish. Instead of flattening the entire head, the side part organizes the top and directs the curls toward one side, allowing their natural shape to remain noticeable through the mid-lengths and ends. This creates an appealing contrast between sleekness and volume. A gel with good slip can define the part and hairline, while a curl-friendly styling product can maintain separation farther down. Avoid brushing through the finished curls after they are shaped, since that can disturb their pattern and reduce the deliberate wet-look definition.
Why It Works
Keeping curl definition through the lengths prevents the sleek root section from making the overall hairstyle feel flat.
Pro Tip
Apply products while the hair is still damp so the roots and curls can be shaped together rather than styled as two completely separate textures.
12. Wet Side Part High Shine Updo Hairstyle
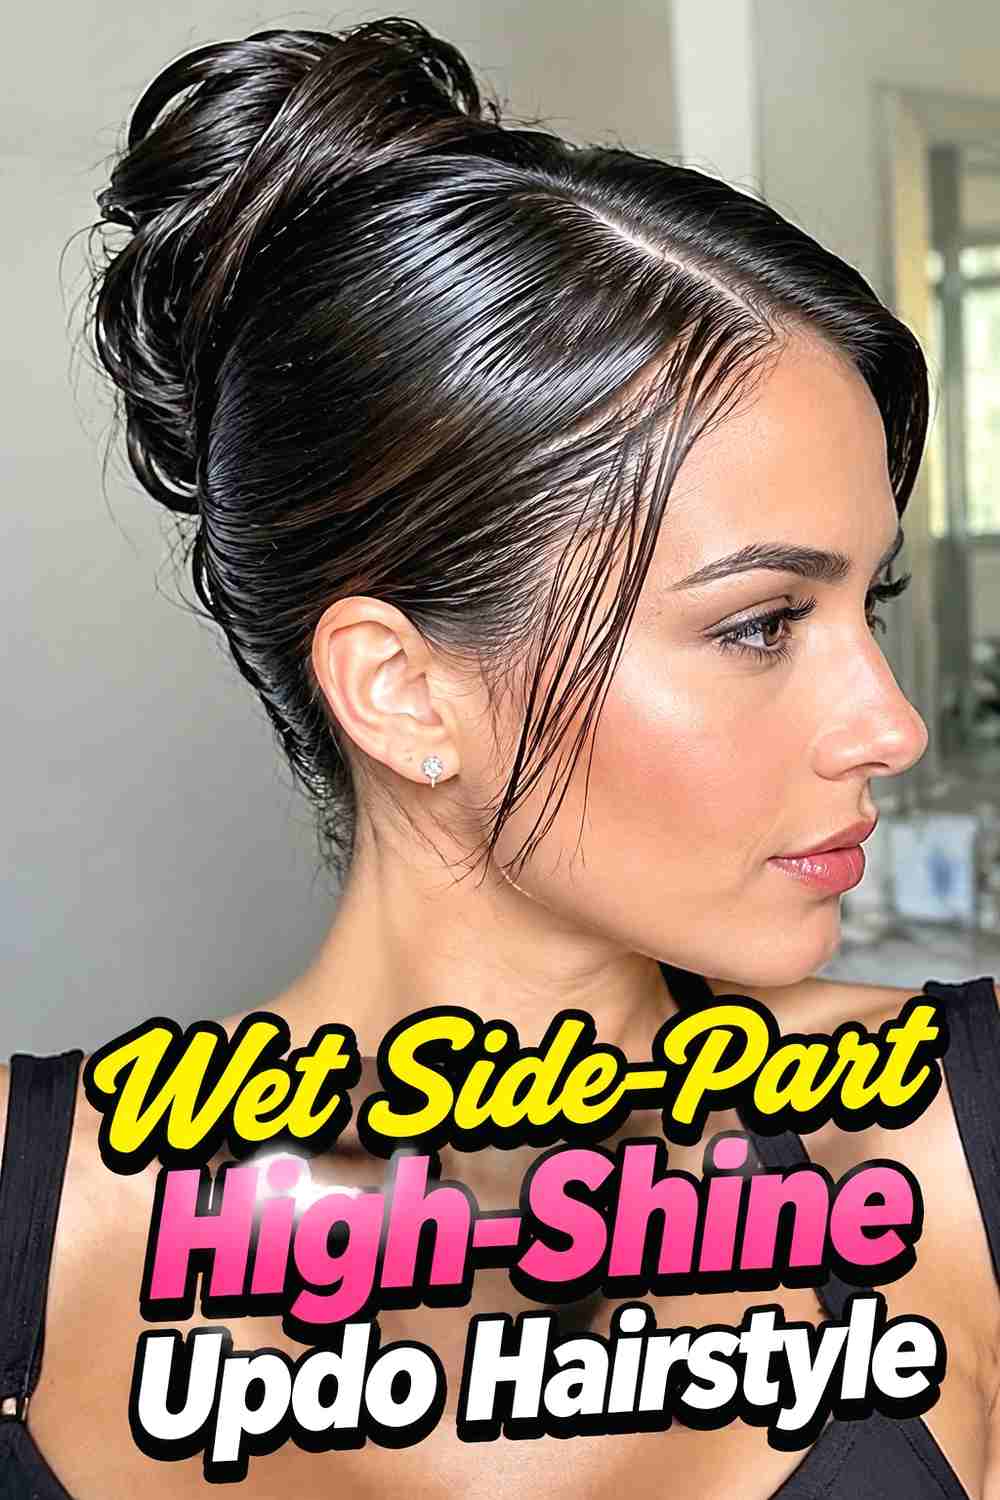
The Wet Side-Part High-Shine Updo Hairstyle takes the glossy side-part concept into a more formal direction. The front is shaped with a precise part and smooth sweep, while the remaining hair is secured into a compact updo at the back. The arrangement can be twisted, folded, or pinned into a clean sculptural shape rather than a loose, airy bun. Because most of the hair is controlled, the finish looks especially polished in photographs. A few carefully placed natural strands can keep the style from appearing too rigid. Build the updo first for security, then refine the visible surface with small amounts of gel or shine cream.
Best For
This approach works well for weddings, evening events, formal dinners, or any setting where you want the hair completely off the shoulders.
Wear & Maintenance
Use pins that anchor into the underlying structure rather than relying on surface product alone to keep the updo stable.
How to Choose the Right Look
Start with your length and how much of your hair you want secured. Pixies, bobs, and lobs make the side part itself the main feature, while long hair offers more options for ponytails, buns, and sculpted updos. If you want movement, choose a lob, long straight finish, or curly variation rather than coating every strand with strong-hold product. Texture also changes the result. Straight hair emphasizes glassy shine and clean lines, curls create contrast between smooth roots and defined ends, and waves allow more sculptural styling. Consider comfort as well: a tightly slicked bun may feel more structured than a loose tucked style. For a softer, wearable finish, concentrate product near the part, hairline, and crown. For stronger editorial polish, extend the glossy finish farther through the lengths and use firmer hold. Your occasion, styling time, and willingness to refresh the hair should guide how sculpted you make the final look.
Final Thoughts
Wet side-part hairstyles can feel minimal, glamorous, vintage-inspired, or sharply modern depending on the silhouette you pair with the glossy finish. Choose a version that works with your actual length and texture, then adjust the amount of shine and hold instead of trying to make every strand equally slick. A controlled part and believable hair movement usually create the most polished result.
FAQs
1. What products work best for a sleek wet side-part hairstyle?
A styling gel, glossy cream, mousse, or combination of lightweight hold and shine products can work well. Choose the amount of hold according to how sculpted you want the finish.
2. Does hair need to stay wet for a wet-look hairstyle?
No. The effect is usually created with styling products that produce shine and definition after the hair is shaped, so the finished style can look wet without remaining soaked.
3. Can curly hair wear a wet side part?
Yes. Keeping the roots sleek while maintaining curl definition through the lengths creates a particularly effective contrast and avoids flattening all of the natural texture.
4. How do I keep a wet side part from looking greasy?
Use product strategically instead of saturating the entire head. Concentrate shine and control around the part and upper sections, and preserve cleaner movement through the ends where appropriate.
5. Is a wet side-part hairstyle suitable for short hair?
Yes. Pixies and bobs work especially well because a precise part, controlled hairline, and glossy surface can create a strong shape without requiring much length. Save your favorite wet side-part hairstyle ideas for your next polished look, and explore more sleek hairstyle inspiration when you want a fresh variation.