17 Spiderweb Bun Hairstyles for Creative Updos
Intricate sections, crossed strands, and sculpted buns turn these spiderweb-inspired hairstyles into playful statement updos with plenty of room for personalization.
Spiderweb bun hairstyles combine the neat structure of a bun with radiating, crossed, twisted, or connected sections that create a web-like pattern around the updo. Some versions are highly polished and geometric, while others use curls, braids, ribbons, or softer texture for a more relaxed finish.
When choosing a version, consider how much length you have, how firmly you like your hair secured, and whether you want the web pattern to be subtle or immediately noticeable. Placement also changes the overall mood: high buns feel bold, low buns look refined, and half-up designs are easier to adapt for casual wear.
Quick List
- Classic Centered Spiderweb Bun Hairstyle
- High Crown Spiderweb Bun Hairstyle
- Low Nape Spiderweb Bun Hairstyle
- Sleek Spiderweb Bun Hairstyle
- Soft Textured Spiderweb Bun Hairstyle
- Braided Spiderweb Bun Hairstyle
- Double Spiderweb Bun Hairstyle
- Side Part Spiderweb Bun Hairstyle
- Curly Spiderweb Bun Hairstyle
- Twisted Spiderweb Bun Hairstyle
- Mini Spiderweb Bun Hairstyle
- Oversized Spiderweb Bun Hairstyle
- Half Up Spiderweb Bun Hairstyle
- Ribbon Wrapped Spiderweb Bun Hairstyle
- Pearl Accent Spiderweb Bun Hairstyle
- Halloween Spiderweb Bun Hairstyle
- Messy Spiderweb Bun Hairstyle
1. Classic Centered Spiderweb Bun Hairstyle
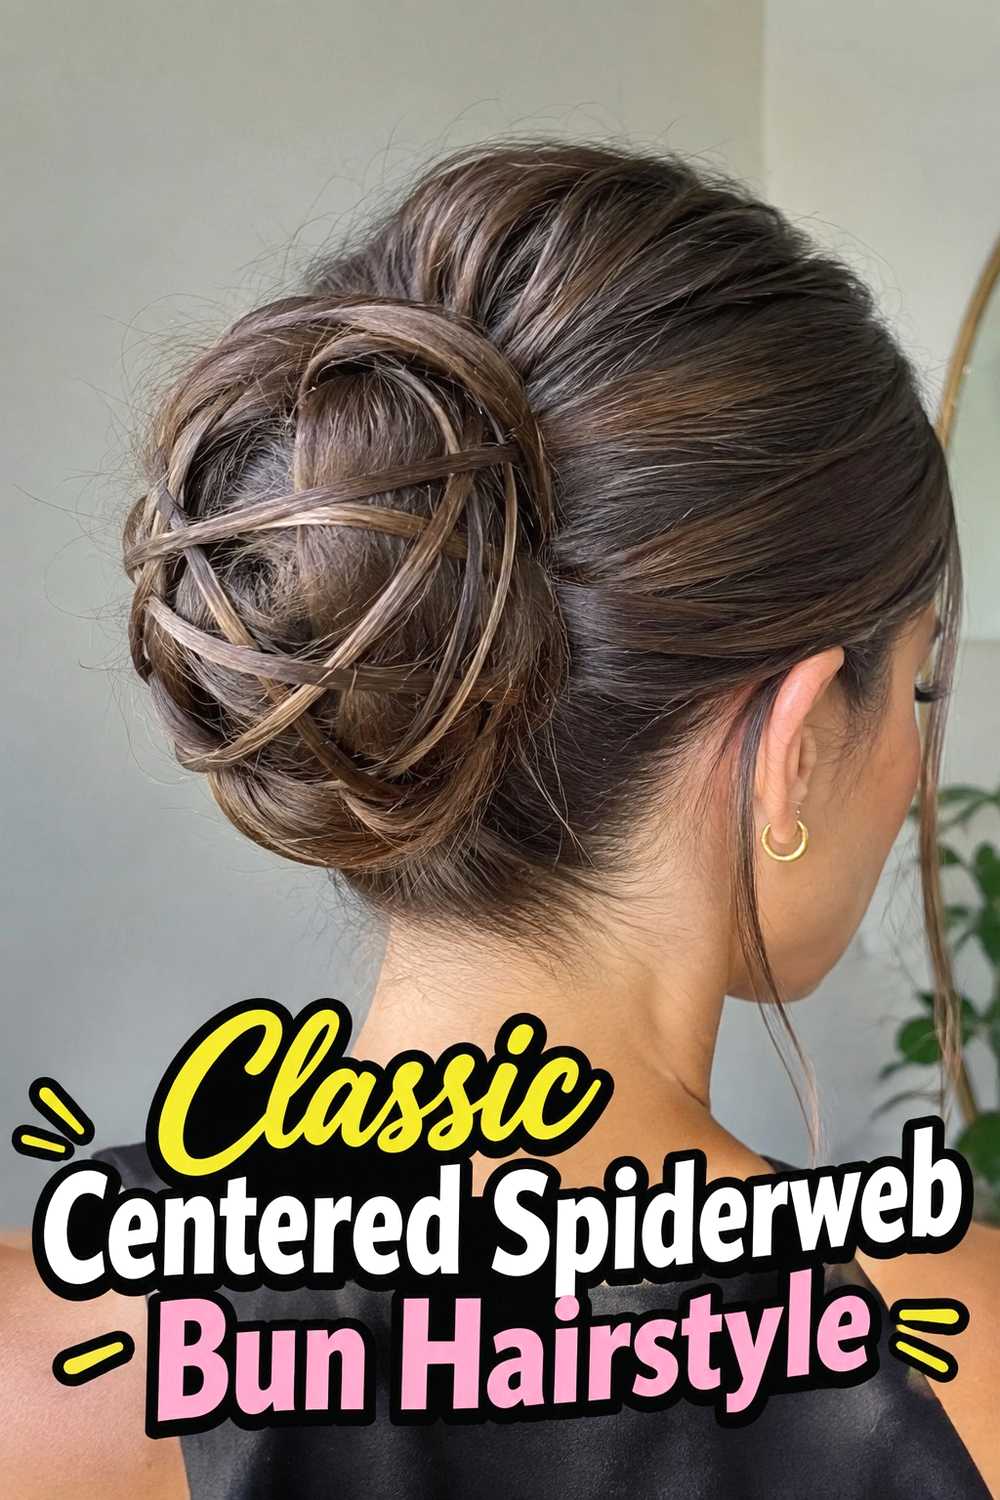
The Classic Centered Spiderweb Bun Hairstyle keeps the design balanced by placing a smooth bun near the center-back of the head and building evenly spaced sections around it. Thin pieces of hair can be crossed, looped, or secured between small anchor points to create a recognizable web effect without making the style feel costume-like. A polished crown keeps the pattern easy to see, while a little natural texture in the bun prevents the finish from looking overly rigid. This version works especially well on medium to long hair with enough length to form both the bun and the surrounding pattern. Keep tension controlled so the sections remain defined without feeling excessively tight.
Styling Notes
Create the bun first so it acts as the visual center. Then work outward in similarly sized sections, using small clear elastics or discreet pins to maintain the web pattern.
2. High Crown Spiderweb Bun Hairstyle
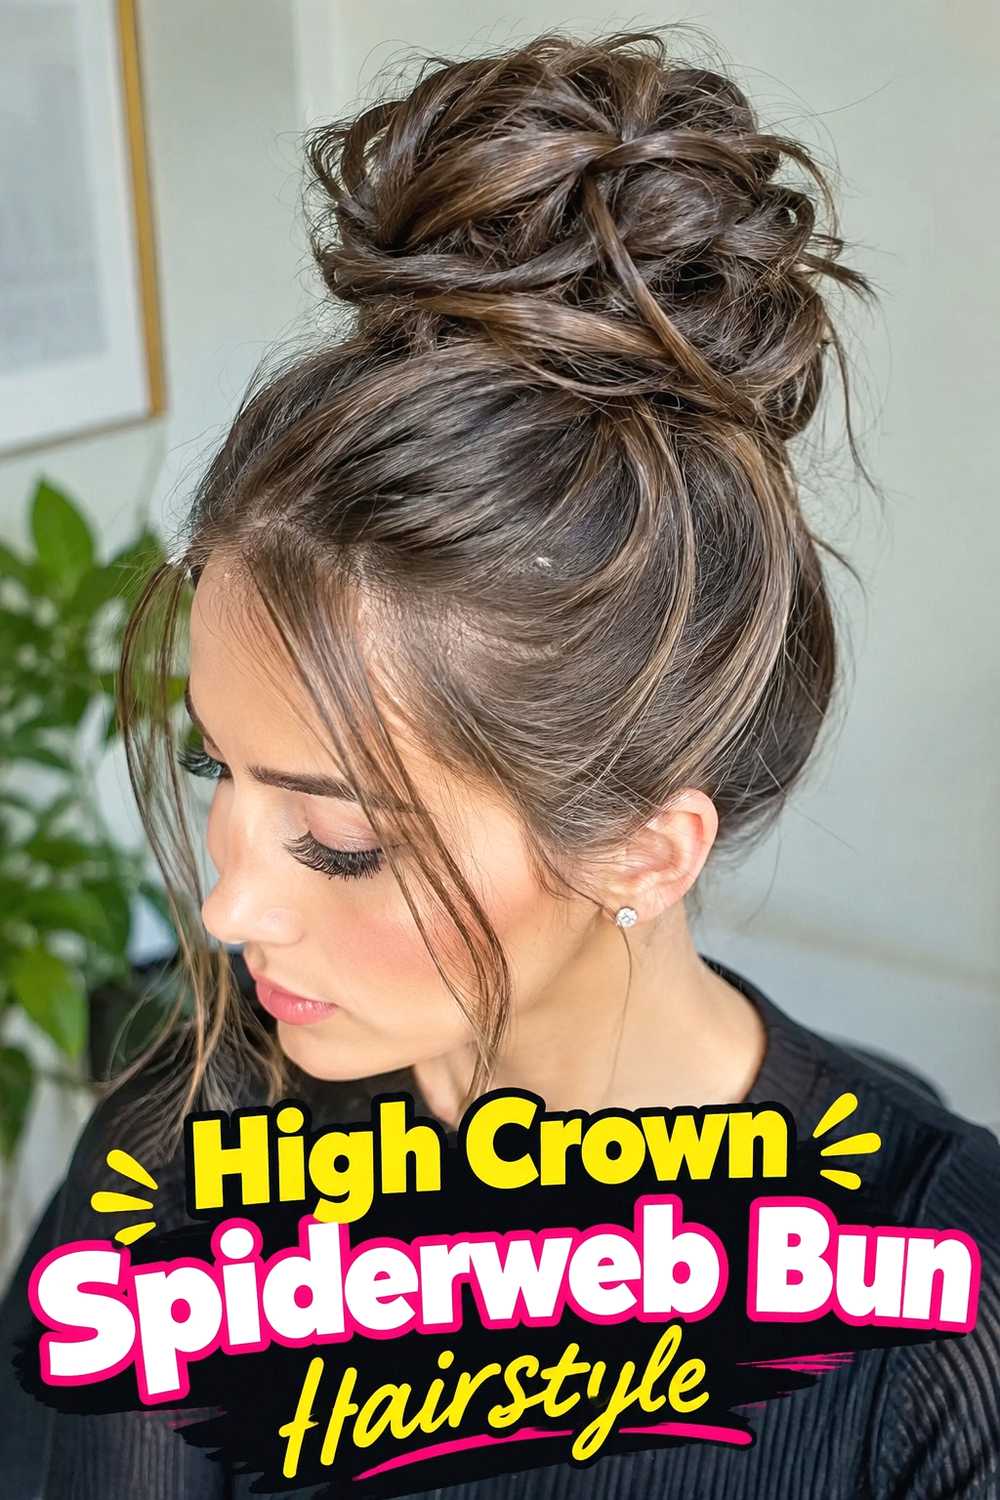
The High Crown Spiderweb Bun Hairstyle lifts the entire design upward, giving the web pattern a more dramatic silhouette. The bun sits near the crown, while narrow sections radiate toward it from different directions, making the style especially noticeable from the back and sides. A high placement can also highlight texture beautifully because the bun becomes a strong focal point rather than blending into the neckline. Medium-long and long hair are easiest to work with because extra length gives you more freedom to build the web without reducing the bun too much. For comfortable wear, keep the base secure but avoid pulling every section with maximum tension.
Best For
Choose this placement when you want a statement updo for parties, creative events, themed looks, or photos where the hairstyle needs to remain visible from several angles.
3. Low Nape Spiderweb Bun Hairstyle
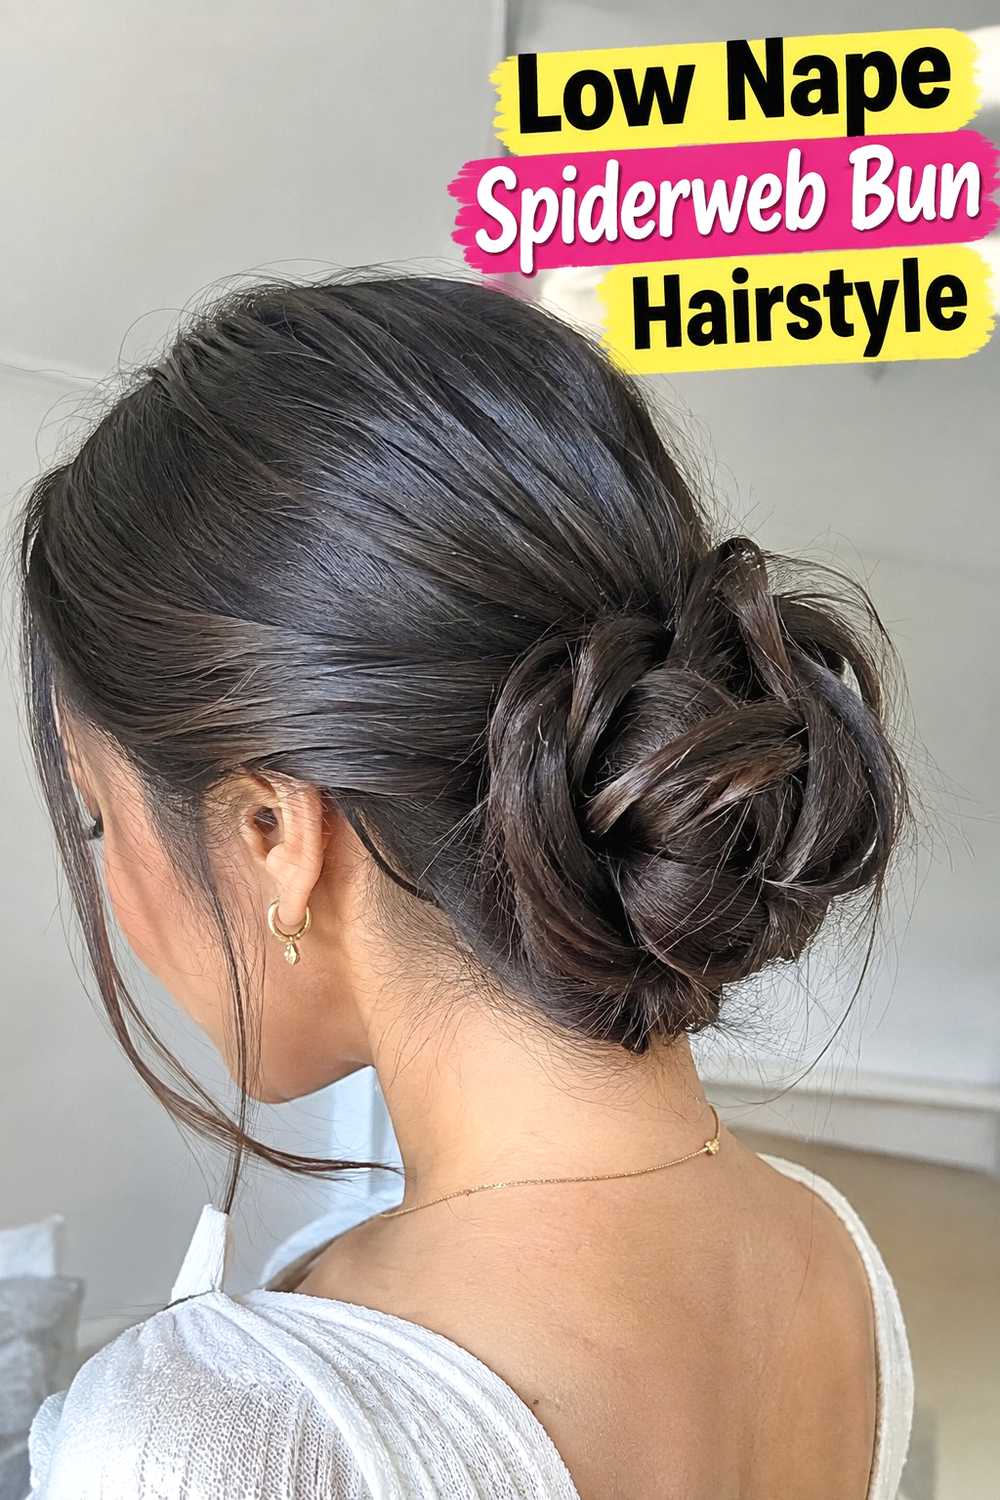
A Low Nape Spiderweb Bun Hairstyle brings the intricate pattern closer to the neckline for a more understated interpretation. Instead of emphasizing height, this variation spreads the web detailing across the lower back of the head before gathering the remaining length into a compact bun. It can look particularly elegant when the top is smooth and the connecting sections are kept narrow and symmetrical. The lower placement also makes it easier to pair the hairstyle with decorative pins without crowding the crown. Because the bun rests near the nape, check pin placement carefully so nothing presses uncomfortably against the neck when you move or sit back.
Why It Works
The lower silhouette balances decorative detail with a refined shape, making this variation easier to dress up without making the entire hairstyle feel oversized or overly theatrical.
4. Sleek Spiderweb Bun Hairstyle
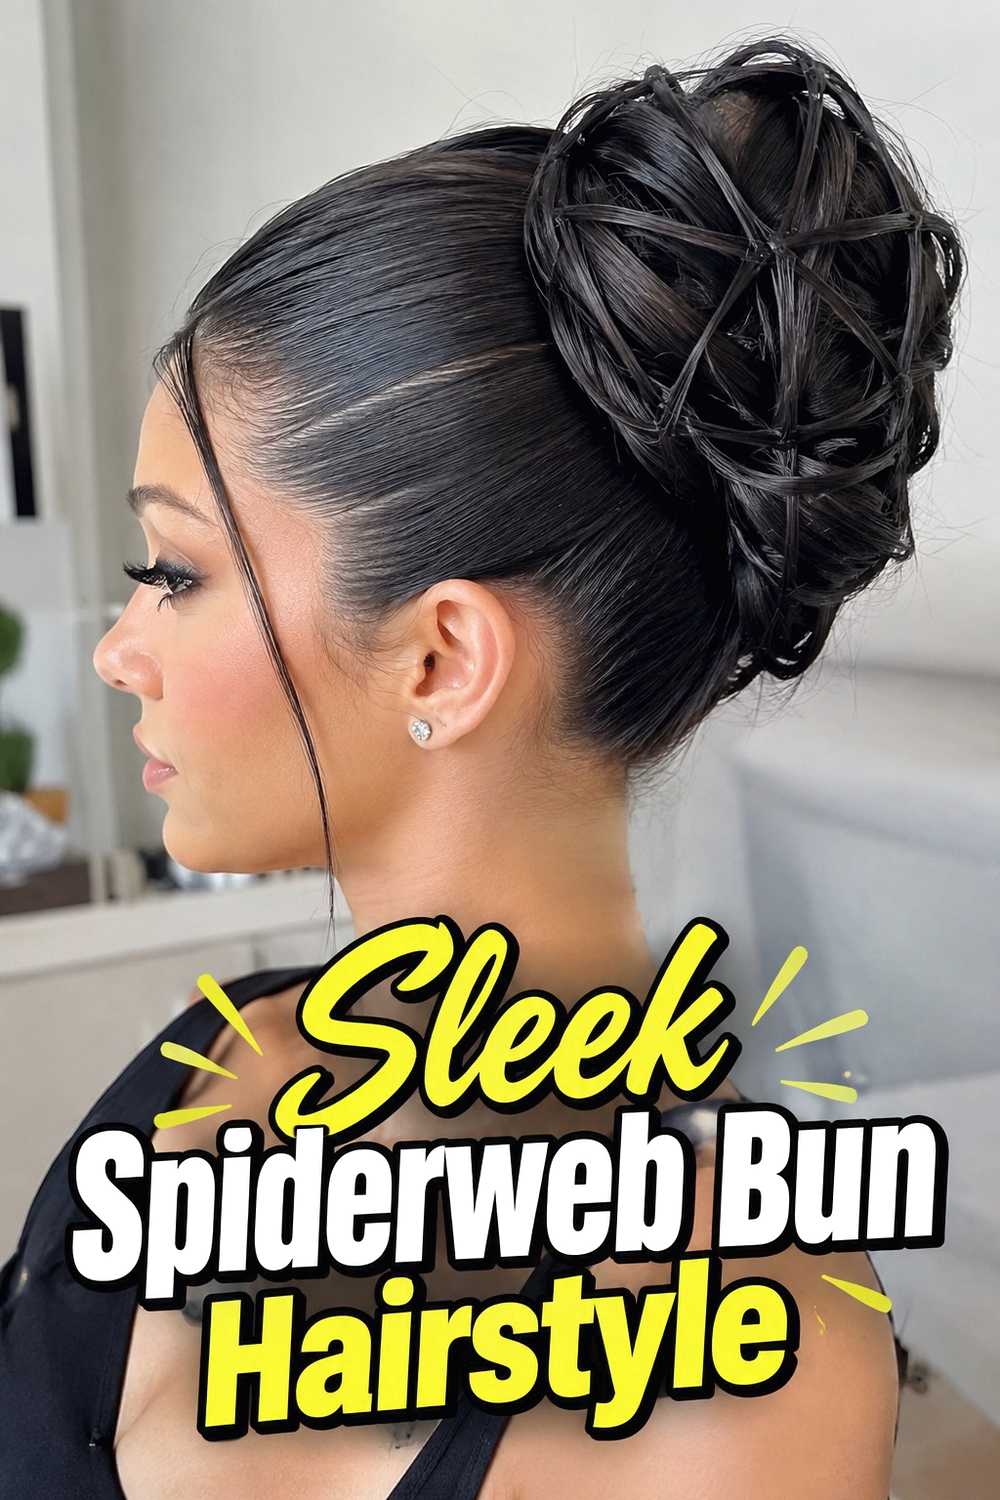
The Sleek Spiderweb Bun Hairstyle emphasizes clean lines, precise sectioning, and a glossy controlled finish. Hair is smoothed close to the head before the web pattern is constructed, allowing every crossed strand and connecting section to stand out clearly. The bun itself can be tightly wrapped or neatly coiled to continue the geometric look. Straight and stretched textures naturally make sharp lines easier to see, although other textures can be prepared with careful smoothing and controlled tension. Because this variation depends on precision, even partings matter. Small inconsistencies become more visible than they would in a softer design, so it is worth working slowly rather than adding too much product.
Pro Tip
Use a fine-tail comb for clean divisions and apply styling product lightly to the surface instead of saturating each section, which can make the finished hair look stiff.
5. Soft Textured Spiderweb Bun Hairstyle
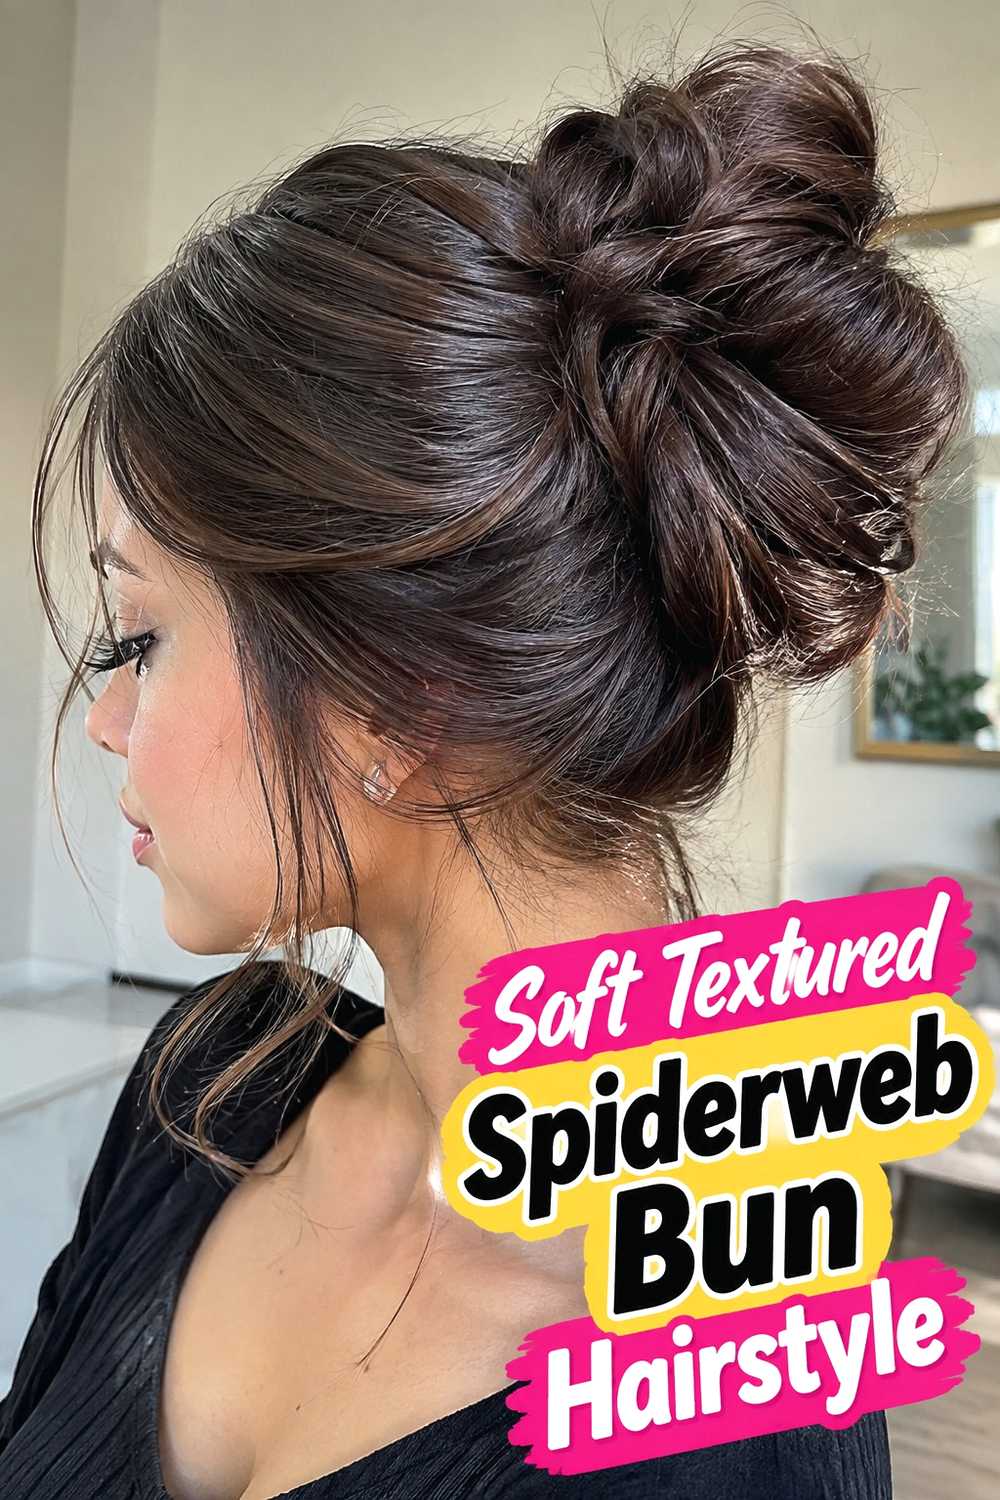
The Soft Textured Spiderweb Bun Hairstyle keeps the recognizable web structure while relaxing the surface finish. Rather than flattening every strand, the crown can retain gentle movement, light volume, and a few natural flyaways. The web sections remain defined enough to create the pattern, but the bun itself may be loosely wrapped or slightly expanded for a softer silhouette. This approach is useful when you want something creative without the severity of a highly polished updo. Naturally wavy hair can add appealing dimension, while straight hair can be lightly curled or texturized beforehand. Keep the connecting strands controlled so the intentional web detail does not disappear into the softer finish.
Hair Type & Length
Medium to long hair is practical for this design. Fine hair may benefit from light texture, while thicker hair can be divided into slightly smaller sections to keep the pattern manageable.
6. Braided Spiderweb Bun Hairstyle
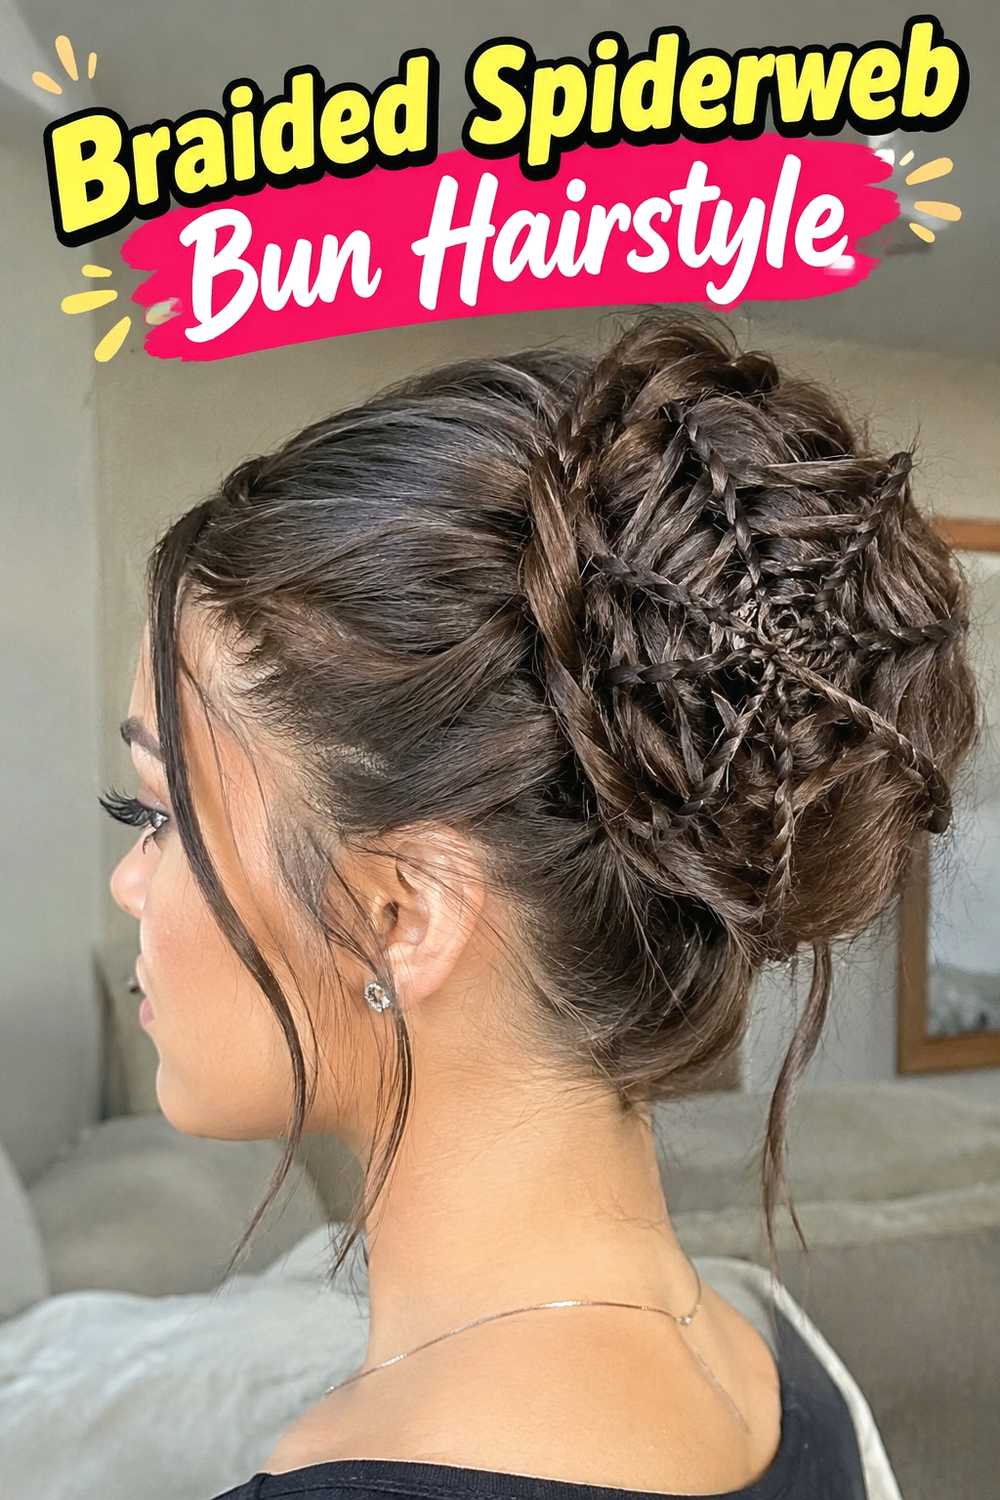
The Braided Spiderweb Bun Hairstyle introduces small braids into the web structure, adding texture and stronger visual definition. Some sections can be braided before they are crossed toward the bun, while others can remain smooth to create contrast. The central bun may also be braided, giving the complete hairstyle a coordinated woven appearance. This variation is especially effective on longer hair because braiding shortens the usable length slightly, so extra inches provide more styling flexibility. Keep individual braids slim enough that they can bend naturally around the shape of the head. Very thick braids may overpower the web pattern and make the arrangement harder to secure neatly.
Wear & Maintenance
Secure braid ends carefully before incorporating them into the bun or web. Small elastics and strategically placed pins help prevent individual sections from loosening during longer wear.
7. Double Spiderweb Bun Hairstyle
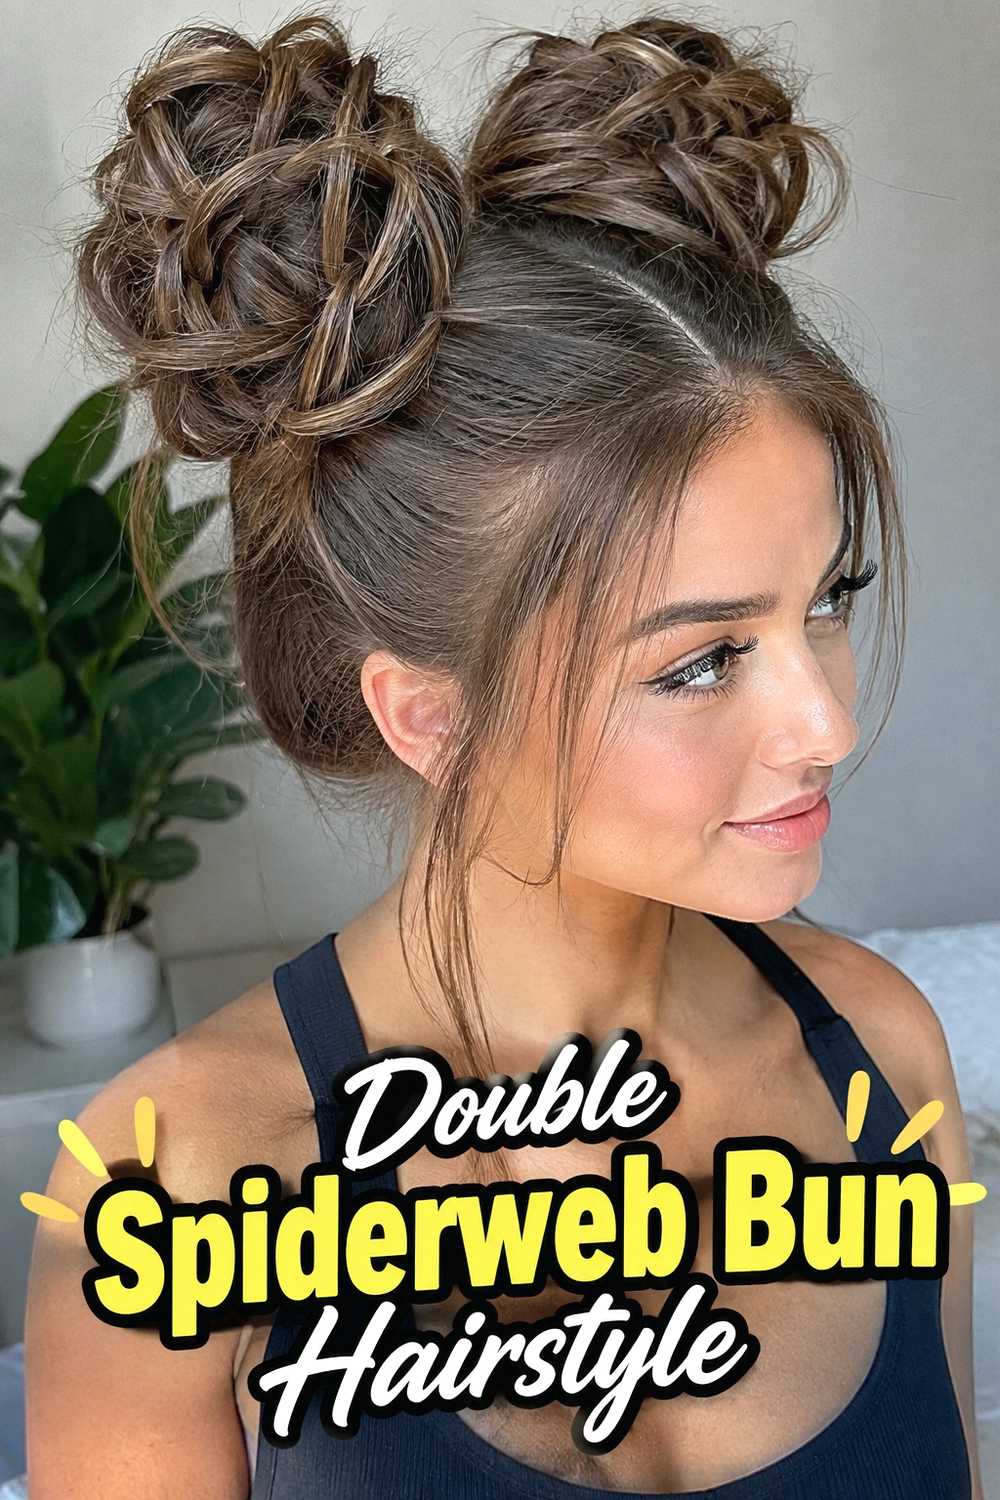
The Double Spiderweb Bun Hairstyle divides the design into two coordinated buns, creating a playful symmetrical result. Each side can have its own smaller web pattern, or connecting sections can extend between the two buns for a more elaborate effect. High double buns create a youthful, bold shape, while lower placements feel slightly more understated. Because the hair must be divided between two focal points, this style can work surprisingly well when a single oversized bun is not practical. Even sectioning is important for visual balance, especially when both buns are meant to match. Leave enough hair around each base to form the decorative web without making either bun look sparse.
Styling Notes
Establish the two bun positions before creating any web sections. Checking their height and spacing in a mirror first can save time and prevent uneven rebuilding later.
8. Side Part Spiderweb Bun Hairstyle
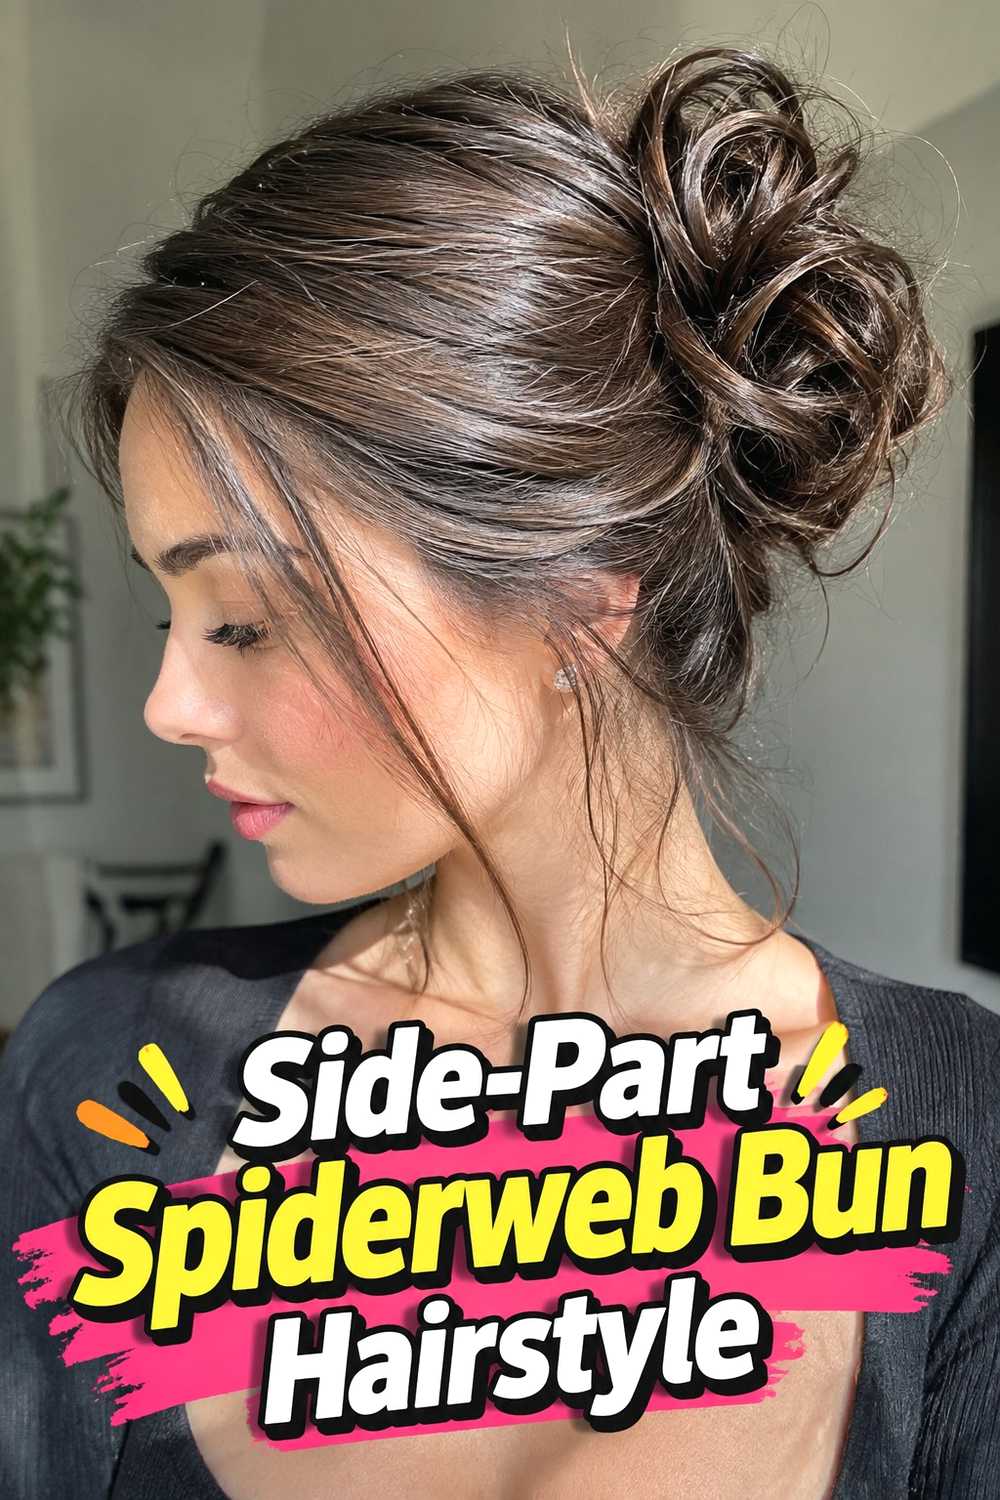
A Side-Part Spiderweb Bun Hairstyle adds asymmetry to the front while keeping the decorative web concentrated toward the back. The defined side part introduces a more styled, intentional frame around the face and can transition smoothly into the crossed sections behind the ear or toward the bun. The bun may stay centered for contrast or sit slightly off-center to strengthen the asymmetrical effect. This option is useful when you want the hairstyle to have visible detail from both the front and back rather than saving all the interest for one angle. Keep the side-parted section smooth enough to preserve its shape while avoiding excessive tension around the hairline.
Best For
This variation suits occasions where front-facing photos matter because the defined part gives the hairstyle a recognizable shape even when the full spiderweb detail is not visible.
9. Curly Spiderweb Bun Hairstyle
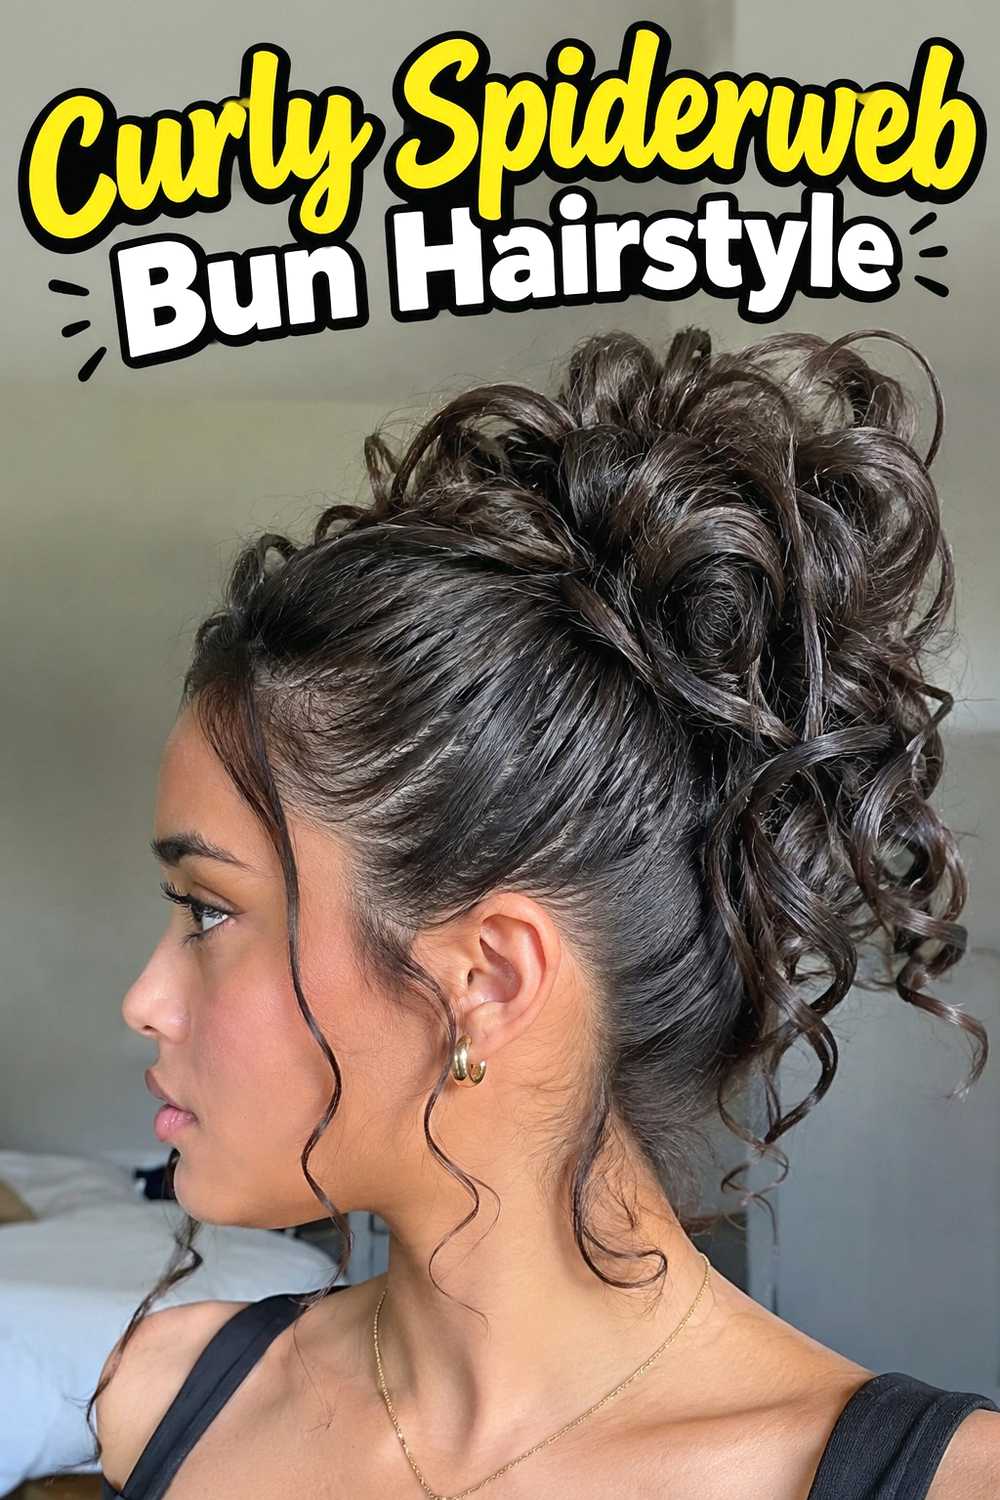
The Curly Spiderweb Bun Hairstyle lets curls provide softness and dimension around a structured web pattern. The connecting sections can be gently controlled near the scalp, while the bun preserves more curl definition instead of being compressed into a completely smooth coil. A few carefully placed curls can also sit around the bun to soften its outline without hiding the web. The contrast between organized sectioning and natural curl variation gives this style plenty of visual depth. When working with curly or coily textures, avoid repeatedly brushing through the lengths once the shape is established. Instead, define the sections individually and let the bun retain some of its natural volume.
Pro Tip
Use the curl pattern as part of the design rather than trying to eliminate it. Keeping the bun fuller often creates a better visual balance against the narrow web sections.
10. Twisted Spiderweb Bun Hairstyle
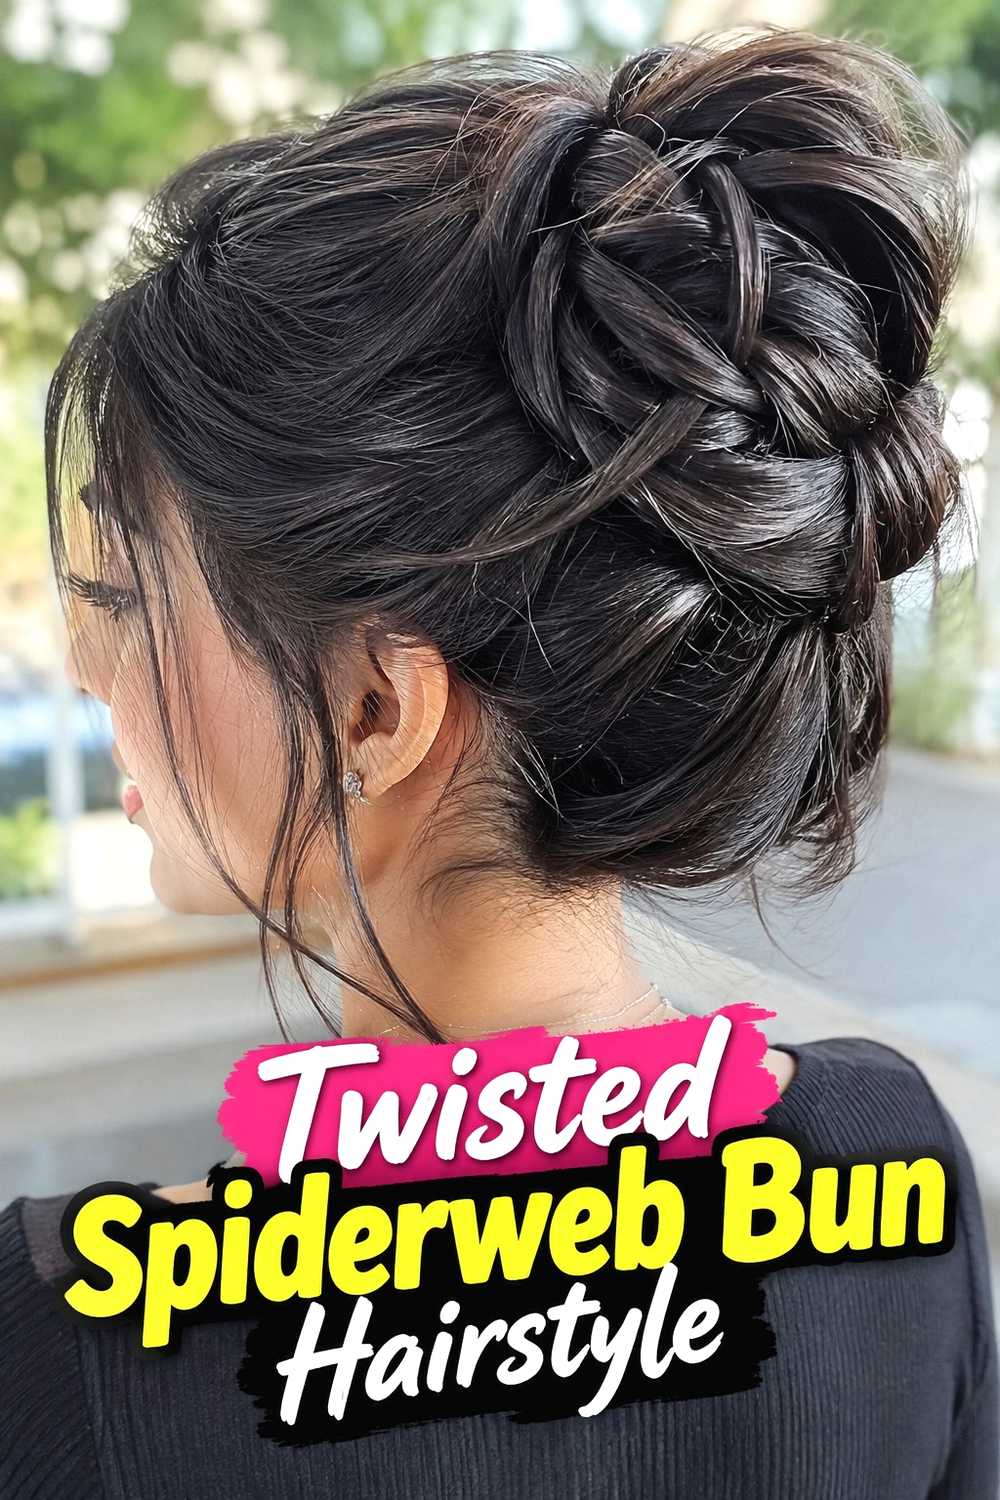
The Twisted Spiderweb Bun Hairstyle replaces some straight connecting pieces with softly twisted strands, giving the web more texture and depth. Two-strand twists are especially useful because they remain flexible enough to cross and curve around the head while still showing clear definition. The bun can continue the same technique with larger twists wrapped around its base, creating a cohesive finish from the outer sections to the center. This variation works well when smooth strands seem too simple but full braids feel too detailed. Keep each twist consistent in thickness so the finished pattern remains readable, and avoid twisting so tightly that individual sections become stiff or difficult to position.
Why It Works
Twists add dimension without completely changing the silhouette of the spiderweb bun, making them a practical middle ground between a sleek design and an intricately braided version.
11. Mini Spiderweb Bun Hairstyle
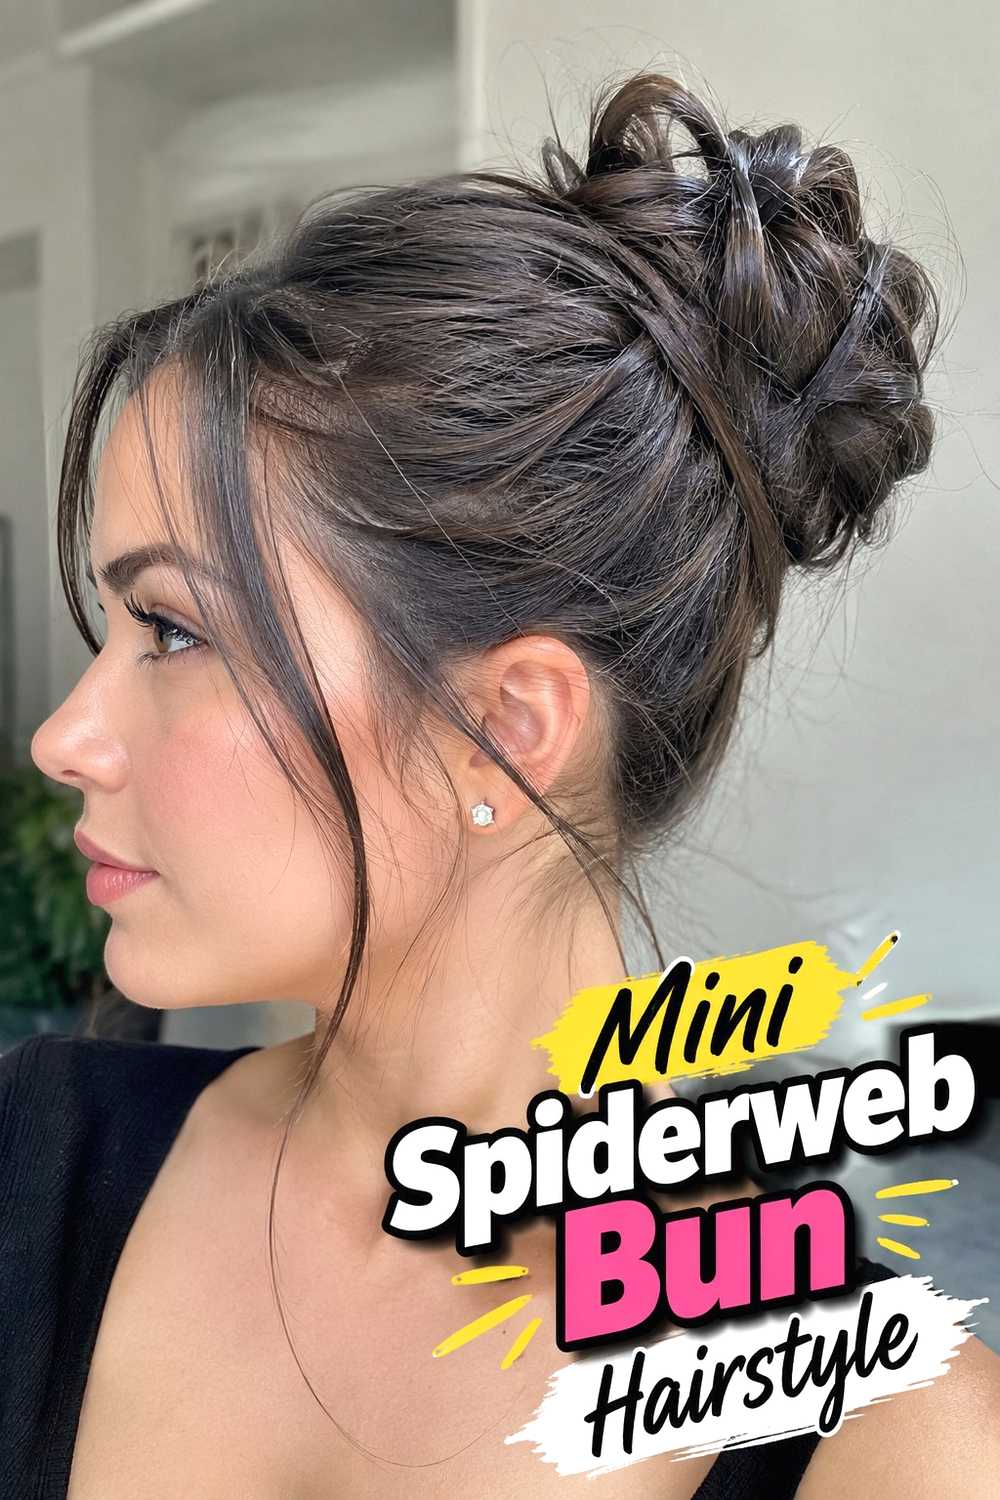
The Mini Spiderweb Bun Hairstyle scales the concept down for a lighter, more compact finish. Instead of building a large bun with a wide network of sections, the web can be concentrated around a smaller central knot or bun. This makes the decorative detail feel more delicate and can be useful for medium-length hair that does not create a very full updo. Narrow sections are particularly important here because thick strands can quickly overwhelm the small focal point. The finished result can look neat and playful without taking over the entire hairstyle. A mini version is also a practical way to experiment with the technique before attempting a larger, more elaborate web arrangement.
Hair Type & Length
Medium or longer hair can work, depending on density. If the bun is naturally small, avoid excessive padding and let the web pattern provide most of the visual interest.
12. Oversized Spiderweb Bun Hairstyle
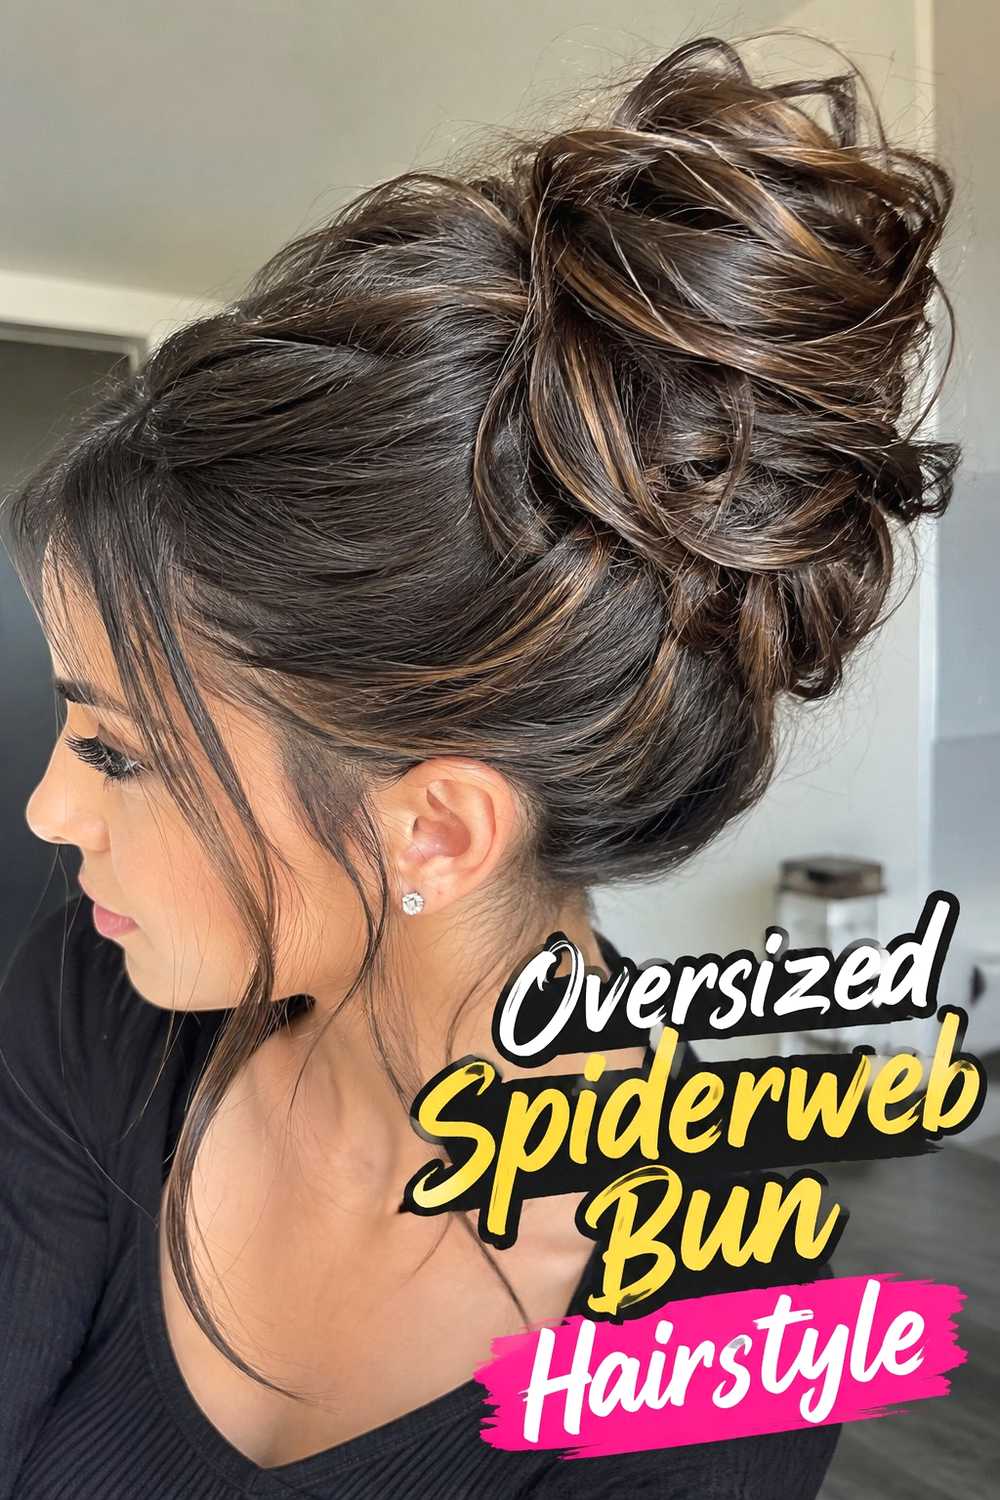
The Oversized Spiderweb Bun Hairstyle is designed around maximum visual impact, with a fuller bun serving as the center of a wider decorative pattern. The surrounding web sections can extend across more of the back of the head, creating a bold frame around the large bun. Thick or long hair can naturally produce this volume, while moderate padding may be used when a larger silhouette is desired without excessive twisting. The key is maintaining proportion: if the bun becomes very full, the surrounding web should be visible enough to avoid looking like an afterthought. Keep the anchor points secure because the additional volume and length can place more weight on the finished updo.
Wear & Maintenance
Check comfort before finalizing the design. A large bun should feel balanced rather than pulling backward, and its supporting pins should sit flat against the head instead of pressing sharply.
13. Half Up Spiderweb Bun Hairstyle
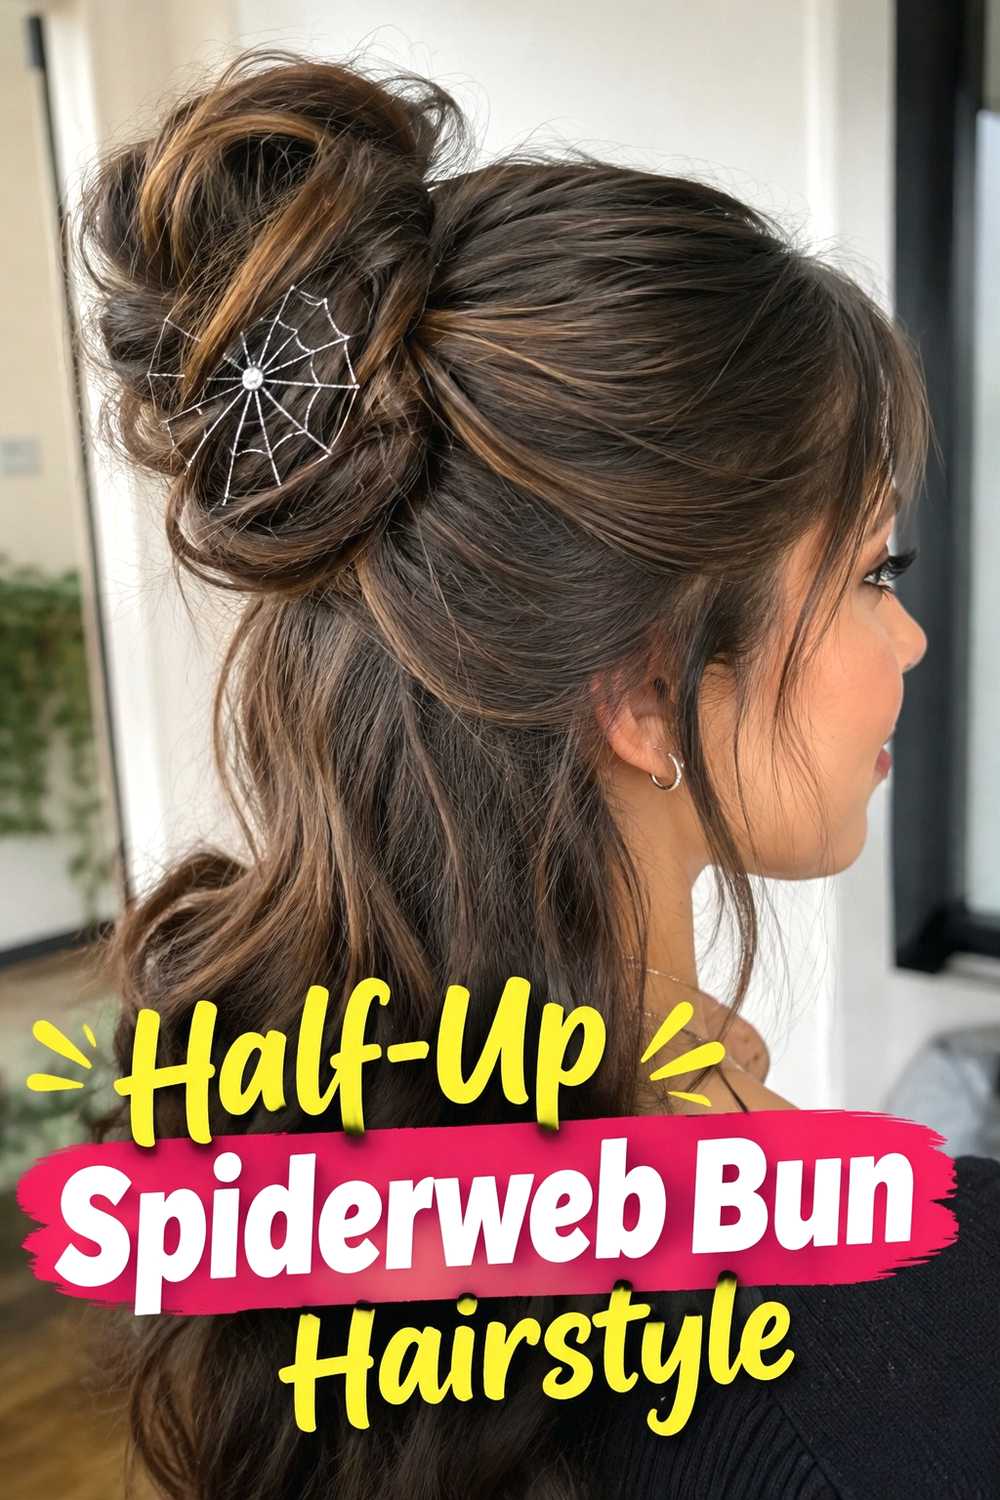
The Half-Up Spiderweb Bun Hairstyle combines decorative structure at the crown with loose lengths underneath. Upper sections are used to create the web pattern and small bun, while the rest of the hair remains down in its natural texture or is styled with waves, curls, or a smooth finish. This approach gives you the visual interest of a spiderweb bun without committing all the hair to an updo. It can also be more comfortable for casual occasions because less hair is pinned in place. The contrast between the structured top and flowing lower lengths is the main attraction, so avoid making the bun so large that it overwhelms the loose portion.
Styling Notes
Separate the amount of hair needed for the half-up section before beginning the web. Leaving enough density underneath helps the loose lengths retain a balanced, full appearance.
14. Ribbon Wrapped Spiderweb Bun Hairstyle
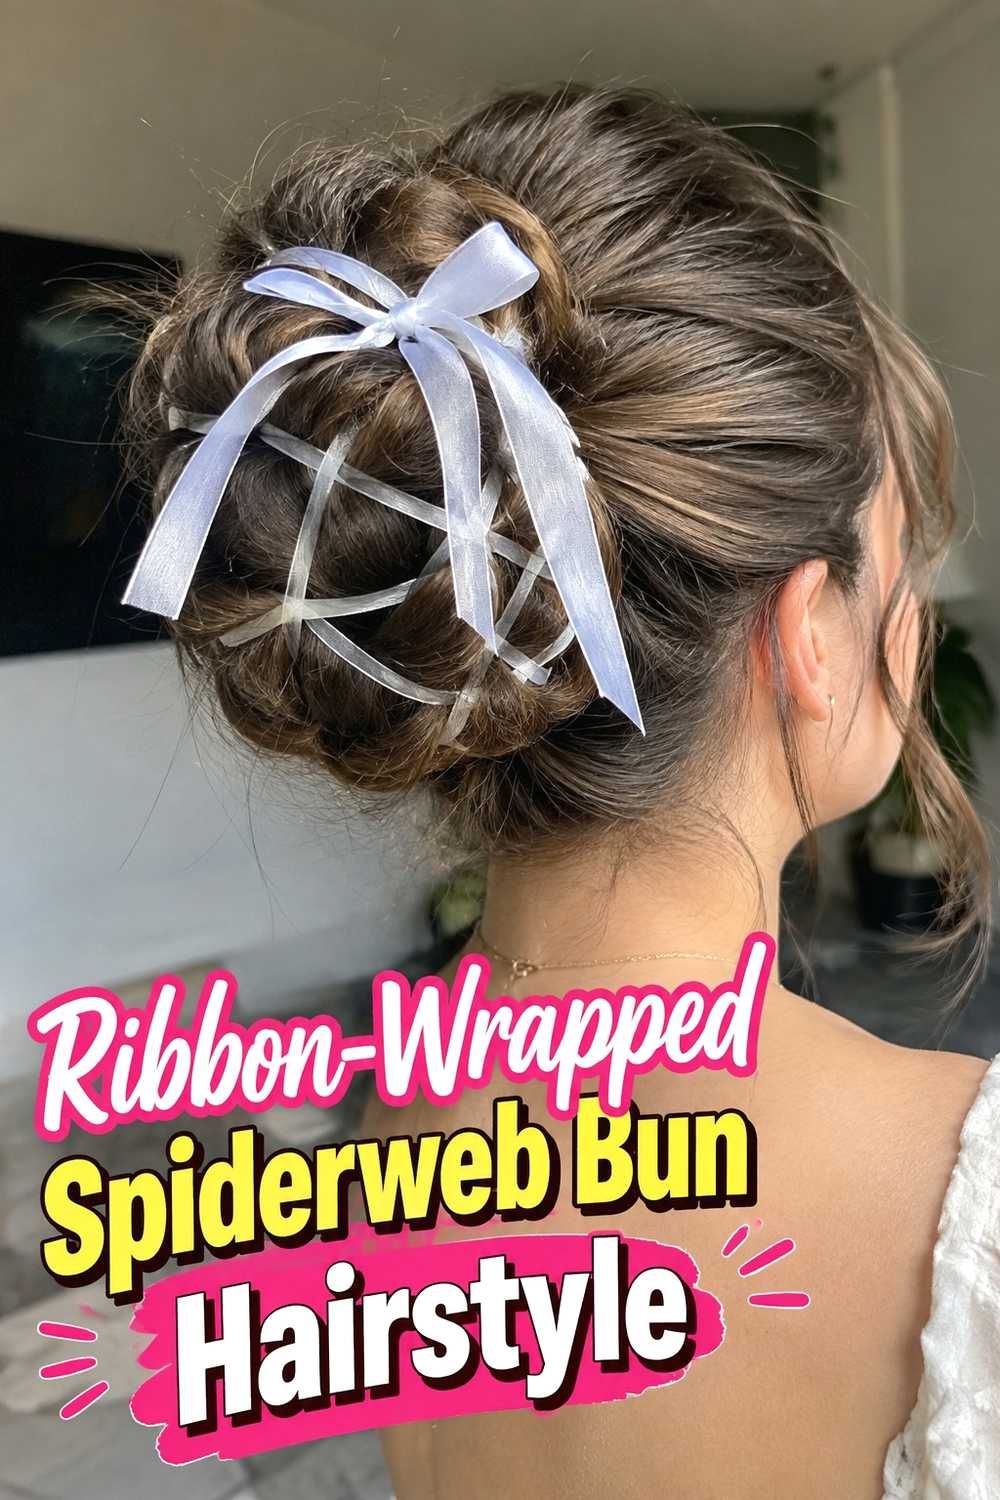
The Ribbon-Wrapped Spiderweb Bun Hairstyle uses narrow ribbon as an accent that follows or highlights the web pattern. The ribbon can be woven beside selected strands, wrapped around the bun, or threaded through a few connecting points for added contrast. Choosing one consistent ribbon color keeps the design easier to read, while a satin or matte finish can change how formal the result feels. The accessory should complement the hairstyle rather than become the entire structure, so the hair itself still needs secure anchors. This variation works particularly well for parties, creative photo shoots, and seasonal styling where a small color detail can connect the hair to an outfit or theme.
Pro Tip
Use thin ribbon and secure its ends discreetly underneath the bun. Wider ribbon can cover the hair pattern and make the web sections look less distinct.
15. Pearl Accent Spiderweb Bun Hairstyle
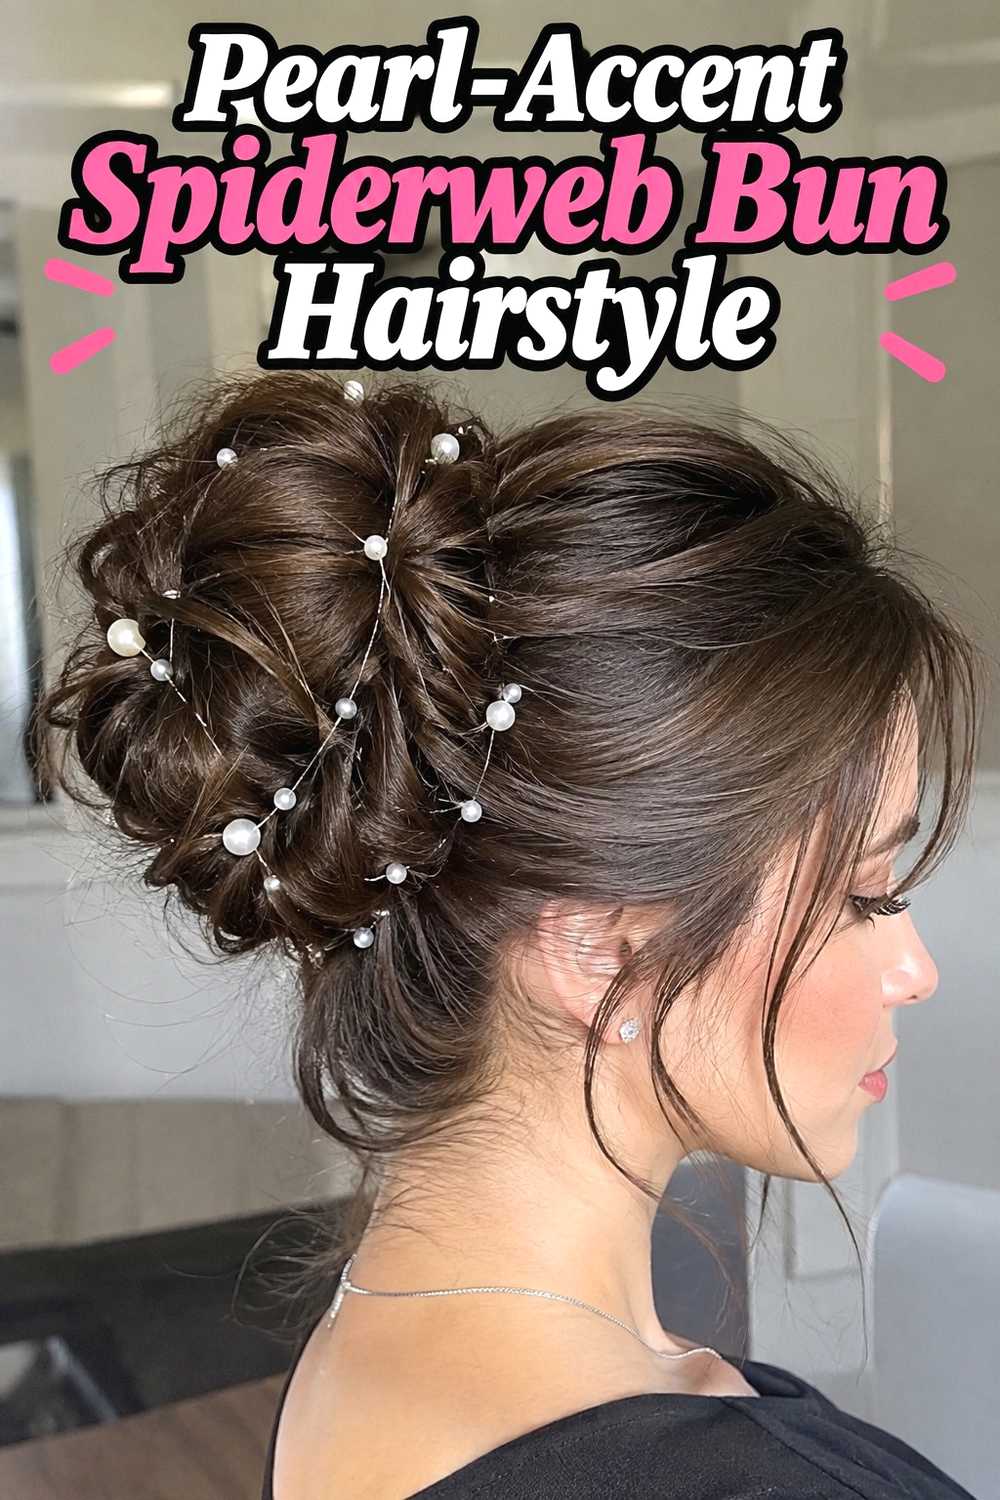
The Pearl-Accent Spiderweb Bun Hairstyle gives the geometric pattern a softer, dressier finish by placing small pearl pins or beads at selected intersections. Rather than filling every section with decoration, a few evenly spaced accents can highlight the web structure while leaving the hairstyle itself visible. A smooth or softly textured bun both work well, depending on whether you want the result to feel polished or romantic. The pearls look especially effective near the central bun and at points where strands cross. Avoid using heavy accessories on delicate web sections because extra weight can distort the pattern. Secure decorative pieces into stable sections or pins whenever possible.
Best For
This version fits dressier occasions, celebrations, and formal events where you want the spiderweb structure to feel decorative and elegant rather than strongly themed.
16. Halloween Spiderweb Bun Hairstyle
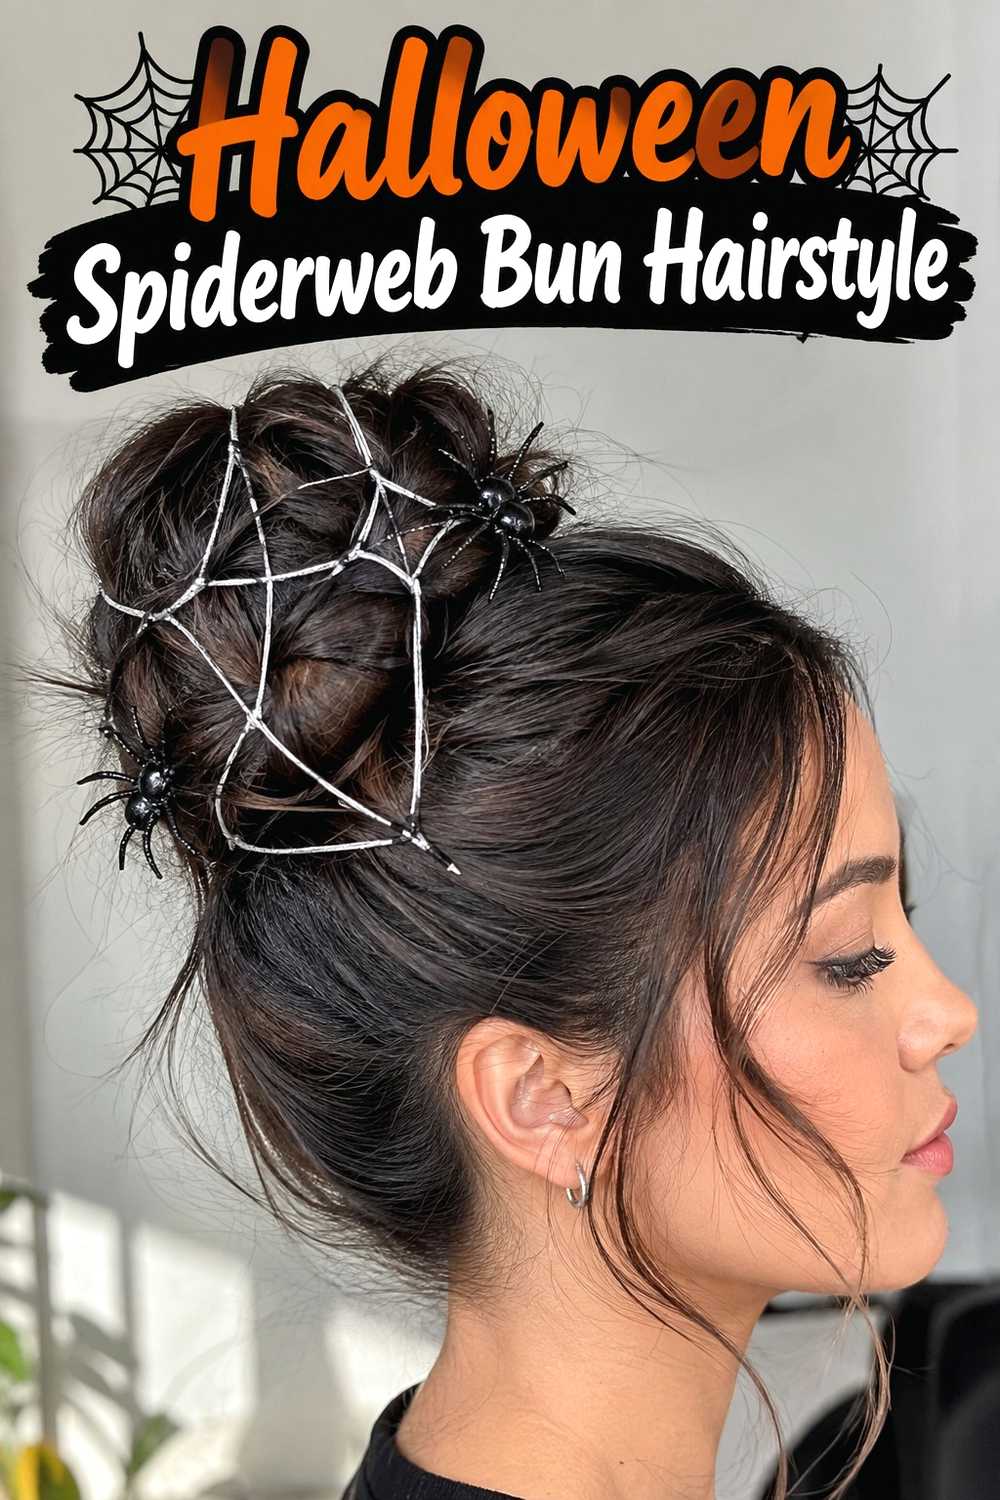
The Halloween Spiderweb Bun Hairstyle leans fully into the web inspiration, making the crossed sections more obvious and theatrical. A centered or high bun can act as the hub, while distinct lines radiate outward and connect in visible rings. Small themed accessories can be added sparingly, but the hairstyle remains more convincing when the hair itself creates most of the web. Sleek sections produce a graphic result, whereas lightly textured hair gives the design a softer, slightly whimsical feel. Because themed hairstyles are often worn for parties or longer events, secure every anchor point well and check that decorative additions do not snag nearby strands or create uncomfortable pressure.
Styling Notes
Map the main radial sections first, then add the connecting pieces. Building the structure in layers usually creates a cleaner web than trying to place every strand at once.
17. Messy Spiderweb Bun Hairstyle
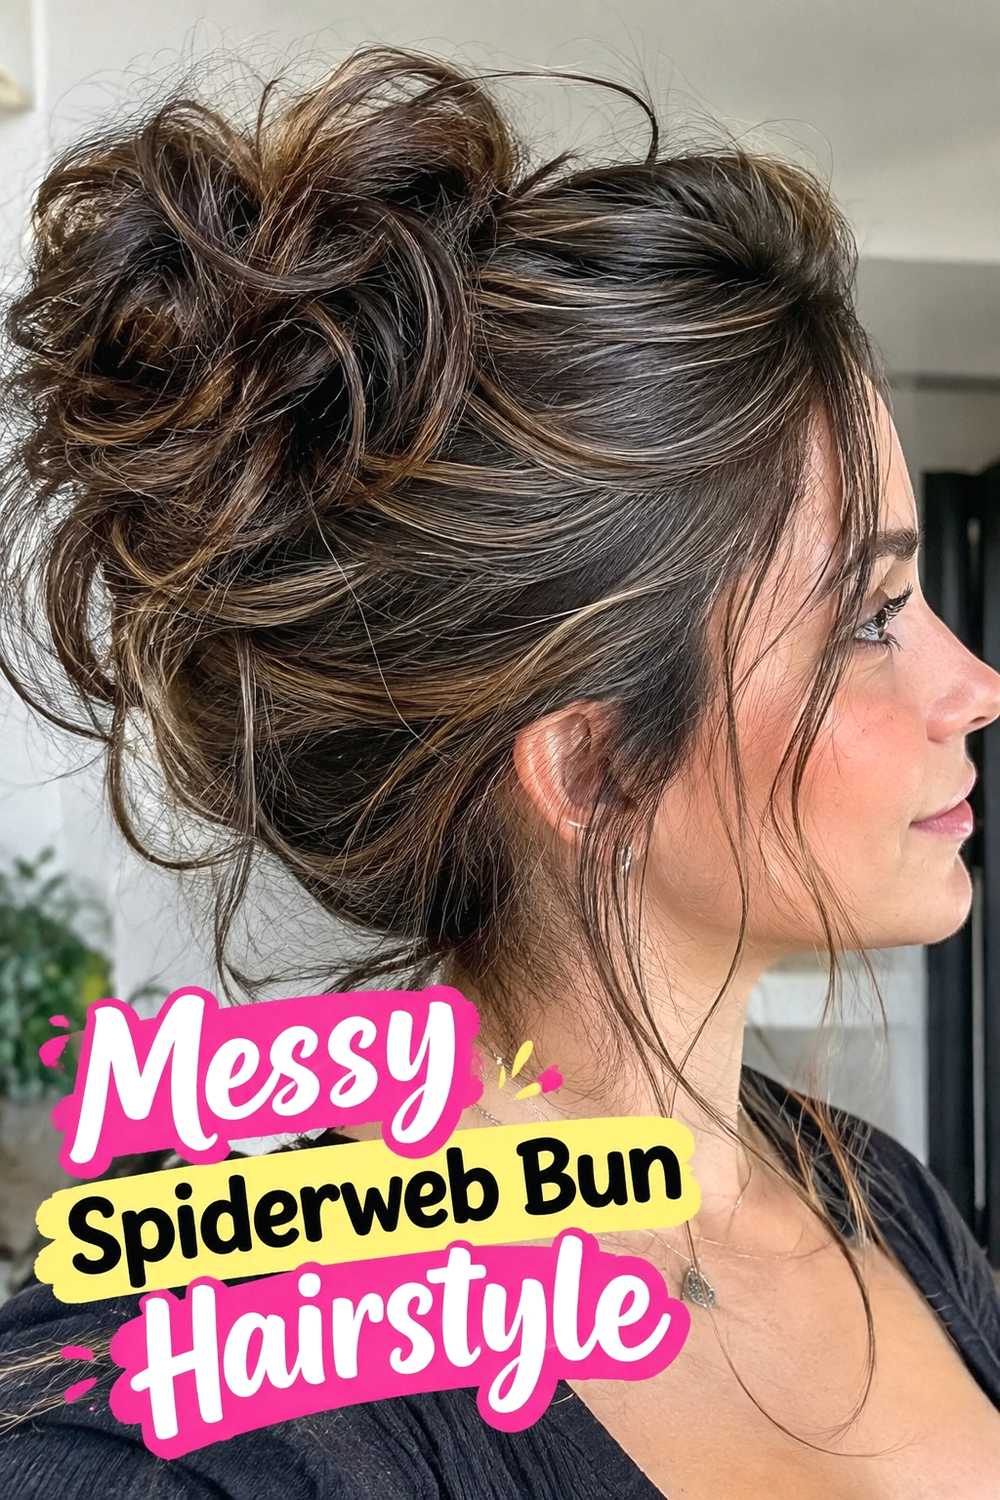
The Messy Spiderweb Bun Hairstyle combines an intentionally relaxed bun with enough structured sectioning to preserve the web concept. The crown can have soft lift, the bun may include loose loops, and a few wispy pieces can remain free around the edges. However, the web itself should still have recognizable connection points; otherwise, the style can simply read as an ordinary messy updo. This version is useful for anyone who likes creative hairstyles but prefers movement over a perfectly polished finish. Work with the hair’s natural texture where possible and loosen selected areas only after the structure is secure. Pulling sections apart too early can make the design difficult to control.
Why It Works
The combination of precise web sections and a relaxed bun creates useful contrast, giving the hairstyle personality while keeping it softer and more wearable than a rigid geometric version.
How to Choose the Right Look
Start with your available length and density. Medium-length hair may be easiest to adapt into a mini, half-up, or low spiderweb bun, while longer hair gives you more freedom for braids, twists, larger buns, and wider web patterns. Thick hair can create dramatic volume naturally, but dividing it into smaller sections may make intricate details easier to manage.
Next, consider styling time. Sleek, braided, double, and Halloween-inspired versions generally require more careful sectioning than a textured or messy design. If comfort is important, choose a low or half-up placement and keep the tension moderate around the hairline.
The occasion matters too. Pearl accents and low buns can feel more refined, ribbons add playful color, and an oversized or high-crown version makes a stronger statement. Most importantly, choose a pattern that stays visible with your natural texture rather than forcing the hair into a finish that is difficult to maintain.
Final Thoughts
Spiderweb bun hairstyles can range from subtle, structured updos to bold themed designs, so the best version depends on how much detail, volume, and styling time you want. Start with a simple centered or mini variation if the technique is new to you, then experiment with curls, braids, twists, ribbons, or accessories as you become more comfortable with the pattern.
FAQs
1. What is a spiderweb bun hairstyle?
A spiderweb bun uses sectioned strands arranged in radiating and connecting lines around a bun, creating a web-like pattern while keeping the hair secured in an updo.
2. How long does hair need to be for a spiderweb bun?
Medium to long hair is generally the easiest to work with. Shorter medium-length hair may still suit mini or half-up versions that require less length.
3. Can curly hair be used for a spiderweb bun?
Yes. Curly and coily textures can create beautiful dimension. The web sections may be controlled individually while the bun retains more natural curl definition and volume.
4. How do you keep the web sections secure?
Small elastics, hairpins, and carefully placed anchor points can help. Build the main sections first and avoid loosening them until the overall structure is stable.
5. Are spiderweb buns only for Halloween?
No. Highly graphic versions work well for Halloween, but sleek, low, pearl-accented, braided, or softly textured spiderweb buns can also suit parties, creative events, and dressier occasions.
Save your favorite spiderweb bun ideas, share them with someone who loves creative updos, and explore more hairstyle inspiration for your next look.