20 Glassy Long Waves Hairstyle Ideas
Smooth, reflective lengths and flowing curves make glassy long waves a polished choice when you want shine, movement, and softness in one hairstyle. Glassy long waves combine a sleek surface with broad, fluid movement. Unlike highly textured beach waves, the focus is on smooth strands, controlled bends, and enough separation for light to travel across the hair. The result can feel minimal and modern or softly glamorous depending on the part, root volume, layering, and wave pattern. Long hair gives this style plenty of space to show gradual curves, but the weight of the hair also affects how the waves hold. When choosing a version, consider your layers, density, natural texture, preferred styling time, and how much volume you want at the roots versus the lengths.
Quick List
- Classic Glassy Long Waves Hairstyle
- Center Part Glassy Long Waves Hairstyle
- Deep Side Part Glassy Long Waves Hairstyle
- Face Framing Glassy Long Waves Hairstyle
- Long Layered Glassy Waves Hairstyle
- Soft S Curve Glassy Long Waves Hairstyle
- Brushed Out Glassy Long Waves Hairstyle
- Sleek Root Glassy Long Waves Hairstyle
- Curtain Bang Glassy Long Waves Hairstyle
- Extra Gloss Glassy Long Waves Hairstyle
- Loose End Glassy Long Waves Hairstyle
- Voluminous Crown Glassy Long Waves Hairstyle
- Side Swept Glassy Long Waves Hairstyle
- Barely There Glassy Long Waves Hairstyle
- Ribbon Wave Glassy Long Waves Hairstyle
- Polished Event Glassy Long Waves Hairstyle
- Feathered Layer Glassy Long Waves Hairstyle
- Soft Hollywood Glassy Long Waves Hairstyle
- Minimalist Glassy Long Waves Hairstyle
- Ultra Long Glassy Waves Hairstyle
1. Classic Glassy Long Waves Hairstyle
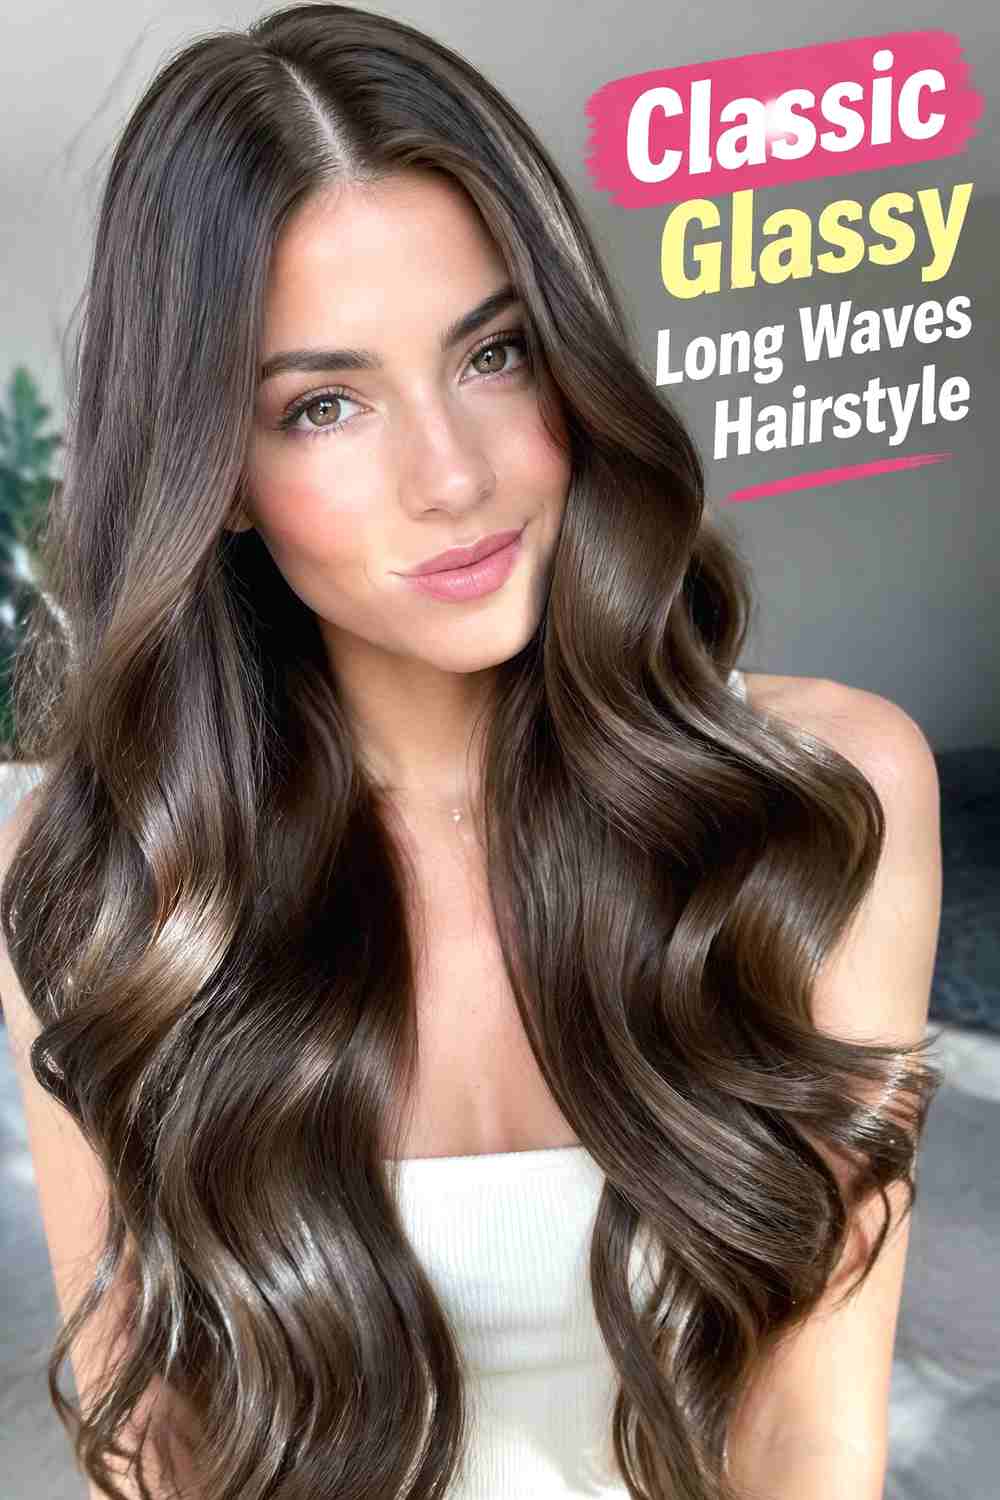
The Classic Glassy Long Waves Hairstyle balances a smooth surface with broad bends that flow through the mid-lengths and ends. The roots stay polished without looking flat, while the wave pattern remains loose enough for the hair to move naturally. Long hair benefits from working in manageable sections so each piece can be smoothed before the curve is created. A large curling tool or flat iron can produce the shape, depending on the finish you prefer. Let each section cool before lightly blending the waves with your fingers. Keep finishing products concentrated through the lower lengths, where a small amount of lightweight serum can enhance reflection without weighing down the roots or reducing the airy separation between waves.
Styling Notes
Smooth each section before shaping it, then use broad curves rather than tight wraps to preserve the long, flowing silhouette.
Best For
This balanced version suits anyone who wants obvious shine and movement without an overly formal or heavily volumized finish.
2. Center Part Glassy Long Waves Hairstyle
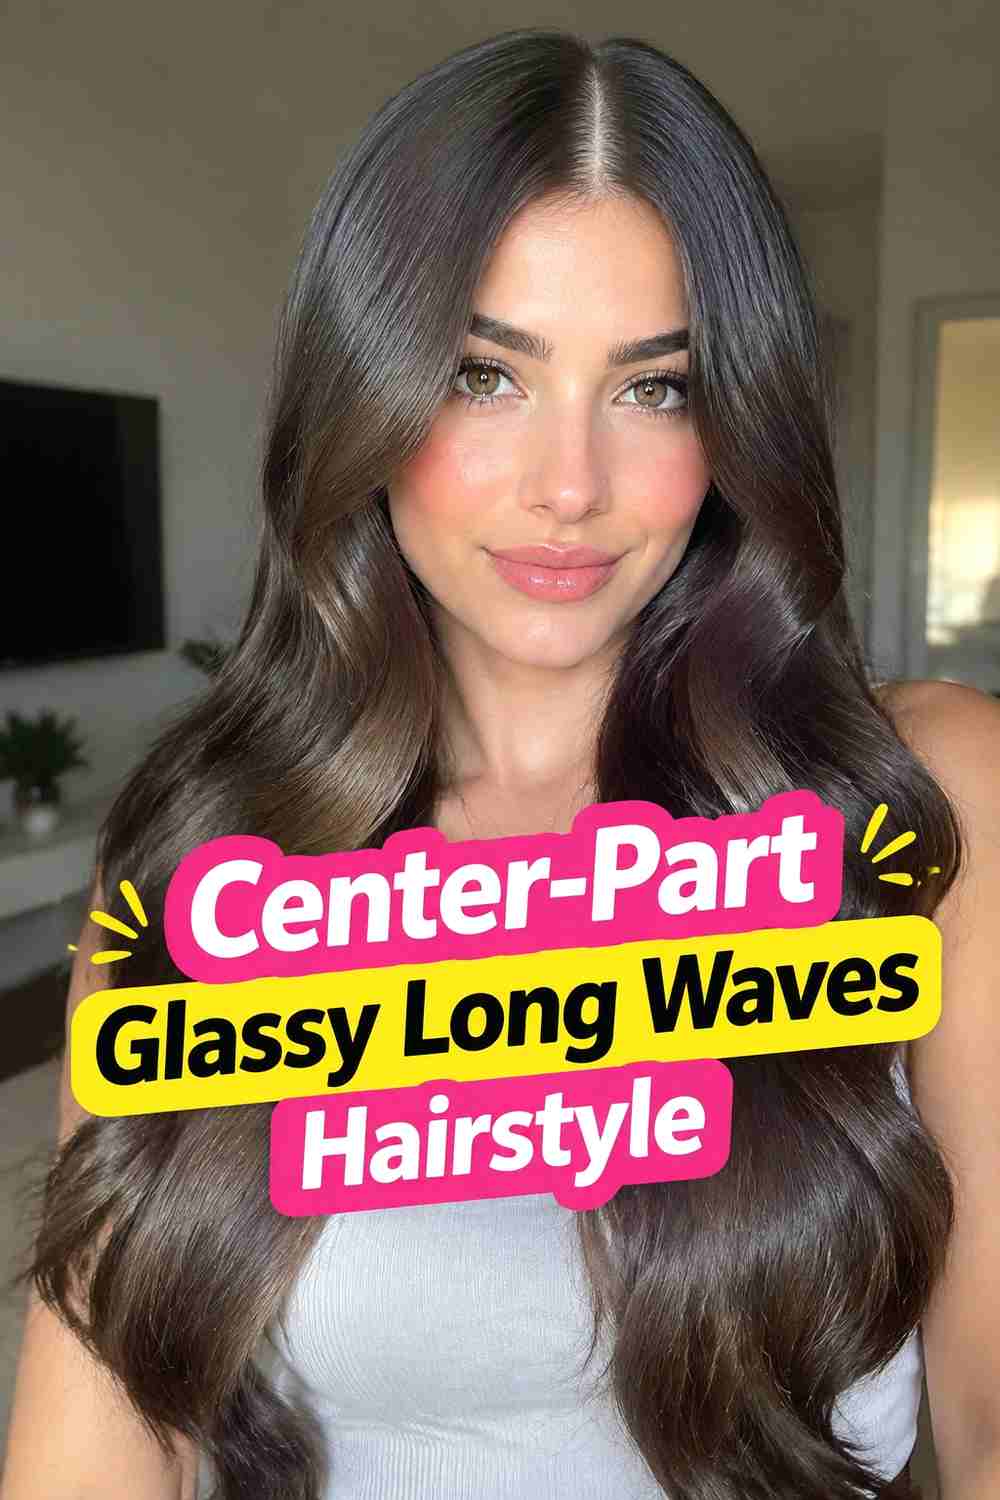
The Center-Part Glassy Long Waves Hairstyle creates a clean, symmetrical frame with polished waves falling evenly on both sides. Keeping the roots relatively smooth makes the center part look deliberate, while the first curves can begin around the cheekbones or jawline to soften the outline. The front pieces should move gently away from the face before blending with longer bends through the body of the hair. Work with wider sections to keep the pattern loose and glossy rather than curly. Once the hair cools, separate it carefully with your fingers instead of aggressively brushing the surface. A tiny amount of smoothing serum through the ends can help emphasize the reflective finish while keeping the roots fresh and naturally lifted.
Why It Works
The symmetrical part gives the hairstyle structure, allowing the smooth wave pattern and shine to become the main visual features.
Pro Tip
Match the first outward curve on both front sections so the face framing stays balanced from side to side.
3. Deep Side Part Glassy Long Waves Hairstyle
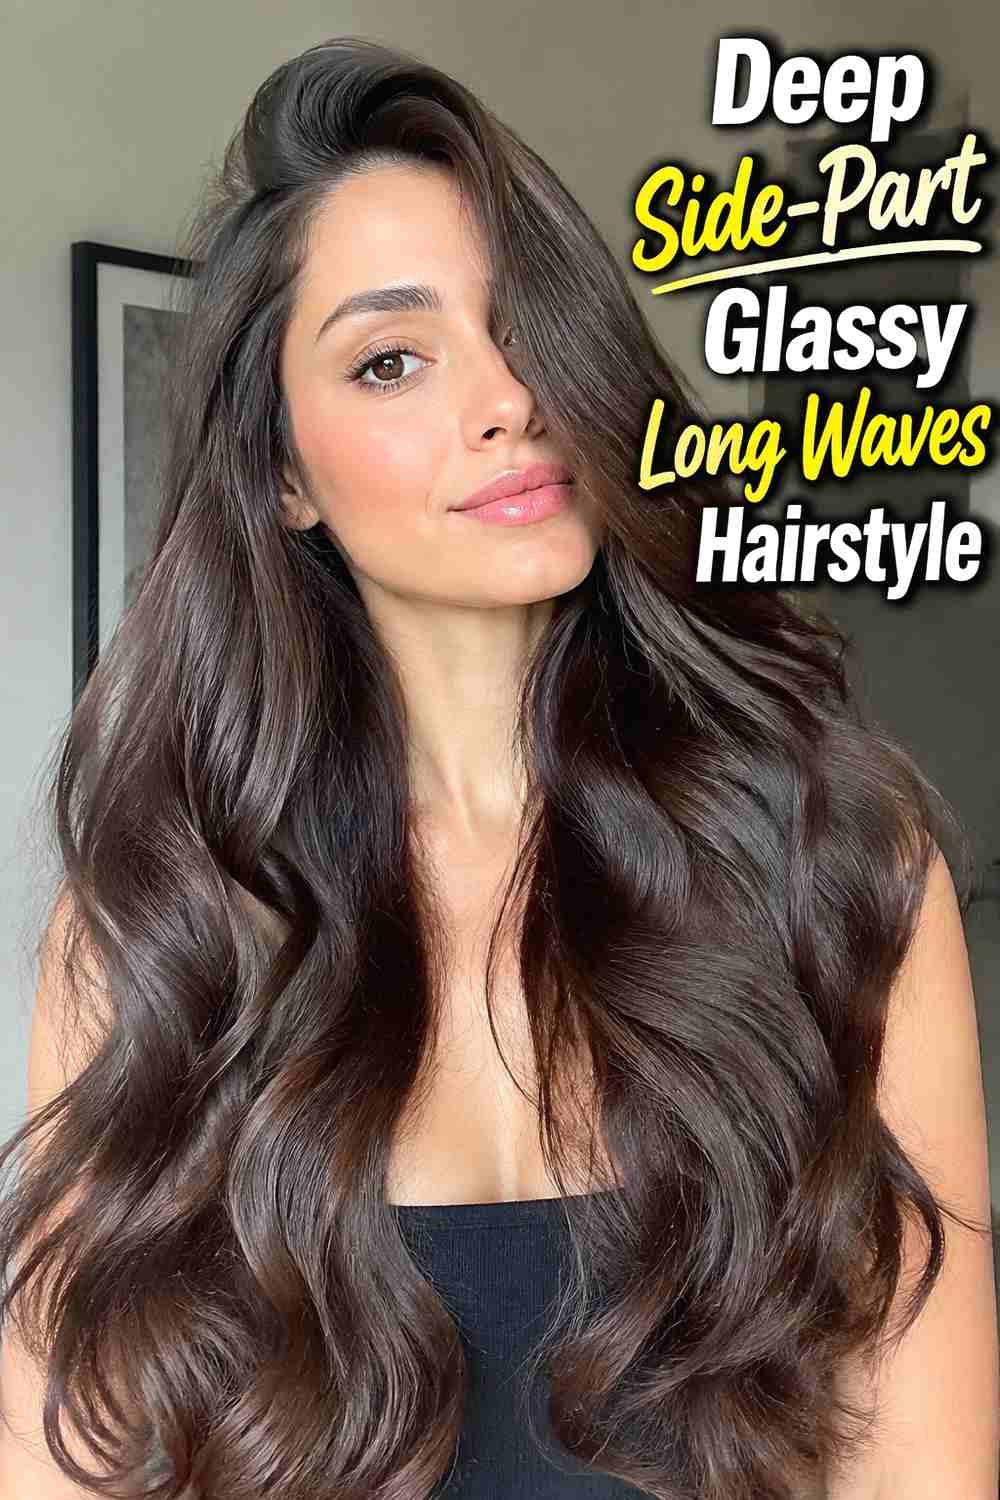
The Deep Side-Part Glassy Long Waves Hairstyle adds drama through asymmetry while preserving the smooth, reflective finish. Moving the part farther to one side creates natural lift on the heavier section and allows the front to sweep across the forehead before curving away from the face. The lighter side can remain closer to the head for contrast. Style the part before shaping the waves so each section falls naturally in its final direction. Use large bends through the lengths, then let them cool before blending. A light flexible spray can help support the front sweep, while serum should stay mostly on the mid-lengths and ends. The result feels fuller at the front without relying on heavy teasing.
Styling Notes
Lift the heavier front section gently at the root before shaping its first curve to create height without disrupting the glassy surface.
Best For
This variation works well when you want a more dramatic front profile while keeping the overall finish smooth and sophisticated.
4. Face Framing Glassy Long Waves Hairstyle
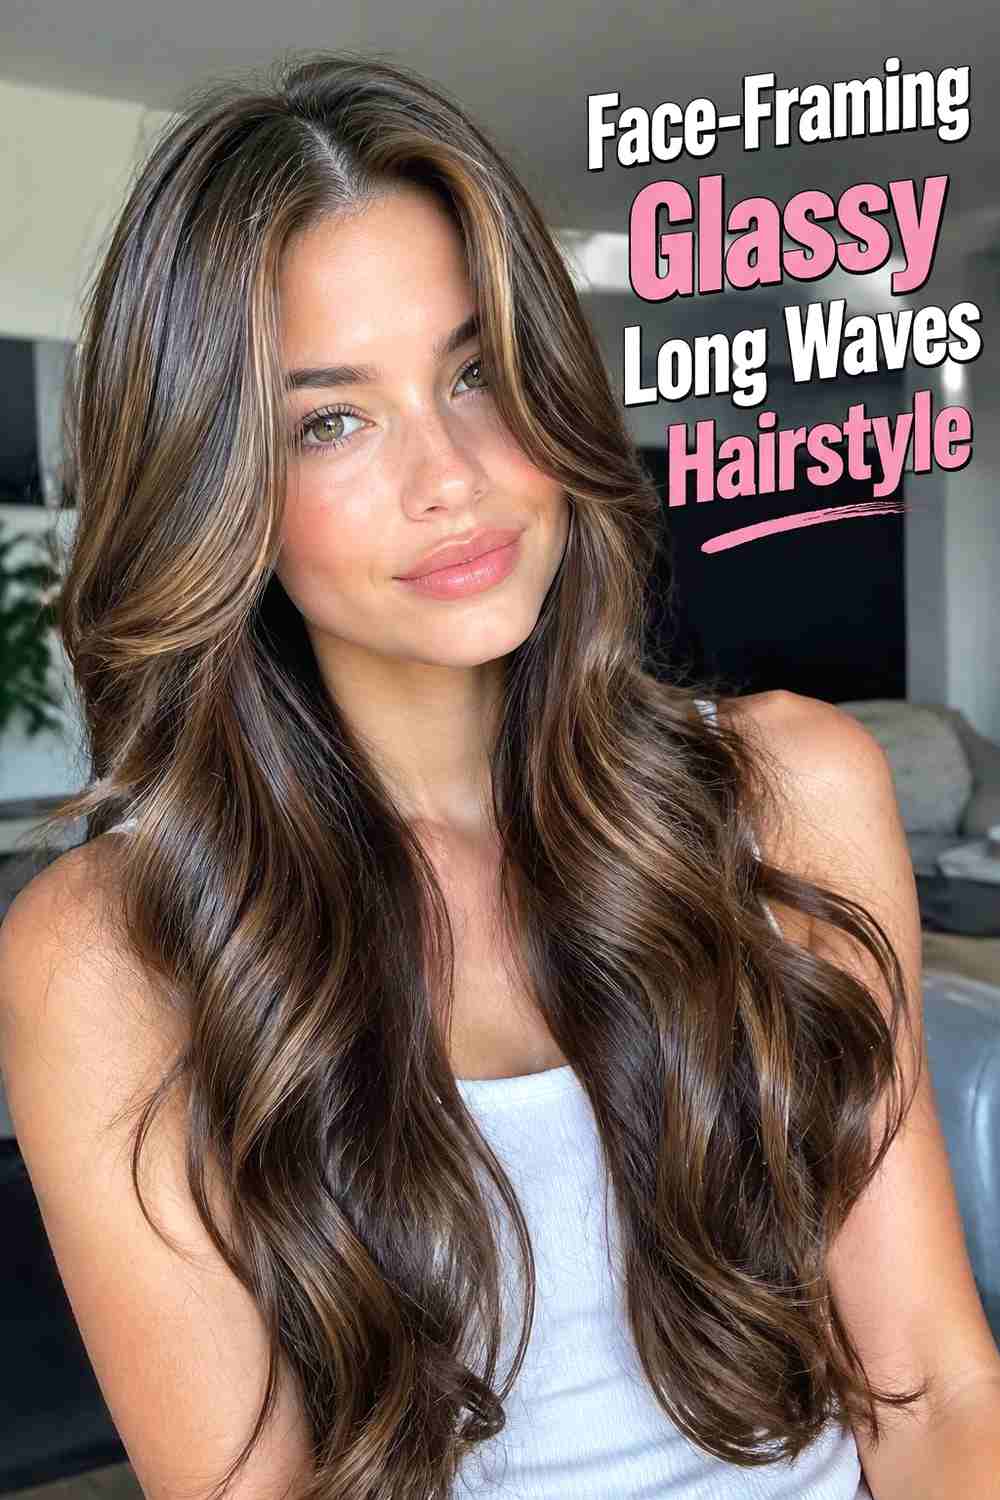
The Face-Framing Glassy Long Waves Hairstyle places the strongest movement around the cheeks, jawline, and collarbone. Shorter front layers curve away from the face, while the longer lengths fall into wider, more relaxed waves. This creates a detailed front view without making the entire hairstyle feel overly styled. Work on the face-framing pieces individually so each bend remains visible and connects smoothly with the rest of the hair. Through the back, larger sections can keep the pattern simple and fluid. Allow everything to cool before gently separating the waves. The polished surface is important, so use just enough smoothing product to control flyaways without coating the hair or reducing the natural movement of the layers.
Hair Type & Length
Long hair with cheekbone, jaw, or collarbone-length front layers gives this look the most visible shape and separation.
Pro Tip
Create slightly more definition in the shortest front layers because they can loosen quickly after being touched or tucked behind the ears.
5. Long Layered Glassy Waves Hairstyle
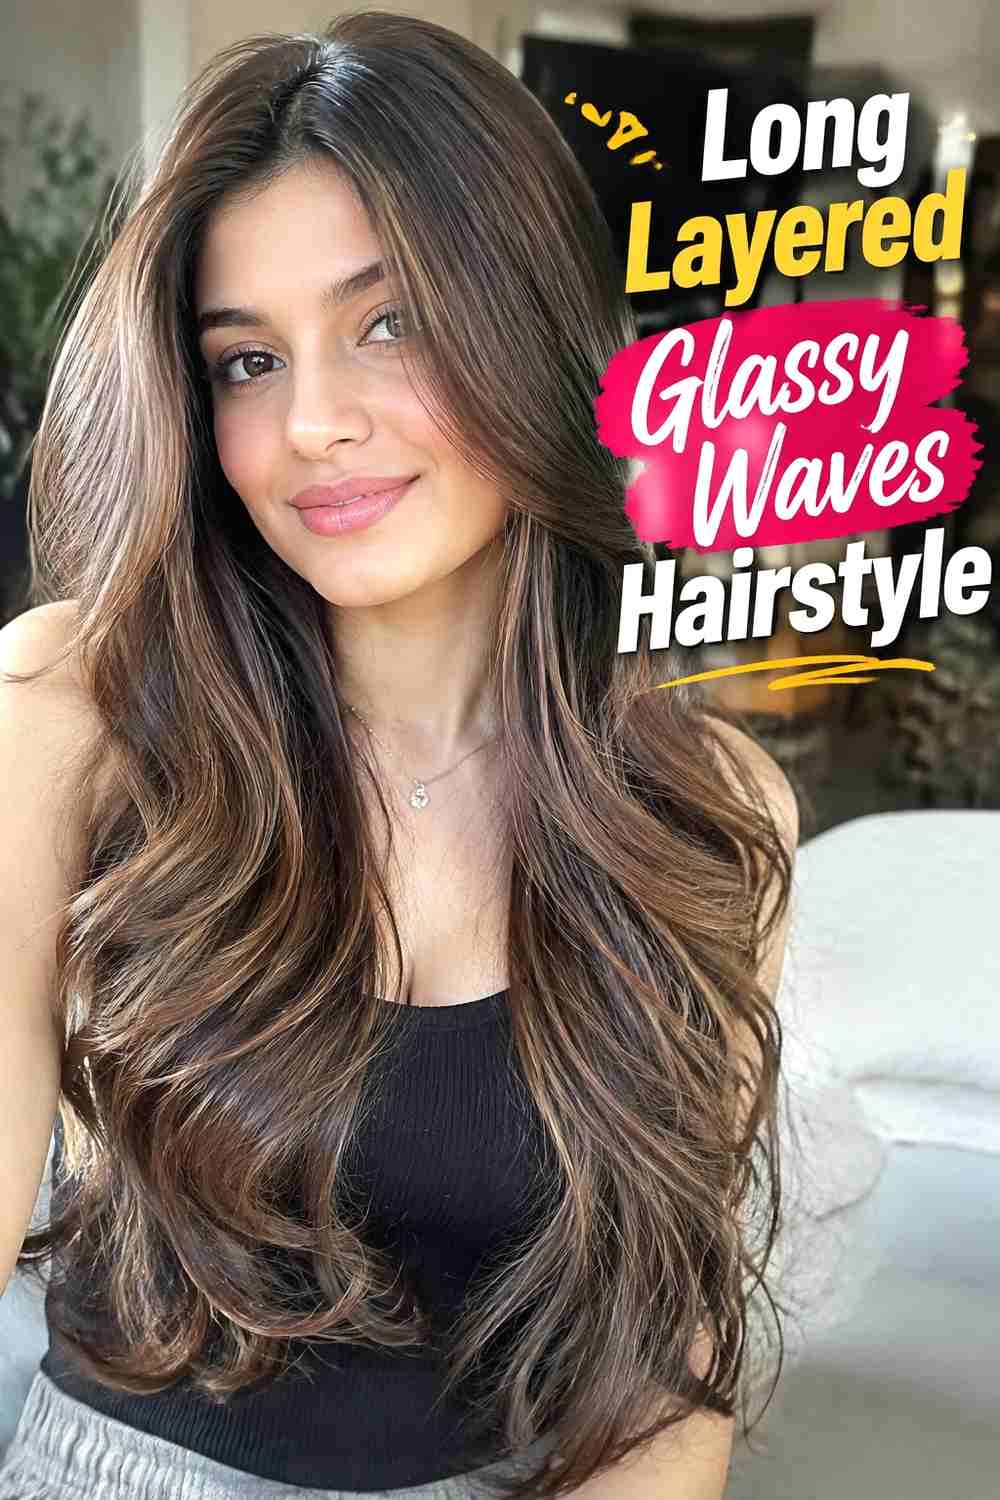
The Long Layered Glassy Waves Hairstyle uses the haircut itself to build movement at multiple levels. Shorter layers form visible curves higher through the sides, while longer pieces carry the wave pattern toward the ends. That variation prevents very long hair from looking like one heavy sheet and helps the reflective finish catch light across different planes. Use larger sections on the longest layers and slightly smaller ones on shorter pieces so the movement stays balanced. Keep the roots controlled rather than excessively lifted, then let the waves cool completely before separating them. A lightweight shine mist can enhance the glassy effect, but the layers should remain airy enough to move independently instead of sticking together.
Why It Works
Layering distributes volume and movement throughout the length, making broad waves easier to see without requiring tight curls.
Wear & Maintenance
Avoid heavy creams or oils that can pull down the layered movement and make the longest sections look overly flat.
6. Soft S Curve Glassy Long Waves Hairstyle
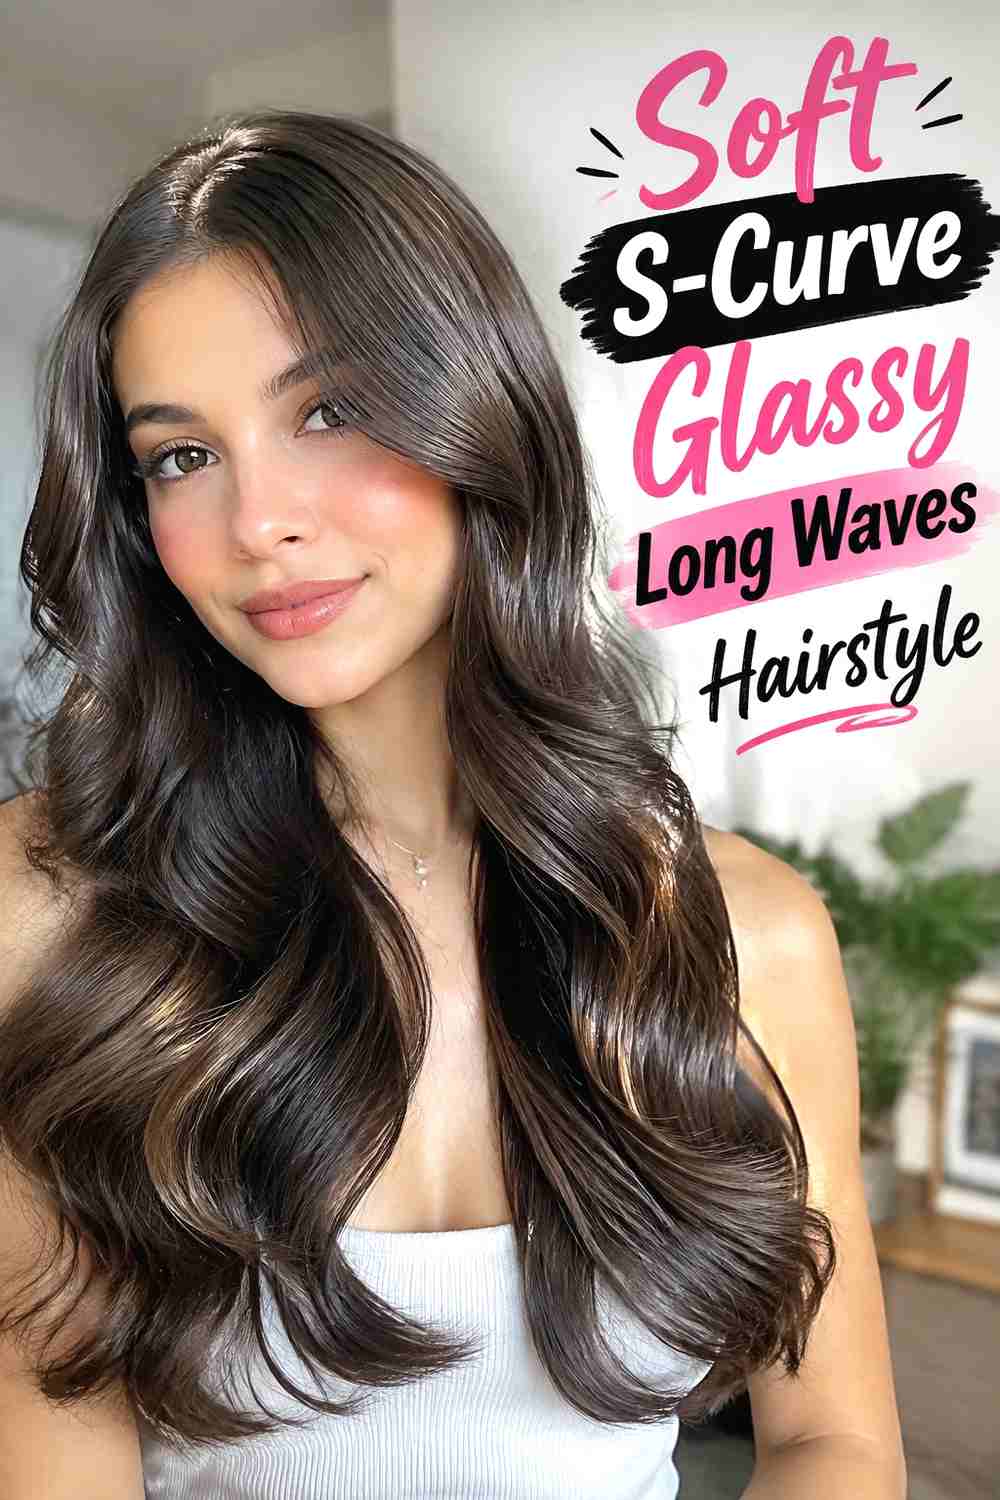
The Soft S-Curve Glassy Long Waves Hairstyle creates gentle changes in direction instead of traditional spiral curls. Each section moves outward, then inward, producing elongated S-shaped bends that preserve the visual length of the hair. A flat iron can be especially useful for this technique because it allows controlled directional changes without fully wrapping the strand. Start the strongest bends below the roots to keep the crown smooth, and vary their placement slightly so the result does not look overly uniform. Once the hair cools, lightly separate the sections while protecting the sleek surface. The finished effect should feel fluid, smooth, and modern, with visible movement that looks more like sculpted texture than conventional curling.
Styling Notes
Work with broad sections and gentle directional changes. Sharp bends can interrupt the soft, glass-like flow of the style.
Best For
This version works well when you want visible texture while keeping the hair elongated and relatively low in volume.
7. Brushed Out Glassy Long Waves Hairstyle
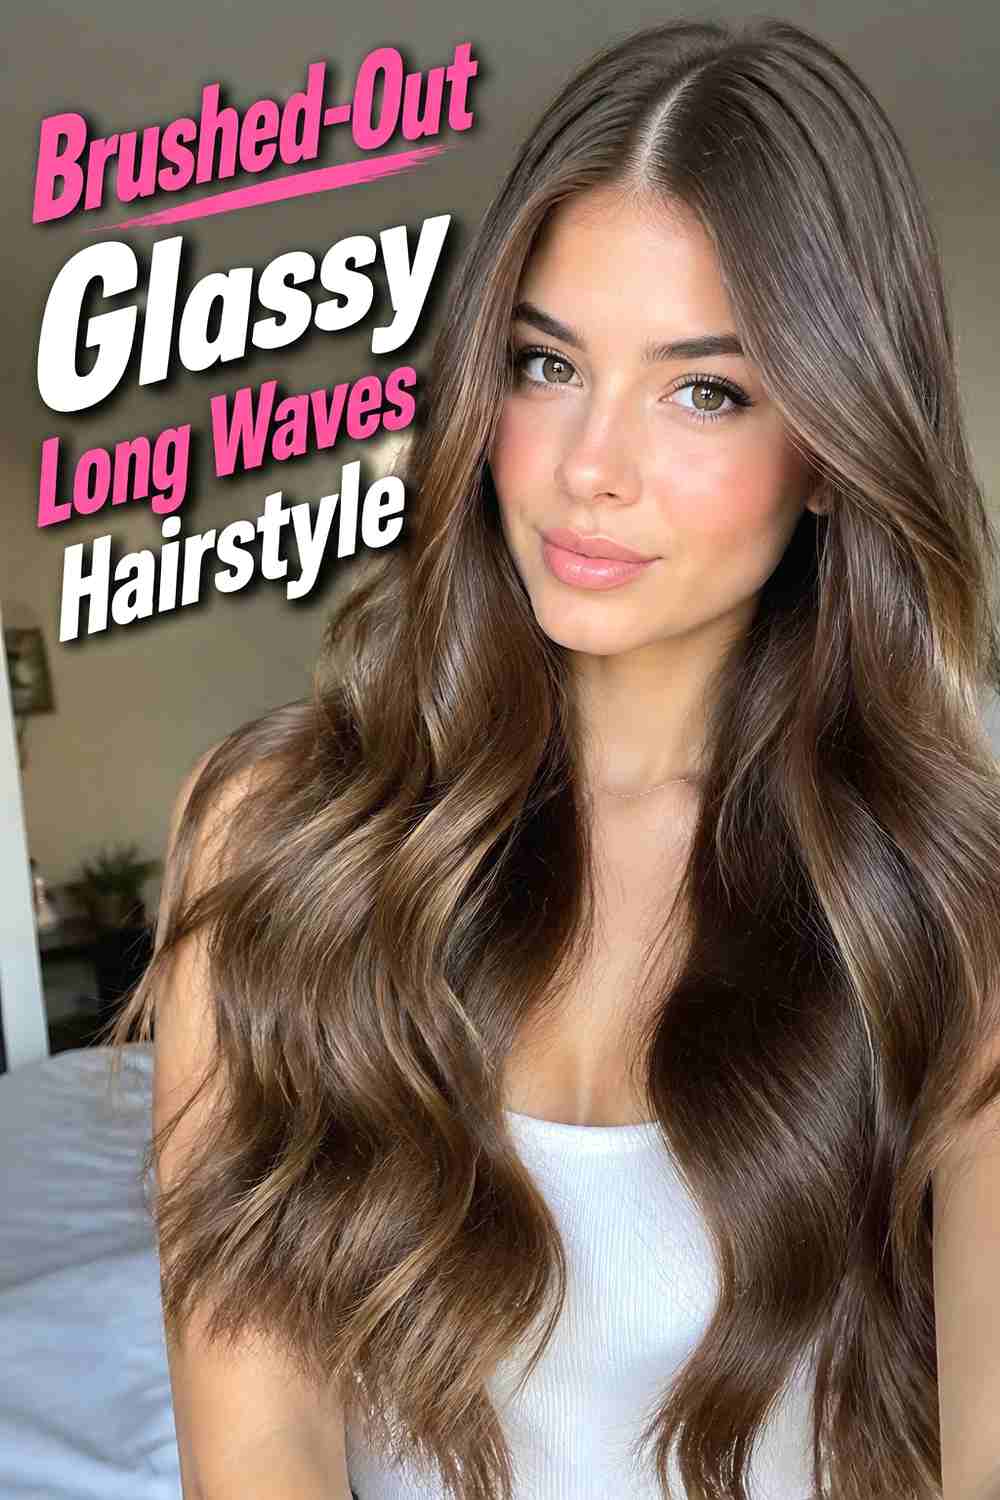
The Brushed-Out Glassy Long Waves Hairstyle starts with more defined shaping and finishes with soft, connected curves. Create loose curls or structured waves first, then let every section cool completely. Once set, use a soft brush or wide-tooth comb to blend the individual sections into larger flowing waves. The brushing should smooth the surface rather than create excessive fluff, so work slowly and stop once the pattern begins to merge. If needed, press a small amount of lightweight serum over the mid-lengths and ends to tame flyaways and restore shine. This technique creates a fuller silhouette than minimal bend waves while still maintaining the polished, reflective texture that defines the glassy look.
Why It Works
Blending individual curls creates broad continuous movement, making the hair appear softer and more luxurious without losing its smooth finish.
Pro Tip
Do not brush until the hair is completely cool, or the wave pattern may relax more than intended.
8. Sleek Root Glassy Long Waves Hairstyle
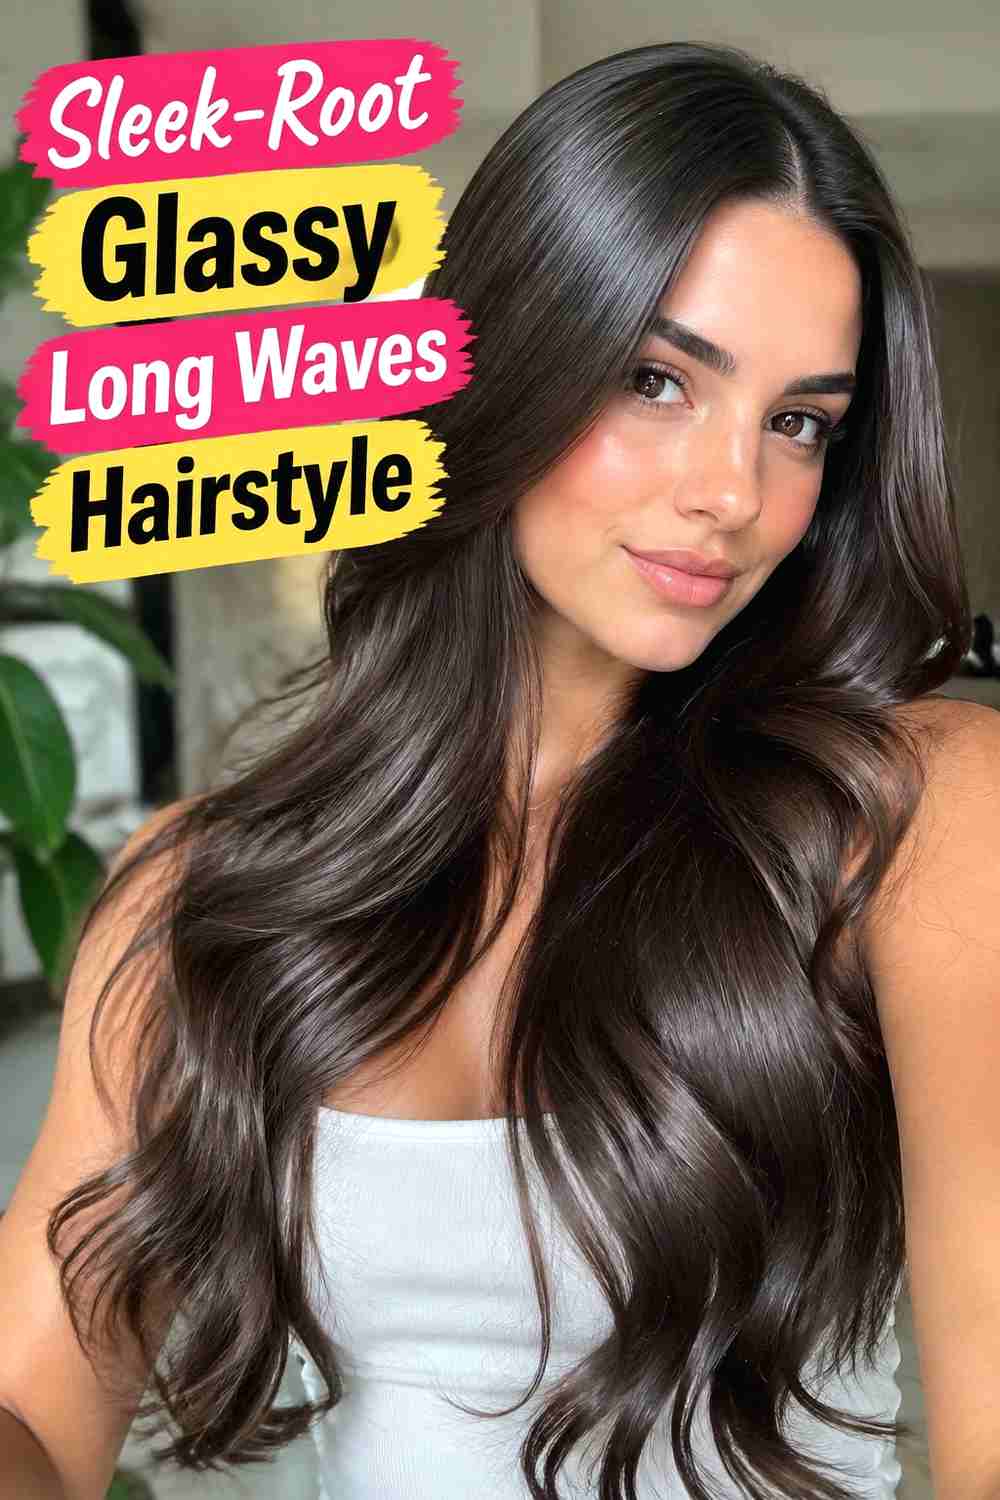
The Sleek-Root Glassy Long Waves Hairstyle keeps the crown and upper lengths intentionally smooth before introducing movement lower down. This contrast makes the waves look especially clean because there is no competing texture near the scalp. A center part enhances the minimalist effect, while a subtle side part can add a little asymmetry without changing the sleek character. Begin the first bend around the jaw, shoulders, or upper chest depending on your length. Use broad curves so the lower sections remain flowing rather than curly. Finish with a small amount of serum through the ends, but keep heavy product away from the roots. The final style should look controlled and polished without appearing greasy or pressed flat.
Best For
Choose this option if you prefer a sleek crown and want the movement concentrated through the middle and lower lengths.
Styling Notes
Use smoothing products sparingly near the scalp; the goal is a clean surface with natural root movement, not a wet-look finish.
9. Curtain Bang Glassy Long Waves Hairstyle
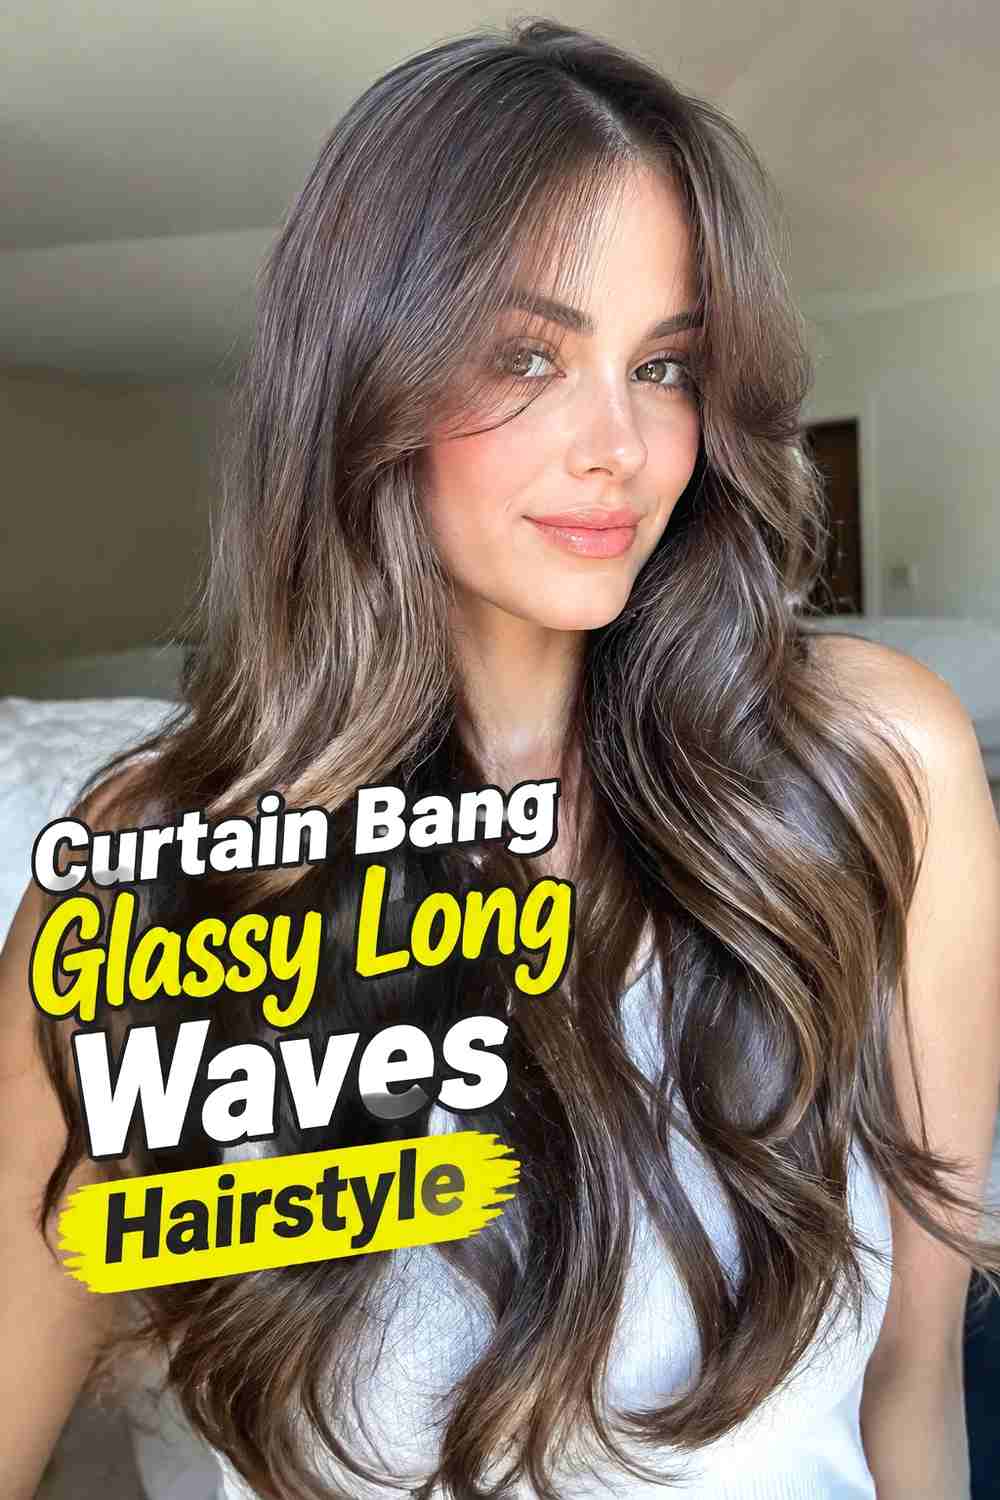
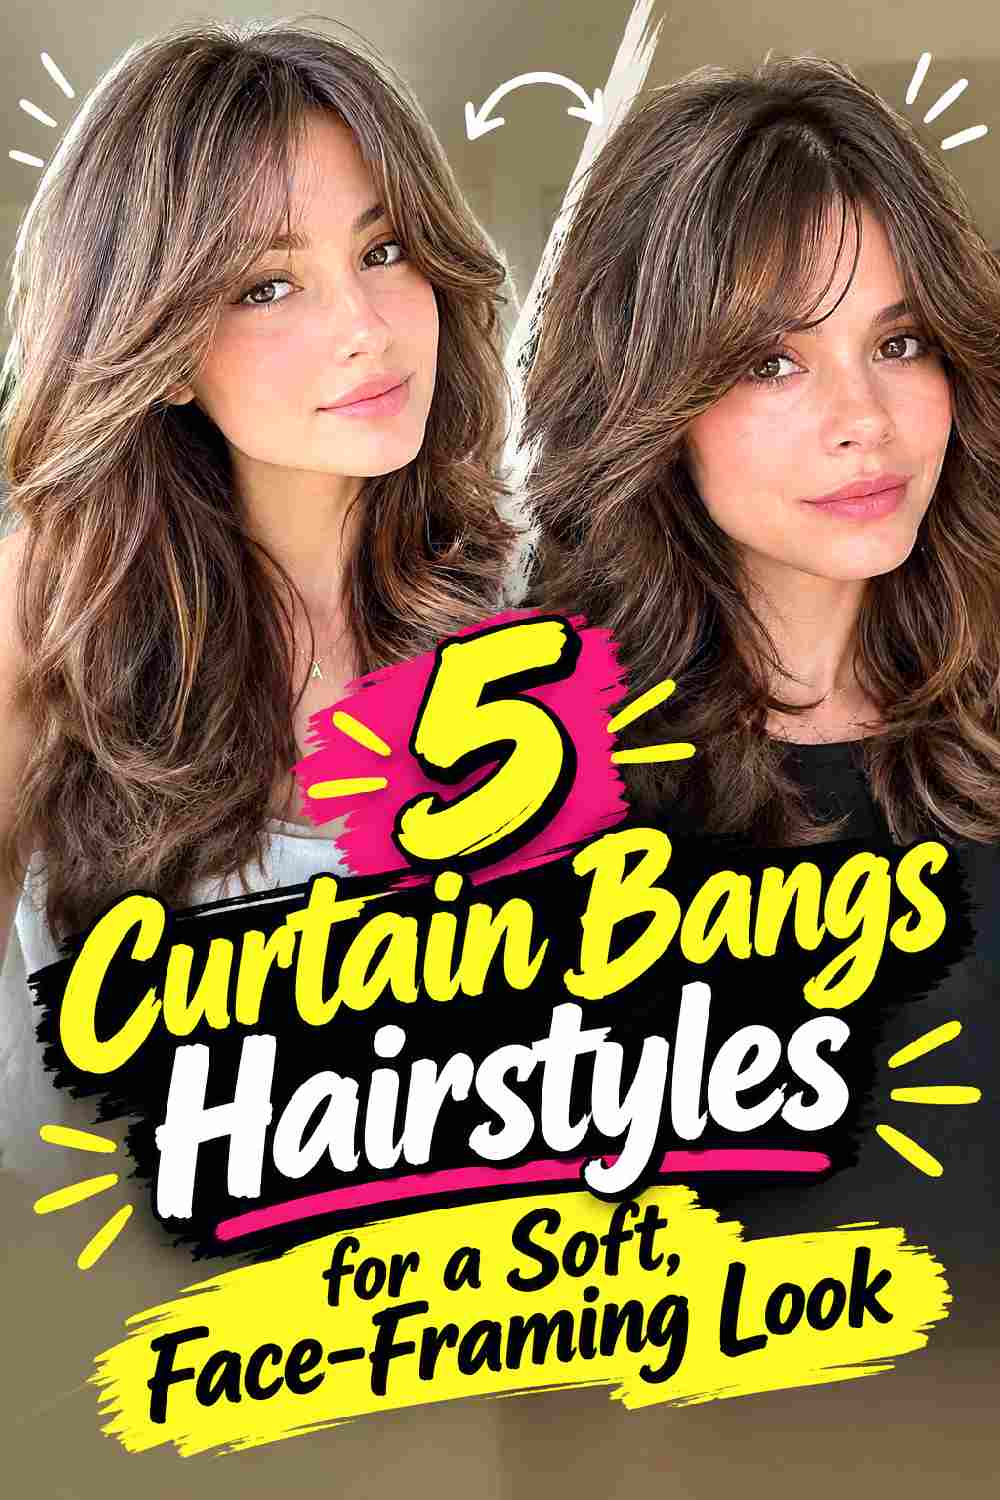
The Curtain Bang Glassy Long Waves Hairstyle blends a center-parted fringe into long, reflective waves for a seamless face frame. The bangs should sweep outward rather than curl tightly, then merge with longer pieces around the temples and cheekbones. Style the fringe separately with a round brush or large tool so its curve stays broad. Through the lengths, use relaxed waves that echo the same outward movement without making every section identical. Once cool, blend the transition between bangs and longer layers carefully so there is no obvious break. Keep shine products light around the fringe, where too much weight can make the bangs separate awkwardly or collapse. The finished shape should feel soft, glossy, and connected from front to back.
Why It Works
The outward sweep of curtain bangs naturally continues into long waves, creating a consistent direction around the face.
Pro Tip
Let the bangs cool in their intended shape before adjusting them so the soft curve has time to settle.
10. Extra Gloss Glassy Long Waves Hairstyle
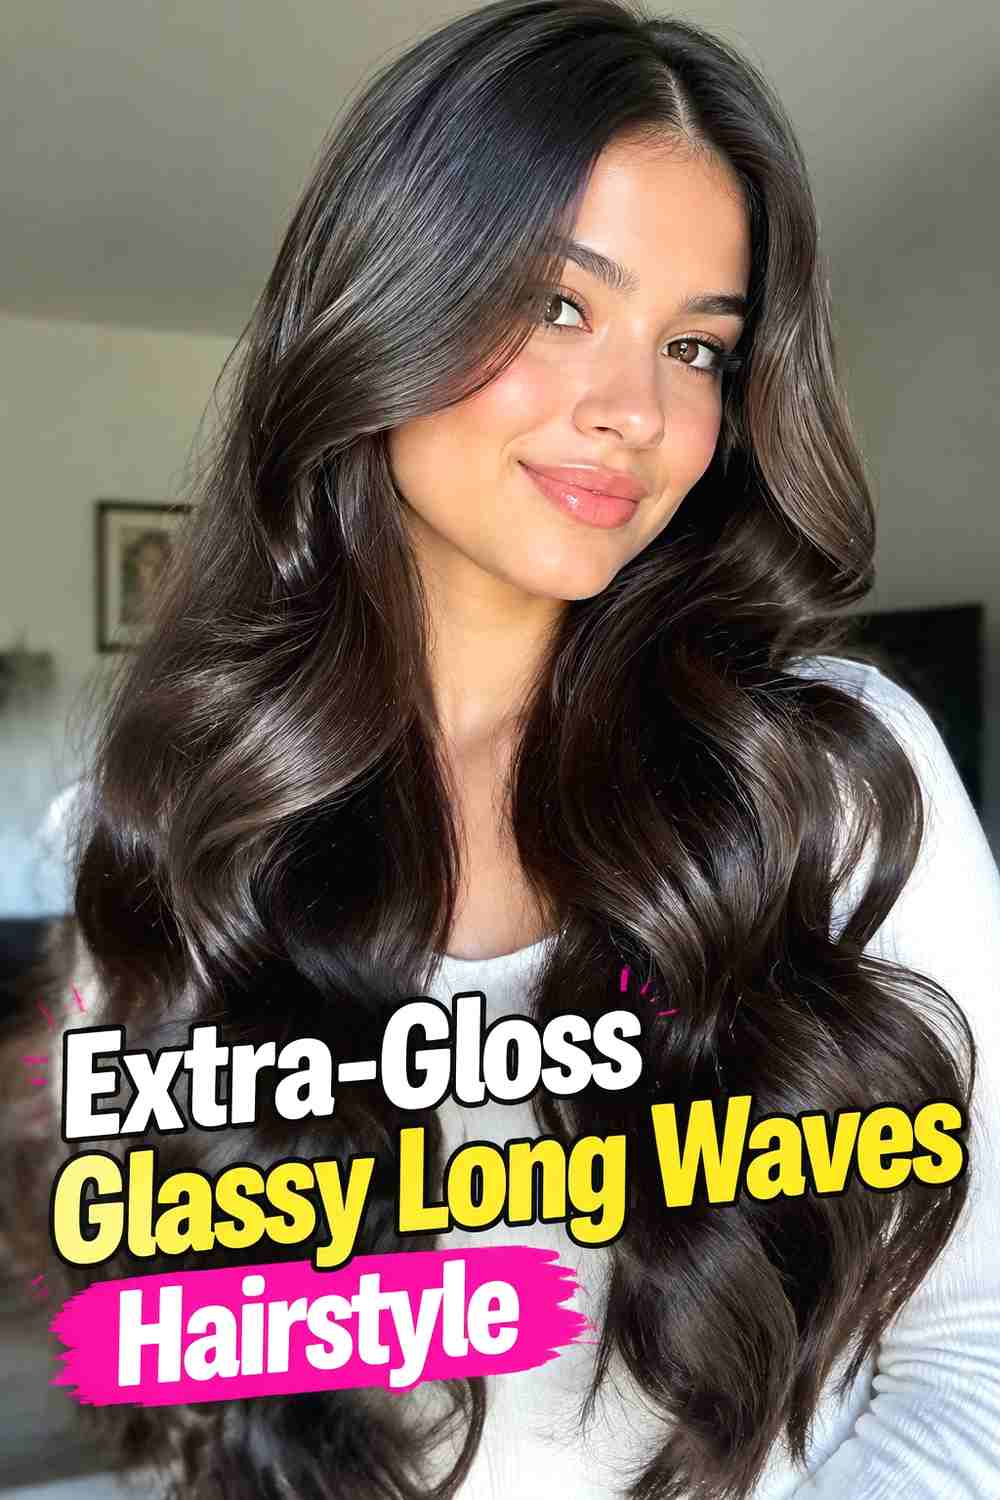
The Extra-Gloss Glassy Long Waves Hairstyle makes reflective shine the main feature while keeping the wave pattern broad and understated. Start with well-detangled hair and smooth each section before creating any curves, since flyaways become more noticeable on a highly polished finish. Use wide styling sections to maintain a continuous reflective surface rather than breaking the hair into many small waves. After cooling, loosen the shape minimally and apply a very small amount of lightweight shine product through the lower lengths. Avoid layering multiple oily products, which can reduce volume and make the finish look heavy. The goal is a luminous surface that still shows individual strands, natural movement, and believable texture rather than an artificially slick appearance.
Styling Notes
Apply shine product gradually. It is easier to add a little more than to recover volume after using too much.
Wear & Maintenance
Limit repeated touching through the day, since oils from the hands can change the clean, reflective finish.
11. Loose End Glassy Long Waves Hairstyle
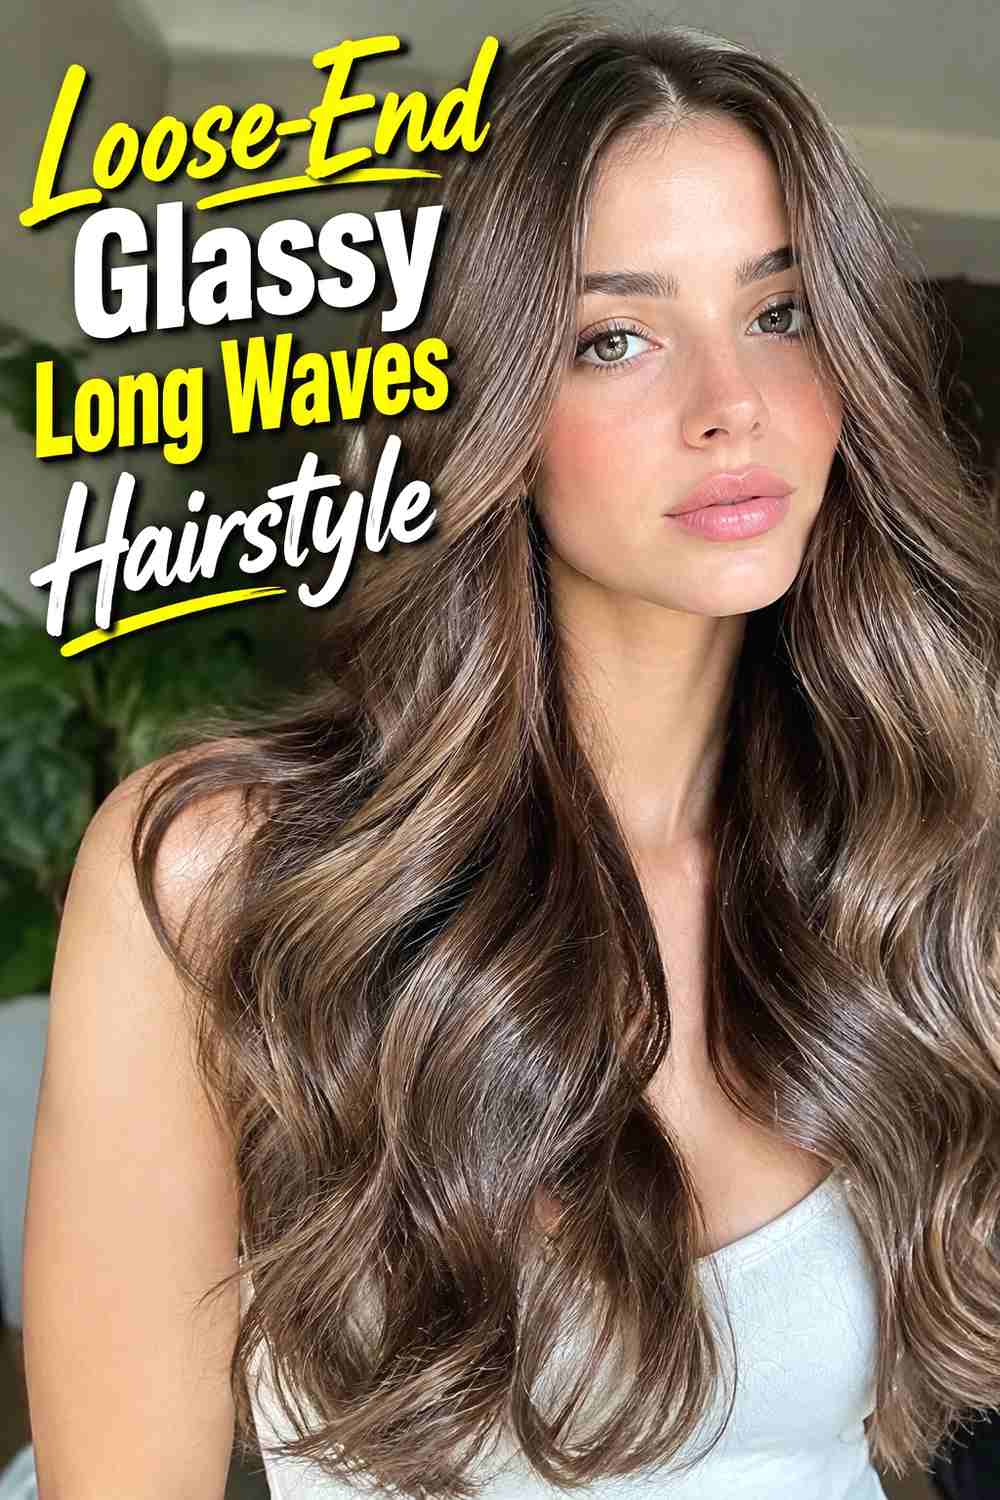
The Loose-End Glassy Long Waves Hairstyle keeps polished bends through the mid-lengths while leaving the final inch or two more relaxed. That subtle straightness at the tips creates a modern contrast and stops the wave pattern from turning into traditional curls. If using a curling iron, leave the ends outside the barrel; with a flat iron, reduce the bend as you approach the tips. Keep the surface smooth and the sections broad so the transition appears intentional. Once the hair cools, separate the waves lightly with your fingers. A tiny amount of serum on the ends can maintain a glossy finish without making them clump. The result feels polished but less formal than waves that curve all the way through the tips.
Why It Works
Relaxed ends preserve visual length and create a contemporary shape while the mid-lengths still provide plenty of soft movement.
Pro Tip
Keep the amount of straight end fairly consistent from section to section so the finish looks deliberate.
12. Voluminous Crown Glassy Long Waves Hairstyle
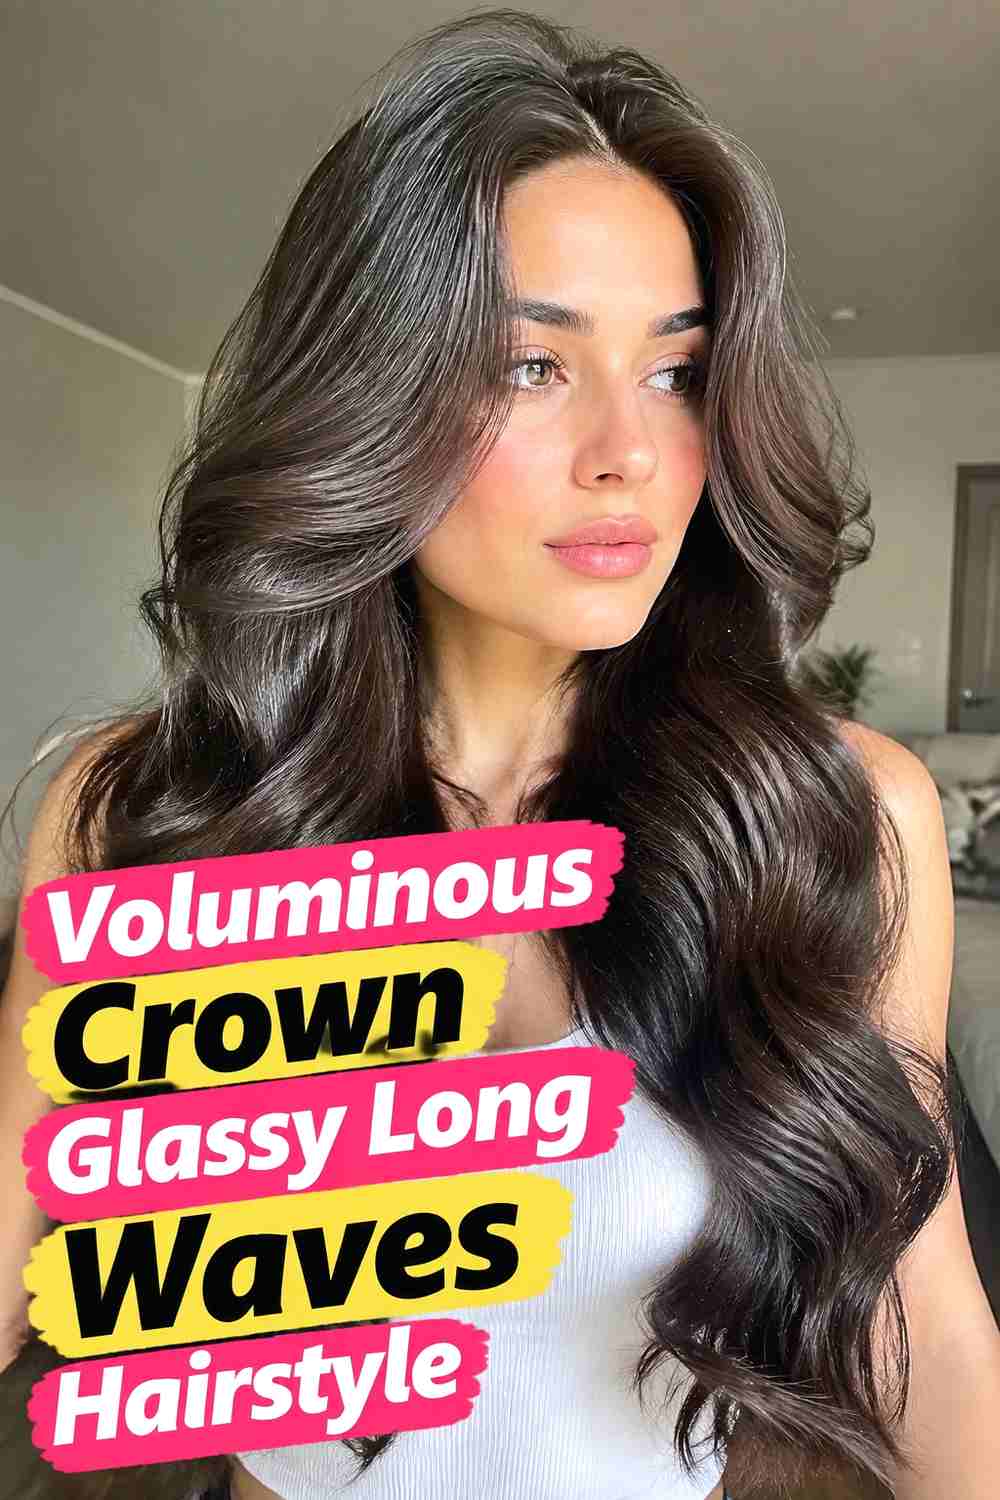
The Voluminous Crown Glassy Long Waves Hairstyle adds controlled root lift to the otherwise sleek, flowing pattern. The top should feel elevated and airy rather than teased or fuzzy, so create volume by changing the drying direction or setting crown sections in large rollers. Once the roots are established, shape the lengths separately into broad waves. This prevents repeated heat or brushing from flattening the volume you created at the top. Keep the surface polished by smoothing flyaways only after the style has cooled. A lightweight root product can support the lift, while shine serum belongs mainly below the crown. The finished silhouette combines a fuller profile with glossy waves that still move naturally through the long lengths.
Styling Notes
Build crown volume first, then create the wave pattern so each element can be controlled independently.
Best For
This version works well when naturally heavy long hair needs extra lift at the top to balance the full lengths.
13. Side Swept Glassy Long Waves Hairstyle
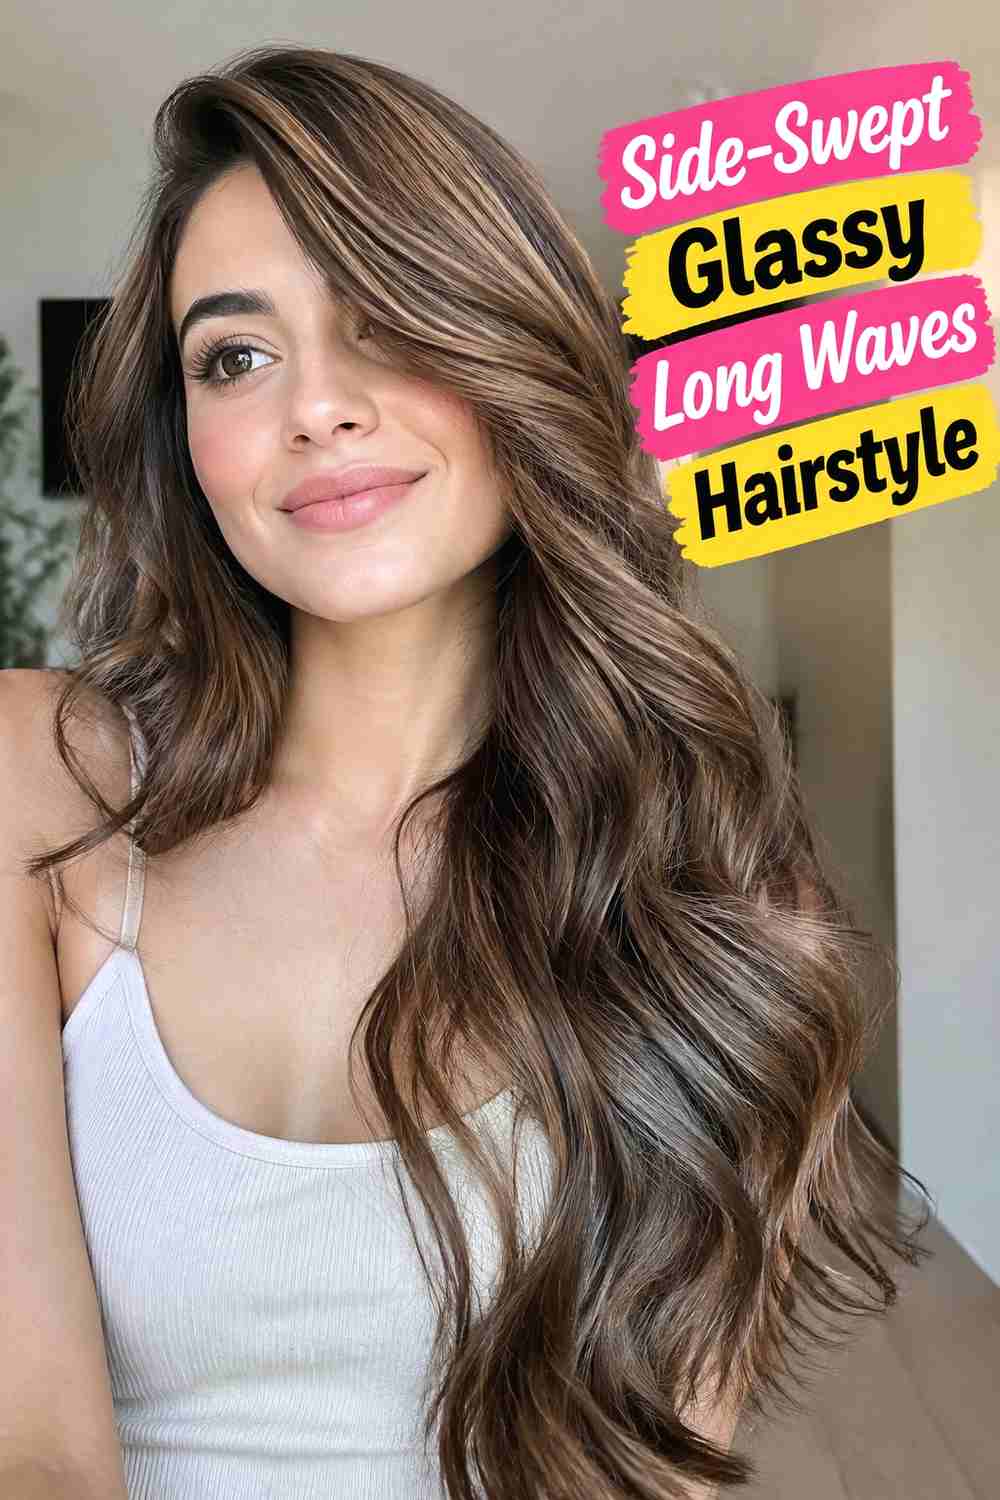
The Side-Swept Glassy Long Waves Hairstyle gathers most of the length over one shoulder, allowing the smooth waves to fall in a dramatic cascade. Create the wave pattern before moving the hair to one side so you do not flatten the sections while styling. Once cool, sweep the lengths across gently and secure the opposite side discreetly near the nape if needed. The front curve can stay soft around the cheek, while the waves through the shoulder remain broad and reflective. Avoid overloading the swept side with product, since long hair can become heavy when concentrated in one area. The finished look should feel elegant and fluid, with the glassy surface visible from the roots through the cascading ends.
Best For
This variation is particularly useful for formal outfits, photographs, and occasions where you want most of the hair visible from one side.
Wear & Maintenance
Use hidden pins underneath the hair if extra security is needed so the fastening does not interrupt the glossy surface.
14. Barely There Glassy Long Waves Hairstyle
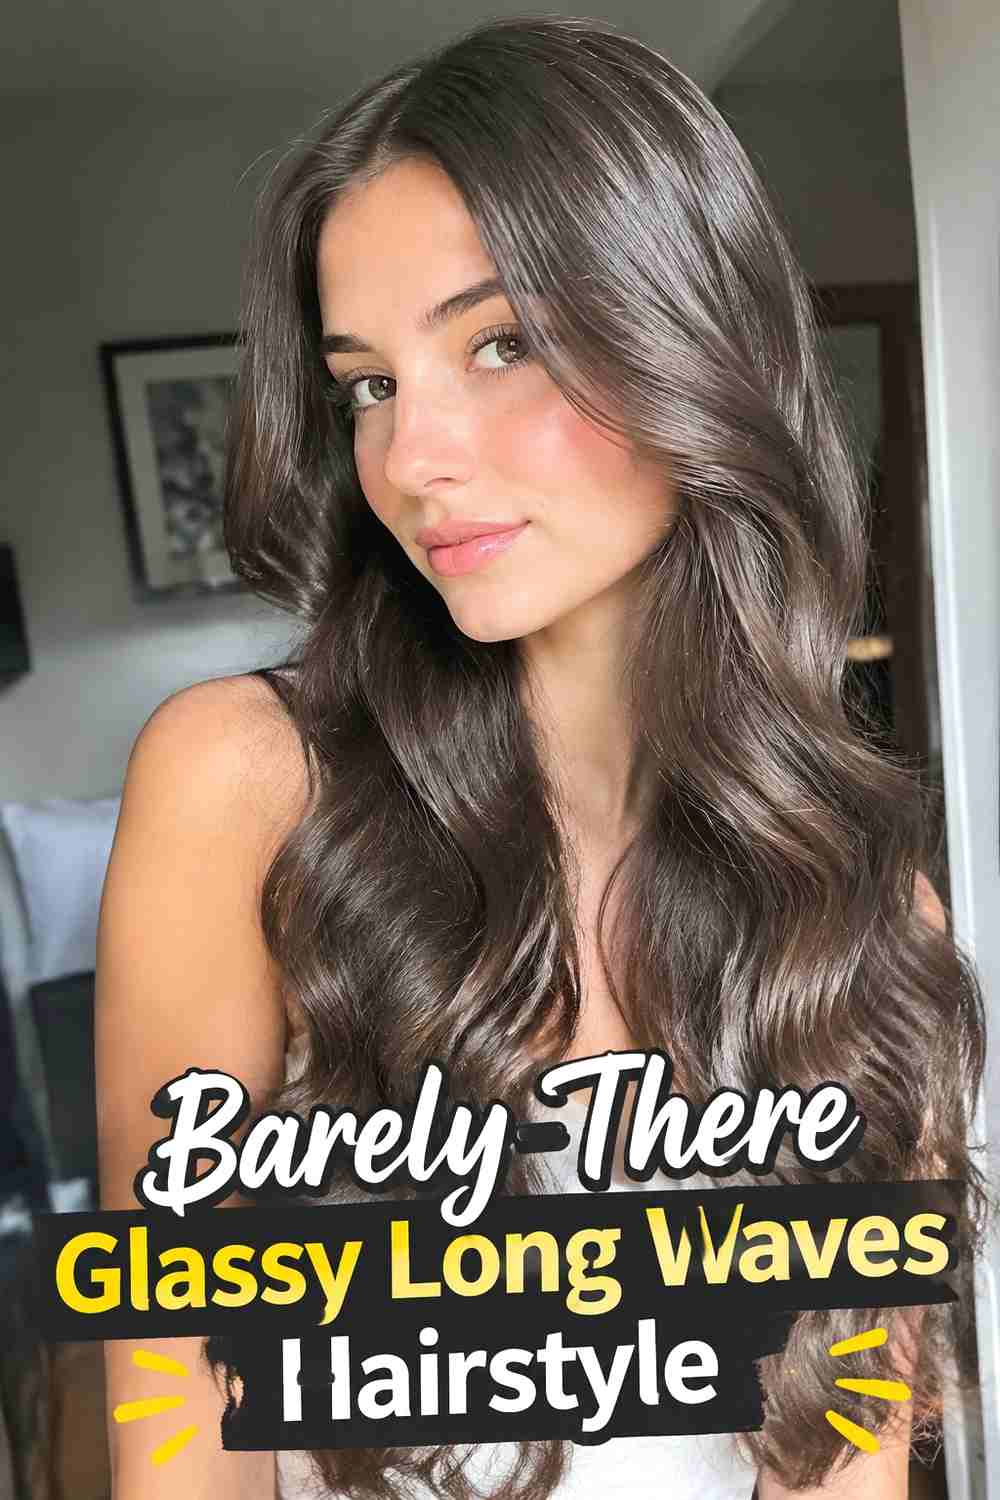
The Barely-There Glassy Long Waves Hairstyle is the most subtle version, using only slight changes in direction to prevent long hair from appearing completely straight. The crown and upper lengths remain smooth, while a few soft bends appear through the middle and lower sections. Work with very large sections and keep the styling tool moving so the curves stay stretched and understated. Several pieces can remain nearly straight to preserve the effortless character. Once cooled, avoid excessive brushing or texturizing products, which can make the finish fuller than intended. A light serum through the lower lengths helps maintain shine. The result is sleek, flowing hair with just enough movement to catch the light and create a soft, dimensional silhouette.
Best For
Choose this look if you prefer mostly straight hair but want gentle movement and a more fluid finish through long lengths.
Styling Notes
Concentrate on a few visible surface sections rather than adding defined bends throughout the entire head.
15. Ribbon Wave Glassy Long Waves Hairstyle
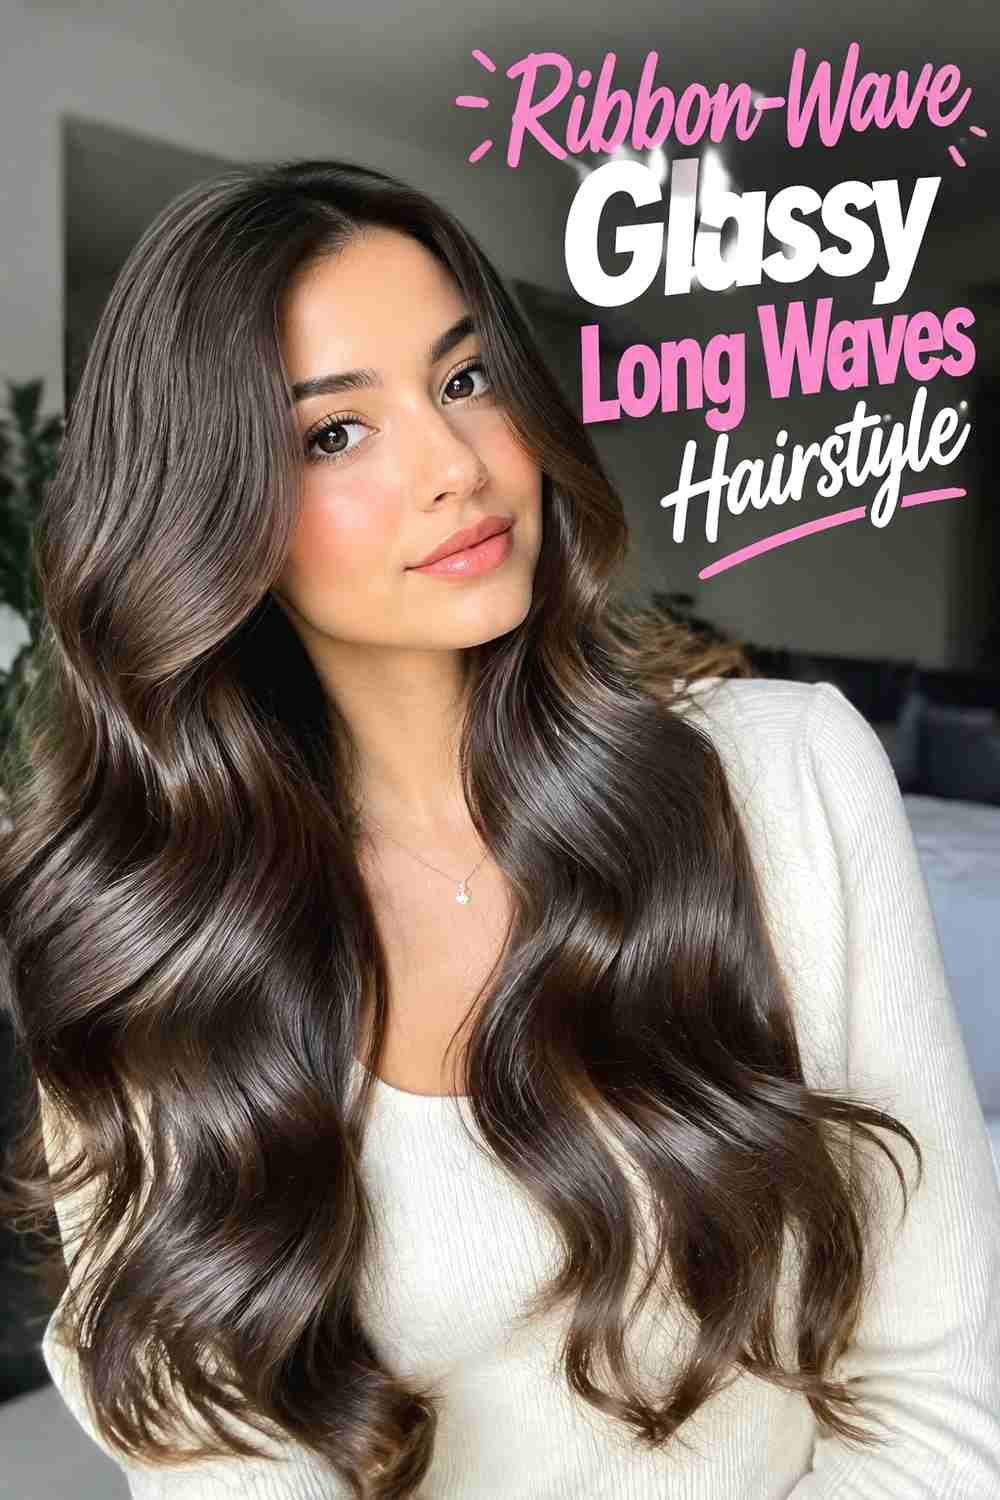
The Ribbon-Wave Glassy Long Waves Hairstyle uses long, continuous curves that appear to flow like soft ribbons through the hair. Instead of alternating many short bends, each section forms one or two extended waves from the upper mid-lengths toward the ends. This creates a graceful pattern that works especially well on long, smooth hair. A large curling tool can help produce the broad curve, but avoid wrapping the section too tightly. Let each wave cool before gently opening it with your fingers. The surface should remain sleek enough for the curved sections to reflect light in long bands. Keep product minimal and focus on preserving movement, because overly strong hold can make the ribbon-like waves look stiff rather than fluid.
Why It Works
Long continuous curves complement the natural length of the hair and create visible movement without sacrificing the smooth, reflective surface.
Pro Tip
Style larger sections to keep each ribbon wave broad and easy to distinguish from a traditional curl.
16. Polished Event Glassy Long Waves Hairstyle
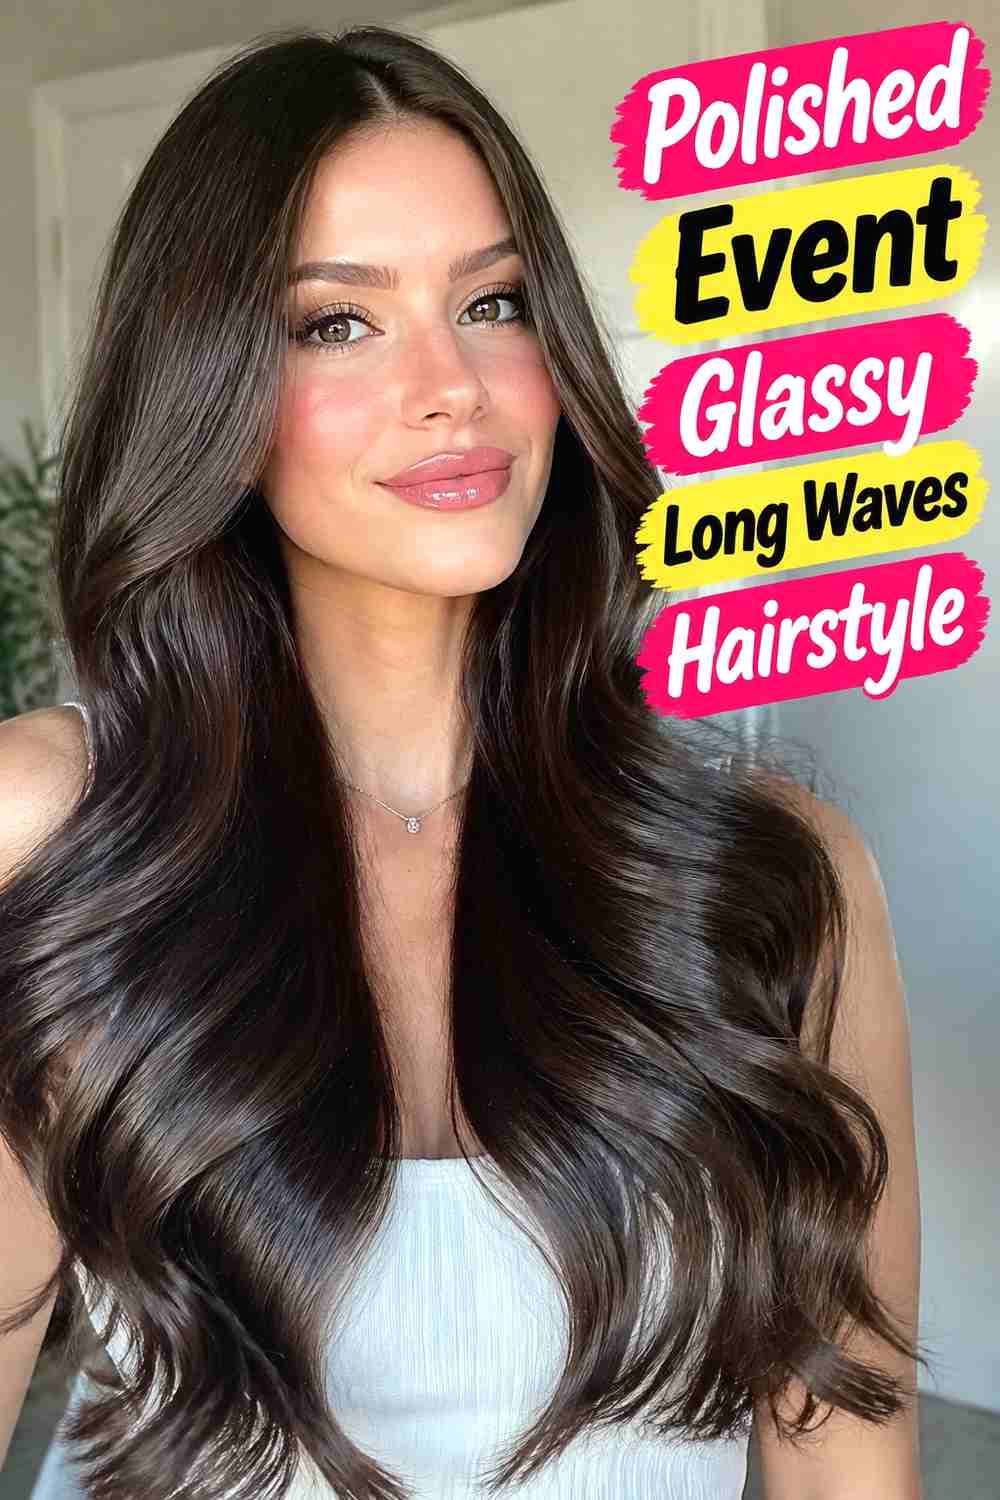
The Polished Event Glassy Long Waves Hairstyle uses stronger definition and slightly more hold for occasions when you want the smooth finish to last through several hours of wear. Start with controlled roots and deliberate face-framing curves, then create broad waves throughout the sides and back. Working systematically helps keep the texture consistent when the hair will be photographed from multiple angles. Let every section cool fully before blending, and finish with flexible hold rather than a stiff setting spray. Add shine sparingly through the lengths so the hair remains reflective without becoming heavy. A center or side part can both work, depending on the outfit and mood. The final result should feel elevated, luminous, and secure while preserving natural movement.
Best For
This fuller version suits weddings, parties, formal dinners, photo sessions, and other occasions where a more deliberate finish feels appropriate.
Wear & Maintenance
Carry a few discreet pins or a small comb for minor adjustments instead of repeatedly brushing the entire style.
17. Feathered Layer Glassy Long Waves Hairstyle
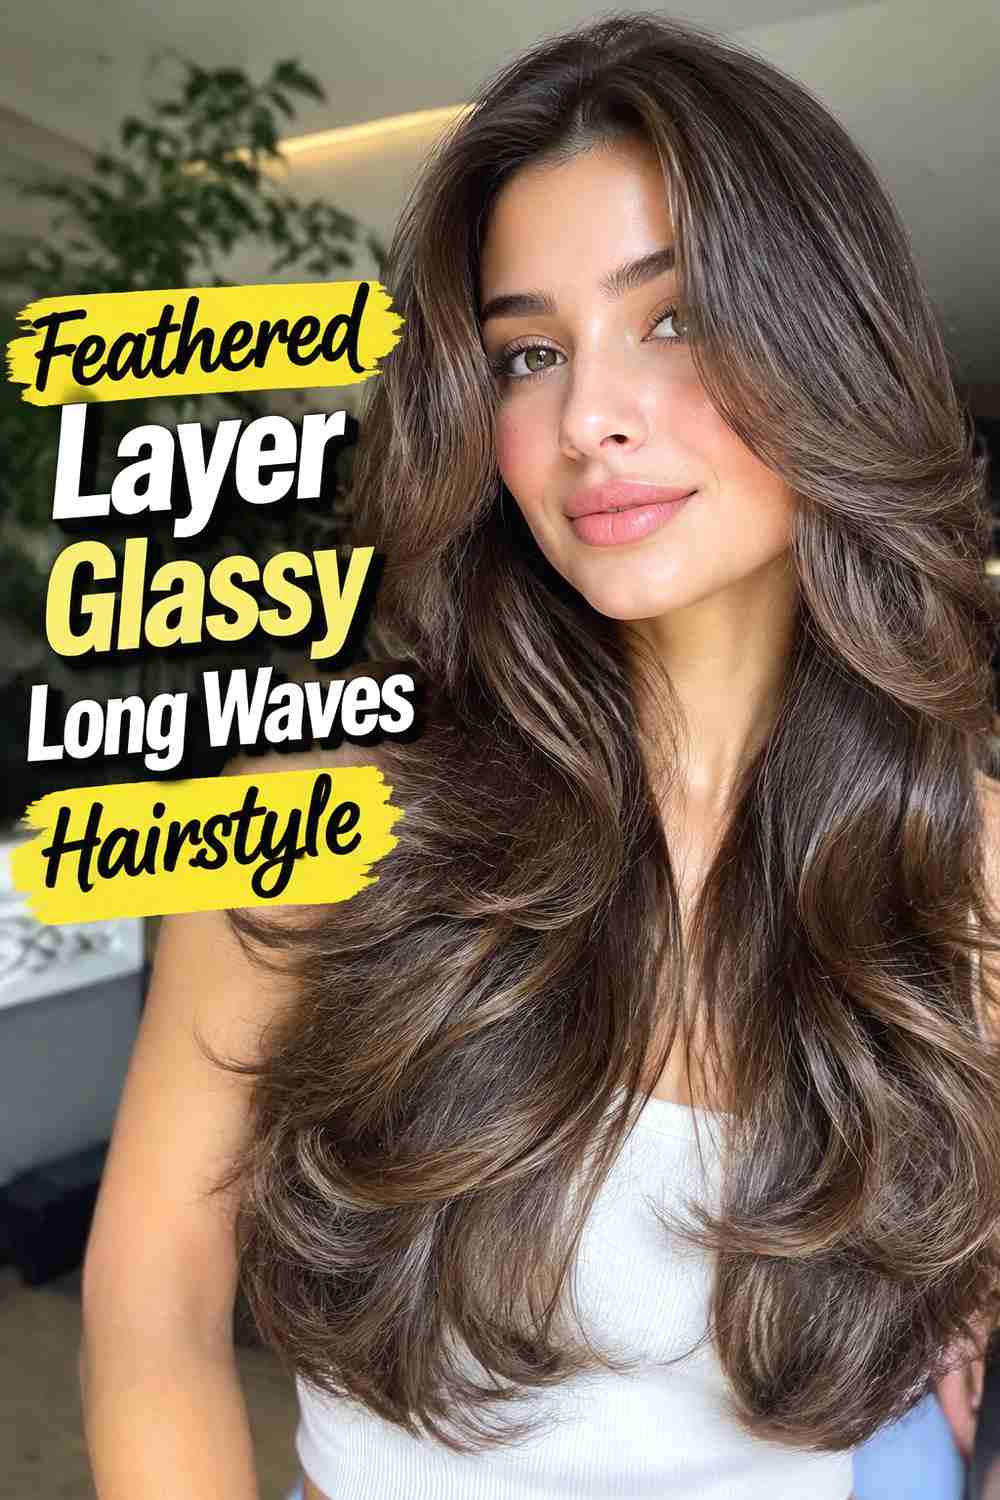
The Feathered Layer Glassy Long Waves Hairstyle combines a sleek surface with lighter, separated movement through the ends. Long feathered layers prevent the lower half from appearing dense, allowing each section to curve independently while still maintaining a cohesive wave pattern. Style the longest pieces in broad bends and direct shorter layers slightly away from the face so they fan softly into the rest of the hair. Once cooled, use your fingers to separate the layers instead of brushing them into one continuous mass. A tiny amount of lightweight serum can keep the ends polished while preserving their airy quality. This variation works particularly well when you want long hair to look flowing and dimensional without relying on extreme root volume.
Hair Type & Length
Long cuts with feathered or graduated layers give this style the clearest separation and movement through the lower lengths.
Pro Tip
Avoid coating the feathered ends with heavy creams, since they need lightness to stay visibly separated.
18. Soft Hollywood Glassy Long Waves Hairstyle
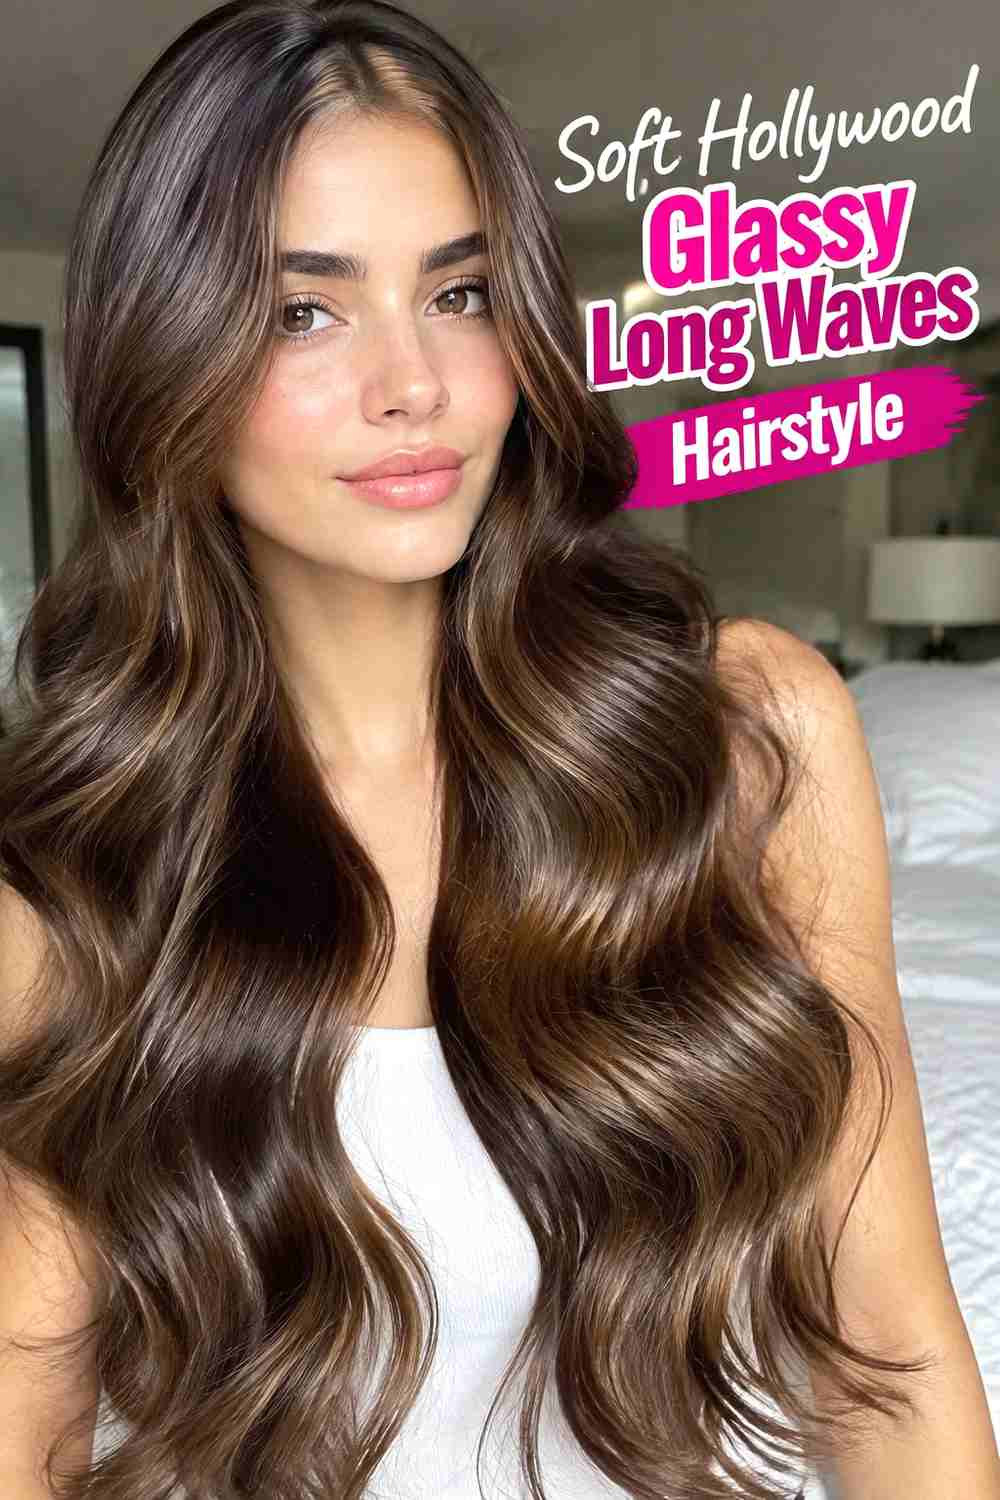
The Soft Hollywood Glassy Long Waves Hairstyle borrows the connected flow of classic glamour but keeps the curves looser and more modern. A side part works especially well, allowing the front section to sweep into a broad cheek-level bend before joining the longer waves. Style the sections in a similar direction, let them cool fully, and then brush them together carefully so individual curls become one flowing pattern. Unlike a highly sculpted vintage set, this version should retain softness and natural movement. A light flexible spray can preserve the shape, while a small amount of shine product enhances the smooth surface. The finished look feels glamorous without becoming overly rigid, making it useful for both formal occasions and polished evening styling.
Why It Works
Coordinated wave direction allows separate sections to merge into smooth connected curves with a distinctly elegant silhouette.
Wear & Maintenance
Limit finger-combing after the final shape is set because too much separation can break up the flowing pattern.
19. Minimalist Glassy Long Waves Hairstyle
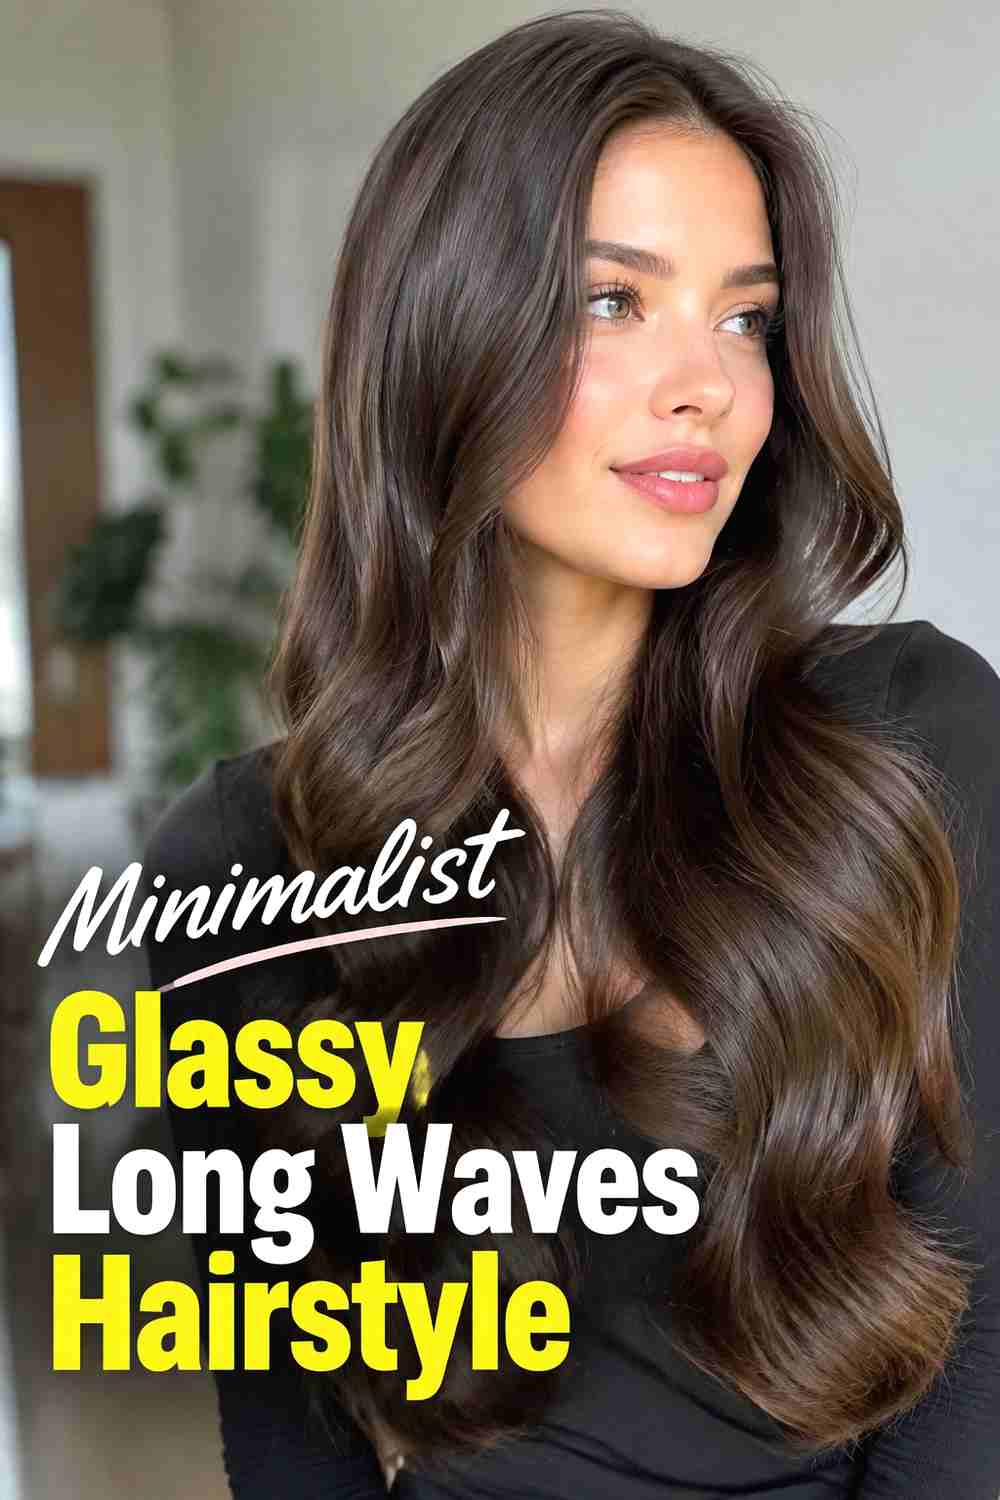
The Minimalist Glassy Long Waves Hairstyle relies on strategic placement rather than styling every strand. Most of the hair remains smooth and nearly straight, while a few broad bends appear around the face and across the visible top layer. This creates enough movement to prevent the length from looking flat without turning the style into a full wave set. Keep the root area clean and simple, then shape only the sections that naturally catch the eye from the front and sides. Underneath pieces can remain largely untouched. Finish with a lightweight smoothing product through the ends to enhance shine and control flyaways. The result feels understated, modern, and especially practical when you want polished hair without a lengthy styling routine.
Best For
This option suits low-maintenance routines and anyone who prefers a sleek finish with only a hint of movement.
Styling Notes
Prioritize the face frame and visible surface sections rather than trying to make the wave pattern perfectly uniform throughout.
20. Ultra Long Glassy Waves Hairstyle
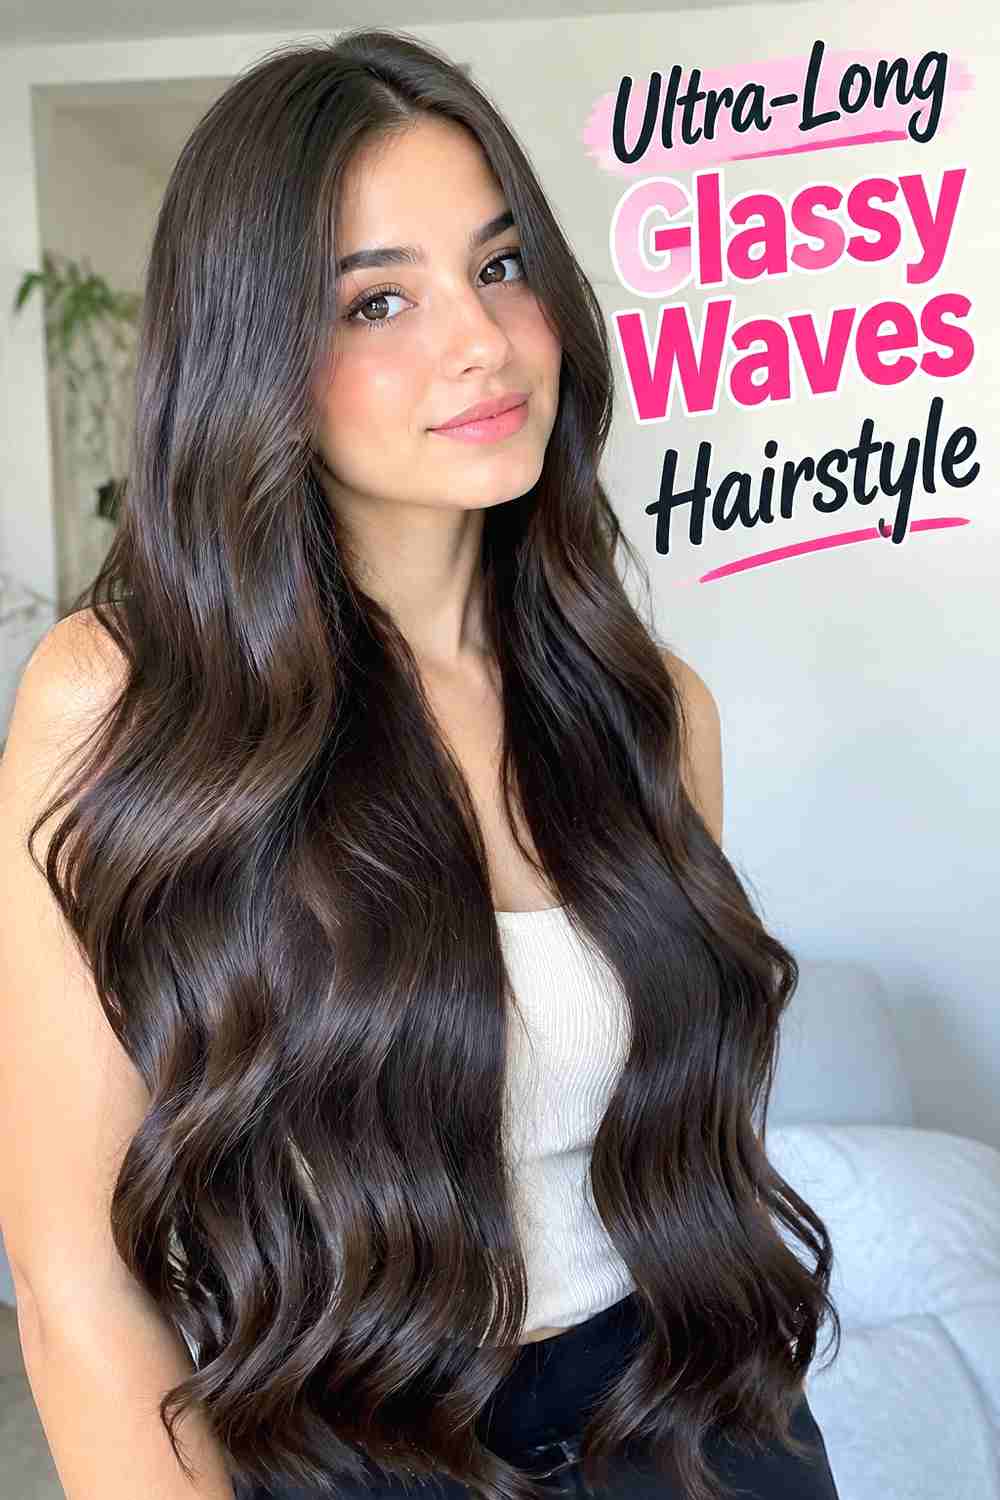
The Ultra-Long Glassy Waves Hairstyle is designed for hair that extends well past the mid-back and needs movement without losing its dramatic length. Because extra-long hair has more weight, begin with slightly stronger bends than the final look requires and allow each section to cool before loosening it. Work in manageable sections so the full length is styled evenly rather than leaving the lower portions undefined. Long layers can help reveal the wave pattern, especially around the front and lower ends. Keep root products lightweight and apply shine serum sparingly through the lower lengths. The finished effect should feel fluid and elongated, with smooth roots, broad reflective curves, and enough separation to prevent the hair from appearing like one heavy sheet.
Hair Type & Length
This variation is intended for very long hair, particularly when gentle layering helps distribute weight and show the wave pattern.
Pro Tip
Let the waves cool completely before loosening them, since the weight of ultra-long hair can quickly relax warm styling.
How to Choose the Right Look
Start by considering how much movement you want. Barely-There and Minimalist Glassy Waves keep the hair mostly smooth, while Ribbon-Wave, Brushed-Out, and Soft Hollywood versions create a more visible flowing pattern. If your priority is shine, the Extra-Gloss option puts the reflective surface ahead of dramatic volume. Your haircut matters too. Long layers and feathered layers help the waves appear at different heights, while less-layered hair creates a heavier, more continuous outline. Curtain bangs and face-framing pieces can add detail around the front without changing the overall length. Think about root volume separately from wave definition. Sleek-Root waves keep the top controlled, while Voluminous Crown waves create a fuller silhouette. A center part feels balanced and streamlined; a deep side part or side-swept finish produces more drama. Long hair can also lose shape under its own weight, so consider how much hold your texture needs. Fine hair may benefit from lightweight volumizing or setting products, while thick hair often requires smaller working sections for consistent shaping. In every case, avoid overloading the lengths with heavy oils if you want the waves to stay mobile.
Final Thoughts
Glassy long waves are all about balancing smoothness with movement. By changing the part, layering, bend size, root volume, and end finish, you can move from a barely-there everyday style to a polished event look while keeping the same luminous, flowing character.
FAQs
1. What makes long waves look glassy?
A smooth surface, controlled flyaways, broad curves, and restrained use of lightweight shine products help create a reflective finish without making the hair appear oily or stiff.
2. Can naturally wavy hair wear a glassy wave style?
Yes. Natural waves can be smoothed and selectively reshaped rather than completely restyled. The amount of smoothing needed depends on the existing texture and desired finish.
3. How do I keep glassy long waves from looking greasy?
Use shine products sparingly and concentrate them on the mid-lengths and ends. Avoid adding multiple heavy oils or serums near the roots.
4. Are layers helpful for glassy long waves?
Layers can make movement more visible by reducing some visual weight and allowing different sections to curve independently, especially on very long hair.
5. How can I help long waves hold their shape?
Let styled sections cool completely before loosening them, work in manageable sections, and use lightweight flexible hold when needed instead of heavy products that may weigh the hair down. Save your favorite glassy long waves, share the looks that inspire you, and explore more polished long-hair ideas for your next styling session.