12 Apple Orchard Side Braid Hairstyle Ideas
Soft side braids, orchard light, and autumn texture come together in these wearable hairstyle ideas made for crisp-day photos and relaxed fall outings. An apple orchard is an easy setting for hairstyles that feel romantic without becoming overly formal. Side braids are especially suited to the look because they keep plenty of hair detail visible from the front while creating texture and movement over one shoulder. The best option depends on your hair length, natural texture, desired hold, and how much styling time you want to spend. Some of these ideas focus on loose volume and softness, while others use Dutch braiding, fishtail techniques, ribbons, scarves, or polished finishes for a more defined result.
Quick List
- Loose Textured Apple Orchard Side Braid Hairstyle
- Soft Dutch Apple Orchard Side Braid Hairstyle
- Romantic Fishtail Apple Orchard Side Braid Hairstyle
- Ribbon Woven Apple Orchard Side Braid Hairstyle
- Half Up Crown Apple Orchard Side Braid Hairstyle
- Voluminous Pancaked Apple Orchard Side Braid Hairstyle
- Curly Apple Orchard Side Braid Hairstyle
- Scarf Wrapped Apple Orchard Side Braid Hairstyle
- Rope Twist Apple Orchard Side Braid Hairstyle
- Polished Three Strand Apple Orchard Side Braid Hairstyle
- Messy Boho Apple Orchard Side Braid Hairstyle
- Low Side Braid With Face Framing Pieces Hairstyle
1. Loose Textured Apple Orchard Side Braid Hairstyle
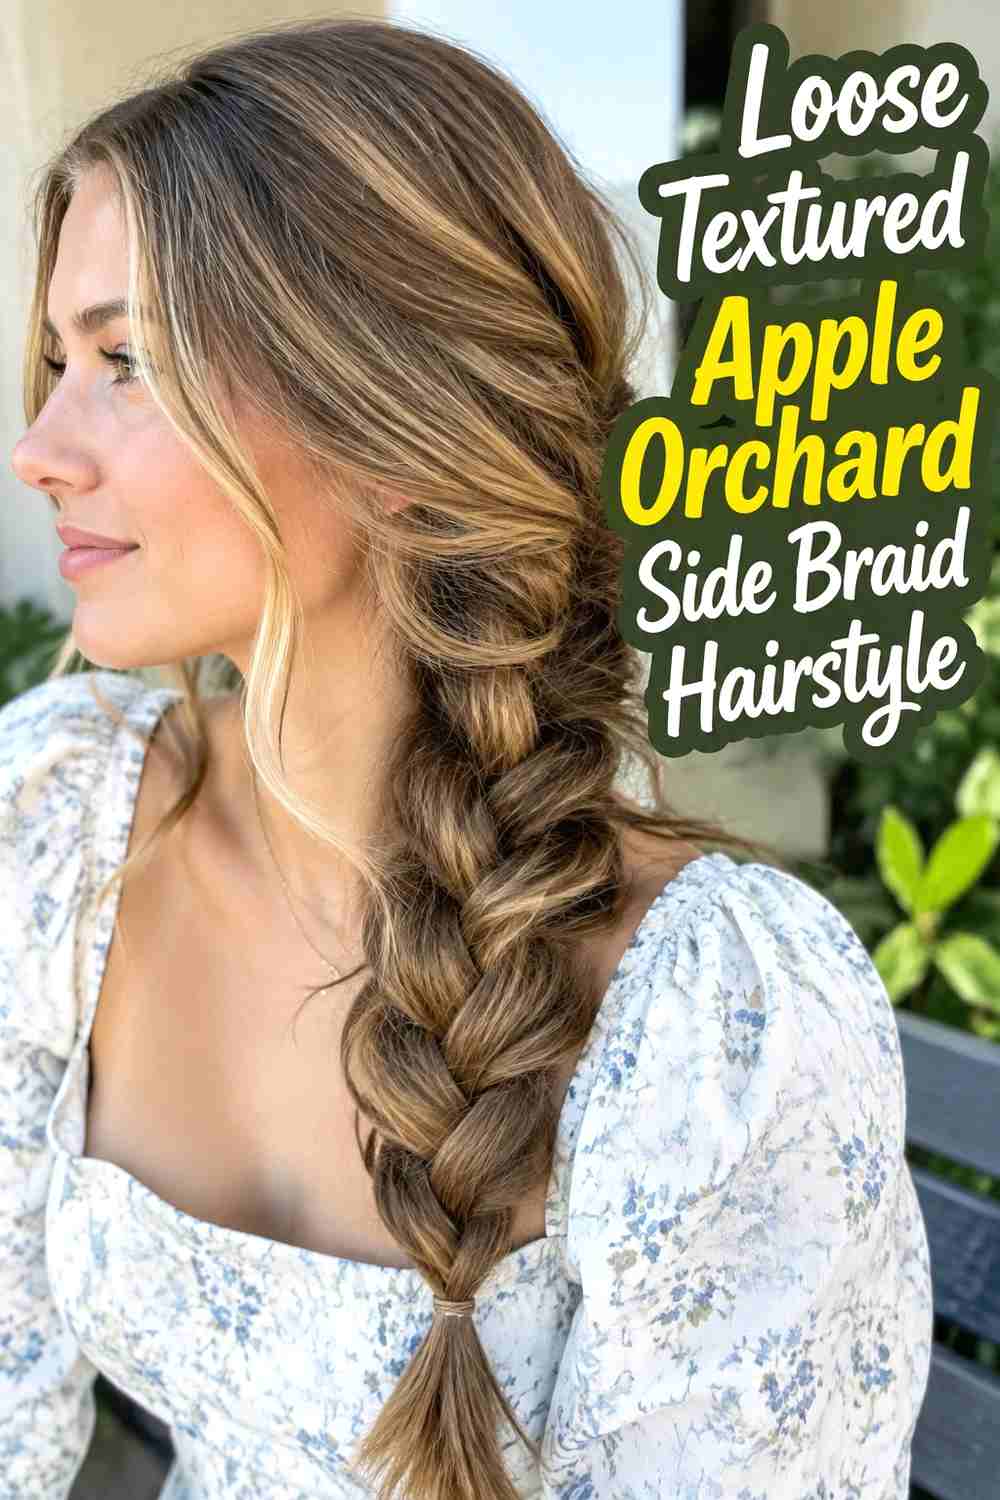
This loose textured side braid has the relaxed softness that works beautifully in an apple orchard setting. The braid sits over one shoulder with gently expanded sections, airy volume through the crown, and a few wispy pieces around the face. It feels polished enough for photos without looking overly formal. Medium to long hair gives the braid enough length to show its shape, while naturally wavy or lightly curled texture adds fullness. Before braiding, add loose bends through the mid-lengths and ends, then keep the tension slightly relaxed. A small clear elastic at the bottom helps the finish stay neat while the upper braid remains soft and touchable.
Styling Notes
Create texture before braiding rather than trying to loosen completely straight, slippery hair afterward. Expand only a few sections at a time to preserve the braid’s structure.
Best For
This look is especially flattering for casual orchard visits, fall portraits, date afternoons, and anyone wanting a romantic style that still feels easygoing.
2. Soft Dutch Apple Orchard Side Braid Hairstyle
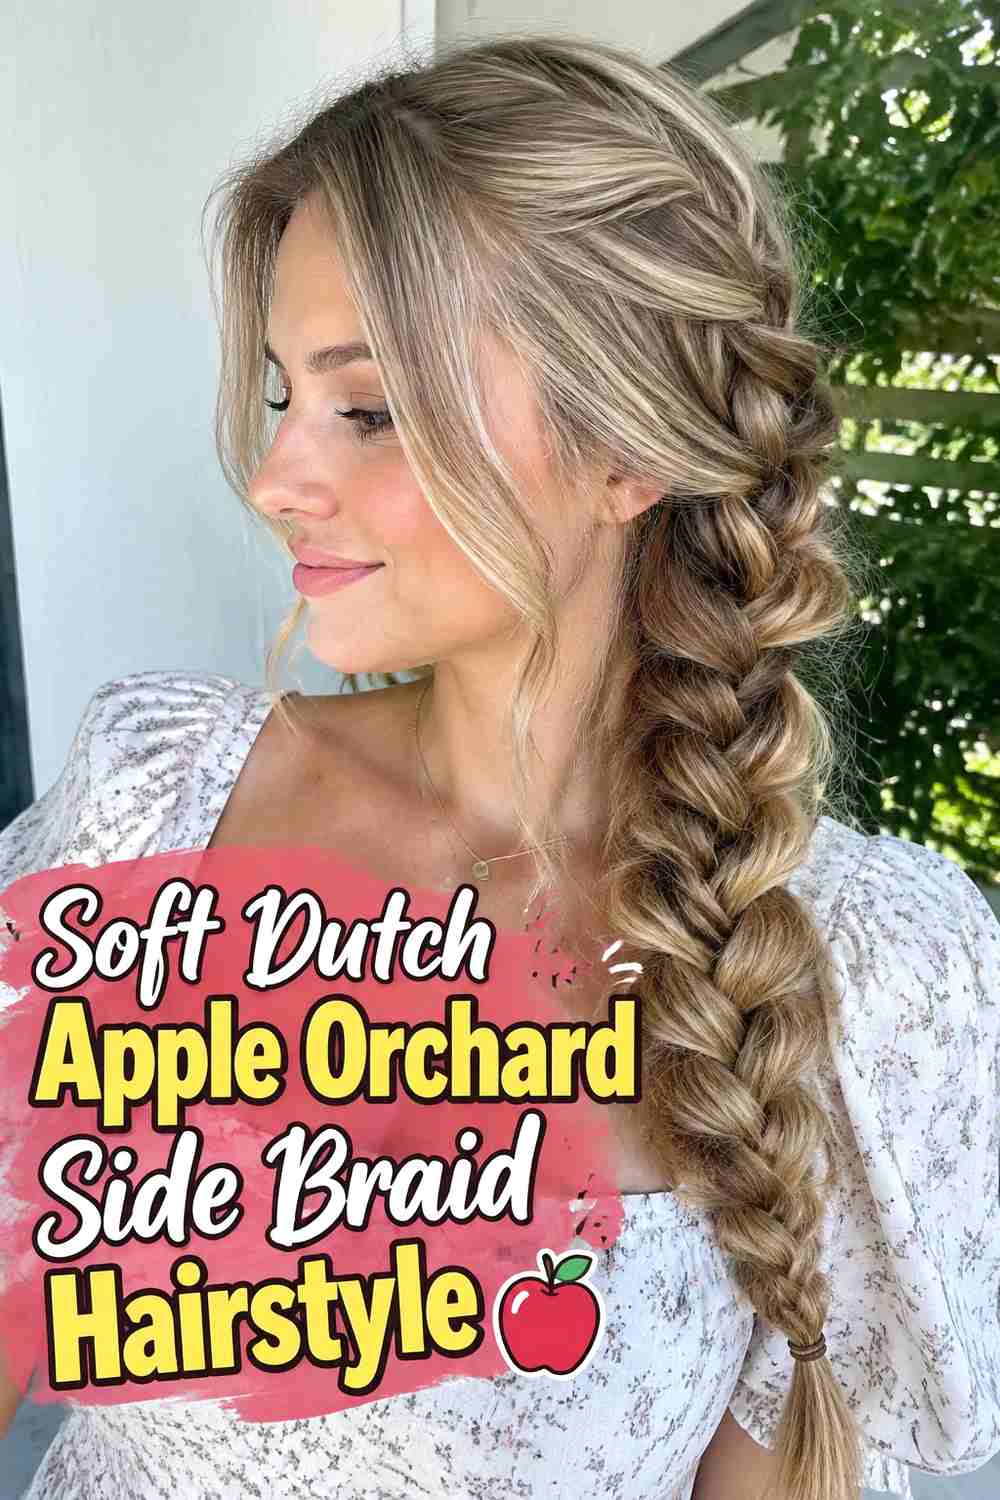
A soft Dutch side braid adds structure while keeping the overall look romantic and wearable. Instead of sitting flat against the hair, the braid appears slightly raised, which makes the woven pattern easy to see in orchard photos. Start near the temple or just above the ear and guide the braid diagonally toward the opposite shoulder, feeding in hair gradually for an even shape. This style is especially useful for long layers because the Dutch technique can hold shorter pieces more securely than a very loose braid. Gently tug the outer edges once the braid is complete to soften the finish, but keep the base anchored so it stays comfortable during walking, photos, or a breezy afternoon outside.
Hair Type & Length
Medium to long hair gives the diagonal braid enough room to develop. Straight and wavy textures can show the woven pattern particularly clearly, while textured hair creates extra fullness.
Pro Tip
Finish the braid first and loosen it afterward. Pulling sections too much while you are still braiding can make the shape uneven or reduce its hold.
3. Romantic Fishtail Apple Orchard Side Braid Hairstyle
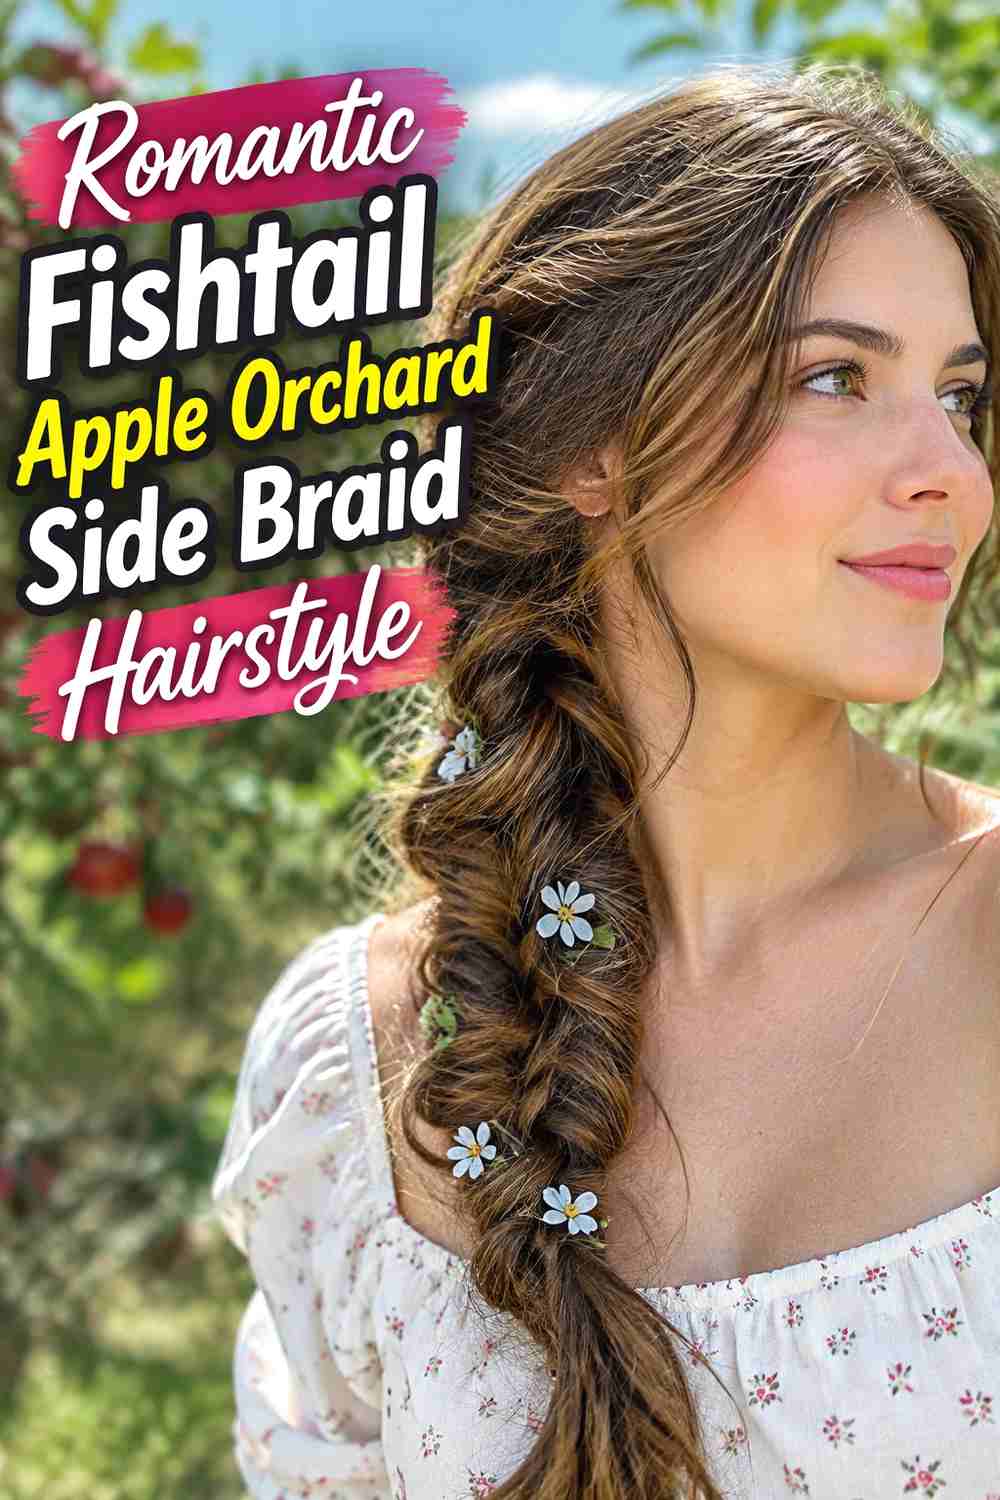
The romantic fishtail side braid has a finer, more intricate texture than a classic three-strand braid, making it a strong choice when you want the hairstyle itself to stand out. Worn over one shoulder, it creates a narrow woven pattern that looks especially pretty with soft waves and face-framing pieces. Fishtails work best on medium to long hair because the pattern becomes more visible with extra length. Keep each section fairly small and consistent, then gently loosen the braid from the bottom upward for a softer orchard-ready finish. If your hair is very silky, a light texture spray can add grip before braiding and help prevent the smaller sections from slipping loose too quickly.
Why It Works
The detailed weave adds visual interest without requiring accessories. It also photographs well from the side because the fishtail pattern remains visible along the shoulder.
Wear & Maintenance
A fishtail can take longer than a standard braid, so allow extra styling time. Secure the end firmly before loosening individual sections.
4. Ribbon Woven Apple Orchard Side Braid Hairstyle
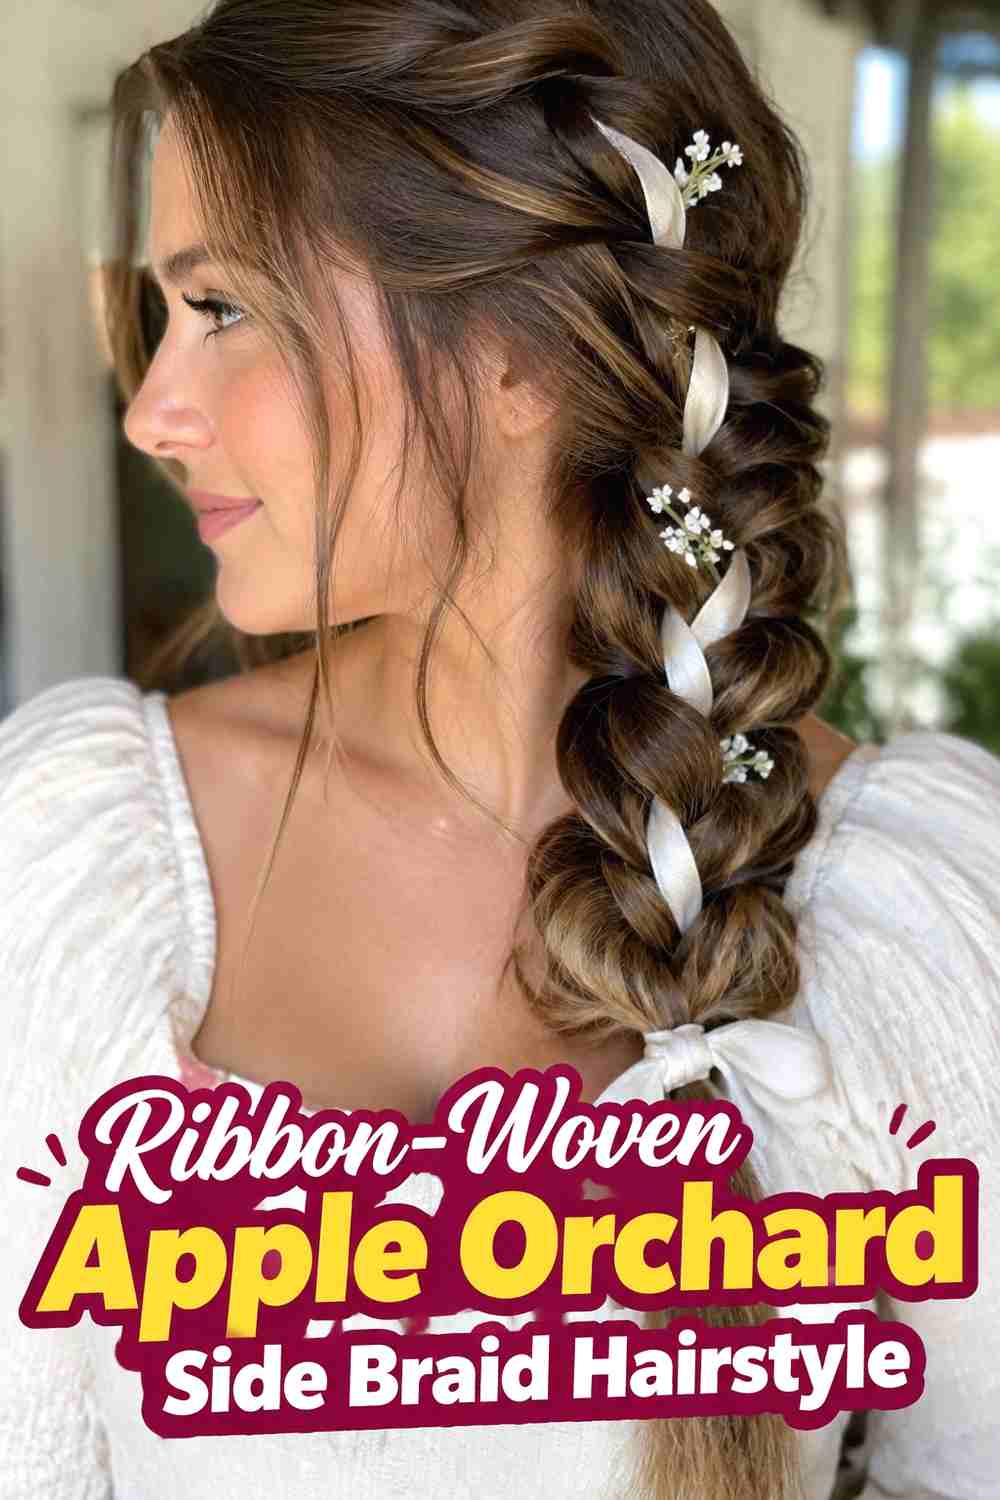
A ribbon-woven side braid brings a subtle autumn detail into the hairstyle without turning it into a costume look. A narrow velvet, satin, or cotton ribbon can be braided through the hair from the upper side section down toward the ends, creating small flashes of color between the strands. Deep red, cream, rust, or muted green can complement an orchard setting while still letting the hair remain the main focus. This style works especially well on medium to long hair with enough density to support both the braid and ribbon. Tie the ribbon securely near the starting point, keep the weaving tension even, and finish with a small elastic before wrapping or knotting the ribbon over it.
Styling Notes
Choose a narrow ribbon that bends easily with the braid. Thick or stiff fabric can make the weave bulky and may compete with the hairstyle.
Best For
Try this option when you want a subtle seasonal accent for fall photos, orchard dates, family outings, or coordinated autumn outfits.
5. Half Up Crown Apple Orchard Side Braid Hairstyle
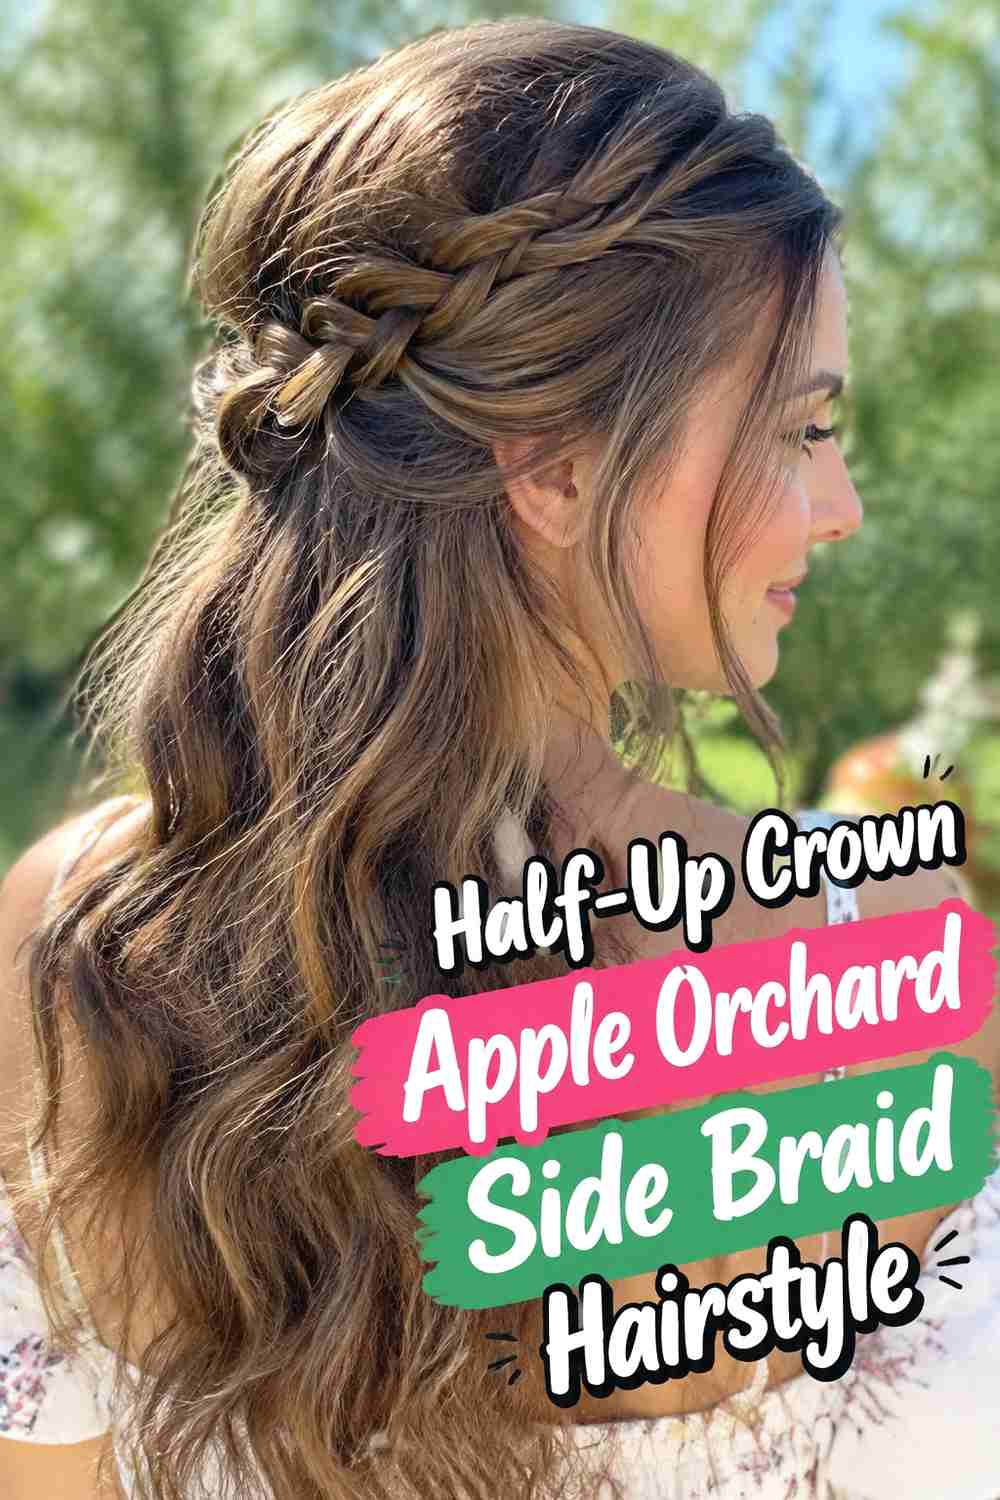
This half-up crown side braid combines a soft halo effect around the head with the length and movement of a side braid. The upper sections are gathered and braided around the crown before blending into a longer braid that falls over one shoulder, leaving some lower hair loose or lightly waved. It is a useful option when you want more detail near the face without pulling every strand tightly away. The style suits medium to long hair and can be adapted for straight, wavy, or curly textures. Keep the crown braid slightly loose for comfort, then secure hidden pins before continuing into the side section. A few carefully released pieces around the temples keep the shape soft rather than severe.
Why It Works
The crown detail makes the hairstyle interesting from several angles, while the side braid keeps the overall shape relaxed and easy to photograph.
Pro Tip
Secure the crown section before forming the longer braid. That extra anchor prevents the upper portion from shifting as the side braid moves.
6. Voluminous Pancaked Apple Orchard Side Braid Hairstyle
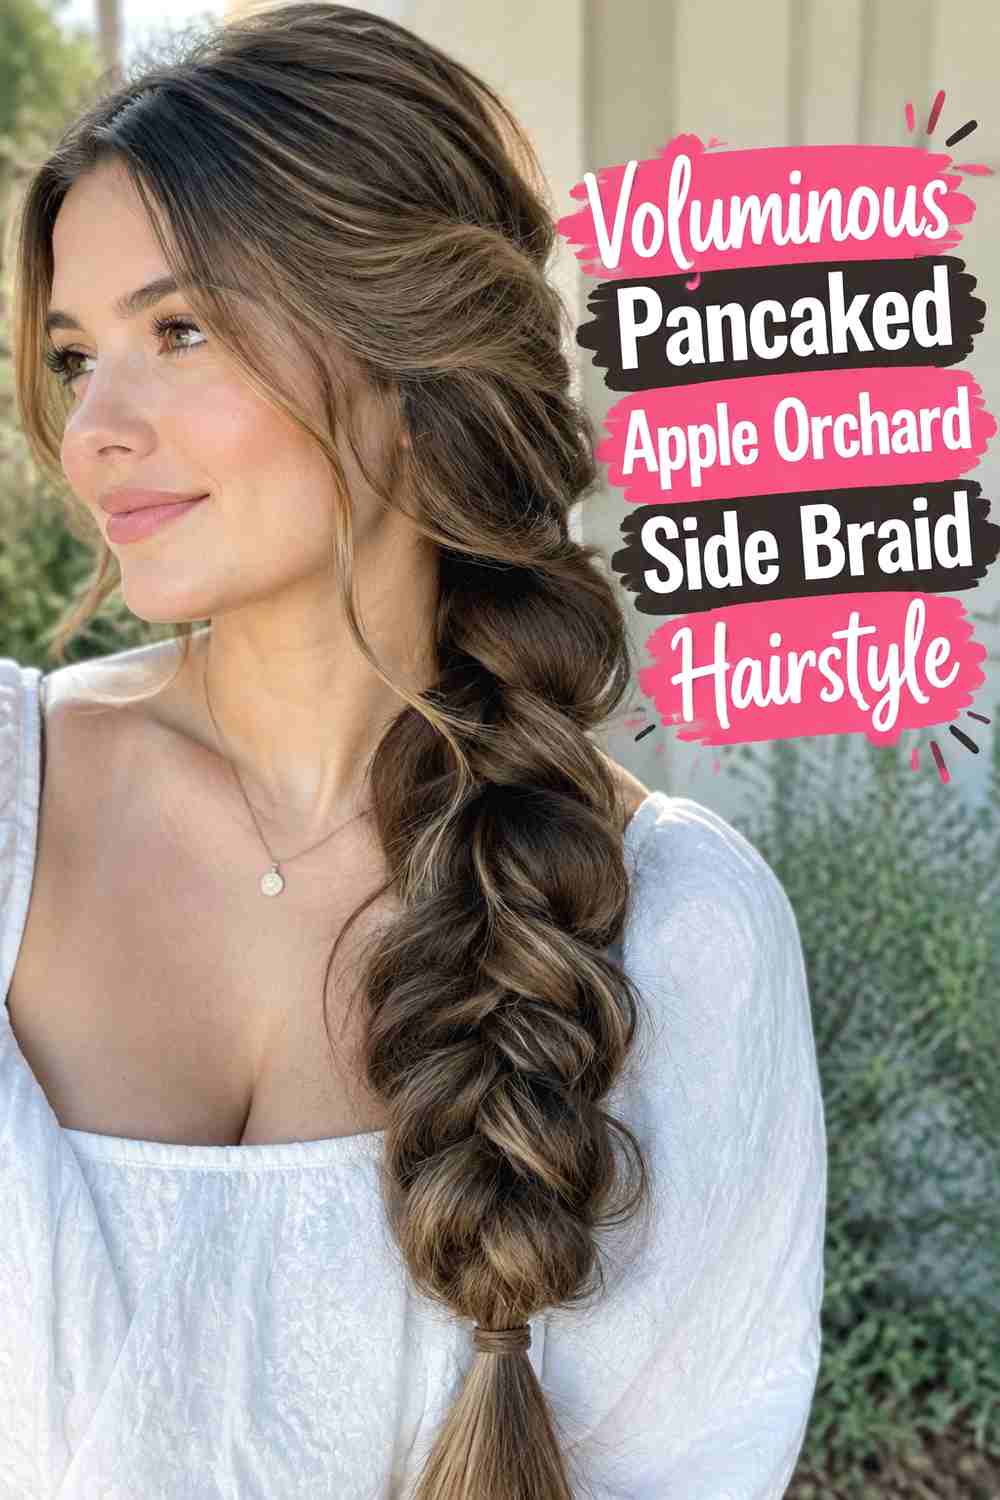
A voluminous pancaked side braid is ideal when you want a fuller silhouette and a braid that reads clearly from a distance. After creating a standard or Dutch braid, gently pull the outer loops outward to widen each section, working slowly so the braid expands without coming apart. The result looks plush, dimensional, and intentionally relaxed, which pairs naturally with casual fall outfits and orchard backgrounds. Medium to long hair with moderate or high density will create the most dramatic fullness, though finer hair can still benefit from pre-styling texture. Avoid pulling every loop equally; slight variation makes the braid look more natural. Secure the end first, then pancake from the bottom upward while supporting the braid with your other hand.
Styling Notes
Work in small adjustments instead of pulling a braid dramatically wider in one pass. You can always add more volume, but an over-loosened section is harder to rebuild.
Hair Type & Length
Longer lengths provide more visible braid sections. Fine hair may benefit from lightweight texture at the roots and through the lengths before styling.
7. Curly Apple Orchard Side Braid Hairstyle
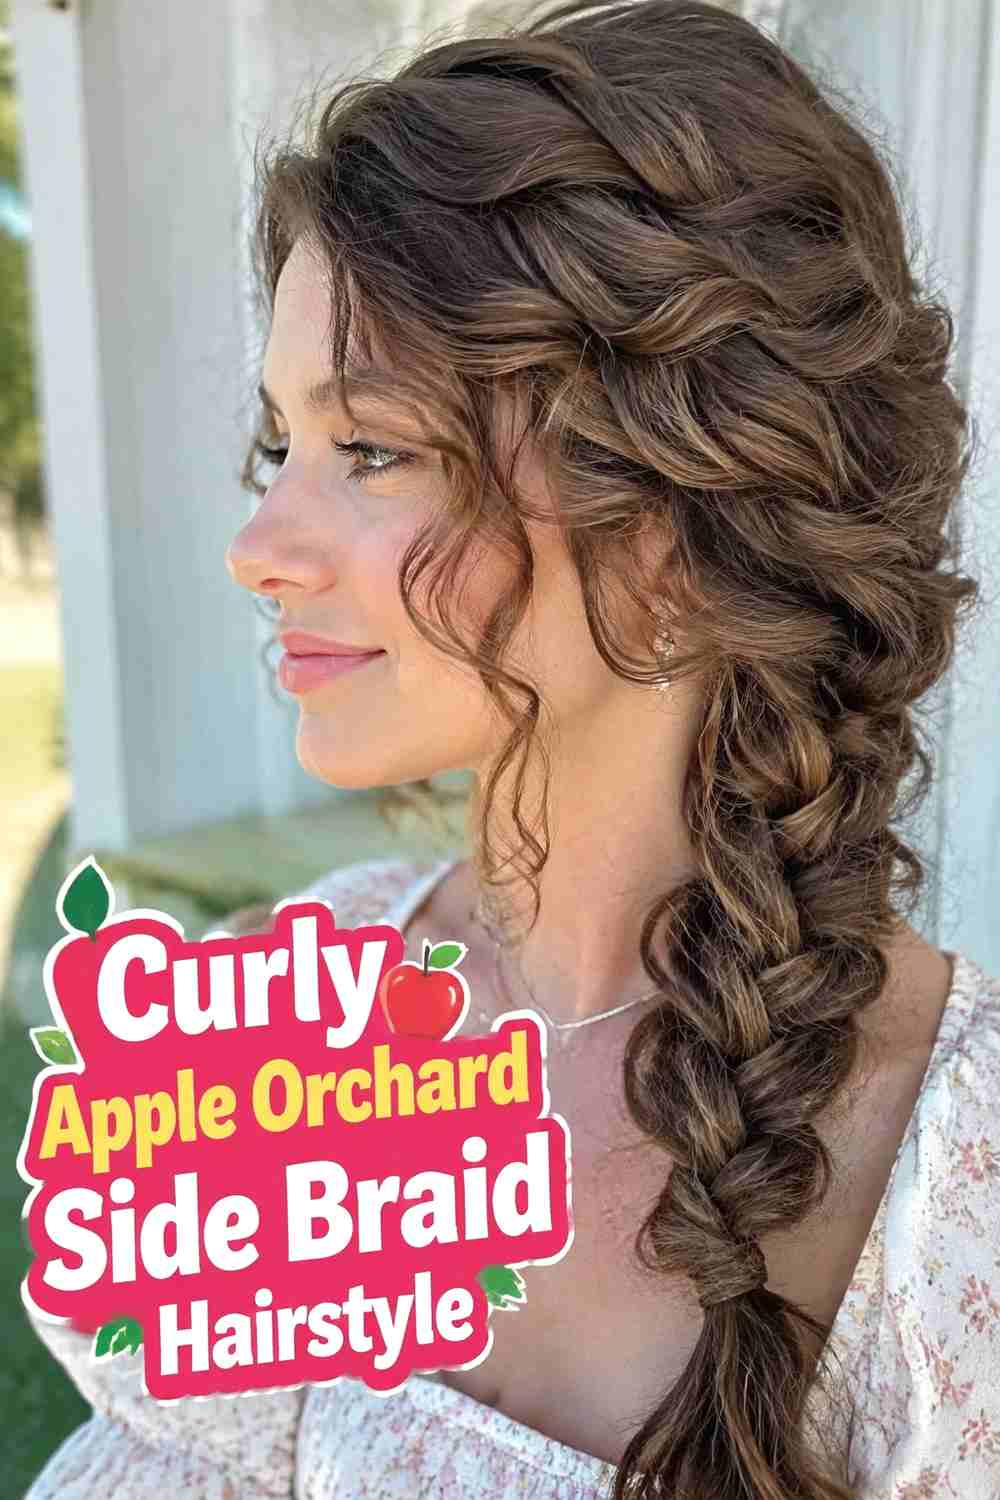
A curly side braid keeps natural movement visible instead of smoothing every curl into a uniform pattern. The braid can begin loosely near the side of the head and travel over one shoulder, with selected curls left free around the hairline and ends. This approach works especially well for naturally curly or coily hair because the texture adds dimension and helps the braid look full without excessive teasing. Use a braid size that matches your curl pattern and density, and avoid over-tightening the roots if you want a soft orchard look. A little moisture or styling cream can help define the exposed curls, while a secure elastic and a few discreet pins can keep the braid stable through outdoor wear.
Wear & Maintenance
Handle curls with your fingers as much as possible during styling to avoid unnecessary disruption of the natural pattern. Refresh exposed curls individually if needed.
Why It Works
Allowing some curl definition to remain visible gives the braid depth and character instead of hiding the hair’s natural texture inside a tight plait.
8. Scarf Wrapped Apple Orchard Side Braid Hairstyle
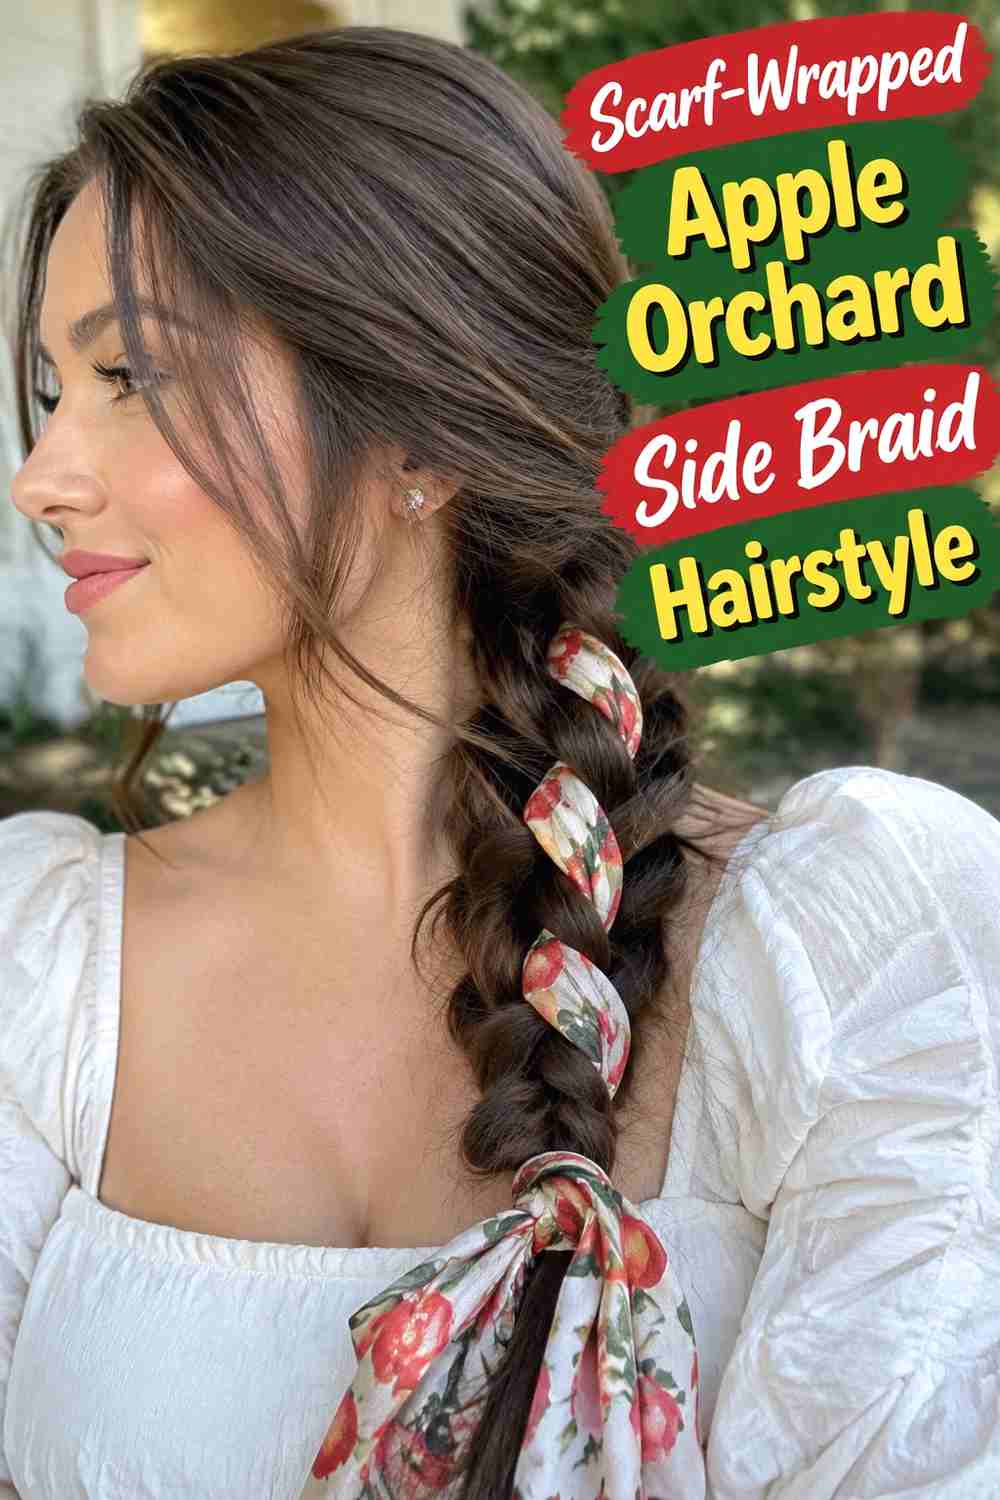
A scarf-wrapped side braid adds color and movement while keeping the hairstyle practical for an outdoor orchard visit. Choose a slim scarf rather than a bulky square, then anchor it near the base of the braid and weave one end through the sections as you work downward. The scarf can also be tied around the finished elastic for a simpler version. Warm plaid, muted floral, cream, burgundy, or olive tones fit the seasonal setting without overwhelming the hair. This style is easiest on medium to long hair, and a slightly textured finish helps the scarf stay in place. Keep the fabric flat as you braid so it does not bunch, and leave short tails at the end for a relaxed finish.
Best For
This variation works well when your outfit is simple and you want the hairstyle to carry a little more color or seasonal personality.
Pro Tip
Use lightweight fabric with a matte or slightly textured surface. Very slippery silk-like scarves can shift more easily during extended outdoor wear.
9. Rope Twist Apple Orchard Side Braid Hairstyle
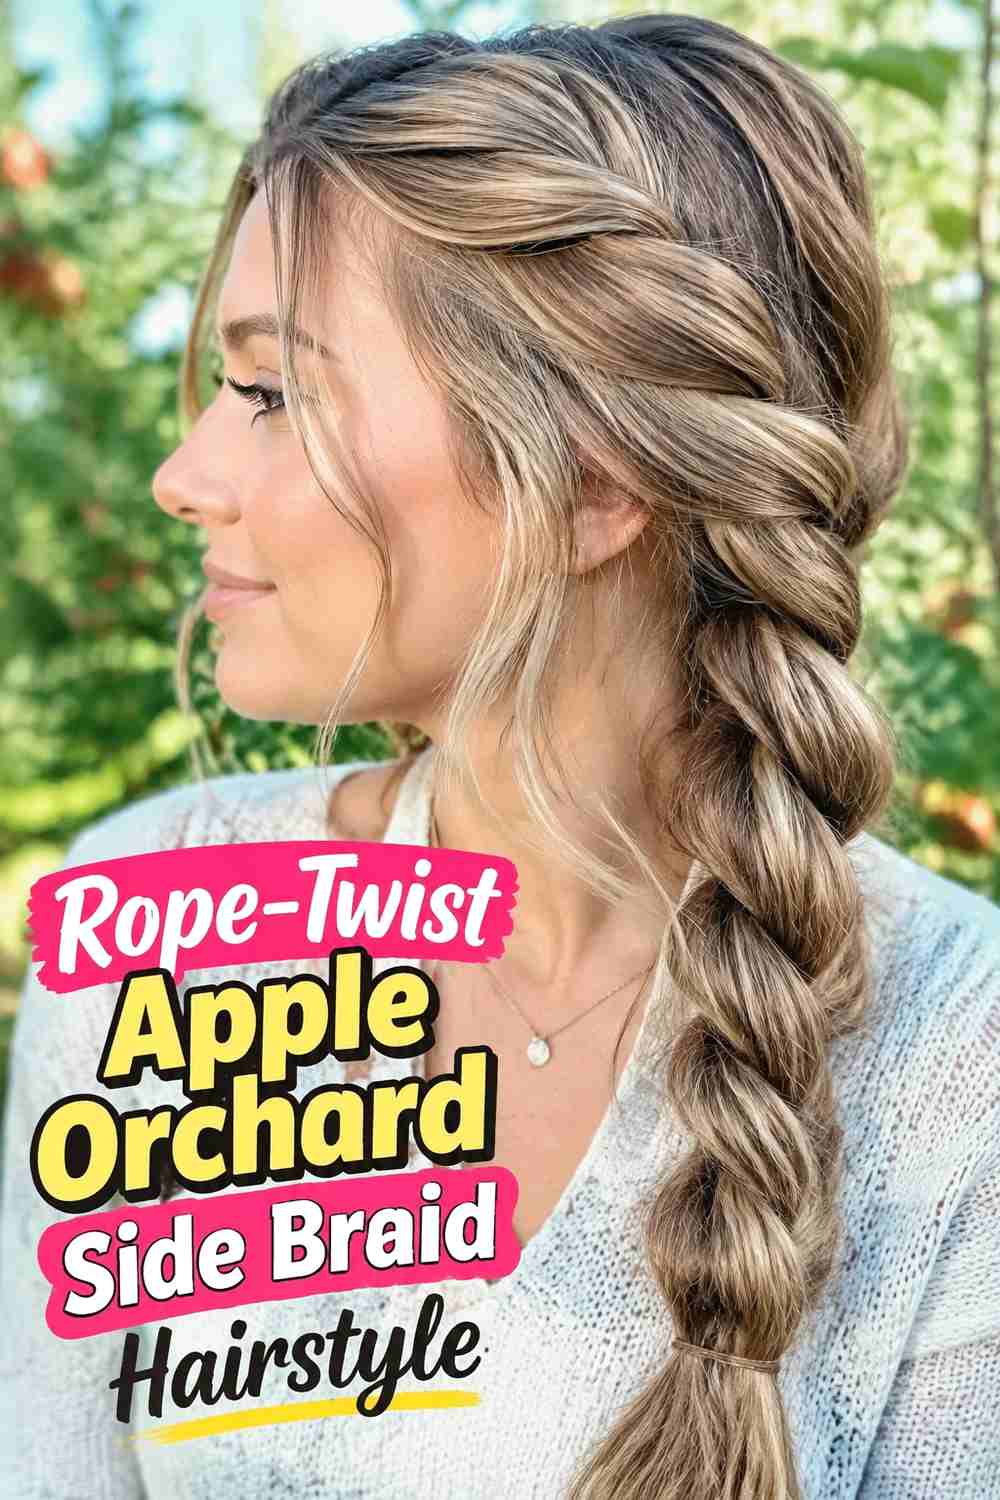
The rope-twist side braid offers a cleaner, simpler pattern than a traditional woven braid while still giving the hair a strong side-swept shape. Divide the ponytail or gathered section into two parts, twist each section in the same direction, then wrap them around each other in the opposite direction. This counter-twist helps the rope hold its form. The finished look is sleek through the length but can be softened with loose front pieces or a little volume at the crown. It works well on medium to long hair and is especially useful when you want something faster than a fishtail. A light styling cream can control flyaways, while a hidden elastic keeps the end compact and tidy.
Styling Notes
Maintain consistent tension through both sections so the twist does not become tight in one area and loose in another.
Best For
Choose this look when you want a quick side-swept style with a defined pattern but do not want to create a traditional three-strand or fishtail braid.
10. Polished Three Strand Apple Orchard Side Braid Hairstyle
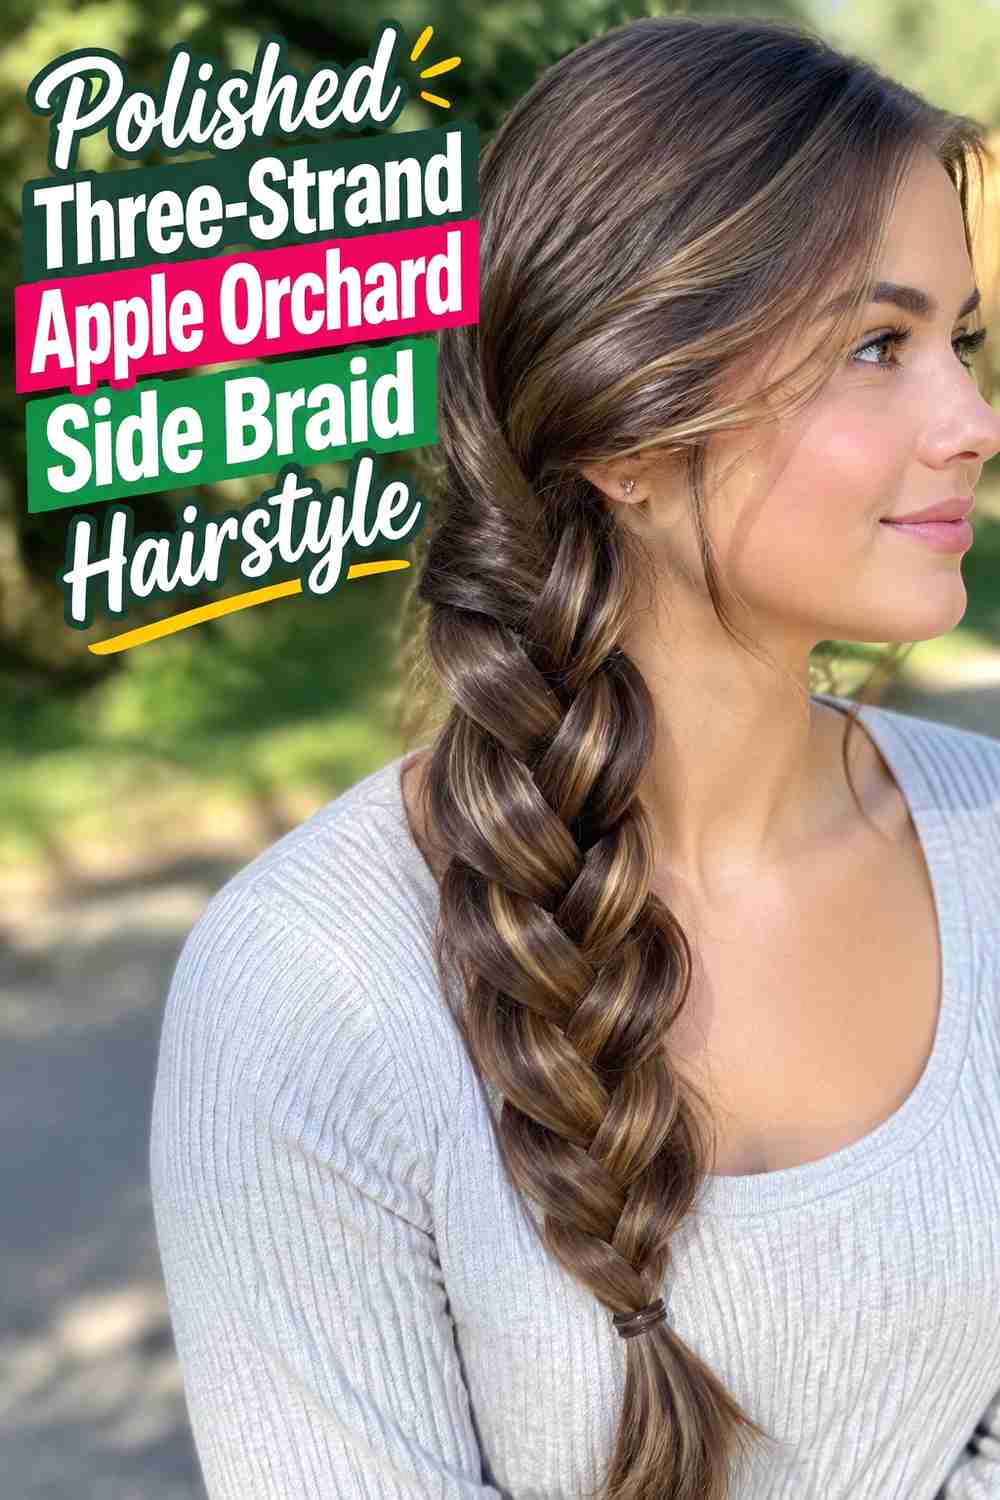
A polished three-strand side braid is the most classic option in this collection, and its simplicity can look especially refined when the parting, surface texture, and finish are intentional. Sweep the hair to one side, smooth the crown lightly, and braid from below the ear so the plait rests neatly across the shoulder. This style suits straight, wavy, or softly curled hair and can be adjusted from snug and tidy to gently relaxed. For orchard photos, a few soft pieces around the face can keep the result from feeling too formal. Use even strand sizes for a clean pattern, then apply only a small amount of smoothing product so the hair keeps natural movement and does not appear stiff or glossy.
Wear & Maintenance
Because the braid structure is simple and stable, this is one of the easier options to maintain through walking, wind, or a longer day outdoors.
Pro Tip
Keep the surface smooth without flattening the crown completely. A small amount of natural lift gives the classic braid a softer, more modern finish.
11. Messy Boho Apple Orchard Side Braid Hairstyle
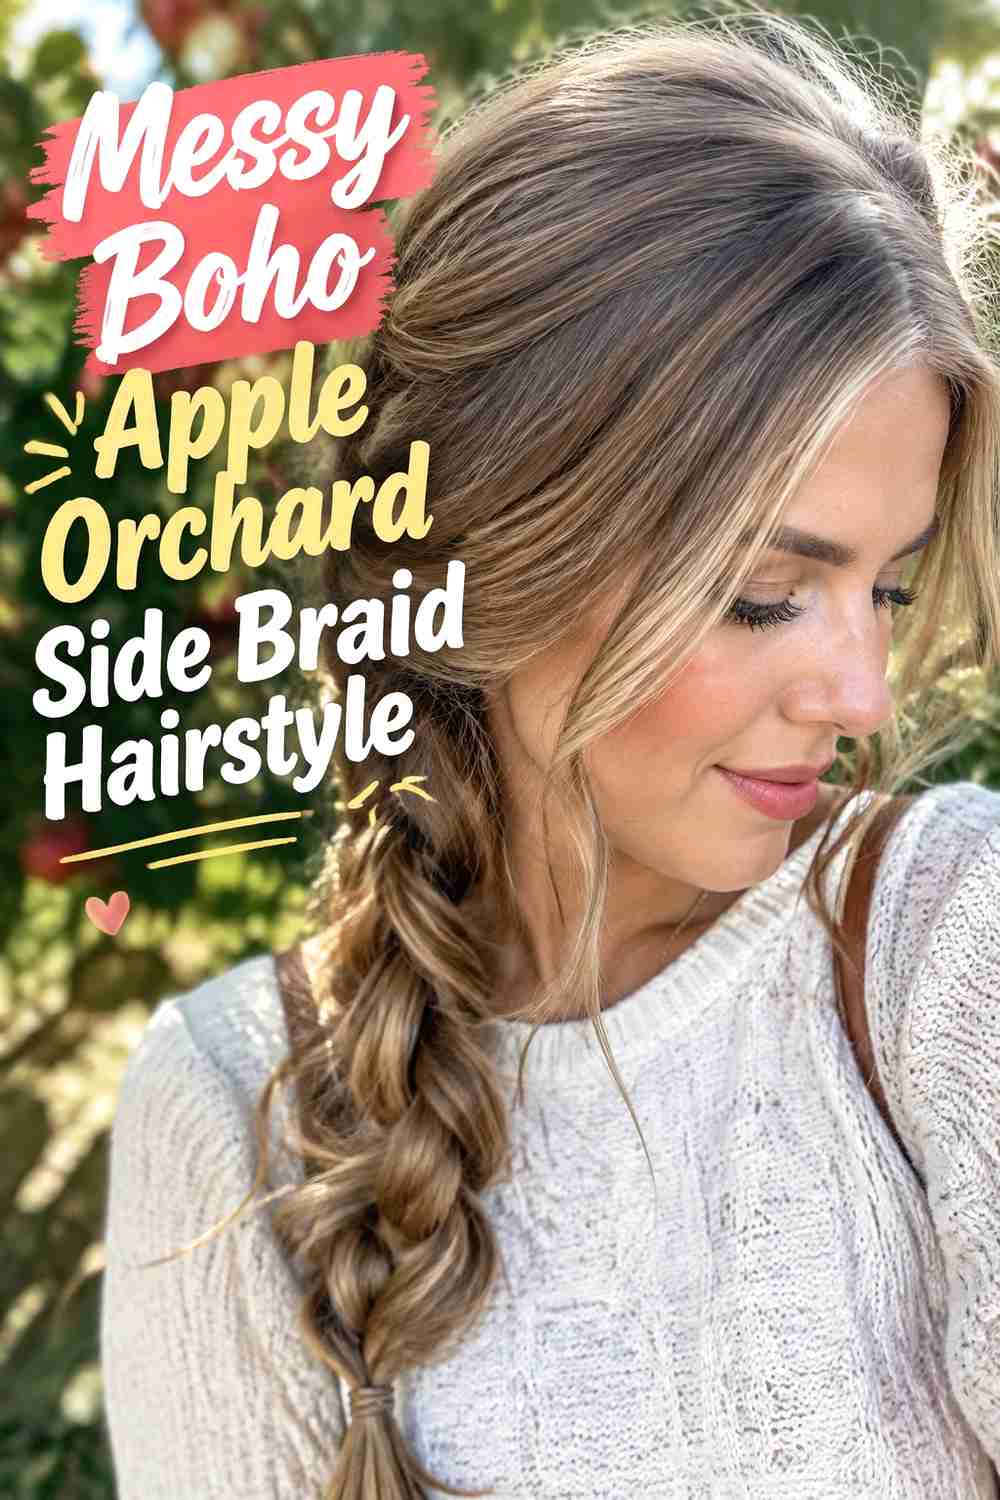
A messy boho side braid leans into uneven texture, soft volume, and a slightly undone finish that feels natural in an outdoor fall setting. The braid should still be secure at its core, but the outer loops can be loosened, a few strands can escape, and the crown can have gentle lift rather than a perfectly smooth surface. This style is forgiving on layered hair because shorter pieces can blend into the intentionally relaxed texture. Start with waves or natural texture, braid over one shoulder, and then adjust the shape with your fingers instead of a brush. The key is controlled imperfection: loosen strategically around the face and braid edges while keeping the elastic, base, and central structure firm enough for comfortable wear.
Why It Works
The varied texture complements casual orchard scenery particularly well and makes minor flyaways or movement feel like part of the style rather than something that must be corrected.
Styling Notes
Create the secure braid first and add the messy finish afterward. This gives you softness without sacrificing the structure underneath.
12. Low Side Braid With Face Framing Pieces Hairstyle
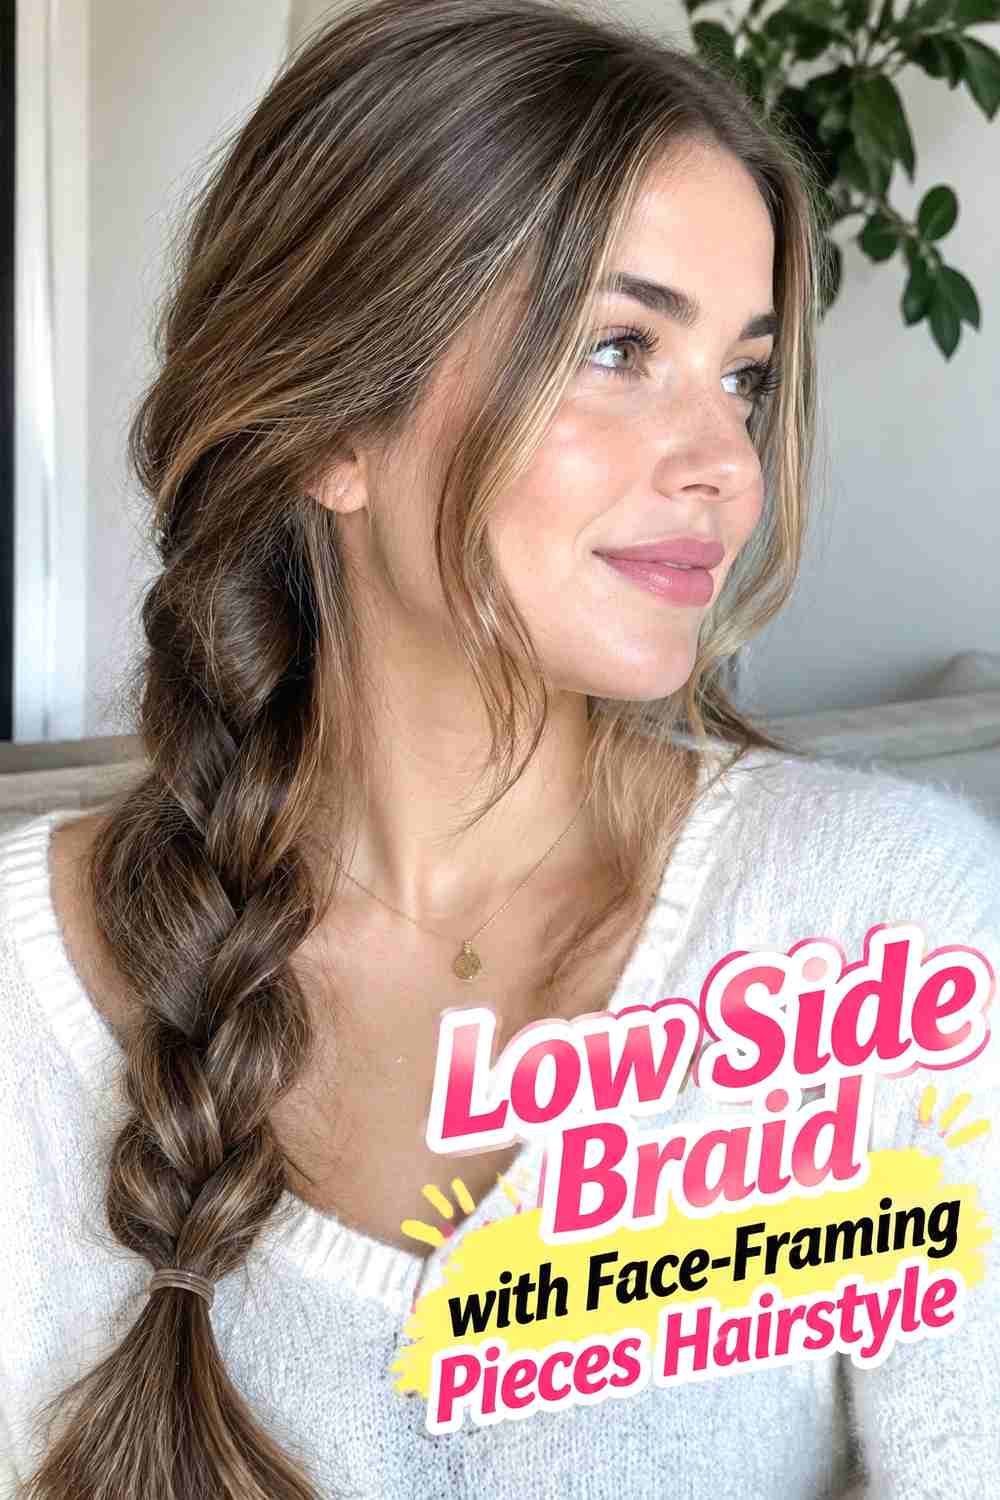
A low side braid with face-framing pieces is a soft, approachable option for anyone who wants the braid to feel relaxed rather than heavily styled. The braid begins low near the nape and rests across one shoulder, while two or three shorter sections are left free around the cheeks and temples. Those pieces can be lightly curled or allowed to follow the hair’s natural texture. Because the braid starts lower, it places less visual emphasis on the crown and creates a calm, understated silhouette. This look works on medium to long hair and is easy to adjust for different densities. Keep the loose front pieces intentional, not excessive, and use a small elastic that blends with the hair for a clean finish.
Best For
This is a practical choice for anyone who prefers understated styling, minimal crown volume, and a braid that can be recreated without complicated techniques.
Wear & Maintenance
Bring a few extra pins if your face-framing layers are short. Outdoor movement can loosen them more quickly than the main braid.
How to Choose the Right Look
Start with your hair length and texture. Medium-length hair may be easiest to manage in a Dutch, three-strand, or low side braid, while longer hair gives fishtails, pancaked braids, rope twists, and scarf-woven styles more room to show their patterns. Next, consider how much hold you need. A polished three-strand braid or anchored Dutch braid generally has a firmer structure than an intentionally loose boho or heavily pancaked style. If you expect wind, walking, or several hours outdoors, choose a secure base and soften only the visible edges. Styling time also matters. Rope twists and classic braids can be relatively straightforward, while fishtails, ribbon weaving, and crown combinations require more sectioning and attention. For accessories, use slim ribbons or scarves that coordinate with your outfit rather than dominating the braid. Finally, choose the finish that feels most natural for your hair. Defined curls can remain visible in a curly side braid, fine hair can gain dimension from gentle pancaking, and naturally smooth hair can make a polished braid or Dutch pattern especially clear.
Final Thoughts
Apple orchard side braids can range from polished and structured to soft, textured, and slightly undone. The strongest choice is one that works with your natural length and texture while staying comfortable enough for an outdoor day. Start with a secure braid, then adjust the volume, accessories, and face-framing pieces to create the finish you prefer.
FAQs
1. What braid works best for an apple orchard hairstyle?
A loose three-strand or Dutch side braid is a versatile starting point because both can be softened for photos while maintaining a secure structure.
2. How can I keep a side braid from falling apart outdoors?
Start with some texture or grip, secure the braid firmly with an elastic, and use discreet pins near the base or around shorter layers when needed.
3. Can I create an apple orchard side braid on fine hair?
Yes. Lightweight texture, gentle crown volume, and carefully pancaking the braid can make fine hair appear fuller without requiring an overly tight style.
4. What accessories look good with an orchard side braid?
Narrow ribbons, slim scarves, understated pins, and small autumn-inspired accents work well. Keep accessories secondary so the braid remains clearly visible.
5. Should I curl my hair before making a side braid?
It is optional. Loose waves can add texture and soften face-framing sections, but naturally straight, curly, or coily hair can also work beautifully without pre-curling. Save your favorite apple orchard side braid ideas, share them for fall inspiration, and explore more wearable hairstyles for your next seasonal look.