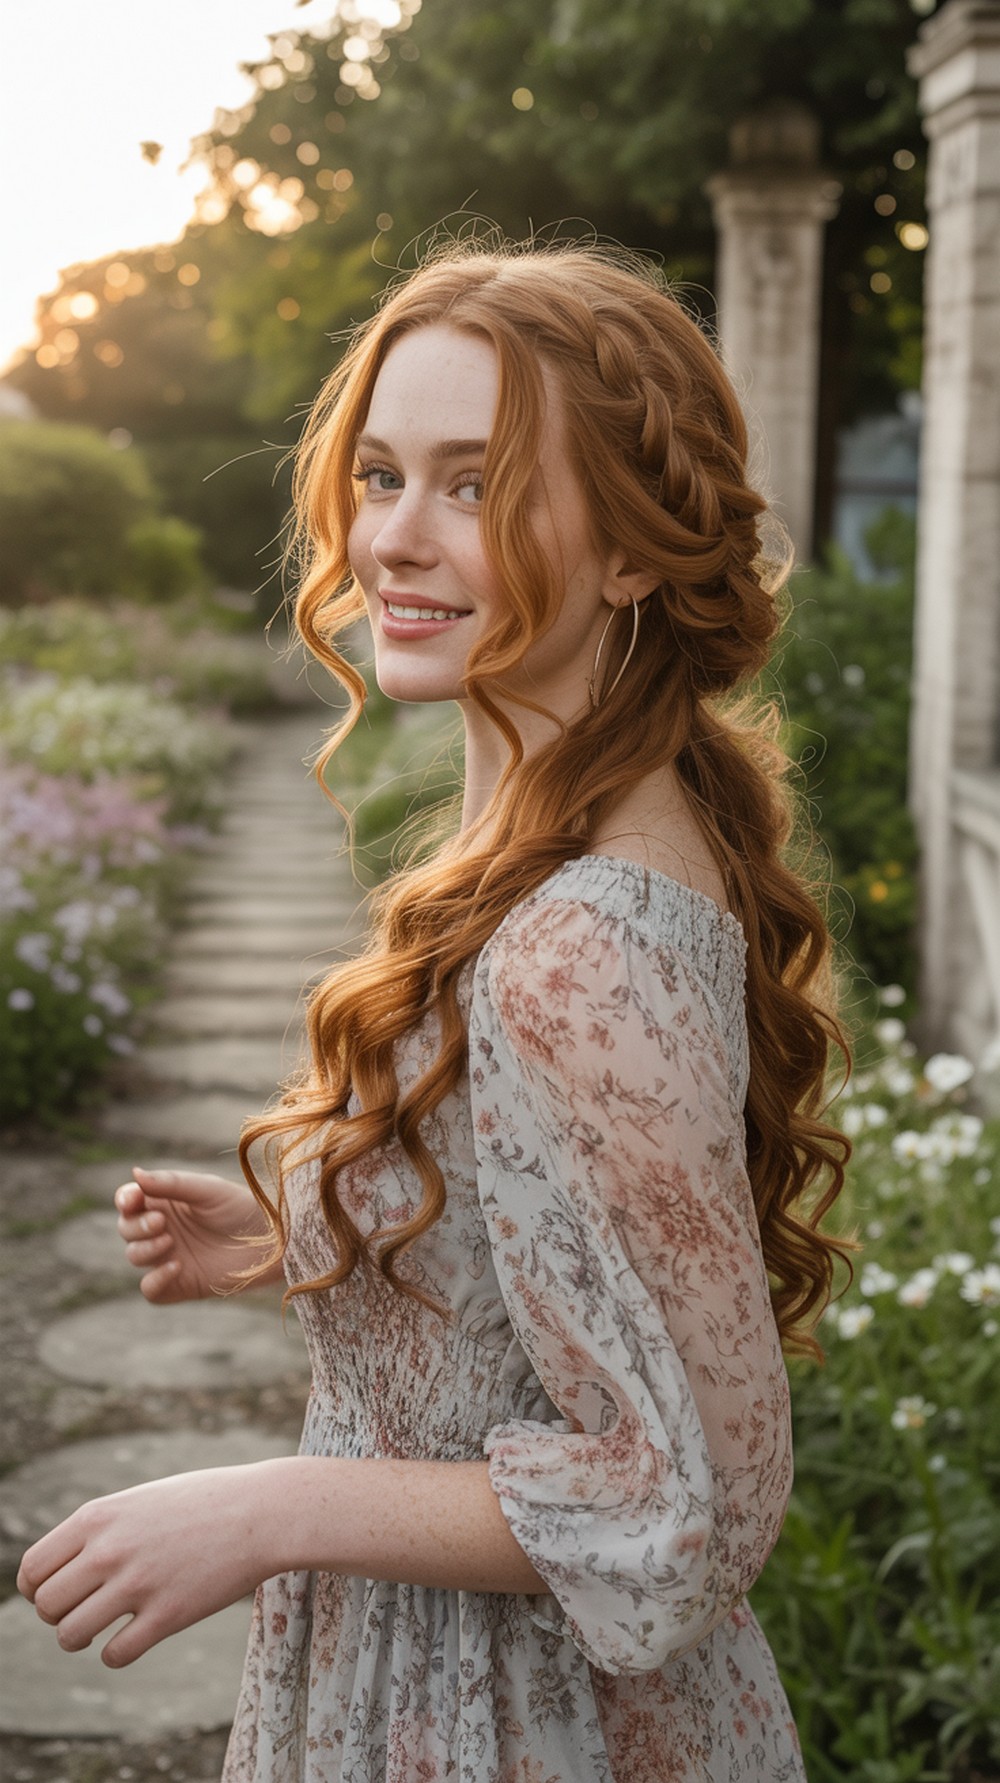
12 Dutch Braided Bun Hairstyle Ideas
Raised braids and neatly secured buns make these Dutch braided hairstyles feel detailed, dimensional, and polished without sacrificing comfortable, wearable structure.
Dutch braided buns combine two strong styling elements: an inside-out braid with visible raised sections and a bun that securely gathers the remaining length. Depending on where the braid begins and where the bun sits, the same technique can create a sporty high updo, an elegant low chignon, or a soft romantic event style.
For a realistic result, the braid should follow the scalp naturally, maintain believable tension, and feed cleanly into the bun instead of appearing detached. The bun should also connect to a secure tie or pinned base, with natural strand variation and physically believable volume. Hair length, density, texture, and layering will all affect the final shape.
Quick List
- Classic Dutch Braided Bun Hairstyle
- Double Dutch Braided Bun Hairstyle
- Side Dutch Braided Bun Hairstyle
- Low Dutch Braided Bun Hairstyle
- High Dutch Braided Bun Hairstyle
- Dutch Braid Into Messy Bun Hairstyle
- Dutch Braided Chignon Hairstyle
- Halo Dutch Braided Bun Hairstyle
- Curly Texture Dutch Braided Bun Hairstyle
- Pearl Pin Dutch Braided Bun Hairstyle
- Wedding Dutch Braided Bun Hairstyle
- Soft Romantic Dutch Braided Bun Hairstyle
1. Classic Dutch Braided Bun Hairstyle
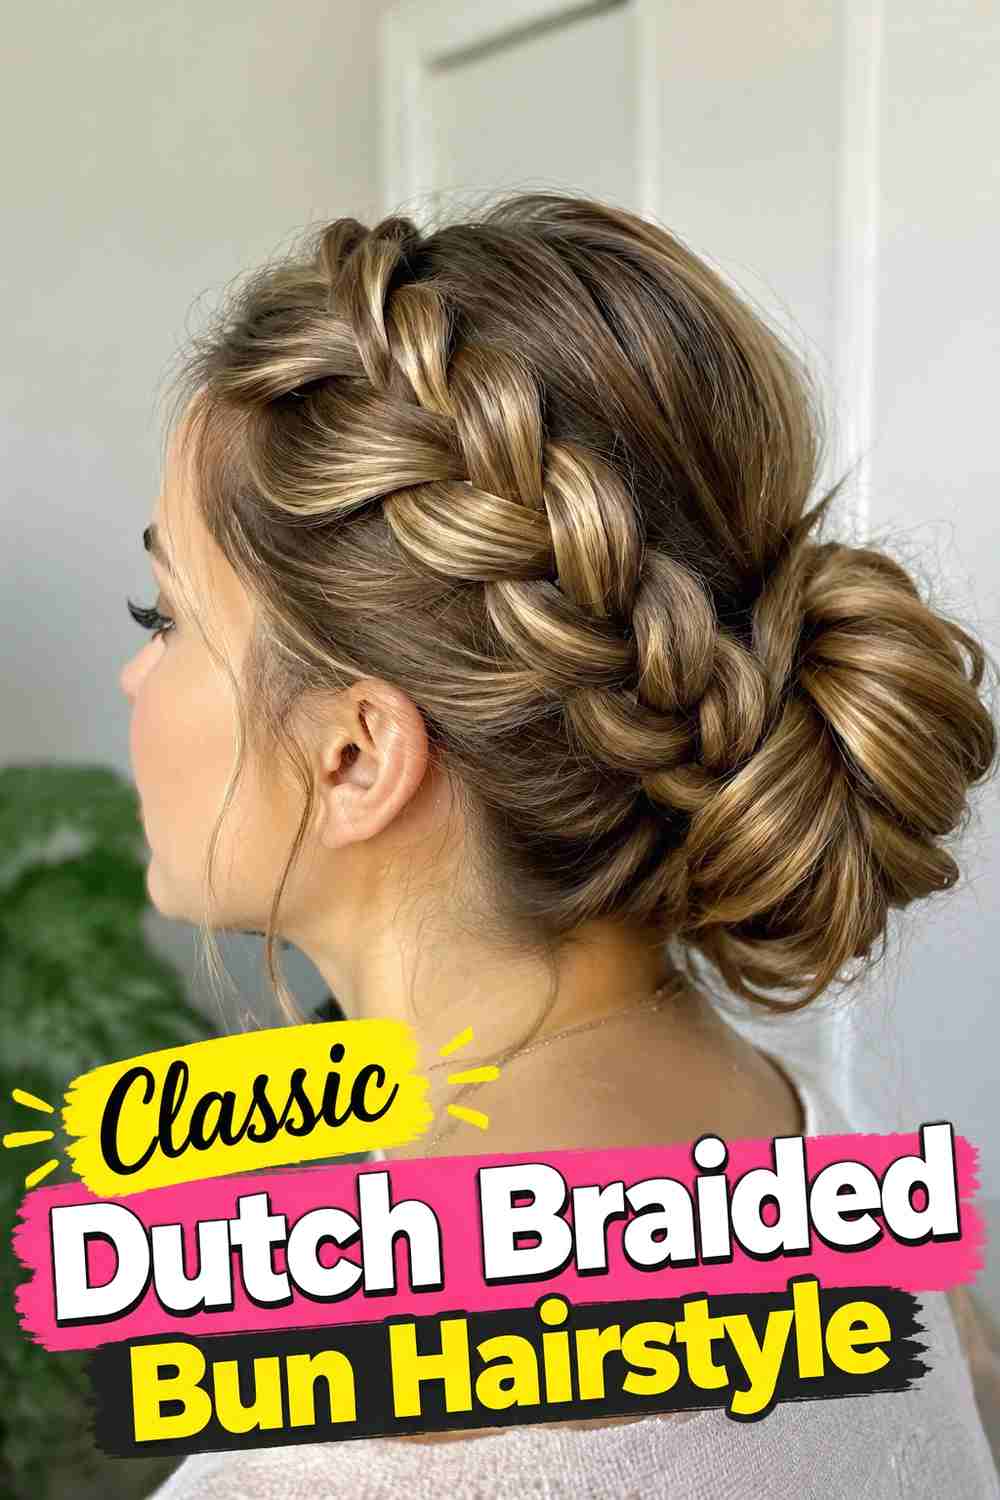
The classic version starts with a single Dutch braid traveling from the front or crown toward the back of the head before feeding directly into a compact bun. Because the braid sits raised above the surrounding hair, its woven structure stays visible even after the remaining length is gathered. Medium to long hair is easiest to work with, especially when the braid has enough length to reach the bun naturally. Keep the sections even and add hair consistently as you braid. Once you reach the desired bun placement, secure the gathered hair first, then twist or coil the length around the base. This creates a believable connection between the braid and finished bun.
Styling Notes
Avoid pulling the braid dramatically wider before the bun is secure. Gentle loosening afterward can add softness without weakening the scalp sections or distorting the braid path.
2. Double Dutch Braided Bun Hairstyle
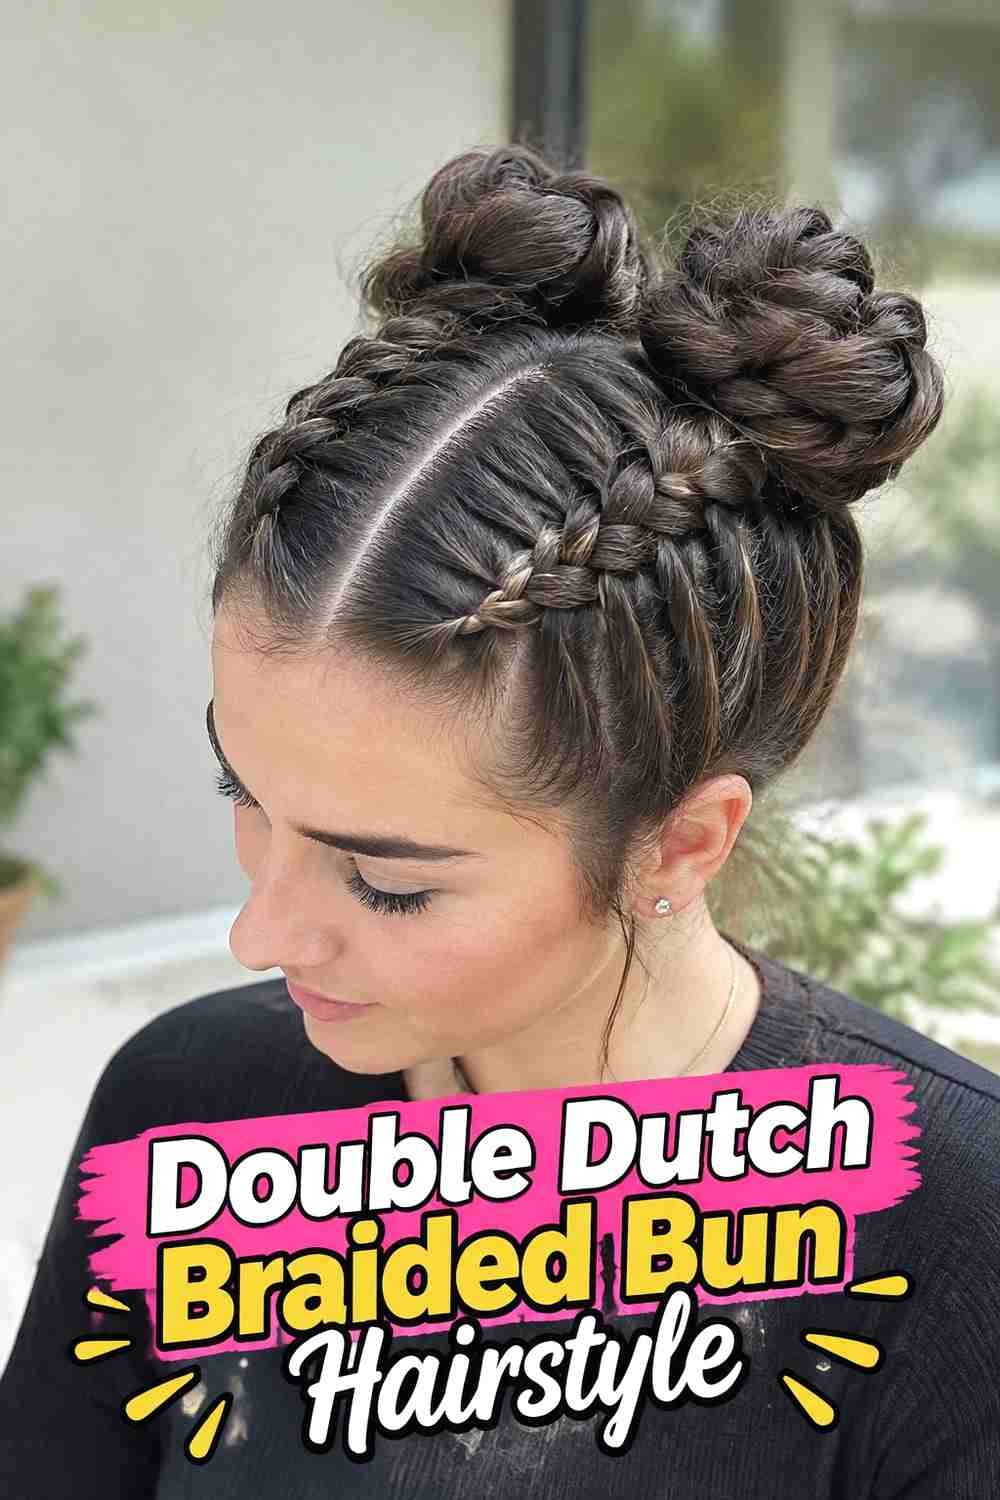
Two Dutch braids create a symmetrical, structured look before joining into one bun at the back. Start with a clean center part and braid each side from the hairline toward the nape or mid-back of the head, keeping the tension similar on both sides. Once the braids reach the meeting point, gather their remaining lengths together and secure a ponytail before forming the bun. This construction works especially well on medium-long or long hair because there is enough length to maintain the braided detail and still create a substantial knot. The style can stay tight and sporty or be gently loosened for a softer finish, but both braids should remain clearly connected to the bun.
Hair Type & Length
Medium to long hair provides the easiest balance between braid length and bun fullness. Dense hair may create a naturally larger bun, while finer hair usually produces a more compact shape.
3. Side Dutch Braided Bun Hairstyle
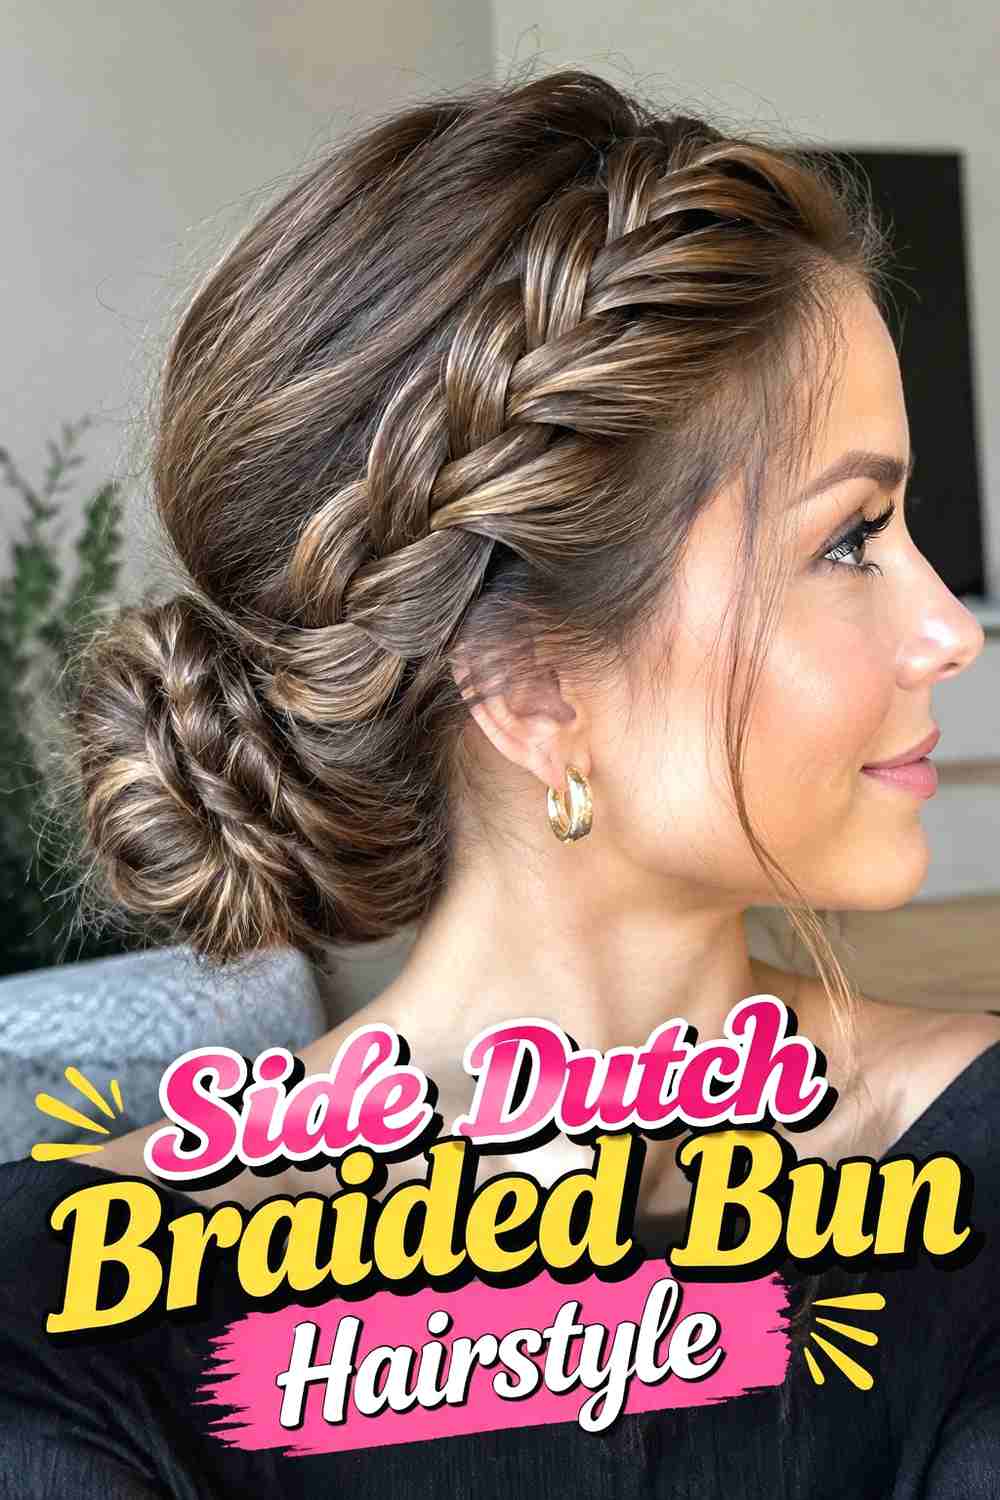
A side Dutch braid adds asymmetry by traveling from one temple or side part toward a bun positioned at the back or slightly off-center. The raised braid becomes a visible design feature across one side of the head, while the opposite side can stay smoother and simpler. This variation works well when you want a braided updo without committing to two full braids. Keep the braid close to the scalp and gradually angle it toward the chosen bun position. Once the braid reaches the back, combine it with the remaining loose hair, secure the base, and form the bun. The finished shape should feel directional and balanced rather than heavily weighted to one side.
Why It Works
One strong braid creates visual movement around the head while the bun anchors the style, giving the updo detail without making every section equally busy.
4. Low Dutch Braided Bun Hairstyle
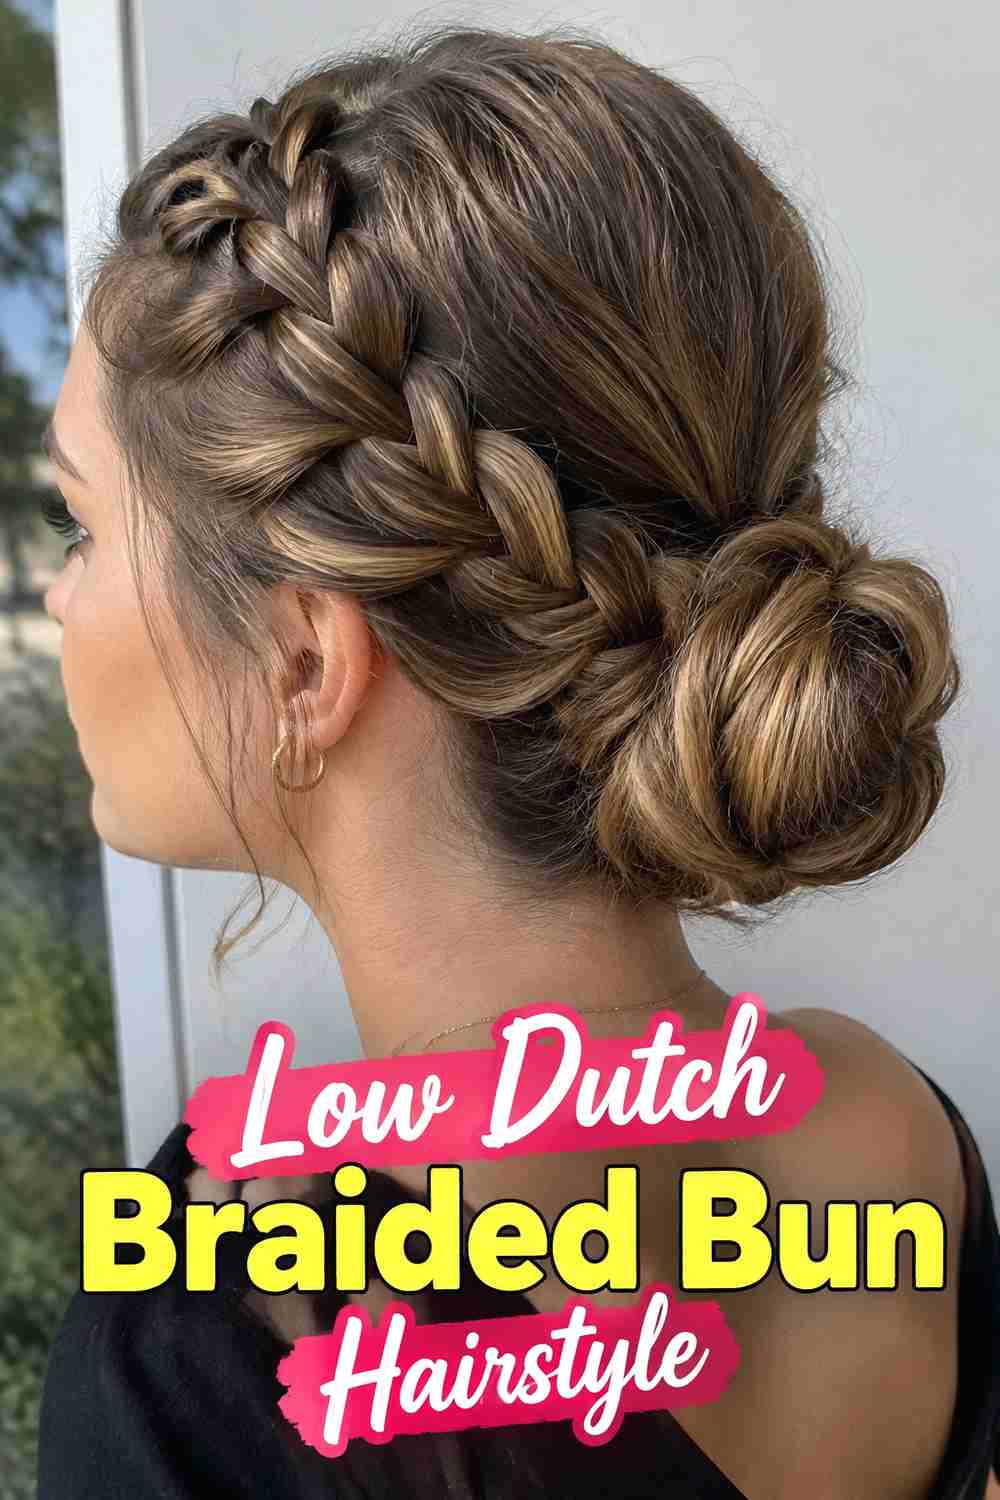
The low Dutch braided bun places the final knot close to the nape, giving the hairstyle a softer and more understated silhouette. A Dutch braid can begin near the crown, temple, or side part and travel downward until it meets the low base. This placement works particularly well with medium to long hair because the bun can sit neatly against the neckline without excessive height. Secure the braid and remaining hair into a low ponytail before twisting the length into a bun. Keep the knot compact if you want a cleaner finish, or loosen a few outer sections for more texture. The low position also leaves room for earrings, collars, and delicate hair accessories.
Best For
Choose this version for dinners, work events, or occasions where you want braided detail with a quieter, more elegant overall shape.
5. High Dutch Braided Bun Hairstyle
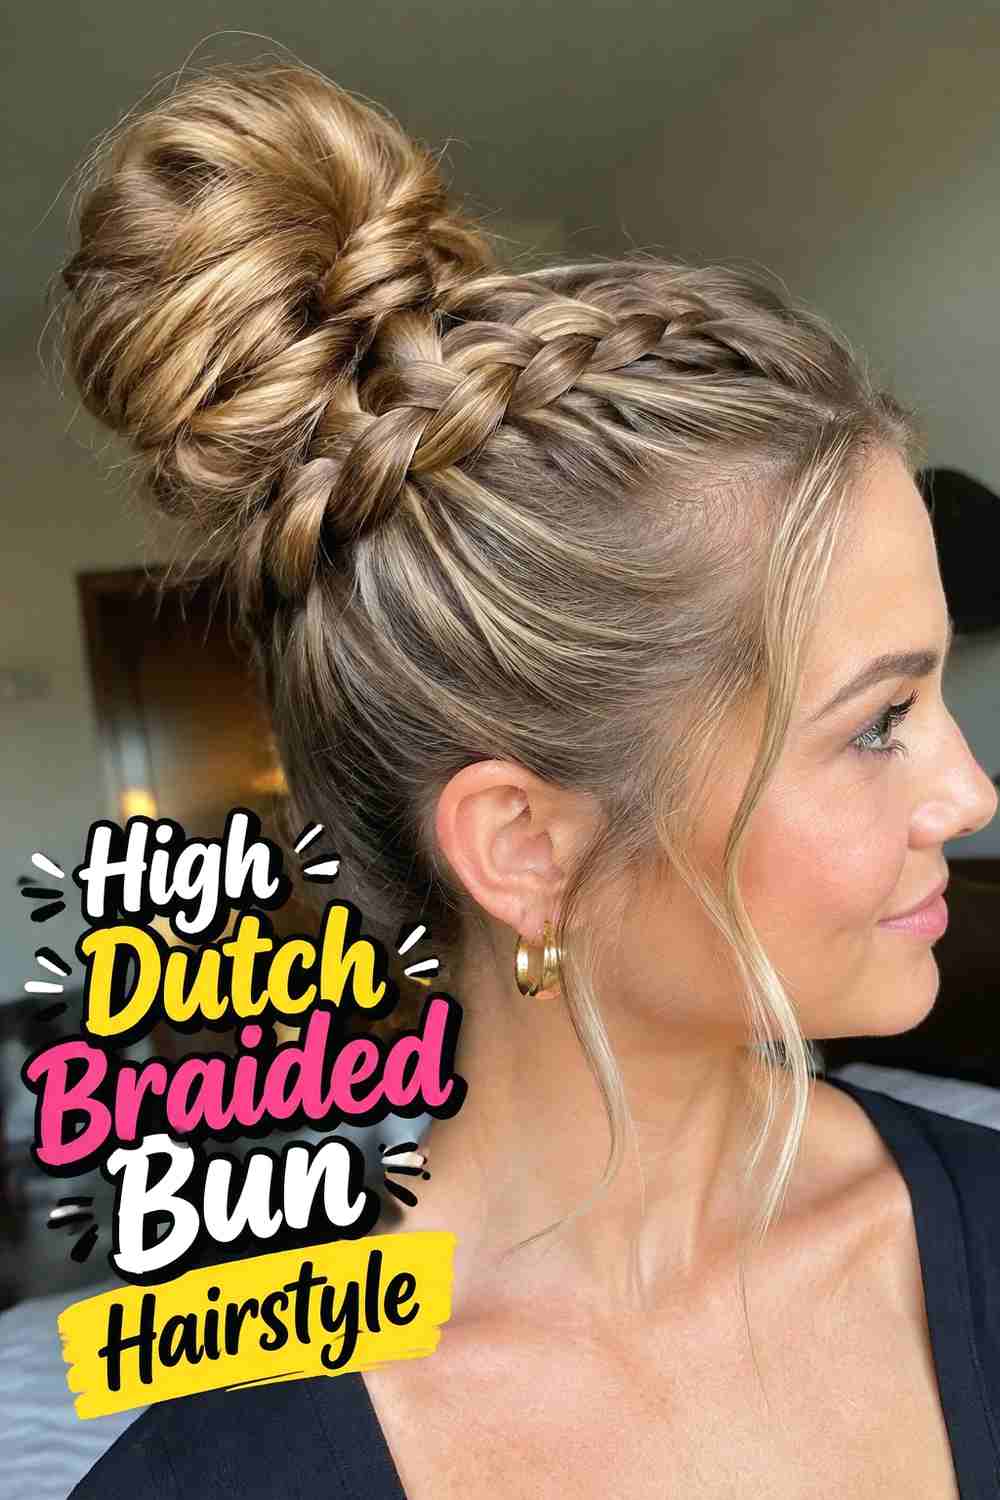
A high Dutch braided bun shifts the focal point toward the crown, creating a more energetic and lifted silhouette. The braid may start at the front hairline or nape and travel upward before meeting a high ponytail base. Nape-to-crown Dutch braiding is especially striking because the raised braid remains visible from the back beneath the bun. Once the braid reaches the intended height, secure all the hair into a ponytail before forming the bun. Keep the base comfortable, since higher placement naturally creates more pull. The finished bun can stay smooth or slightly textured, but it should sit directly over the tie point so the construction looks supported rather than floating above the head.
Wear & Maintenance
Use pins to support the bun instead of relying on an excessively tight ponytail. This helps maintain the high shape while reducing unnecessary scalp tension.
6. Dutch Braid Into Messy Bun Hairstyle
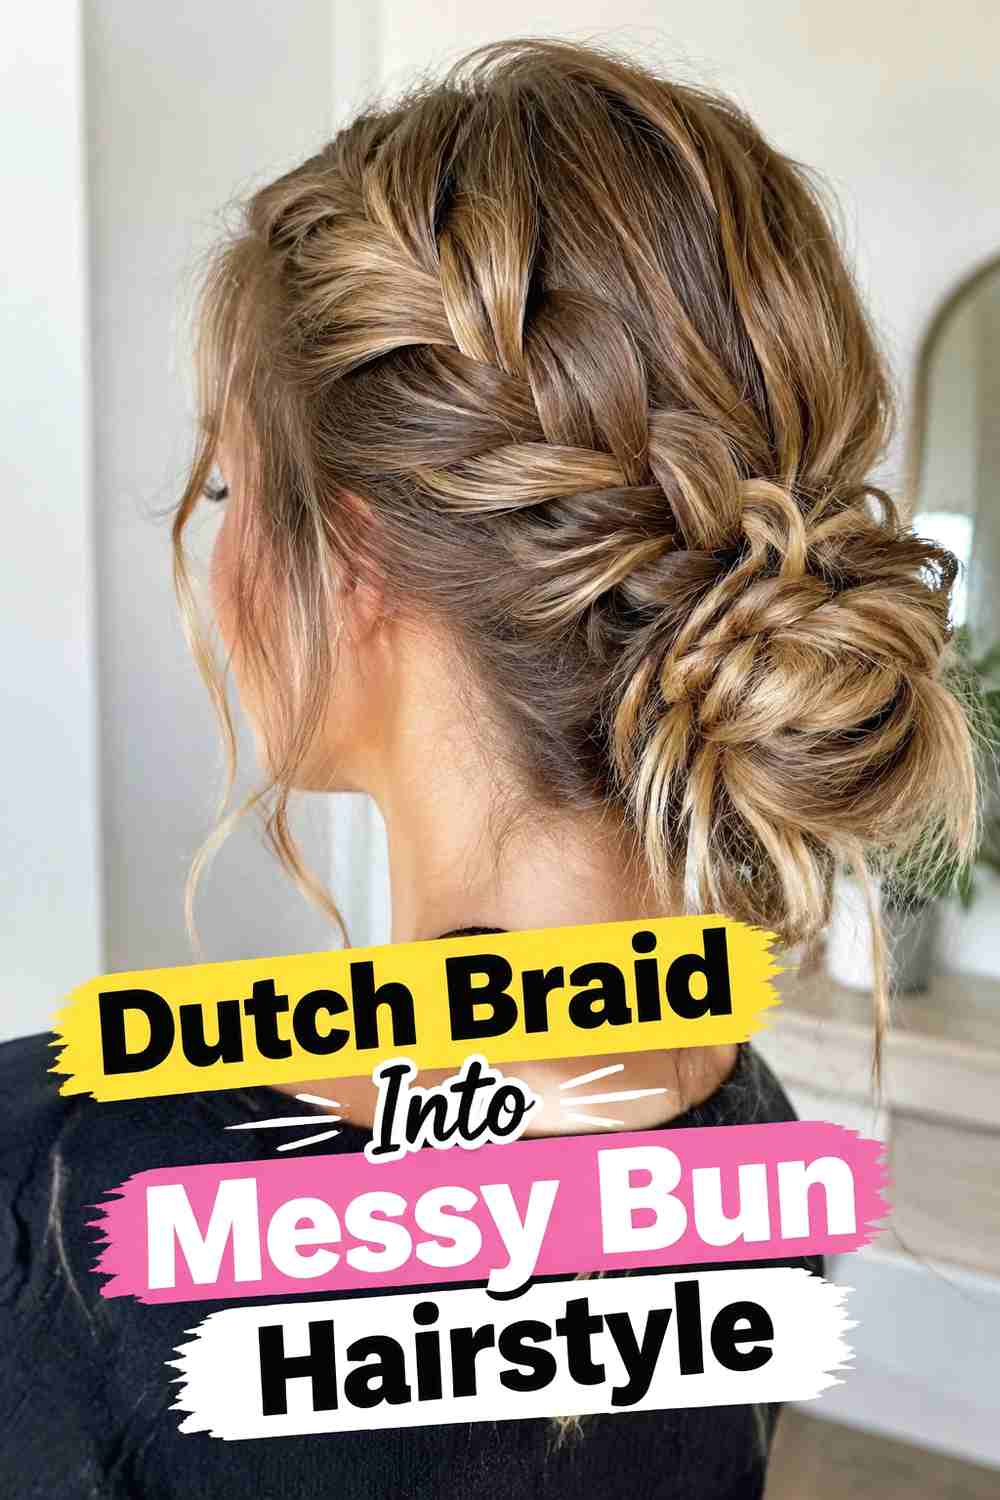
This style combines a structured Dutch braid with a deliberately relaxed bun for a useful contrast between detail and softness. The braid can run from the front or side toward the back, remaining fairly neat until it reaches a low or mid-height ponytail. From there, twist and fold the remaining length loosely, allowing a few ends and soft sections to remain visible around the bun. Once the knot is secure, gently loosen selected braid loops and crown sections so the whole hairstyle feels cohesive. The messy effect should come from controlled texture rather than unstable pinning. This variation works especially well on lightly wavy or layered hair, where natural bends help create an airy bun shape.
Styling Notes
Build the secure bun first, then loosen the braid and outer texture. Pulling everything apart before the base is pinned can make the updo difficult to control.
7. Dutch Braided Chignon Hairstyle
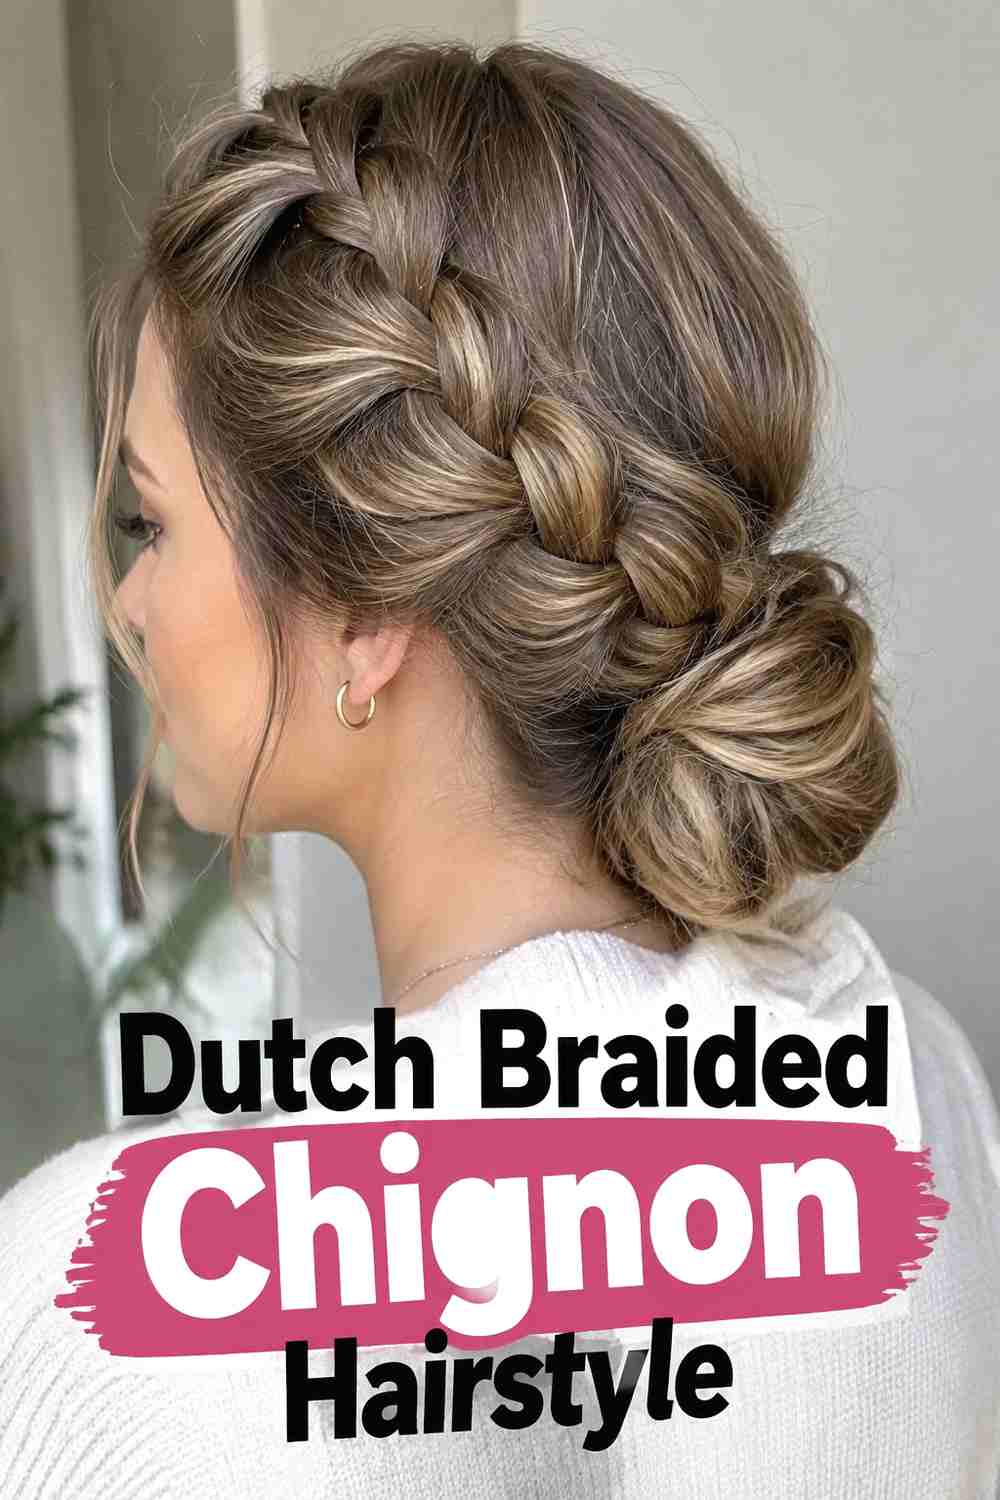
A Dutch braided chignon takes the raised braid into a more formal low updo. The braid usually travels diagonally or along one side before joining a tucked, horizontal, or softly rolled chignon near the nape. The result feels refined while still showing visible woven texture. Medium-long and long hair provide enough length for both the braid and low roll, although the final chignon size will depend on density. Keep the braid moderately firm so it maintains its pattern, then secure the remaining hair before folding it into the chignon. Hidden pins should support the inner structure, leaving the outer surface clean enough for the braid and low shape to remain easy to read.
Best For
This variation suits formal dinners, ceremonies, and elegant events where a standard braided bun may feel too casual but a plain chignon needs more detail.
8. Halo Dutch Braided Bun Hairstyle
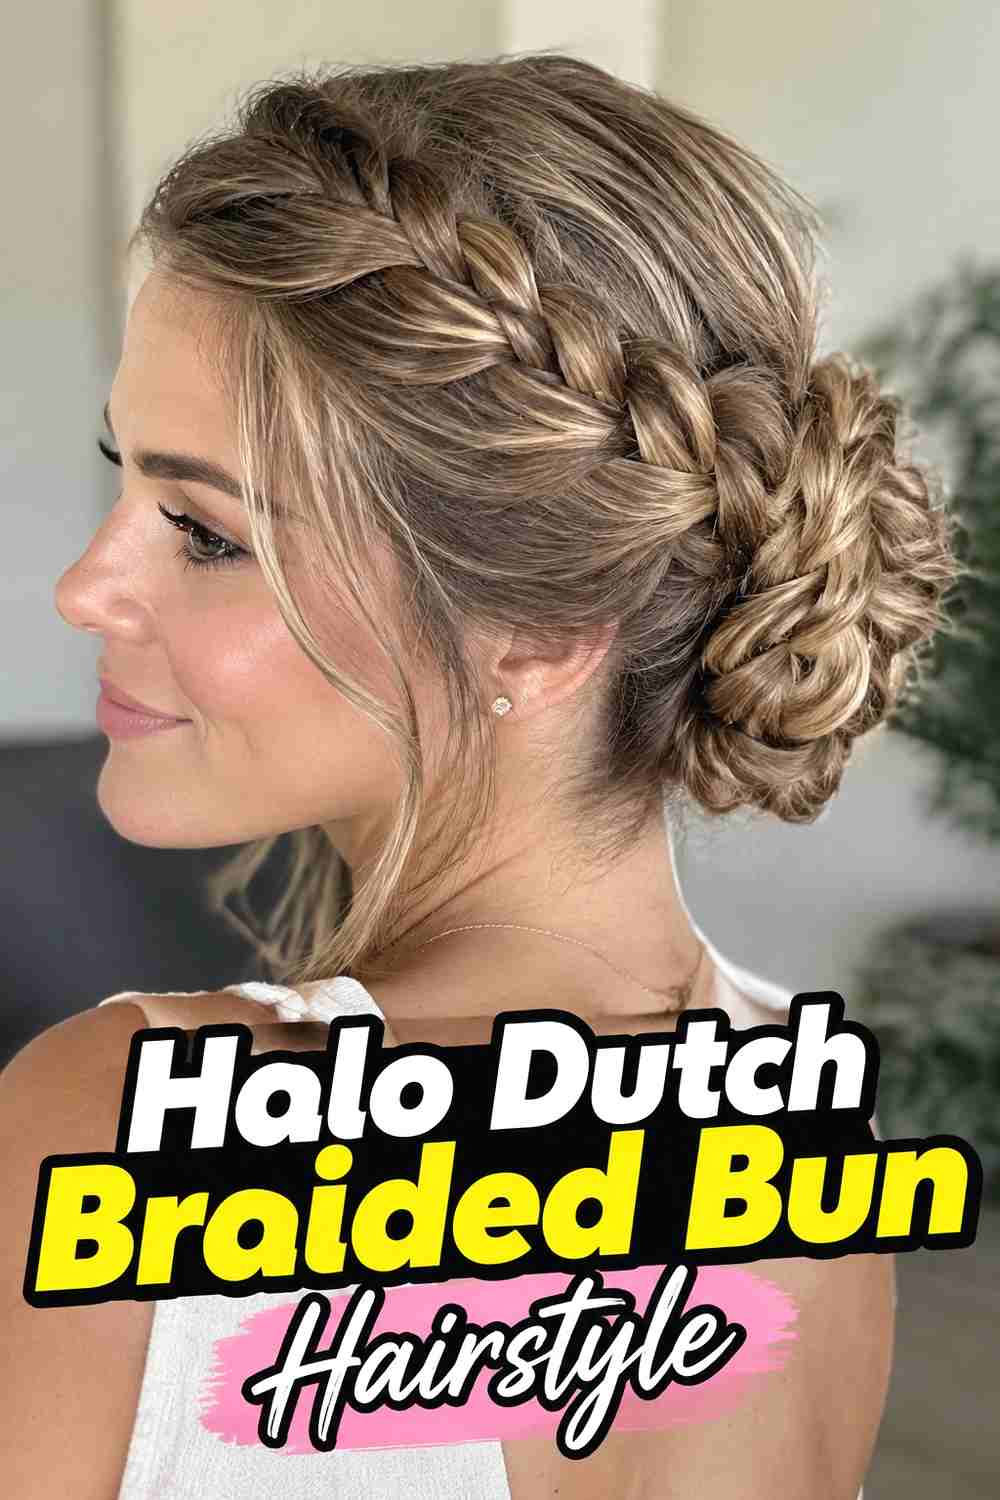
A halo Dutch braid follows the curve of the head before finishing in a compact bun, creating a crown-like frame with a secure focal point. Rather than ending the braid as a loose tail, guide it around the side or upper back of the head and direct the remaining length toward a low or side bun. The raised braid should remain consistent in size so the halo effect looks intentional. Long hair offers the most flexibility, although medium lengths can work with a partial halo and smaller knot. Gently loosening the outer edge of the braid can soften the silhouette, but keep the inner scalp sections firm enough to maintain the circular path and support the final bun.
Pro Tip
Plan the bun position before starting the braid. Knowing where the braid needs to end makes it easier to maintain a smooth, believable curve around the head.
9. Curly Texture Dutch Braided Bun Hairstyle
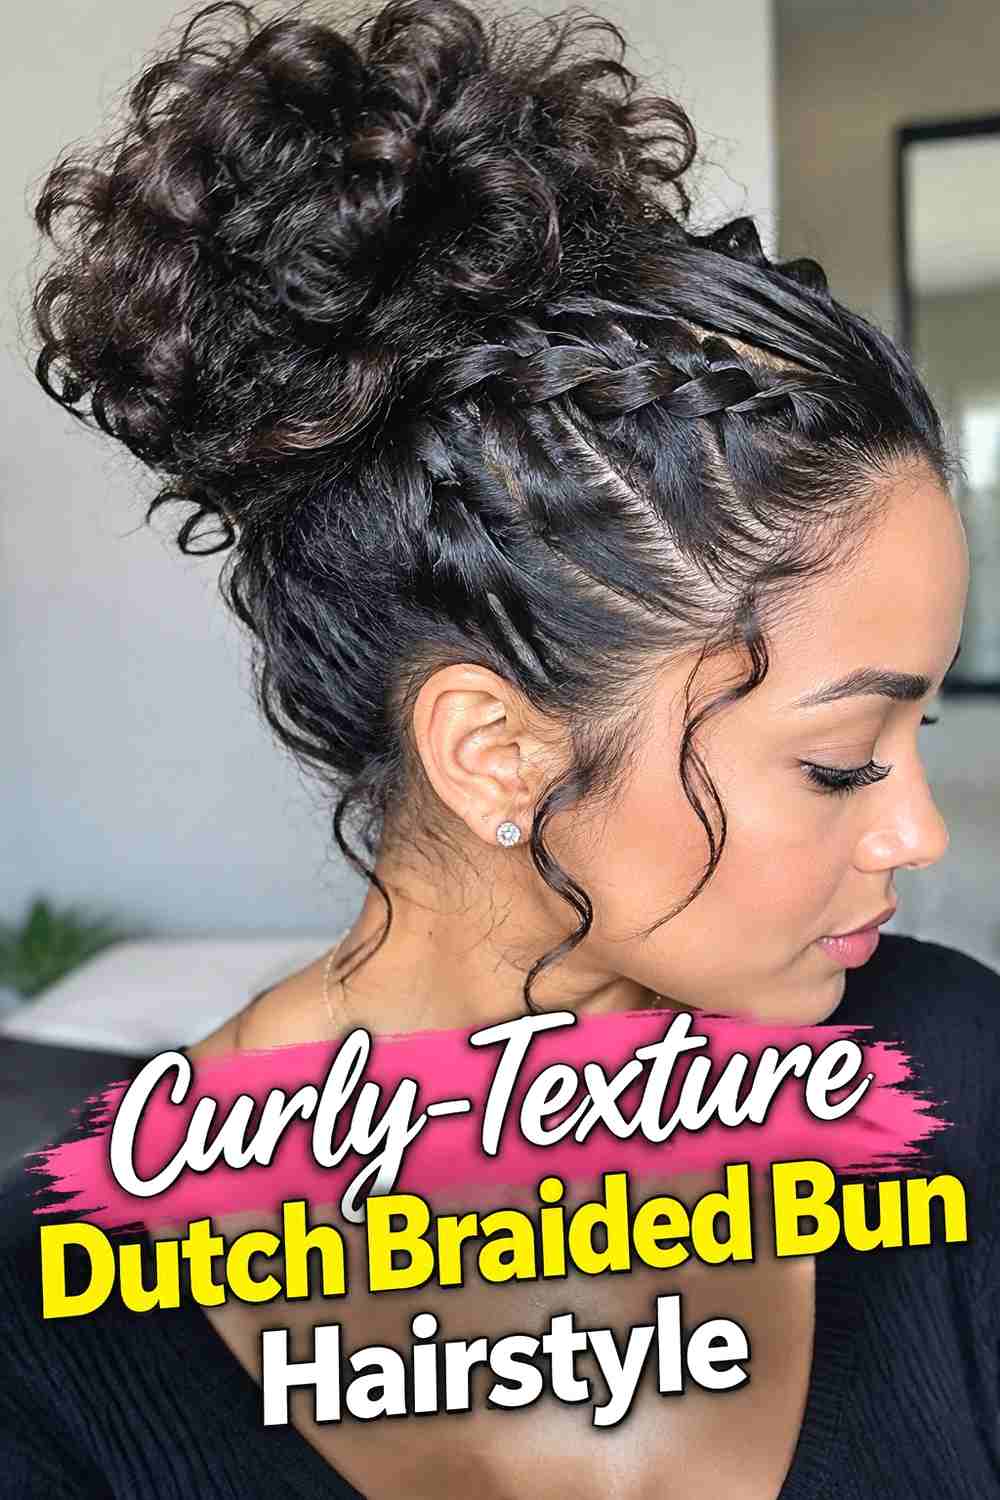
Curly texture adds natural volume and dimension to a Dutch braided bun without requiring the hair to be completely smoothed first. Keep enough definition in the curls to show texture between the braid sections and through the bun. Depending on the curl pattern, larger braid sections may help maintain a visible Dutch structure without excessive tension. Once the braid reaches the chosen bun position, gather the remaining curls gently and pin them into a rounded or softly irregular knot. A few curls near the hairline can remain free if they fall naturally. The goal is to preserve texture while keeping the braid path recognizable and the bun securely connected to the base.
Hair Type & Length
Curly medium-to-long hair can create a naturally fuller bun. Adjust section size and tension to suit the curl pattern rather than forcing every strand into an ultra-smooth finish.
10. Pearl Pin Dutch Braided Bun Hairstyle
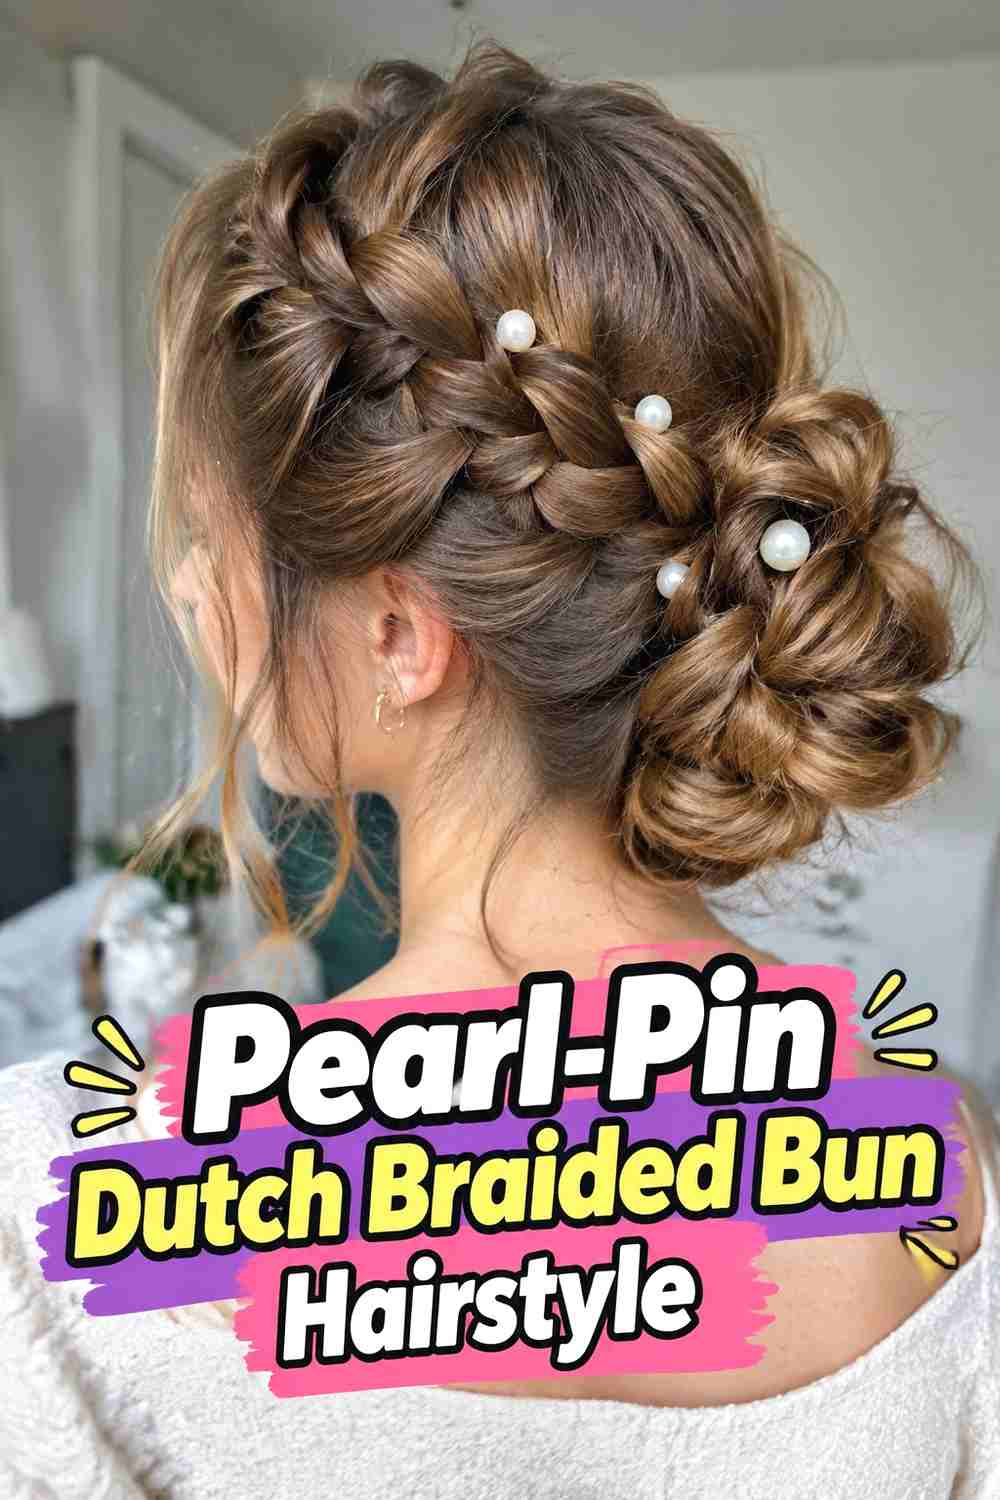
Pearl pins add a dressy accent to the raised braid and bun without changing the hairstyle’s underlying construction. Complete the Dutch braid and secure the bun first with ordinary hidden pins, making sure the structure can hold on its own. Then place a few pearl-topped pins alongside the braid, around one edge of the bun, or at the point where the braid meets the knot. Keep the placement restrained so the woven pattern remains visible. This style works beautifully on low and mid-height buns because the accessories can frame the braid without crowding the crown. The pearls should decorate the finished look rather than act as the primary anchors holding the bun together.
Pro Tip
Add decorative pins only after checking the braid and bun from every angle. This helps you place the pearls where they enhance empty spaces rather than covering the strongest braid detail.
11. Wedding Dutch Braided Bun Hairstyle
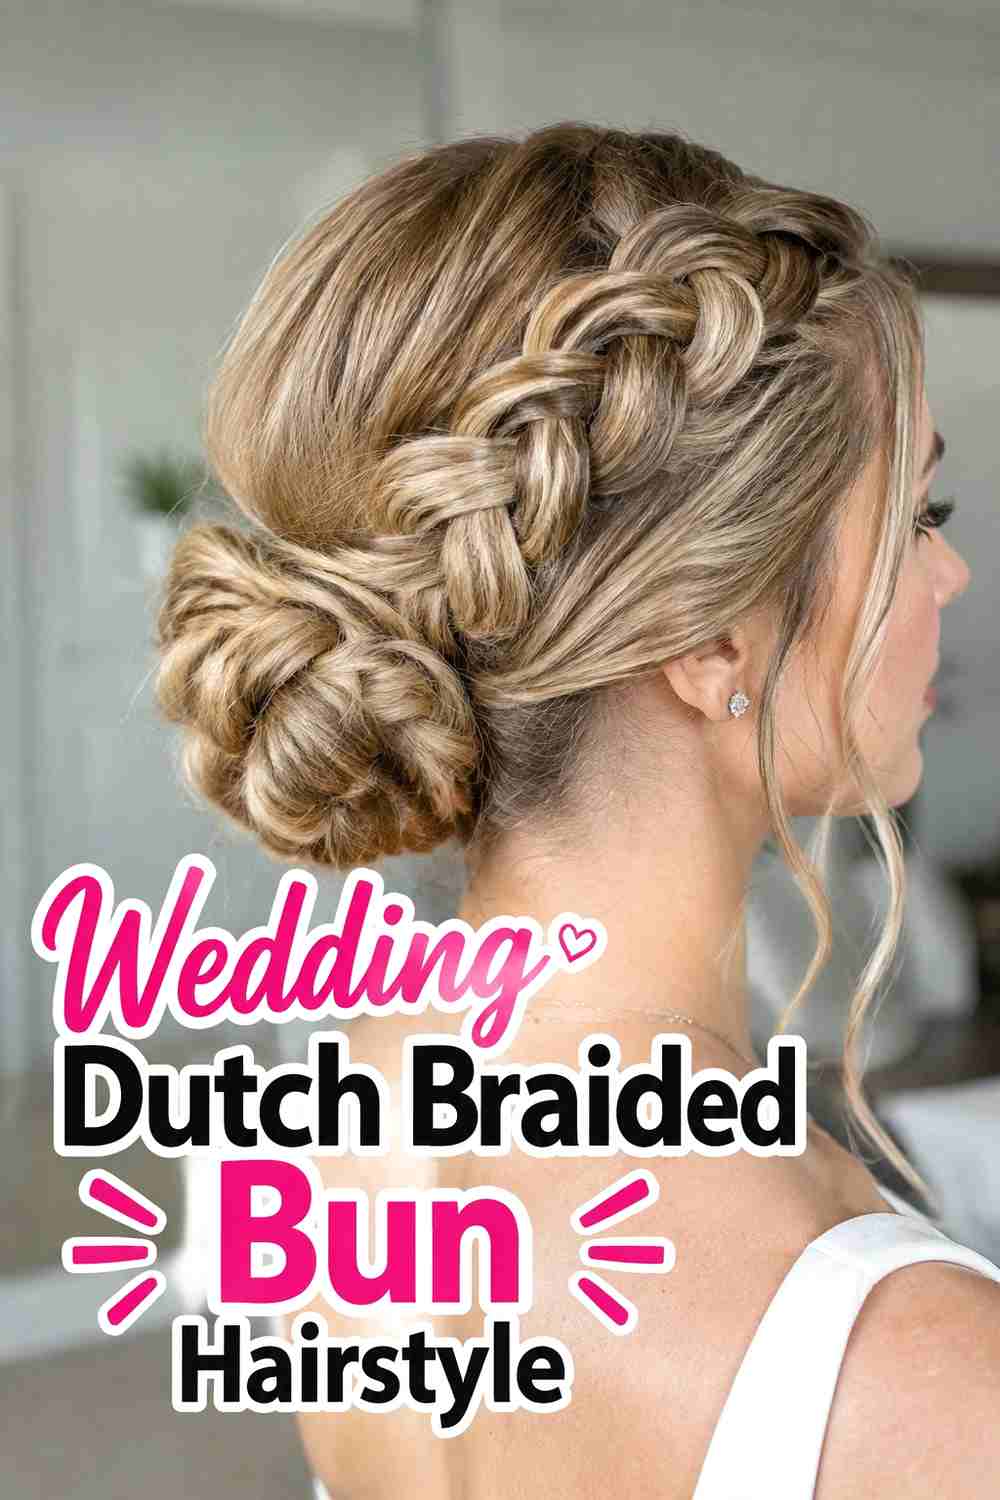
A wedding Dutch braided bun combines visible braid detail with a secure updo that can work alongside veils, jewelry, or subtle hair accessories. A side or double Dutch braid can feed into a low bun, creating texture while leaving the neckline clear. Keep the internal structure dependable: the braid should be anchored naturally, the bun should have its own secure base, and decorative pins should be added only after everything is stable. Soft face-framing pieces can make the style feel more romantic, but avoid releasing so much hair that the braided design becomes hidden. Flexible hold is useful for controlling flyaways while allowing the hairstyle to retain natural texture throughout a long event.
Wear & Maintenance
Test any veil or comb placement before the event. The bun should remain secure even if decorative accessories need to be removed or repositioned later.
12. Soft Romantic Dutch Braided Bun Hairstyle
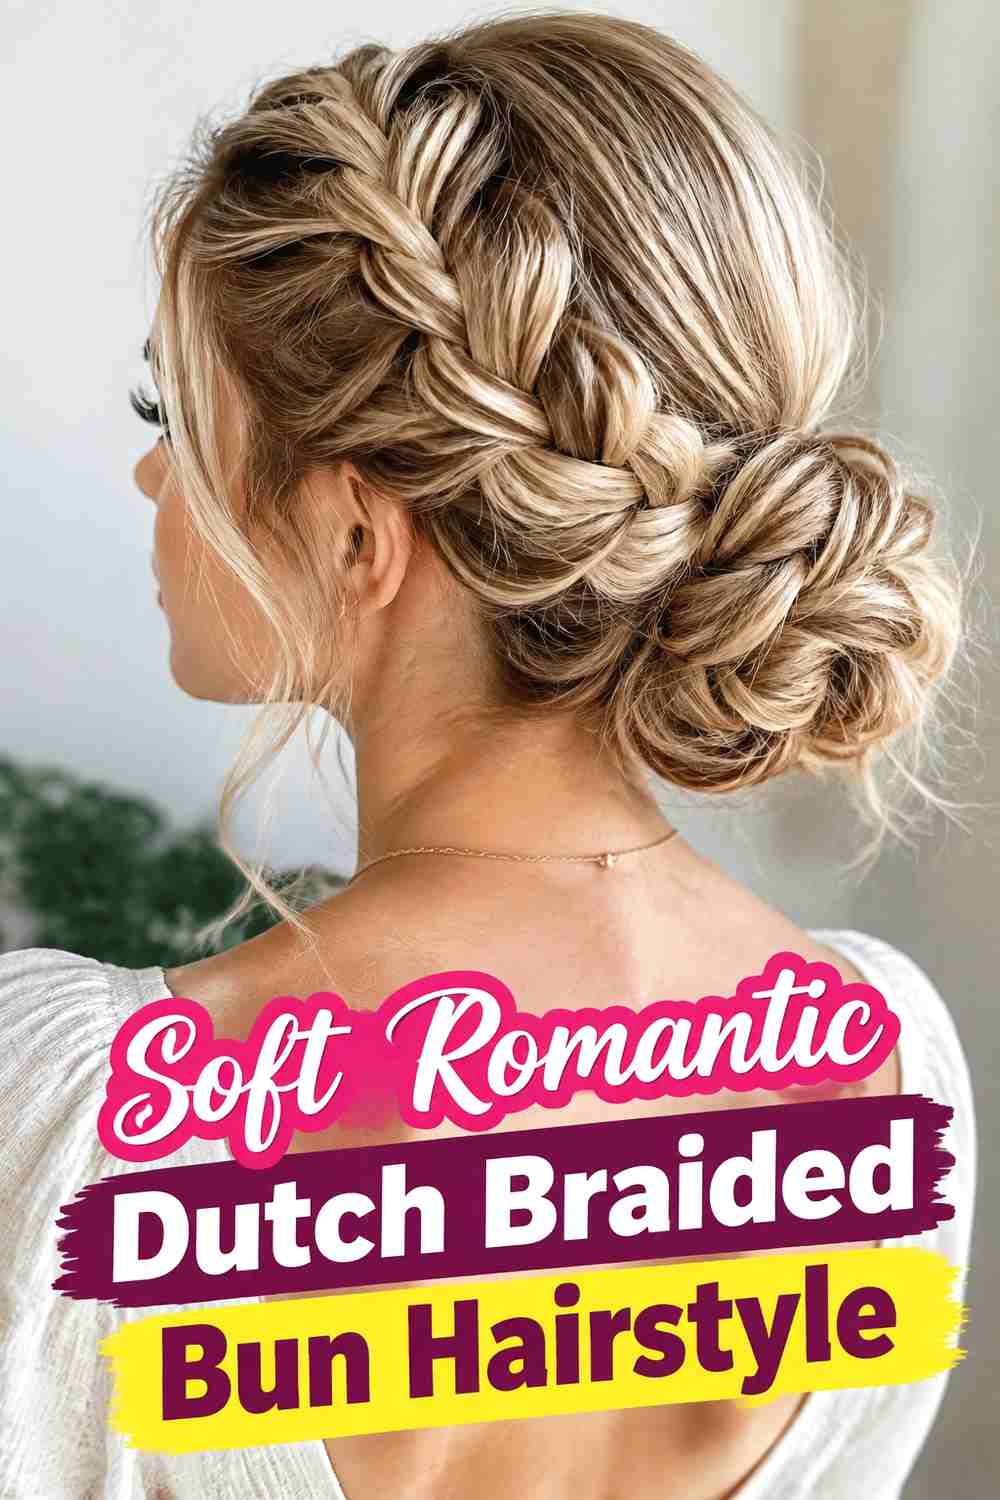
The romantic version softens the structure of a Dutch braid with gentle crown volume, lightly loosened braid loops, and a relaxed low or mid-height bun. Leave a few narrow face-framing pieces free before braiding, then work with moderate tension so the raised pattern stays visible without looking overly tight. Once the braid reaches the back, secure the remaining hair and create a softly textured bun with a few natural ridges. After pinning, loosen only selected areas of the braid and crown to create softness without losing the shape. This style works especially well with lightly waved hair because the bends add movement around the bun and front pieces while maintaining an elegant, cohesive finish.
Why It Works
The Dutch braid provides enough structure to keep the updo defined, while softer volume and loose front pieces prevent the overall result from feeling too formal or severe.
How to Choose the Right Look
Start with your hair length and density. Medium hair can work well for classic, side, low, and compact Dutch braided buns, while longer hair gives you more flexibility for double braids, halo shapes, chignons, and fuller knots. Dense hair often creates a naturally substantial bun, whereas finer hair may look better with a smaller, neatly proportioned shape.
Next, think about braid placement. A single side braid creates asymmetry, double Dutch braids feel more structured, and a halo braid wraps the detail around the head. High buns create more lift, while low buns and chignons feel softer and more formal.
Texture matters too. Straight hair highlights the braid pattern clearly, while waves and curls add volume and softness. For weddings or events, secure the braid and bun independently before adding pearls, combs, or other decorative accessories.
Final Thoughts
Dutch braided buns combine visible woven texture with the practicality of a secure updo. The most successful versions keep the braid physically connected to the bun, use comfortable tension, and preserve natural strand detail. Choose a high, low, double, side, curly, or romantic variation based on your length and occasion, then adjust the softness and accessories without compromising the underlying structure.
FAQs
1. What makes a Dutch braid different in a bun hairstyle?
A Dutch braid crosses the working sections underneath rather than over, creating a raised braid that sits visibly above the surrounding hair before feeding into the bun.
2. How long should hair be for a Dutch braided bun?
Medium to long hair is usually easiest because you need enough length to build the braid and still form a bun. Longer styles allow more elaborate braid placement.
3. How can I keep a Dutch braided bun secure?
Maintain consistent braid tension, secure the gathered hair at the bun position, and use pins through the dense inner part of the knot rather than relying only on surface pins.
4. Can curly hair work in a Dutch braided bun?
Yes. Curly texture can add natural fullness and dimension. Use section sizes and tension that preserve the curl pattern while keeping the raised braid clearly visible.
5. Can a Dutch braided bun work for a wedding?
Yes. Low, side, chignon, and romantic Dutch braided buns can all suit weddings, especially when the structure is secured first and accessories are added afterward.
Save your favorite Dutch braided bun hairstyle ideas, share them with someone planning a braided updo, and explore more hairstyle inspiration for your next look.