11 Flat Twist Low Bun Hairstyle Ideas
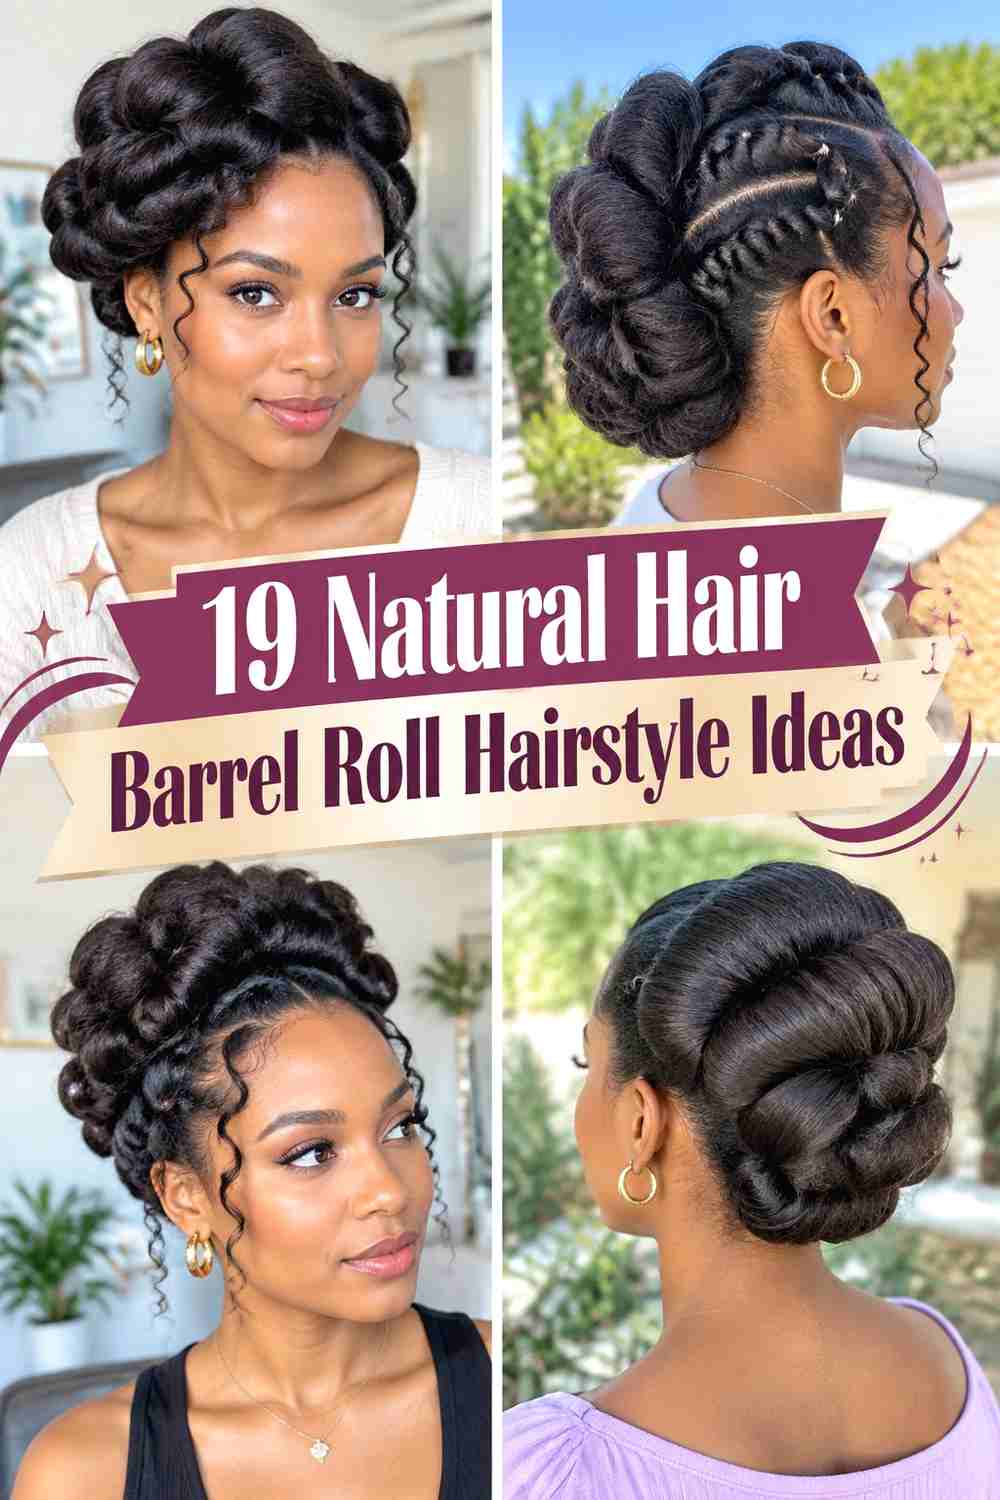
Flat twists flowing into a low bun create a polished textured updo that can feel soft, sculpted, practical, or elegant depending on the finish.
This hairstyle combines close-to-the-scalp flat twists with a bun positioned near the nape, giving the hair a clear direction from front to back. Small changes in parting, twist width, bun size, and surface texture can make the same basic structure look noticeably different.
When choosing a version, consider your hair length, density, preferred tension, and how polished you want the finished style to feel. Fine flat twists create more visible detail, while larger twists give the updo a softer, bolder pattern. The bun can also stay compact or become fuller depending on available length and volume.
Quick List
- Classic Flat Twist Low Bun Hairstyle
- Side Part Flat Twist Low Bun Hairstyle
- Center Part Flat Twist Low Bun Hairstyle
- Double Flat Twist Low Bun Hairstyle
- Curved Flat Twist Low Bun Hairstyle
- Asymmetrical Flat Twist Low Bun Hairstyle
- Chunky Flat Twist Low Bun Hairstyle
- Sleek Flat Twist Low Bun Hairstyle
- Textured Flat Twist Low Bun Hairstyle
- Side Detail Flat Twist Low Bun Hairstyle
- Soft Halo Flat Twist Low Bun Hairstyle
1. Classic Flat Twist Low Bun Hairstyle
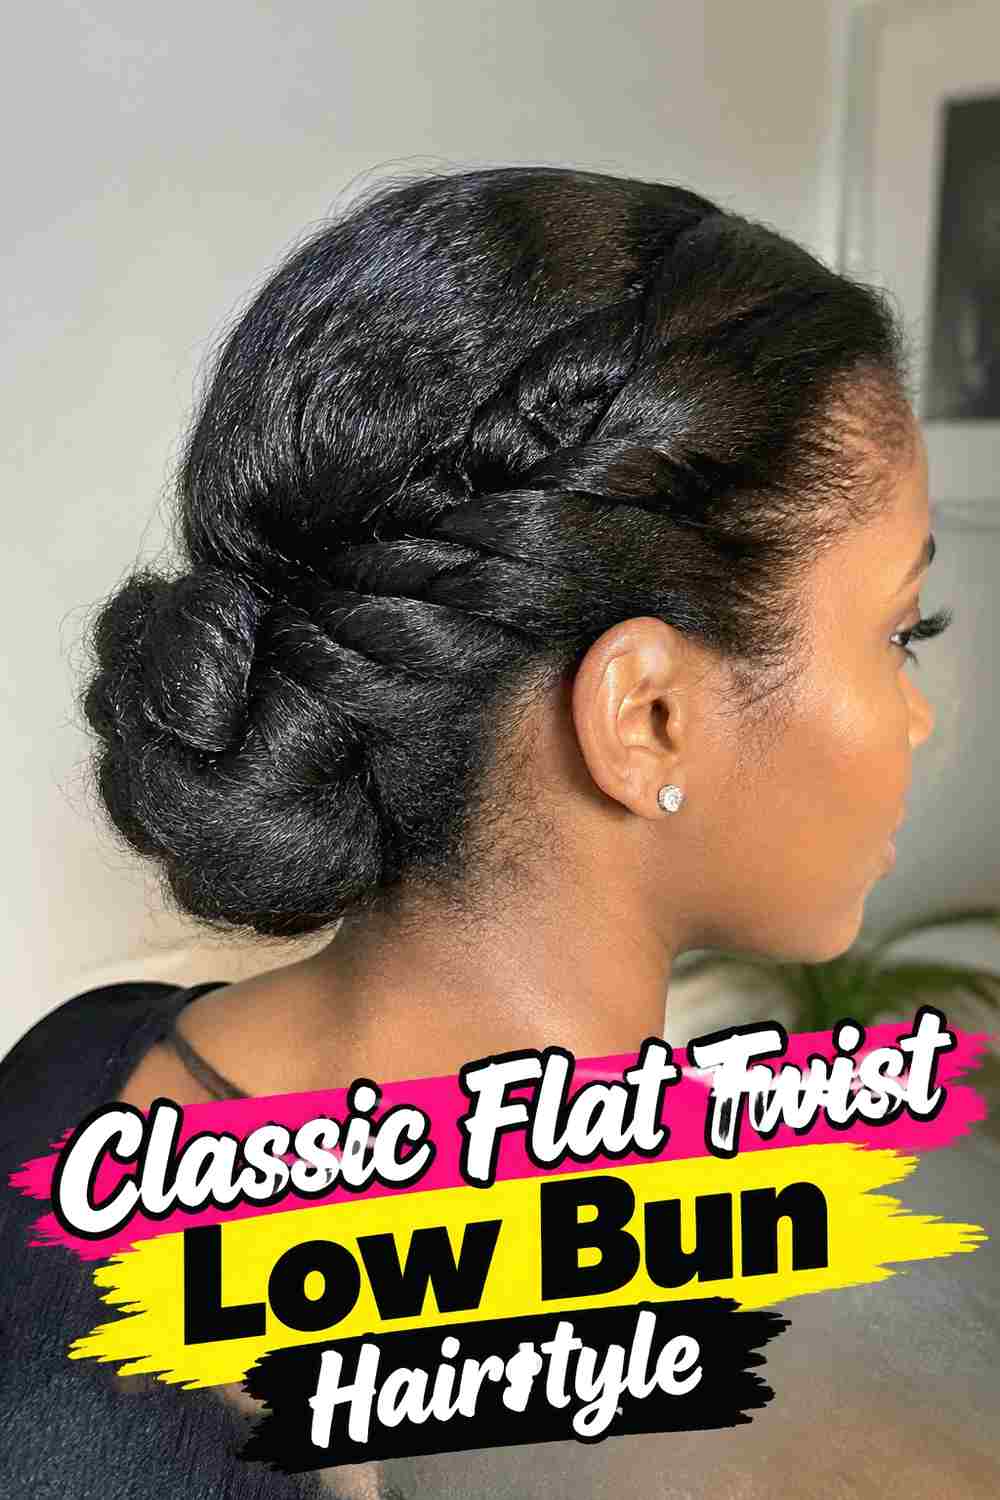
The classic flat twist low bun keeps the structure simple and balanced, with smooth twists traveling from the front and sides toward a neatly shaped bun at the nape. The twists should remain visible enough to create texture while connecting naturally into the gathered back section. A medium-size bun usually gives this version a polished silhouette without making the nape feel bulky. This style works especially well when you want most of the hair secured and away from the face while still showing natural texture. Keep the twist tension comfortable and consistent so the pattern looks neat without making the scalp feel overly tight.
Styling Notes
Direct each flat twist toward the same gathering point at the nape. This makes the transition into the bun smoother and reduces awkward crossing near the back.
Best For
This versatile version suits workdays, dinners, formal events, and occasions where a clean textured updo feels appropriate.
2. Side Part Flat Twist Low Bun Hairstyle
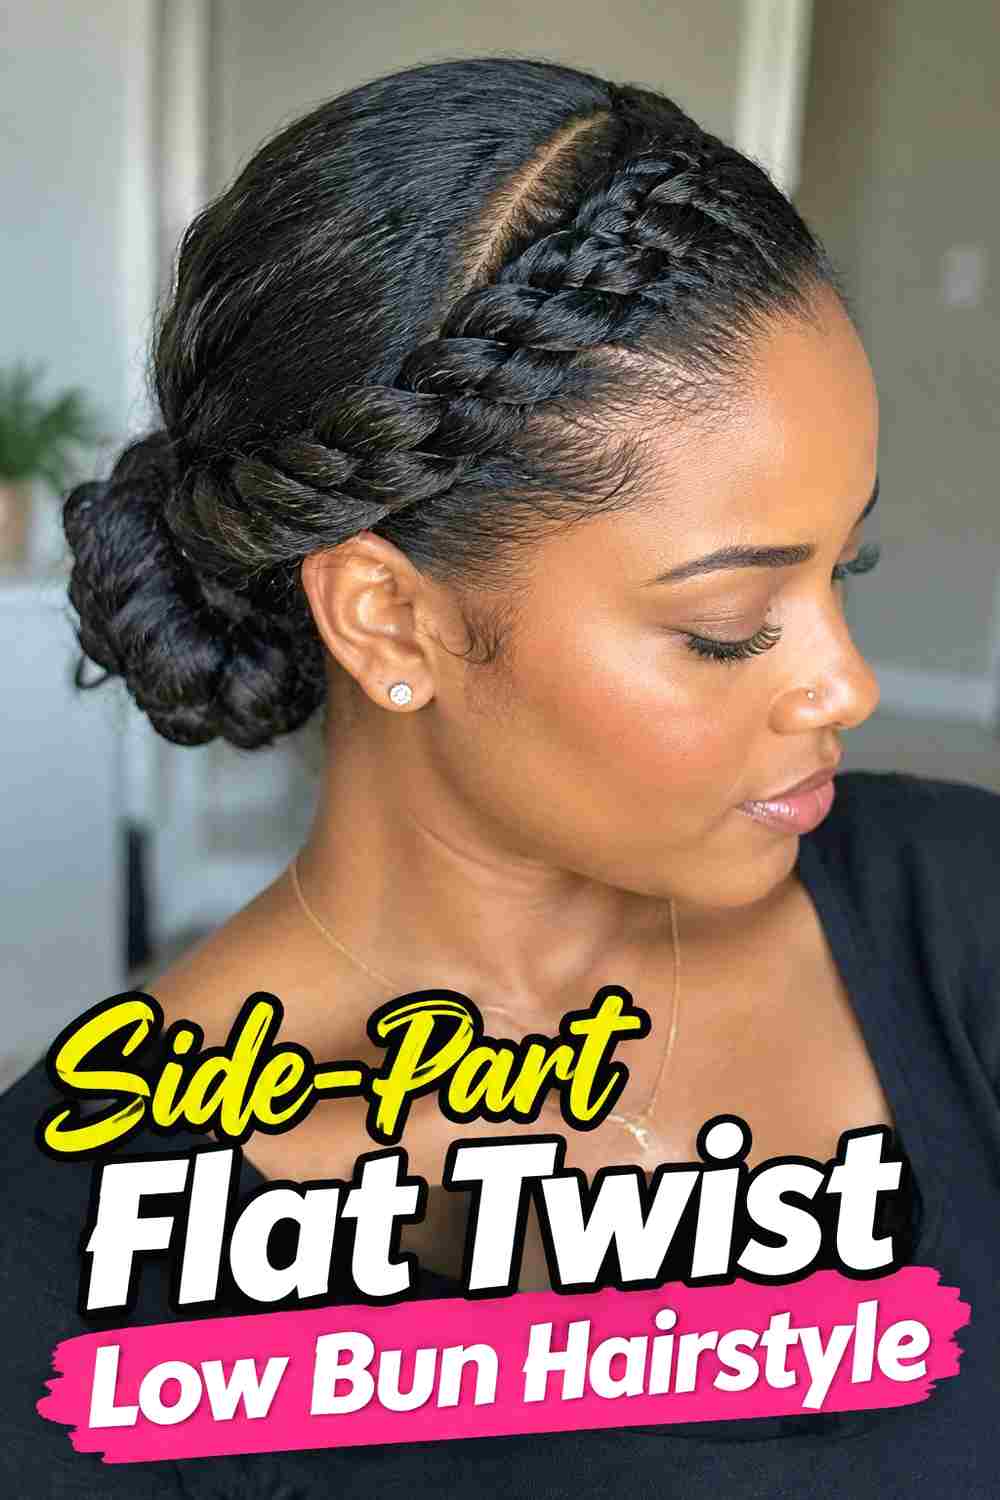
A defined side part gives the low bun more movement by creating an uneven twist pattern across the front. The larger section can sweep diagonally toward the back, while the smaller side follows a shorter path into the bun. That difference adds visual interest without changing the compact nape placement. Keep the front twist slightly fuller if you want the side part to remain noticeable once the style is complete. The bun can stay smooth or retain a little texture to complement the twists above it. This option works particularly well when you prefer a softer, less symmetrical front than a traditional center-parted updo.
Why It Works
The side part naturally redirects the flat twists, giving the hairstyle a flowing shape instead of a strictly balanced pattern.
Pro Tip
Establish the part before sectioning the twists so the front pieces fall naturally toward the bun rather than being forced into position later.
3. Center Part Flat Twist Low Bun Hairstyle
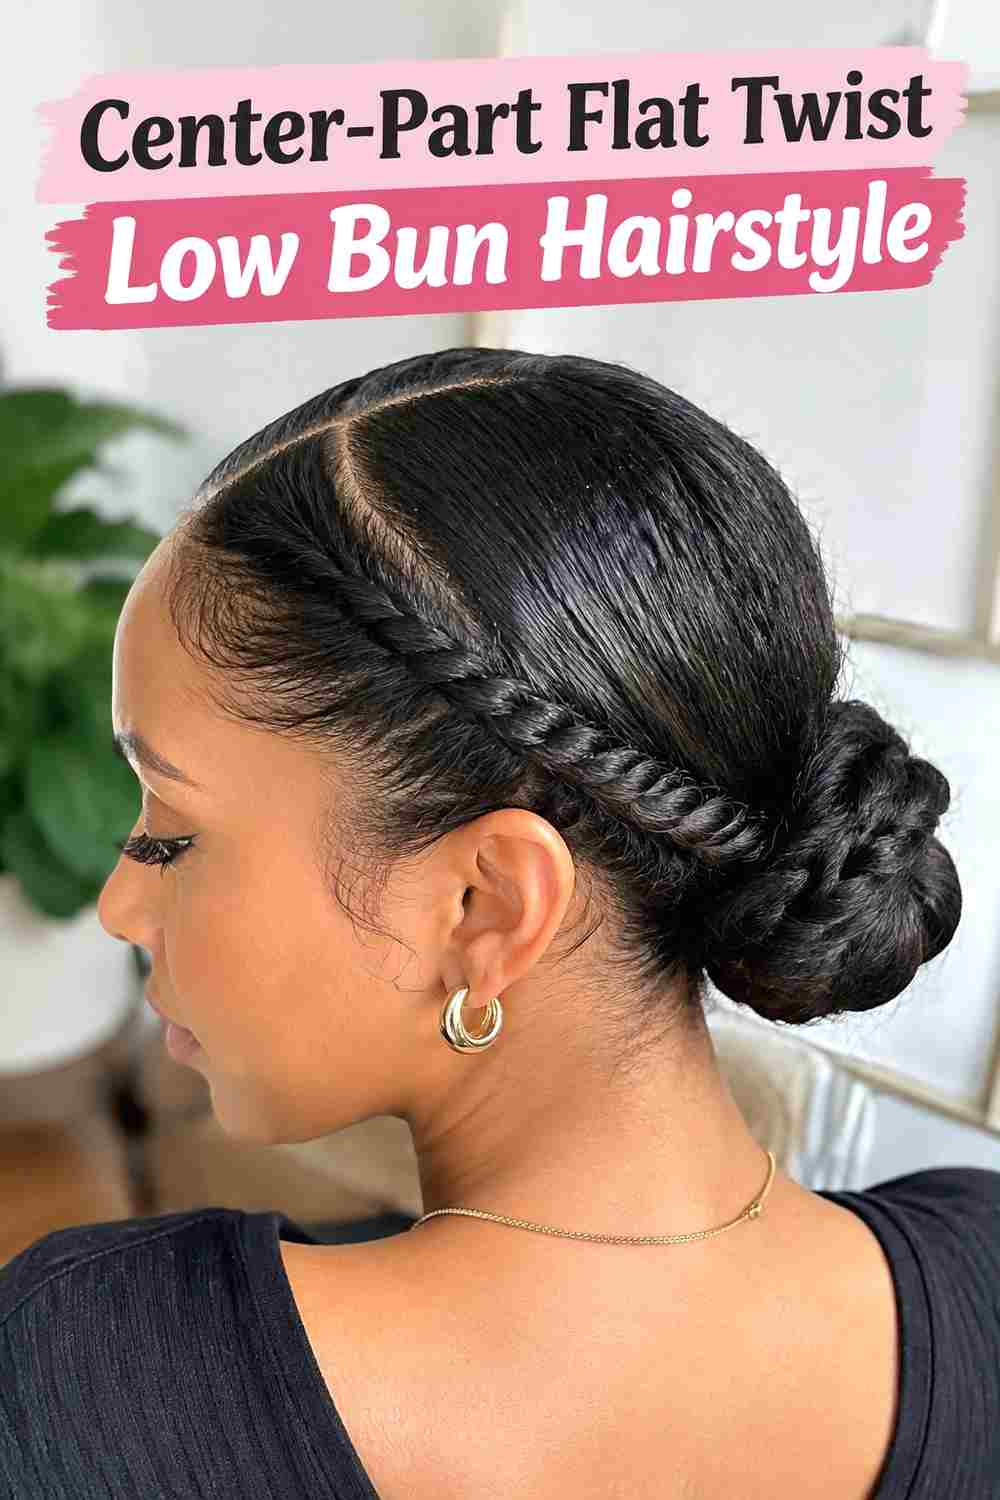
A center part creates a symmetrical front and gives the flat twist low bun a refined, balanced appearance. Twists begin on both sides of the part and move backward toward the nape, where they meet in a compact bun. Matching the first sections on each side helps the overall design look intentional, although the twists do not need to be perfectly identical. A little natural fullness around the roots keeps the style from feeling overly severe. This variation can be particularly attractive when the twist pattern itself is the main feature, because the center line makes the structure easy to see from the front and top.
Best For
Choose this look for weddings, professional settings, special occasions, or anytime you want a neat and evenly framed updo.
Styling Notes
Use the center part as the main guide, then adjust the width of later sections according to hair density so both sides remain visually balanced.
4. Double Flat Twist Low Bun Hairstyle
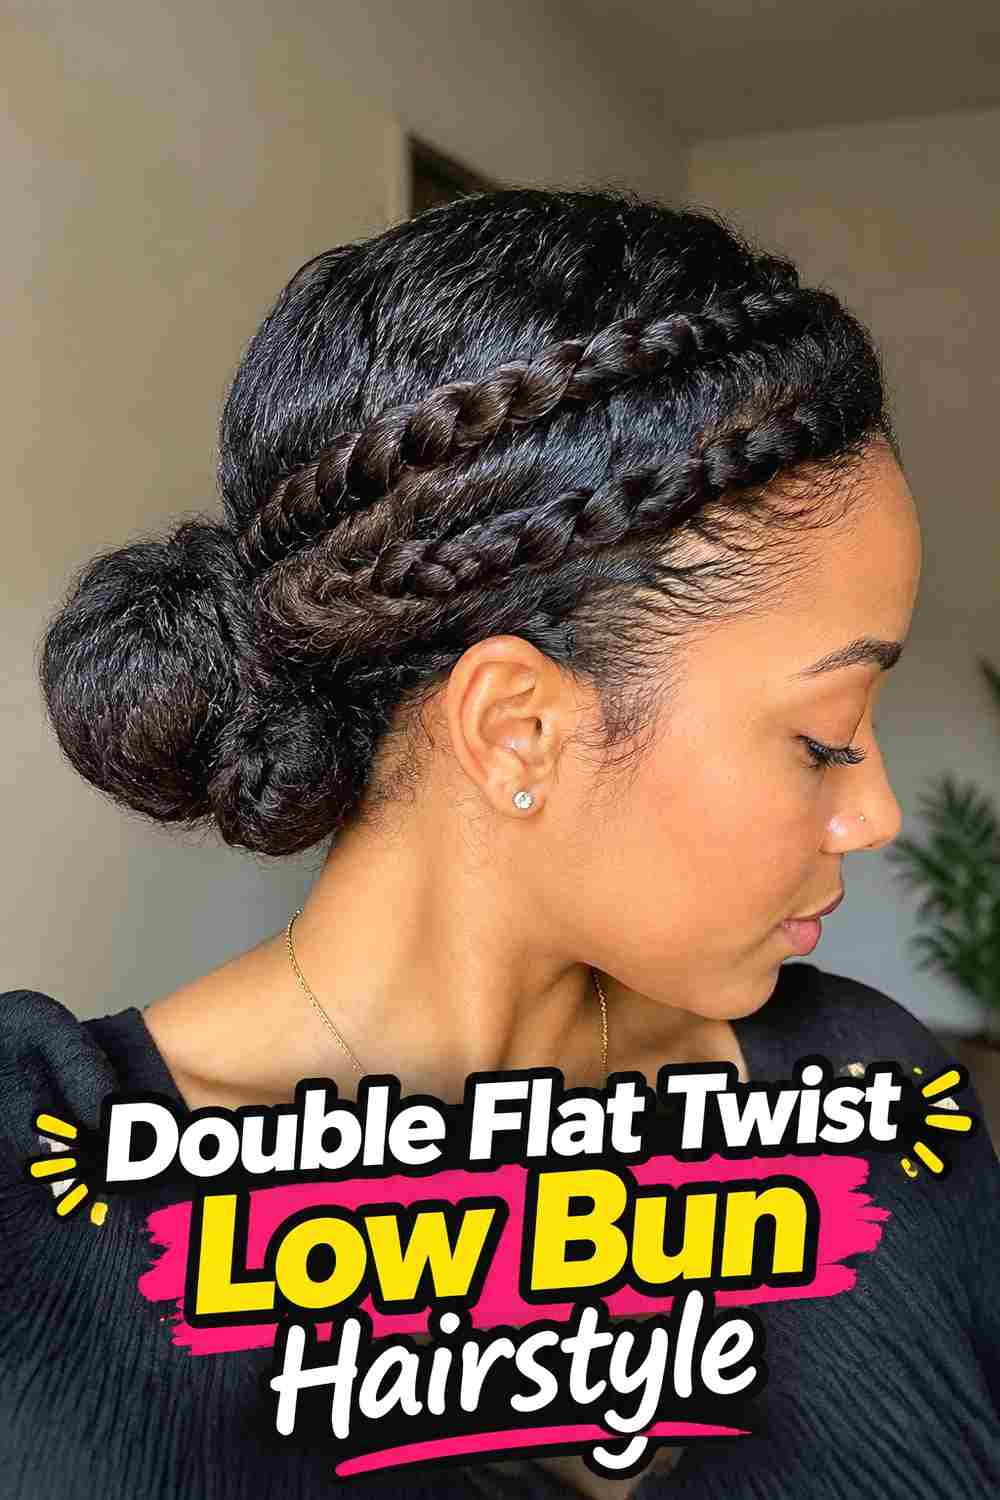
The double flat twist low bun uses paired twist rows to create extra dimension before the hair reaches the nape. Two twists can run parallel on each side, or an inner and outer row can curve backward toward the same low bun. This layered structure gives the hairstyle more detail without requiring beads, cuffs, or decorative accessories. Keeping a small amount of space between the rows helps both twists remain visible instead of blending into one larger section. The bun should stay relatively simple so it does not compete with the more intricate top pattern. Medium to long hair usually makes the transition into the gathered section easier.
Hair Type & Length
This style works especially well on medium-length or longer textured hair with enough density to divide into several defined flat-twist sections.
Pro Tip
Map the paired rows before twisting. Even spacing makes the double pattern much easier to recognize once everything is directed toward the bun.
5. Curved Flat Twist Low Bun Hairstyle
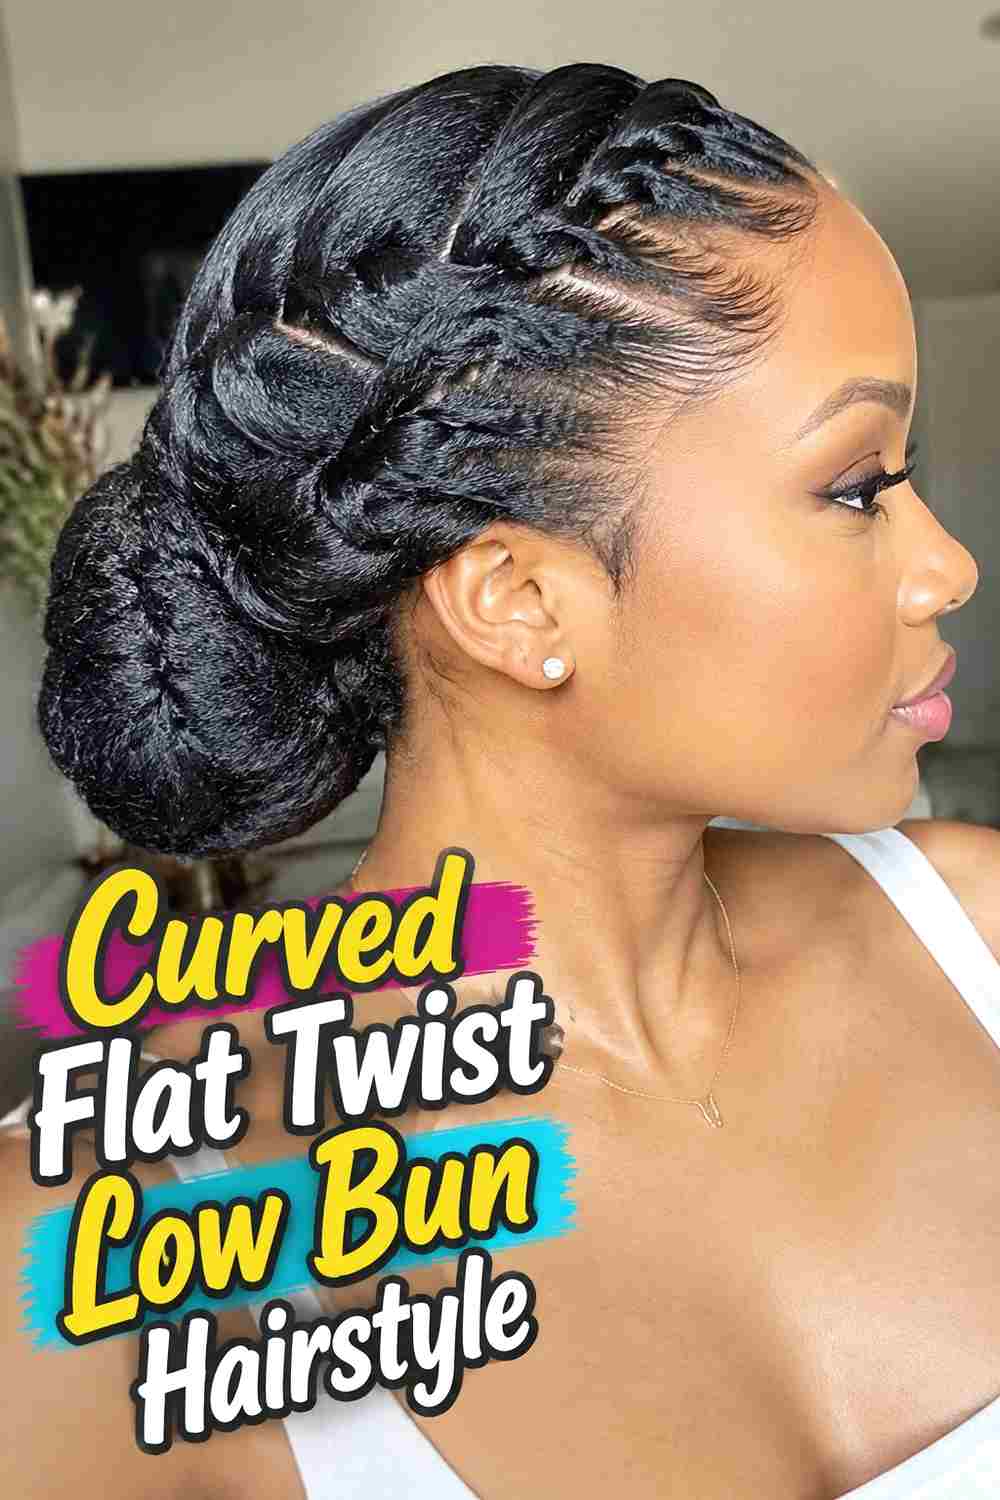
Curved flat twists add a softer, more sculpted flow to the low bun by following rounded section lines instead of straight paths. The twists can arc from the temples toward the back, creating gentle movement across the sides of the head before meeting at the nape. This approach makes the hairstyle look more designed while keeping the bun itself understated. Clear sectioning is important because the curved lines are part of the visual effect, but the scalp should not appear overly exposed. A smooth, medium-size bun helps anchor the directional pattern and gives the back a clean finishing point.
Why It Works
The curved parting lines echo the rounded shape of the bun, creating a connected design from the front of the hairstyle to the nape.
Styling Notes
Part the curves carefully before adding styling product. Well-defined sections are easier to follow and help prevent the twist paths from becoming uneven.
6. Asymmetrical Flat Twist Low Bun Hairstyle
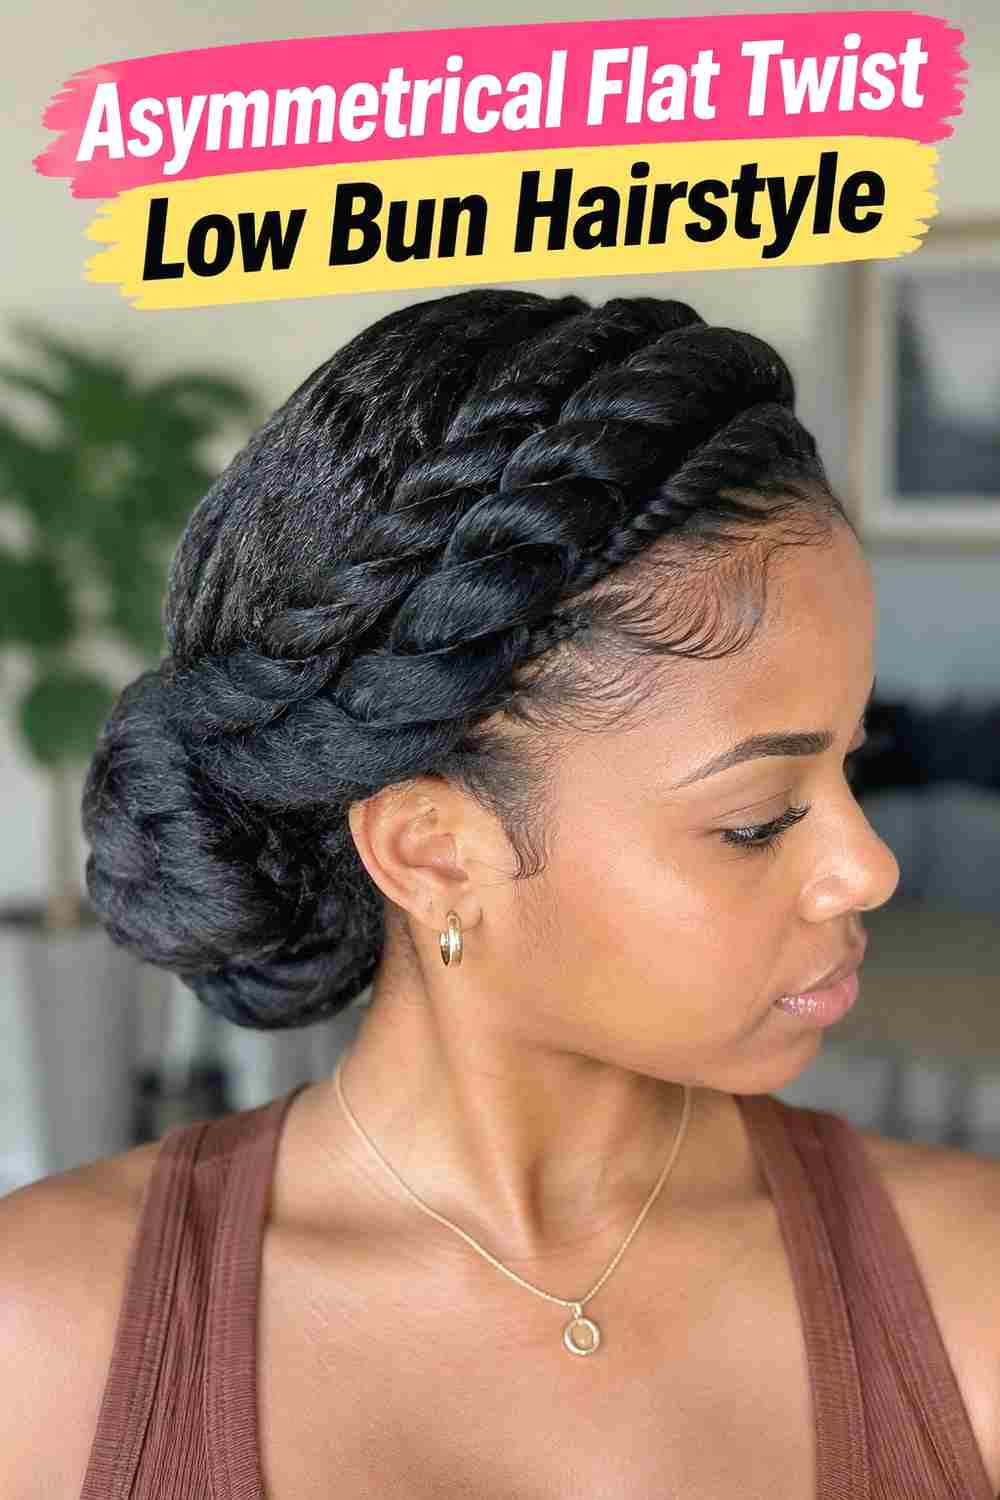
An asymmetrical flat twist low bun places more detail or volume on one side while still finishing with a low bun at the back. Several narrow twists might sweep across one side, while the opposite section uses one or two larger twists for contrast. The bun can sit directly at the nape or slightly off center if you want the asymmetry to continue through the entire hairstyle. This look feels modern because it avoids perfect mirror-image sectioning while still remaining controlled and polished. Keep the twist directions connected so the design appears intentional rather than randomly uneven, especially around the crown and back.
Best For
This variation suits creative events, portraits, dinners, and anyone who prefers a more directional updo instead of a fully symmetrical twist pattern.
Pro Tip
Choose the main focal side before parting. Keeping the opposite side simpler allows the asymmetrical detail to stand out clearly.
7. Chunky Flat Twist Low Bun Hairstyle
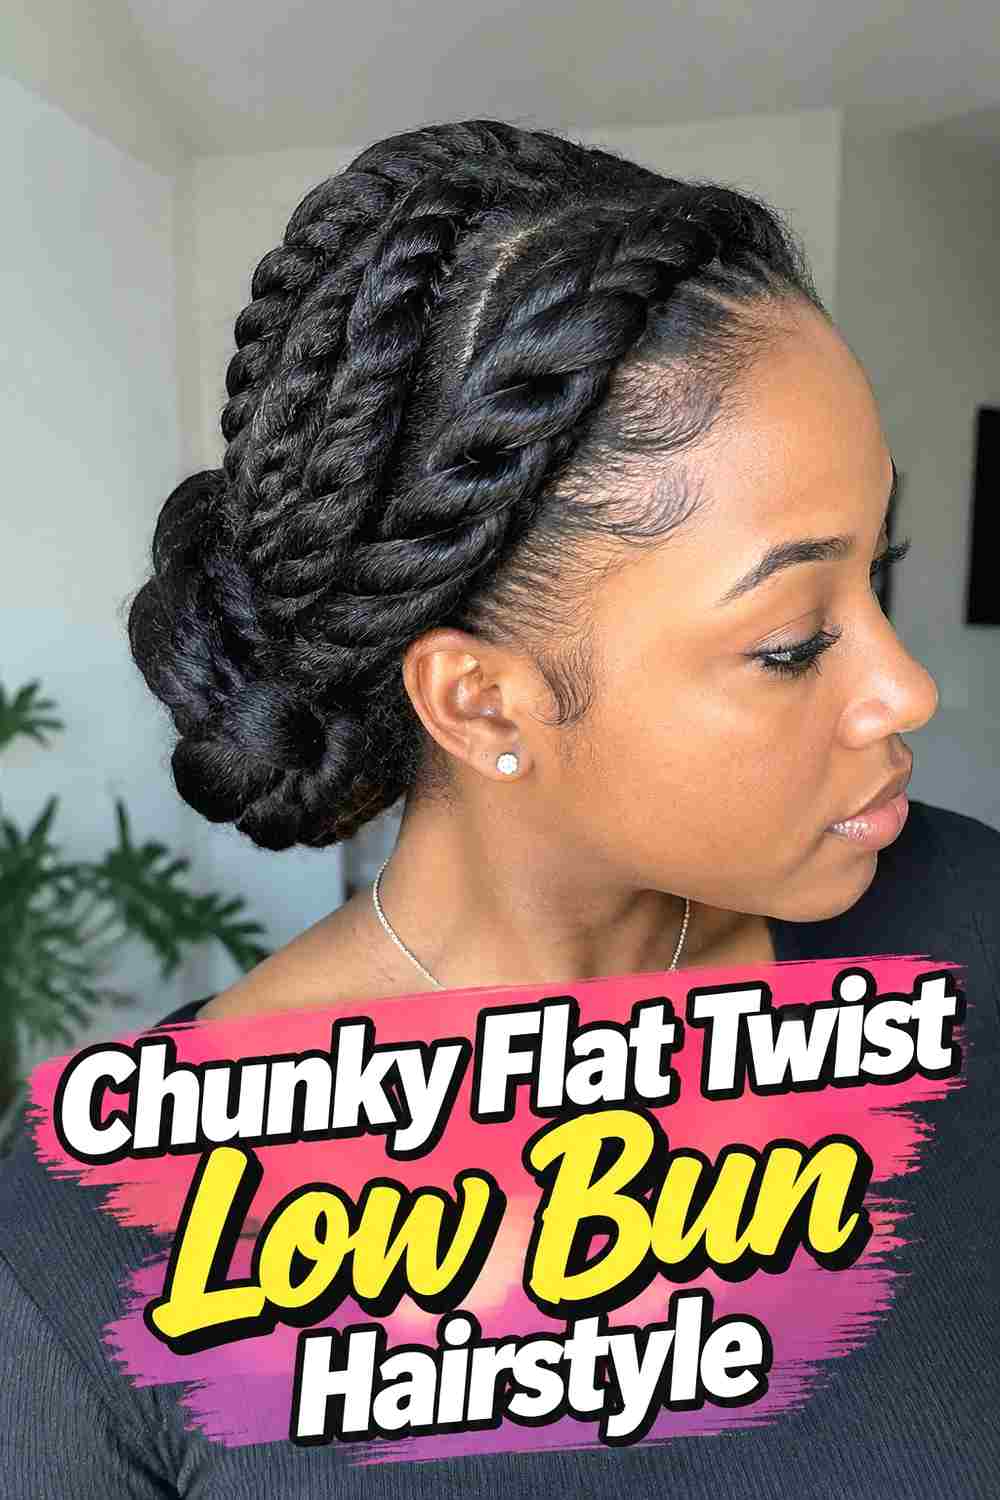
Chunky flat twists give the low bun a bold but soft appearance by using fewer, wider sections across the head. The broader twists create visible texture without the intricate look of many narrow rows, making the overall style feel relaxed and substantial. They can travel straight back or curve slightly before feeding into a fuller bun at the nape. This variation works particularly well on dense hair because larger sections showcase natural fullness without requiring excessive separation. The finished bun should connect smoothly to the chunky twists, with no abrupt change in scale or tension around the back.
Hair Type & Length
Dense, curly, coily, or naturally voluminous hair can be especially suited to this version because the larger twists benefit from visible fullness.
Wear & Maintenance
Protect the twists from friction at night and check that the larger sections remain secure near the nape, where movement can gradually loosen them.
8. Sleek Flat Twist Low Bun Hairstyle
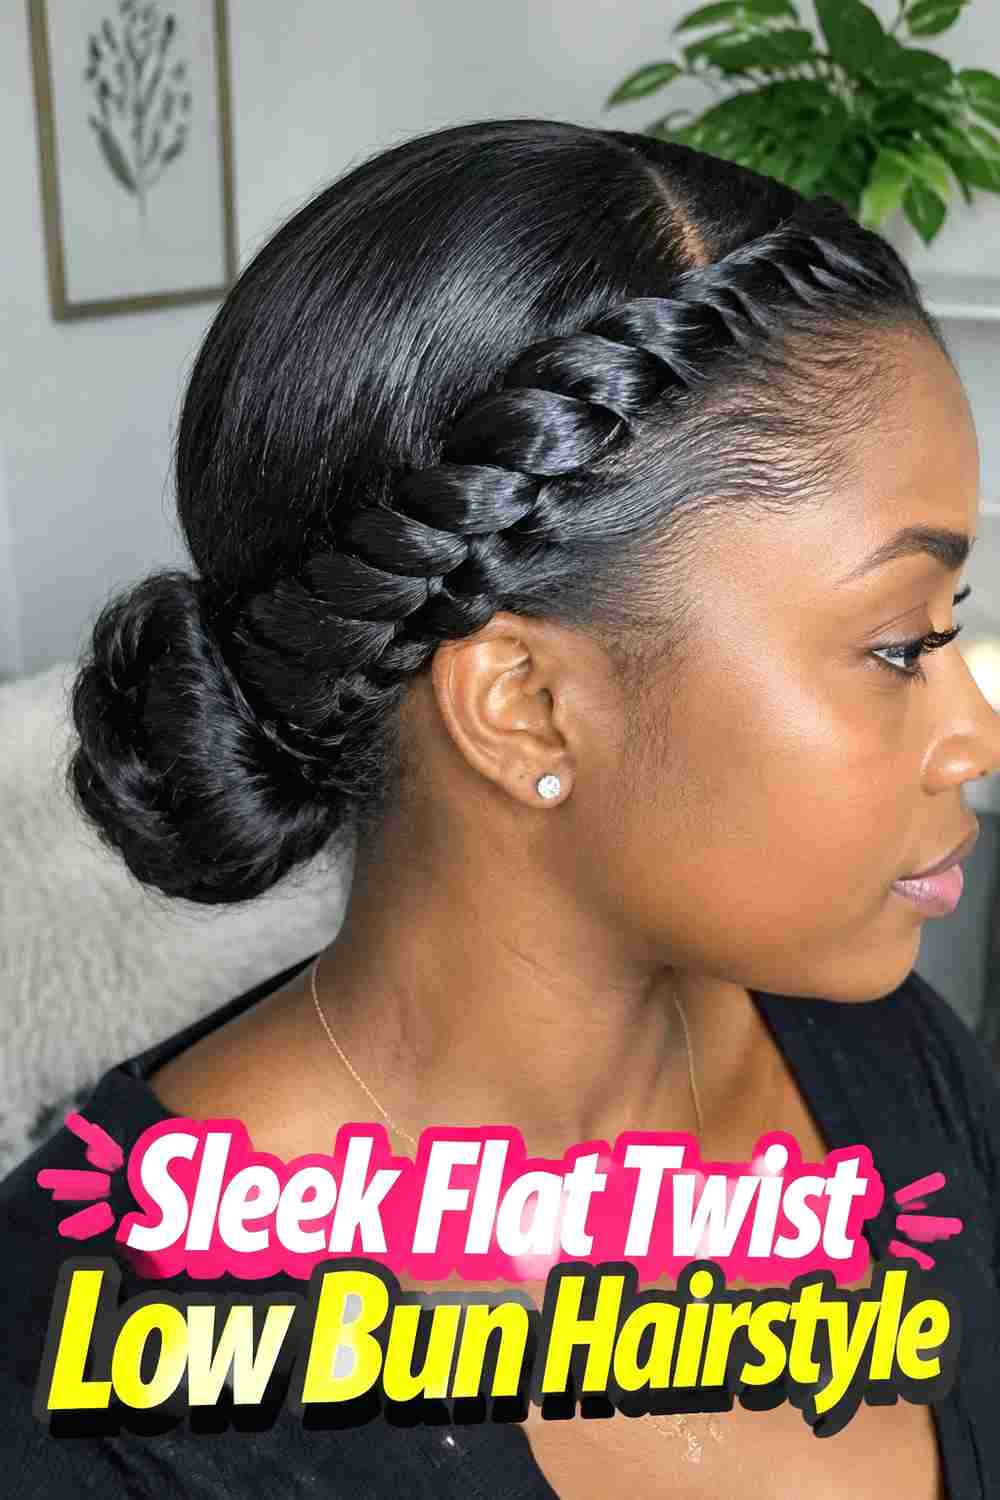
The sleek flat twist low bun combines defined twist rows with a smoother, more polished surface around the parting and hairline. The twists still provide texture, but flyaways are kept minimal and the bun is shaped into a clean, compact form at the nape. The result feels refined without eliminating the character of the flat twists. Keep product application controlled so the hair looks smooth rather than coated or unnaturally shiny. This version can work especially well for formal occasions when you want a textured updo that still has crisp section lines and a tidy overall silhouette from every angle.
Styling Notes
Smooth each section before beginning the flat twist instead of adding large amounts of product after the twist is already formed.
Best For
This polished finish works well for formal events, professional settings, ceremonies, and occasions where a neat low-profile updo complements the outfit.
9. Textured Flat Twist Low Bun Hairstyle
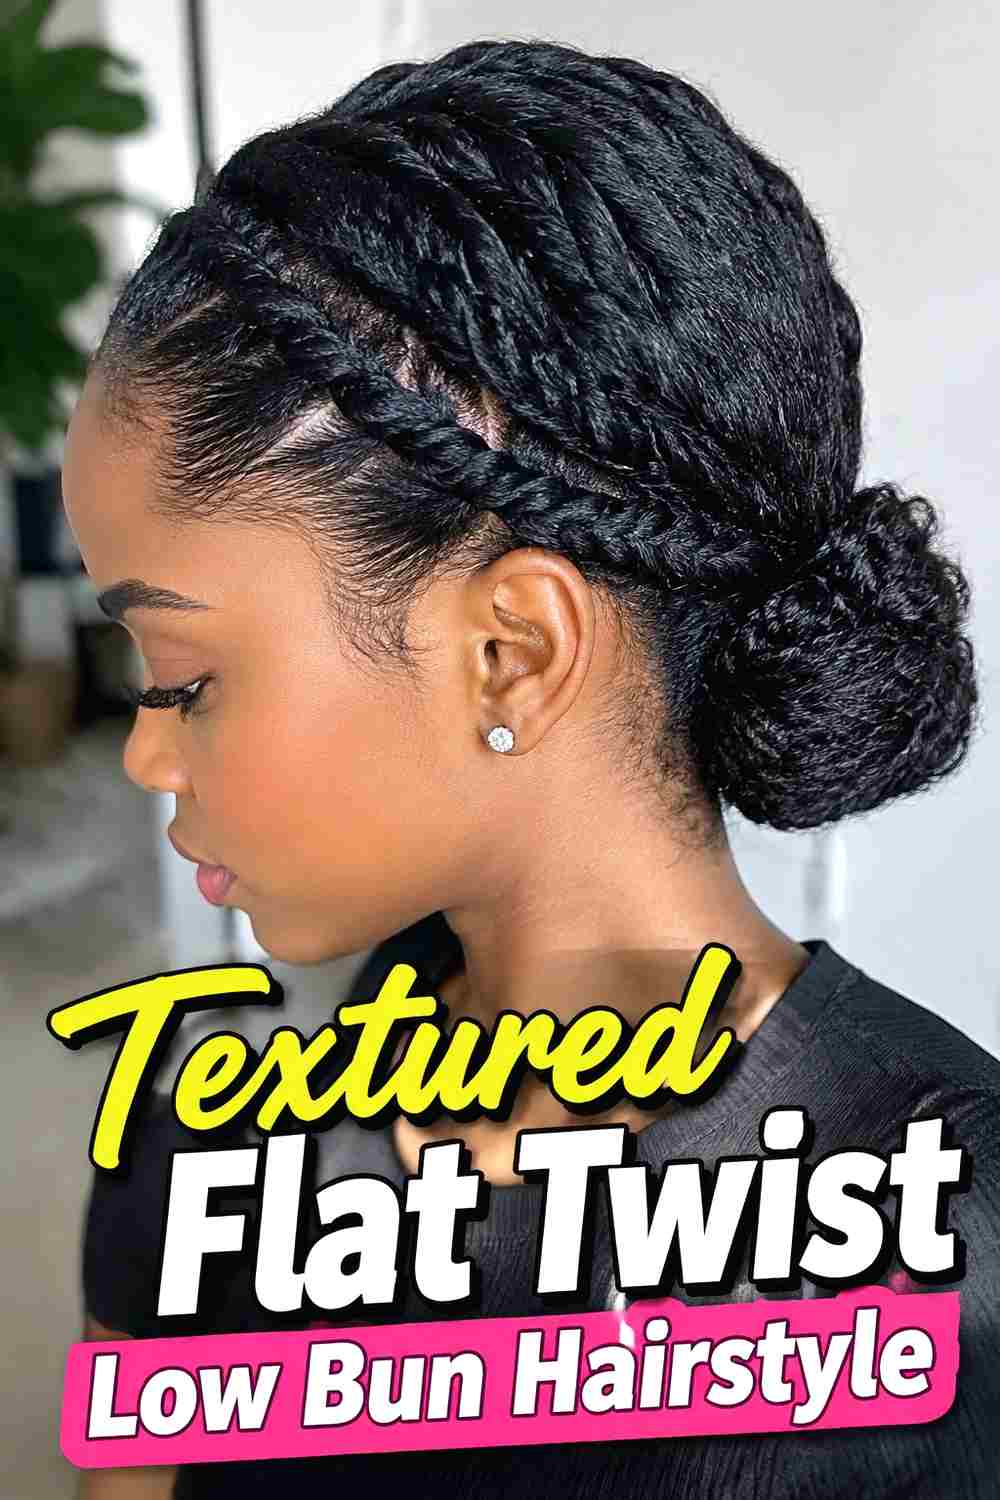
A textured flat twist low bun preserves more natural fullness through the twists and bun instead of aiming for a highly sleek finish. The sections remain defined, but small variations in strand texture and volume give the style a softer appearance. At the nape, the bun can be gently expanded so it looks substantial without becoming overly tight or perfectly smooth. This approach is useful when you want an updo that feels polished enough for an event but still celebrates visible natural texture. Avoid flattening every root or brushing away every small flyaway; the overall shape and twist direction matter more than creating a completely uniform surface.
Why It Works
Keeping visible texture throughout the style makes the bun and twists feel connected, creating a cohesive updo instead of a smooth bun attached to heavily textured sections.
Wear & Maintenance
Refresh only loose areas when needed rather than repeatedly smoothing the entire hairstyle, which can gradually change the soft textured finish.
10. Side Detail Flat Twist Low Bun Hairstyle
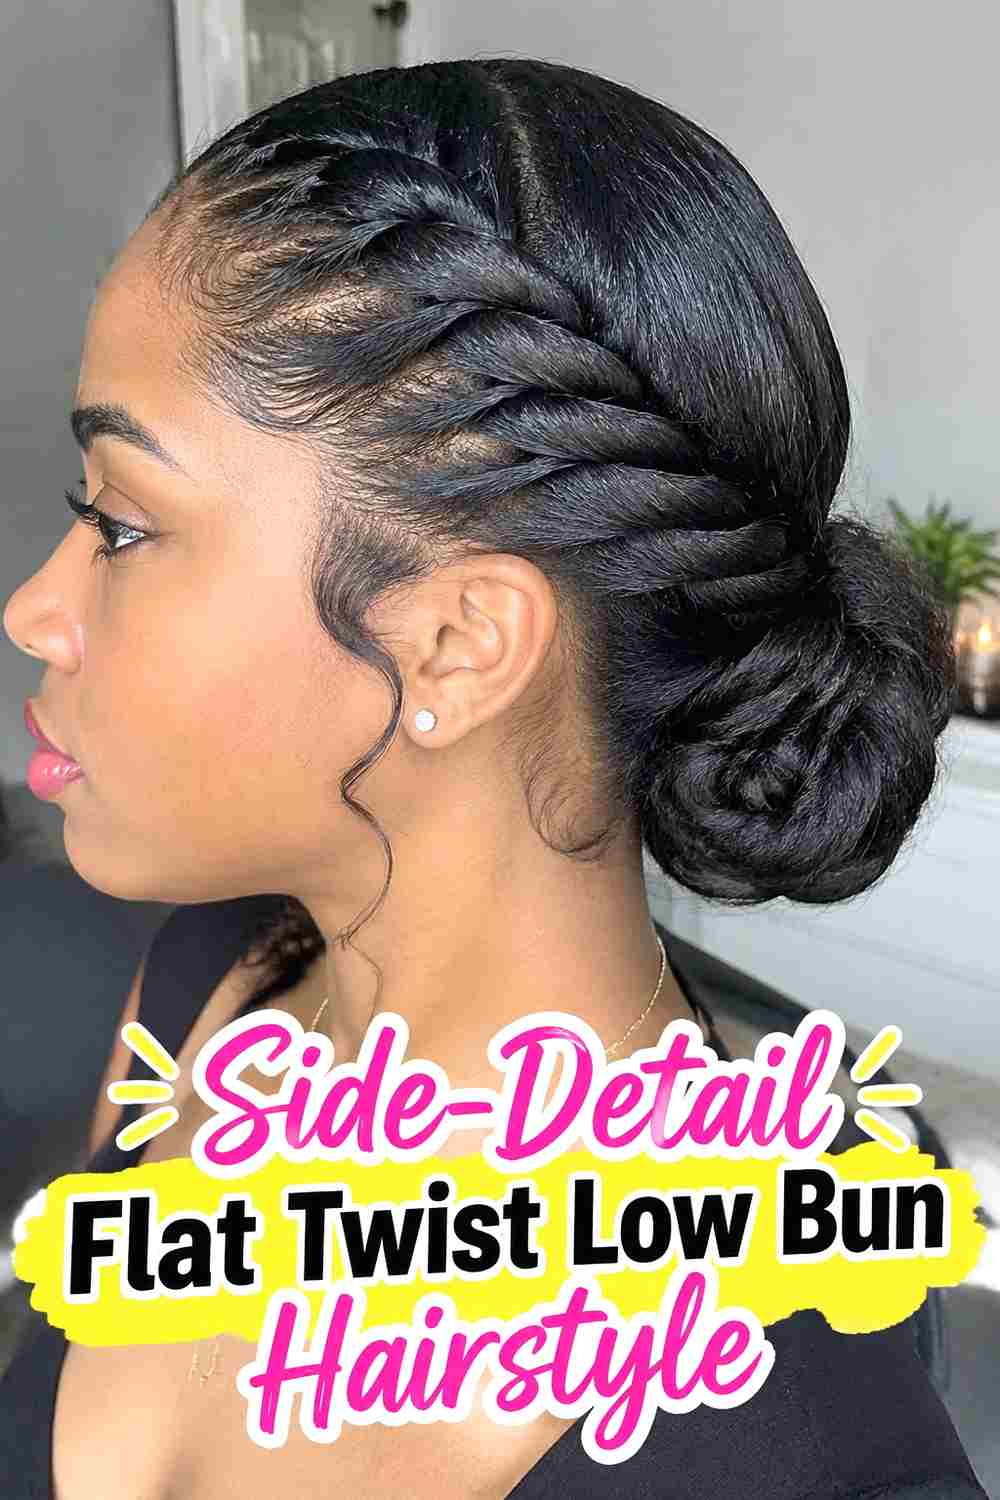
The side-detail flat twist low bun keeps most of the hairstyle simple while concentrating extra twist work near one temple or above one ear. Several narrow flat twists can curve backward into the bun, while the rest of the hair follows broader, quieter sections. This creates a focal point without making the whole style intricate. The detail is especially attractive from the side and can work well for portraits or special events where different angles of the hairstyle will be visible. Keep the bun centered and relatively smooth so the decorative side pattern remains the feature instead of competing with an elaborate back section.
Styling Notes
Plan the detailed side first and use the remaining hair to create simpler supporting twists. This makes it easier to preserve the contrast between the two areas.
Best For
This version suits parties, weddings, portraits, and anyone who wants a subtle design element without committing to a highly complex full-head pattern.
11. Soft Halo Flat Twist Low Bun Hairstyle
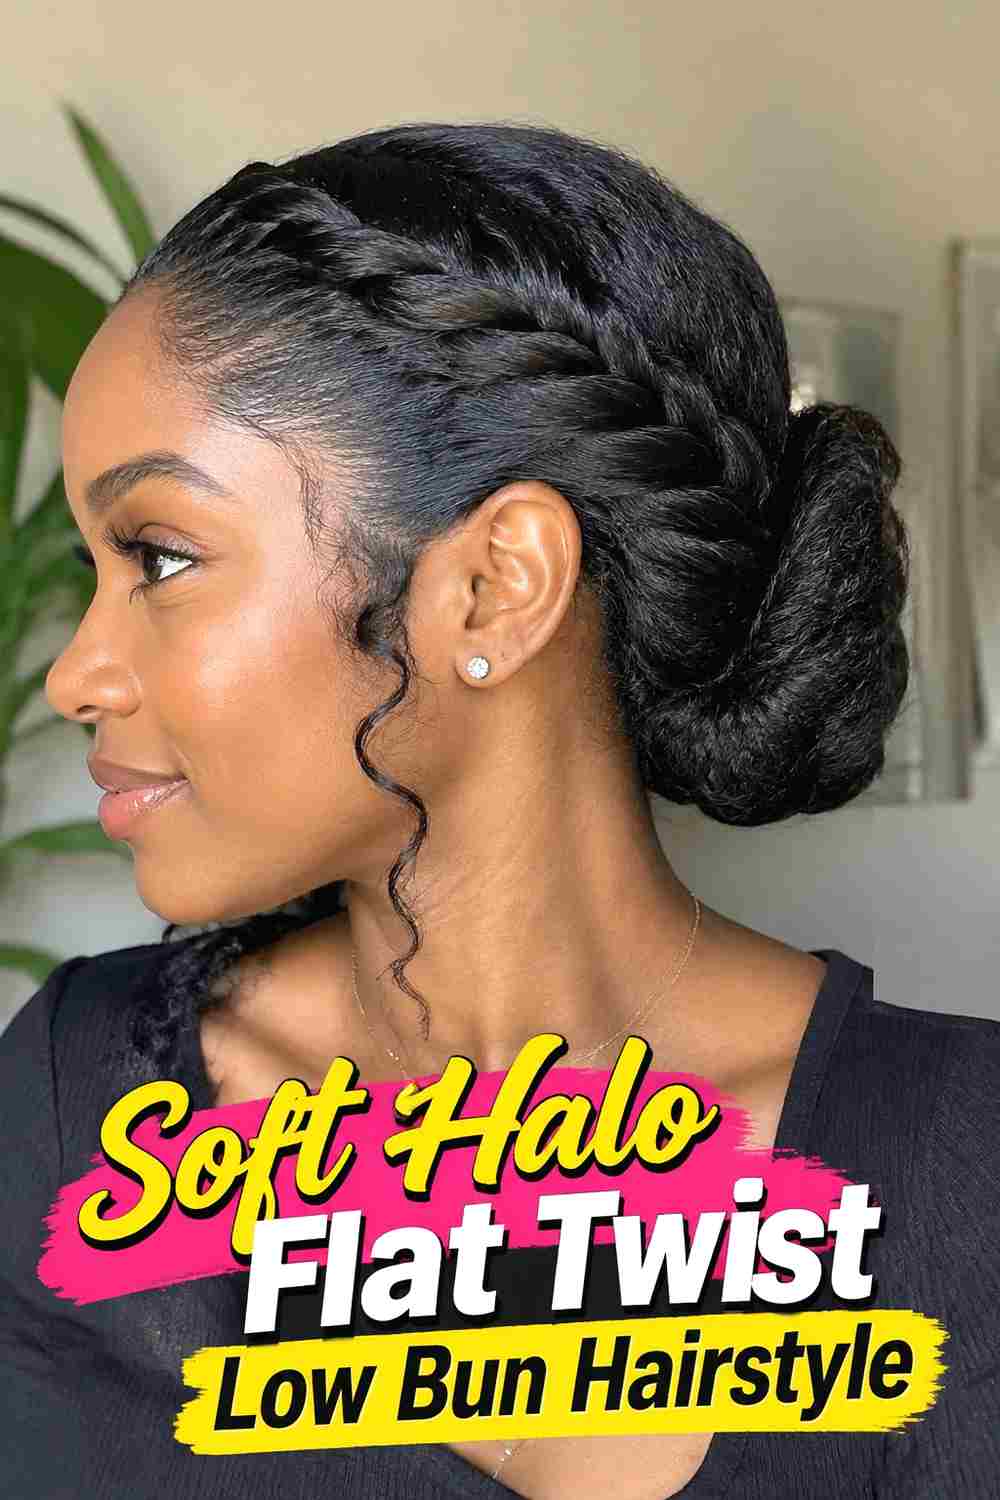
The soft halo flat twist low bun uses twists that curve around the perimeter before gathering into a low bun at the nape. Instead of traveling directly backward, the twist pattern follows the head in a gentle circular motion, creating a crown-like effect around the front and sides. The low bun gives the halo a natural ending point and keeps the overall hairstyle grounded. Slight fullness in the twists can make the crown effect softer and more visible, while neatly tucked ends help the back stay polished. This version blends the elegance of a halo twist with the practicality of a contained low bun.
Why It Works
The curved perimeter frames the head like a crown, while the low bun provides a structured finish that keeps the style wearable and balanced.
Pro Tip
Keep the halo twists comfortable around the hairline and avoid pulling them tighter simply to make the crown shape more pronounced.
How to Choose the Right Look
Start with the amount of detail you want across the scalp. Chunky flat twists create a simpler, bolder pattern, while double twists and side-detail designs give you more intricate sectioning. Curved and halo versions emphasize flowing lines, while center-part and classic styles create a cleaner, more balanced structure.
Consider the bun next. A compact bun keeps the silhouette understated and polished, while a fuller textured bun adds softness and visual weight at the nape. If your hair is shorter or less dense, keeping the bun modest can make the proportions feel more natural.
Part placement changes the mood as well. Center parts feel balanced, side parts add movement, and asymmetrical designs create a stronger focal point. Whatever pattern you choose, keep the twist tension comfortable and direct the sections toward the bun naturally.
For longer wear, choose a layout that is easy to protect at night and does not rely on excessive tension around the hairline. A secure but comfortable foundation is usually more practical than a style that feels overly tight from the beginning.
Final Thoughts
Flat twist low buns can range from clean and symmetrical to textured, curved, chunky, or asymmetrical. The most noticeable differences come from the twist pattern, part placement, bun fullness, and surface finish. Choose the structure that matches your hair length and density, then keep the tension comfortable so the updo looks polished without feeling overly restrictive.
FAQs
1. How long does hair need to be for a flat twist low bun?
You need enough length to create secure flat twists and gather the ends toward the nape. Medium to longer lengths are generally easier to form into a visible bun.
2. Can flat twists go directly into a low bun?
Yes. The twists can be directed toward one gathering point at the nape, where their ends are combined, tucked, or wrapped into the bun.
3. How can I make the low bun look fuller?
Gently expand the bun after securing it or use naturally fuller sections when wrapping. Avoid pulling the bun so tightly that all of its texture disappears.
4. Can I wear a flat twist low bun with a side part?
Yes. A side part works especially well because it creates directional movement and allows the front twists to sweep naturally toward the bun.
5. How do I keep a flat twist low bun comfortable?
Use moderate tension, especially around the hairline and nape, and avoid adding more pins than necessary. The hairstyle should feel secure without painful pulling.
Save your favorite flat twist low bun ideas, share the styles you love, and explore more textured updo inspiration for your next look.