11 Glossy Center-Part Bun Hairstyle Ideas
Glossy center-part buns pair a mirror-smooth finish with clean symmetry, creating polished updos that can feel minimal, bridal, modern, or evening-ready.
The defining details are a precise middle part, controlled surface texture, and a bun that looks intentionally shaped rather than casually wrapped. Although the overall aesthetic is sleek, changing the bun’s placement and construction can make the style feel dramatically different.
Low buns create a restrained, elegant profile, while midi and high placements add more presence. Twists, knots, braids, tucked ends, and subtle tendrils provide additional variation without losing the polished center-part foundation. The best option depends on your hair length, density, desired tension, occasion, and how much visible detail you want at the back.
Quick List
- Sleek Low Glossy Center Part Bun Hairstyle
- Glossy Center Part Ballet Bun Hairstyle
- Glossy Center Part Knot Bun Hairstyle
- Glossy Center Part Twisted Bun Hairstyle
- Glossy Center Part Braided Bun Hairstyle
- Glossy Center Part Midi Bun Hairstyle
- Glossy Center Part High Bun Hairstyle
- Compact Glossy Center Part Bun Hairstyle
- Glossy Center Part Bun With Tucked Ends Hairstyle
- Glossy Center Part Bun With Face Framing Tendrils Hairstyle
- Glossy Center Part Bridal Bun Hairstyle
1. Sleek Low Glossy Center Part Bun Hairstyle
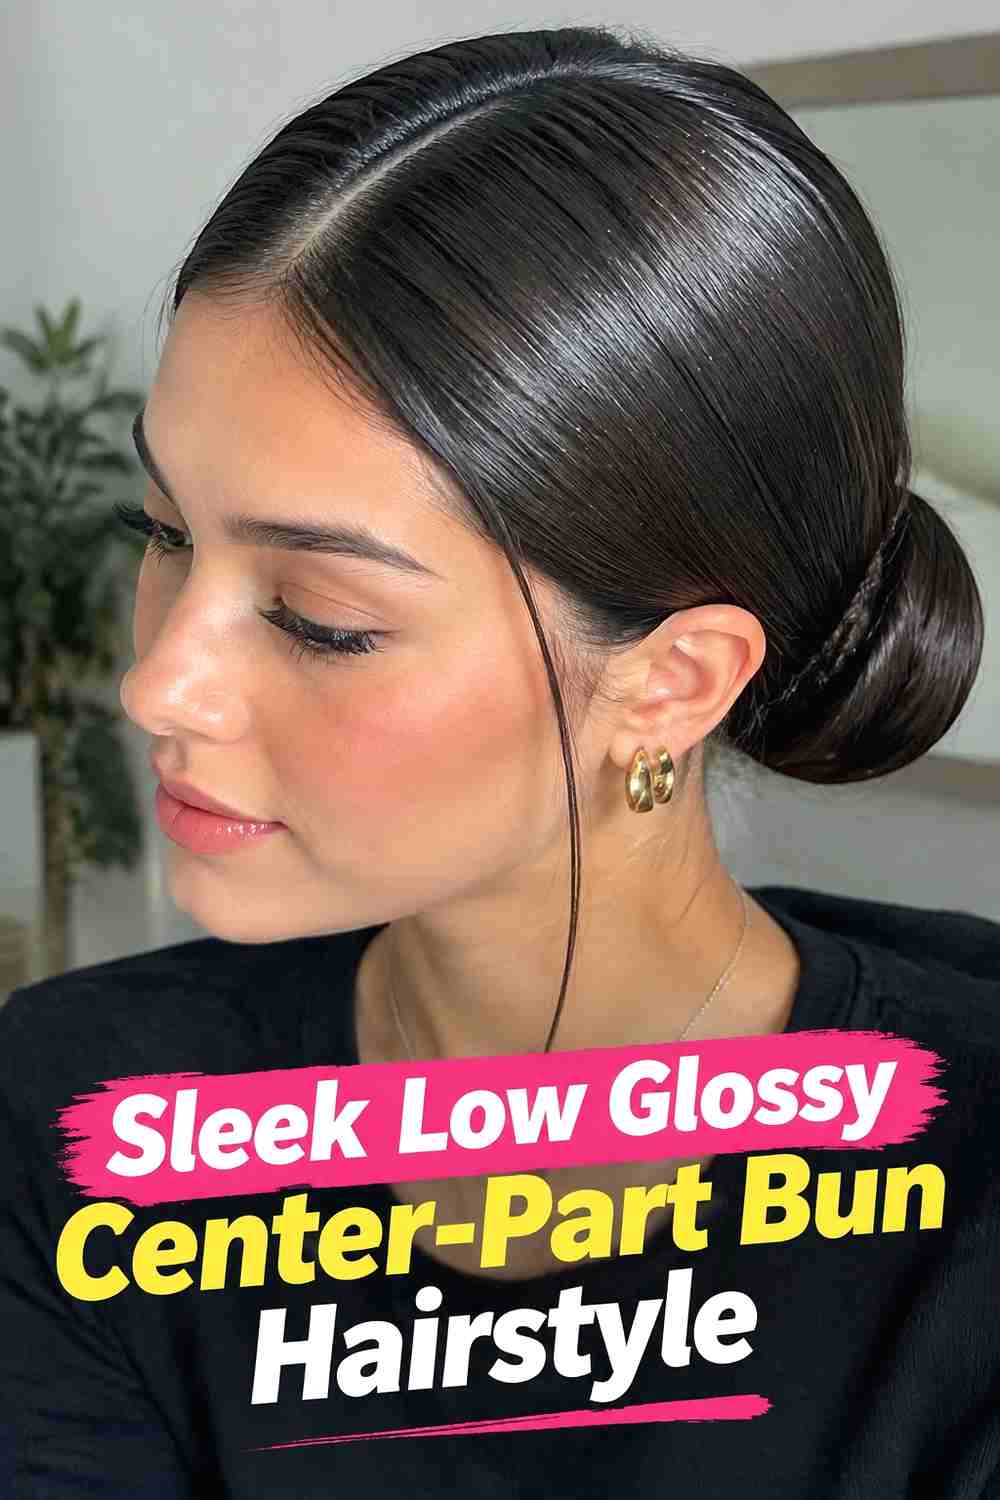
The sleek low glossy center-part bun keeps the entire silhouette controlled, with a crisp middle part leading into smooth sides and a compact bun at the nape. Its low placement makes the style feel sophisticated without creating extra height around the crown. Medium and long hair are easiest to secure, although density will influence how large the finished bun appears. Smooth the hair in sections toward the back instead of brushing everything at once, then anchor the ponytail before shaping the bun. A light styling cream or gel can control surface flyaways, while a small amount of shine product adds polish. Avoid excessive tension around the hairline when creating the sleek finish.
Styling Notes
Refine each side of the center part separately before gathering the hair. This helps keep the line straight and prevents bumps near the temples.
Best For
This version works especially well for professional events, formal dinners, minimalist outfits, and occasions where a clean low-profile updo feels appropriate.
2. Glossy Center Part Ballet Bun Hairstyle
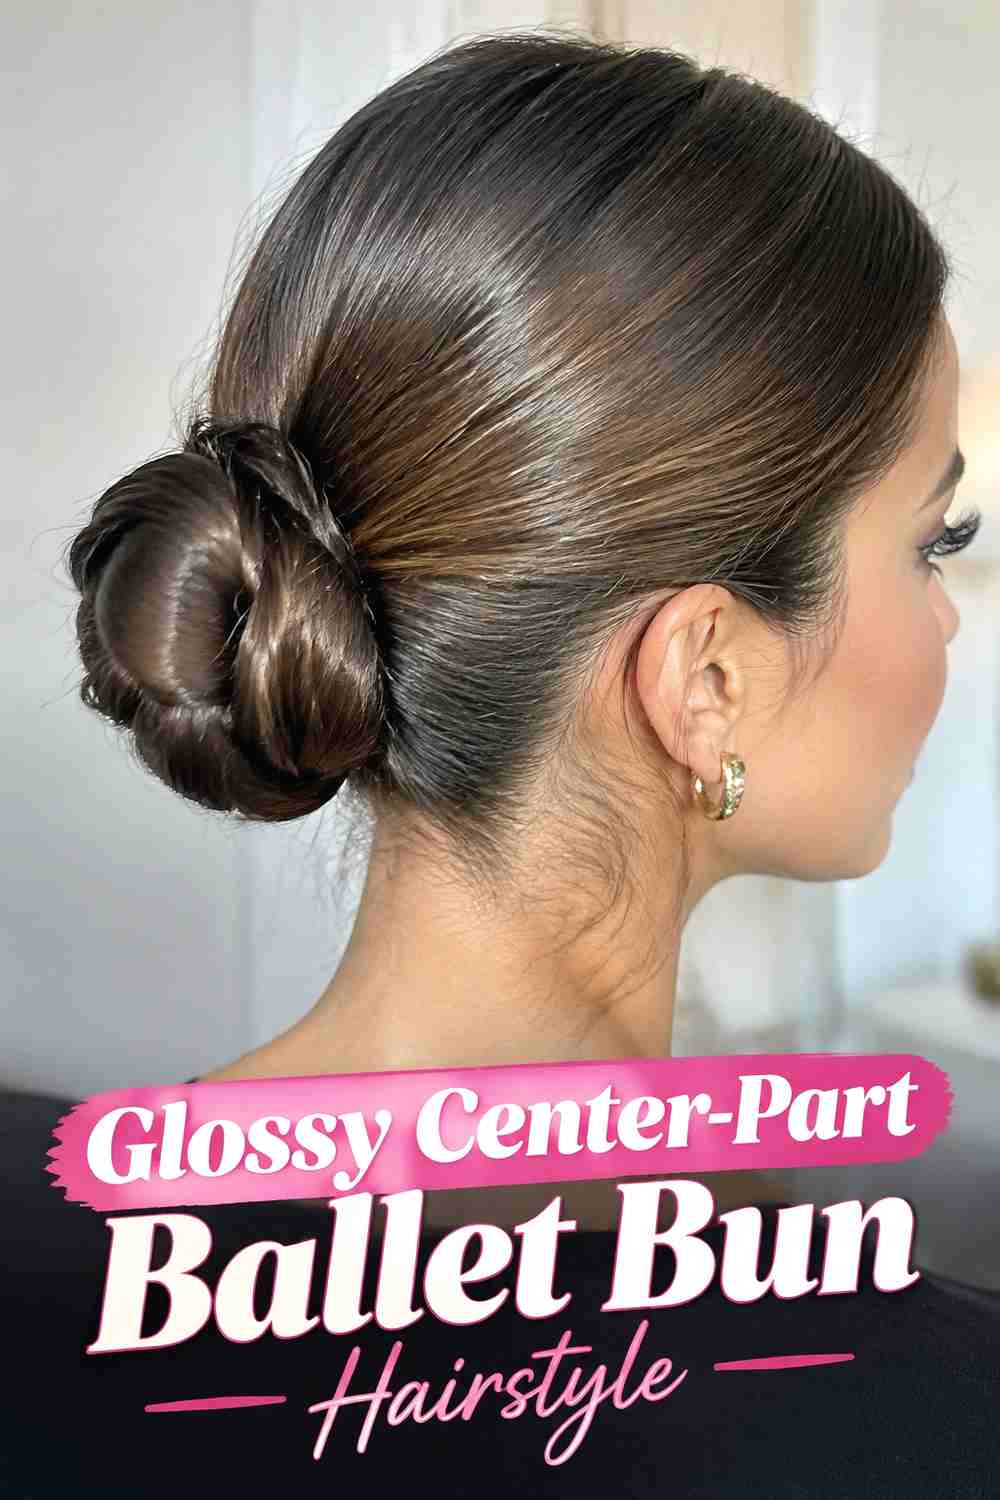
A glossy center-part ballet bun uses a rounded, disciplined shape inspired by traditional ballet styling, but the precise middle part gives it a modern fashion-forward finish. The bun usually sits around the middle or lower back of the head and stays evenly shaped rather than oversized. Smooth the lengths into a secure ponytail first, then wrap them around the base with consistent tension so the circle remains neat. Fine hair can create a smaller, delicate bun, while denser or longer hair naturally produces more volume. Finish the surface with a brush or fine comb and a controlled amount of styling product. The result should look polished while still showing believable natural hair texture.
Why It Works
The circular bun provides visual softness at the back while the sharp center part and glossy surface maintain structure at the front.
Wear & Maintenance
Use enough pins to distribute the hold around the entire bun instead of relying on one tight point of tension.
3. Glossy Center Part Knot Bun Hairstyle
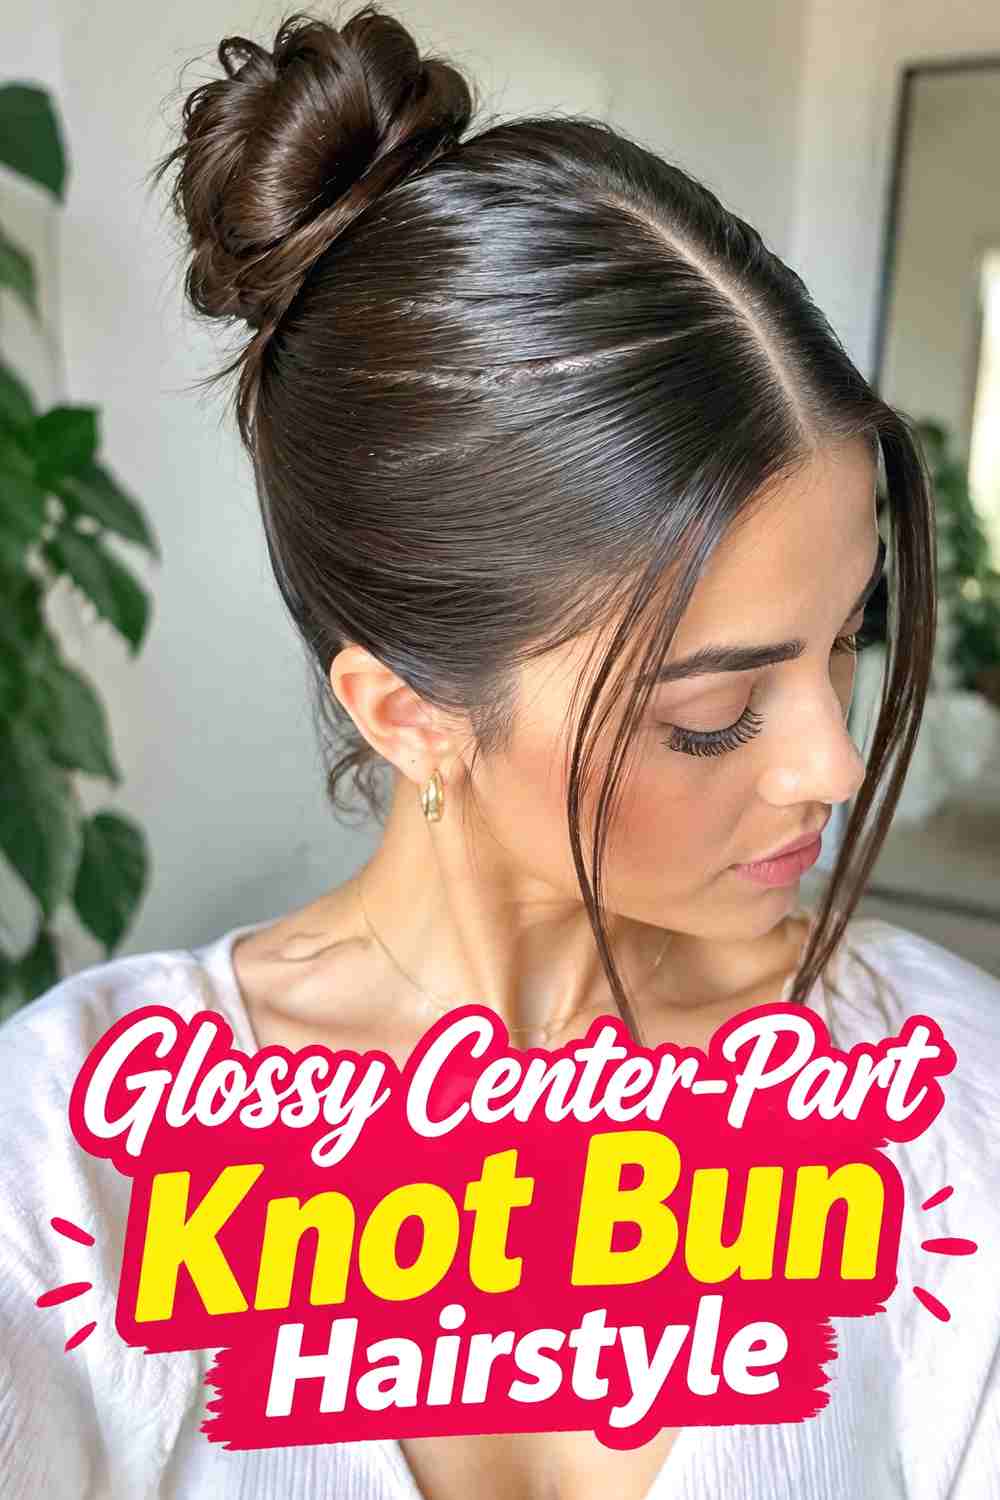
The glossy center-part knot bun replaces a simple wrapped coil with a more architectural knot shape. The front stays extremely clean, with the middle part dividing two smooth sections that meet at the back before the hair is folded or looped into a compact knot. This works especially well on medium to long hair that has enough length to cross over itself securely. The bun can sit low for a minimalist effect or slightly higher for more visibility. Smooth the ponytail before knotting so stray strands do not interrupt the structure. Hidden pins should support the folded sections from underneath, leaving the visible shape uncluttered and allowing the glossy finish to remain the main focus.
Styling Notes
Create the knot loosely enough to shape it before inserting the final pins. Over-tightening too early makes it harder to refine the silhouette.
Best For
Choose this version when you want a sleek bun with more visual structure than a standard circular wrap.
4. Glossy Center Part Twisted Bun Hairstyle
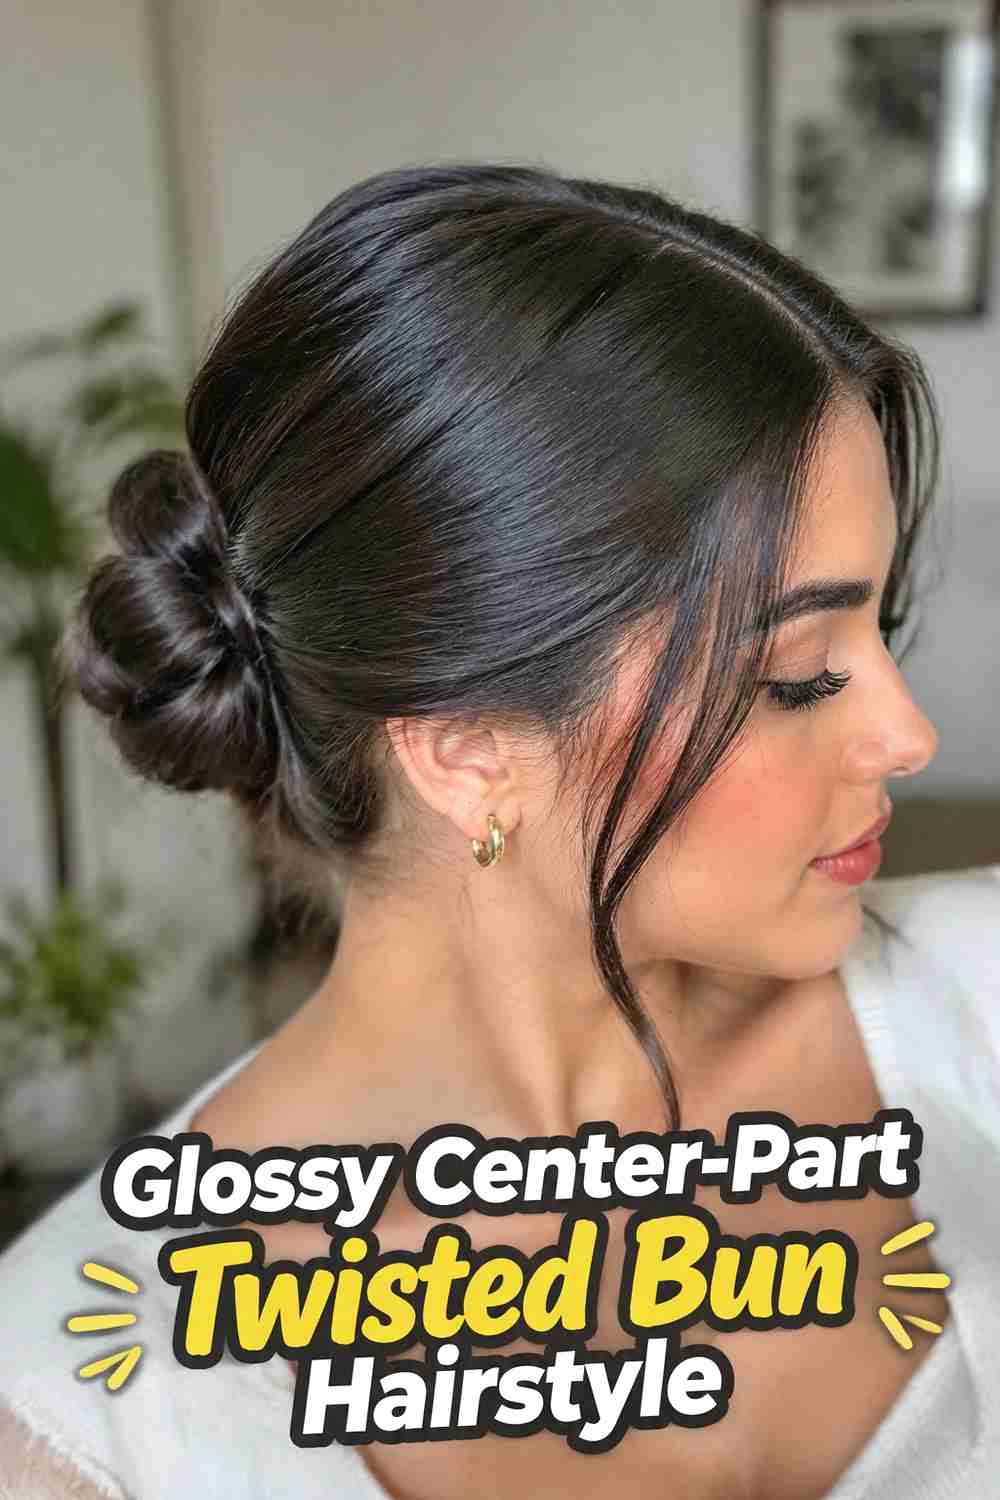
A glossy center-part twisted bun adds directional detail while keeping the front of the hairstyle minimal and smooth. After creating the precise middle part and securing the hair into a ponytail, divide or twist the lengths before wrapping them around the base. The resulting ridges give the bun dimension without requiring decorative accessories. This approach is especially effective on medium to long hair because extra length makes the twist pattern easier to see. Keep the sides polished and avoid excessive crown volume so the texture at the bun remains the focal point. A lightweight serum through the ponytail before twisting can help create a smooth reflective surface while reducing unwanted frizz between the sections.
Why It Works
The twist introduces visible texture at the back while preserving the clean symmetry and glossy finish that define the overall style.
Pro Tip
Twist with consistent tension so the ridges remain even, but avoid pulling so firmly that the bun becomes uncomfortable.
5. Glossy Center Part Braided Bun Hairstyle
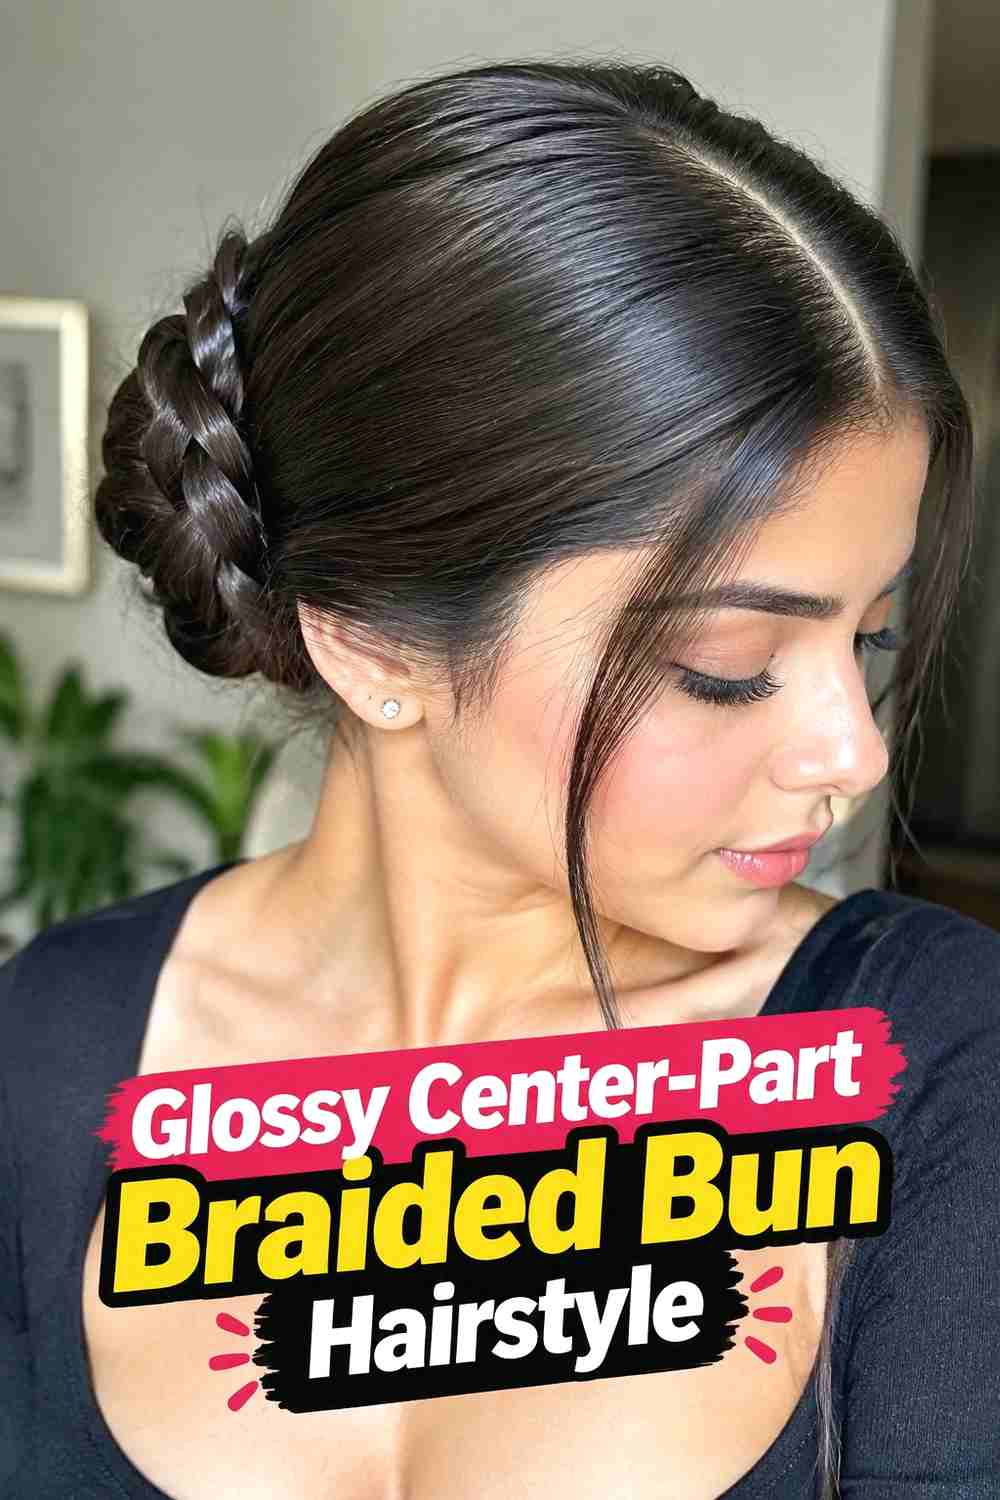
The glossy center-part braided bun combines a highly polished front with subtle woven texture at the back. Begin with a sharp middle part and smooth both sides into a secure ponytail. Braid the ponytail before wrapping it around the base, allowing the pattern to remain visible as it forms the bun. A simple three-strand braid keeps the result understated, while the polished surface prevents the texture from looking overly casual. Medium and long hair generally provide the clearest braided detail, particularly when the braid is not pulled apart too much. Use discreet pins between the woven sections and finish with light shine spray so the bun and sleek front read as one cohesive style.
Styling Notes
Keep the braid smooth and moderately firm rather than heavily pancaked. Too much expansion can hide the compact, glossy character of the bun.
Best For
This option is useful when you want a classic sleek updo with one extra detail visible from the side or back.
6. Glossy Center Part Midi Bun Hairstyle
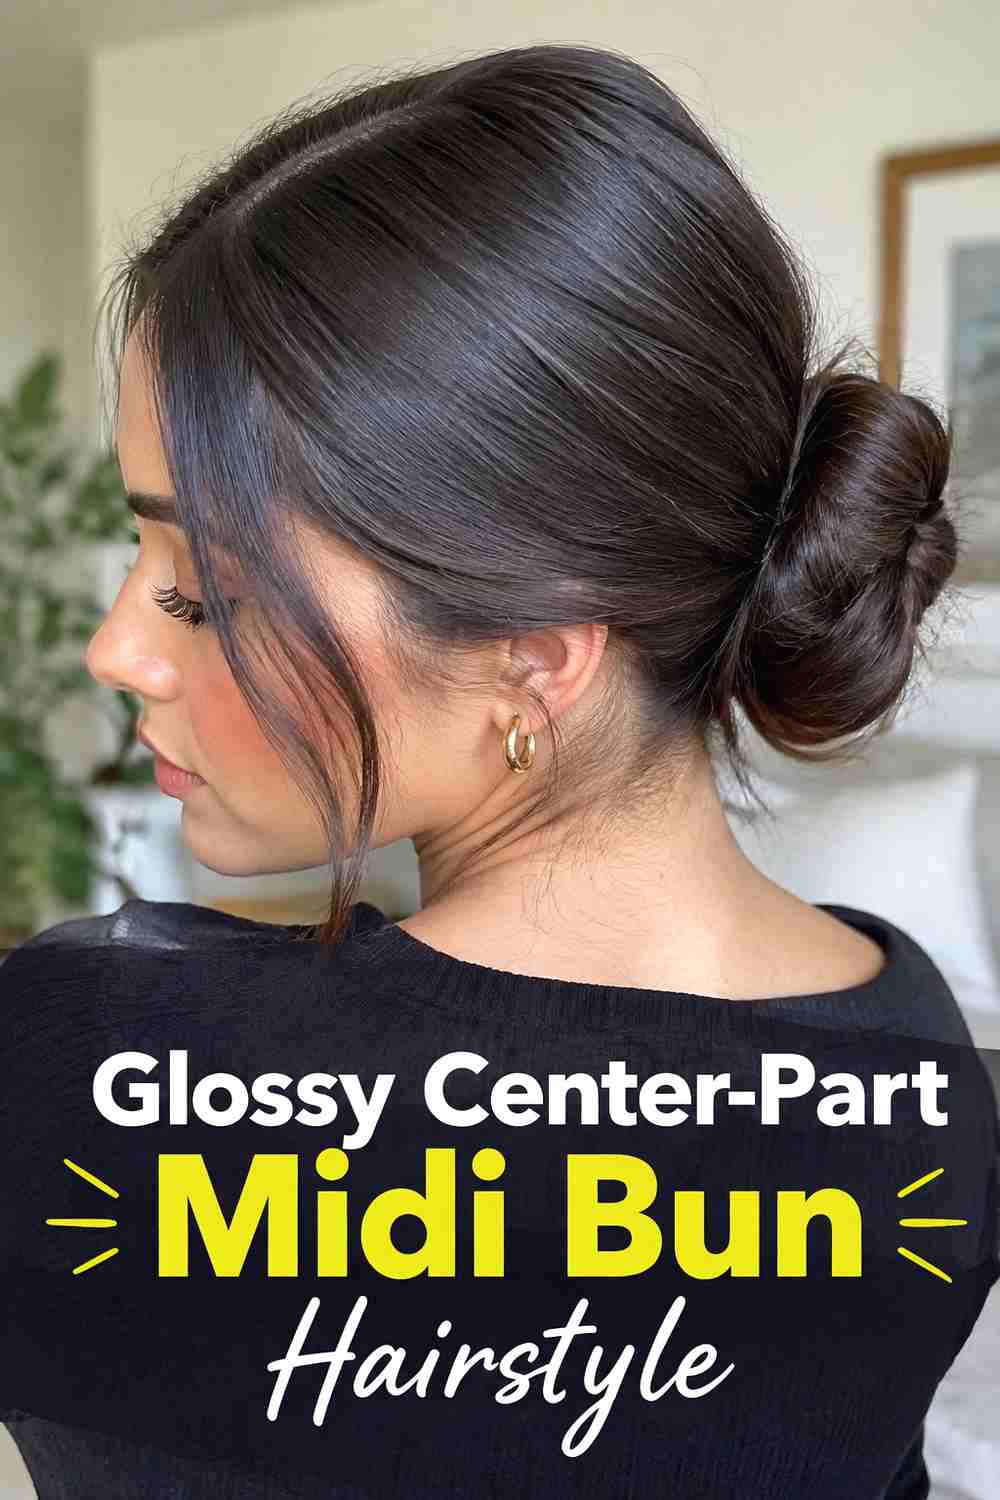
A glossy center-part midi bun sits between the nape and crown, creating a balanced placement that feels neither traditionally low nor dramatically high. That middle position makes the bun more visible from the front while retaining a polished, versatile silhouette. The center part should remain crisp, with both sides smoothed back evenly toward the ponytail base. Medium or long hair can be wrapped into a rounded, knotted, or lightly twisted bun depending on density. Because the placement is higher than a nape bun, secure the foundation carefully to prevent slipping. Keep the crown smooth rather than puffed, and use enough surface product to control flyaways without creating an artificial wet or hardened finish.
Why It Works
The middle placement gives the bun more presence while maintaining the restrained proportions associated with sleek center-part styling.
Wear & Maintenance
Check that the ponytail base feels secure but comfortable before shaping the bun, since the final structure depends heavily on that anchor point.
7. Glossy Center Part High Bun Hairstyle
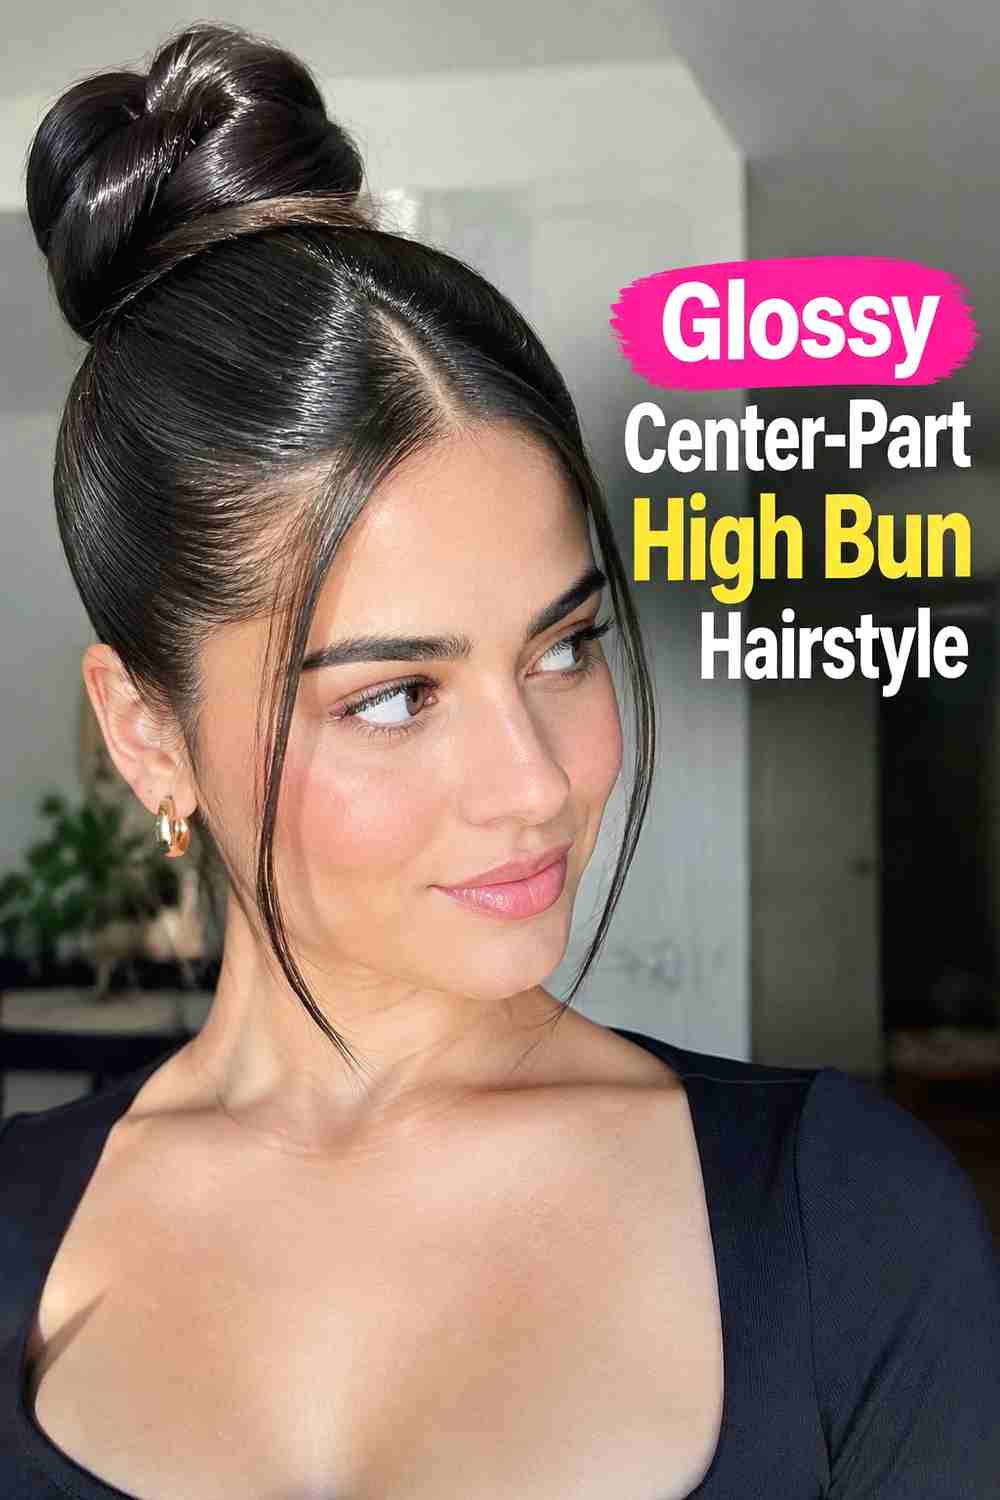
The glossy center-part high bun creates a stronger vertical silhouette while maintaining the clean symmetry of a sleek middle part. Instead of brushing the part away when lifting the hair, keep it visible through the front and guide both sections upward toward a high ponytail. The bun can be compact and rounded rather than oversized, which keeps the finish modern and controlled. This placement can work particularly well on long hair that needs enough length to wrap securely around a higher base. Smooth the hair gradually to prevent bumps beneath the crown, then pin the bun evenly around its perimeter. Avoid pulling the front excessively tight simply to achieve a glossy surface.
Styling Notes
Build the high ponytail first and check the front symmetry before constructing the bun. Correcting the part afterward can disturb the sleek surface.
Best For
This option suits parties, evening looks, and outfits where a higher updo helps keep the neckline and shoulders visually open.
8. Compact Glossy Center Part Bun Hairstyle
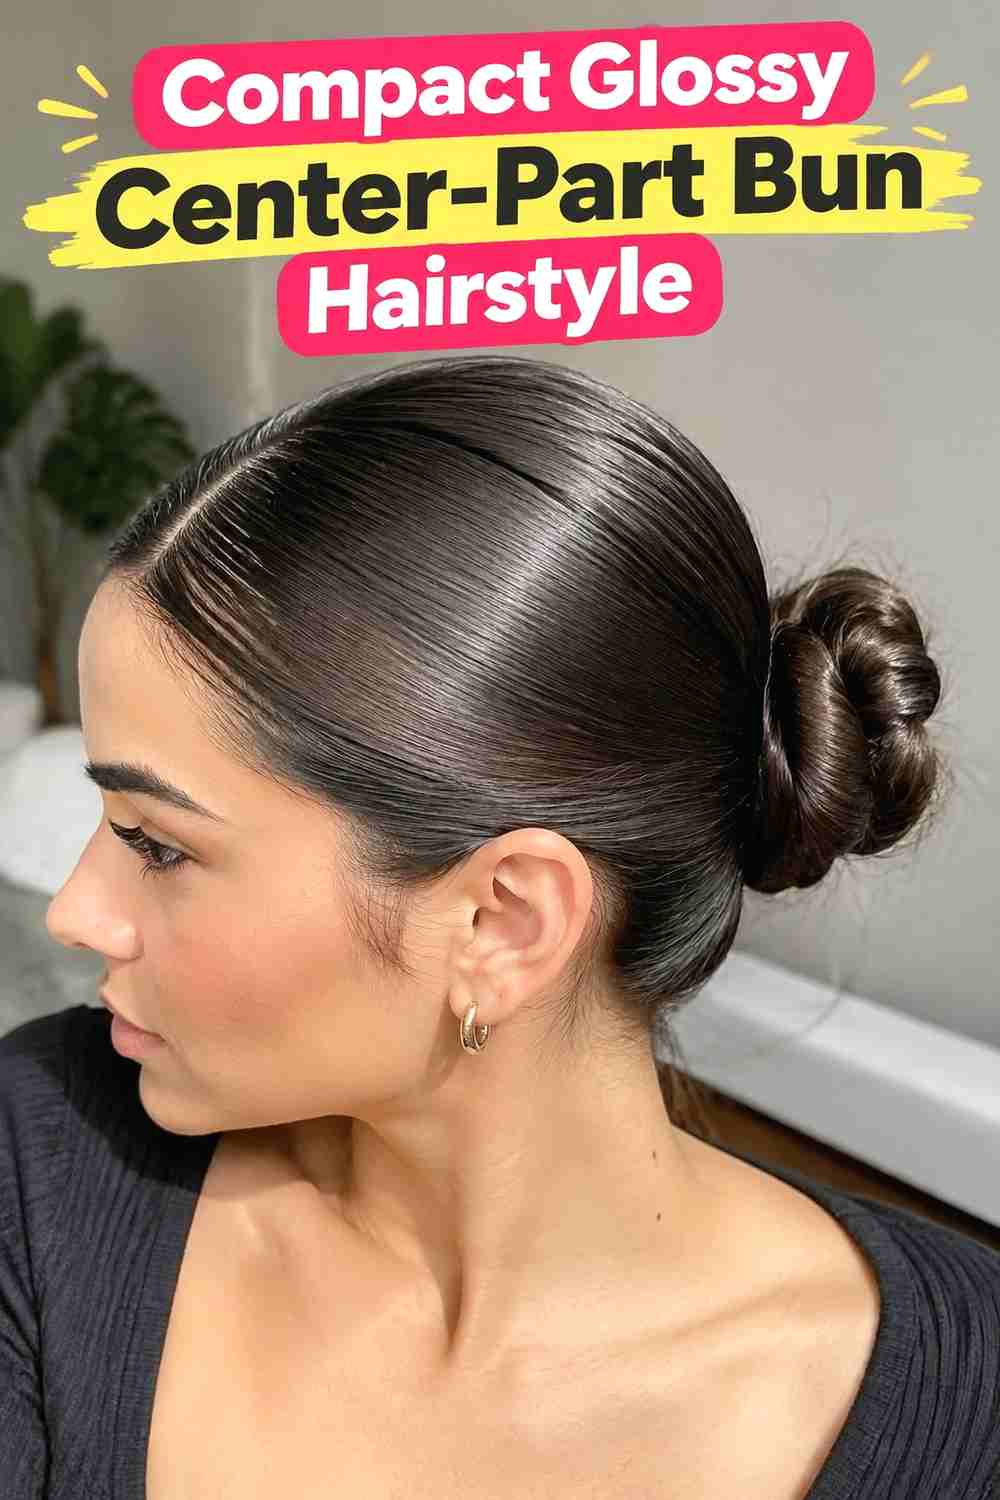
A compact glossy center-part bun focuses on a small, tightly controlled shape rather than dramatic volume. The front remains symmetrical and sleek, while the bun is wrapped close to its base so it sits neatly against the head. This style can work particularly well for medium-length hair because it does not require excessive length to create a convincing shape. Longer hair can also be folded inward to keep the bun deliberately small. Use hidden pins to contain the ends and preserve a clean outline from every angle. The glossy surface should highlight the natural direction of the hair without appearing coated. A compact shape also pairs naturally with minimalist jewelry and streamlined clothing.
Why It Works
Reducing the bun’s size keeps attention on the crisp center part and smooth head shape rather than adding unnecessary volume at the back.
Hair Type & Length
Medium and long hair can both work, although thicker hair may need careful folding to keep the finished bun genuinely compact.
9. Glossy Center Part Bun With Tucked Ends Hairstyle
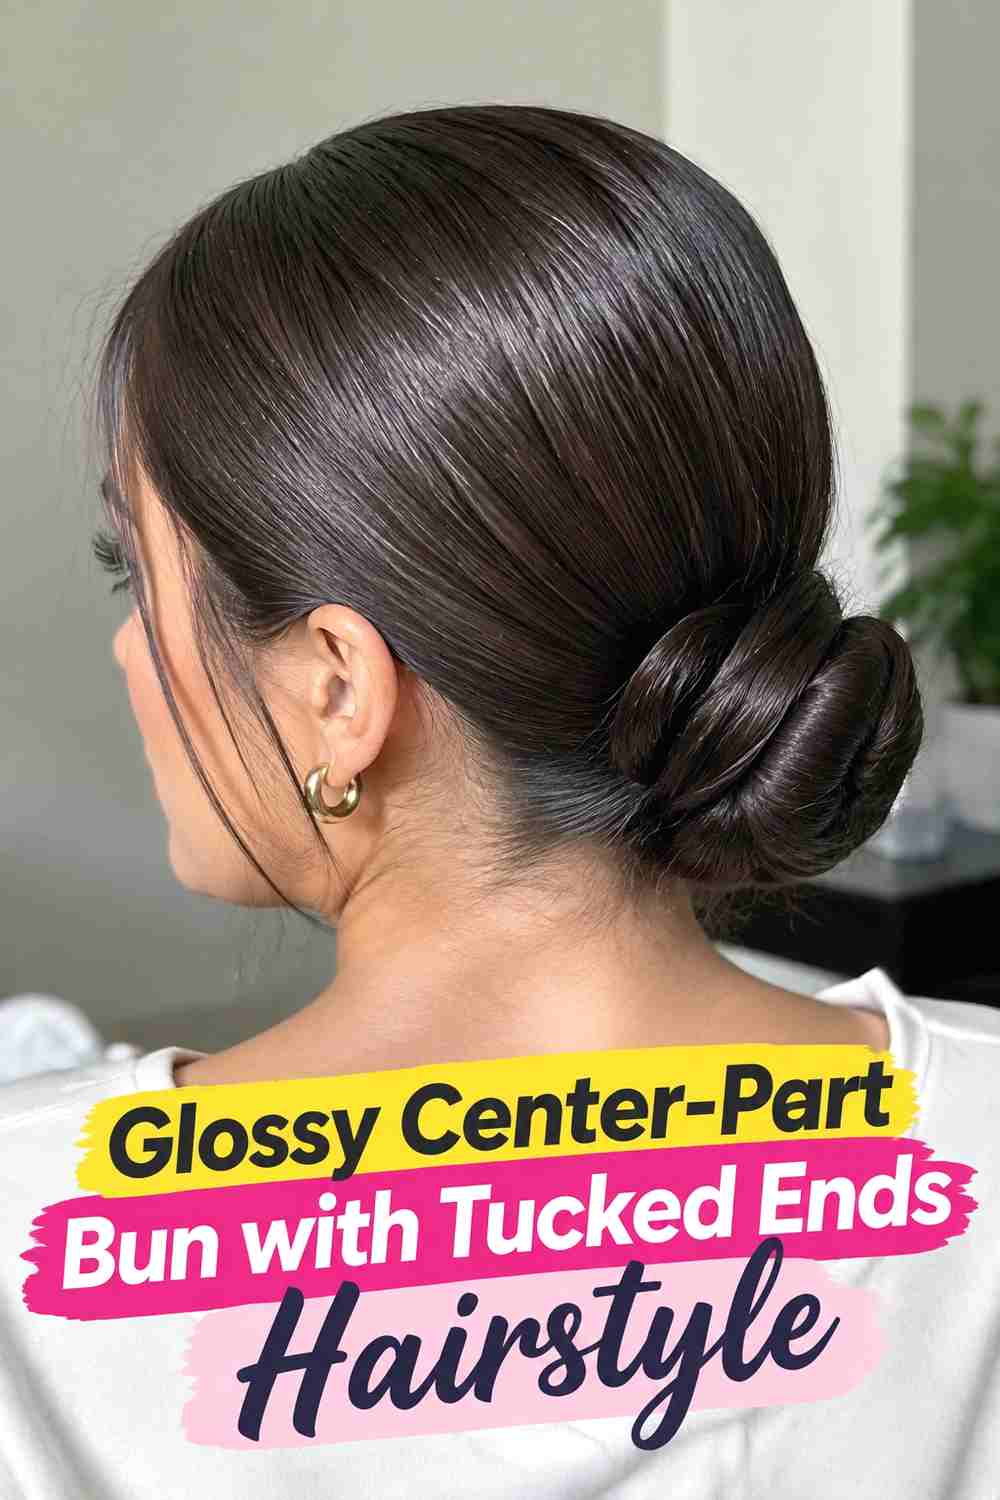
The glossy center-part bun with tucked ends creates a seamless finish by hiding every loose tip inside the bun rather than leaving visible ends. After smoothing the center-parted hair into a ponytail, wrap or fold the lengths into the desired shape and tuck the final section underneath before pinning. The result is especially clean from the side, where no stray tail interrupts the outline. Medium and long hair are easiest to work with, although very long lengths may require folding before wrapping to avoid creating an oversized bun. Keep the front polished and the crown flat enough to maintain the modern silhouette. Hidden pins should hold the tucked sections securely without becoming visible.
Styling Notes
Plan where the final ends will disappear before completing the wrap. Forcing them underneath afterward can create lumps or loosen the bun.
Wear & Maintenance
A secure tucked finish is helpful for longer events because there are fewer exposed ends to shift or unravel during wear.
10. Glossy Center Part Bun With Face Framing Tendrils Hairstyle
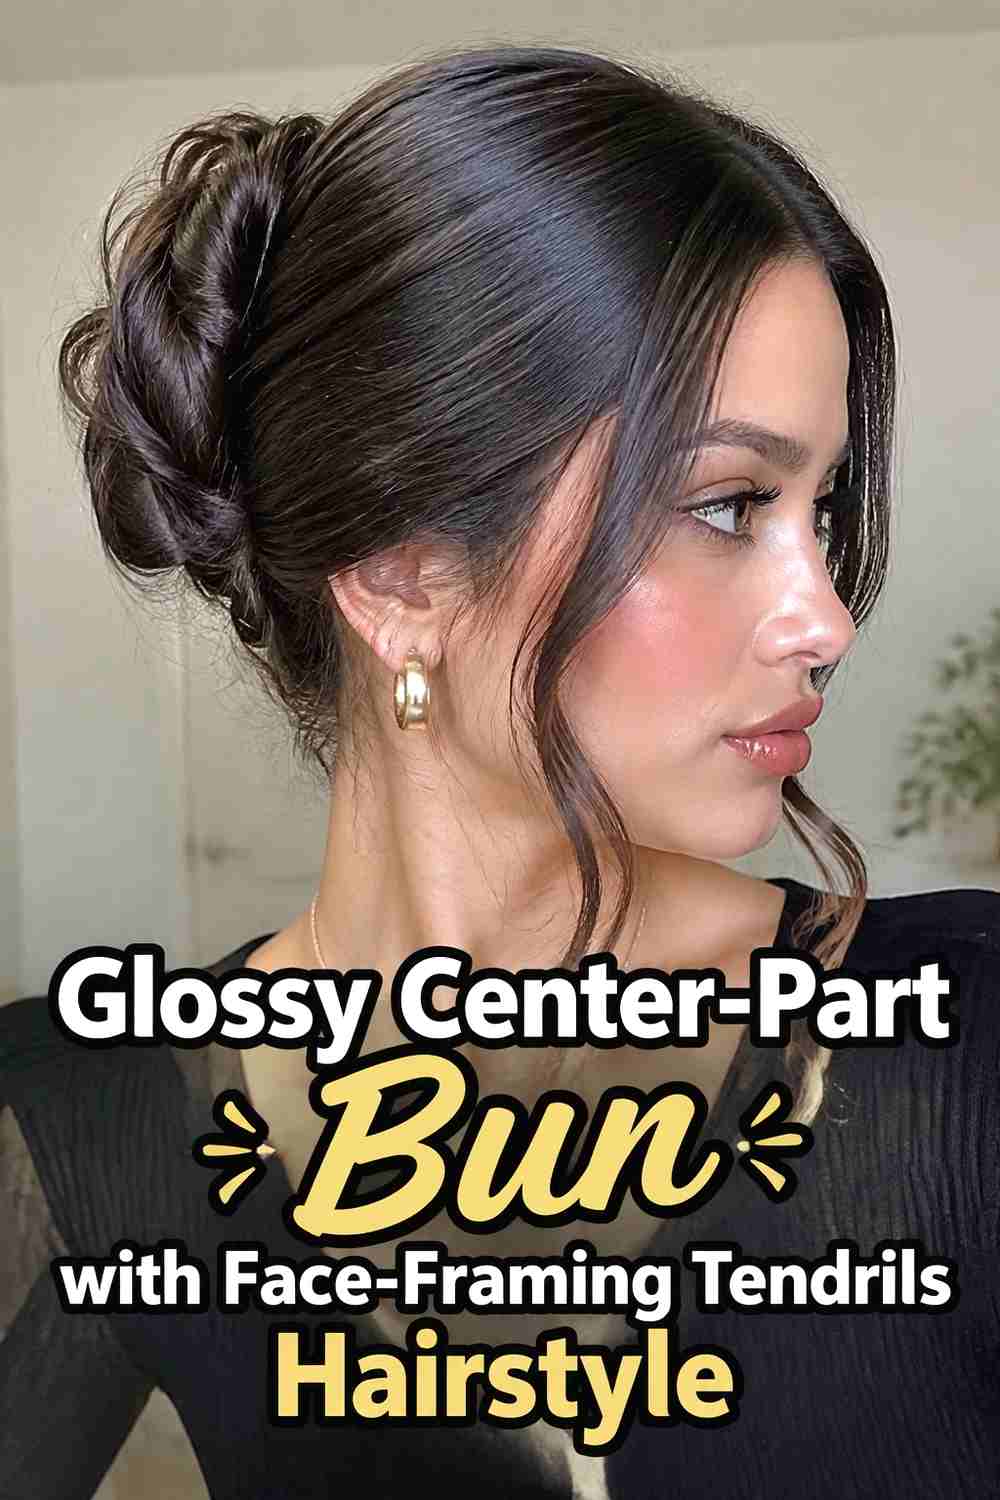
Face-framing tendrils soften the glossy center-part bun without removing its clean, polished identity. The key is selecting only a small amount of hair near each temple before smoothing the remaining sections back. Those tendrils can stay nearly straight or receive a gentle bend, while the rest of the hair remains sleek and controlled. A low or midi bun usually complements the softer front especially well. This variation works best when the loose pieces appear intentional and balanced rather than randomly pulled from the finished style. Separate them before building the bun so the main structure stays secure. Keep styling product lighter on the tendrils so they retain natural movement against the glossy surface behind them.
Styling Notes
Leave the front pieces out from the beginning. Pulling strands free after the bun is secured can loosen the sleek sides and disturb the part.
Best For
This style works well for weddings, dinners, date nights, and occasions where a completely slick front may feel more severe than you want.
11. Glossy Center Part Bridal Bun Hairstyle
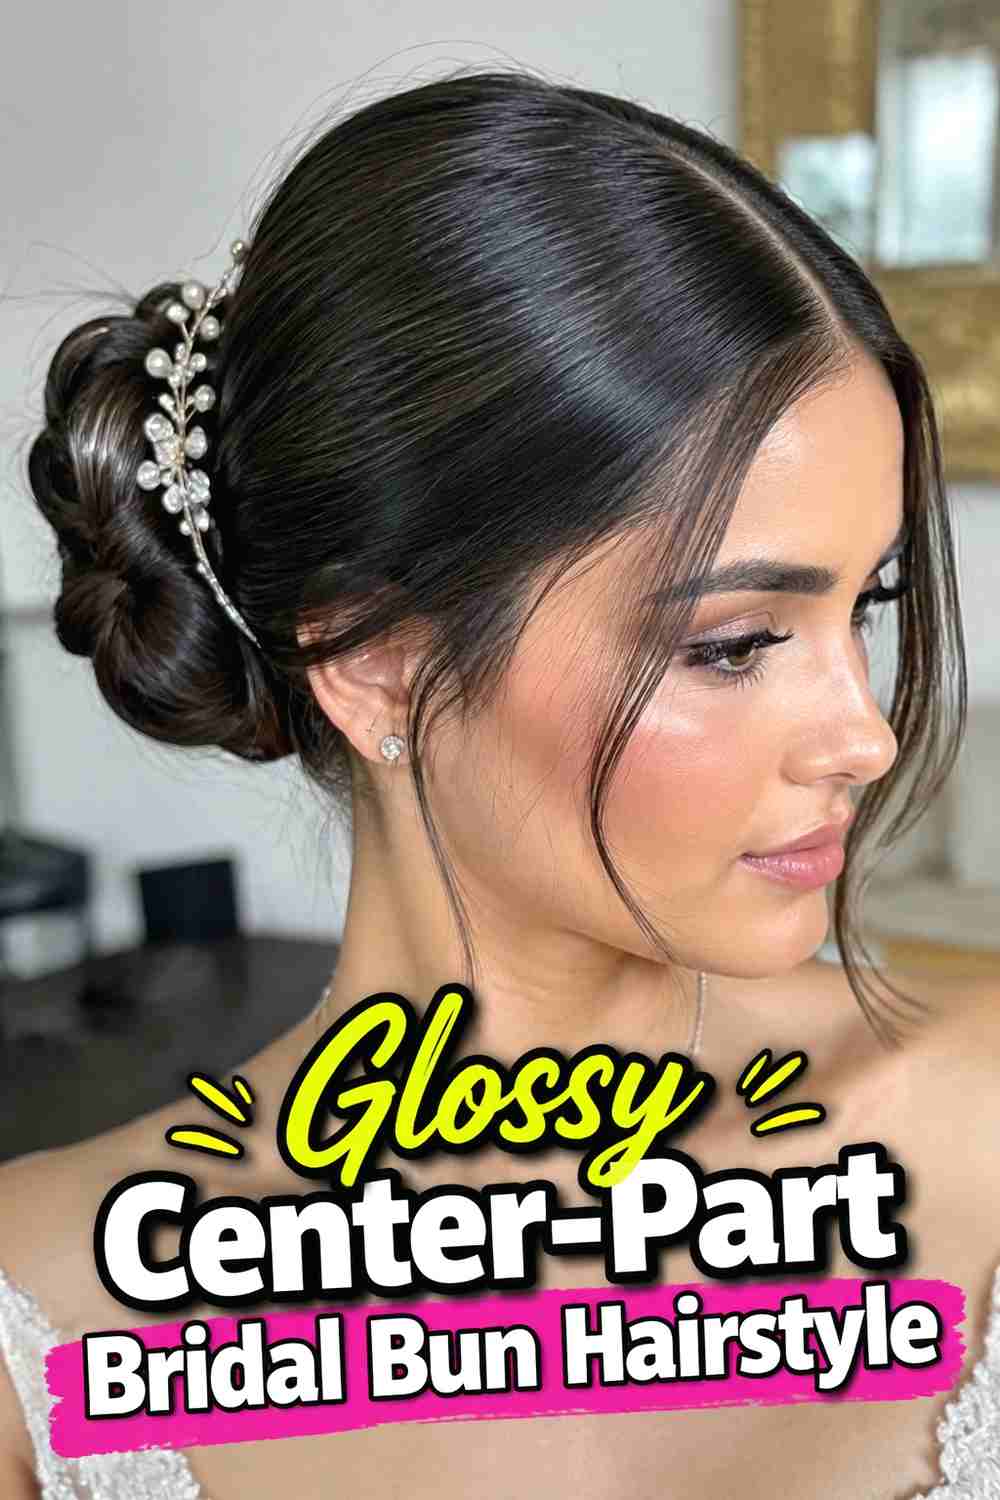
A glossy center-part bridal bun combines symmetrical front styling with a carefully finished bun designed to look polished from every angle. The bun can sit low or around the mid-back of the head, depending on the neckline, veil placement, and desired profile. Keep the center part precise, the sides smooth, and the bun structured without making it excessively large. A twisted or softly folded construction can add detail while preserving the clean aesthetic. If an accessory is used, one refined pin or small comb is often enough. Strong internal pinning matters more than heavy hairspray, especially for extended wear. The overall result should feel elegant, secure, and intentionally simple rather than heavily embellished.
Wear & Maintenance
Test veil or accessory placement with the completed bun so added weight does not interfere with the pins supporting the hairstyle.
Why It Works
The glossy symmetry photographs cleanly from the front while the structured bun provides enough detail to make the style feel occasion-ready.
How to Choose the Right Look
Start with bun placement. Low buns are restrained and elegant, making them a natural fit for minimalist looks, bridal styling, and formal outfits. Midi buns provide more visibility without becoming dramatic, while high buns create a stronger vertical silhouette and keep the neck completely open.
Next, consider your hair length and density. Medium-length hair can work beautifully in ballet, compact, and low buns, while longer hair gives you more material for knots, braids, twists, and tucked constructions. Thick hair may need extra internal pins or strategic folding to prevent the bun from becoming larger than intended.
Think about texture and detail as well. A braided or twisted bun adds interest at the back, while a compact or tucked-end bun keeps the finish especially clean. Face-framing tendrils soften the look, whereas fully slick sides create the sharpest minimalist effect.
Finally, prioritize comfort along with hold. Glossy does not need to mean painfully tight. Use smoothing products, controlled brushing, and secure anchoring instead of excessive tension, especially if you plan to wear the bun for several hours.
Final Thoughts
A glossy center-part bun can shift from minimalist to romantic or formal simply by changing its placement and construction. Keep the middle part precise, build the bun securely, and choose a finish that works with your length and density. The strongest versions look polished while still preserving natural hair texture and comfortable movement.
FAQs
1. How do I make a center-part bun look glossy?
Start with a smooth blow-dry, define the middle part carefully, and use a small amount of smoothing cream, gel, or shine product over the surface. Avoid applying so much that the hair looks heavily coated.
2. Should a glossy bun be low or high?
Both can work. Low buns feel more understated and classic, while high buns create a stronger, more visible silhouette.
3. Can medium-length hair create a glossy center-part bun?
Yes. Compact, ballet, and low buns are particularly practical for medium hair because they require less excess length than elaborate braided or oversized styles.
4. How can I keep the bun sleek without pulling too tightly?
Use smoothing product and brush the hair into position gradually, then rely on a secure ponytail base and well-placed pins for hold rather than excessive tension at the hairline.
5. What type of glossy center-part bun works well for weddings?
Low structured, twisted, tucked-end, and bridal buns all work well for wedding styling. The best choice depends on hair length, accessories, veil placement, and the desired amount of detail.
Save your favorite glossy center-part bun hairstyle ideas for your next polished updo, and share the collection with anyone who loves sleek, elegant hair inspiration.