15 Windy-Sidewalk Hair Tucks With Oversized Coats
Simple ear tucks, low twists, and pinned-back sections can keep your hair controlled on blustery sidewalks without competing with an oversized coat. Oversized coats look effortlessly stylish, but broad collars, scarves, and windy sidewalks can send loose hair across your face or trap the ends inside layers. Hair tucks offer a practical middle ground: they control the sections most likely to blow forward without requiring a full updo. The best version depends on length, texture, and how much hold you need. Some of these looks use nothing more than the ears as natural anchors, while others add slim pins, braids, or a low tie for extra security. The goal is comfortable, low-bulk styling that still looks intentional when you step indoors.
Quick List
- Deep Side Ear Tuck Hairstyle
- Double Ear Tuck Sleek Hairstyle
- Low Side Part Tuck Hairstyle
- Soft Wave Ear Tuck Hairstyle
- Pin Secured Side Tuck Hairstyle
- Scarf Friendly Nape Tuck Hairstyle
- Behind The Ear Bob Tuck Hairstyle
- Curly Side Tuck Hairstyle
- Twisted Temple Tuck Hairstyle
- Low Half Up Tuck Hairstyle
- Collarbone Length Side Tuck Hairstyle
- Center Part Double Tuck Hairstyle
- Textured Pixie Ear Tuck Hairstyle
- Braided Side Tuck Hairstyle
- Low Ponytail Ear Tuck Hairstyle
1. Deep Side Ear Tuck Hairstyle
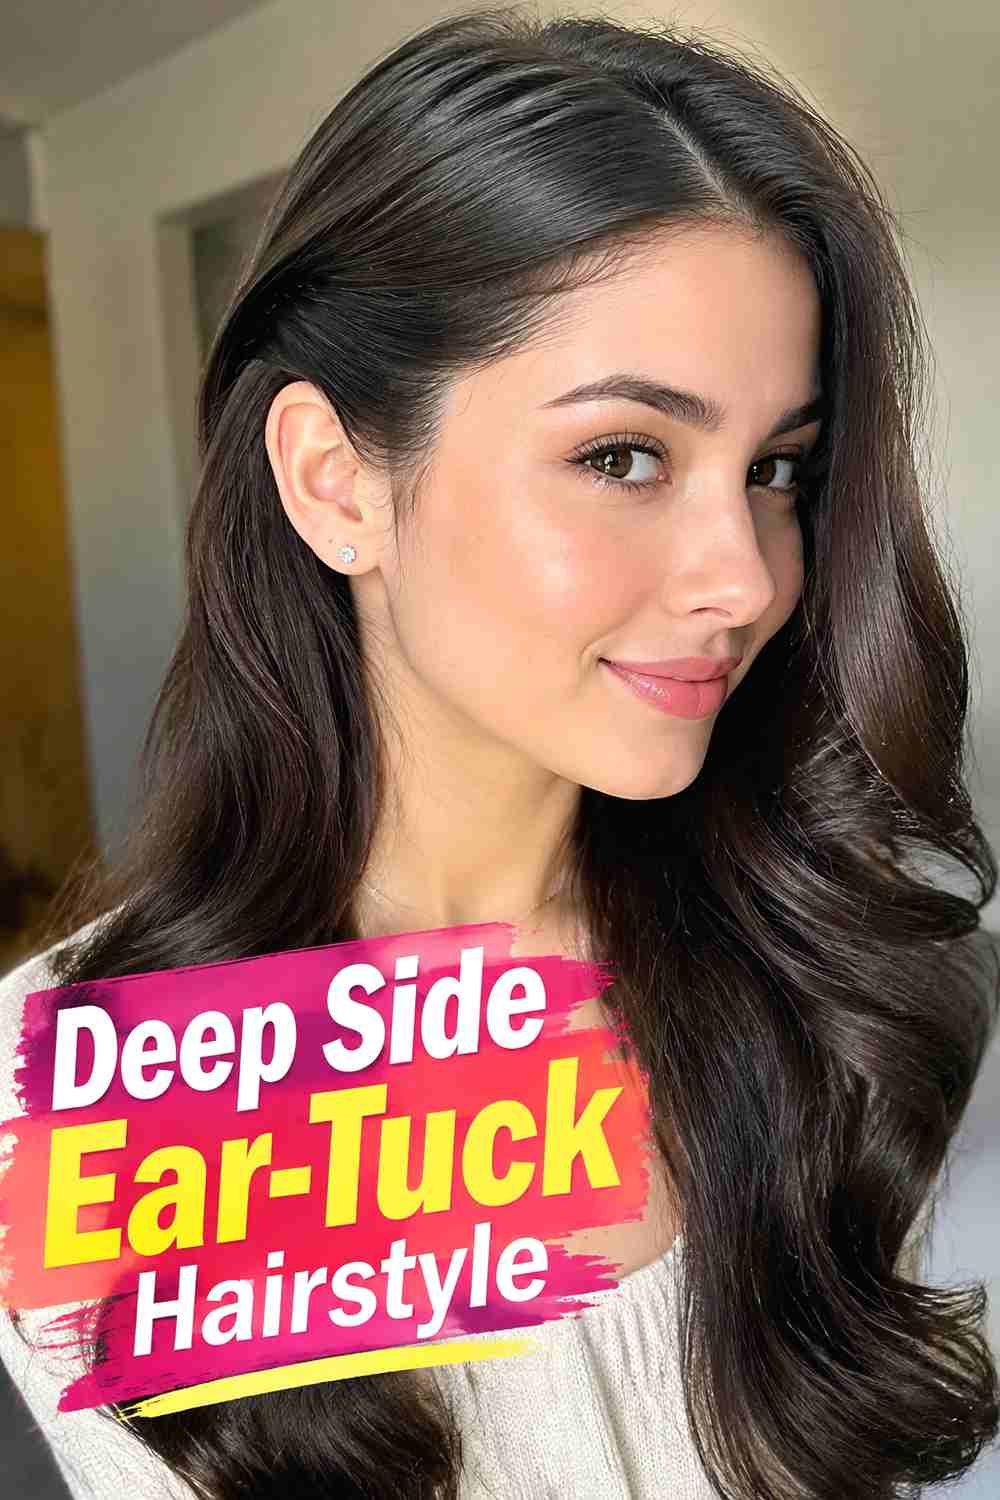
The Deep Side Ear-Tuck Hairstyle uses an off-center part to create a controlled, asymmetrical shape that works especially well with oversized outerwear. Sweep the fuller side naturally across the forehead while tucking the lighter side securely behind the ear. This keeps one side of the face open and reduces the amount of hair blowing across your eyes on a breezy sidewalk. Straight and softly wavy hair show the sleek contrast most clearly, but the idea can also work with textured lengths. Let the ends remain loose over or inside the coat depending on your collar. A touch of flexible styling cream near the tucked side can help shorter pieces stay in position.
Best For
This look is especially practical for bob through long lengths when you want quick control without tying up all of your hair.
Styling Notes
Keep the tucked side smooth and compact, but avoid flattening the fuller side so completely that the style loses its natural movement.
2. Double Ear Tuck Sleek Hairstyle
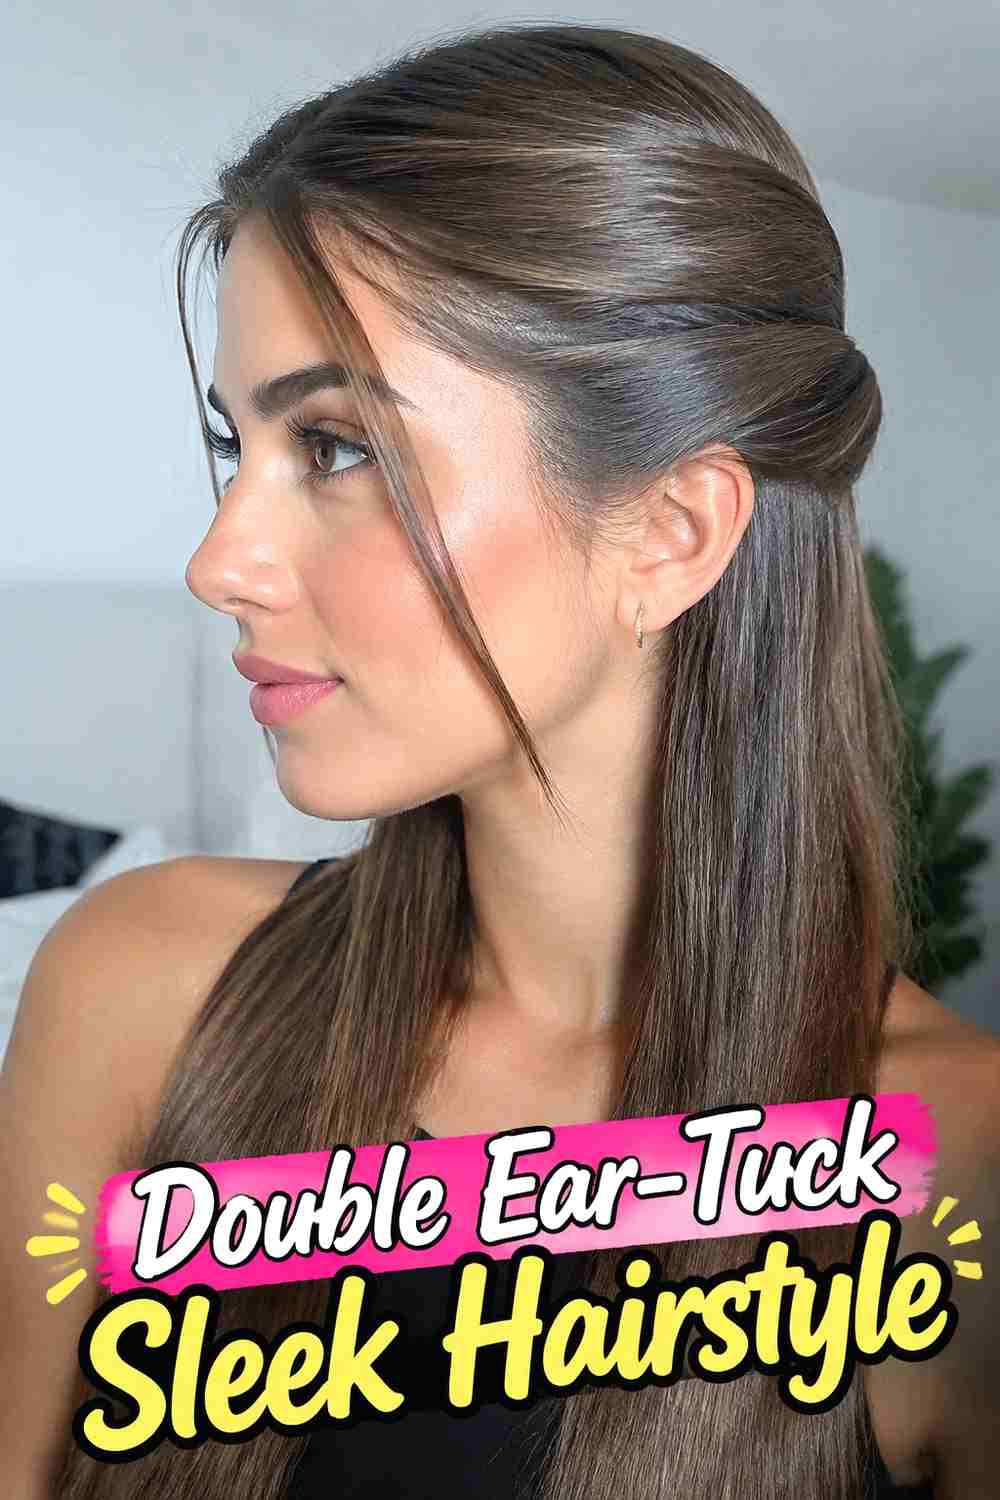
The Double Ear-Tuck Sleek Hairstyle creates a clean frame by tucking both front sections behind the ears. A center or softly off-center part keeps the look balanced, while the exposed sides of the face make bulky coat collars feel less visually crowded. This approach works beautifully with straight hair, smooth blowouts, and softly bent ends. It is also one of the fastest ways to keep front pieces controlled when the wind is coming from different directions. Hair that slips forward easily can be reinforced with discreet pins placed behind the ears. Keep the lengths relaxed rather than overly stiff so they can move naturally over the shoulders without making the hairstyle look overly formal.
Why It Works
Both temple sections are removed from the face, giving wind fewer loose front strands to catch.
Wear & Maintenance
After taking off a scarf or coat, run your fingers through the lower lengths while leaving the tucked sections intact.
3. Low Side Part Tuck Hairstyle
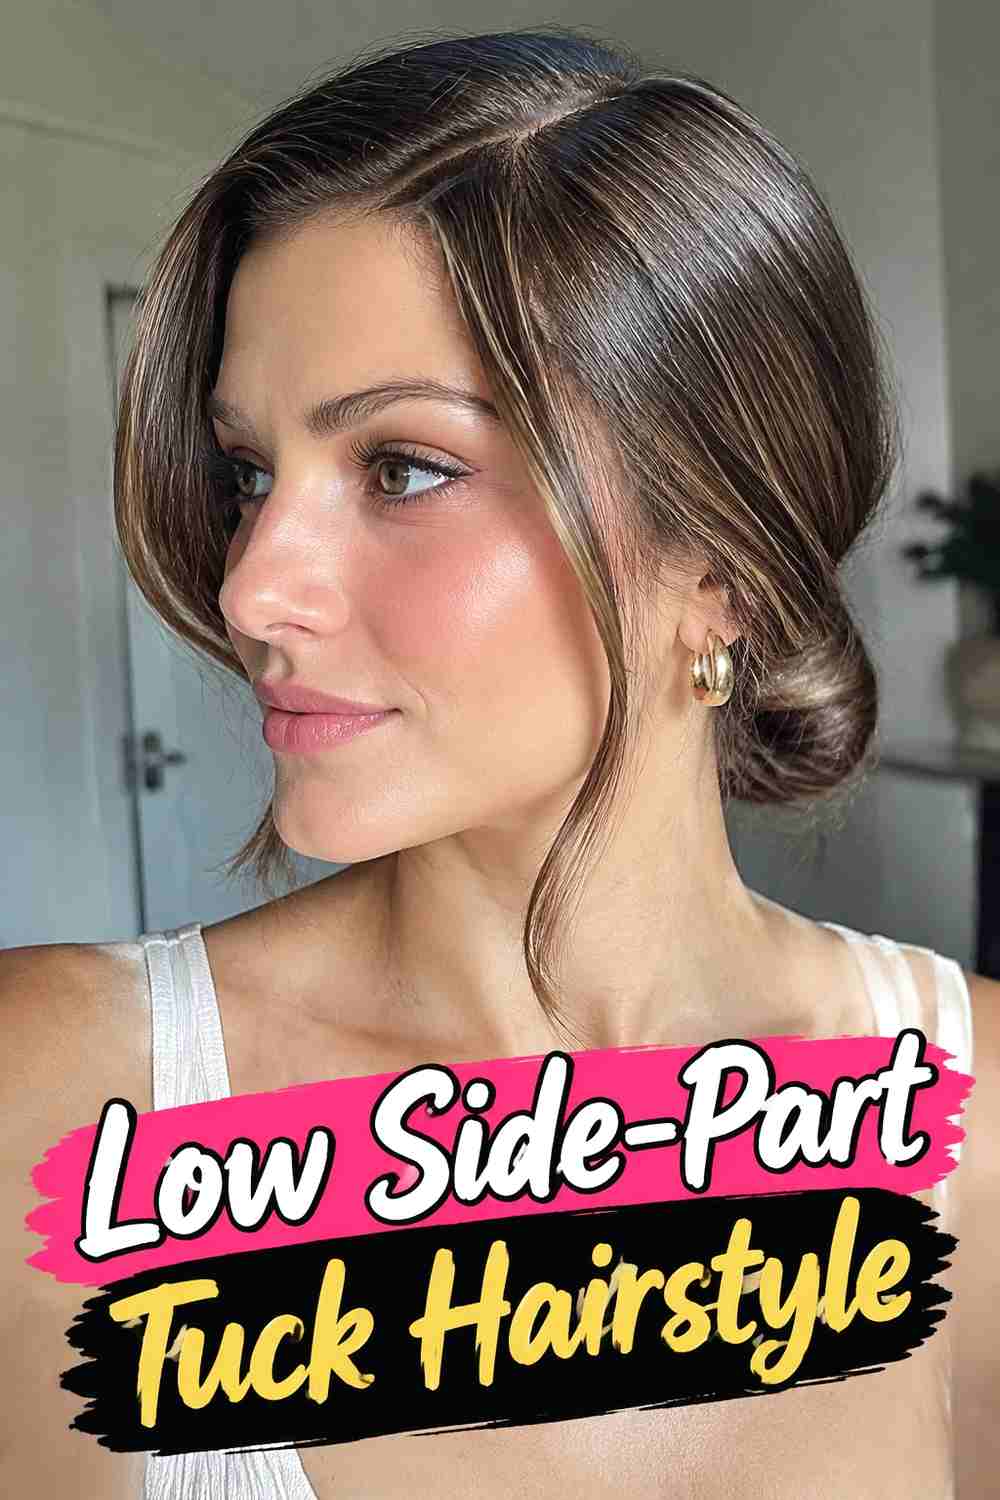
The Low Side-Part Tuck Hairstyle combines a subtle side part with a smooth tuck that sits close to the head. Instead of building crown volume, let the hair follow its natural fall and guide the smaller section behind the ear. The result looks polished but remains low-profile enough for a high coat collar or winter scarf. Medium-length and long hair can keep the ends loose, while shorter cuts benefit from the clean definition around the cheek and jaw. If the sidewalk is especially windy, a hidden bobby pin behind the ear provides extra insurance without changing the visible silhouette. A light finishing cream can also reduce flyaways while preserving natural strand movement.
Best For
Choose this style when you prefer understated, wearable hair that complements rather than competes with a large coat silhouette.
4. Soft Wave Ear Tuck Hairstyle

The Soft Wave Ear-Tuck Hairstyle balances controlled front sections with loose movement through the lengths. Create gentle waves or work with your natural bend, then tuck one side behind the ear while allowing the opposite side to fall softly around the face. This gives oversized coats a relaxed, feminine finish without leaving every strand vulnerable to wind. The tuck also helps reveal earrings or the neckline when a large collar would otherwise dominate the look. Shoulder-length and longer hair provide enough space for the wave pattern to remain visible below the tuck. Keep the texture soft rather than highly curled, since flexible movement is easier to refresh after wearing a coat or scarf.
Styling Notes
Shape the waves first and tuck afterward so you do not disturb the finished bend around the temple.
Pro Tip
Use a discreet pin behind the ear if your hair is silky or freshly washed and tends to slide forward.
5. Pin Secured Side Tuck Hairstyle
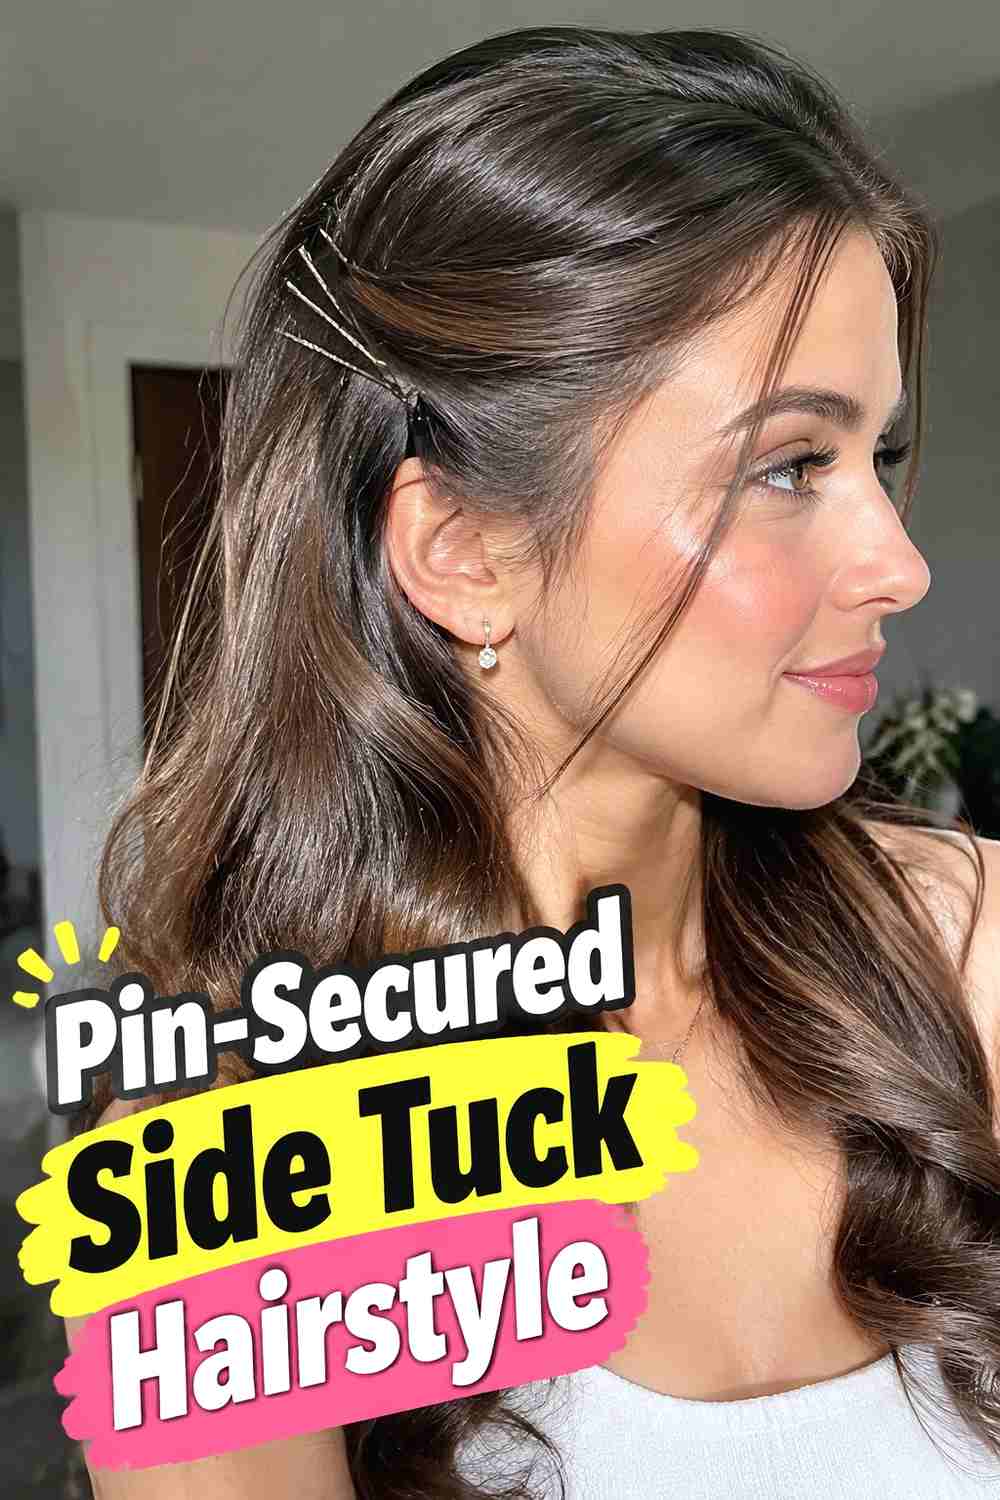
The Pin-Secured Side Tuck Hairstyle is designed for days when a simple ear tuck needs more staying power. Sweep the temple section backward, tuck it neatly behind the ear, and add one or two slim bobby pins close to the scalp. The pins can remain almost invisible, giving the hairstyle a natural appearance while helping it stay controlled in repeated gusts. This technique suits straight, wavy, curly, and coily textures because the section size can be adjusted to match density. Leave the rest of the hair loose for contrast, or guide longer lengths toward the opposite shoulder. Keeping the hardware small also prevents unnecessary bulk around coat collars and scarves.
Wear & Maintenance
Cross two pins for extra grip if one tends to slide. Place them where they will not rub against the arm of glasses.
6. Scarf Friendly Nape Tuck Hairstyle
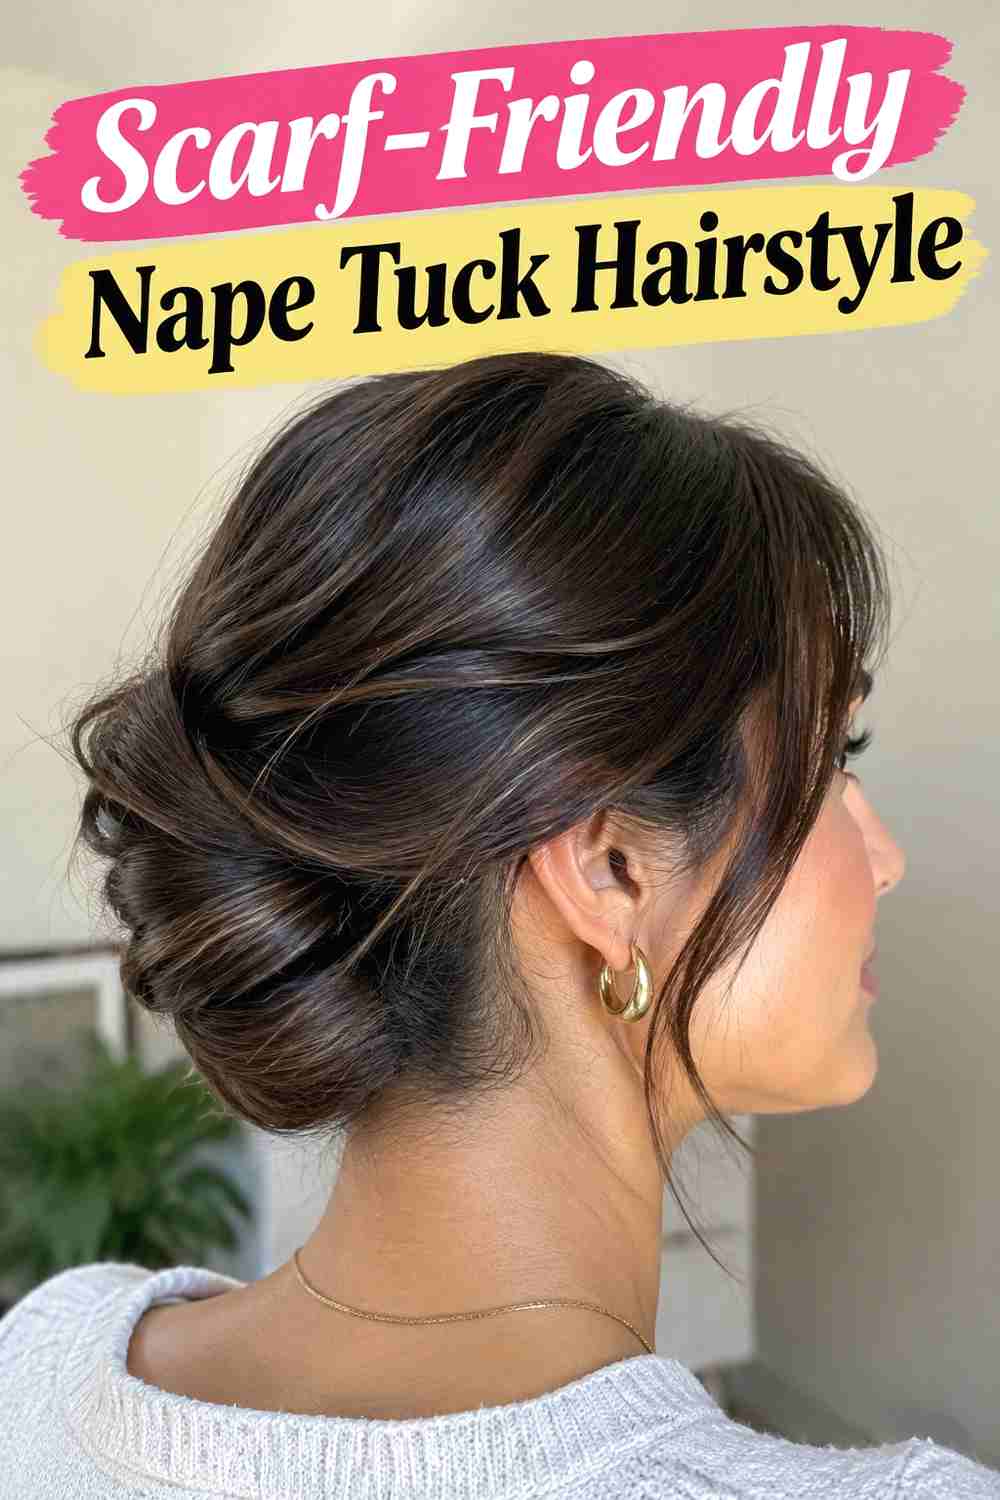
The Scarf-Friendly Nape Tuck Hairstyle moves the loose ends away from the front while keeping the crown uncomplicated. Gather the lengths toward the back, roll or fold a small amount inward near the nape, and secure only what is necessary with discreet pins. The result is flatter than a full bun and less likely to compete with a thick scarf or oversized coat collar. It is particularly useful for medium-length hair that constantly catches between layers. Keep the tuck soft rather than tightly rolled so it remains comfortable when you turn your head. A few natural strands can remain loose near the ears, but windy days may call for smoothing them back into the overall shape.
Best For
This works well for shoulder-length to medium-long hair when loose ends feel cumbersome inside winter layers.
Pro Tip
Put your scarf on after styling and check the tuck from the back to ensure the fabric is not pushing the pins upward.
7. Behind The Ear Bob Tuck Hairstyle
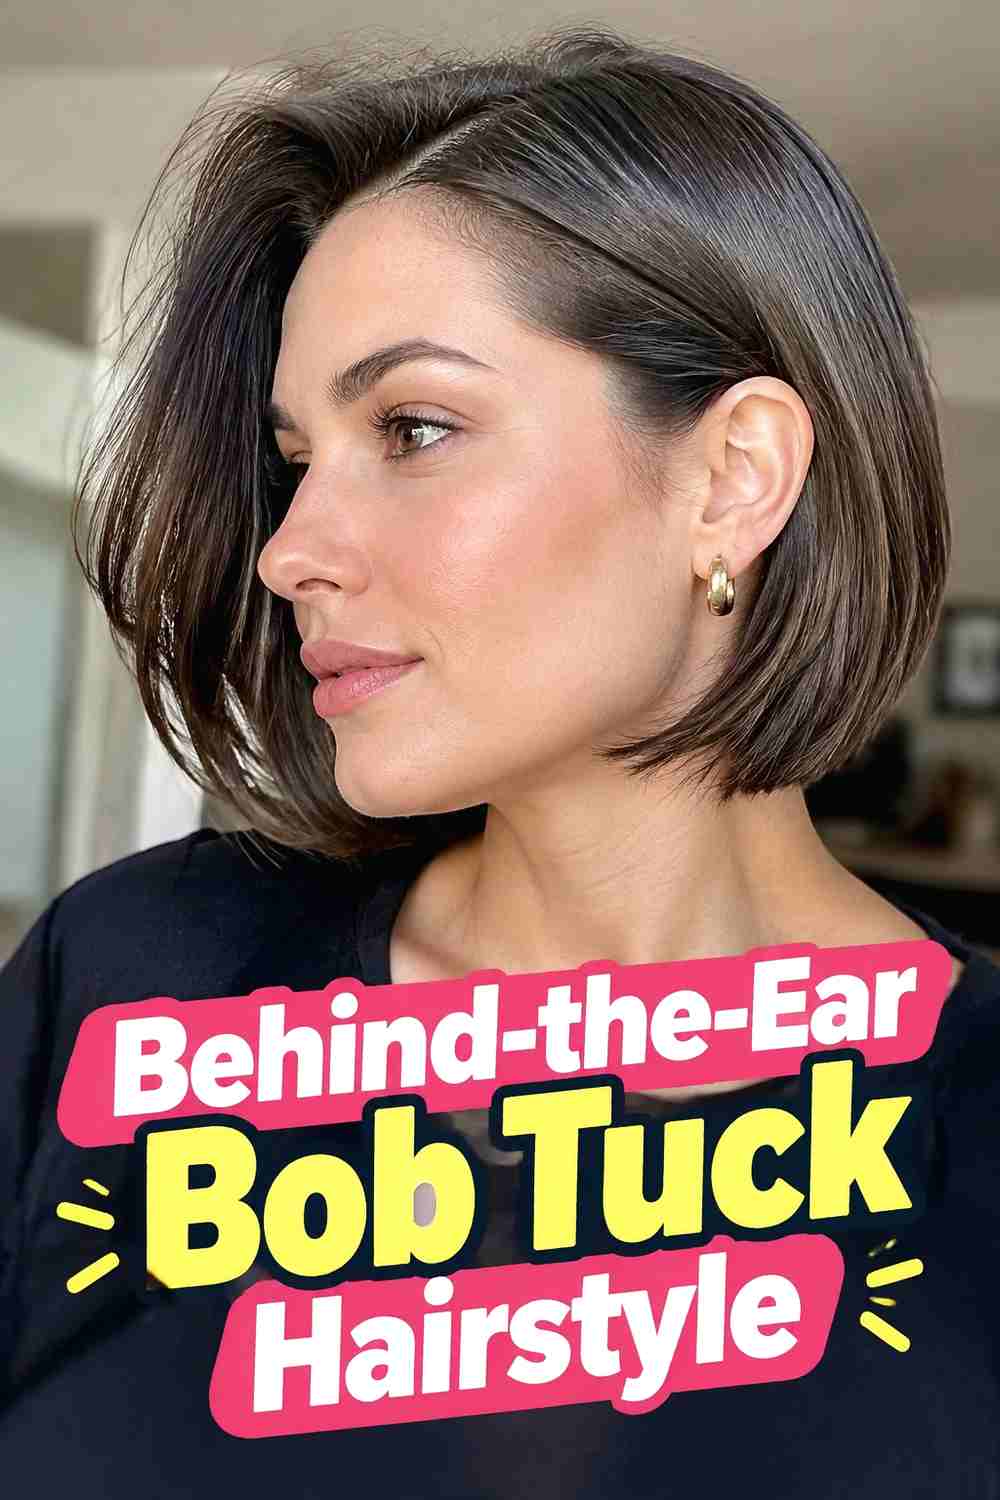
The Behind-the-Ear Bob Tuck Hairstyle makes excellent use of a bob’s naturally compact length. Smooth one or both front panels behind the ears while allowing the ends to sit cleanly around the jaw or neck. The exposed temple area keeps the cut looking intentional even when an oversized coat creates substantial volume around the shoulders. A blunt bob appears crisp with this treatment, while a layered bob gains a softer, slightly undone effect. Wind can easily push shorter pieces forward, so a pea-sized amount of lightweight cream around the temple may improve control. Avoid using too much product through the ends, where natural swing helps the haircut retain its shape.
Why It Works
The hairstyle removes the most wind-prone front pieces while preserving the bob’s original silhouette and movement.
8. Curly Side Tuck Hairstyle
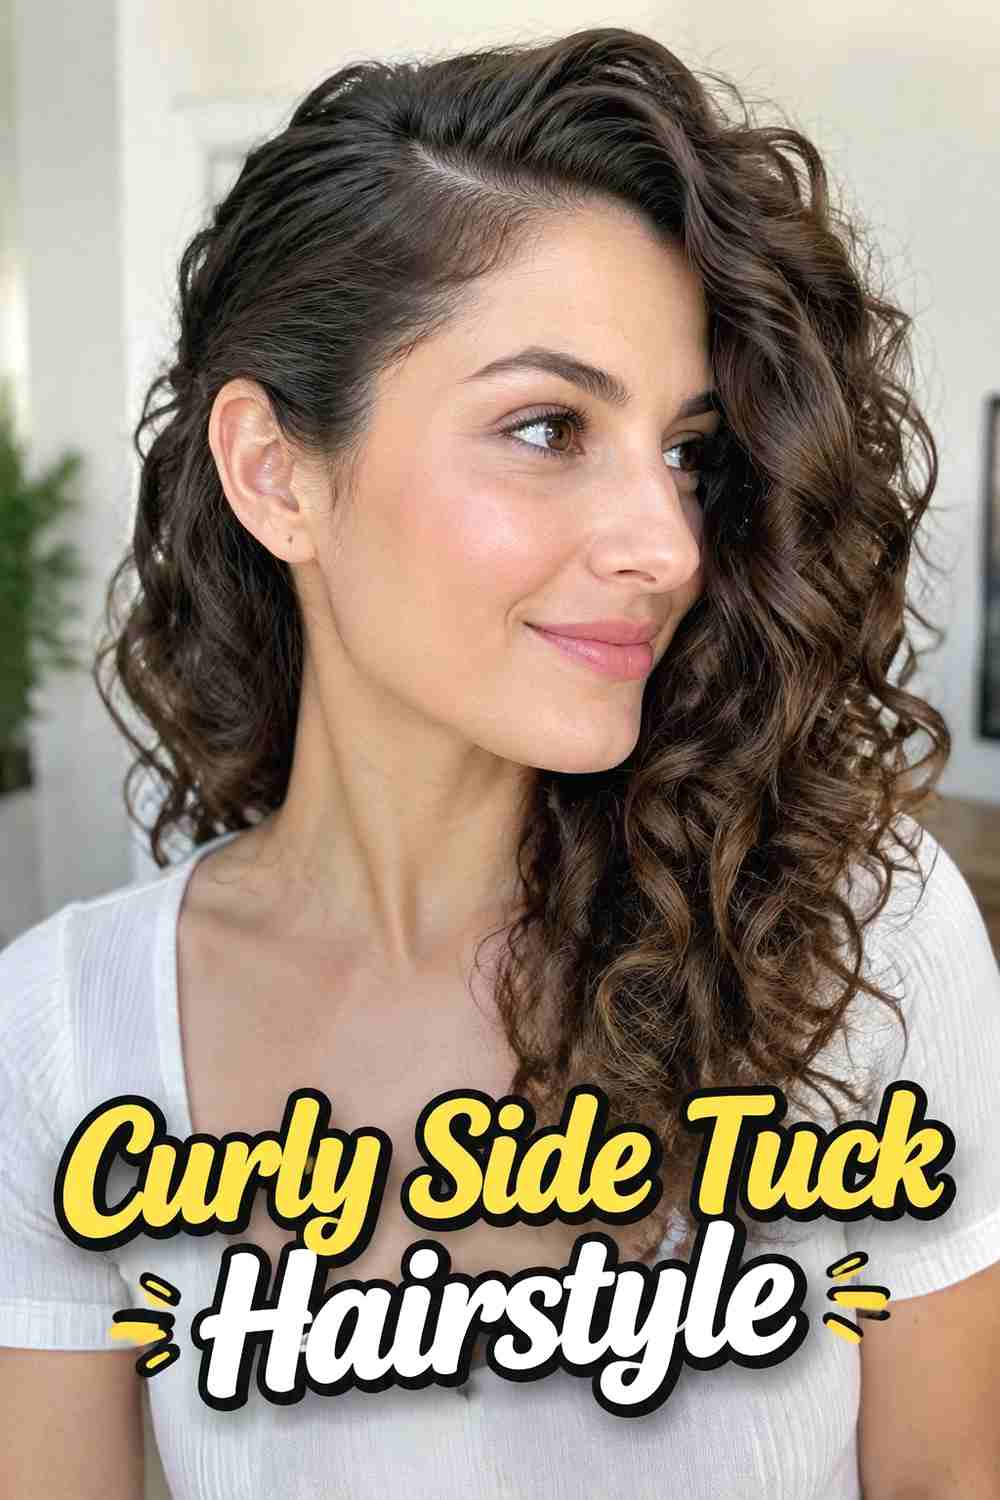
The Curly Side Tuck Hairstyle keeps natural texture visible instead of flattening it beneath a heavily controlled finish. Select a modest section near one temple, guide it behind the ear, and secure it only if your curl pattern needs extra support. Leave the remaining curls free so their shape and volume can balance the oversized proportions of the coat. The asymmetry gives the hairstyle definition while opening one side of the face. This method can suit loose curls, spirals, and tighter coils; the main adjustment is how much hair you gather into the tuck. Handle the curls gently so the front section remains controlled without stretching or disrupting the surrounding pattern unnecessarily.
Hair Type & Length
This approach is especially adaptable to curly and coily hair from short to long lengths, provided the side section comfortably reaches the ear.
Wear & Maintenance
Refresh any compressed curls with your fingers after removing a scarf rather than brushing through the texture.
9. Twisted Temple Tuck Hairstyle
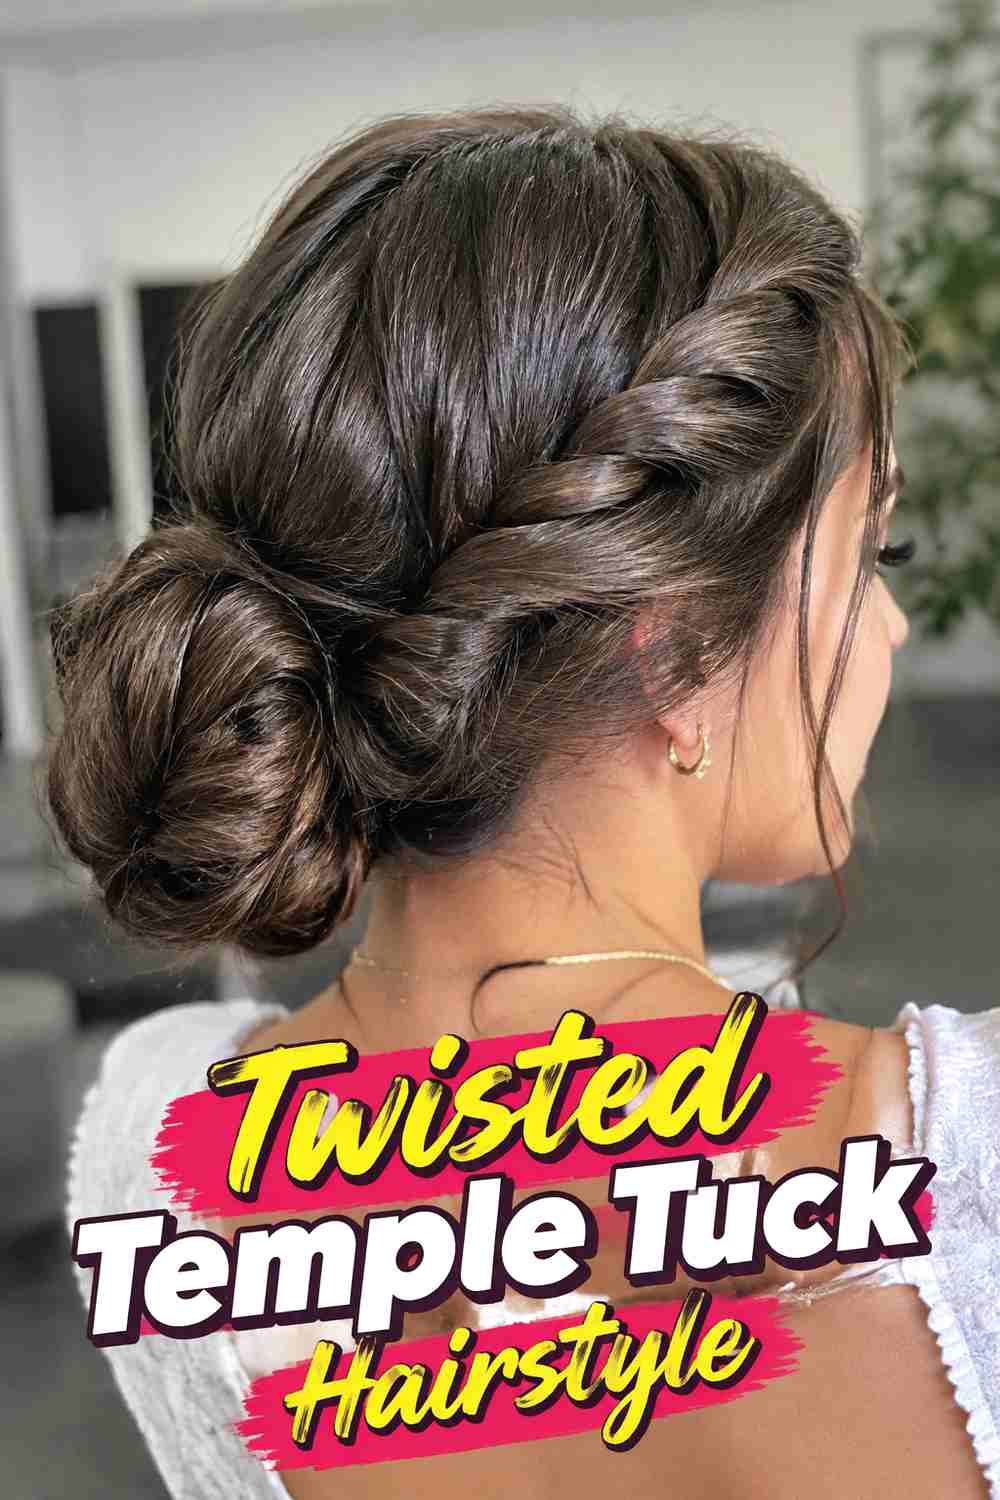
The Twisted Temple Tuck Hairstyle adds a small structural detail before the hair disappears behind the ear. Take a narrow section at the temple, twist it backward two or three times, and tuck the end behind the ear. A hidden pin can hold the twist if the wind is strong or the hair is slippery. The technique controls shorter face-framing layers more effectively than simply sweeping them back, yet it remains flatter than a braid or decorative clip. Medium and long hair can leave the remaining lengths completely loose, while shorter cuts gain a subtle focal point at the side. The twist also looks particularly dimensional on highlighted or naturally multi-tonal hair.
Styling Notes
Keep the twist close to the scalp so it feels secure and does not create unnecessary bulk beneath hats, scarves, or raised coat collars.
10. Low Half Up Tuck Hairstyle
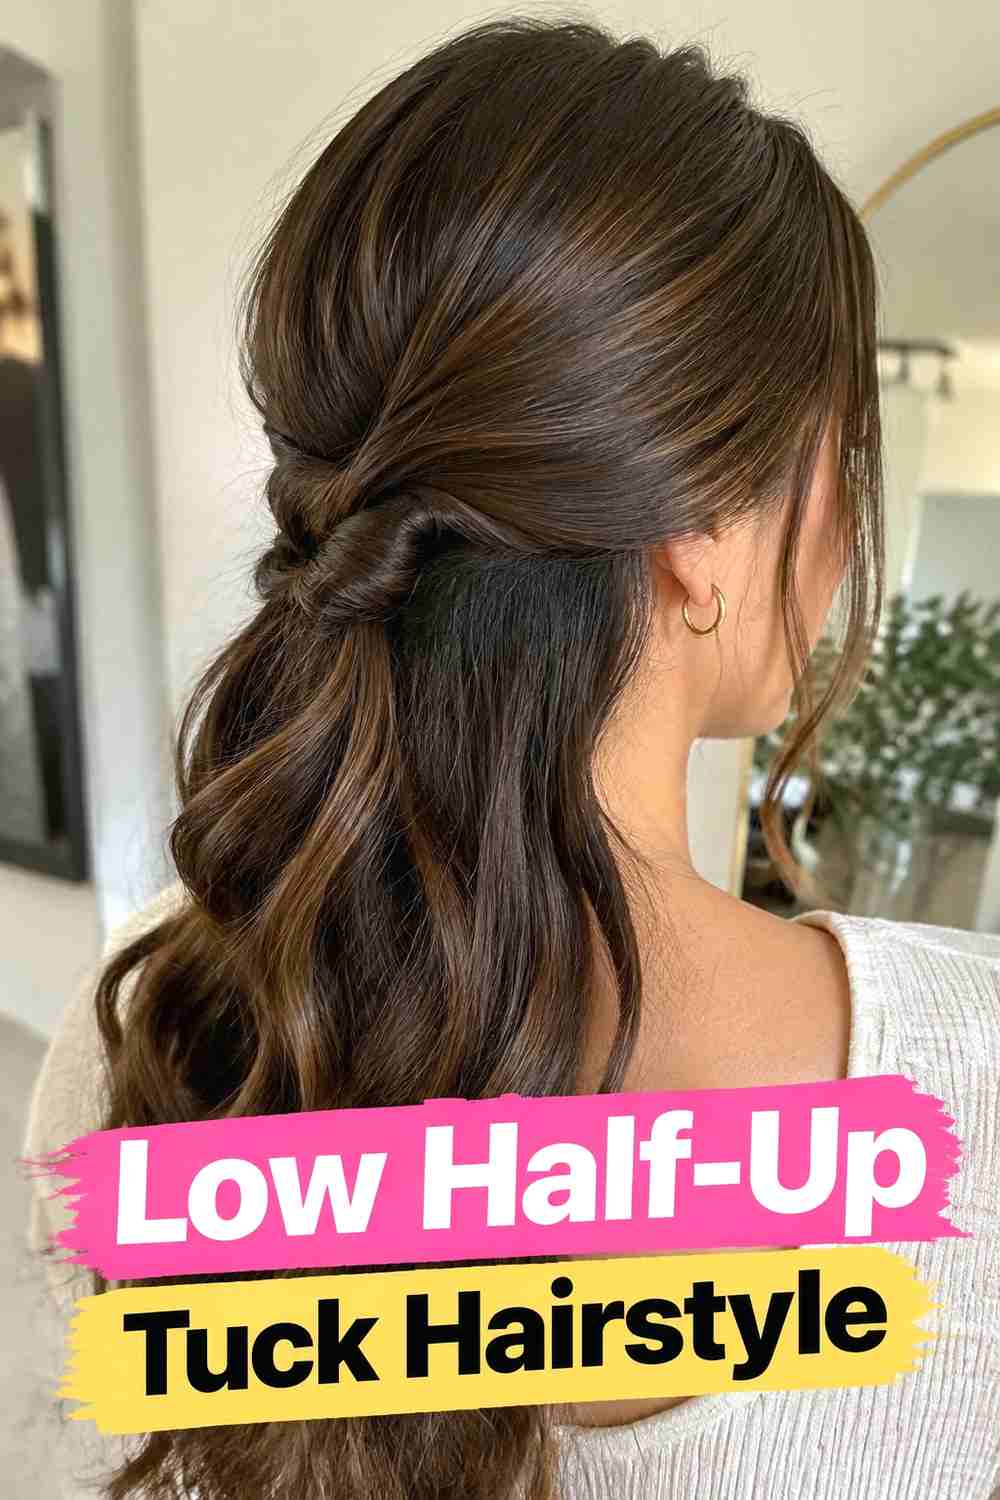
The Low Half-Up Tuck Hairstyle gathers both side sections toward the back without lifting them high onto the crown. Sweep hair from around the temples, join it near the lower back of the head, and secure it with a slim elastic or crossed pins. Tuck any shorter front pieces behind the ears before fastening for extra wind control. The low placement keeps the top relatively smooth while still allowing most of the length to remain visible over an oversized coat. Straight hair creates a streamlined finish, while waves and curls give the loose lower section more body. This is a useful middle option when basic ear tucks feel too loose but a full ponytail feels unnecessary.
Best For
Medium to long hair benefits most from this style, especially on days when you want moderate hold with plenty of movement.
11. Collarbone Length Side Tuck Hairstyle

The Collarbone-Length Side Tuck Hairstyle is tailored to that in-between length that often catches on lapels and coat collars. Create a natural side part, tuck the lighter section firmly behind the ear, and direct the remaining hair slightly forward over the opposite shoulder. This arrangement keeps one side controlled while preventing both ends from repeatedly disappearing inside the coat. A smooth finish emphasizes the clean shape, but gentle natural texture can make the look feel more casual. Because collarbone-length hair is light enough to move easily in wind, a hidden pin behind the ear may be useful. Keep the ends flexible so they can shift naturally as you walk.
Why It Works
The asymmetric placement reduces friction around the collar while keeping most of the hair visible instead of trapped inside the coat.
12. Center Part Double Tuck Hairstyle
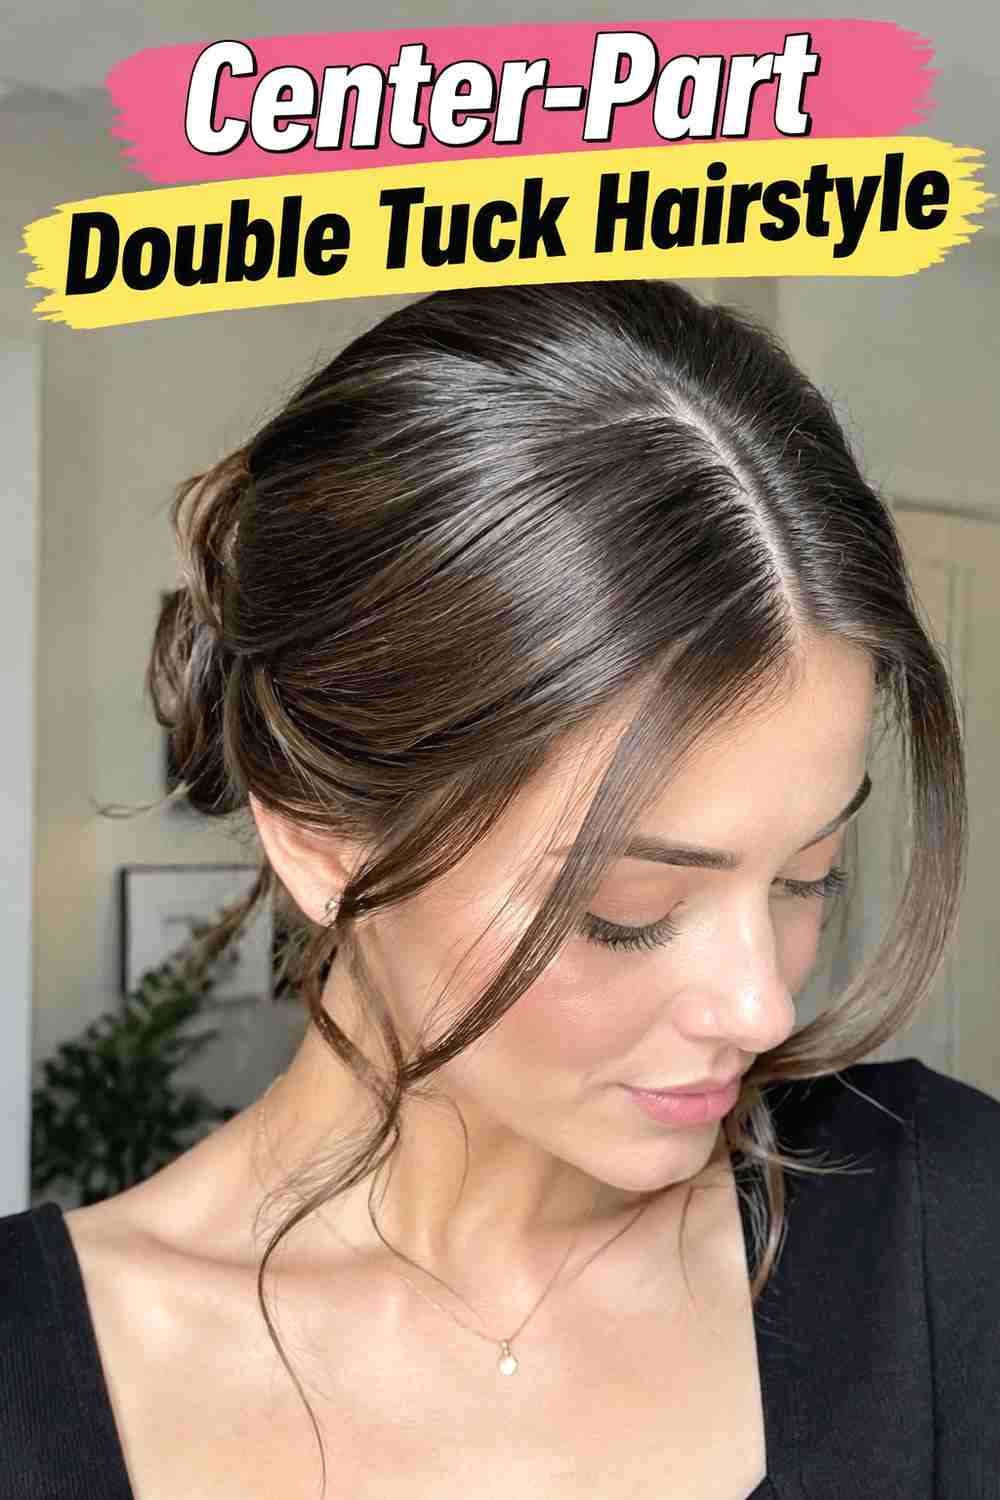
The Center-Part Double Tuck Hairstyle creates symmetry by dividing the hair evenly and guiding both front sections behind the ears. The clean middle part gives the look a modern, simple structure that pairs naturally with broad lapels and oversized coat shapes. Straight hair emphasizes the precision, while waves or loose curls soften the overall effect. If the front sections are layered, use small hidden pins just behind each ear to stop them from blowing forward. The rest of the hair can remain down the back or be divided over both shoulders. Avoid excessive crown volume; keeping the top close to its natural shape makes the hairstyle easier to reset after scarves or hoods have been worn.
Best For
This is a strong everyday option for anyone who wants equal control on both sides of the face without committing to a ponytail or updo.
13. Textured Pixie Ear Tuck Hairstyle
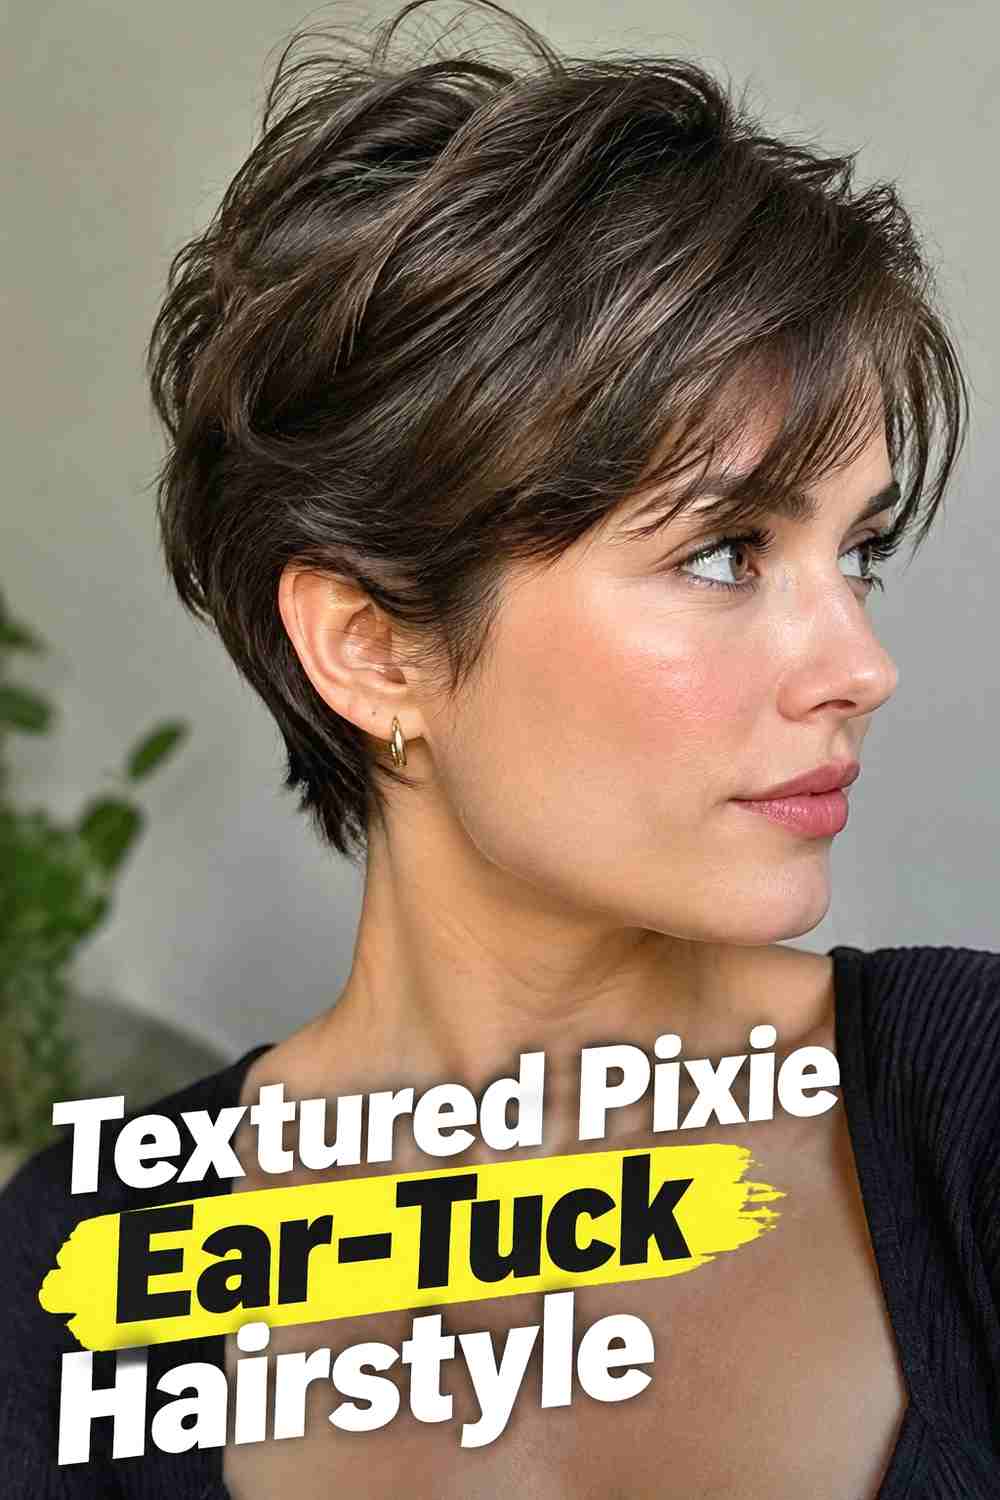
The Textured Pixie Ear-Tuck Hairstyle proves that wind-friendly tucking is not limited to longer hair. Work a small amount of lightweight styling product through the top to define natural separation, then direct the side section neatly behind one ear. Leave the upper layers slightly textured so the cut maintains shape instead of looking pressed flat. The exposed ear creates a clean contrast with a bulky oversized coat, while the compact length prevents hair from tangling around the collar. A longer pixie fringe can stay softly swept to one side or be partially tucked depending on the wind. Use flexible hold so the hairstyle can be reshaped easily with your fingers once you arrive indoors.
Styling Notes
Focus product on the sides and ends rather than coating the entire haircut. This preserves movement and realistic strand definition.
14. Braided Side Tuck Hairstyle
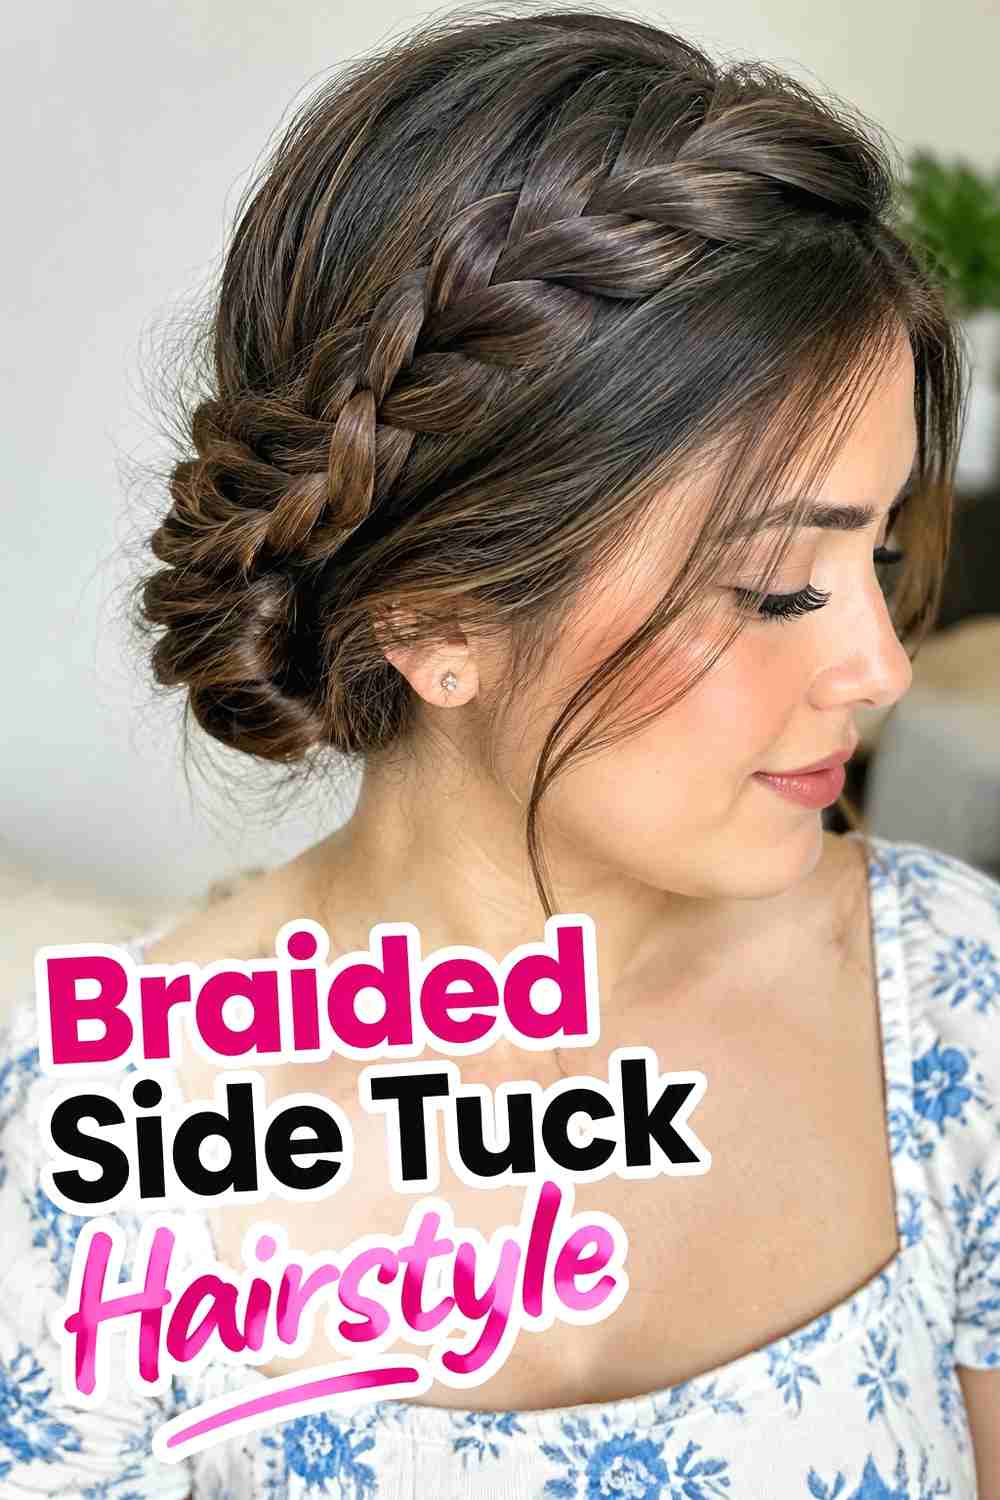
The Braided Side Tuck Hairstyle turns a small temple braid into a practical anchor for windy weather. Take a narrow section near the hairline, create a compact three-strand braid, and guide it backward behind the ear. Secure the end with a discreet pin beneath the loose hair so the fastening point stays hidden. The braid contains shorter pieces that may escape from a regular tuck while adding visible texture without much bulk. It works especially well on medium and long hair, though a short side braid can also complement lob-length cuts. Keep the braid reasonably snug if you expect strong gusts, but avoid pulling tightly around the hairline just for extra hold.
Why It Works
Braiding groups smaller strands together, making the tucked section less likely to separate and blow across the face.
Pro Tip
Start with a small amount of texture product if fine hair tends to slip while you braid.
15. Low Ponytail Ear Tuck Hairstyle
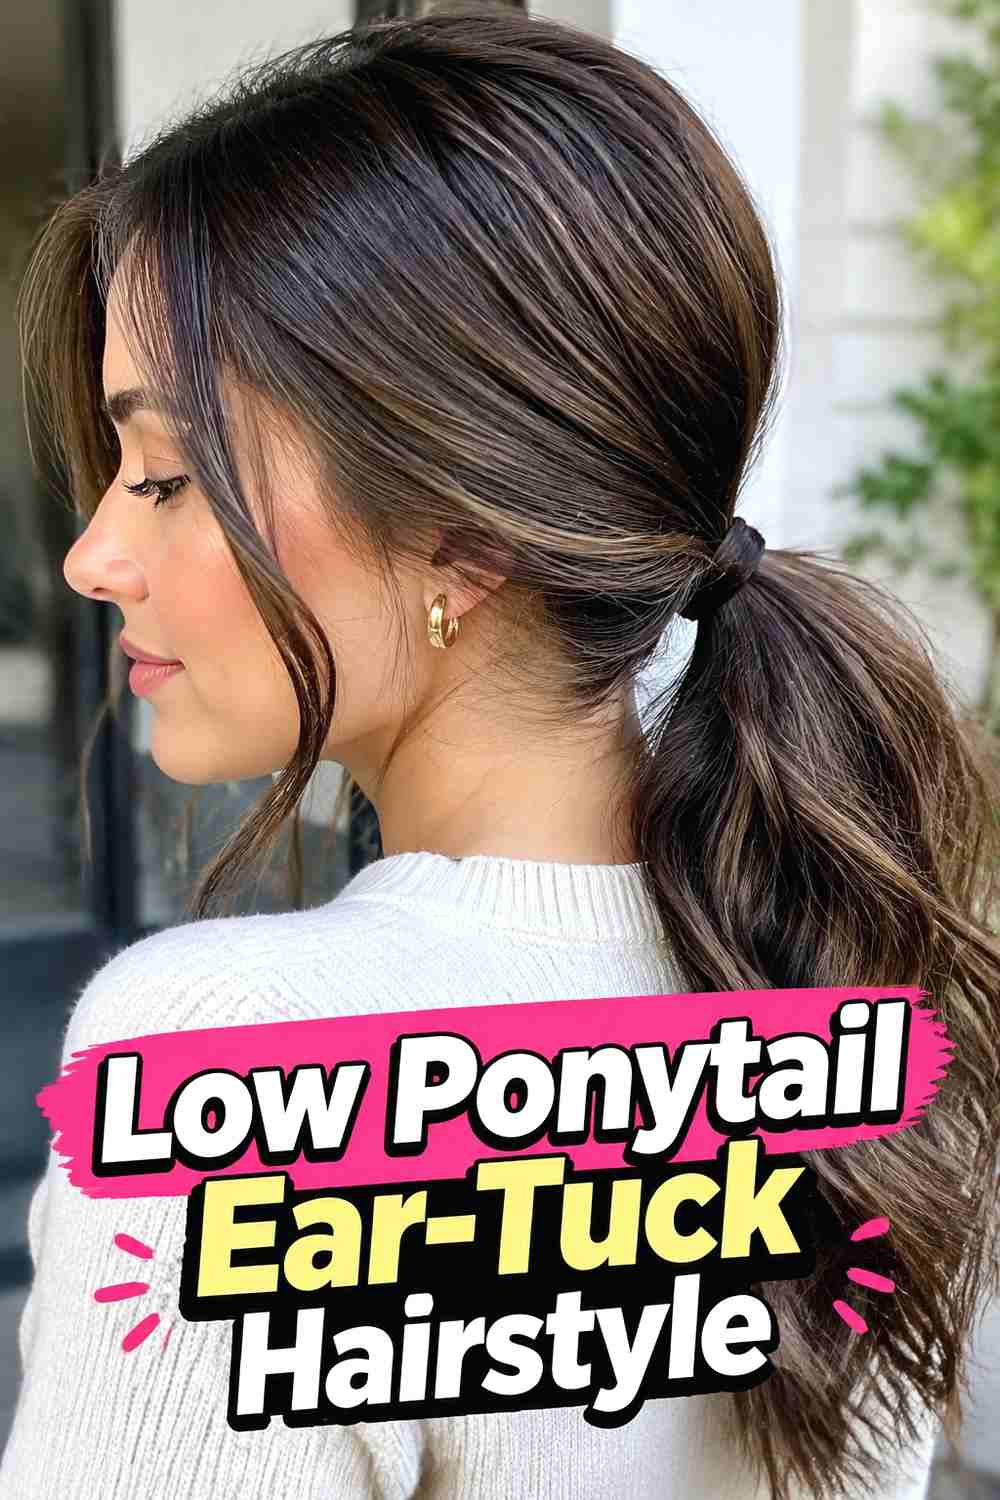
The Low Ponytail Ear-Tuck Hairstyle offers the most contained option in the collection. Tuck both temple sections behind the ears, gather all of the hair at the nape, and secure it with a soft elastic. The result keeps hair away from the face and prevents the lengths from whipping across an oversized coat on especially blustery sidewalks. Low placement also avoids unnecessary volume around the crown while allowing the ponytail to sit naturally beneath or outside the coat collar. Straight, wavy, curly, and coily textures can all use this structure, with the ponytail’s finish reflecting the natural hair pattern. Keep the elastic secure but comfortable so the style remains easy to wear for several hours.
Best For
Choose this look for commuting, long walks, or especially windy days when loose hair becomes difficult to manage.
Wear & Maintenance
If the ponytail develops friction from the coat, smooth the lengths with your hands rather than repeatedly tightening the elastic.
How to Choose the Right Look
Start with how windy the day actually is. A simple Deep Side Ear-Tuck Hairstyle or Soft Wave Ear-Tuck Hairstyle may be enough for a mild breeze, while exposed sidewalks and stronger gusts call for pins, braids, a half-up fastening point, or a low ponytail. Hair length also affects the best choice. Bobs and pixies can use the ears as natural anchors without much additional hardware. Collarbone-length hair benefits from asymmetric placement because the ends often collide with coat collars. Long hair may be easier to manage when one tuck is combined with a low half-up style or ponytail. Texture should guide how firmly you secure the hair. Silky straight strands may need hidden pins, while textured, curly, or coily hair can often gain natural grip from its pattern. Consider your coat, too: large lapels and scarves favor flat side tucks and low fastening points. Whatever style you choose, prioritize comfort, flexible hold, and an easy refresh once you step indoors.
Final Thoughts
Windy-sidewalk hair does not need to mean a tight updo. Strategic tucks can keep the face clear while letting your length and texture remain part of the outfit. Start with a simple ear tuck for everyday wear, then add pins, twists, braids, or a low tie whenever the weather demands more hold.
FAQs
1. How do I keep an ear tuck from coming loose in the wind?
Add one discreet bobby pin behind the ear or lightly prep the section with texture spray. Both options provide extra grip without changing the visible style.
2. Which hair tuck works best with a large coat collar?
A flat side tuck, low half-up tuck, or low ponytail keeps most of the structure away from the collar and reduces bulky contact points.
3. Can curly hair be worn in a tucked hairstyle?
Yes. Tucking only a small temple section allows curls or coils to remain visible while helping keep hair away from the face.
4. Are hair tucks suitable for short hair?
Yes. Bobs and pixie cuts are especially well suited to behind-the-ear tucks because their shorter lengths naturally create a compact silhouette.
5. Should I use hairspray for windy sidewalk hairstyles?
You can use a flexible-hold product if needed, but pins, braids, or low ties often provide more practical control without making the hair overly stiff. Save your favorite windy-day hair tucks for coat season, share the ideas with a friend, and explore more practical hairstyle inspiration for cold-weather outfits.