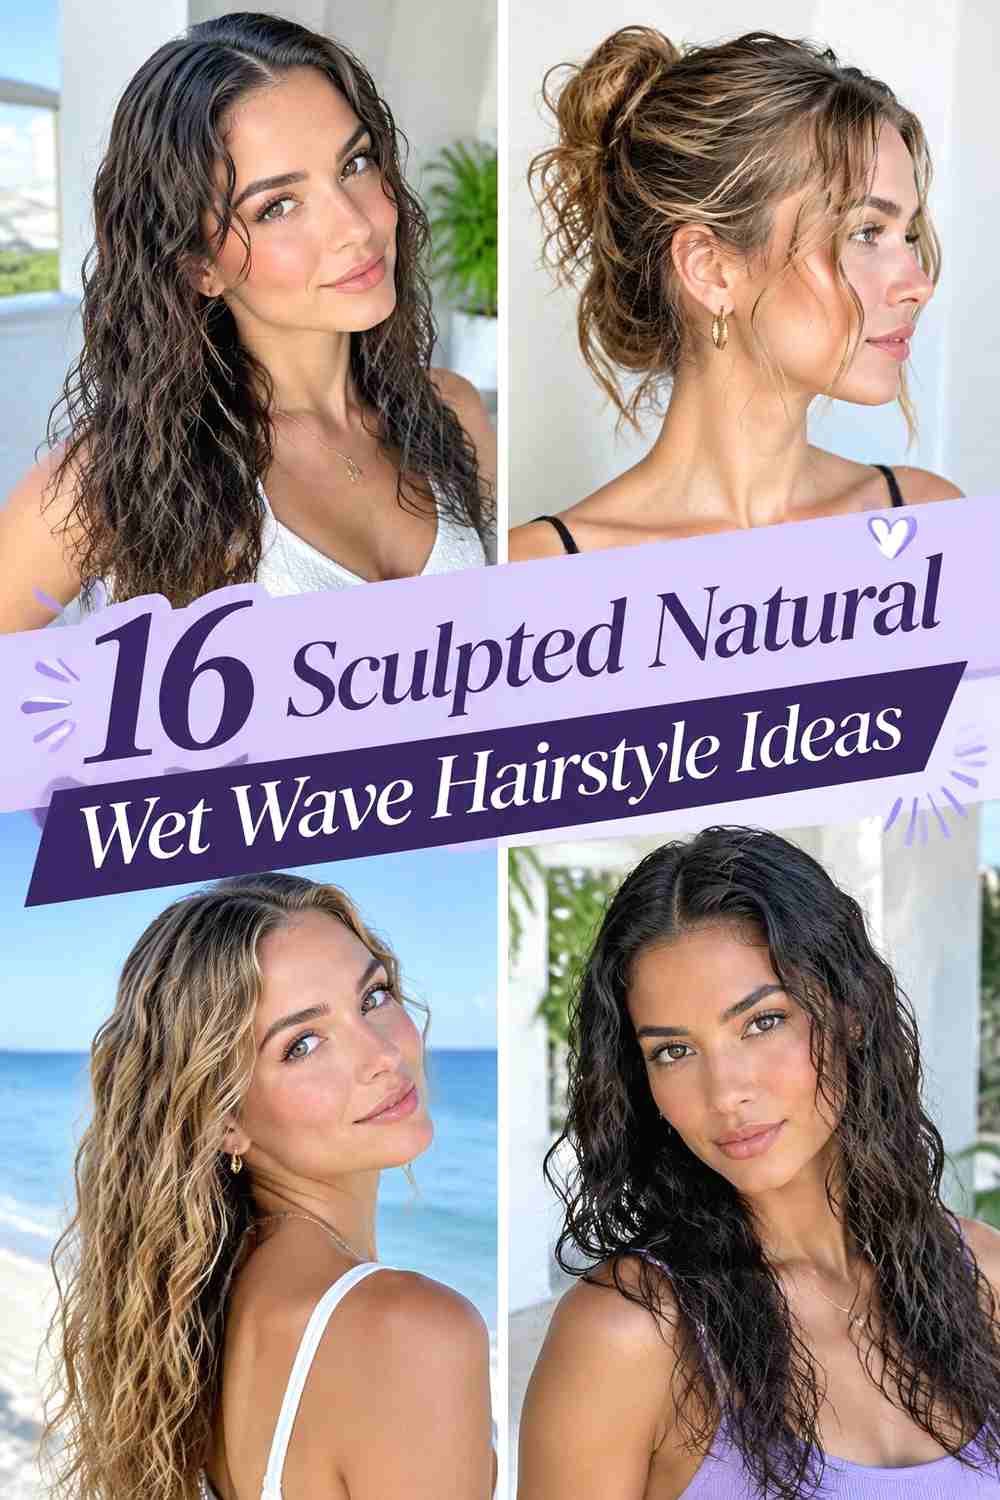
15 Sculpted Wet-Look Wave Hairstyles
Glossy, sculpted waves bring instant definition to everything from short pixies and sharp bobs to flowing lengths and polished evening updos.
Wet-look waves are less about making hair appear freshly soaked and more about creating controlled shine, visible separation, and deliberate wave patterns. Depending on the finish, the style can feel vintage and precise, sleek and editorial, or soft with a glossy, almost liquid movement.
When choosing a version, consider your length, natural texture, preferred amount of hold, and how structured you want the wave pattern to appear. Short hair can showcase carefully molded curves especially well, while medium and long lengths offer room for larger S-waves, brushed-back texture, and dramatic cascading shapes.
Quick List
- Classic Sculpted S Wave Hairstyle
- Deep Side Part Wet Wave Hairstyle
- Sculpted Finger Wave Bob Hairstyle
- Slicked Back Crown Wet Wave Hairstyle
- Center Part Glossy Wave Hairstyle
- Wet Look Pixie Wave Hairstyle
- Hollywood Wet Glam Wave Hairstyle
- Chin Length Wet Wave Bob Hairstyle
- Long Bob Sculpted Wet Wave Hairstyle
- Asymmetrical Wet Wave Hairstyle
- Brushed Back Wet Mermaid Wave Hairstyle
- Defined Curly Wet Wave Hairstyle
- Sculpted Side Tuck Wet Wave Hairstyle
- Wet Look Waterfall Wave Hairstyle
- Sculpted Wet Wave Updo Hairstyle
1. Classic Sculpted S Wave Hairstyle
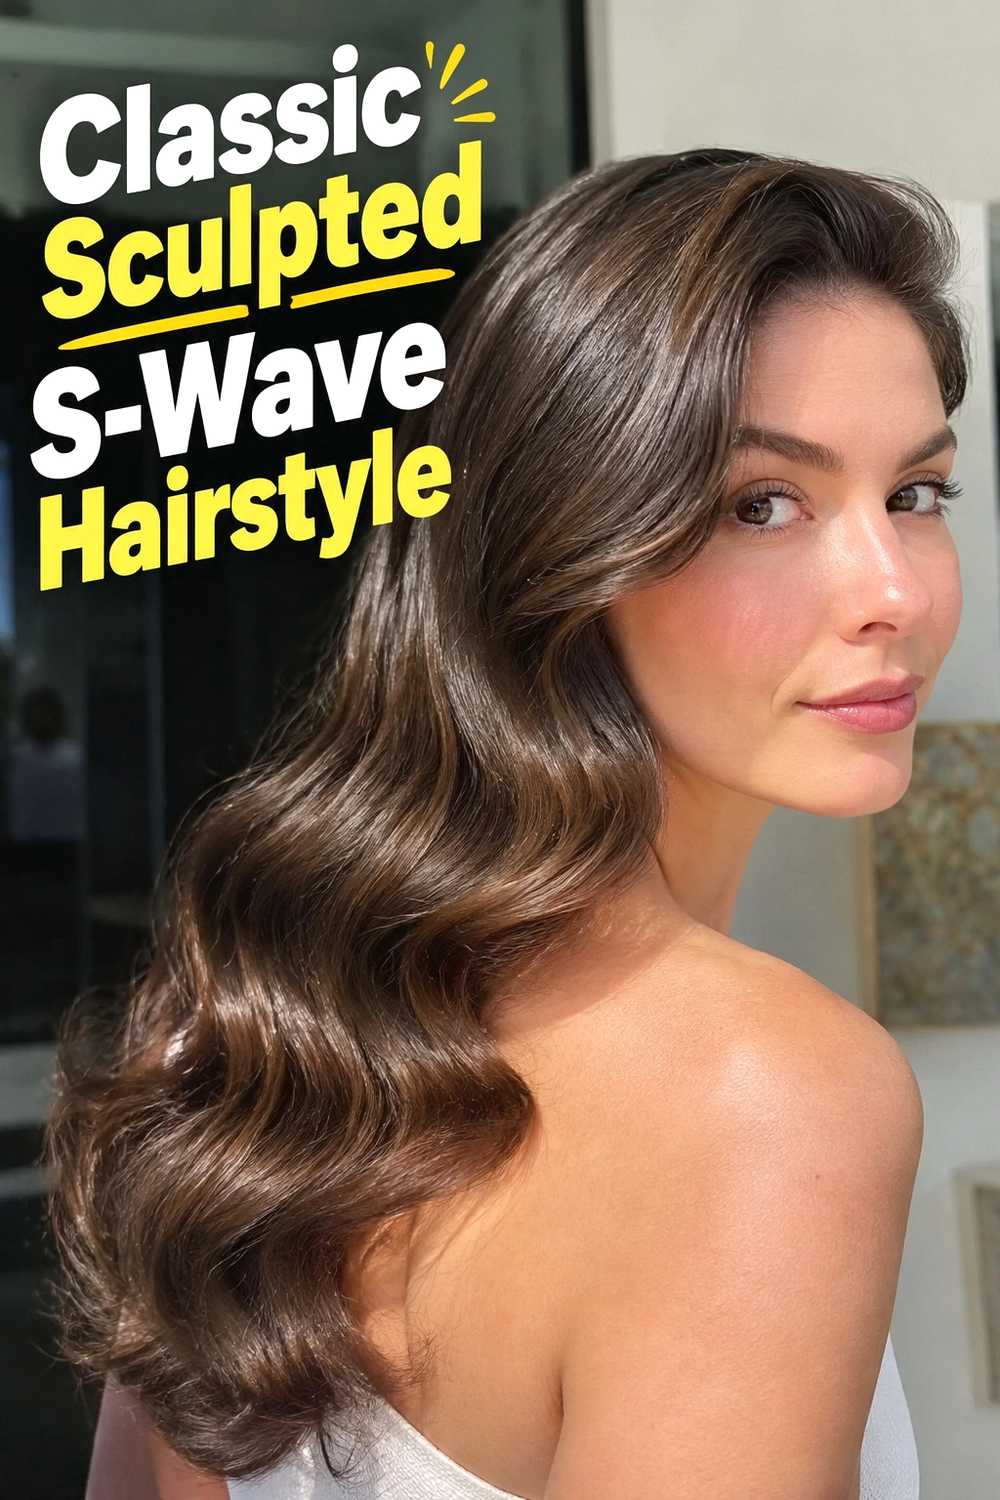
The Classic Sculpted S-Wave Hairstyle centers on smooth, continuous curves that move across the hair in a clearly defined S pattern. Rather than creating lots of separate curls, the hair is encouraged to flow as one connected shape, giving the finished look a polished, almost fluid appearance. A glossy styling product helps emphasize each ridge and valley without hiding the natural strand detail. This version can be adapted to short, medium, or longer hair, although the scale of the wave should change with the length. Keep the roots controlled and the bends deliberate, then soften the lower sections slightly if you want the style to feel more modern than strictly vintage.
Styling Notes
Work with damp rather than dripping-wet hair when molding the initial shape. A fine-tooth comb can help establish clean wave direction before the style sets.
Why It Works
The continuous S pattern creates visual rhythm, while the high-shine finish makes each curve more noticeable without requiring added volume.
2. Deep Side Part Wet Wave Hairstyle
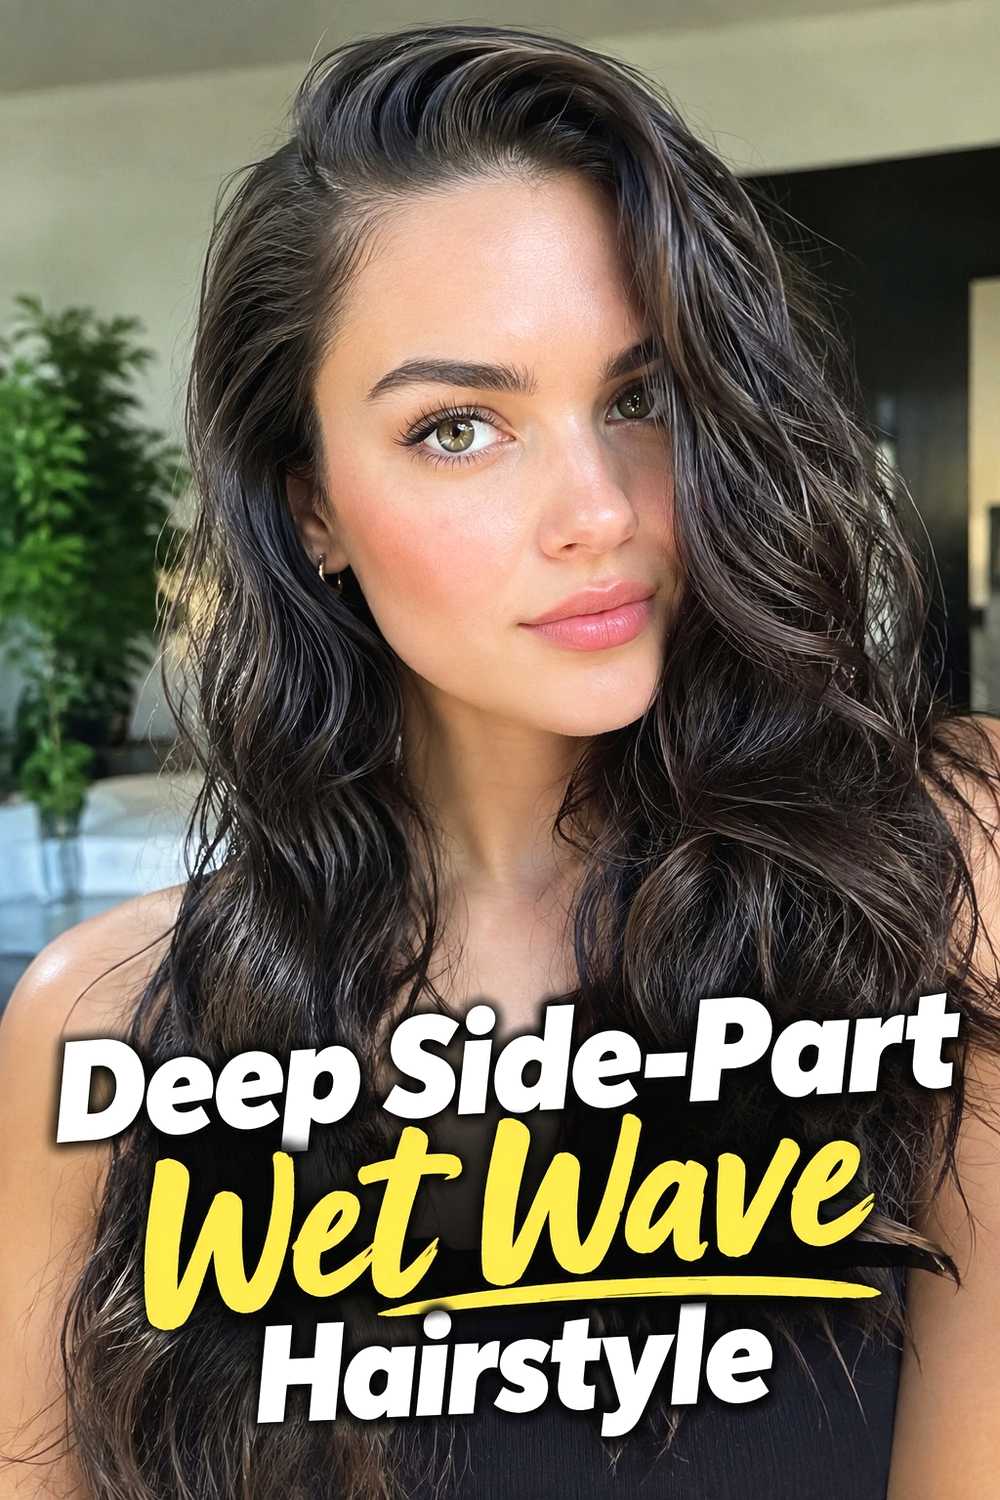
A Deep Side-Part Wet Wave Hairstyle combines dramatic asymmetry with smooth, glossy movement. The deeper part creates a heavier section that can be sculpted into one or two prominent waves sweeping across the forehead or temple. On the opposite side, the hair stays closer to the head, creating contrast between controlled sleekness and fuller movement. This layout works particularly well when you want the wave pattern to frame the face rather than sit evenly on both sides. Keep the roots polished and direct the first curve away from the part for a stronger silhouette. The lengths can remain sculpted throughout or gradually transition into softer waves toward the ends.
Best For
This is an easy choice for evening looks, formal styling, or anyone who prefers a more dramatic shape than a centered wet-look style.
Pro Tip
Decide exactly where you want the deepest wave ridge before adding strong-hold product, because repeated combing after the hair begins to set can disturb the finish.
3. Sculpted Finger Wave Bob Hairstyle
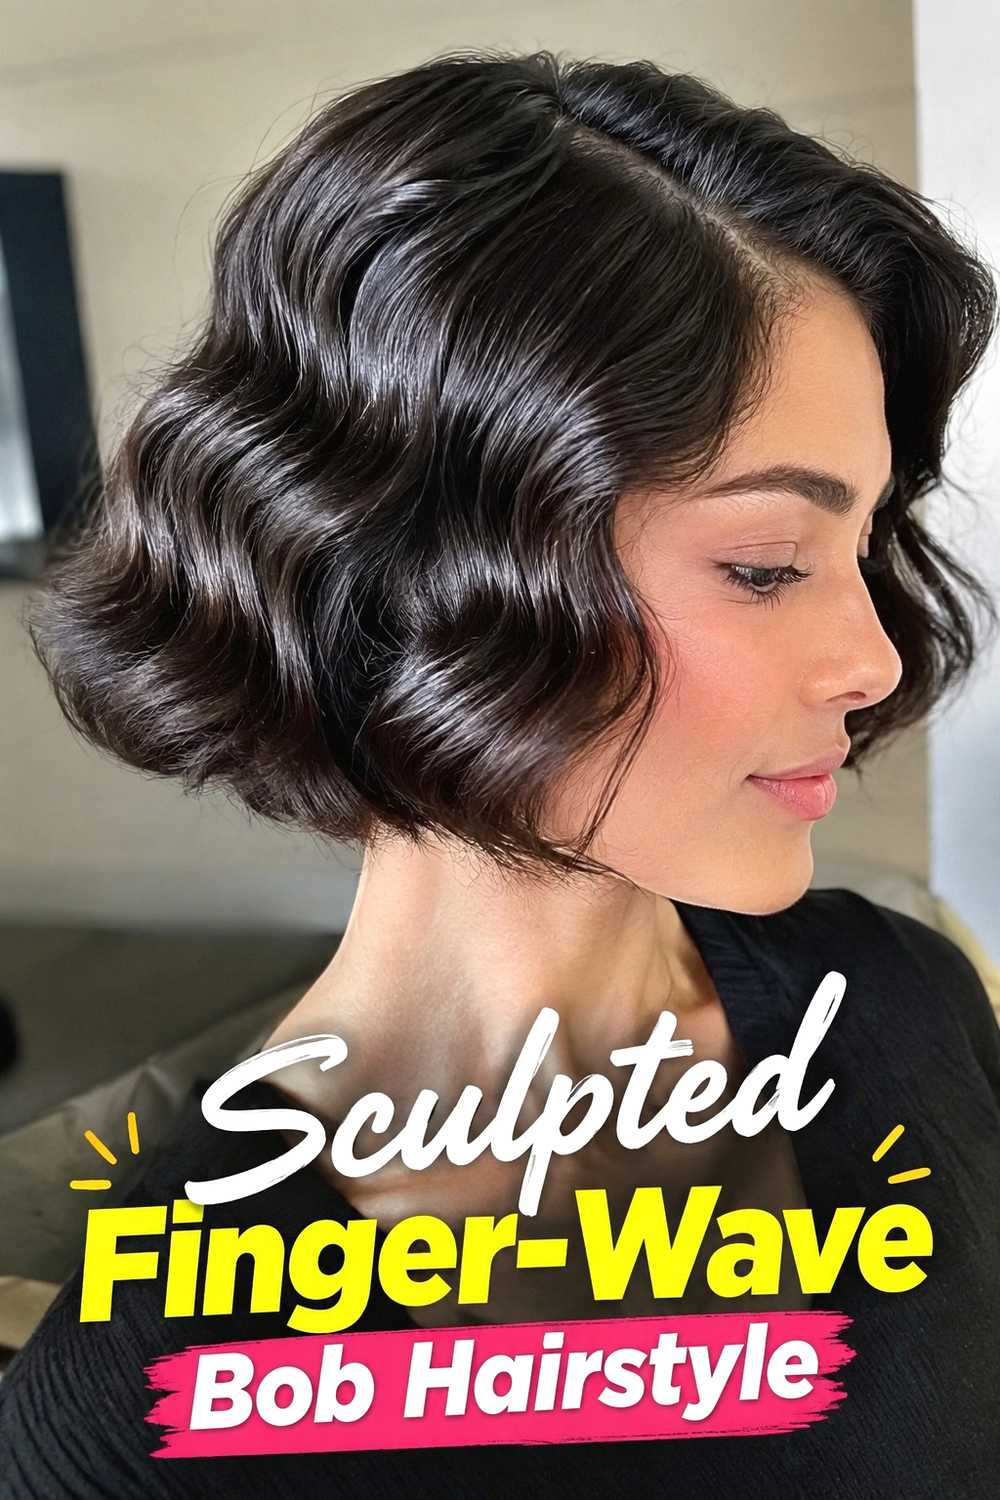
The Sculpted Finger-Wave Bob Hairstyle gives a short cut a highly defined, vintage-inspired surface while keeping the overall silhouette compact. Hair is shaped close to the head in alternating curves, with each ridge clearly visible from the hairline through the sides. On a chin-length bob, the lower ends can remain tucked inward or form softer bends so the entire style does not feel overly rigid. Shine is important, but the hair should still show natural separation instead of looking painted onto the scalp. This is one of the more precise options in the collection, making careful sectioning and consistent wave direction more important than creating extra height or fullness.
Styling Notes
Use controlled comb-and-finger shaping to form each ridge while the hair is workable. Clips can temporarily hold difficult curves until they begin to settle.
Wear & Maintenance
Once the waves are positioned, minimize unnecessary touching. Frequent reshaping can break apart the clean ridges that give this hairstyle its distinctive structure.
4. Slicked Back Crown Wet Wave Hairstyle
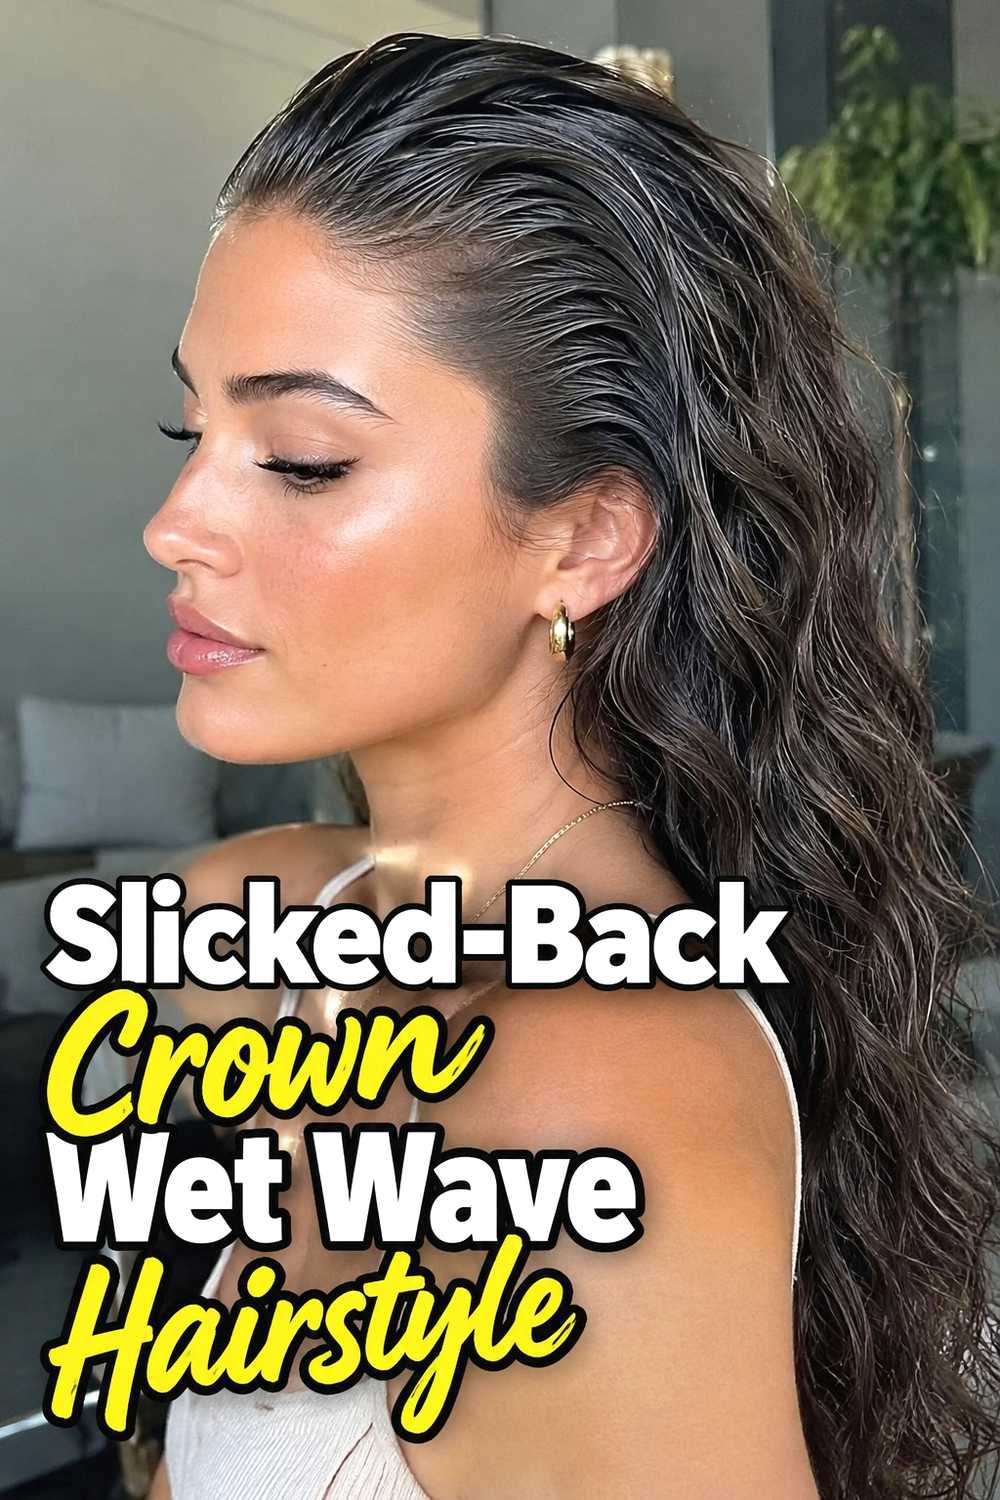
The Slicked-Back Crown Wet Wave Hairstyle keeps the front and upper sections close to the head before allowing defined waves to emerge through the mid-lengths and ends. This creates a sleek transition from a polished crown into visible texture, making the style feel modern and editorial rather than uniformly curled. The hairline can remain clean and controlled, while the sides are directed backward to open the face. From there, larger waves add movement without interrupting the slick silhouette near the roots. This approach works especially well on medium and longer hair because there is enough length for the contrast between the smooth upper section and the sculpted lower pattern to become obvious.
Styling Notes
Concentrate stronger hold around the crown and use a lighter touch through the wave lengths so the lower sections retain movement and strand definition.
Best For
Choose this version if you like the drama of wet-look styling but do not want every inch of the hair molded tightly against the head.
5. Center Part Glossy Wave Hairstyle
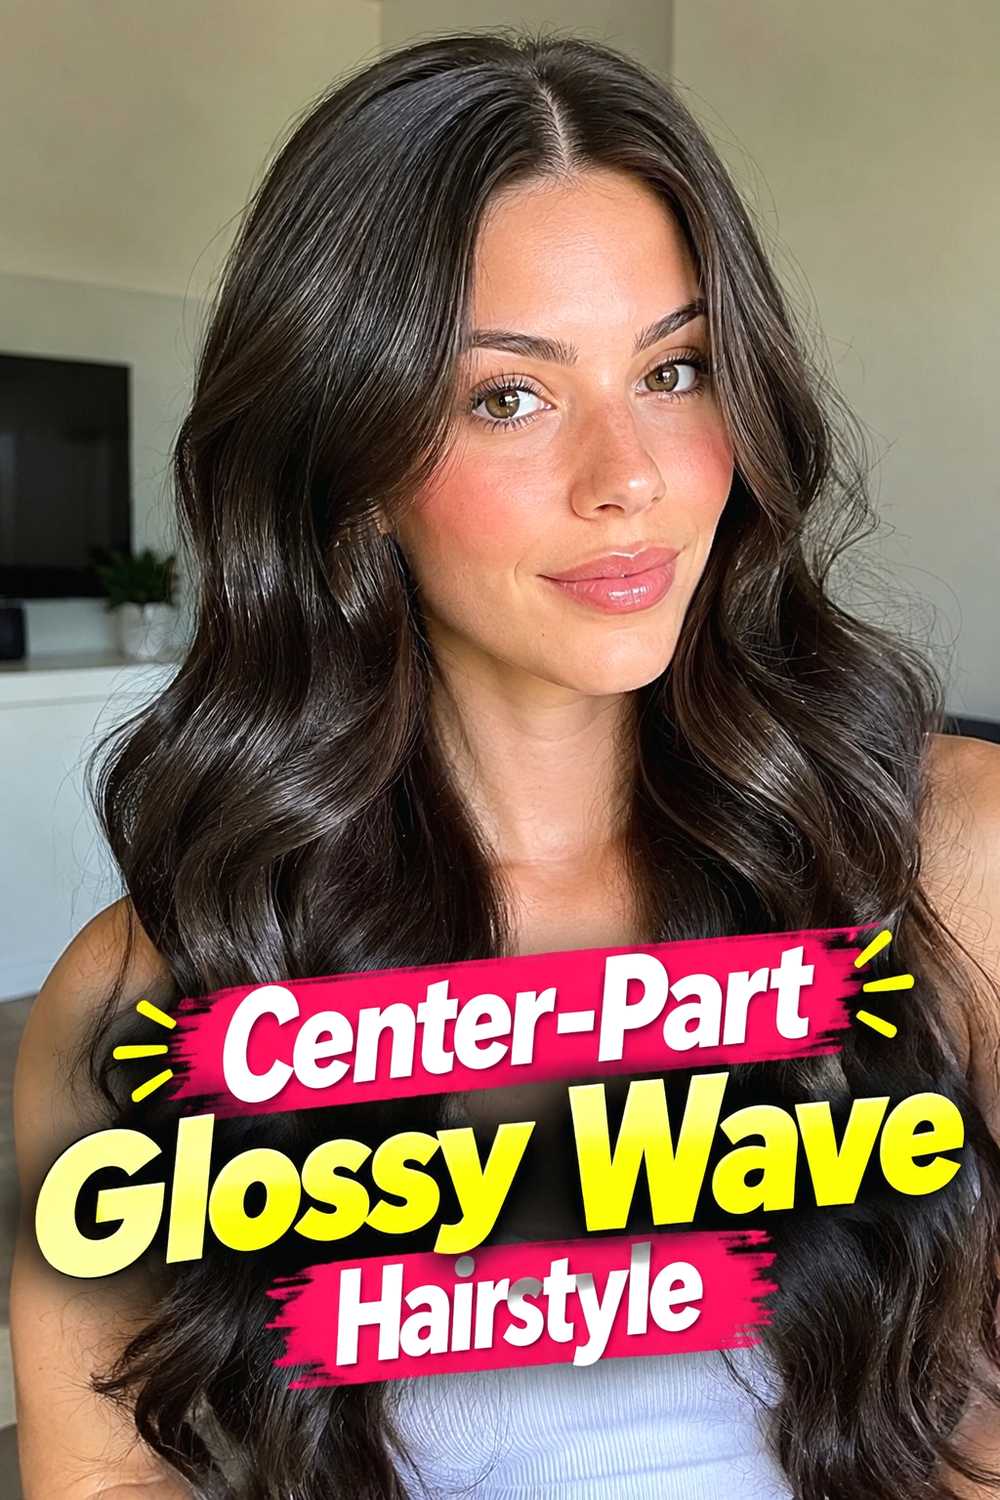
A Center-Part Glossy Wave Hairstyle creates a more balanced interpretation of the sculpted wet finish. The middle part establishes symmetry, while the hair on both sides follows smooth bends that frame the face before continuing toward the shoulders. Instead of exaggerating one dramatic ridge, this style usually looks best with evenly distributed waves and a consistent glossy surface. The roots can be sleek without being completely flat, preserving enough lift to prevent the hair from appearing heavy. Medium and long lengths offer plenty of room for repeating waves, but a long bob can also carry the shape beautifully. Keep the sections similar in size so both sides maintain a coordinated pattern.
Why It Works
The centered structure allows the wave pattern and shine to become the main features rather than relying on extreme volume or an asymmetric part.
Pro Tip
Check both sides from the front while shaping. Matching the wave height near the temples helps the finished style look intentional and balanced.
6. Wet Look Pixie Wave Hairstyle
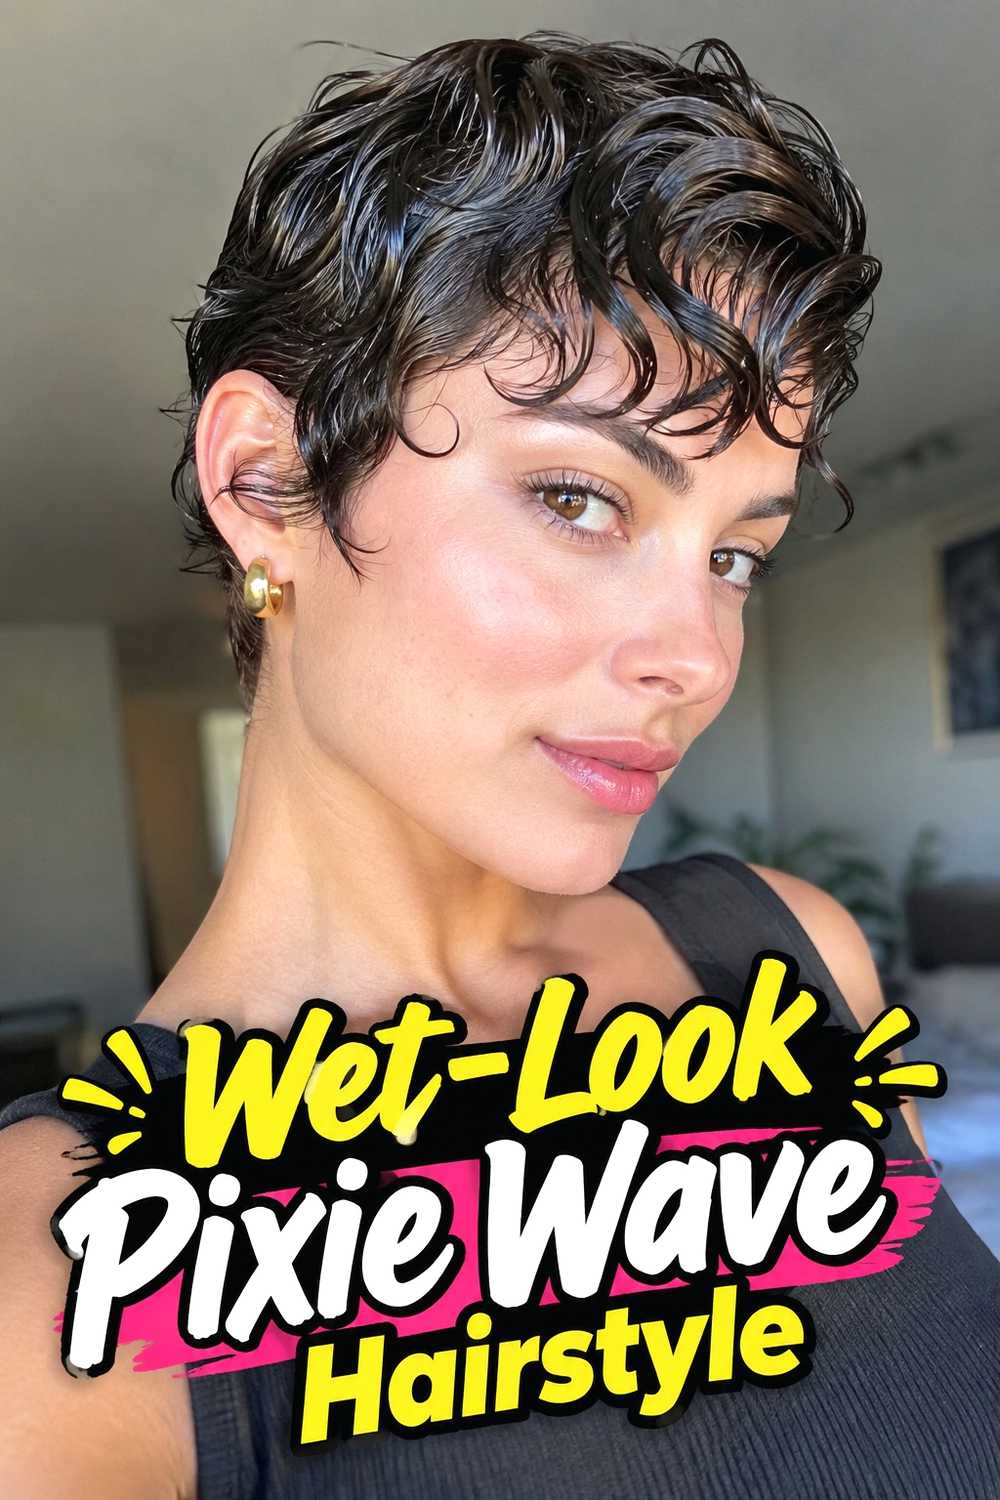
The Wet-Look Pixie Wave Hairstyle turns short length into an advantage by making every curve visible. Longer top and fringe sections can be molded into compact waves, while shorter sides stay sleek and closely controlled. Because there is less hair to work with, the direction of each wave matters: one deliberate bend across the front can have more impact than several tiny, crowded curves. A glossy finish emphasizes the haircut’s shape while preserving its short silhouette. This style can look polished with a clean side part or slightly more relaxed when the top is swept back without an obvious division. Keep the product application even so no section appears unexpectedly dry beside the glossy areas.
Hair Type & Length
Pixies with extra length through the top and front are easiest to sculpt. Very closely cropped sections can simply remain smooth while the longer areas carry the wave pattern.
Styling Notes
Use small amounts of product at a time. Short hair can become overloaded quickly, which may flatten the shape instead of defining it.
7. Hollywood Wet Glam Wave Hairstyle
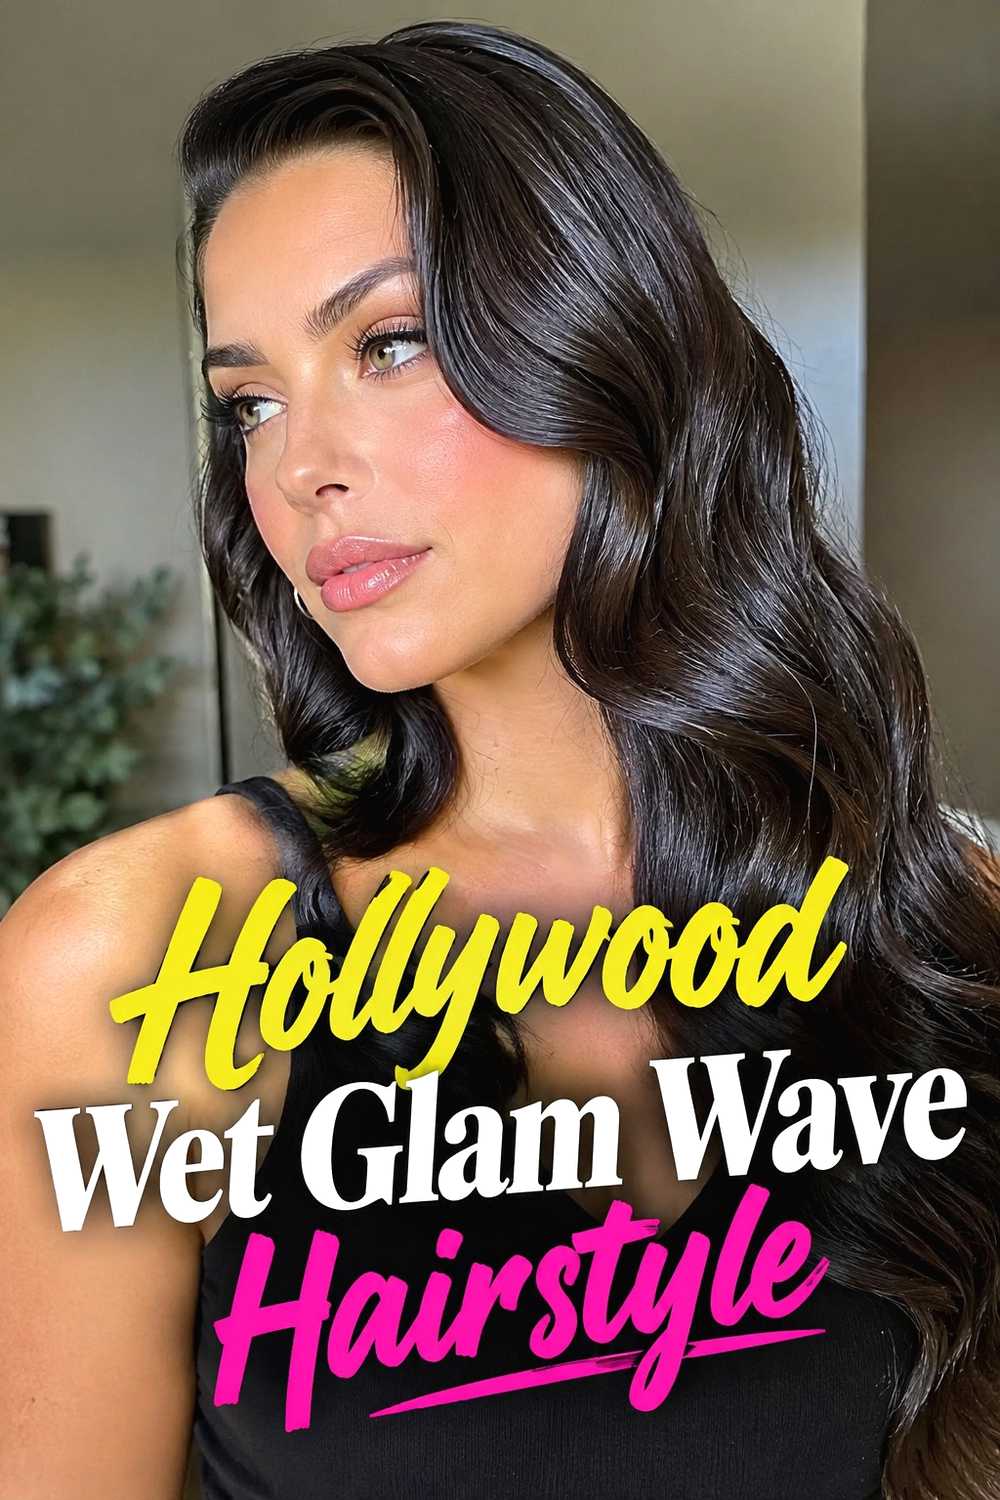
The Hollywood Wet Glam Wave Hairstyle takes the broad, polished curves associated with classic glamour and gives them a more reflective, modern surface. Begin with a strong side part, then create large waves that align smoothly from the temple through the lengths. Unlike highly separated beach waves, these bends should flow together in a cohesive pattern, with one section naturally leading into the next. The wet-look finish gives the style extra definition, particularly around the front where a glossy ridge can frame the cheek and jawline. Keep the crown controlled and avoid excessive teasing; the drama should come from the scale and shine of the waves rather than exaggerated height.
Best For
This style suits formal events, evening outfits, photo-ready looks, and occasions where a more deliberate, polished finish feels appropriate.
Pro Tip
Shape the waves in the same directional pattern before adding final shine so the surface remains smooth rather than broken into individual curls.
8. Chin Length Wet Wave Bob Hairstyle
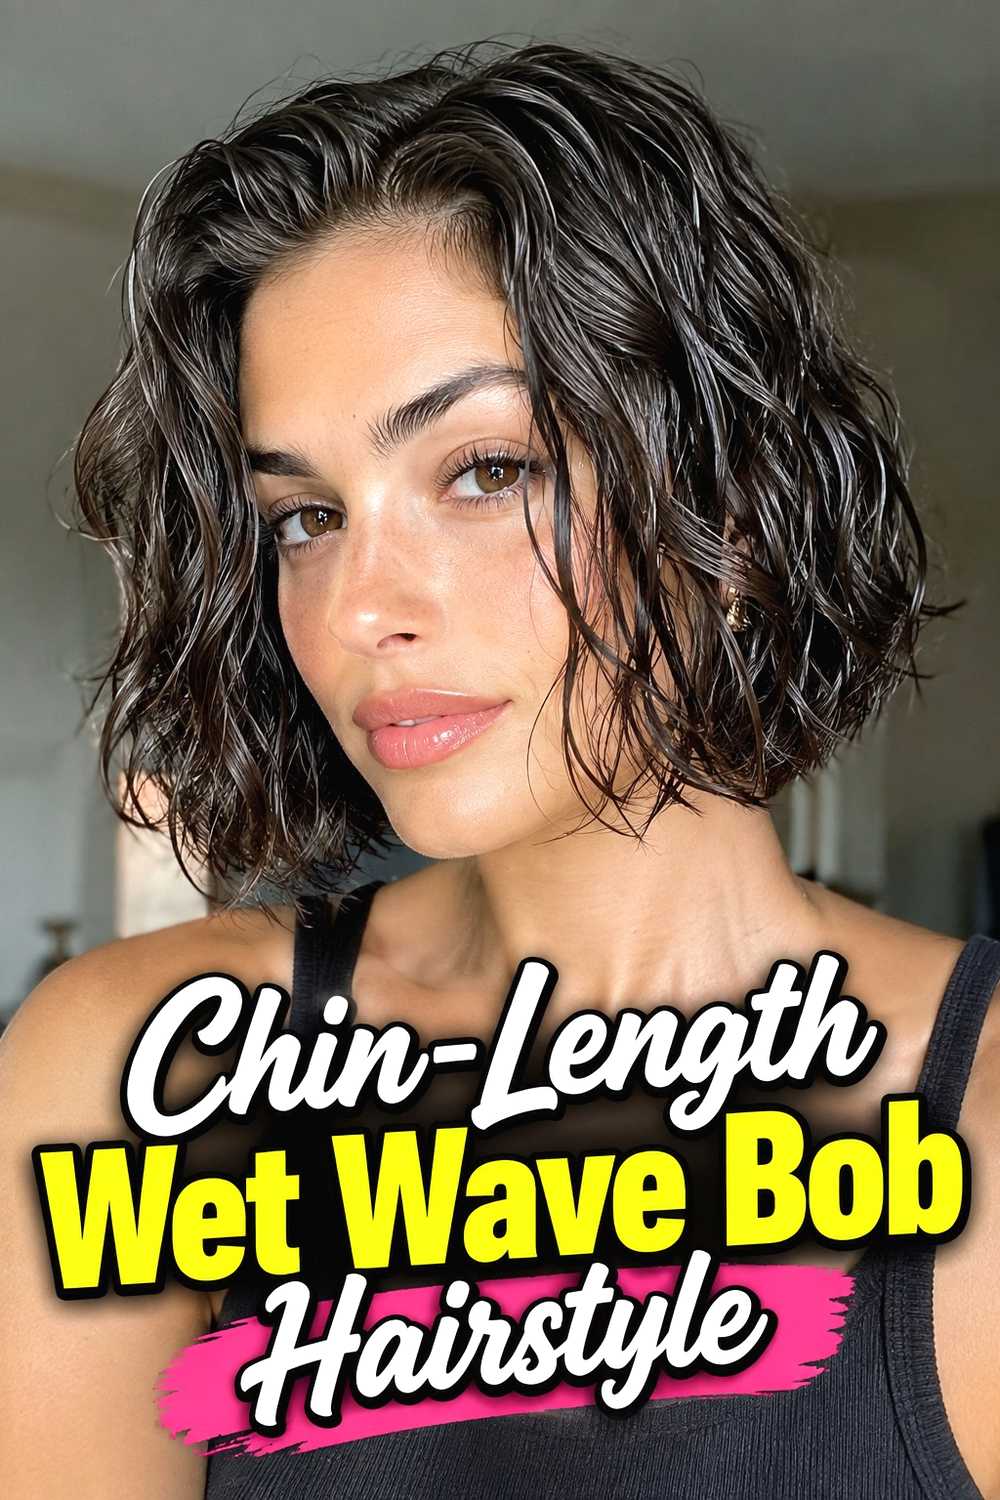
A Chin-Length Wet Wave Bob Hairstyle combines a sharp short silhouette with controlled, glossy texture. The wave pattern can begin near the roots and continue through the ends, creating enough movement to soften the bob without hiding its length. A side part gives the style a more dramatic appearance, while a centered part produces a cleaner, balanced shape. Because the ends sit near the jaw, avoid making every wave extremely large; smaller, deliberate curves usually fit the proportions of the haircut more naturally. The wet finish can also help emphasize a blunt perimeter by keeping the surface neat. Leave a little separation at the ends so the bob still shows realistic movement.
Hair Type & Length
This version works especially well on chin-length bobs with enough density to create visible wave ridges without excessive bulk.
Wear & Maintenance
Keep a small comb available if you need to refresh the surface, but reshape only the outer layer rather than repeatedly combing through the entire wave pattern.
9. Long Bob Sculpted Wet Wave Hairstyle
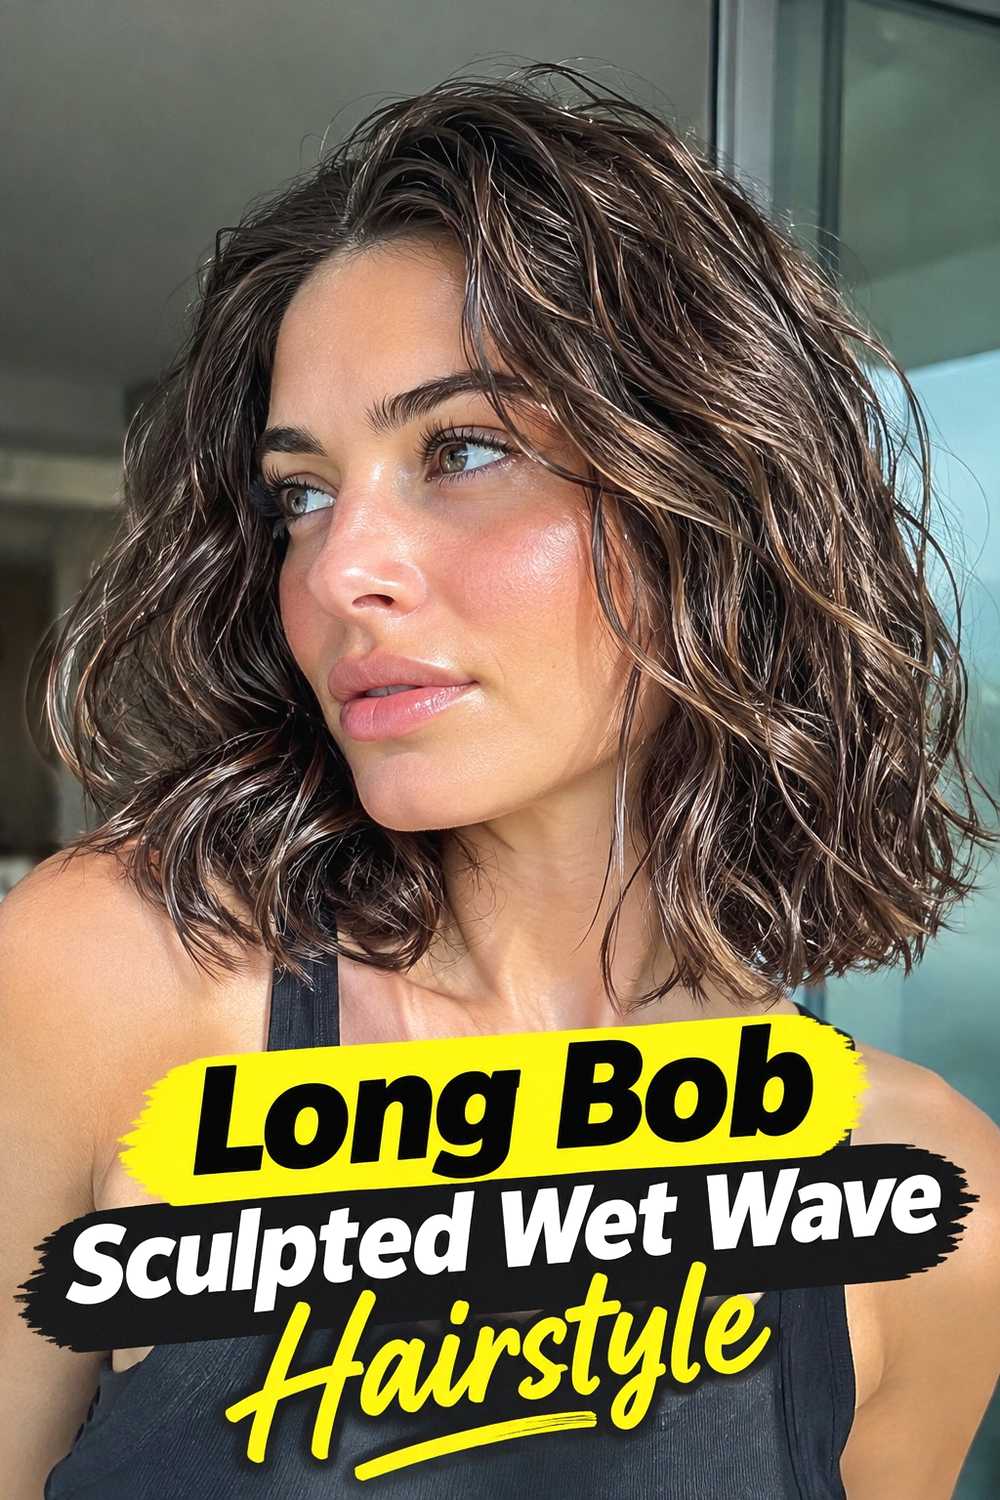
The Long Bob Sculpted Wet Wave Hairstyle offers more room for movement than a shorter bob while retaining a clean, modern outline. Hair can be molded into medium-sized S-waves starting around the temples and repeating through the lengths, with the final bend resting near the shoulders. The extra length makes it possible to create a noticeably fluid pattern without the style becoming too bulky around the jaw. A glossy finish enhances the sculpting, but leaving subtle separation through the ends prevents the lob from looking overly stiff. This style can be worn with a middle or side part, making it one of the more adaptable options for polished wet-look styling.
Styling Notes
Keep the wave sections broad enough to suit the longer bob length. Very tight curves can make the surface look unnecessarily busy.
Why It Works
The lob provides enough length for repeated sculpted movement while still keeping the wave structure close enough to the face to remain highly visible.
10. Asymmetrical Wet Wave Hairstyle
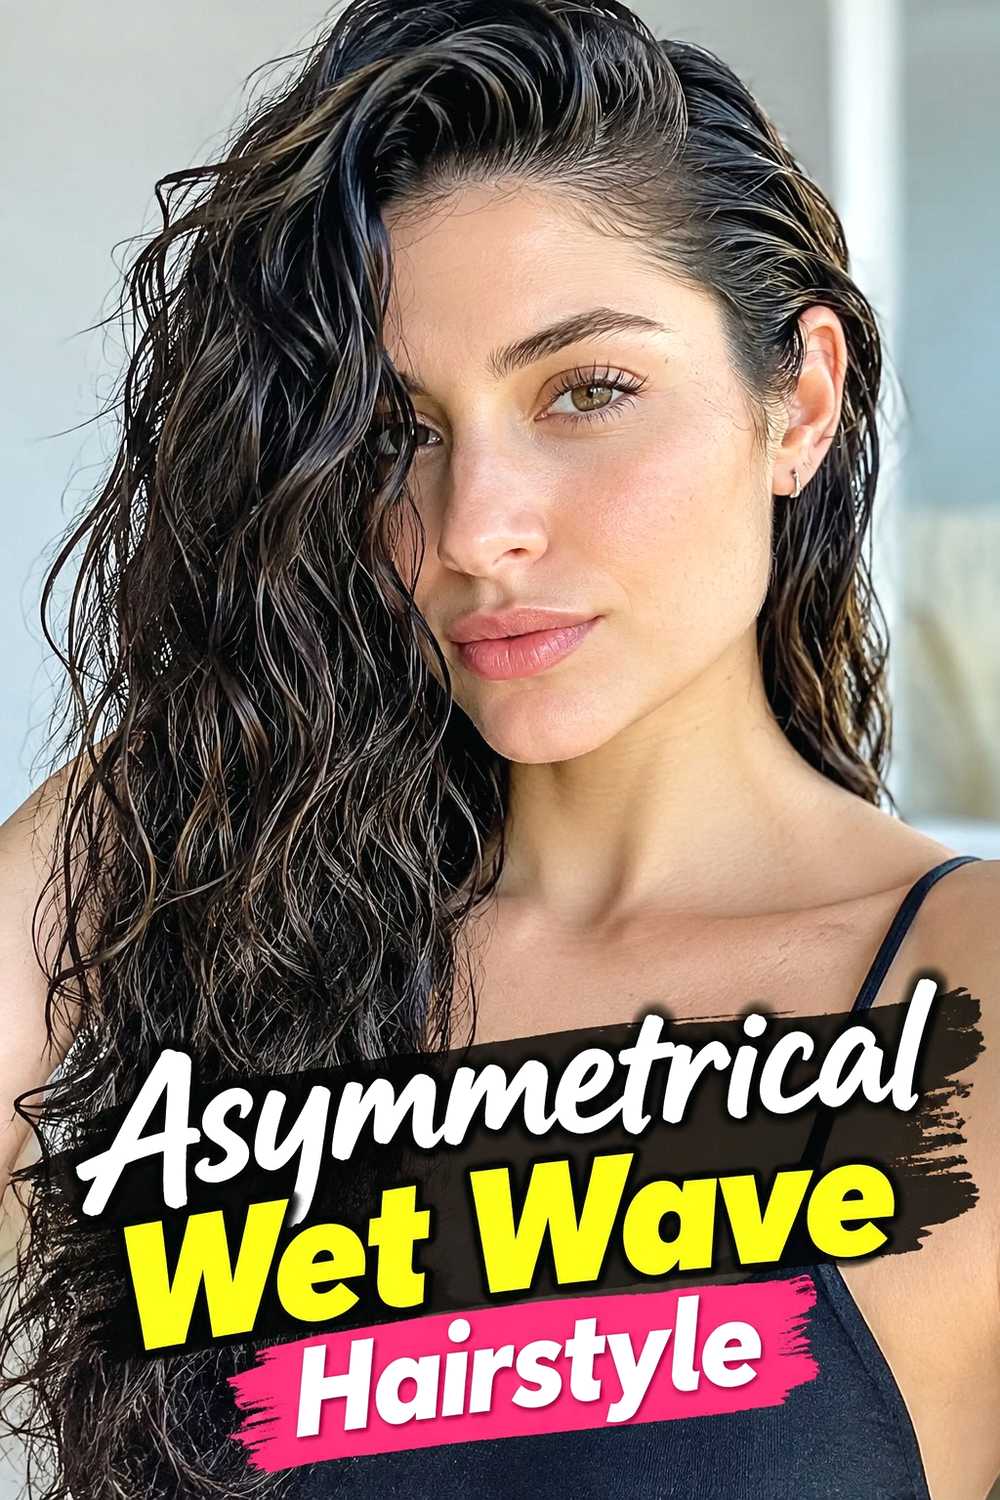
An Asymmetrical Wet Wave Hairstyle deliberately gives each side a different role. One side may be smoothed tightly behind the ear or directed backward, while the opposite side carries larger, sculpted waves with visible shine and volume. The contrast creates drama without requiring an elaborate updo or extra accessories. This approach works on everything from short bobs to shoulder-length hair, provided there is enough length on the fuller side to show the wave pattern. The sleek section should remain simple so it does not compete with the textured side. For the most cohesive finish, keep both areas equally glossy even though their shapes and volume differ.
Best For
This look is useful when you want a strong editorial effect or a hairstyle that photographs clearly from one preferred side.
Pro Tip
Tuck or pin the sleek side securely before shaping the waves. Establishing that structure first makes it easier to judge how much volume the opposite side needs.
11. Brushed Back Wet Mermaid Wave Hairstyle
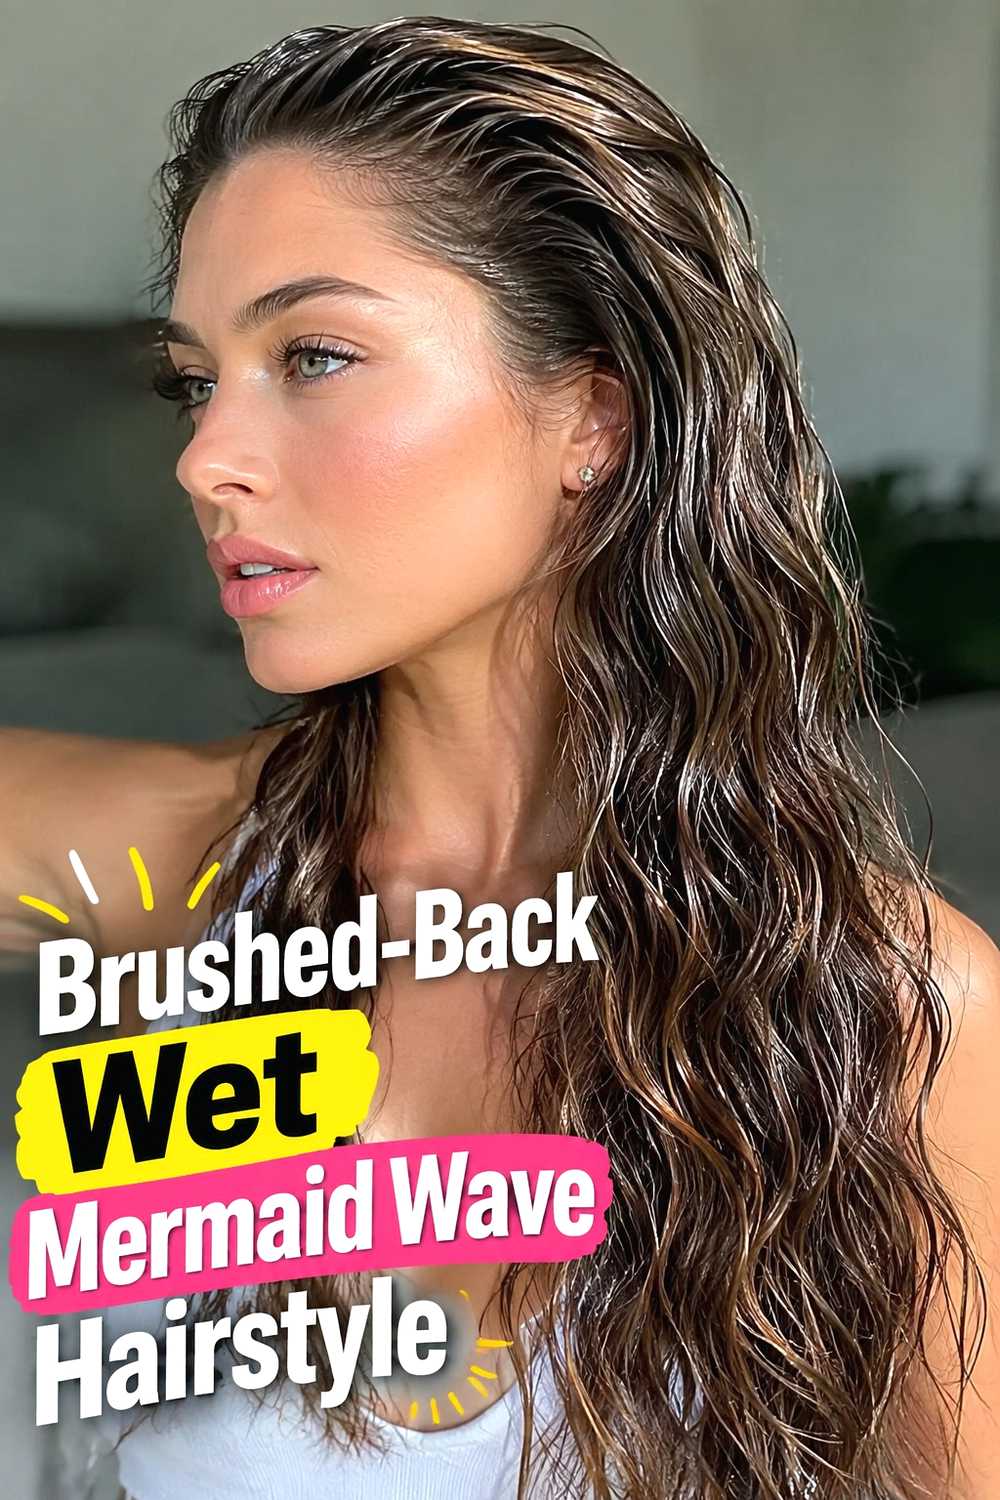
The Brushed-Back Wet Mermaid Wave Hairstyle combines an open, face-framing front with long, rippling texture through the lengths. Instead of creating a defined part, the roots are directed backward and kept glossy, allowing the waves to begin farther away from the hairline. The lower sections then form wide, repeating bends that resemble flowing water rather than separate curls. This creates a striking contrast between the controlled top and the looser, sculpted lengths. Long hair shows the pattern most clearly, although medium lengths can produce a shorter version. Keep the ends flexible and slightly separated so the style maintains movement instead of becoming a single rigid sheet.
Styling Notes
Build hold mainly where the hair is brushed back, then use a lighter styling layer through the lower waves to preserve softness.
Hair Type & Length
Medium-to-long hair provides enough space for several visible wave repetitions and creates the most noticeable waterfall-like movement.
12. Defined Curly Wet Wave Hairstyle
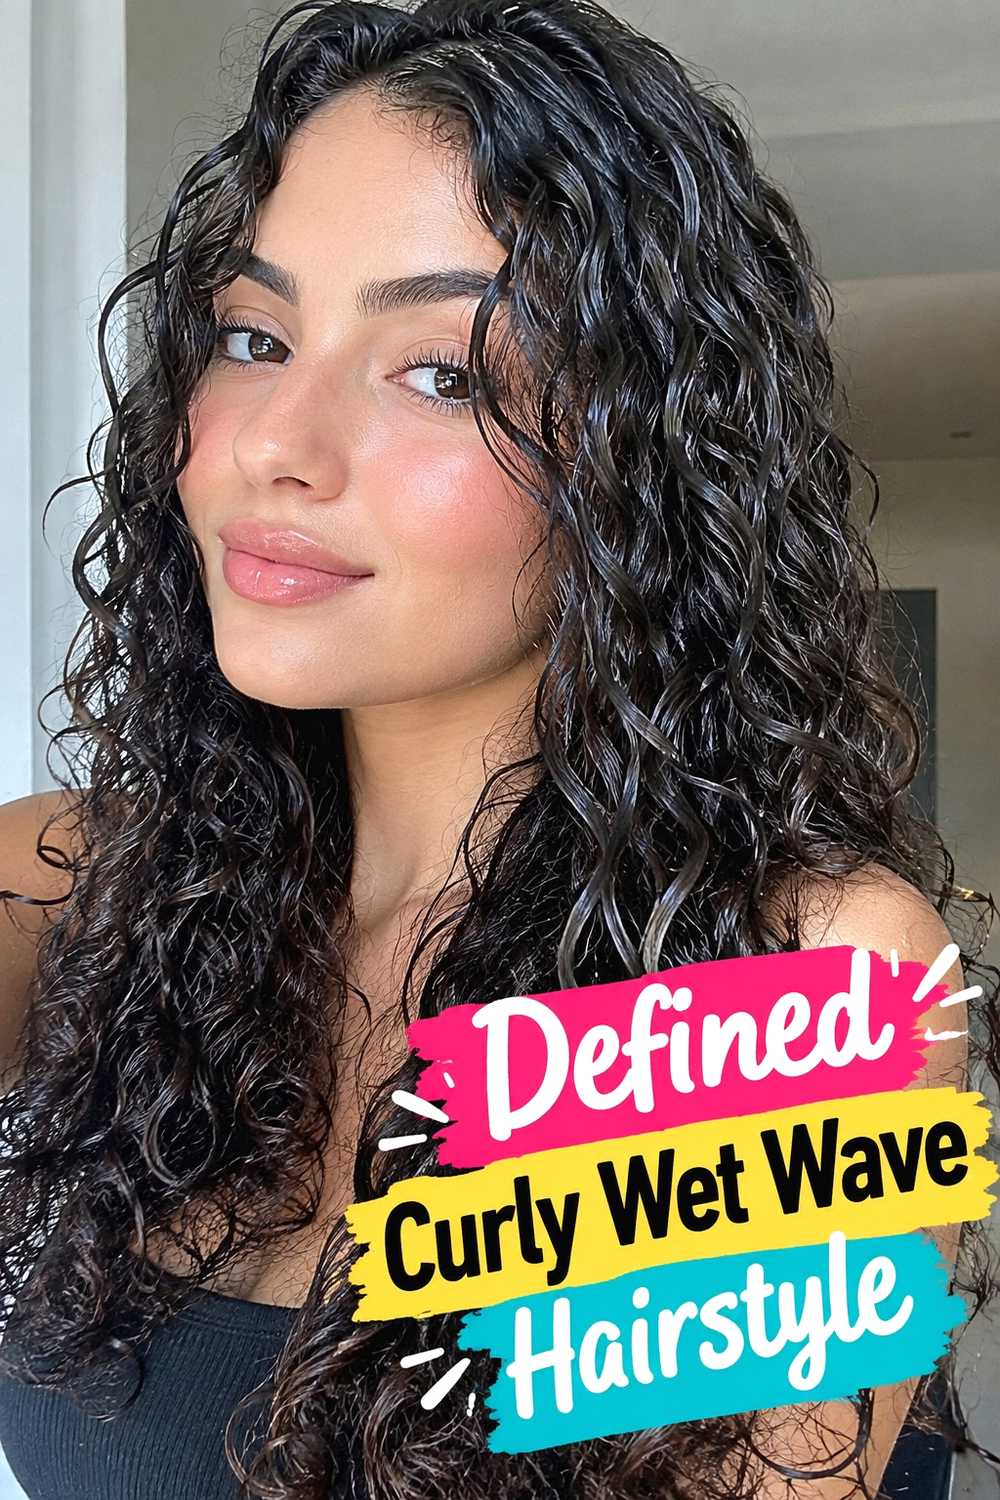
The Defined Curly Wet Wave Hairstyle works with existing curl and coil patterns rather than forcing them into completely uniform S-waves. The goal is to enhance definition, group strands into deliberate sections, and create a glossy surface while maintaining natural texture. Around the front, selected curls can be gently directed into curved shapes that frame the face, while the rest of the hair retains more organic variation. This makes the wet finish feel sculpted without erasing the individuality of the curl pattern. Depending on density, the roots can stay relatively sleek or preserve controlled volume. Avoid repeatedly brushing through established curls, since separation and frizz can reduce the polished effect.
Hair Type & Length
This approach is especially suited to naturally curly and coily textures where definition and shine are more practical than recreating identical waves throughout the entire head.
Pro Tip
Work with existing curl groupings and shape them while damp. Add product section by section so the final finish remains even.
13. Sculpted Side Tuck Wet Wave Hairstyle
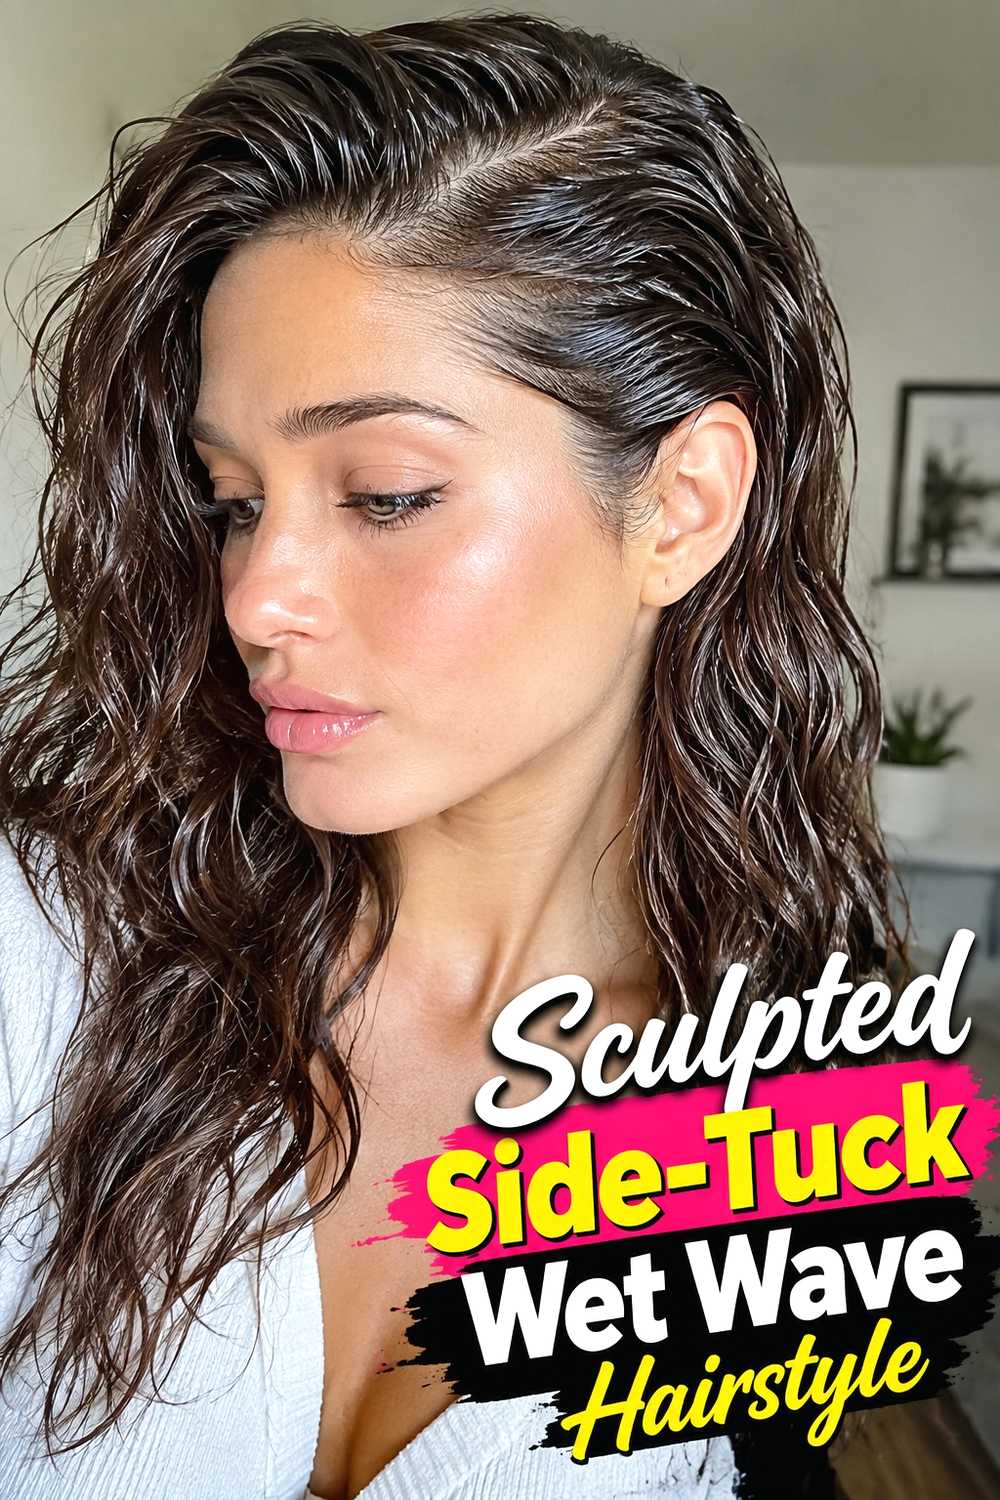
The Sculpted Side-Tuck Wet Wave Hairstyle pairs glossy curves with one cleanly exposed side for an elegant, uncomplicated silhouette. Create waves through the main body of the hair, then guide the smaller side behind the ear and keep it sleek against the head. The opposite section can carry a stronger wave across the temple, creating a visible sculpted ridge before flowing into the lengths. Because the tuck removes volume from one side, the hairstyle feels polished without needing a full updo. This works particularly well on bobs, lobs, and medium hair. A small hidden pin can provide extra security if the sleek side tends to slip forward.
Styling Notes
Keep the tucked section smooth but comfortable. Too much tension around the ear can make the style feel unnecessarily rigid.
Why It Works
Exposing one side creates visual contrast and gives the fuller wave section more prominence while maintaining a clean overall shape.
14. Wet Look Waterfall Wave Hairstyle
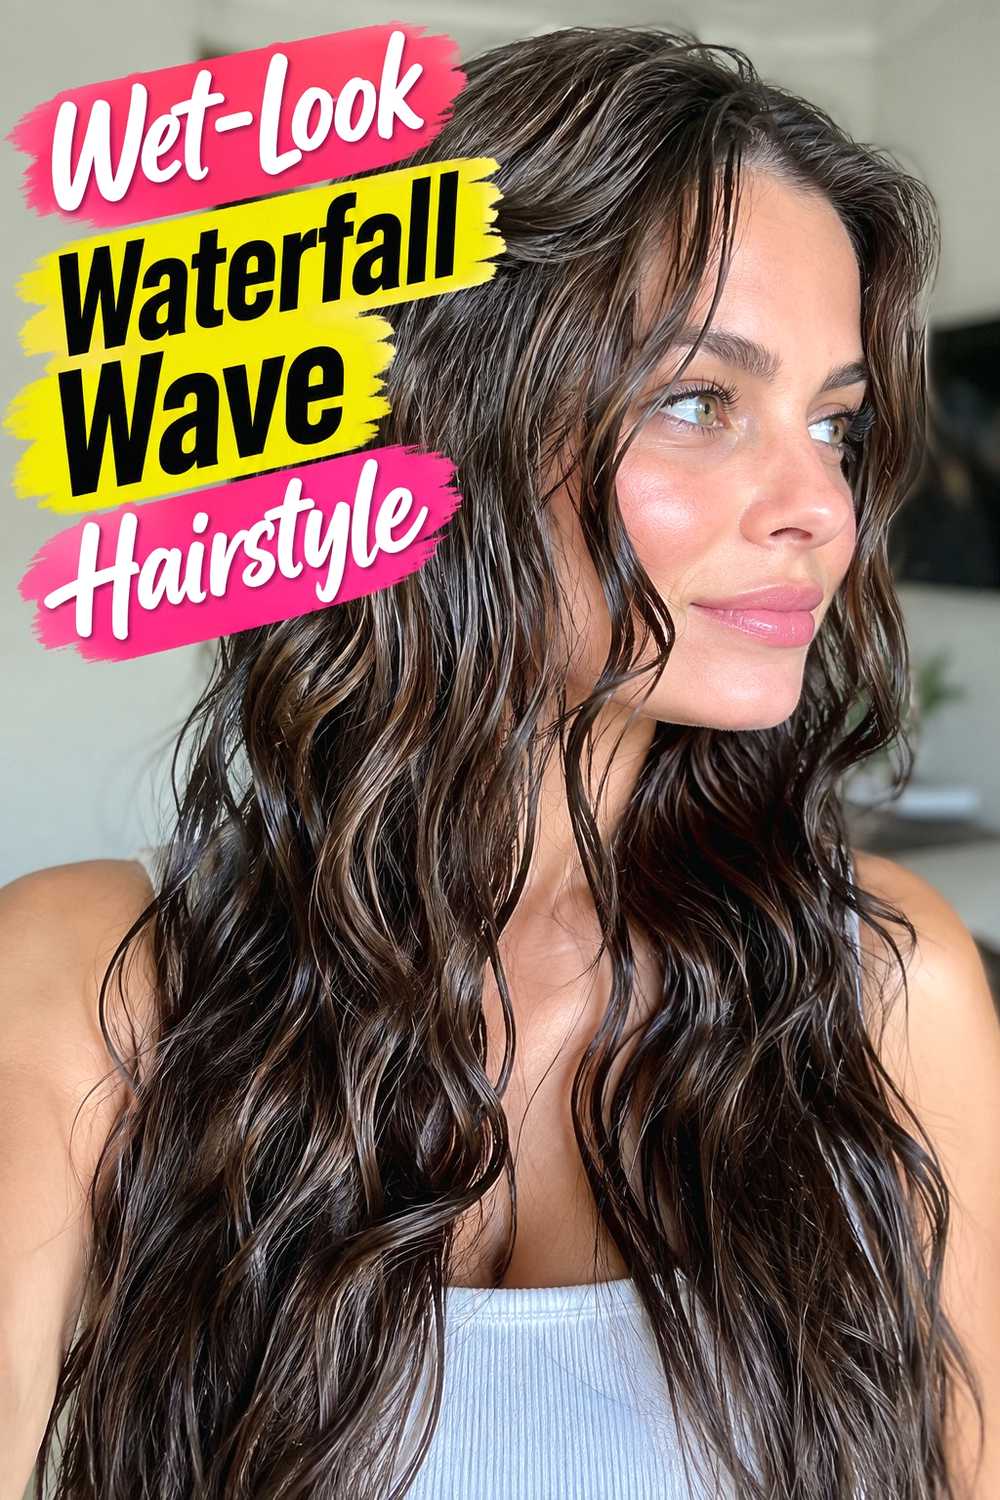
The Wet-Look Waterfall Wave Hairstyle is designed around long, connected curves that travel down the hair in a flowing pattern. Instead of emphasizing tight ridges near the scalp, the upper section stays smooth and controlled while increasingly visible waves develop through the mid-lengths. Each bend should transition naturally into the next, creating the impression of continuous movement. The glossy finish catches light across the curved surface and helps define the shape without requiring extreme volume. This hairstyle works especially well when the ends remain soft rather than sharply curled. A centered part creates a balanced result, while a subtle side part can make the waterfall effect feel more directional.
Hair Type & Length
Longer hair provides the clearest canvas for this look because several broad wave repetitions can remain visible from the shoulders toward the ends.
Pro Tip
Keep the final wave pattern relatively large. Smaller curls can interrupt the smooth, cascading effect that defines this style.
15. Sculpted Wet Wave Updo Hairstyle
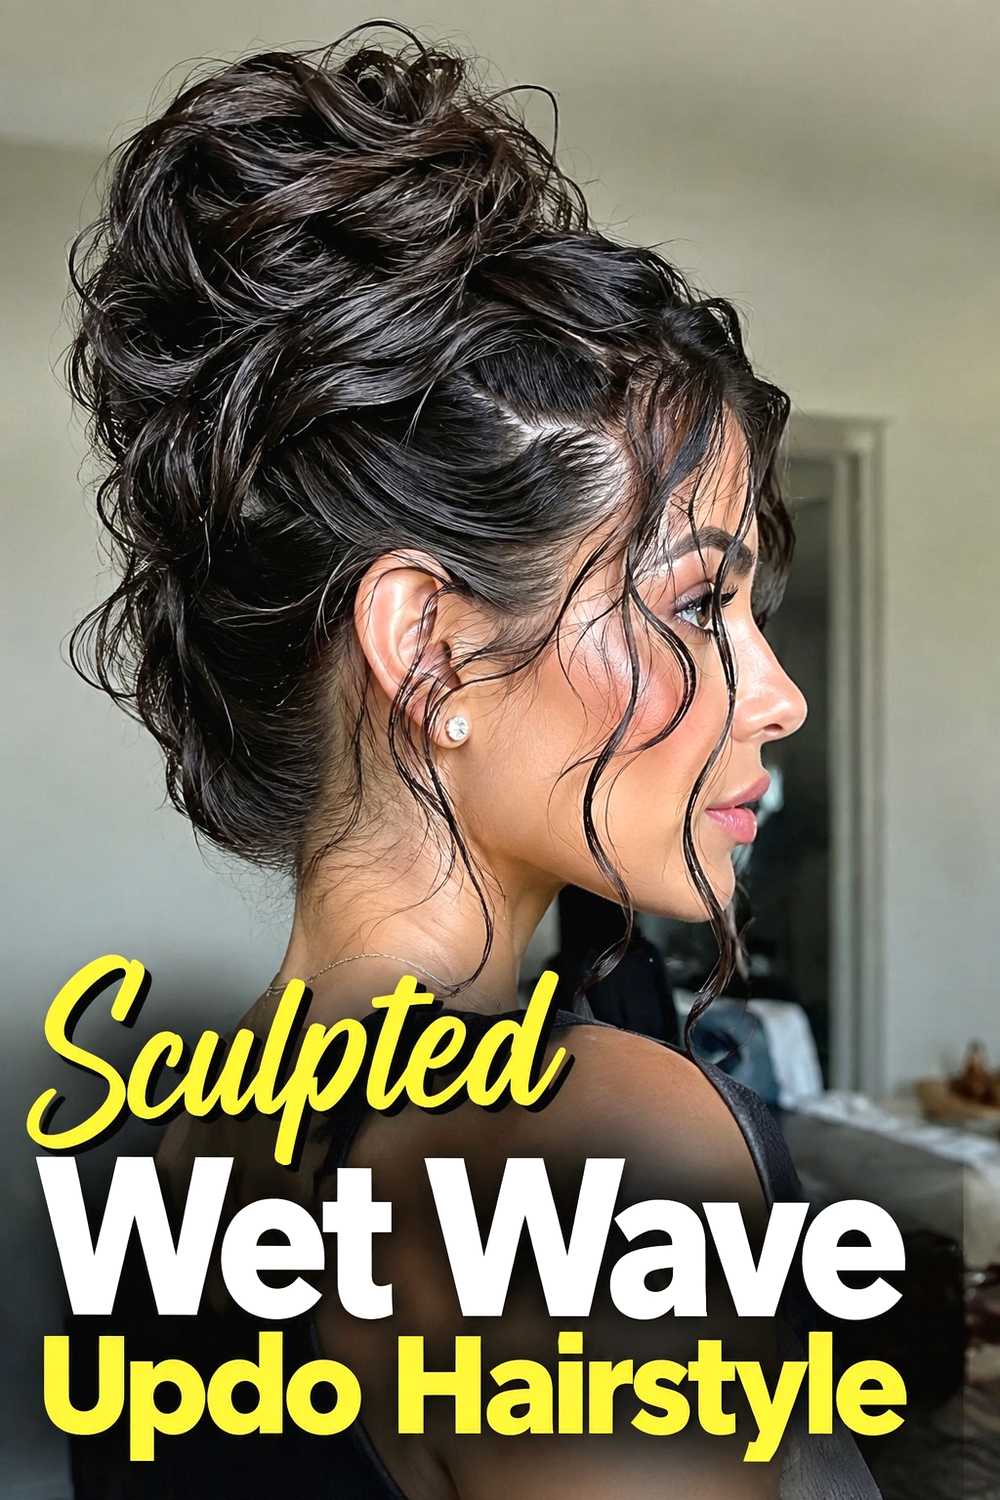
The Sculpted Wet Wave Updo Hairstyle combines defined surface waves with a secured back section for a formal, architectural finish. The front and side sections are molded into glossy curves that follow the head before disappearing into a low bun, roll, or tucked shape at the back. This allows the sculpted wave pattern to remain visible from the front while removing most of the loose length. A softer updo can include a few carefully placed bends around the hairline, while a more polished version keeps every section controlled. The gathered portion should connect naturally to the waves rather than appearing like a separate hairstyle attached behind them.
Styling Notes
Finish the front wave placement before securing the final updo whenever possible. This prevents the back section from becoming too tight while you adjust the sculpted curves.
Best For
Choose this variation for weddings, evening events, formal dinners, or occasions where you want wet-look definition with the security of pinned-up hair.
How to Choose the Right Look
Start with your length. Pixies and short bobs naturally suit compact finger waves, side-swept ridges, and precise glossy shaping because the entire pattern remains visible. Lobs and medium lengths allow larger S-waves and asymmetrical styling, while long hair gives you space for waterfall waves, brushed-back mermaid textures, and broad Hollywood-inspired bends.
Next, consider your natural texture. Straight and softly wavy hair can be molded into uniform curves relatively easily, while curly and coily textures may look better when the wet finish enhances existing curl groupings rather than forcing every section into an identical pattern.
Think about hold as well. Highly sculpted finger waves generally require more control than soft glossy lengths. If you prefer movement, focus stronger product near the roots and wave ridges while keeping the ends more flexible.
Finally, decide how polished you want the finished result to feel. Center parts and flowing waves give a cleaner, balanced impression, deep side parts create drama, and slicked-back crowns or sculpted updos produce a stronger editorial or formal effect.
Final Thoughts
Sculpted wet-look waves can range from tiny polished pixie bends to long, glossy curves that flow through the entire hairstyle. The most believable versions balance shine with visible hair texture and use enough hold to define the shape without making every strand appear rigid. Choose a wave scale and finish that suits your length, natural texture, and occasion, then let the sculpting highlight the movement already present in the hair.
FAQs
1. What creates a wet-look finish without leaving hair soaking wet?
The effect usually comes from styling damp hair with products that add hold, definition, and visible shine. The finished hair can be fully set while still maintaining a glossy appearance.
2. Are sculpted wet-look waves suitable for short hair?
Yes. Pixies and short bobs can showcase molded waves particularly clearly because the curves remain close to the head and are easy to see.
3. Can naturally curly hair wear sculpted wet-look waves?
Yes. Instead of forcing every curl into the same shape, work with natural curl groupings and emphasize selected curves, definition, and shine.
4. How do I keep wet-look waves from appearing stiff?
Use stronger hold only where the structure needs it, then keep the ends or lower lengths slightly softer. Visible strand separation also helps the finish appear more natural.
5. Which part works best with sculpted wet waves?
A deep side part creates a dramatic, vintage-inspired effect, while a center part gives the hairstyle more symmetry. Brushed-back roots are another option when you want the face fully open.
Save your favorite sculpted wet-look wave hairstyle, share the ideas you love, and explore more glossy, polished hairstyle inspiration for your next look.