14 Air-Dried Waves Hairstyle Ideas
Let your natural texture do the work with soft, touchable air-dried waves that look effortless, modern, and beautifully individual from roots to ends.
Air-dried waves celebrate movement that does not need to look perfectly uniform. Depending on your natural texture, haircut, product choice, and drying method, the finished result can range from barely-there bends to defined, beachy ripples with plenty of volume.
The most believable looks preserve individual strands, natural density, slight flyaways, and realistic movement rather than forcing every section into an identical pattern. As you compare these ideas, think about your length, layering, root volume, desired definition, and how much product your hair comfortably handles.
Quick List
- Soft Tousled Air Dried Waves Hairstyle
- Center Part Air Dried Waves Hairstyle
- Side Part Air Dried Waves Hairstyle
- Beachy Air Dried Waves Hairstyle
- Defined Air Dried Waves Hairstyle
- Shoulder Length Air Dried Waves Hairstyle
- Long Layered Air Dried Waves Hairstyle
- Bob Length Air Dried Waves Hairstyle
- Frizz Softened Air Dried Waves Hairstyle
- Piecey Air Dried Waves Hairstyle
- Voluminous Air Dried Waves Hairstyle
- Curtain Bang Air Dried Waves Hairstyle
- Scrunched Air Dried Waves Hairstyle
- Glossy Natural Air Dried Waves Hairstyle
1. Soft Tousled Air Dried Waves Hairstyle
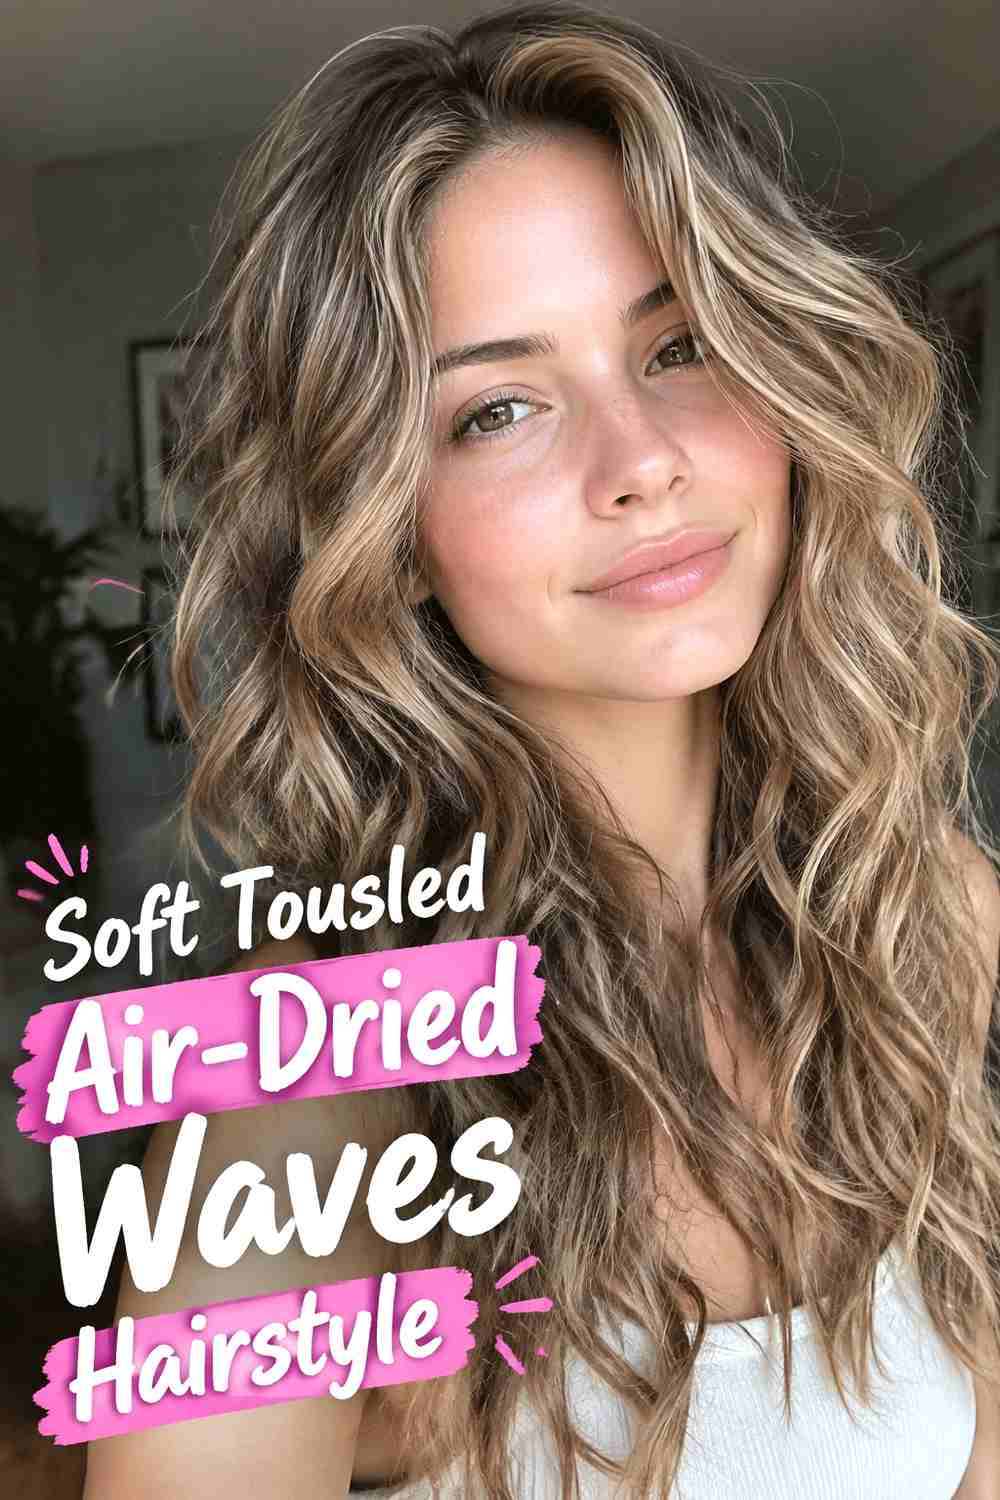
Soft tousled waves are ideal when you want natural movement without obvious styling lines. The texture stays relaxed through the crown, then opens into irregular bends through the mid-lengths and ends for an easy, lived-in finish. This version works particularly well on naturally wavy hair and softly layered cuts because different lengths can move independently as they dry. Apply a small amount of lightweight leave-in product or wave cream to damp hair, distribute it gently, and avoid repeatedly touching the strands while they set. Once fully dry, loosen the texture with your fingertips rather than a brush. A few soft flyaways can actually support the effortless effect, so there is no need to make every section perfectly smooth.
Styling Notes
For a softer pattern, avoid aggressive scrunching. Lightly cup the ends upward once or twice, then allow the hair to settle into its own wave formation as it dries.
2. Center Part Air Dried Waves Hairstyle
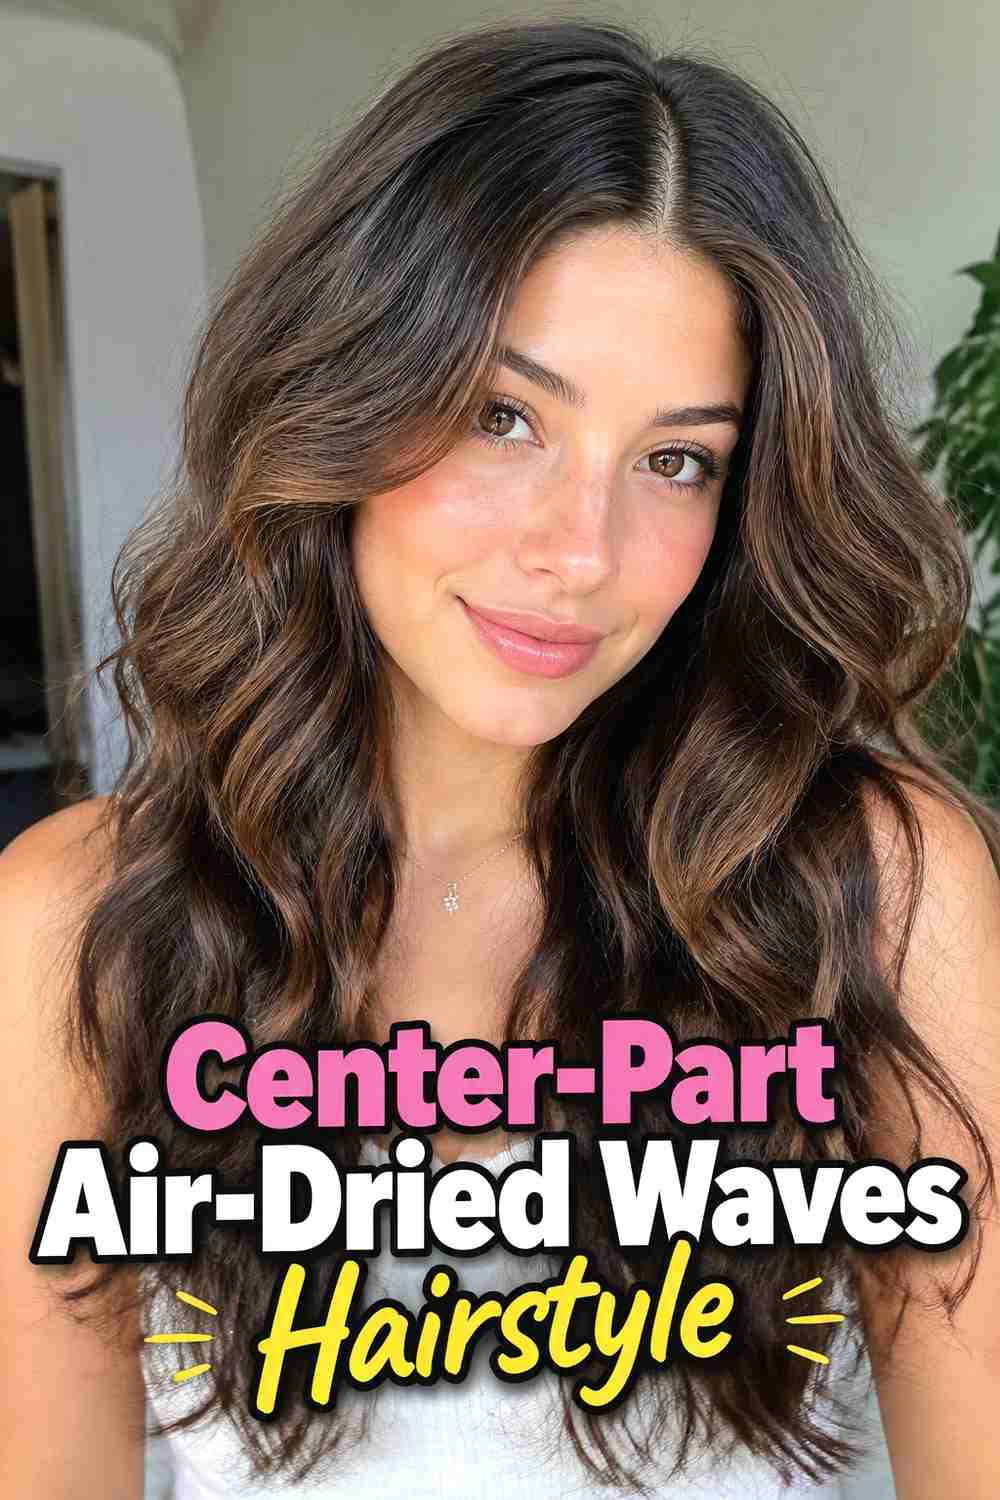
A center part gives natural air-dried waves a balanced silhouette while letting texture provide the softness. The roots can remain relatively smooth, with subtle bends beginning around the cheekbones and becoming more visible toward the ends. This approach looks especially polished on medium to long hair because both sides frame the face without requiring perfectly matched waves. Create the part while the hair is still damp so it dries in place, then apply a lightweight styling product through the lengths. Keep product away from the immediate root area if your hair loses volume easily. Once dry, separate any larger clumps with your fingertips while preserving the natural bends that formed during the drying process.
Best For
This version suits anyone who likes a clean, symmetrical part but does not want the rest of the hairstyle to feel overly controlled. It works particularly well with long layers and soft face-framing pieces.
3. Side Part Air Dried Waves Hairstyle
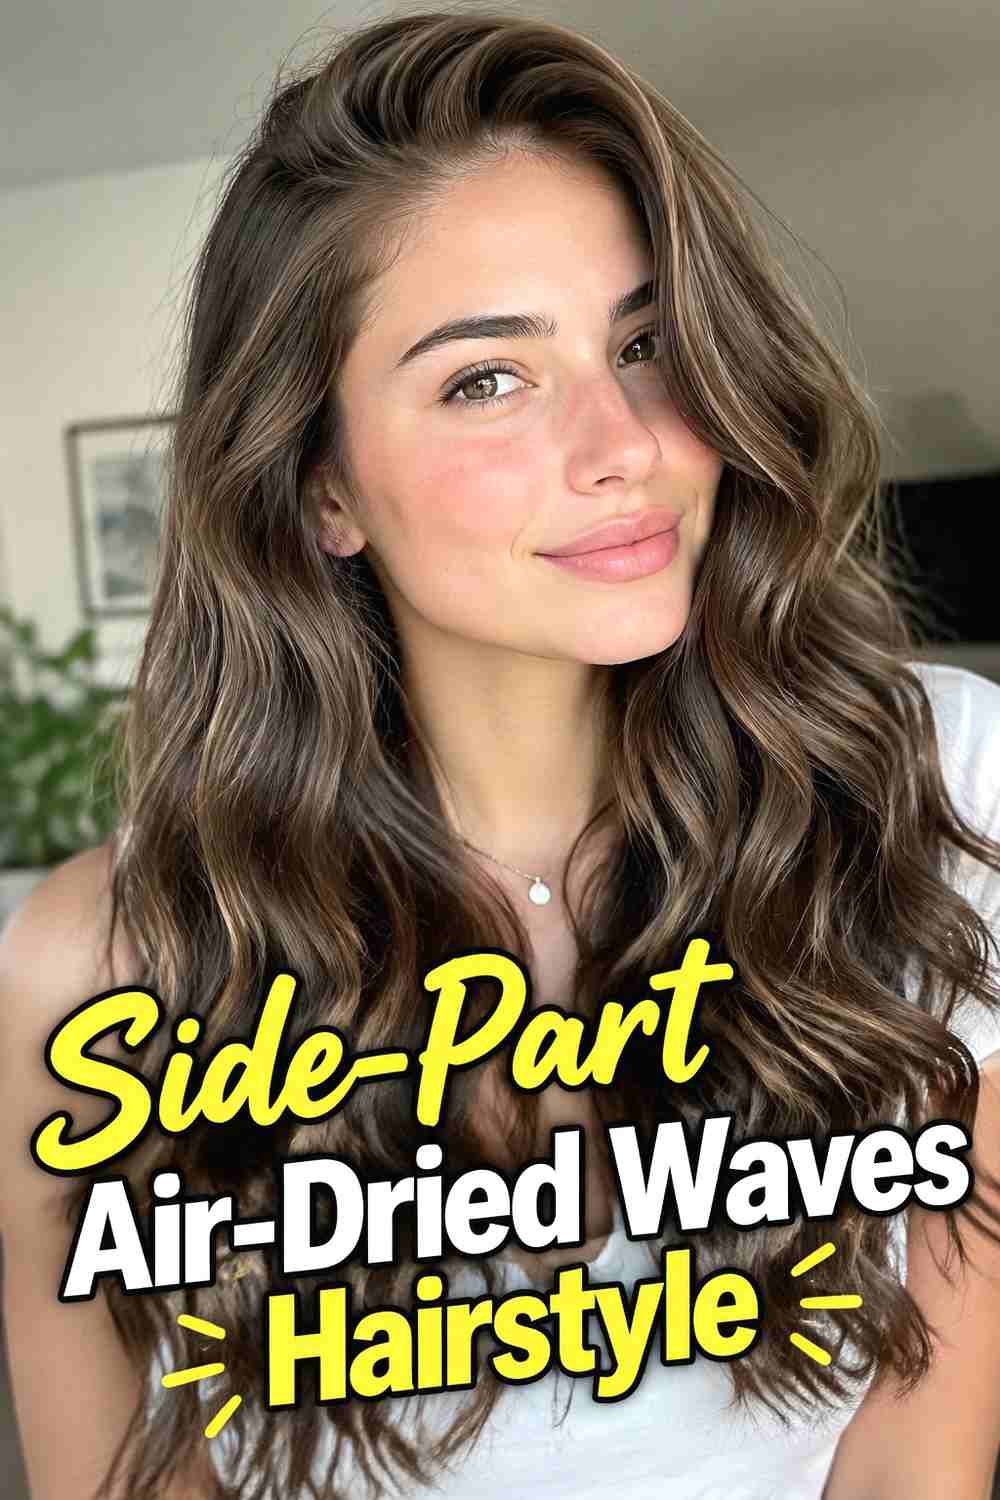
A side part instantly adds direction and a little extra lift to air-dried waves. Moving more hair to one side encourages natural volume near the crown, while the lengths fall into an uneven, relaxed pattern that feels casual rather than carefully sculpted. It is a useful option for wavy hair that tends to dry flatter around a center part or for anyone who prefers asymmetrical framing. Establish the side part while the hair is damp, then gently scrunch the fuller side to encourage movement. Let the opposite side dry closer to the head for contrast. When everything is completely dry, lift the roots lightly with your fingertips instead of brushing through the waves.
Pro Tip
Try moving your part slightly farther over than usual while drying, then settling it into your preferred position afterward. This can create natural-looking root lift without teasing.
4. Beachy Air Dried Waves Hairstyle
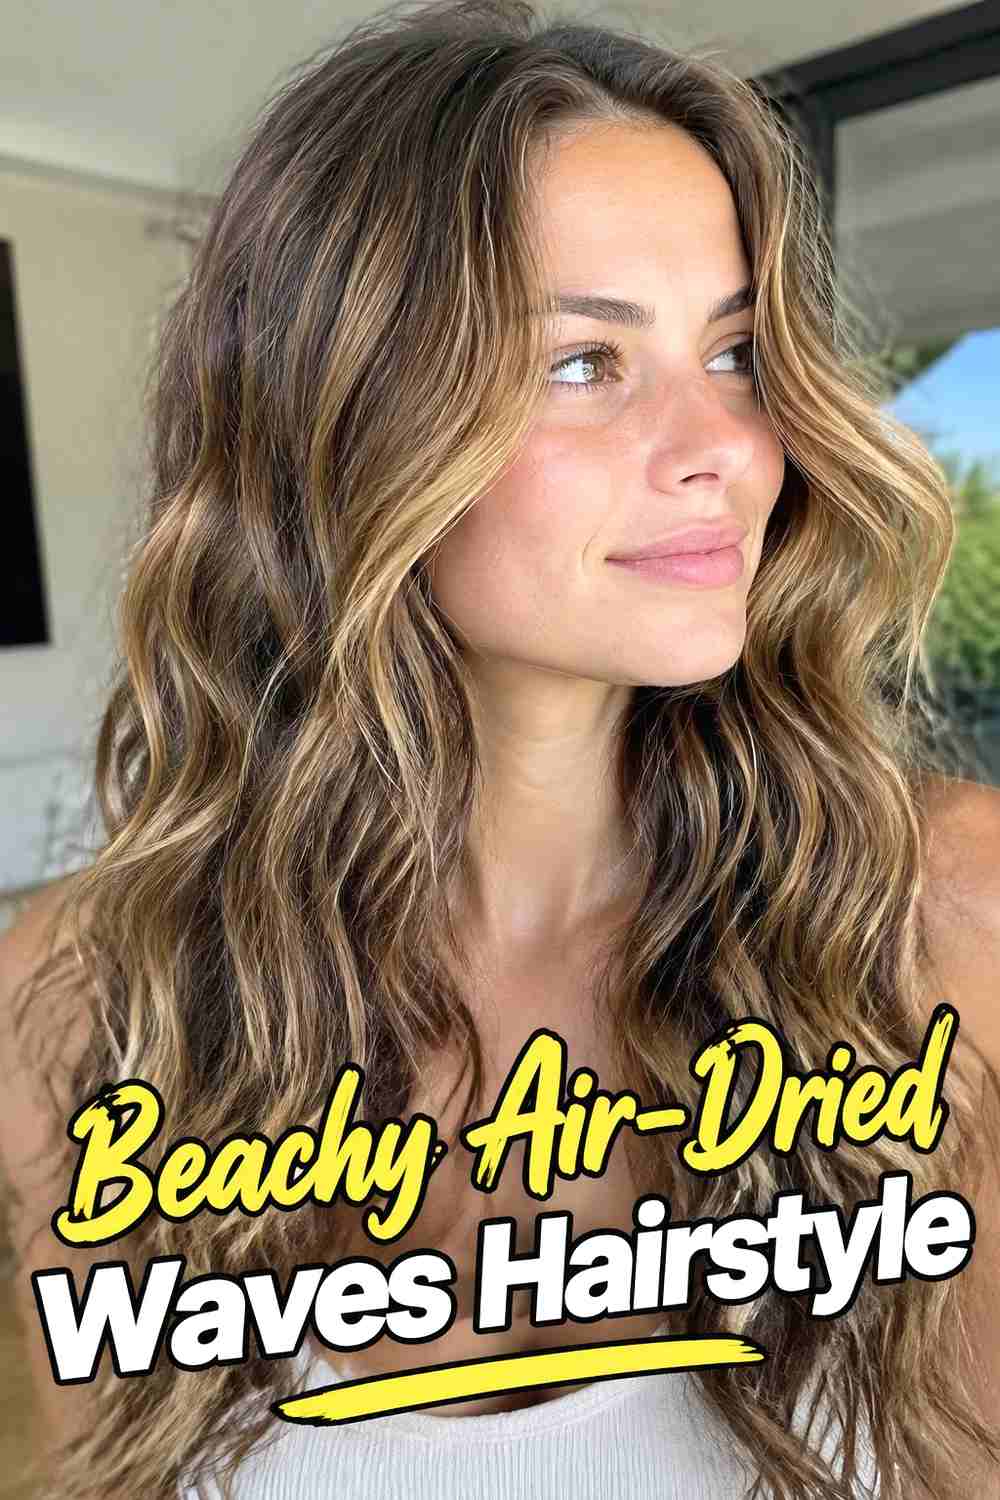
Beachy air-dried waves have a slightly separated, breezy finish with bends that vary in size from section to section. The goal is movement rather than perfect curl formation, making this look particularly natural on hair with an existing loose wave pattern. A light wave-enhancing cream or salt-free texturizing product can help encourage separation without making the lengths feel stiff. Apply it to damp hair, twist a few random sections away from the face, and leave the remaining hair mostly untouched. As it dries, the twisted pieces create stronger bends alongside softer natural texture. Once dry, gently break apart the twists and shake the hair from underneath for a relaxed, wind-swept shape.
Why It Works
The mixture of stronger bends and softer sections prevents the hairstyle from looking too uniform. That irregularity is what gives beachy waves their relaxed, naturally dried character.
5. Defined Air Dried Waves Hairstyle
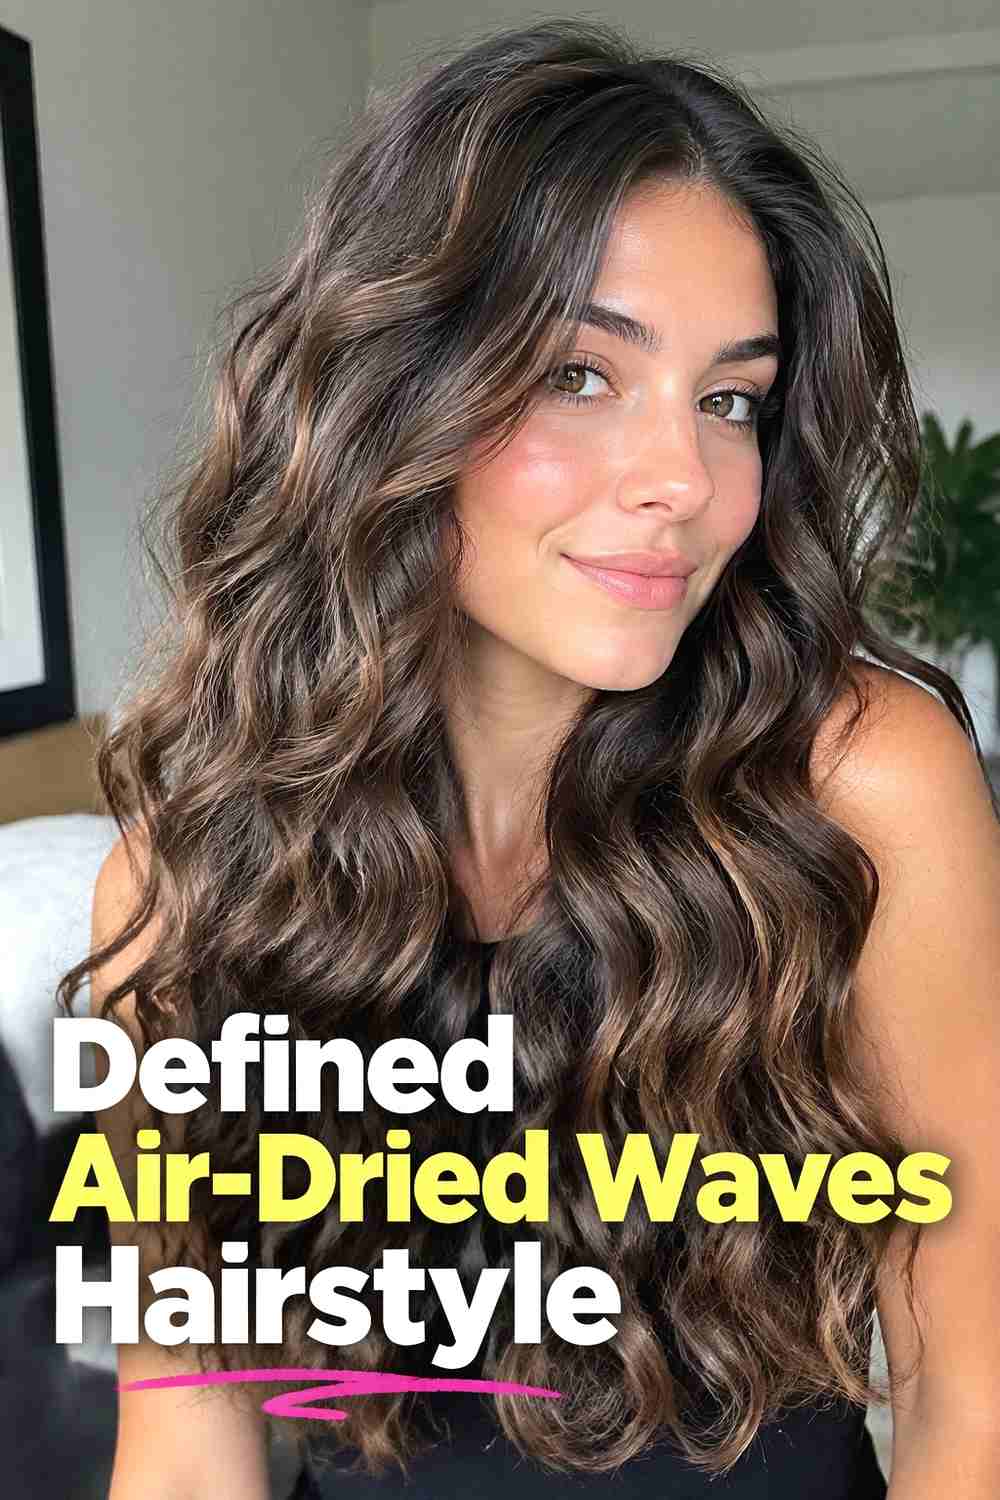
Defined air-dried waves keep the natural pattern visible from roots to ends without relying on a curling iron to create identical shapes. This look benefits from styling the hair while it is very damp so products can spread evenly and help neighboring strands form soft wave groups. Work a small amount of wave cream or light-hold gel through the lengths, then scrunch upward without disturbing the root placement too much. Allow the hair to dry completely before separating any sections. If a light cast forms from the styling product, gently squeeze the lengths with dry hands to soften it. The result should have clear wave definition while still retaining natural variation, softness, and individual strand movement.
Hair Type & Length
Naturally wavy hair usually shows this style most easily, but the amount of definition will vary with texture, density, layering, and product choice. Medium and long lengths give the wave pattern plenty of room to develop.
6. Shoulder Length Air Dried Waves Hairstyle
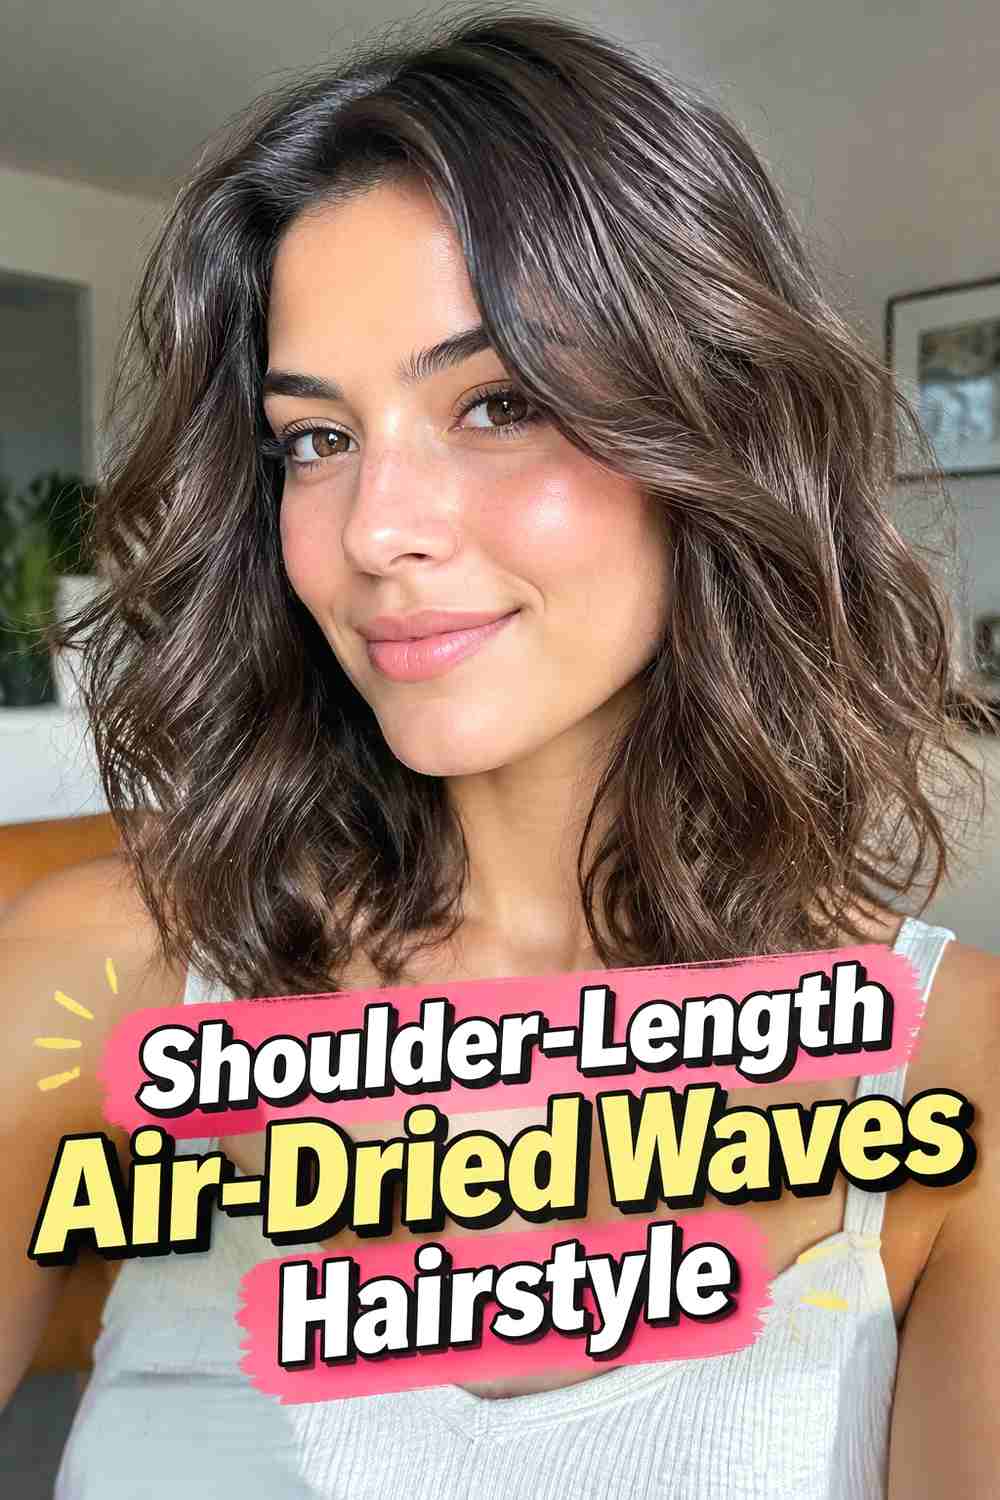
Shoulder-length hair is a practical canvas for air-dried waves because it has enough length to show movement without being weighed down by very long ends. A softly layered lob can create natural bends around the jaw and shoulders, especially when the ends are encouraged upward with gentle scrunching. Apply a lightweight leave-in or styling lotion to damp hair, focusing mostly on the middle and lower sections. If your roots tend to flatten, keep them relatively product-free and allow a little natural lift around the crown. When the hair is dry, separate only the sections that feel too clumped together. The finished shape should look airy, easy, and slightly undone rather than heavily styled.
Wear & Maintenance
This length is easy to refresh by lightly dampening only the sections that have lost their shape. Rework those pieces with your fingers rather than soaking and restyling the entire head.
7. Long Layered Air Dried Waves Hairstyle
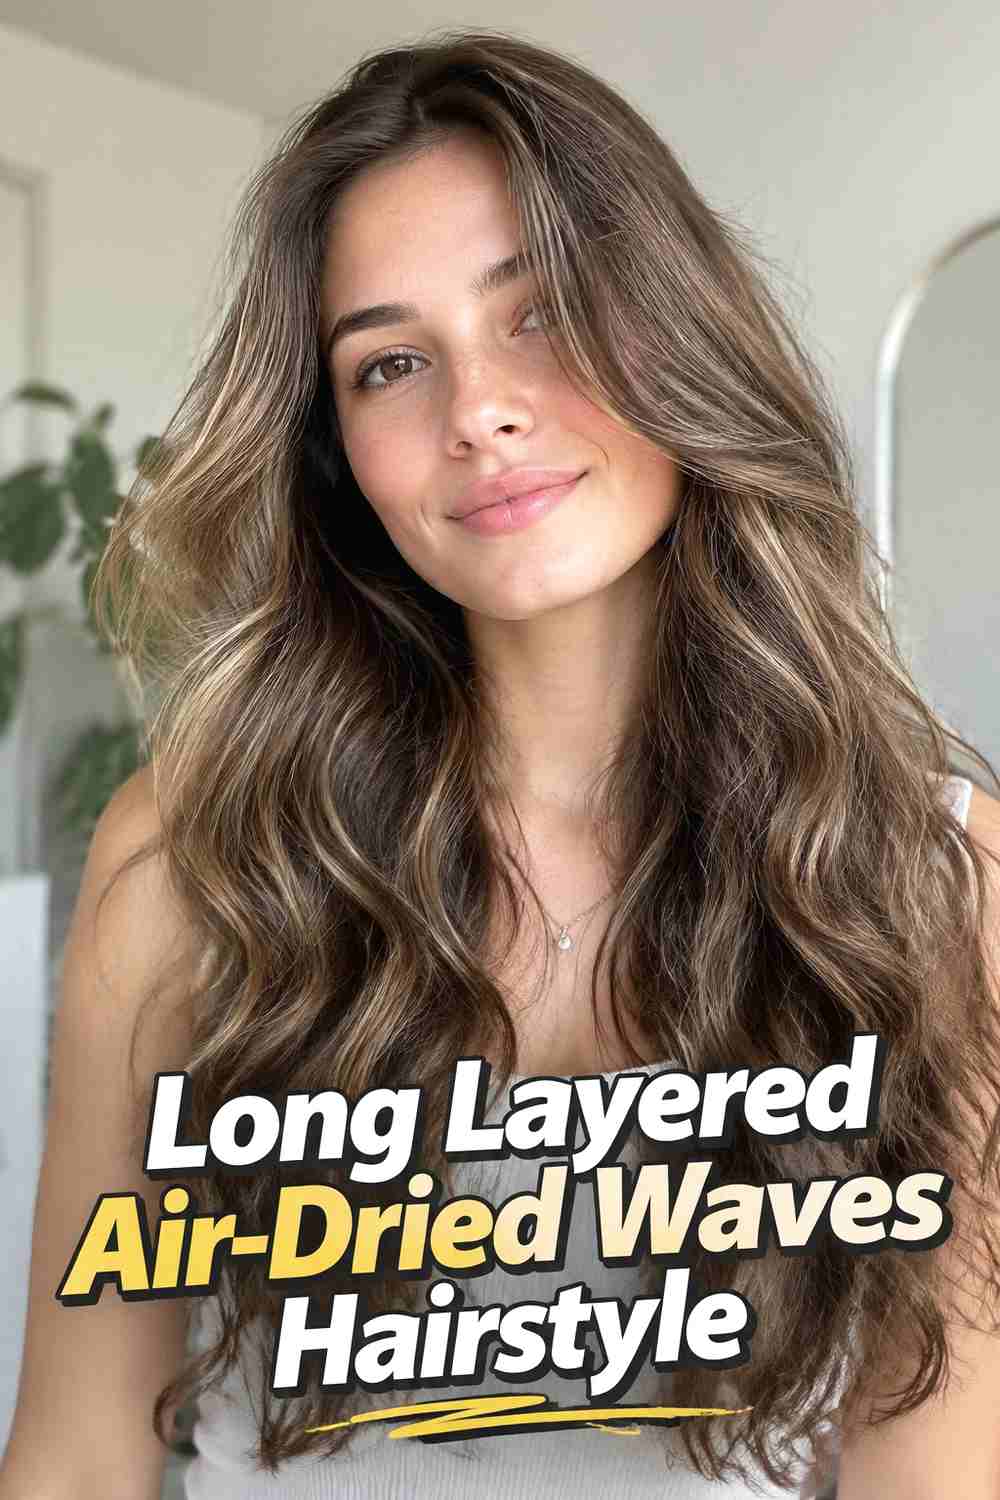
Long layers help air-dried waves stay visible by removing some of the visual heaviness that can make one-length hair look flat. Shorter pieces around the face can form light bends, while longer sections create stretched, flowing waves through the back. The result feels natural and dimensional rather than overly full at the bottom. After washing, distribute a lightweight conditioning styler through damp hair and gently squeeze out excess water with a soft towel or cotton T-shirt. Encourage a few sections with finger twists, but let most of the hair follow its natural pattern. Once dry, shake the roots lightly and separate only the thicker clumps so the layers remain distinct without becoming frizzy.
Why It Works
Layering creates different lengths and weights throughout the haircut, allowing the wave pattern to show at several levels instead of collecting mainly near the ends.
8. Bob Length Air Dried Waves Hairstyle
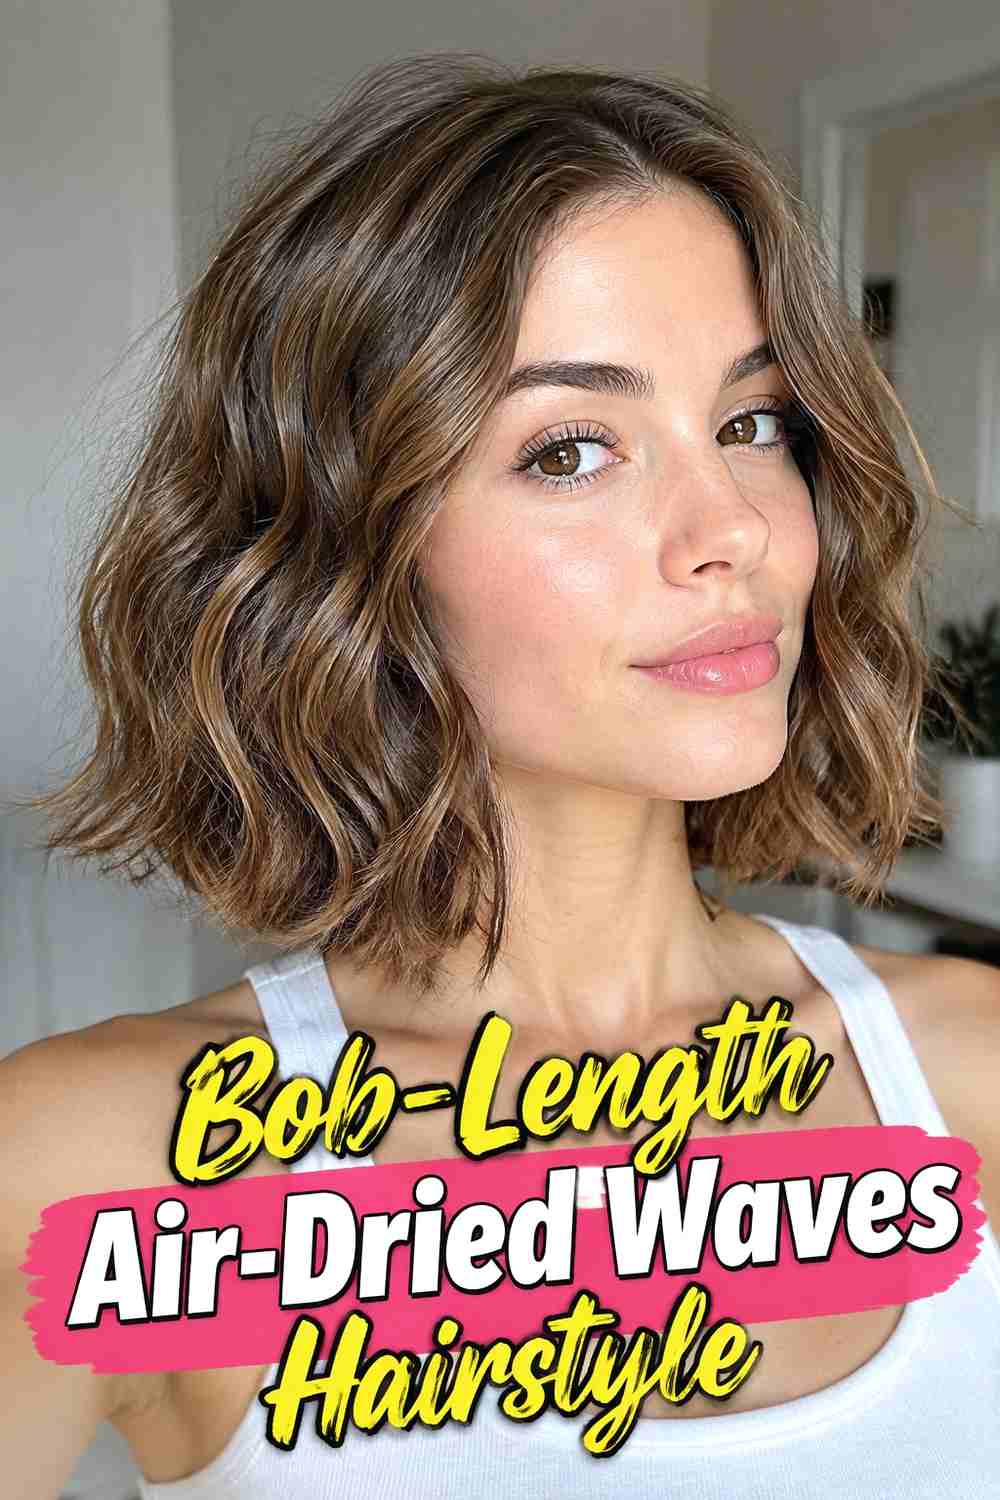
Air-dried waves can give a bob a soft, modern shape that feels less rigid than a perfectly blown-out finish. On chin- to jaw-length hair, even small natural bends can create noticeable texture because there is less length pulling them downward. Start with damp hair and apply only a small amount of lightweight styling cream, especially if the strands are fine. Gently tuck one side behind the ear or establish a subtle off-center part while the hair dries to create shape around the face. Avoid constantly rearranging the ends, since short pieces can become puffy when disturbed. Once fully dry, use your fingertips to separate the waves and settle the outline into a relaxed bob silhouette.
Best For
This look is especially useful for naturally wavy bobs that already form bends around the cheek and jaw. A light product application helps preserve movement without overwhelming the shorter length.
9. Frizz Softened Air Dried Waves Hairstyle
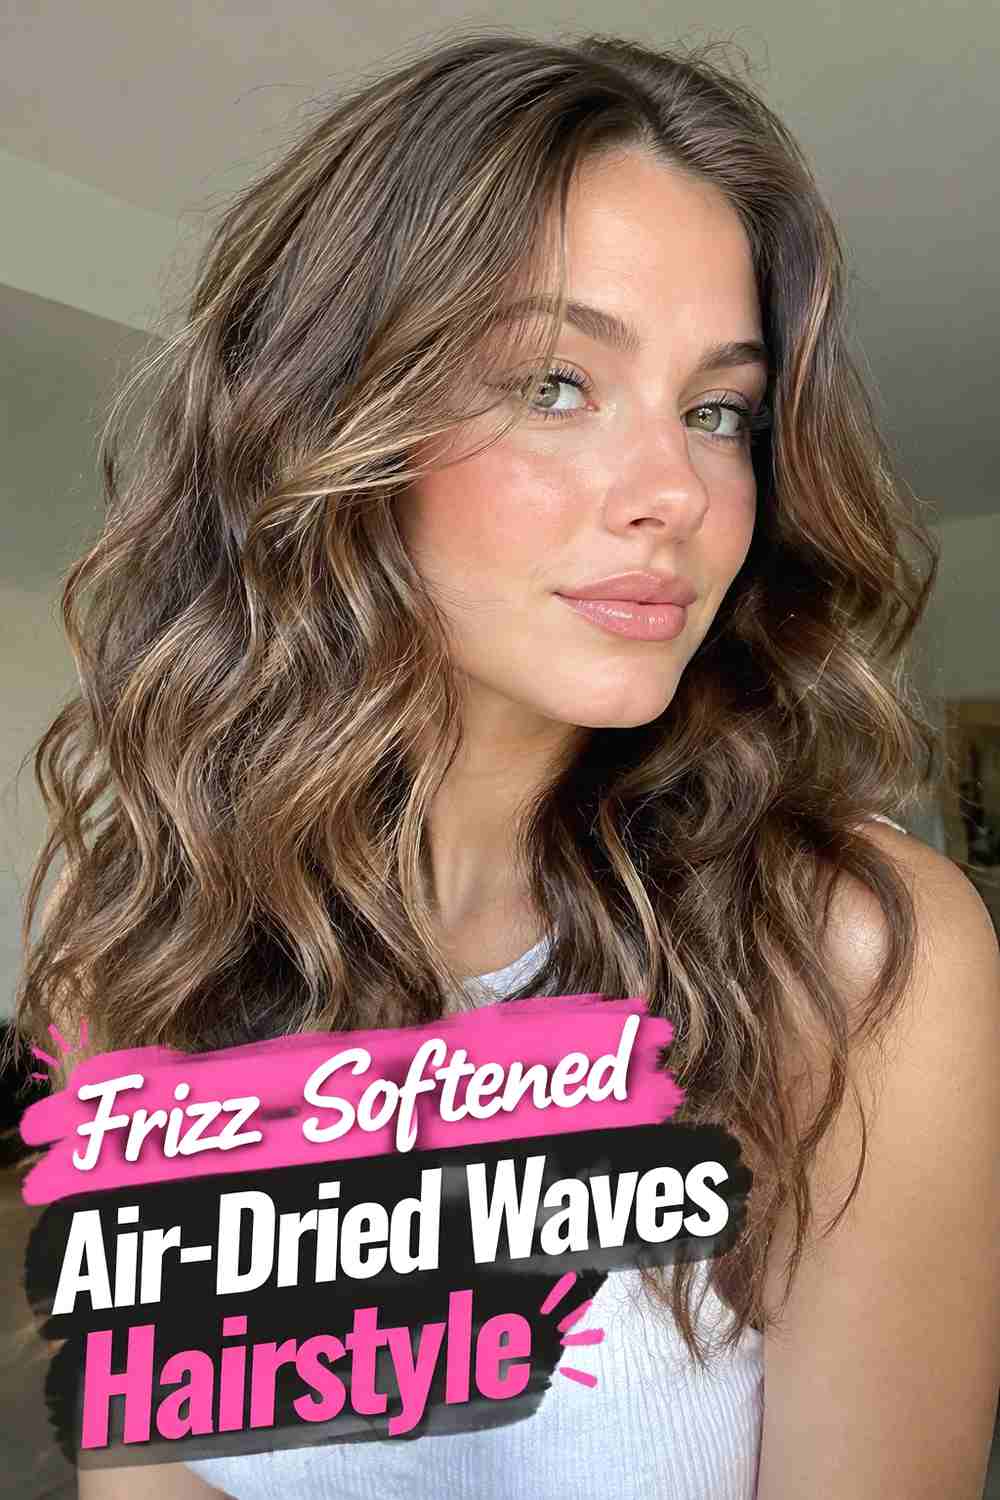
Frizz-softened waves aim for a polished natural finish without erasing every flyaway or bit of texture. The waves remain airy and touchable, but the surface is gently controlled so individual bends look clearer. Begin by applying a smoothing leave-in or lightweight cream to very damp hair, working it through with your hands rather than repeatedly brushing once the wave pattern begins forming. Scrunch softly, then allow the hair to dry with minimal disturbance. When fully dry, warm a tiny amount of finishing serum between your palms and skim it over the outer layer instead of saturating the strands. This keeps the style realistic and softly textured while reducing the appearance of excess surface puffiness.
Pro Tip
Use less finishing product than you think you need. Adding too much after the hair dries can collapse the airy wave pattern and make naturally separated sections look heavy.
10. Piecey Air Dried Waves Hairstyle
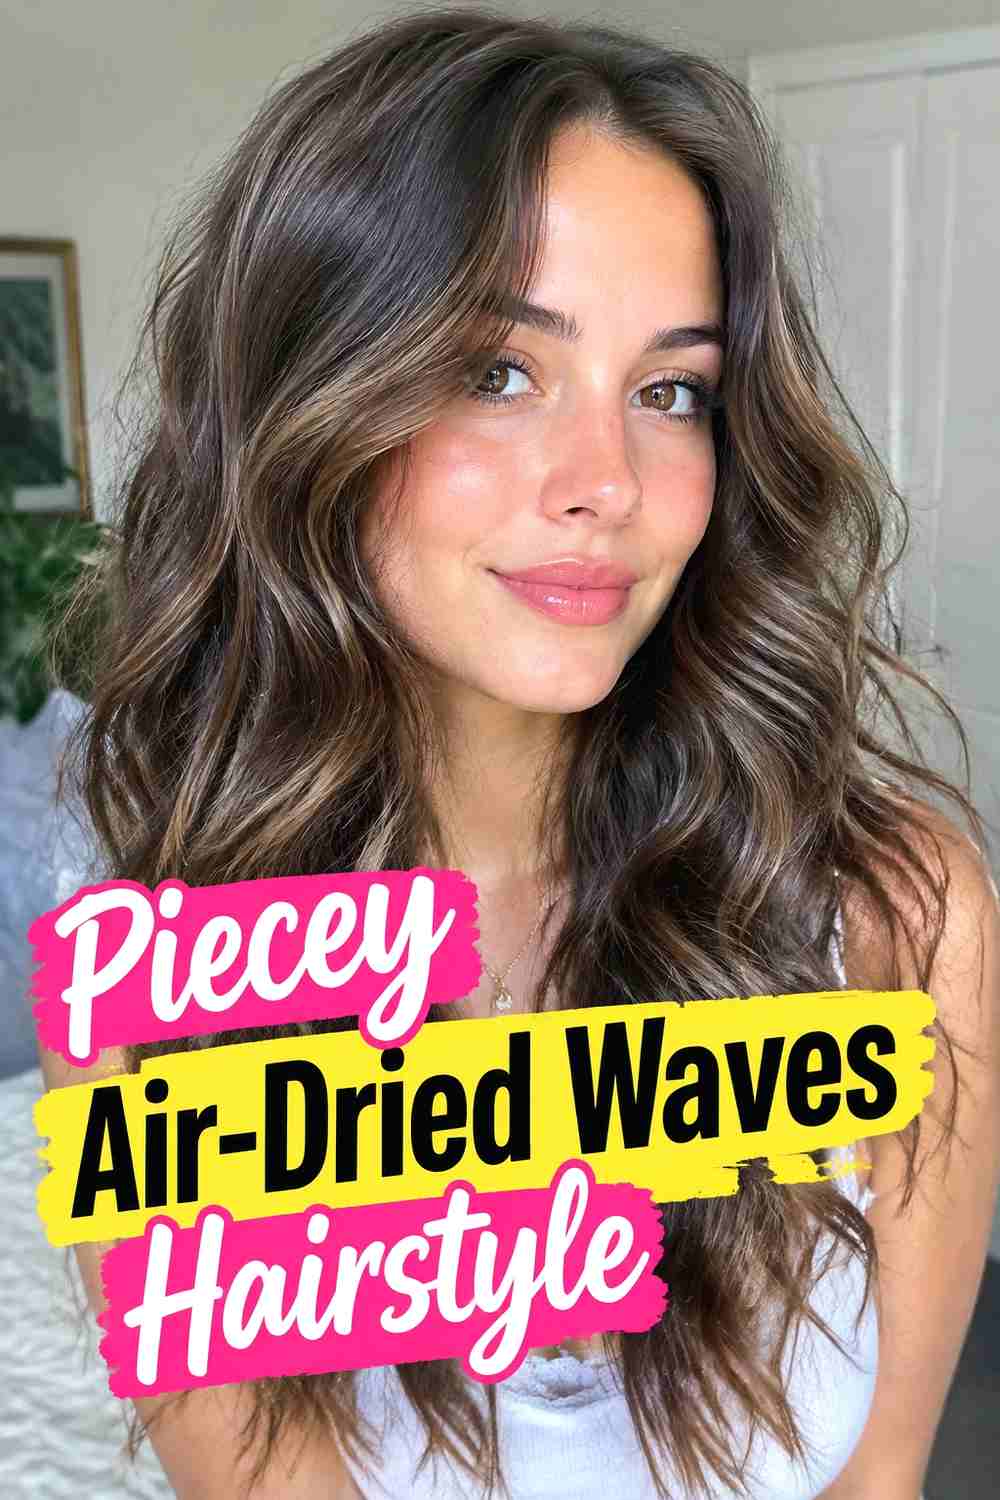
Piecey air-dried waves have more visible separation between sections, giving the hairstyle a casual, slightly editorial texture. Instead of brushing the hair into one continuous wave pattern, individual bends remain distinct and move in slightly different directions. This works well on layered medium or long hair where the ends naturally separate as they dry. Apply a small amount of lightweight wave product to damp hair, then twist several narrow sections loosely with your fingers. Leave plenty of hair untwisted so the result does not become too uniform. Once dry, open the twists carefully and use your fingertips to define a few ends. The finished look should appear textured and intentional without looking stringy or coated.
Styling Notes
Concentrate separation around the mid-lengths and ends rather than the roots. Keeping the root area softer prevents the piecey finish from looking overly fragmented.
11. Voluminous Air Dried Waves Hairstyle
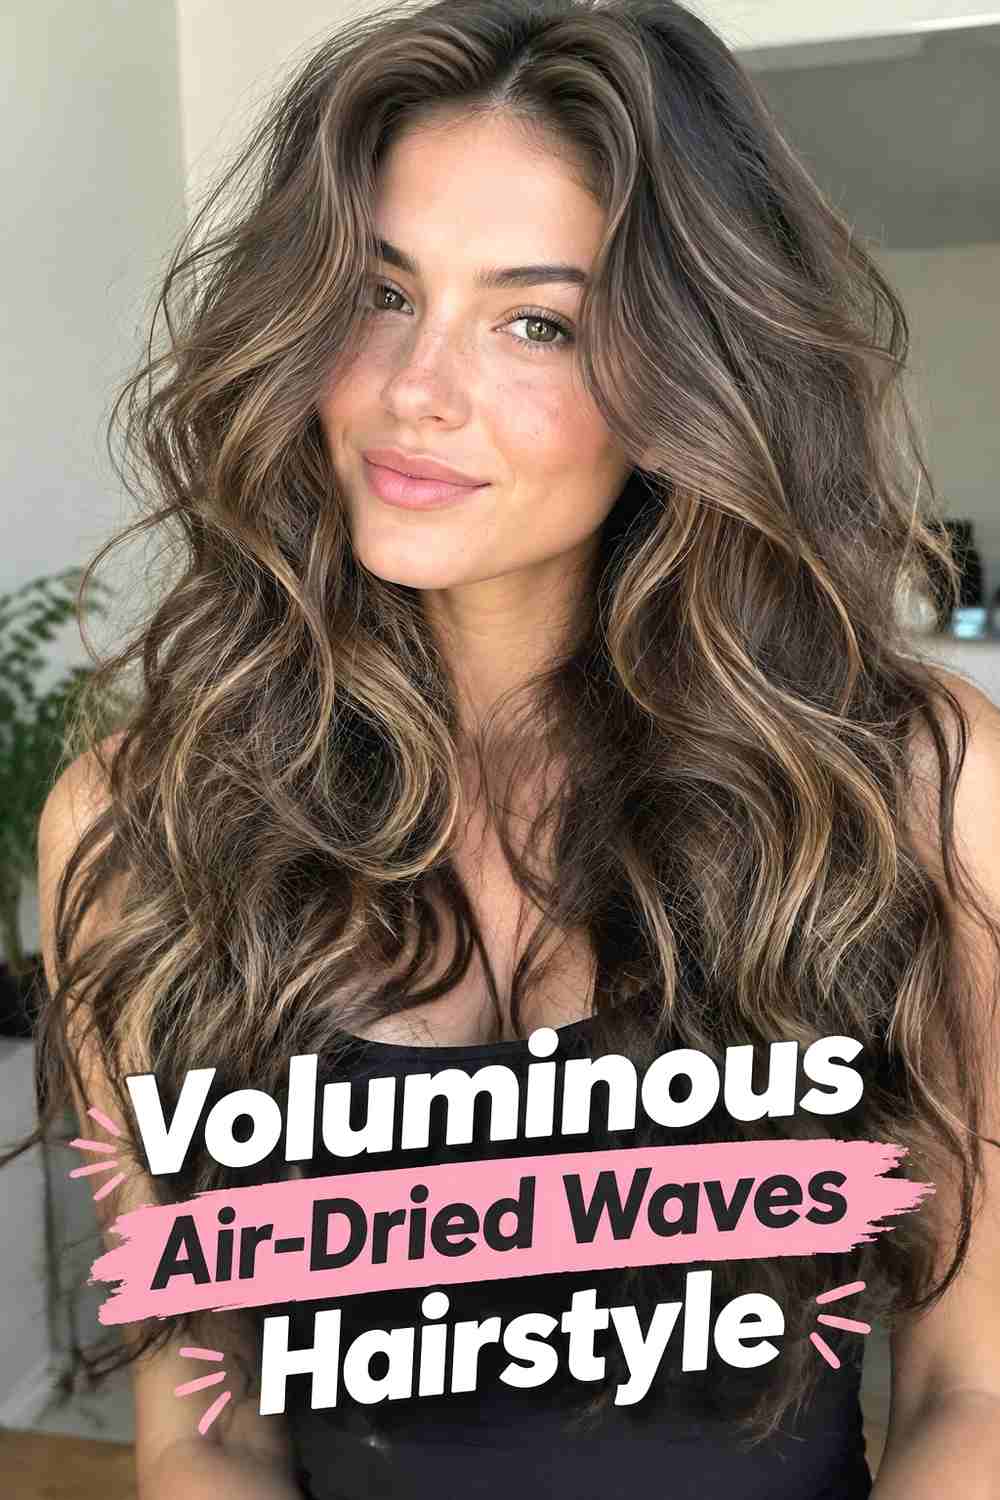
Voluminous air-dried waves focus on lift and width while keeping the texture soft enough to move naturally. This style is particularly effective when the hair already has some wave at the root or when layers help prevent the lengths from pulling everything downward. Apply a lightweight mousse or airy styling foam through damp hair, then scrunch upward with your hands while keeping the crown loose. If comfortable for your routine, changing the direction of your part during drying can also help prevent the roots from settling completely flat. Once the hair is dry, gently lift underneath with your fingertips and avoid brushing through the lengths. The finished result should feel full and buoyant rather than stiff or excessively expanded.
Hair Type & Length
Medium-density wavy hair often carries this shape naturally, while finer hair may need lighter products. Very long or dense hair may show more volume through the lower lengths than at the roots.
12. Curtain Bang Air Dried Waves Hairstyle
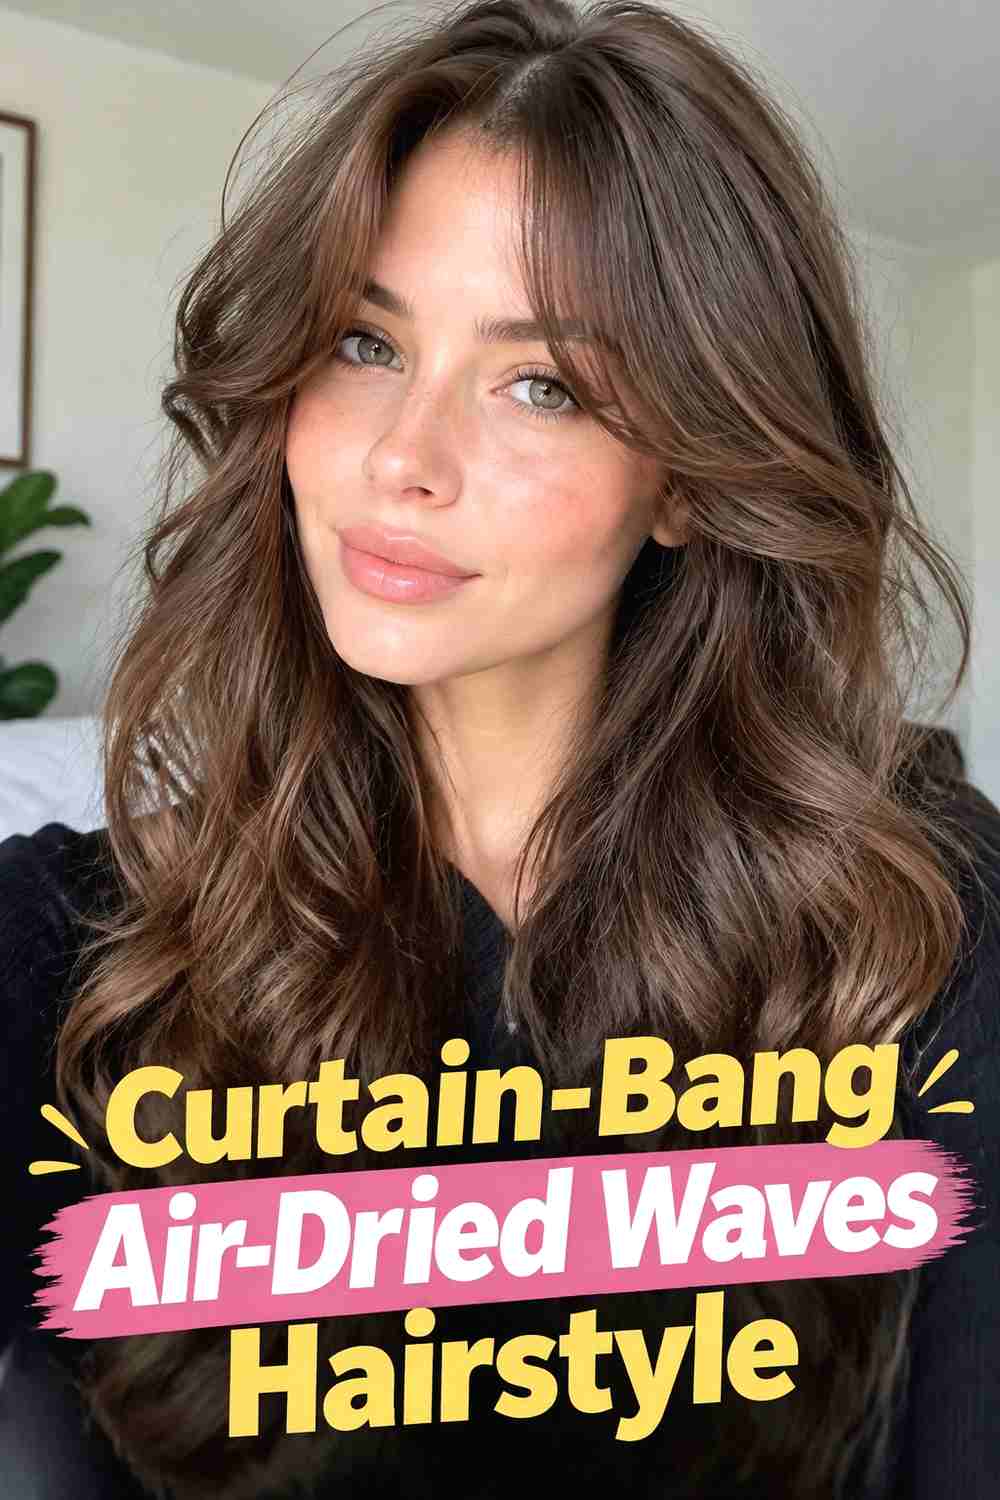
Curtain bangs pair naturally with air-dried waves because both rely on softness and imperfect movement rather than a rigid finish. The fringe can split around the center or just off-center, blending into face-framing layers that develop loose bends near the cheeks. While the hair is damp, position the bangs where you want them to fall and encourage each side away from the face with your fingers. Apply styling product mainly through the longer lengths so the fringe does not become weighed down. As the hair dries, resist repeatedly moving the bangs from side to side. Once dry, separate the front pieces gently and let their natural bend connect with the surrounding waves.
Styling Notes
Curtain bangs may dry differently from the rest of the hair because they are shorter and lighter. Shape them early, then leave them alone while the longer sections continue drying.
13. Scrunched Air Dried Waves Hairstyle
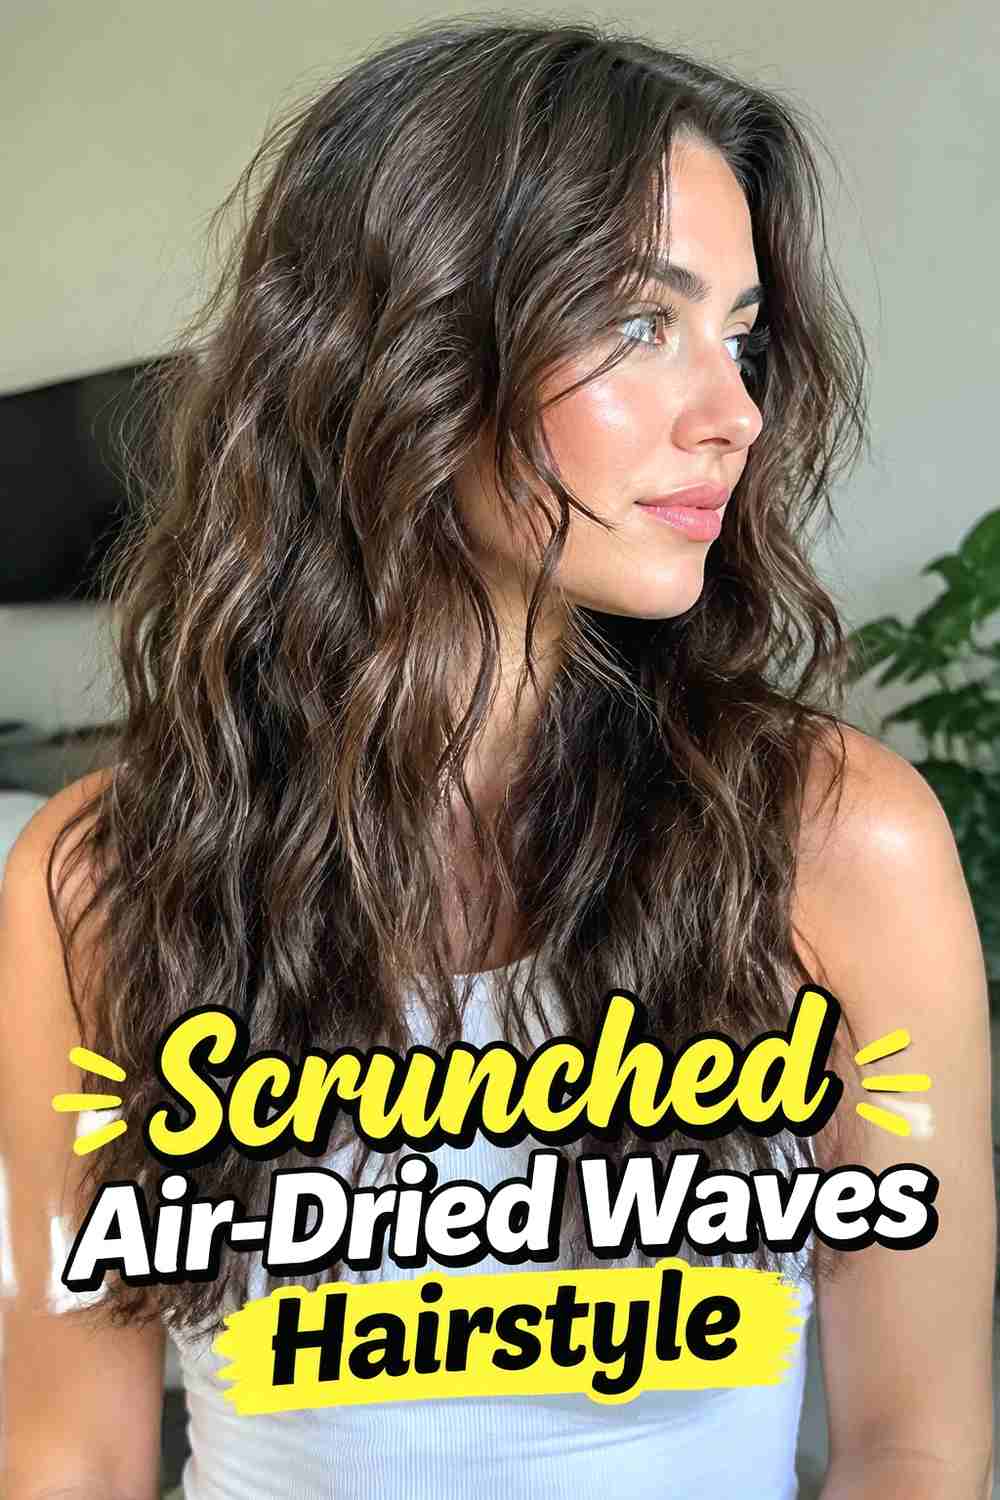
Scrunching is one of the simplest ways to encourage an existing wave pattern while hair dries. This version has more obvious bends and texture through the lengths, with a slightly springier finish than softly tousled waves. Start with damp hair and distribute your preferred light-hold product evenly before cupping the ends upward toward the scalp. Use gentle squeezing motions rather than rough rubbing, and repeat only enough to encourage the pattern. Then leave the hair alone so the forming waves are not constantly pulled apart. Once everything is completely dry, soften any firm product cast by scrunching again with clean, dry hands. The result should feel flexible and touchable while keeping visible wave definition.
Pro Tip
Avoid breaking up the wave groups while the hair is still damp. Waiting until the style is fully dry usually makes it easier to soften the texture without creating unnecessary puffiness.
14. Glossy Natural Air Dried Waves Hairstyle
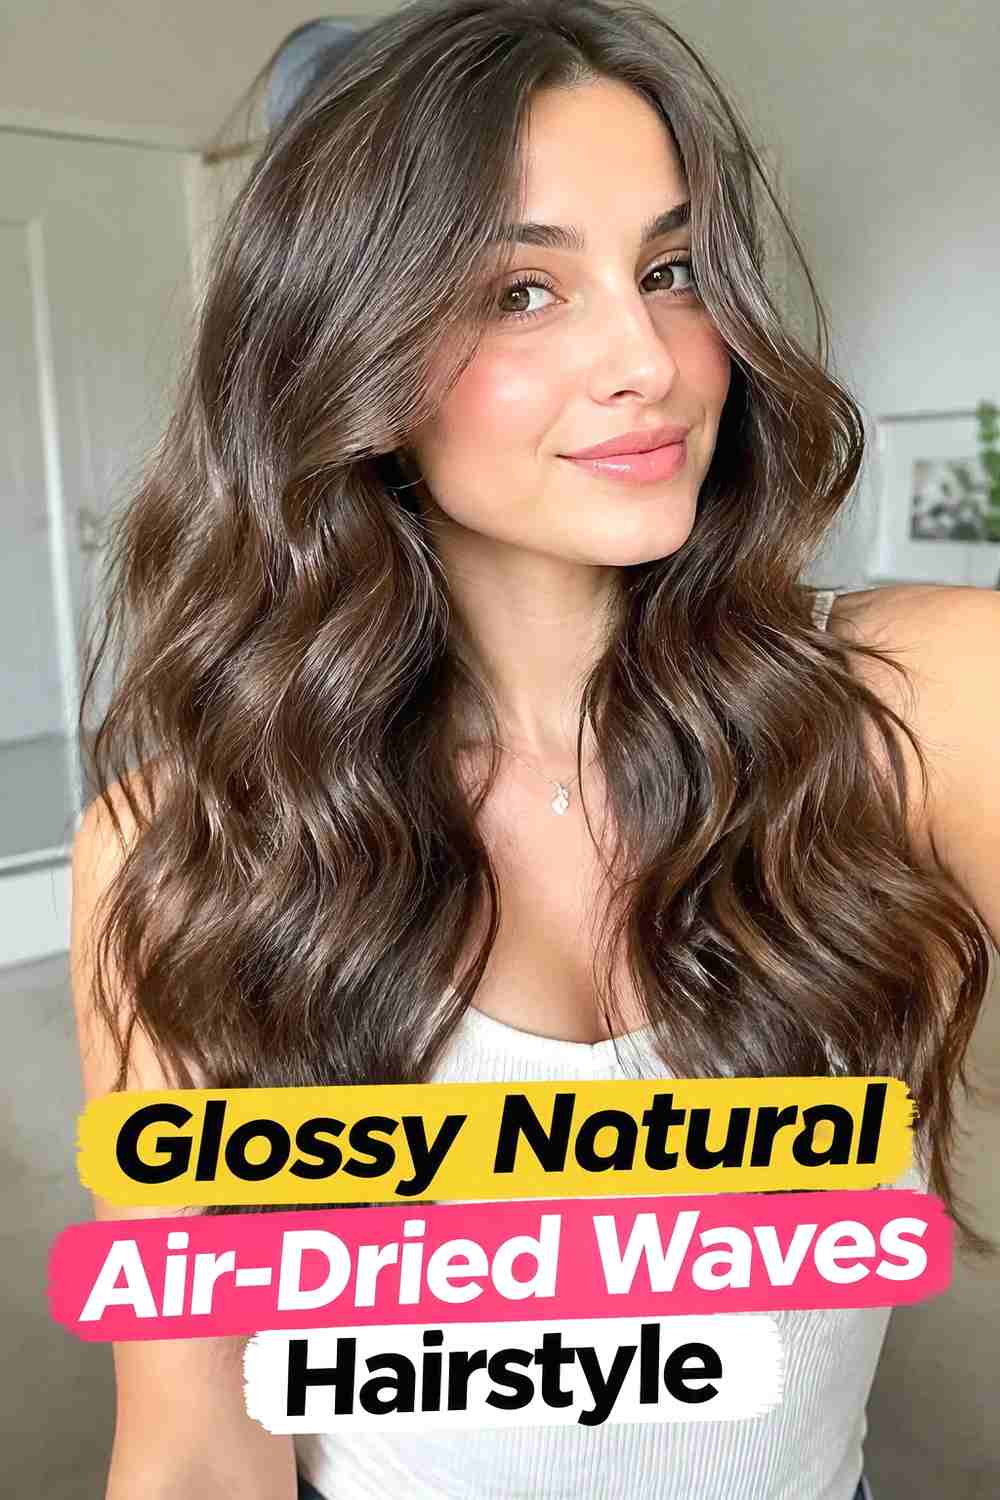
Glossy natural waves prove that air-dried texture can look polished without becoming overly sleek. The key is keeping the surface smooth enough to reflect light while preserving the irregular bends, individual strands, and soft movement that make naturally dried hair distinctive. Apply a lightweight leave-in product to damp hair, then add a small amount of wave cream through the mid-lengths and ends. Encourage the existing pattern with gentle scrunching or a few loose finger twists, then allow the hair to dry without frequent handling. When completely dry, smooth a tiny drop of serum over the outer layer and ends. The final finish should look luminous and healthy-looking while still clearly reading as natural texture.
Why It Works
Shine is most flattering here when it enhances the existing texture instead of flattening it. Keeping glossy product mainly on the surface and ends helps maintain both dimension and movement.
How to Choose the Right Look
Start with your natural wave pattern. If your hair already forms visible bends, defined, scrunched, or glossy air-dried waves can emphasize what is there. If your pattern is looser, soft tousled, piecey, or beachy finishes may feel more realistic because they do not depend on every section forming a strong wave.
Length matters too. Bobs show even small bends clearly, shoulder-length hair offers a balanced mix of movement and manageability, and long layers can prevent longer waves from looking weighed down. Curtain bangs and face-framing layers add movement near the front, while a center or side part changes the overall silhouette without requiring extra styling.
Product weight is another important factor. Fine hair usually benefits from lighter formulas, while denser or drier-feeling textures may prefer more conditioning control. For more definition, style while the hair is very damp and minimize touching as it dries. For a softer finish, use less product and separate the waves gently after drying.
Final Thoughts
Air-dried waves look best when the styling method works with your existing texture rather than forcing every strand into the same shape. Choose a finish based on your length, density, layering, and preferred level of definition, then keep the process simple enough for your everyday routine. Whether you prefer a soft bob, beachy texture, defined waves, or glossy long layers, a little natural variation keeps the result modern and believable.
FAQs
1. How can I make air-dried waves more defined?
Apply a lightweight wave cream, mousse, or gel while the hair is still damp, then scrunch or finger-shape the existing pattern. Let the hair dry fully before separating the waves.
2. Should I brush my hair after air-drying it wavy?
A traditional brush can soften or stretch out the wave pattern. If you want to preserve definition, use your fingertips to separate sections once the hair is completely dry.
3. How do I air-dry waves without making the roots look flat?
Keep heavy products away from the roots, establish your part while the hair is damp, and gently lift or change the root direction during the early stages of drying.
4. Can short hair be styled into air-dried waves?
Yes. Naturally wavy bobs and lobs can show texture particularly well because shorter lengths have less weight pulling the bends downward. Lightweight styling products are usually easier to control on short hair.
5. How much product should I use for air-dried waves?
Start with a small amount and add only if your hair needs more control or definition. The right quantity depends on length, density, texture, and the product itself, and too much can make waves feel heavy.
Save your favorite air-dried waves hairstyle ideas, share them with a friend, and explore more effortless texture inspiration for your next look.