14 Cobweb Hair Net Bun Hairstyle Ideas
Turn an everyday bun into a striking seasonal statement with cobweb-inspired hair nets, polished textures, playful details, and wearable gothic touches.
Cobweb hair net bun hairstyles blend classic updo structure with a decorative web-like covering that instantly gives the bun more visual detail. Depending on the finish, the result can feel polished, romantic, theatrical, vintage, or playfully Halloween-inspired without requiring an overly complicated updo.
The key differences are bun placement, surface texture, net color, accessories, and how much softness you leave around the face. A sleek low bun feels refined, while messy or curly versions create more dimension beneath the web. Braids, ribbons, pearls, and small spider accents can personalize the theme even further.
Quick List
- Classic Cobweb Hair Net Bun Hairstyle
- Low Nape Cobweb Hair Net Bun Hairstyle
- High Crown Cobweb Hair Net Bun Hairstyle
- Side Swept Cobweb Hair Net Bun Hairstyle
- Braided Cobweb Hair Net Bun Hairstyle
- Twisted Chignon Cobweb Hair Net Bun Hairstyle
- Messy Cobweb Hair Net Bun Hairstyle
- Sleek Cobweb Hair Net Bun Hairstyle
- Curly Cobweb Hair Net Bun Hairstyle
- Double Cobweb Hair Net Bun Hairstyle
- Silver Web Cobweb Hair Net Bun Hairstyle
- Velvet Ribbon Cobweb Hair Net Bun Hairstyle
- Pearl Pinned Cobweb Hair Net Bun Hairstyle
- Mini Spider Accent Cobweb Hair Net Bun Hairstyle
1. Classic Cobweb Hair Net Bun Hairstyle
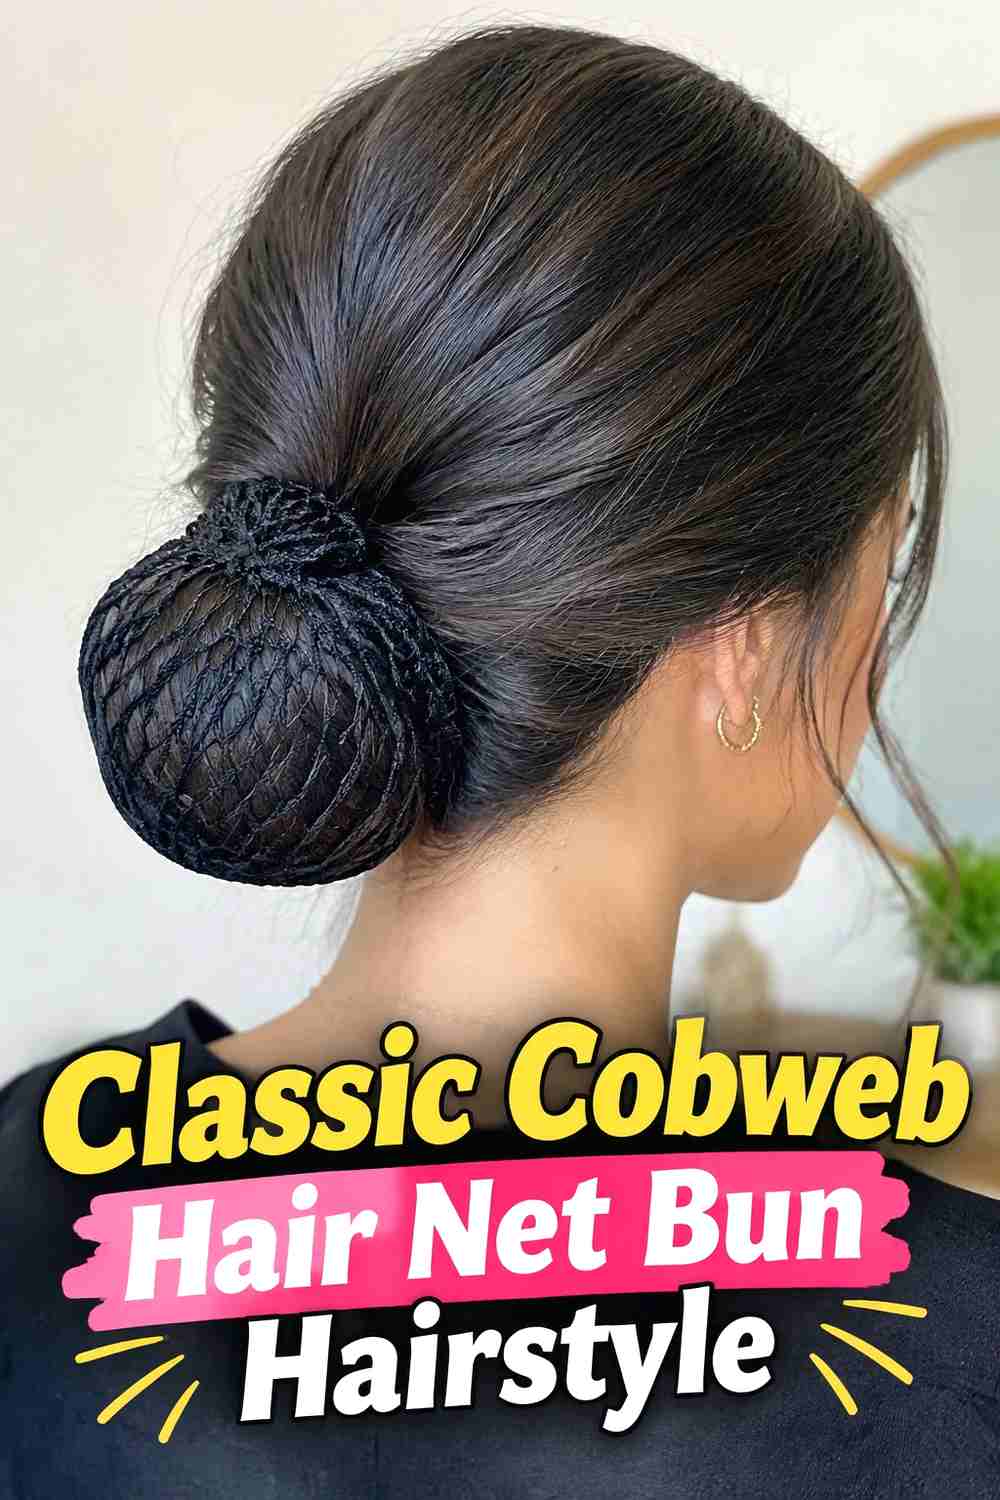
The classic version keeps the concept simple: a rounded bun is wrapped neatly in a fine cobweb-inspired hair net so the web pattern remains clearly visible against the hair. A medium-height placement at the back of the head gives the style a balanced silhouette that works well from both side and rear angles. The hair underneath can be smooth without looking overly lacquered, allowing realistic strands and natural shine to show through the net. This is a strong starting point if you want the web detail to be noticeable without adding many extra accessories. A secure ponytail base helps the bun stay centered and keeps the decorative net from shifting.
Styling Notes
Form the bun first, pin it firmly, and stretch the net evenly around the shape so the pattern does not bunch at one side.
Best For
This version suits themed parties, costume events, fall photos, or anyone wanting a clean interpretation of the cobweb bun trend.
2. Low Nape Cobweb Hair Net Bun Hairstyle
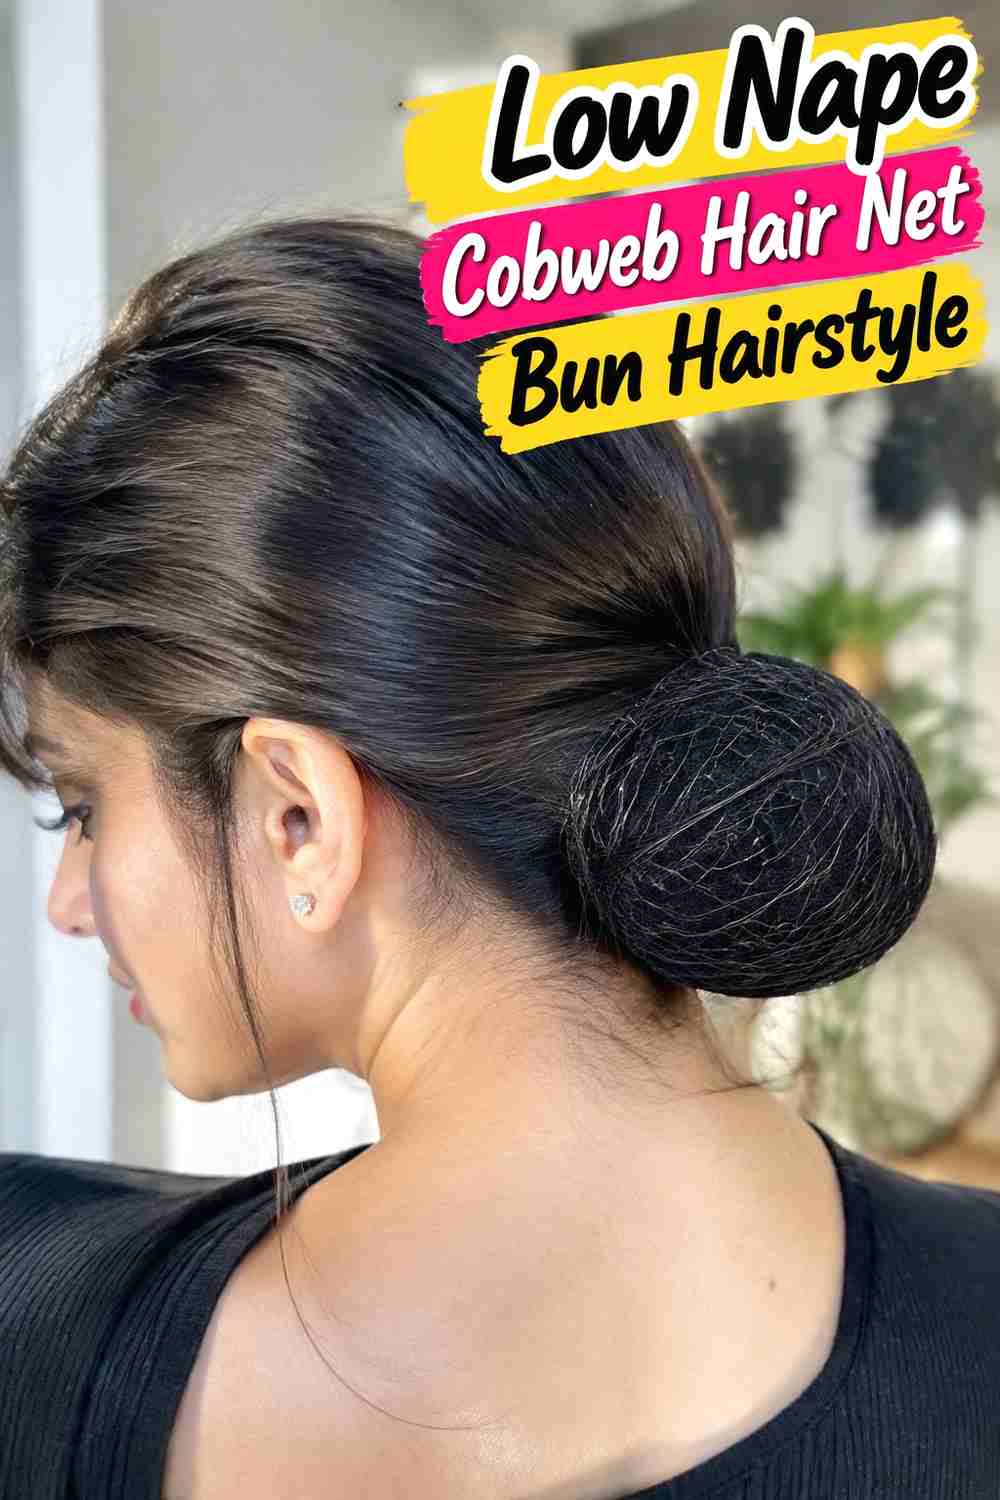
A low nape placement gives the cobweb bun a softer, more elegant feel. The bun sits just above the neckline, where the net can wrap around a compact twisted shape without adding excessive height. This placement works especially well with a center or soft side part because the front can remain smooth and understated while the decorative detail stays concentrated at the back. A few fine pieces around the ears can soften the silhouette if you prefer a less formal finish. Since low buns rest close to collars and scarves, keeping the net securely pinned is useful for longer wear. The finished style feels subtle from the front but reveals its web-inspired detail when viewed from behind.
Wear & Maintenance
Use discreet pins around the outer edge of the net, especially near the neckline where clothing may brush against the bun.
Why It Works
The low placement balances the playful cobweb detail with a refined shape, making the theme feel more polished than costume-heavy.
3. High Crown Cobweb Hair Net Bun Hairstyle
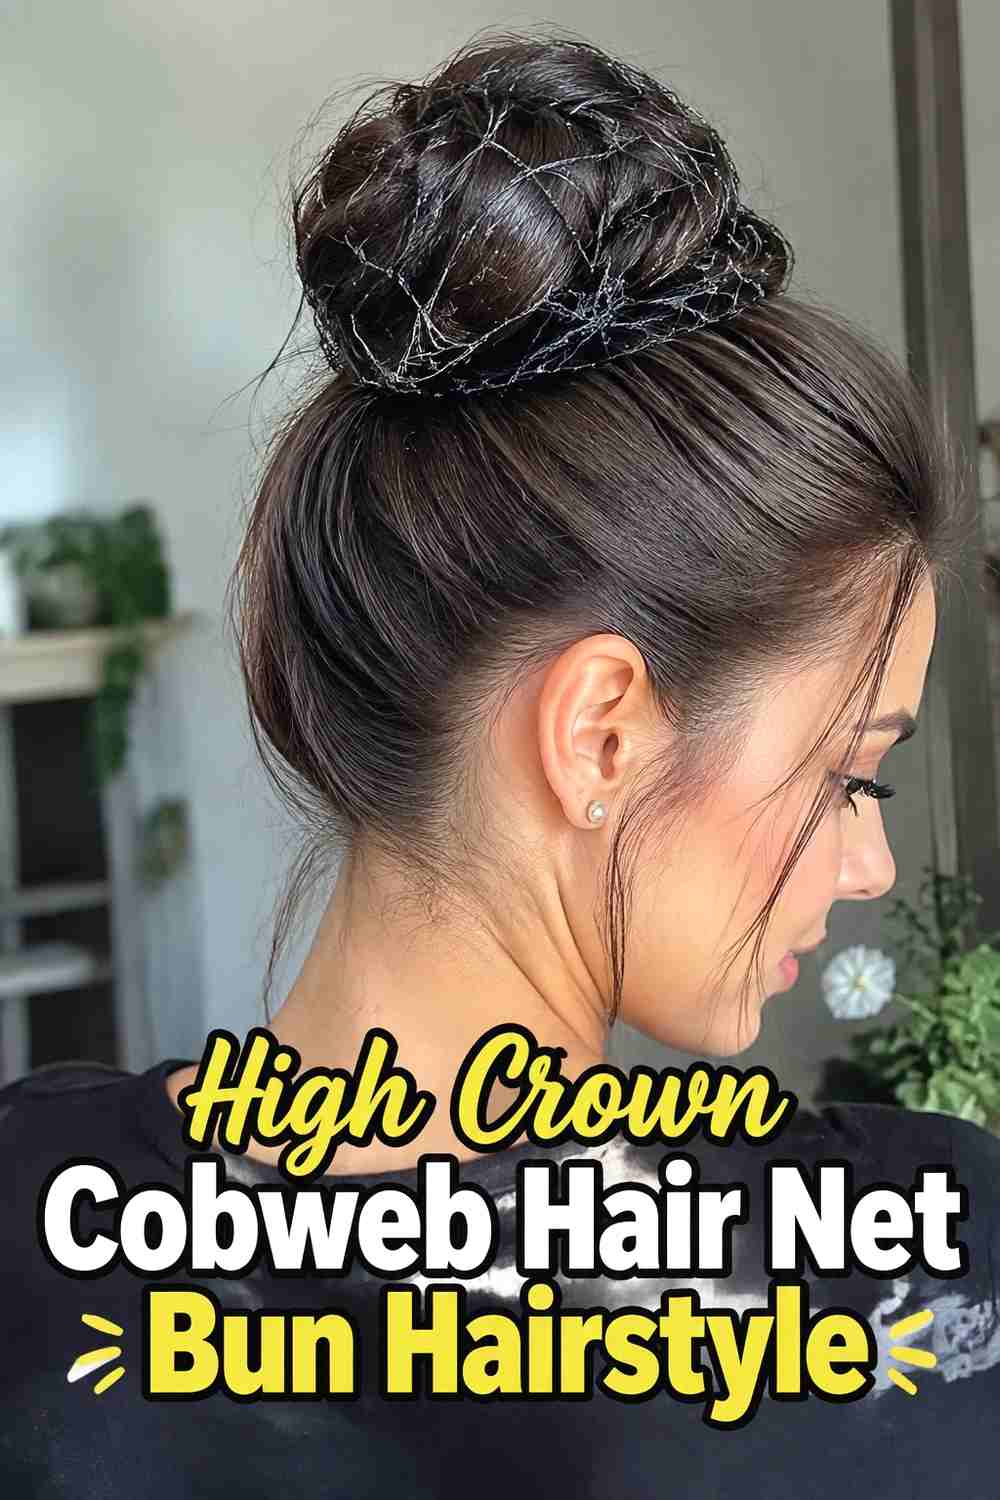
A high crown bun turns the cobweb hair net into a more dramatic focal point. Positioned near the top-back of the head, the bun becomes visible from more angles and creates a longer, lifted silhouette. The hair can be brushed smoothly upward or left with slight texture depending on how polished you want the result. A larger bun gives the web pattern more surface area to show, so this version works particularly well with medium or long hair. Keep the bun centered and well anchored before placing the net, since the higher position can feel less stable if the base is loose. The overall effect is bold and playful while still relying on a familiar top-bun structure.
Styling Notes
Secure the ponytail tightly enough to support the bun, but avoid excessive tension around the hairline.
Best For
Choose this option when you want the cobweb feature to remain visible in front-facing photos as well as side and back views.
4. Side Swept Cobweb Hair Net Bun Hairstyle
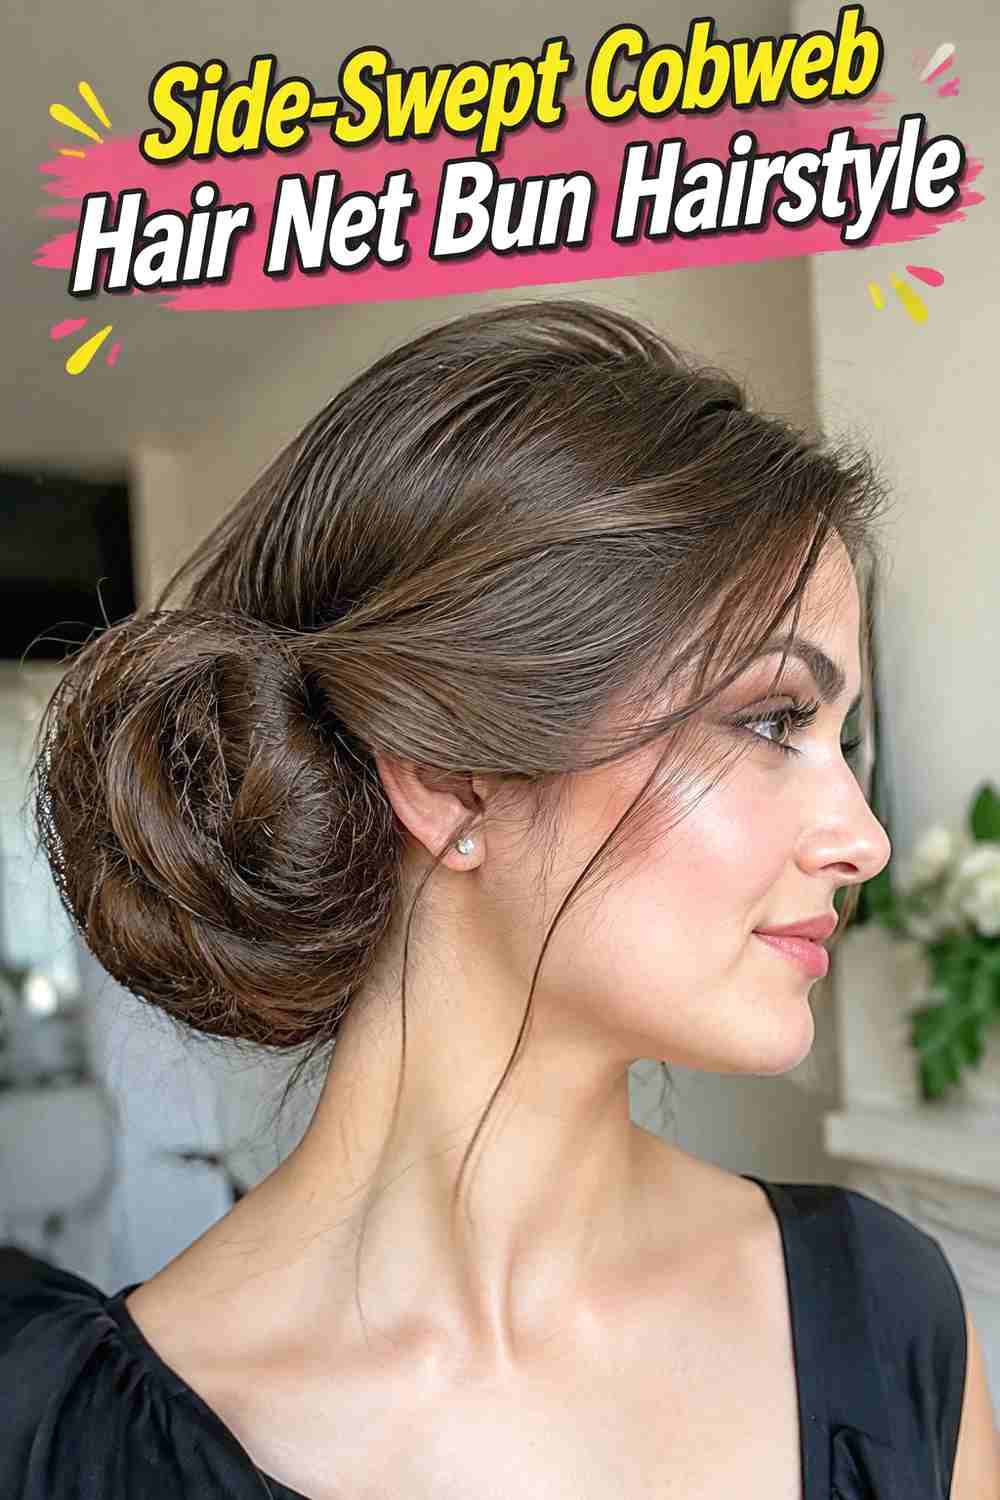
This asymmetrical version pairs a side-swept front with an off-center cobweb bun for a more expressive silhouette. The front hair can sweep diagonally across the forehead or temple before feeding into a bun positioned slightly behind one ear. Wrapping that bun in a web-pattern net emphasizes the unusual placement and creates a strong decorative detail from the profile. Because the design already has plenty of visual movement, the bun itself can remain simple and rounded. A few carefully placed pins are important to keep the side bun from drooping during wear. This variation has a slightly vintage, theatrical quality and can be dressed up or down depending on the net and accessory choices.
Hair Type & Length
Medium-to-long hair usually gives enough length to create a stable side bun while maintaining a smooth sweep across the front.
Pro Tip
Position the bun behind rather than directly over the ear so the style feels balanced and remains comfortable for longer wear.
5. Braided Cobweb Hair Net Bun Hairstyle
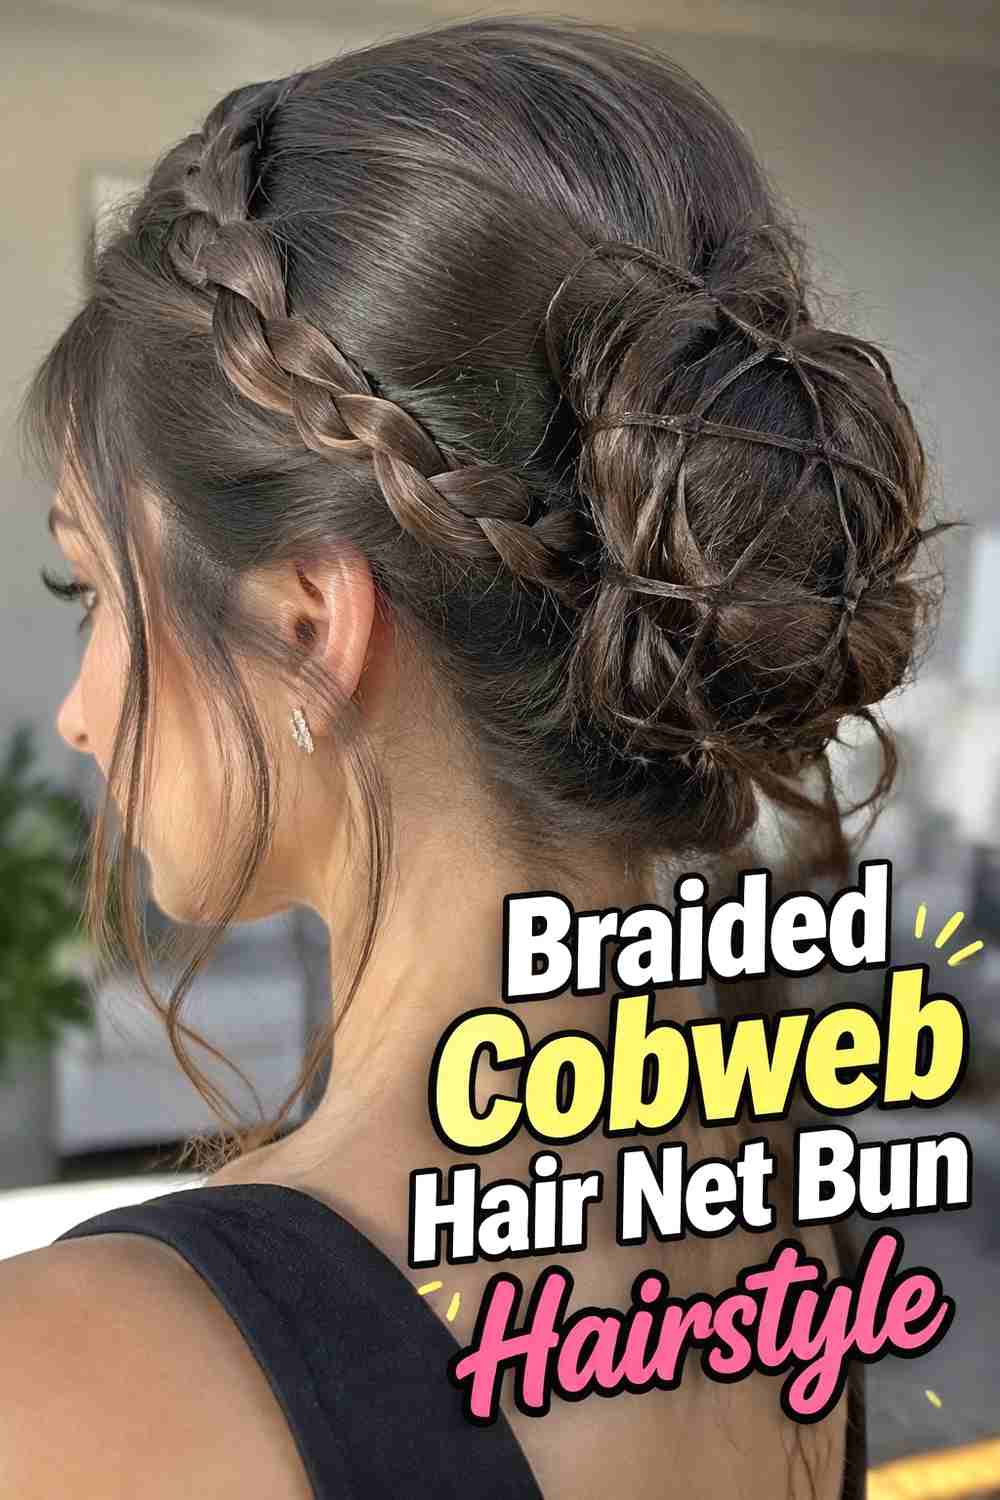
Adding a braid beneath the cobweb net creates texture that can still be seen through the open web pattern. Start with a ponytail, braid the length, and wrap it into a rounded bun so the woven structure forms visible ridges beneath the net. This gives the hairstyle more depth than a smooth bun and makes the back view especially detailed. A simple three-strand braid works well, although a rope braid can produce a cleaner spiral effect. The web covering should remain slightly transparent so it enhances rather than hides the braid underneath. Because braided buns hold their shape naturally, this is also a practical choice when you want a decorative updo with a firm, controlled structure.
Why It Works
The braid and the web pattern create two different layers of texture without requiring bulky accessories or complicated ornamentation.
Styling Notes
Loosen the braid slightly before wrapping it if you want the bun to appear fuller beneath the hair net.
6. Twisted Chignon Cobweb Hair Net Bun Hairstyle
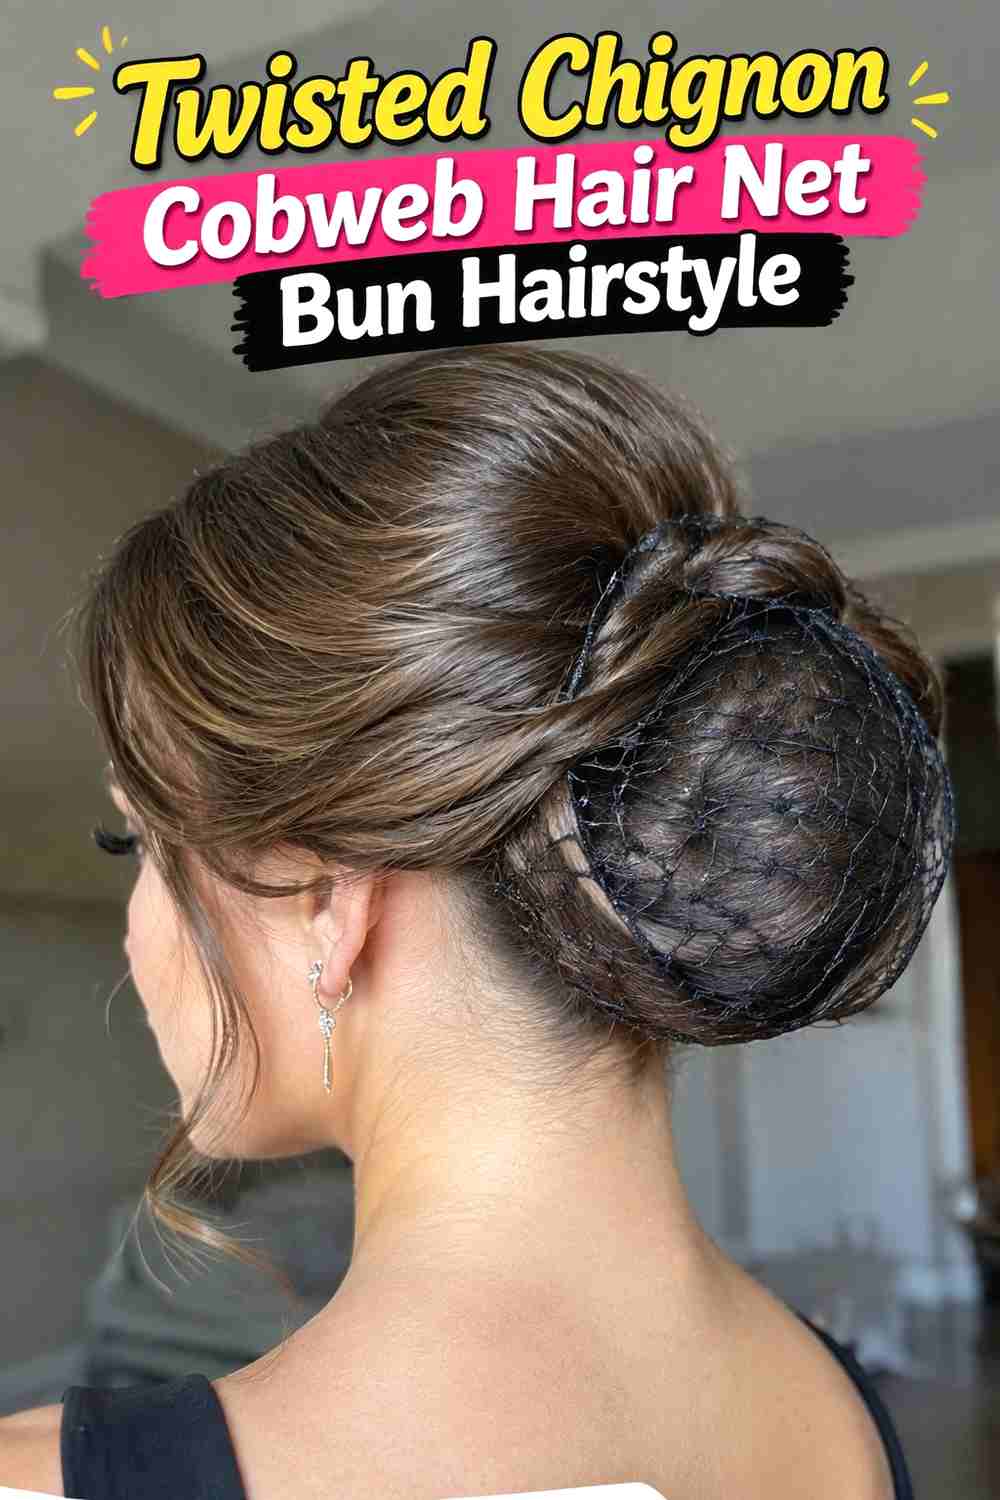
A twisted chignon gives the cobweb theme a more sophisticated foundation. Instead of forming a perfectly round bun, the hair is rolled and twisted horizontally at the nape before being covered with a flexible web-style net. The slightly elongated shape makes this variation look more like an evening updo while still preserving the seasonal decorative element. Keeping the crown smooth allows the chignon and net to become the clear focal point, although subtle volume near the back of the head can soften the profile. This style benefits from several concealed pins because the twist should stay secure before the net is added. A fine, delicate web pattern keeps the finished result elegant rather than overly theatrical.
Best For
This version works especially well for dressier Halloween events, autumn dinners, themed weddings, or vintage-inspired looks.
Wear & Maintenance
Check that the net follows the chignon’s shape rather than pulling it into a round bun and changing the intended silhouette.
7. Messy Cobweb Hair Net Bun Hairstyle
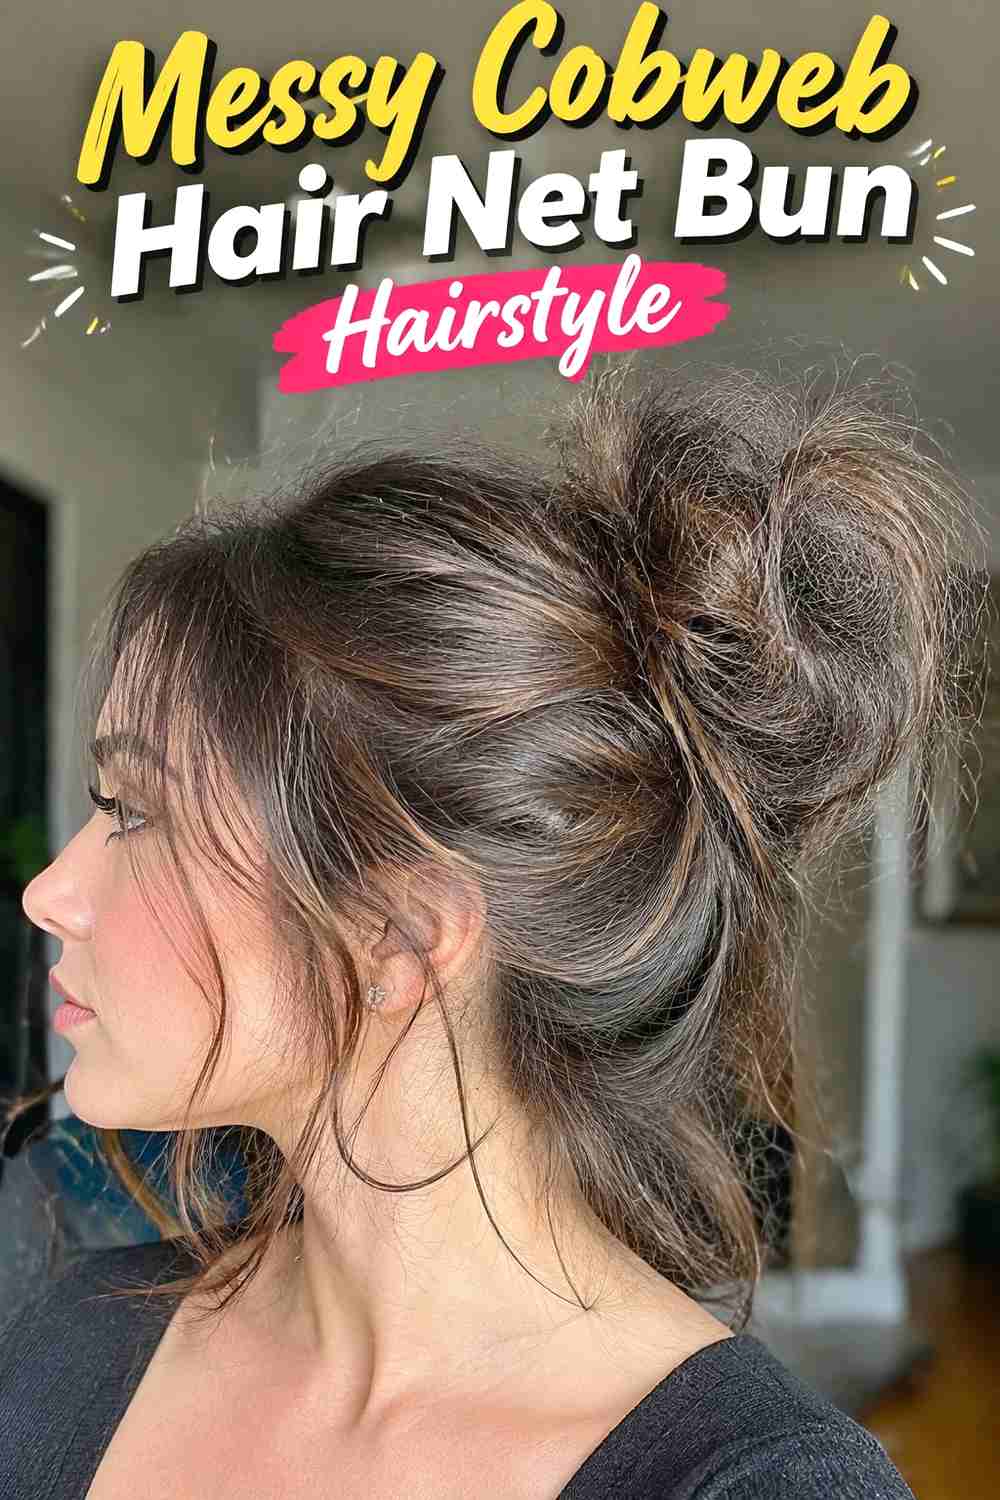
A messy bun creates a relaxed contrast with the structured lines of a cobweb hair net. Instead of smoothing every strand, the hair is gathered loosely so soft loops, small bends, and a few controlled flyaways remain visible beneath and around the net. The web covering then contains the shape without eliminating its texture. This is an approachable option if you prefer hairstyles that do not need to look perfectly symmetrical. Leaving two fine face-framing pieces can reinforce the undone finish, while keeping the crown gently lifted prevents the style from appearing flat. The trick is creating intentional looseness rather than an unstable bun, so the base should still be firmly secured before the decorative net goes on.
Styling Notes
Build a secure ponytail first, then loosen selected sections after pinning the bun rather than starting with an overly loose base.
Why It Works
The airy texture beneath the net creates dimension and makes the cobweb pattern feel naturally integrated instead of simply placed over the hair.
8. Sleek Cobweb Hair Net Bun Hairstyle
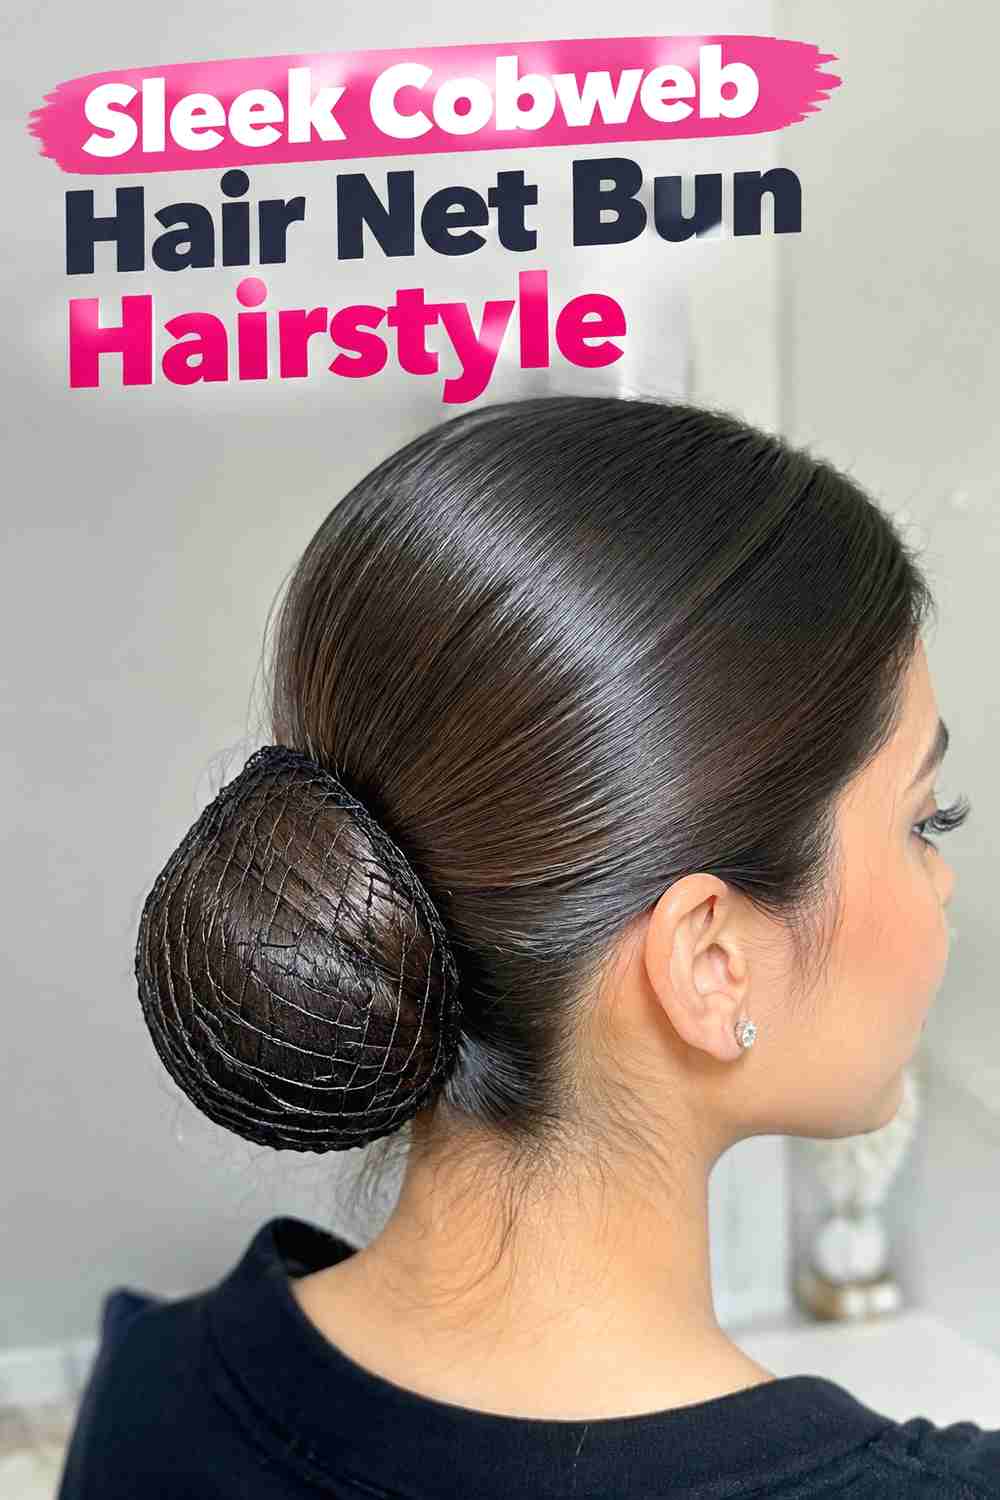
A sleek cobweb bun emphasizes contrast between a smooth hair surface and the graphic pattern of the net. The hair is brushed cleanly away from the face and gathered into a compact bun at the back, creating a polished base with minimal flyaways. Once the net is stretched across the bun, its web design becomes the main decorative element. This version looks particularly striking with dark hair and a lighter or metallic net because the pattern reads clearly from a distance. Keep styling products light enough that the hair retains realistic texture and shine instead of looking stiff. A neat center part can make the finish feel modern, while a side part adds a slightly softer impression.
Best For
Choose this style when you want a crisp, graphic interpretation of the trend rather than a romantic or deliberately undone bun.
Pro Tip
Smooth the surface before constructing the bun so you do not have to keep brushing once the hair net and pins are already in place.
9. Curly Cobweb Hair Net Bun Hairstyle
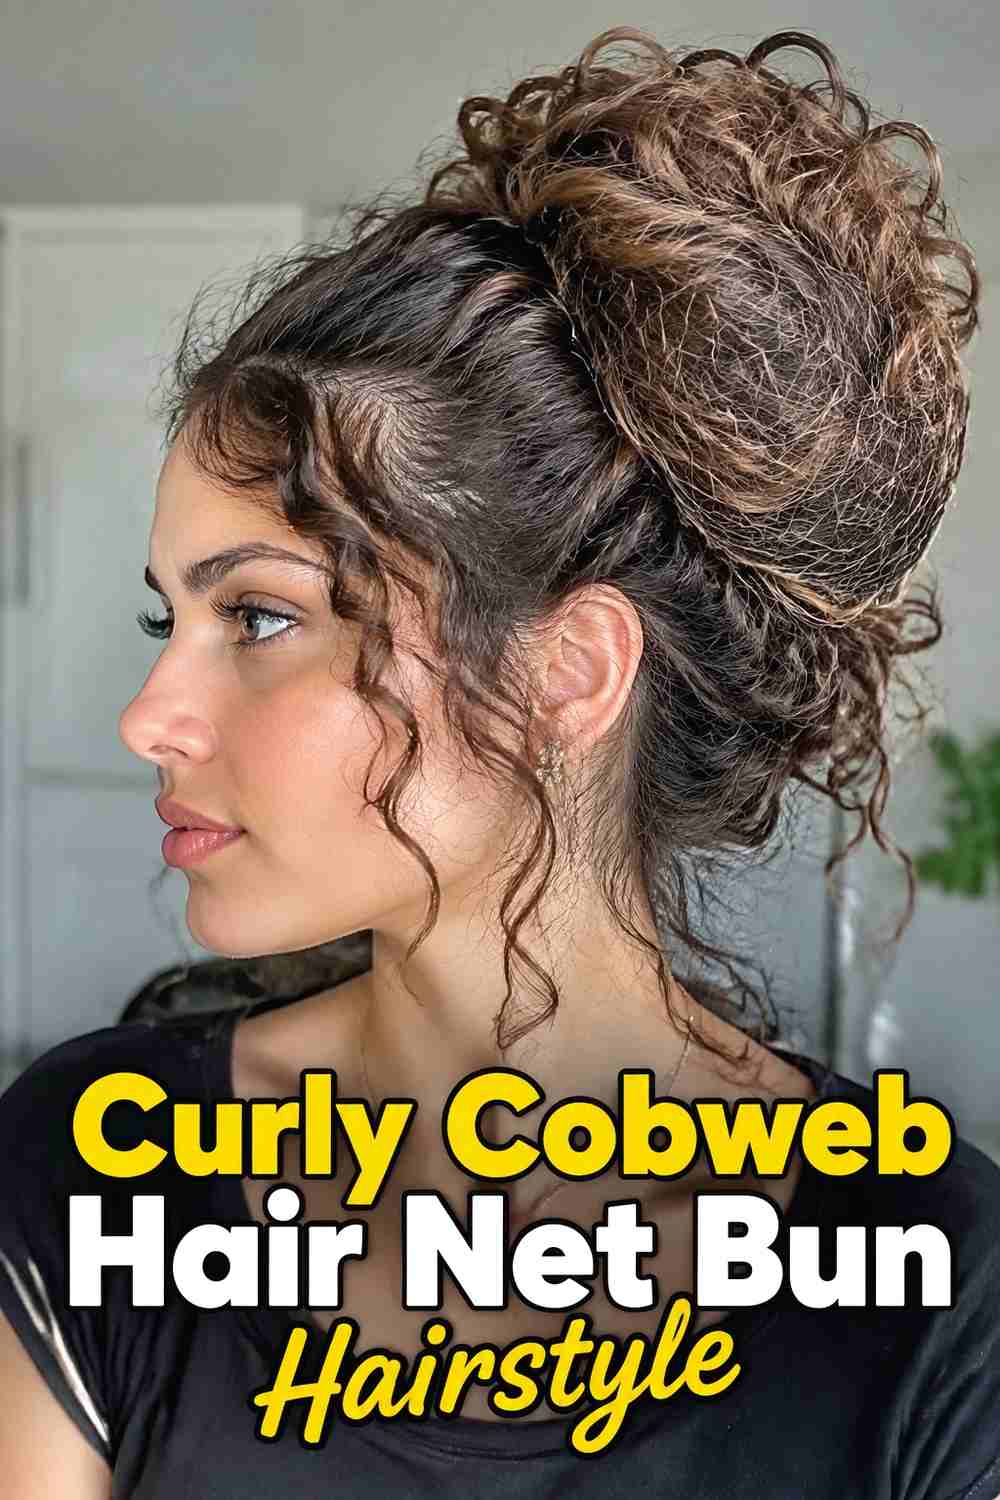
Curly texture gives a cobweb hair net bun extra depth because individual curves and coils remain visible through the open net. The hair can be gathered without completely stretching out its natural pattern, then pinned into a rounded bun that preserves some dimensional texture. A slightly larger net accommodates the fuller shape without compressing the curls too tightly. Around the face, a few naturally curling pieces can be left free for softness if desired. This style works best when the bun feels secure but not flattened, allowing both the curl pattern and web detail to contribute to the finished look. Choose lightweight pins and place them around the base rather than pressing directly through prominent curls whenever possible.
Hair Type & Length
This approach can work on naturally curly or pre-curled medium-to-long hair, provided there is enough length to gather securely into the bun.
Styling Notes
Shape the bun with your hands first and stretch the web net gently over it so the curls maintain visible volume.
10. Double Cobweb Hair Net Bun Hairstyle
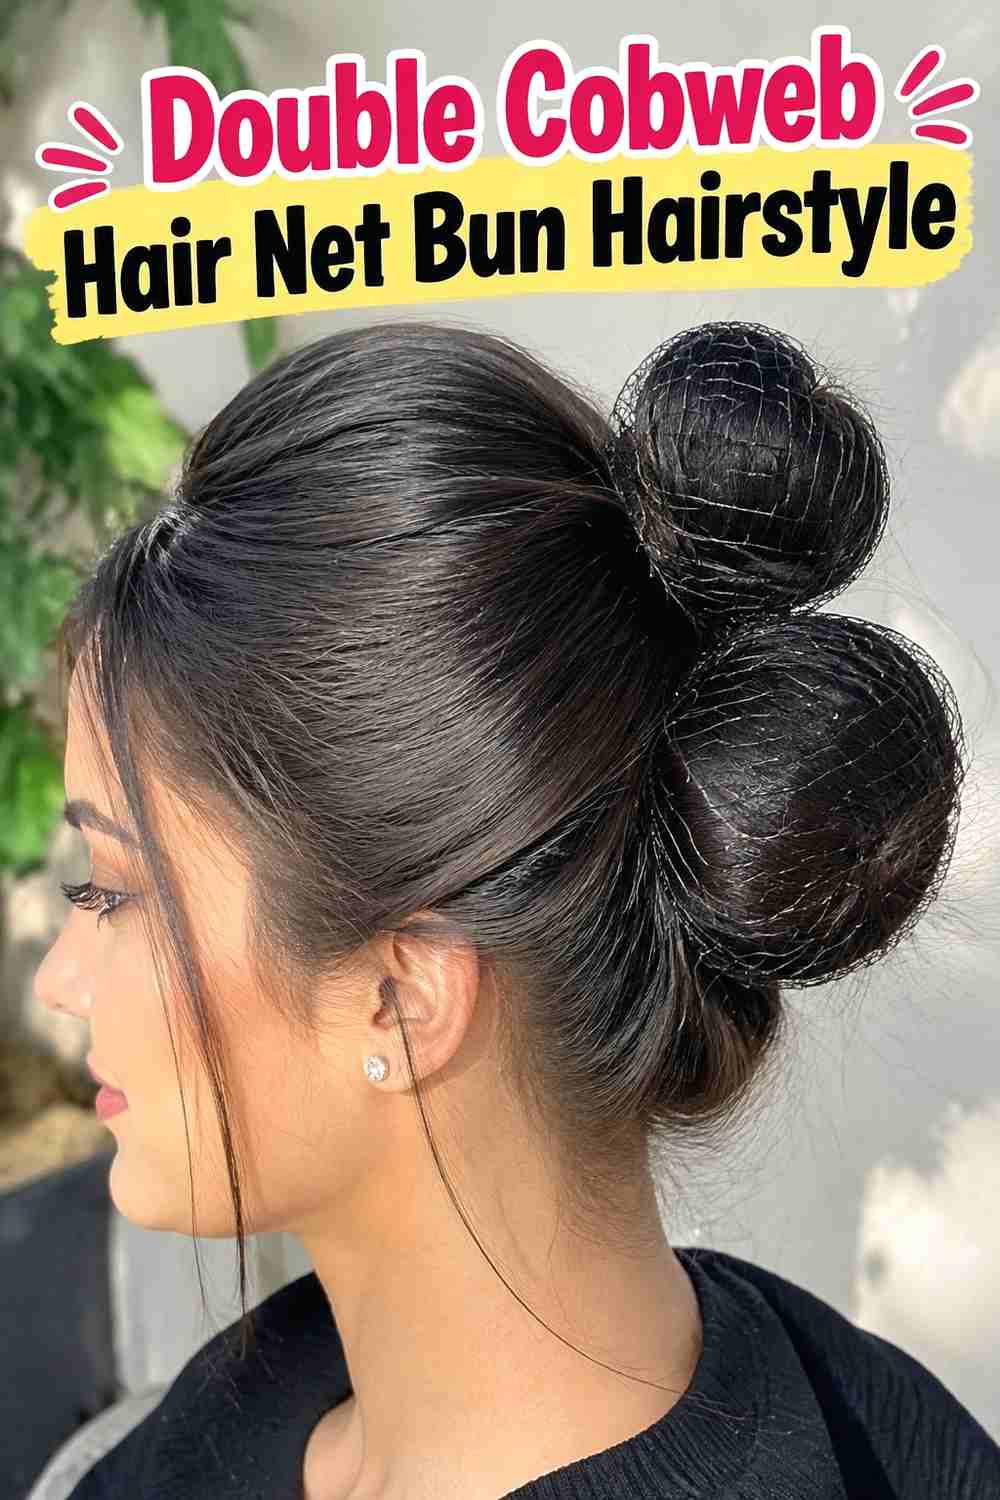
Two smaller cobweb buns create a playful alternative to the traditional single updo. Divide the hair evenly and position matching buns at the back or upper sides of the head, then cover each with its own miniature web-pattern net. Keeping the buns symmetrical gives the style a graphic, intentional appearance, while slightly looser texture can make it feel more whimsical. Because each bun contains less hair, the nets should fit closely rather than hanging loosely around the shape. This version naturally leans more playful and costume-inspired, making it a fun option when you want the cobweb theme to be obvious. A clean center part helps organize the hairstyle and keeps the two sections balanced.
Styling Notes
Create both ponytail bases before forming either bun so you can compare their placement and adjust the symmetry first.
Best For
This style is well suited to Halloween parties, themed photo shoots, concerts, and playful seasonal events where a stronger statement feels appropriate.
11. Silver Web Cobweb Hair Net Bun Hairstyle
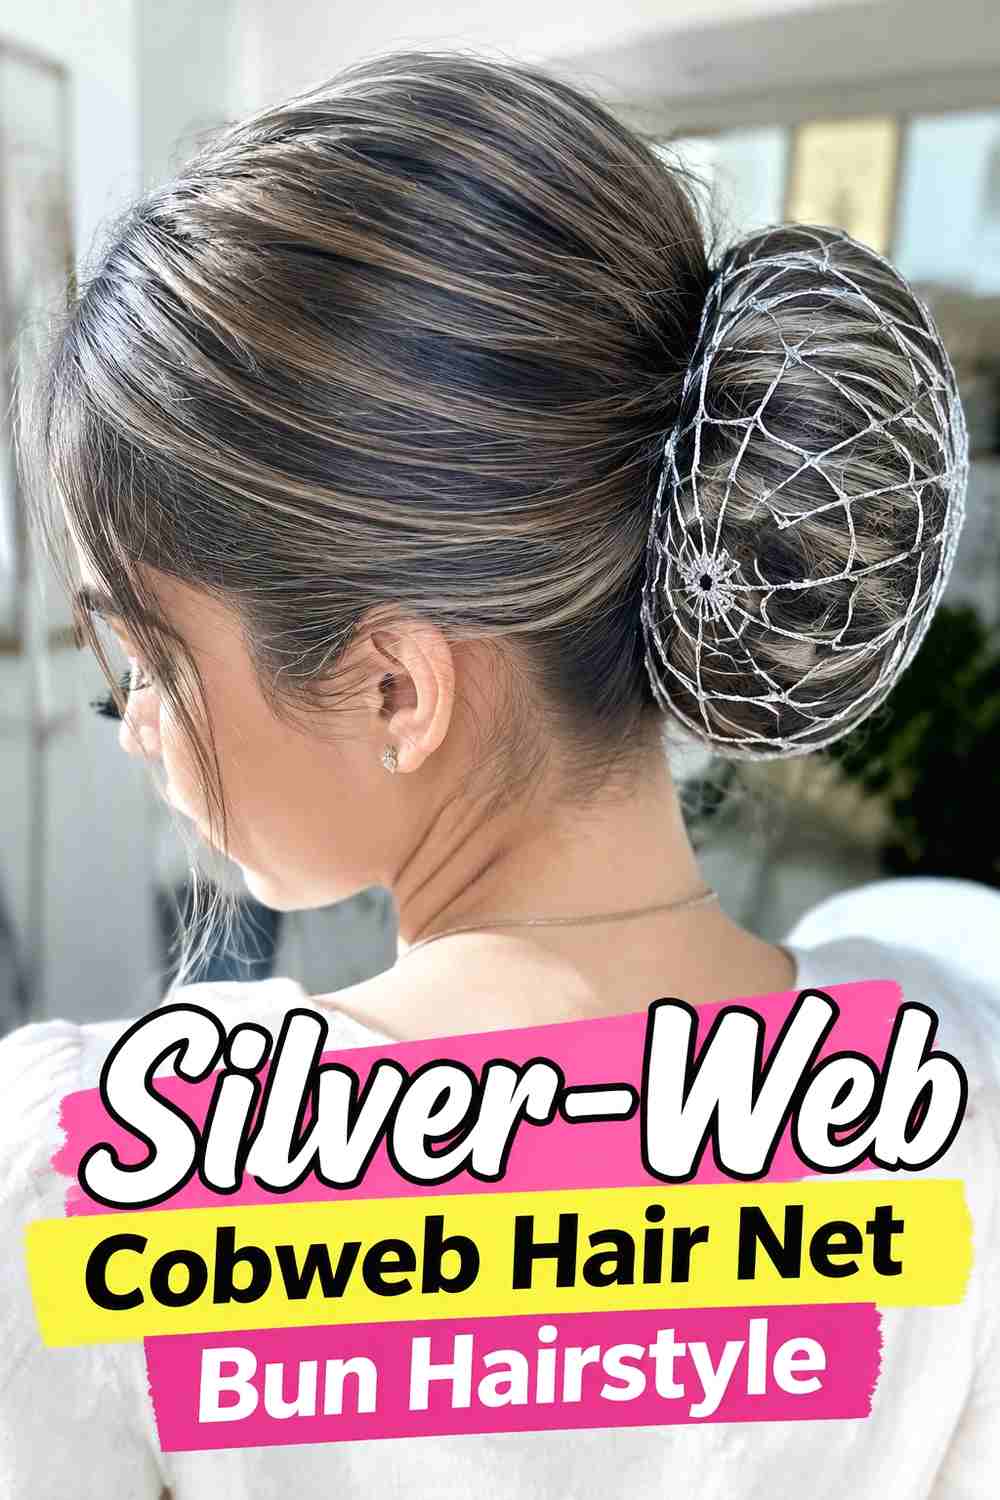
A silver web net adds contrast and a subtle metallic finish to a classic bun. The reflective threads catch light around the contours of the updo, making the cobweb pattern visible without requiring oversized accessories. A smooth dark bun provides particularly strong contrast, but the idea can work with many hair colors when the net remains delicate. Keep the rest of the hairstyle relatively simple so the metallic web becomes the focal detail. A medium or low placement works well because it lets the net reflect light from different angles without overwhelming the overall shape. For a balanced finish, use small silver-toned pins only where needed instead of adding several competing decorative elements.
Why It Works
The metallic thread emphasizes the web geometry and gives the bun a more polished, evening-ready interpretation of the theme.
Wear & Maintenance
Check that metallic fibers are smooth at the edges and secured comfortably so they do not catch on nearby strands during wear.
12. Velvet Ribbon Cobweb Hair Net Bun Hairstyle
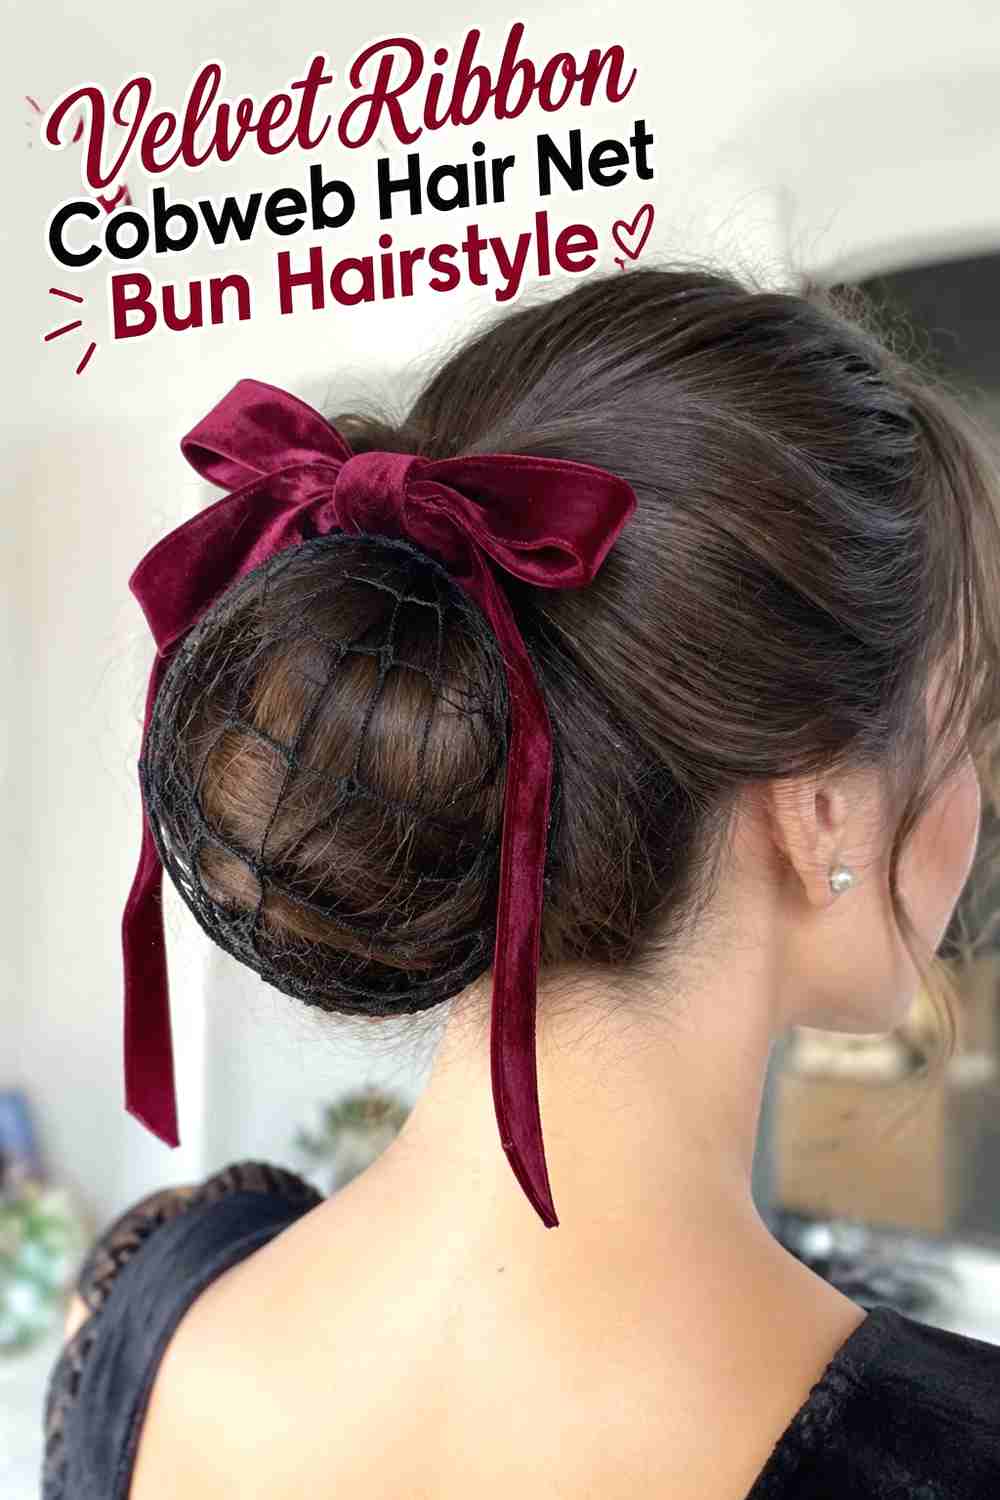
A velvet ribbon adds softness and richer texture to the structured cobweb net. The bun can sit at the nape or mid-back of the head, wrapped first with the decorative web and then finished with a narrow velvet bow placed just beneath or above it. Keeping the ribbon slim prevents it from hiding the net pattern, while its matte surface provides a pleasing contrast against glossy hair. Deep burgundy, black, plum, or forest tones can create a seasonal mood, though the hairstyle itself does not need to be dark or severe. This version feels romantic and slightly vintage, making it useful when you want a themed detail that still coordinates naturally with dresses, blouses, or evening outfits.
Styling Notes
Tie or pin the ribbon separately from the hair net so either piece can be adjusted without disturbing the other.
Best For
This option suits romantic gothic styling, autumn events, themed dinners, and seasonal portraits that call for a softer decorative finish.
13. Pearl Pinned Cobweb Hair Net Bun Hairstyle
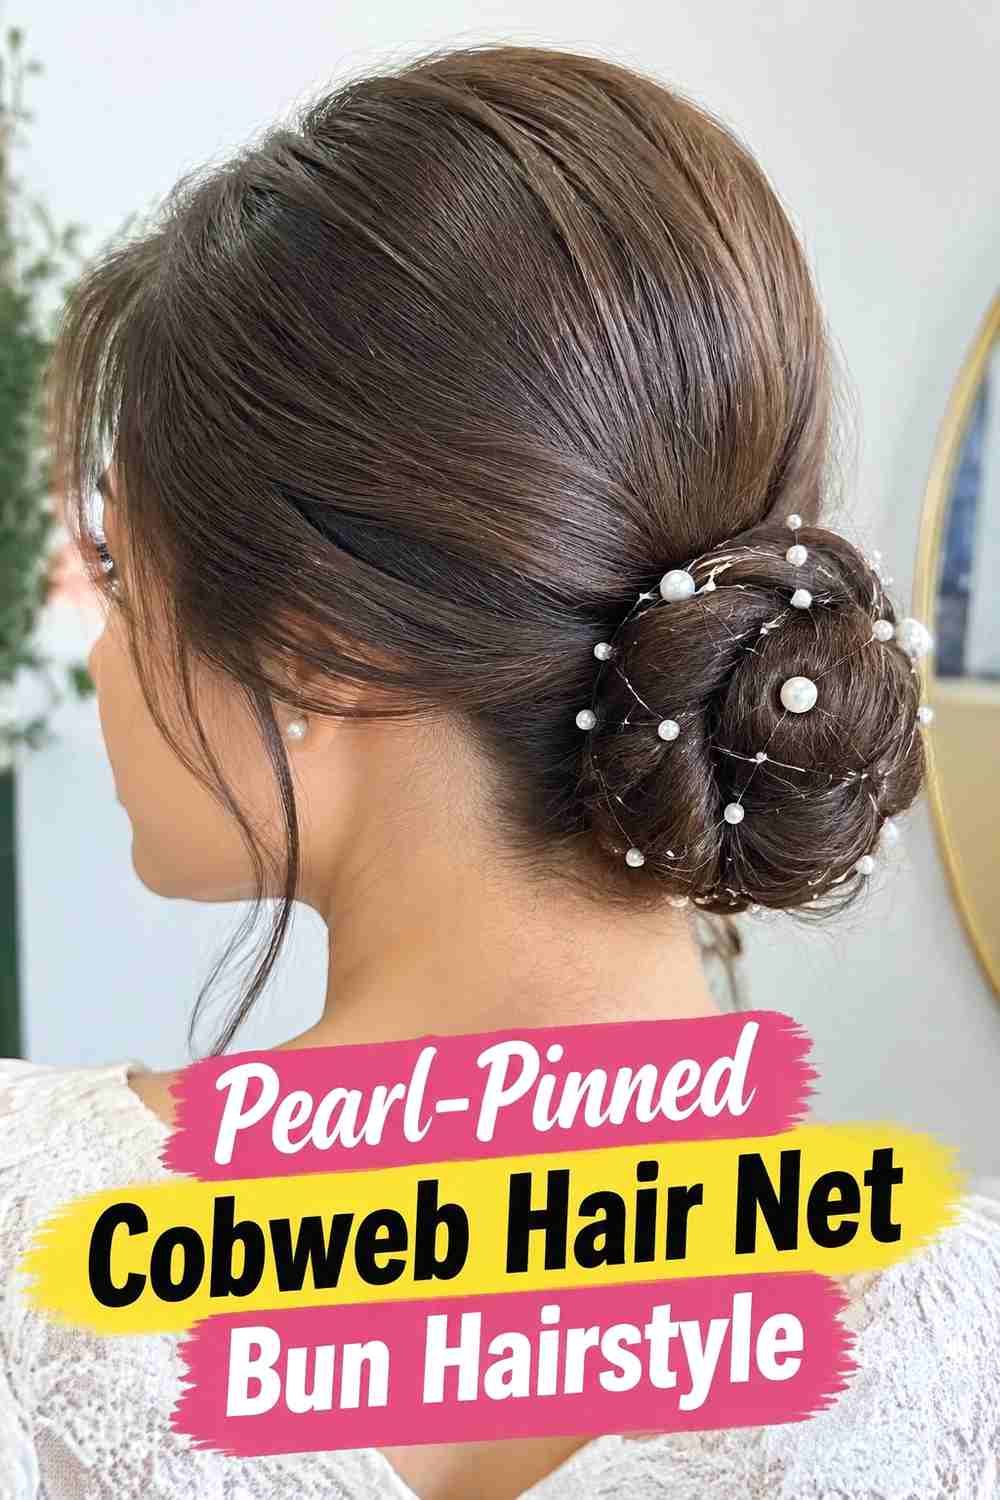
Pearl pins can turn a cobweb bun into a more refined decorative updo. After the bun is covered with a fine web net, place a small number of pearl-tipped pins at selected intersections around the pattern. The effect resembles tiny beads resting across the web without concealing its structure. A low or mid-height bun works particularly well because the pearls remain visible from the side and back while still feeling balanced. Keep the front hair softly polished so the overall style reads as elegant rather than overly embellished. Using pearls in one consistent size creates a cleaner effect, while a few slightly varied sizes can add subtle dimension without making the bun look crowded.
Why It Works
The pearls introduce brightness and refinement while still allowing the cobweb net to remain the defining element of the hairstyle.
Pro Tip
Use only enough pearl pins to highlight the web pattern; too many can obscure the lines and make the bun visually heavy.
14. Mini Spider Accent Cobweb Hair Net Bun Hairstyle
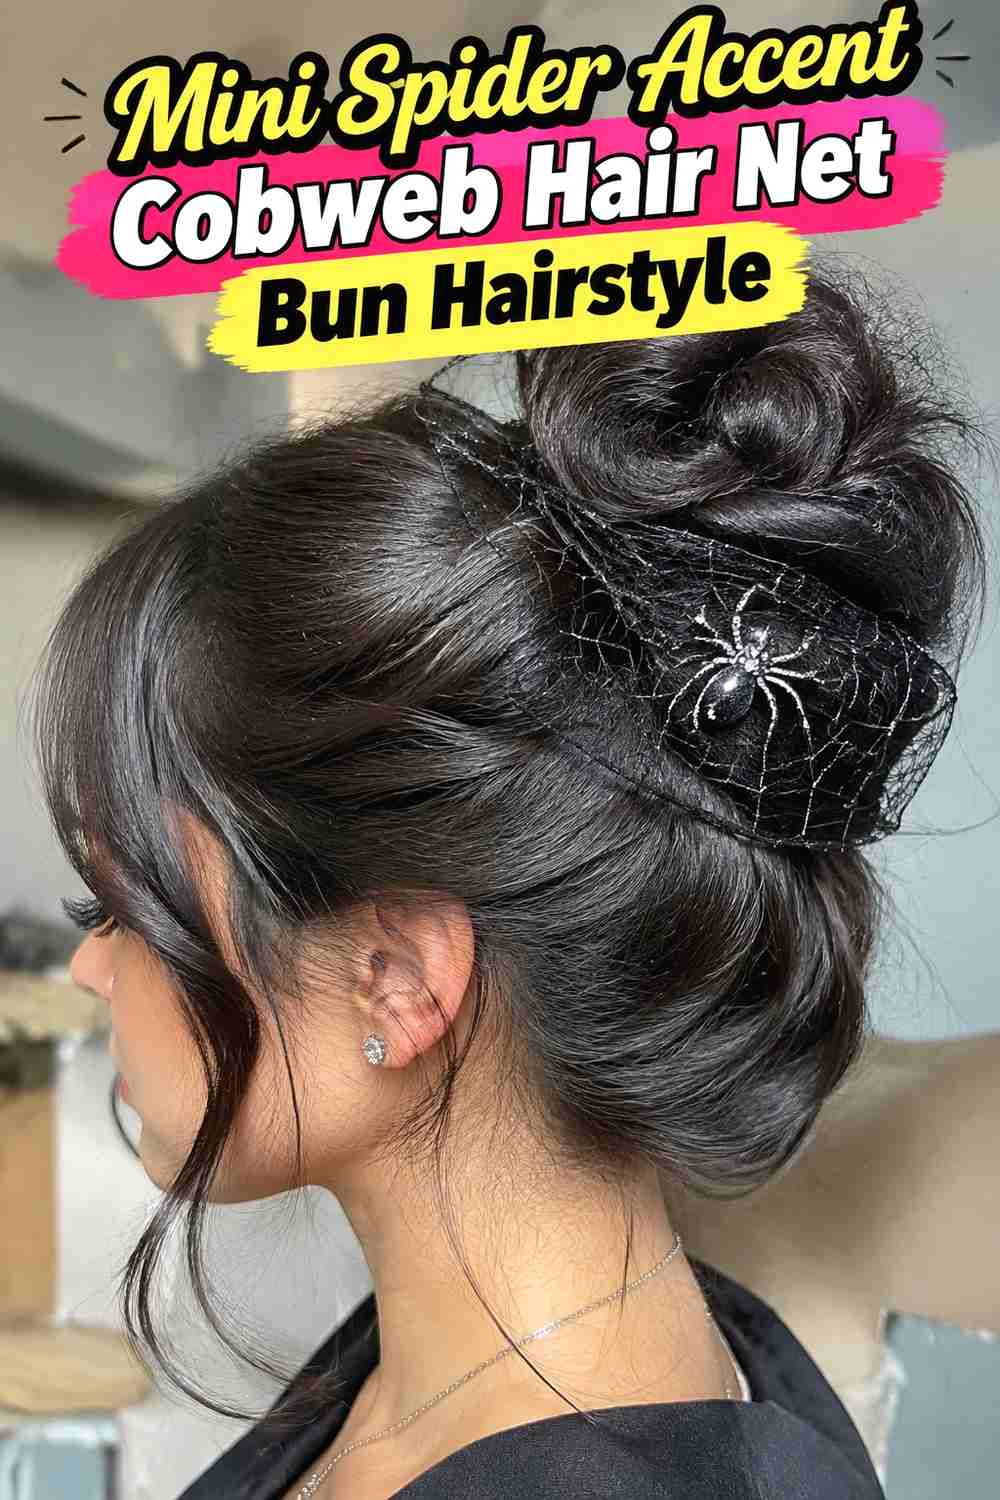
A miniature spider accent makes the cobweb theme instantly recognizable while keeping the hairstyle wearable. Start with a simple low, mid, or high bun wrapped neatly in a web-pattern hair net, then add one small decorative spider near the outer edge. Positioning the accent slightly off-center usually feels more natural than placing it directly in the middle. The rest of the hair can remain smooth or softly textured, depending on whether you want a polished or playful result. Because the spider already creates a strong themed focal point, avoid adding several other large accessories. A lightweight clip or pin is preferable so the decoration does not pull on the net or distort the bun during wear.
Styling Notes
Attach the spider after the net is fully secured, positioning it through a reinforced edge or a stable pin point rather than a delicate strand.
Best For
This is an easy choice for Halloween parties or costume styling when you want a recognizable seasonal detail without building an elaborate updo.
How to Choose the Right Look
Start with bun placement. Low nape and twisted chignon versions feel more refined, while high crown and double buns make the cobweb theme more noticeable. A mid-height classic bun sits comfortably between those two directions and works well when you want the web pattern to be the main feature.
Next, compare texture. Sleek buns give the net a crisp graphic background, braided buns add structured detail underneath it, and curly or messy versions create a softer, more dimensional result. If you expect to wear the style for several hours, prioritize a firm ponytail or pinned base before adding the decorative net.
Accessories can completely change the mood. Silver webbing feels polished and dramatic, velvet ribbon introduces romantic softness, pearls create an elegant finish, and a mini spider makes the seasonal theme unmistakable. Keep comfort in mind as well: lighter nets and accessories generally work better for extended wear, especially with high or side-positioned buns.
Final Thoughts
Cobweb hair net buns can range from sleek and sophisticated to playful and theatrical depending on the bun shape, texture, and accessories you choose. Start with a secure updo that suits your hair length, then let the web net provide the main theme. Small details such as a ribbon, metallic thread, pearls, or one spider accent are often enough to personalize the look without overwhelming the hairstyle.
FAQs
1. What is a cobweb hair net bun hairstyle?
It is a bun covered with a decorative hair net designed to resemble a spiderweb or cobweb, creating a textured seasonal or gothic-inspired finish.
2. Can a cobweb hair net work on a low bun?
Yes. Low nape buns and chignons work particularly well because the net can be pinned securely around a compact shape while remaining clearly visible from the back.
3. Do I need very long hair for a cobweb bun?
Not necessarily. Medium-length hair can often form a small bun, while shorter or finer hair may need additional pins or a modest bun foundation to create enough shape for the net.
4. How do I keep the hair net from slipping?
Secure the bun completely before adding the net, then anchor the net around its outer edge with discreet bobby pins or hairpins placed into the bun base.
5. Can a cobweb bun look elegant instead of costume-like?
Yes. A low chignon, fine web net, smooth finish, and minimal accessories such as pearls or a narrow velvet ribbon can create a much more refined interpretation.
Save your favorite cobweb hair net bun hairstyle ideas and explore more creative updos for Halloween, fall events, and statement styling.