12 Love Layers Haircut Ideas
Soft, romantic, and full of movement, these Love Layers haircut ideas show how one flowing layered shape can create many distinctly wearable looks.
Love Layers are a 2026 update to the curved layered haircut, built around long, heart-shaped sections that begin below the chin, create lift through the upper hair, and narrow toward the ends. The term was introduced by celebrity hairstylist Dimitris Giannetos, with the silhouette described as an evolution of the C-cut.
The core shape can change considerably depending on parting, fringe, overall length, natural texture, and styling finish. Before choosing a version, compare how much volume you want, where you prefer the shortest face-framing piece to fall, and how often you are willing to blow-dry or reshape the layers. The styling and image-realism approach used throughout this collection follows the supplied hairstyle guidance.
Quick List
- Classic Heart Shaped Love Layers Hairstyle
- Center Part Love Layers Hairstyle
- Side Part Love Layers Hairstyle
- Voluminous Blowout Love Layers Hairstyle
- Soft Wavy Love Layers Hairstyle
- Sleek Straight Love Layers Hairstyle
- Curtain Bangs Love Layers Hairstyle
- Wispy Fringe Love Layers Hairstyle
- Shoulder Length Love Layers Hairstyle
- Extra Long Feathered Love Layers Hairstyle
- Curly Love Layers Hairstyle
- Flipped End Love Layers Hairstyle
1. Classic Heart Shaped Love Layers Hairstyle
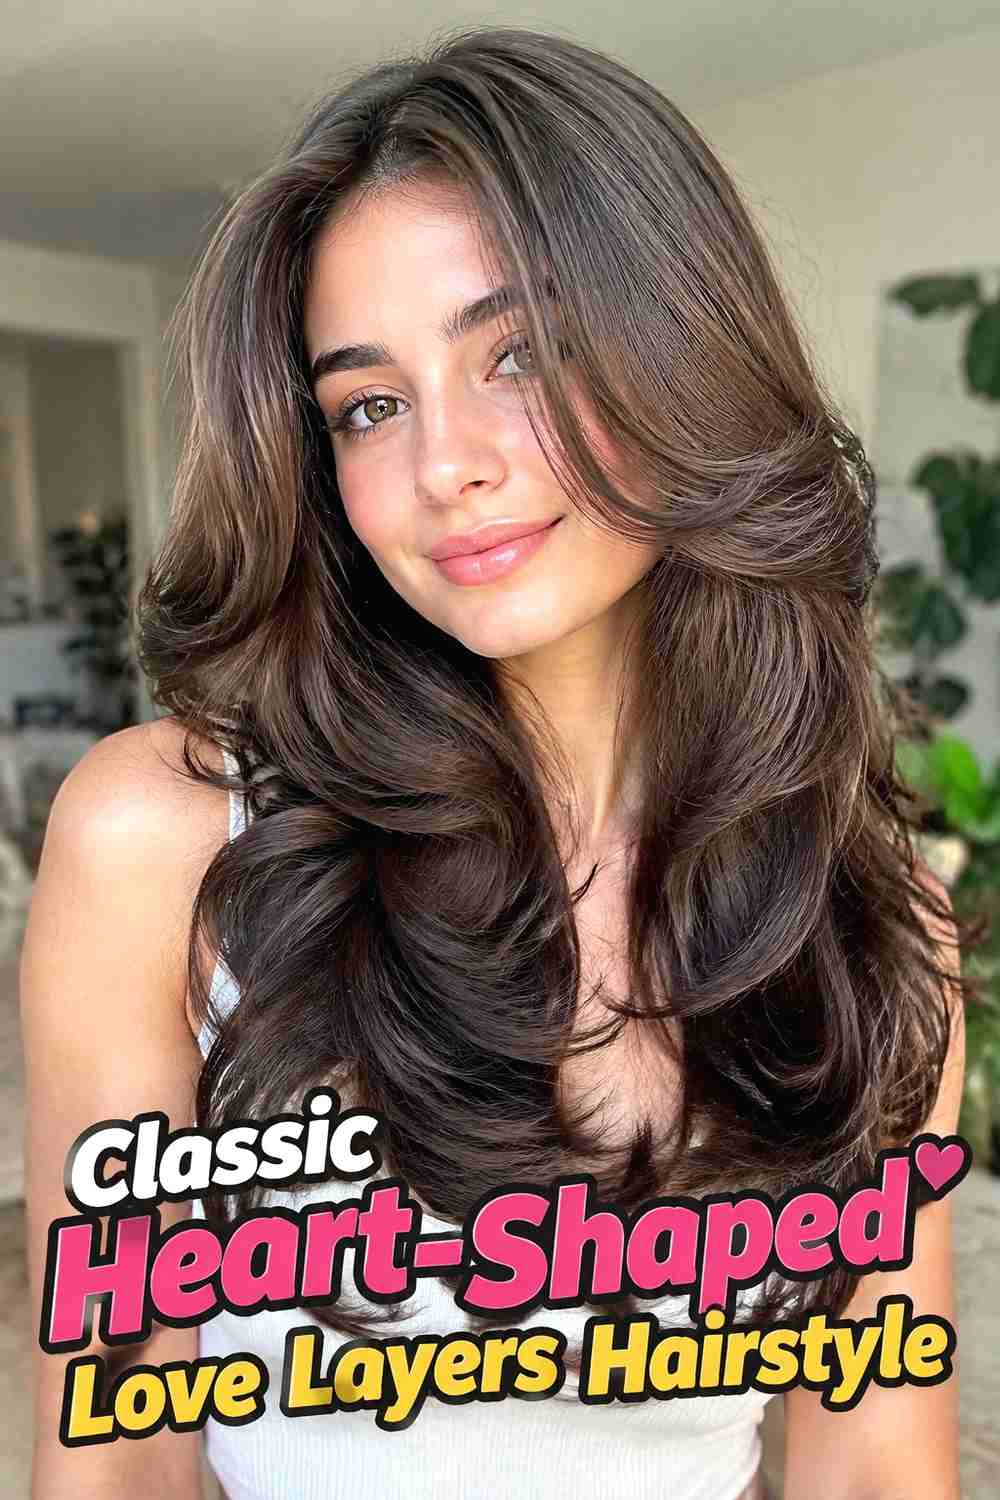
Classic Heart-Shaped Love Layers Hairstyle shows the trend in its clearest form: long, connected layers that begin below the chin, sweep outward through the sides, and taper gently toward the ends. The result is a soft heart-like outline with fullness near the top and a more refined finish at the bottom. This version works especially well on medium-to-thick hair because there is enough density to show movement without making the perimeter feel sparse. A smooth blowout makes the curved sections easiest to see, but the cut can also fall naturally with a softer finish. Ask for blended face-framing pieces rather than short, disconnected layers so the overall shape stays fluid and romantic.
Why It Works
The gradual transition creates visible movement without relying on very short layers. Keeping the bottom relatively substantial also helps the haircut retain a polished, full appearance.
Hair Type & Length
Medium-to-long hair gives the heart-shaped silhouette enough space to develop. Dense hair can support stronger layering, while finer hair may look fuller with fewer layers and a firmer perimeter.
2. Center Part Love Layers Hairstyle
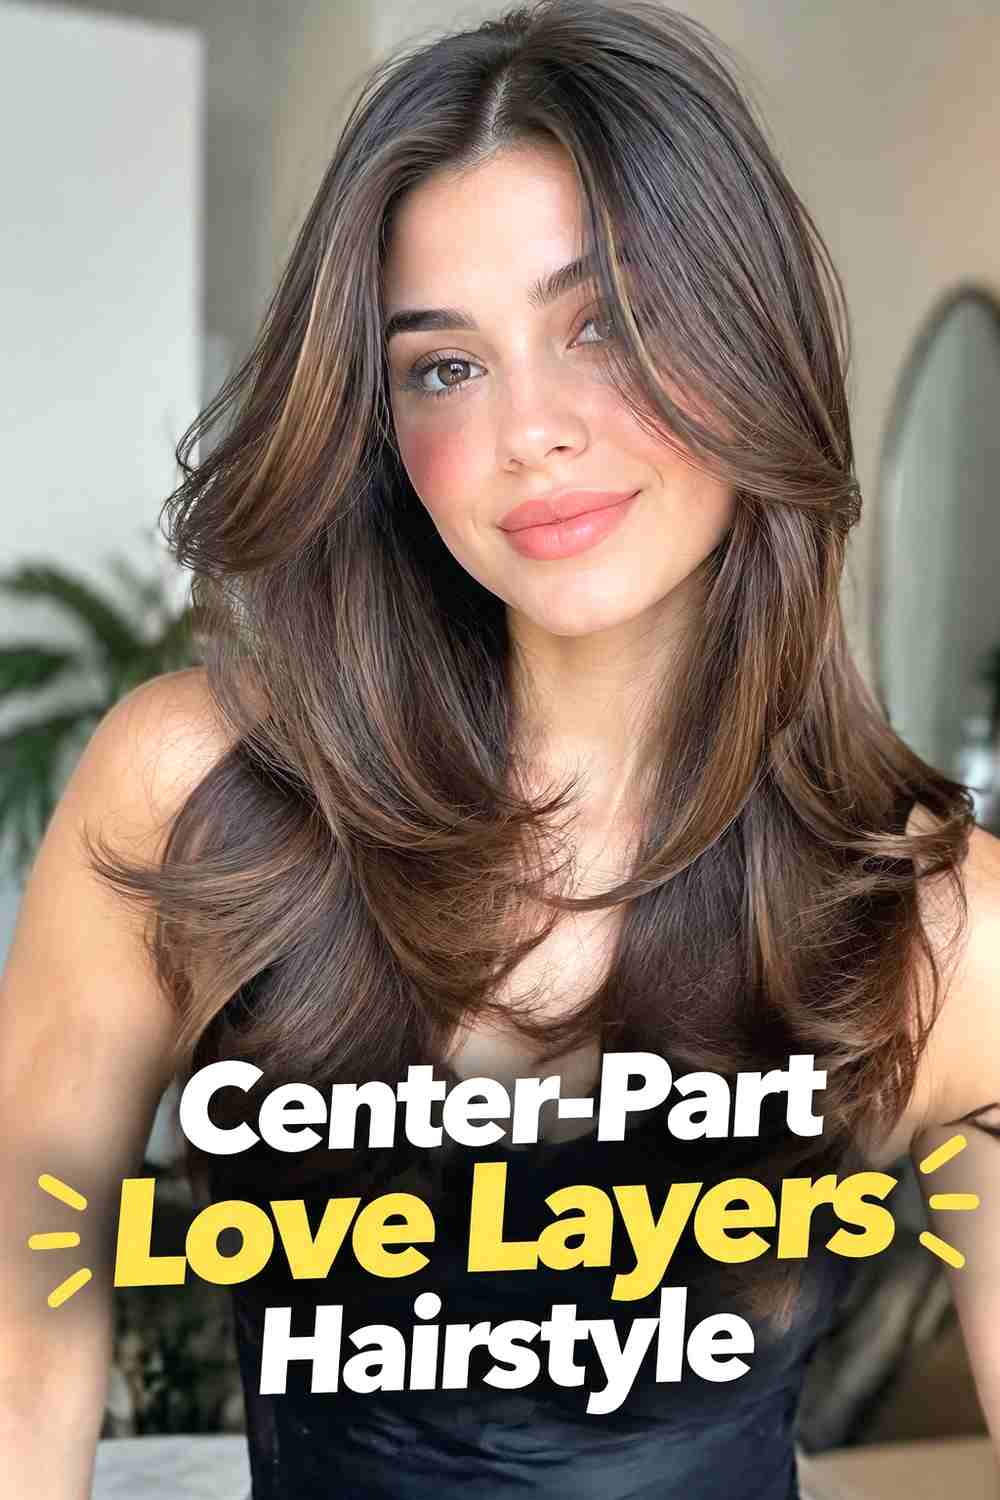
Center-Part Love Layers Hairstyle gives the cut a balanced, symmetrical look that emphasizes the face-framing curve on both sides. The shortest pieces can begin just below the chin, then melt into longer sections that create movement through the mid-lengths while preserving a strong perimeter. This version is especially attractive on straight or softly wavy hair because the center part makes the heart-shaped outline easy to read. It can feel polished with a round-brush blowout or more relaxed with loose bends through the ends. If your natural part is strong, dry the front sections while they are still damp so the layers settle evenly rather than separating into uneven wings.
Styling Notes
Direct the front layers away from the face with a medium or large round brush. Let the sections cool in place before touching them to encourage a longer-lasting curve.
Best For
Choose this version when you like balanced framing and want both sides of the haircut to show similar movement. It is especially effective when the front layers are a major feature of the finished look.
3. Side Part Love Layers Hairstyle
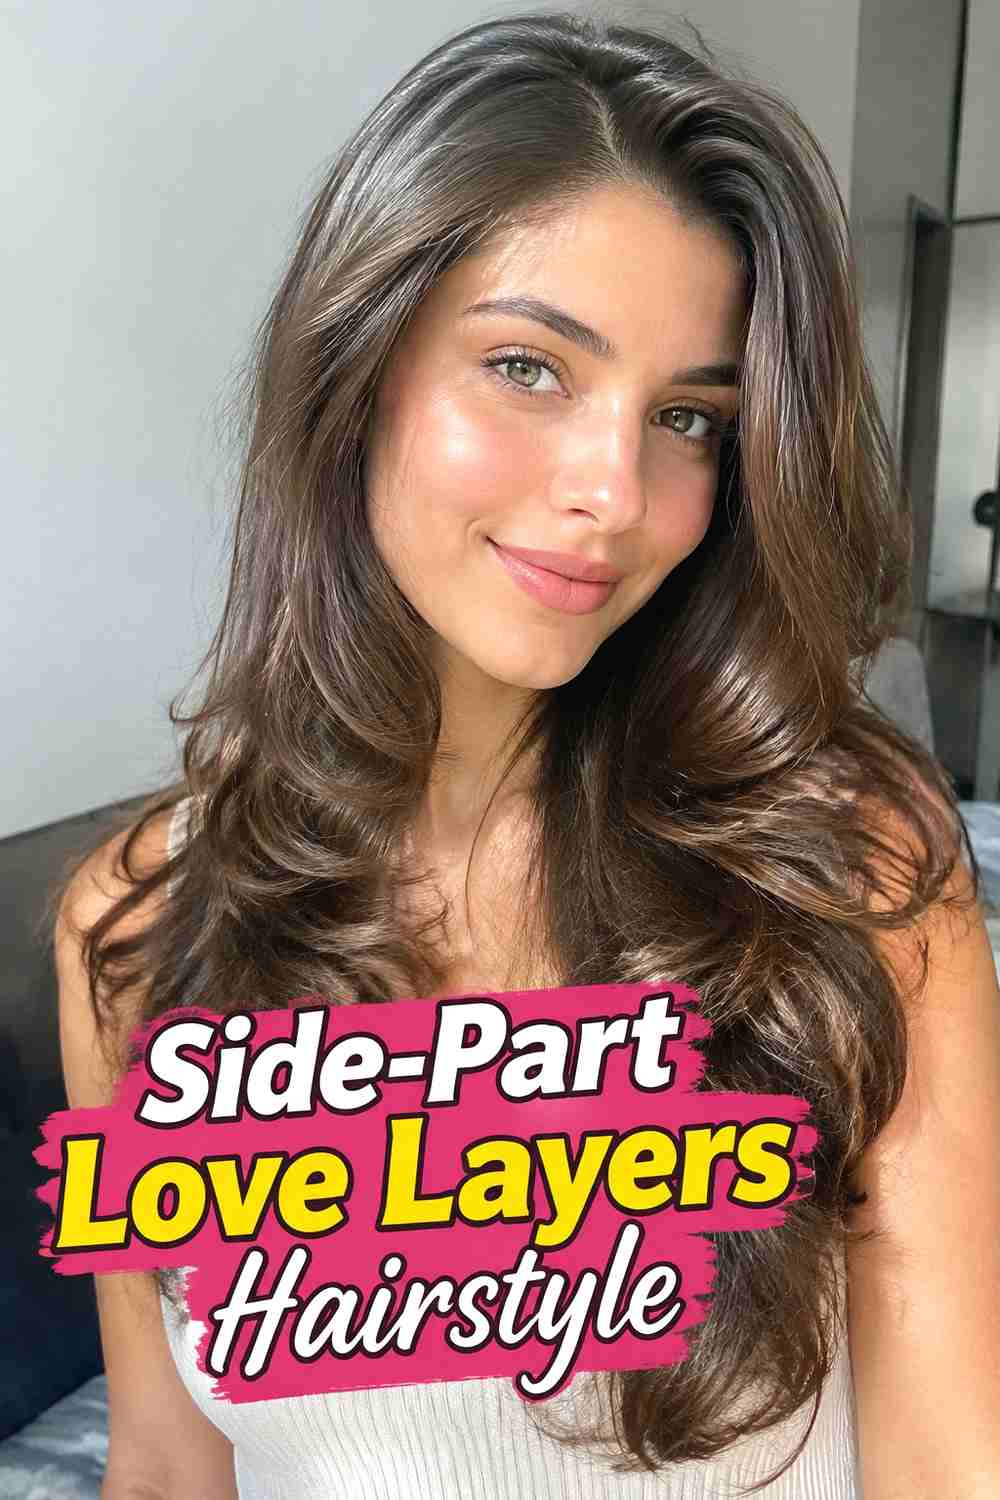
Side-Part Love Layers Hairstyle shifts the volume slightly to one side, giving the layered shape a softer, more glamorous sweep. Instead of looking perfectly mirrored, the front sections fall diagonally across the face and blend into longer layers through the sides. This variation is useful for anyone who likes movement around the cheekbones but does not want a strict center part. Medium and thick hair can support more pronounced layering, while finer hair usually benefits from keeping the ends fuller. A large round brush helps lift the heavier side at the roots, and a light flexible spray can hold the curve without turning the layers stiff or overly sculpted.
Best For
A side part suits readers who prefer an asymmetrical finish or naturally wear their hair swept to one side. It can also make a polished blowout feel less formal.
Pro Tip
Start building lift at the roots on the heavier side before shaping the ends. Root direction has a major effect on whether the side sweep looks intentional or simply uneven.
4. Voluminous Blowout Love Layers Hairstyle
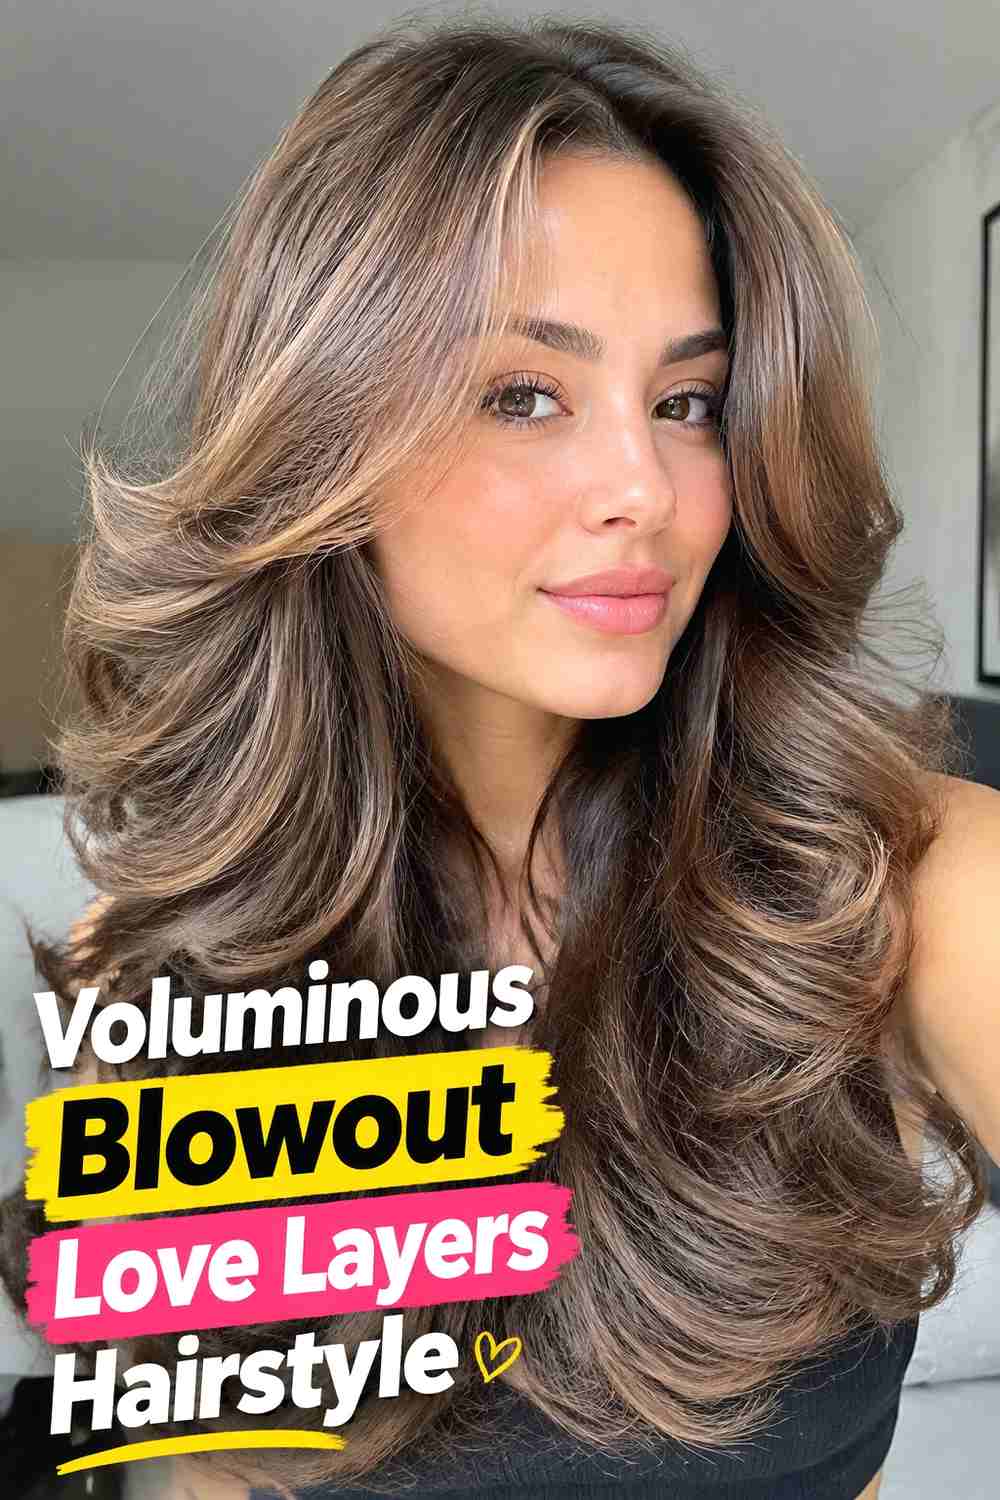
Voluminous Blowout Love Layers Hairstyle is designed to make the cut’s curved structure look extra plush and dimensional. The layers begin below the chin, then fan outward before narrowing toward the ends, while root lift creates the rounded upper shape associated with Love Layers. This finish suits medium-to-thick hair especially well, although finer hair can wear a lighter version with fewer internal layers. Use a large round brush or hot rollers to build bend through the face-framing pieces and mid-lengths, then let each section cool before brushing it out. The goal is bounce rather than tight curls, so keep the ends smooth and avoid overloading the hair with heavy creams or oils.
Styling Notes
Work in medium sections and direct the front layers away from the face. Cooling the hair before brushing it out helps preserve volume while keeping the finish soft.
Wear & Maintenance
The cut itself can remain wearable between styled days, but the dramatic blowout effect requires some restyling after washing. Dry shampoo or a light volumizing mist can help refresh the roots.
5. Soft Wavy Love Layers Hairstyle
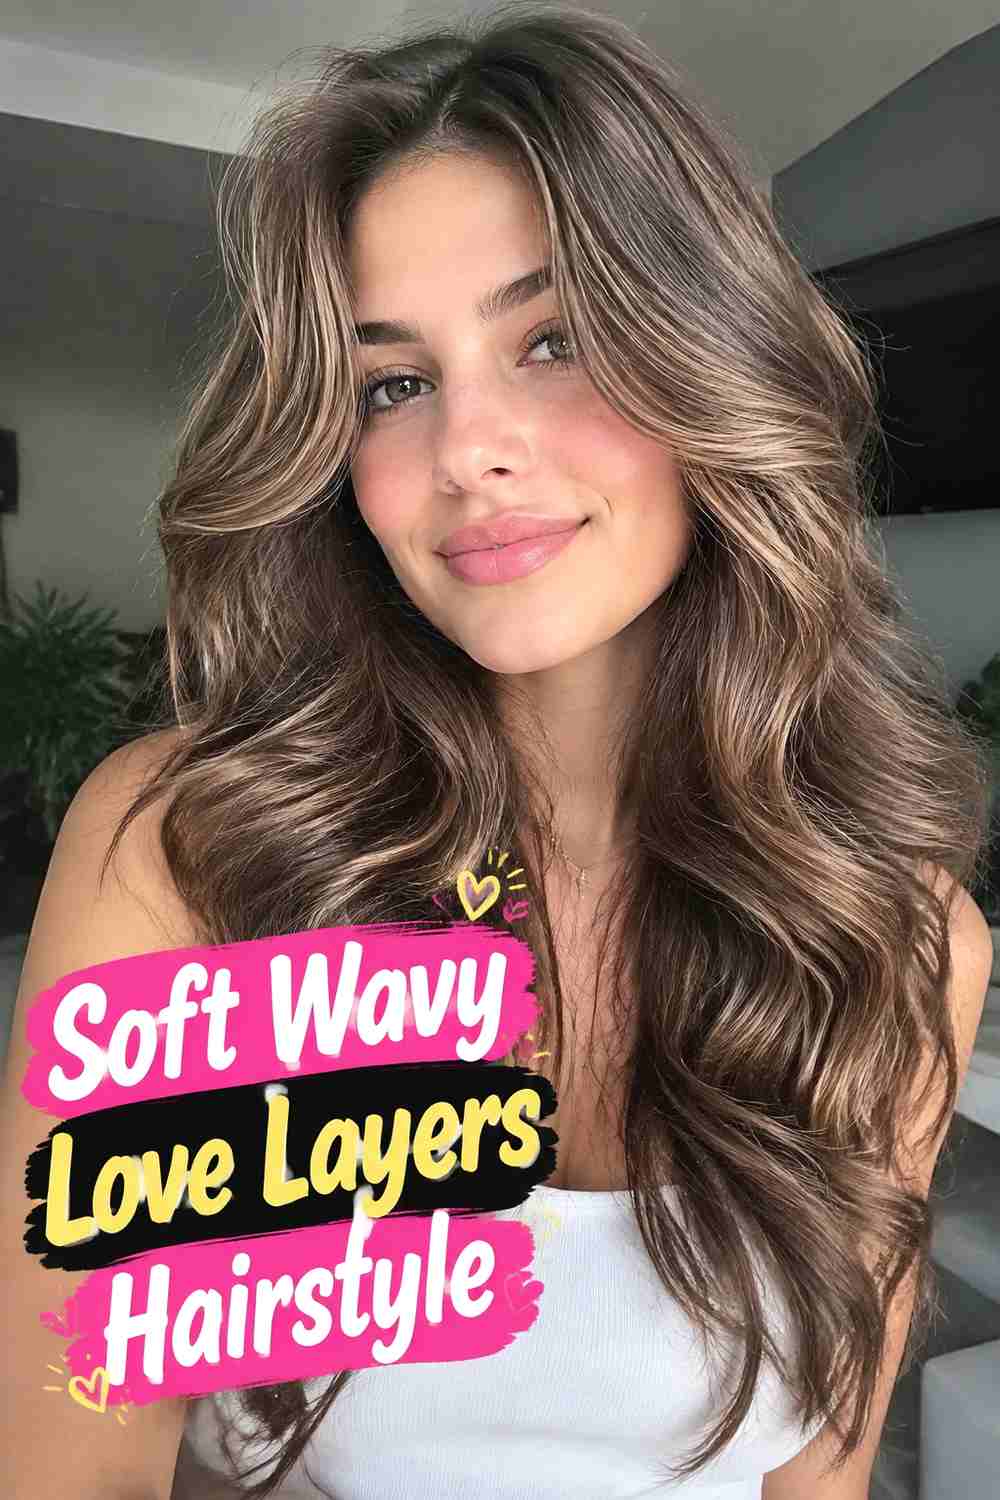
Soft Wavy Love Layers Hairstyle blends the signature heart-shaped layering with loose, relaxed bends for an airy finish. The waves soften the exact outline of the cut while still showing where the front layers begin and how they flow into the longer lengths. This is a practical choice for naturally wavy hair because the texture can add movement without requiring a full polished blowout every day. Keep the layering connected so the waves do not form obvious shelves, and leave enough weight through the bottom to prevent the ends from looking thin. A diffuser or wide-barrel iron can refine a few sections, but the style looks best when the wave pattern stays varied and touchable.
Hair Type & Length
Naturally wavy medium or long hair can make this variation especially easy to maintain. Straighter textures can create the same effect with loose bends rather than uniform curls.
Pro Tip
Alternate the direction of a few waves through the lower lengths while keeping the face-framing sections swept outward. That contrast creates a softer, less manufactured finish.
6. Sleek Straight Love Layers Hairstyle
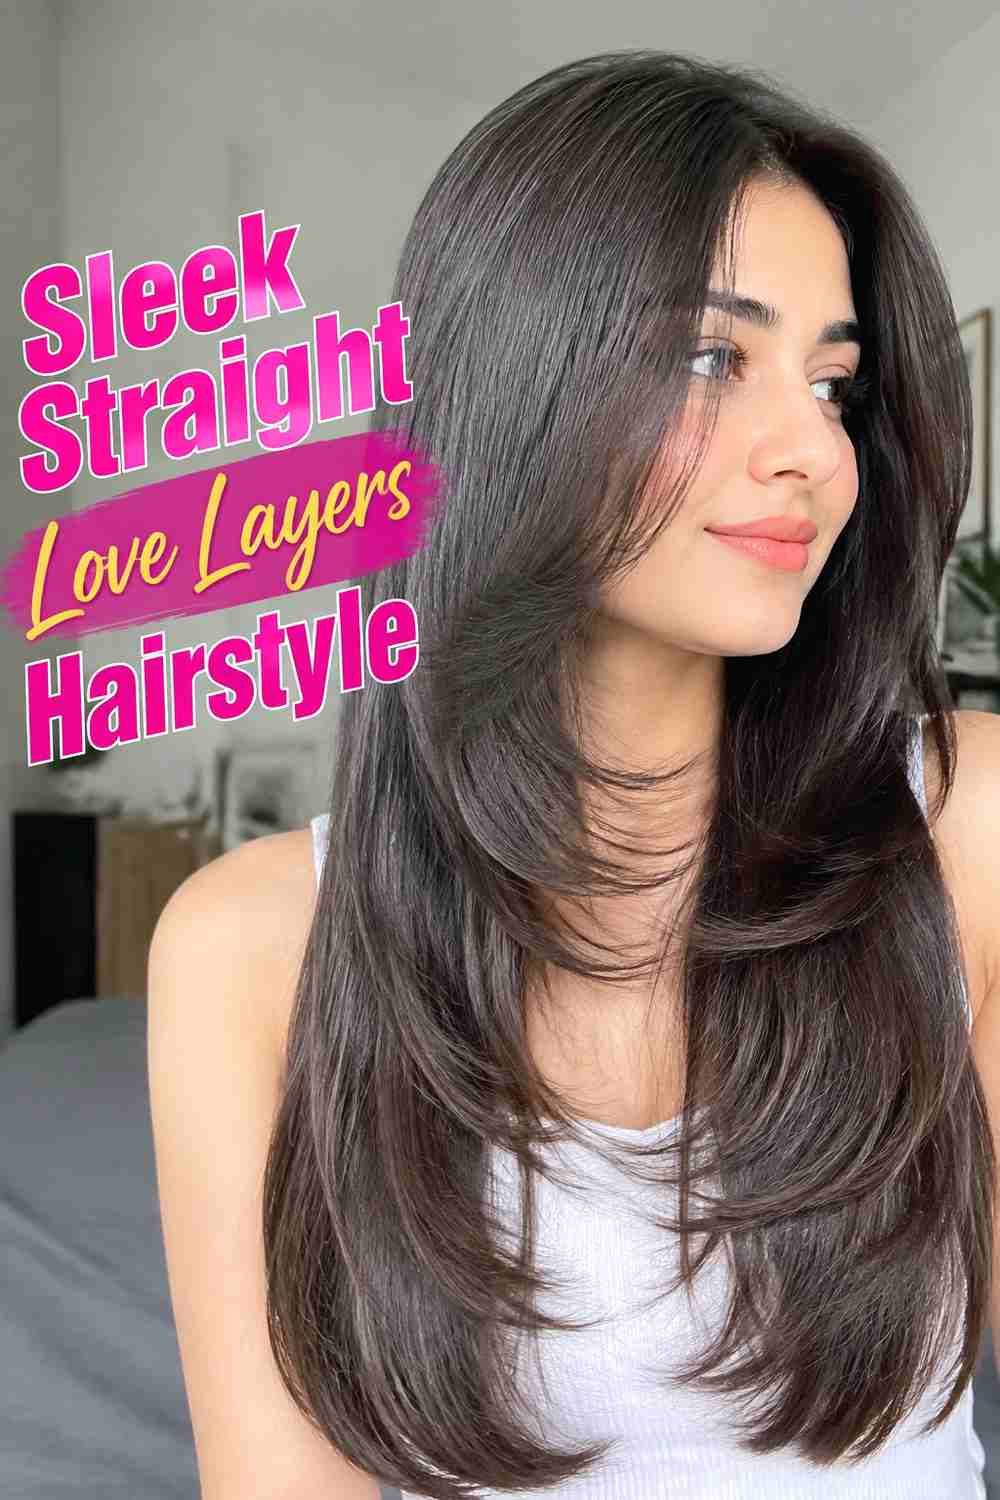
Sleek Straight Love Layers Hairstyle proves that the cut does not need curls or a bouncy blowout to show its shape. When worn straight, the layered lines are cleaner and more architectural, with face-framing pieces beginning below the chin and gradually lengthening toward a fuller perimeter. This version works well for straight hair and for anyone who prefers a polished, low-volume finish. Because flat styling can reveal every transition, the layers should be softly blended rather than heavily stepped. Use a heat protectant and smooth the hair in sections, keeping a little natural bend at the ends so the silhouette still feels fluid instead of pin-straight and severe.
Why It Works
Straight styling makes the progression from shorter front pieces to longer lengths especially visible. A clean perimeter keeps the haircut looking deliberate instead of overly thinned.
Styling Notes
Aim for smoothness rather than extreme flatness. A slight inward or outward bend near the ends preserves movement and prevents the layers from disappearing into one rigid line.
7. Curtain Bangs Love Layers Hairstyle
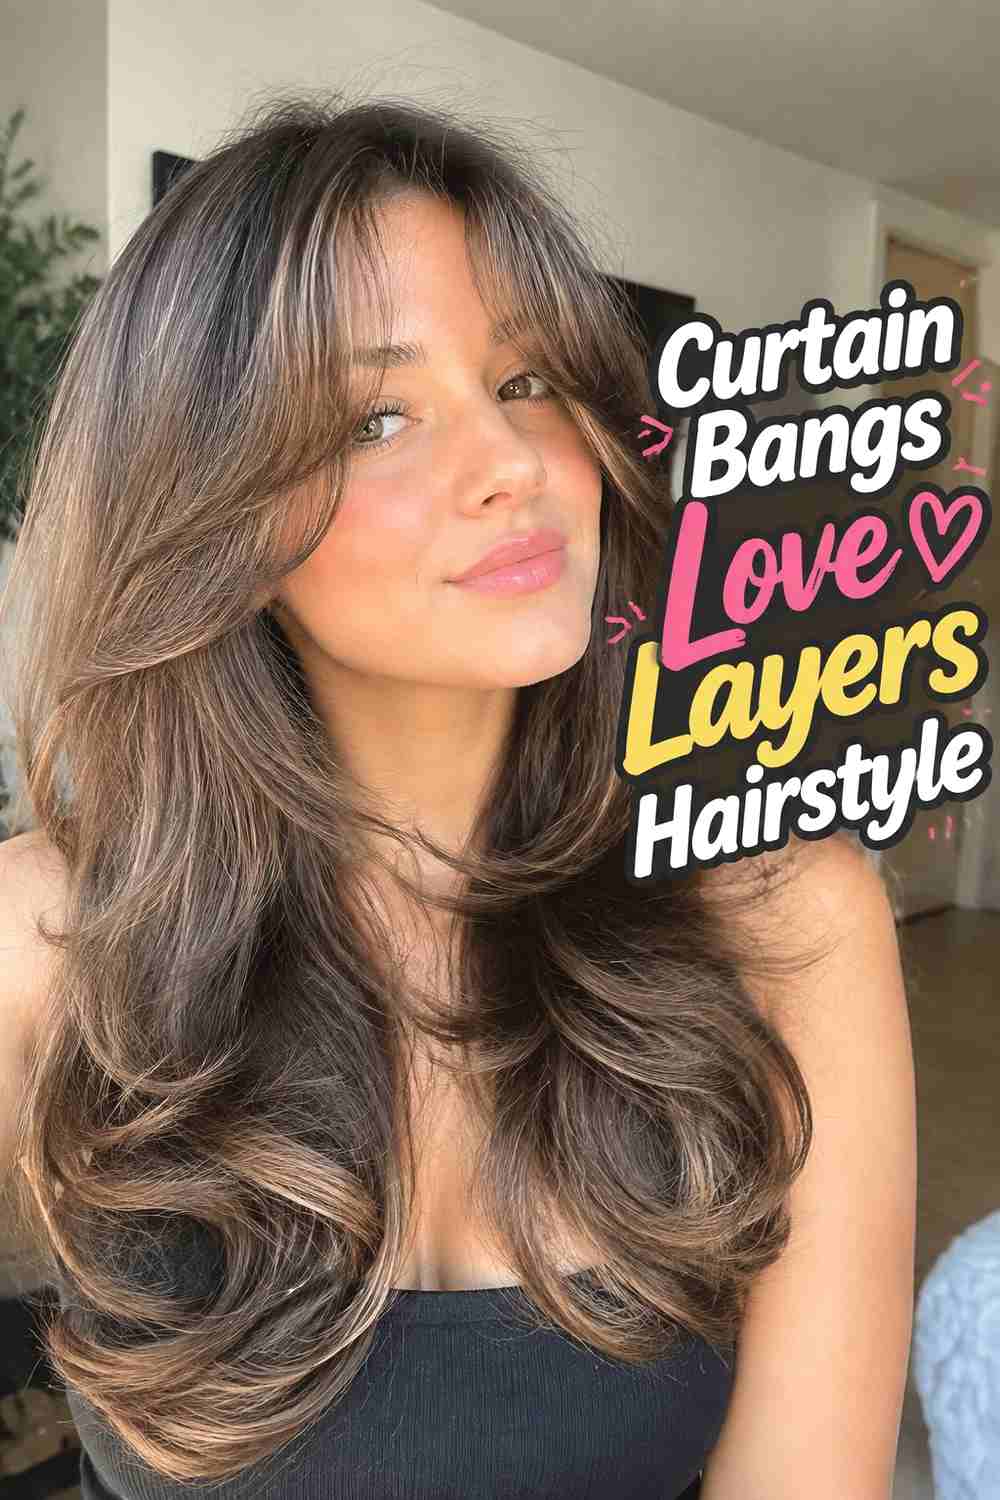
Curtain Bangs Love Layers Hairstyle adds a shorter frame around the eyes while keeping the main Love Layers shape long and flowing. The curtain fringe can split near the center, sweep across the cheekbones, and connect into the below-the-chin layers so the front never looks detached from the rest of the haircut. This version is especially useful if you want more movement around the face without committing to a full blunt bang. Straight, wavy, and medium-density hair can all adapt well with the right fringe weight. Dry the bangs first after washing, directing them side to side before shaping the final curve, then blend the outer edges into the longer face frame.
Best For
This variation suits anyone wanting a more noticeable front detail while preserving substantial length through the rest of the haircut. The curtain shape can be adjusted from airy to fuller.
Wear & Maintenance
The fringe may require more frequent reshaping than the long layers. On non-wash days, refreshing only the bangs can restore the entire style without restyling every section.
8. Wispy Fringe Love Layers Hairstyle
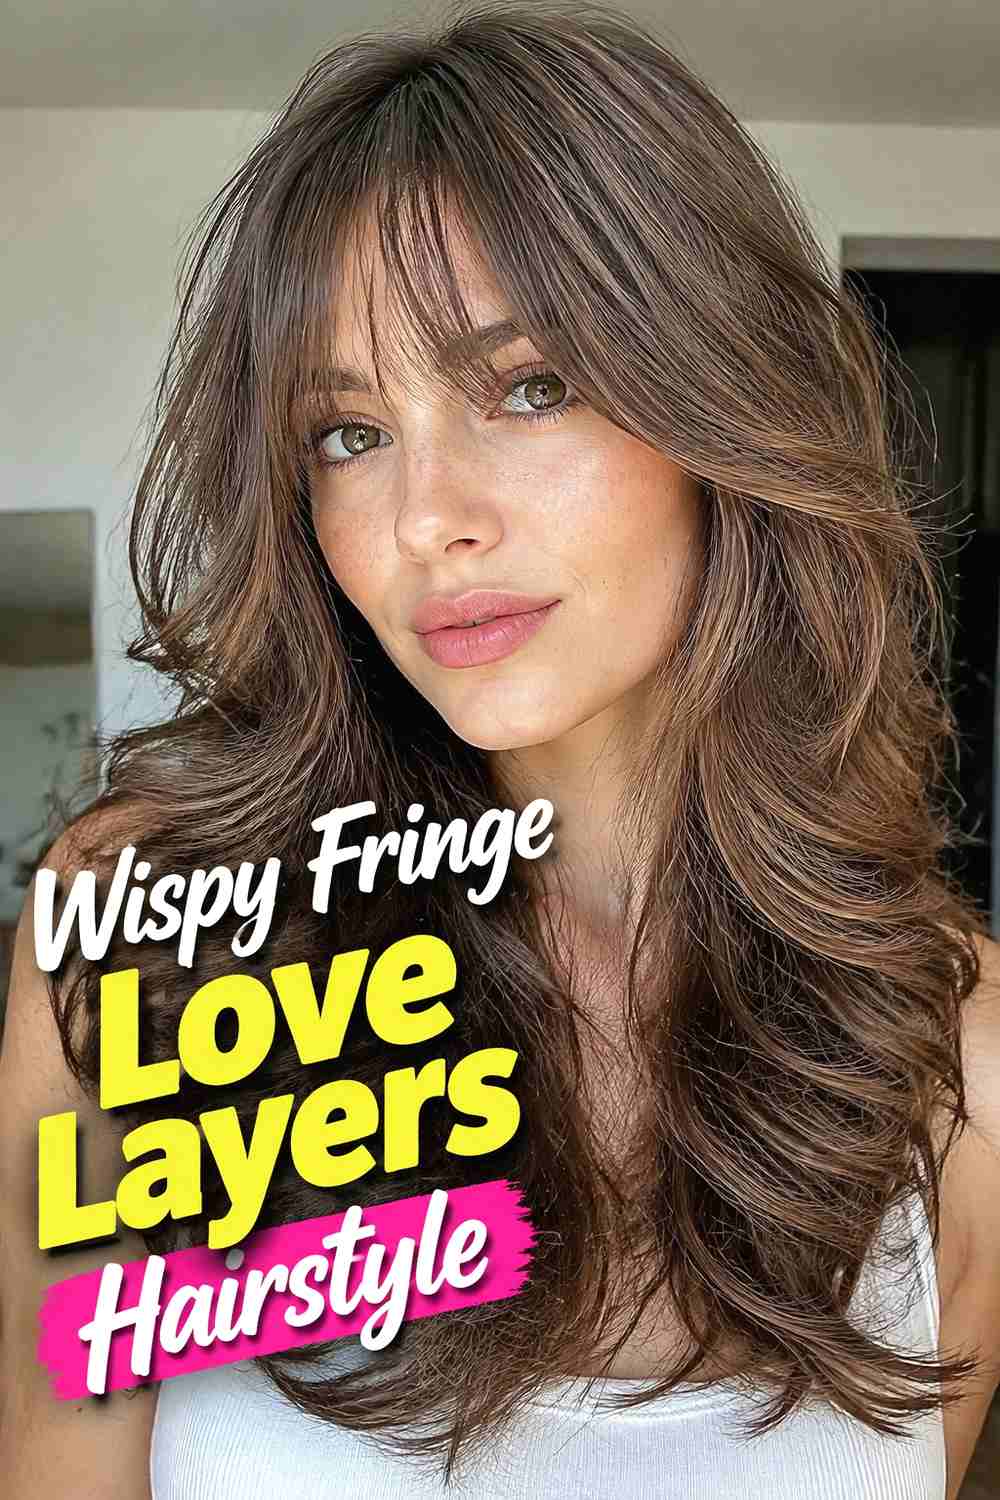
Wispy Fringe Love Layers Hairstyle combines a light, airy bang with long curved layers for a softer, slightly more playful finish. The fringe should stay fine enough to show some forehead, while the longer side pieces connect naturally into the Love Layers beginning below the chin. This contrast keeps the front visually interesting without making the haircut feel top-heavy. It can work on fine-to-medium hair when the fringe is cut sparingly and the lower perimeter remains full. Styling is usually quickest when the fringe is dried immediately after washing with a small brush or fingers. Keep heavy oils away from the bangs, since too much product can collapse the wispy separation.
Hair Type & Length
Fine and medium-density hair can handle a wispy fringe more easily when only a small amount of hair is removed from the front. Keep the longer layers conservative if fullness is a priority.
Styling Notes
Use minimal product around the forehead. A small amount of lightweight styling spray is usually enough to separate the fringe while allowing it to move naturally.
9. Shoulder Length Love Layers Hairstyle
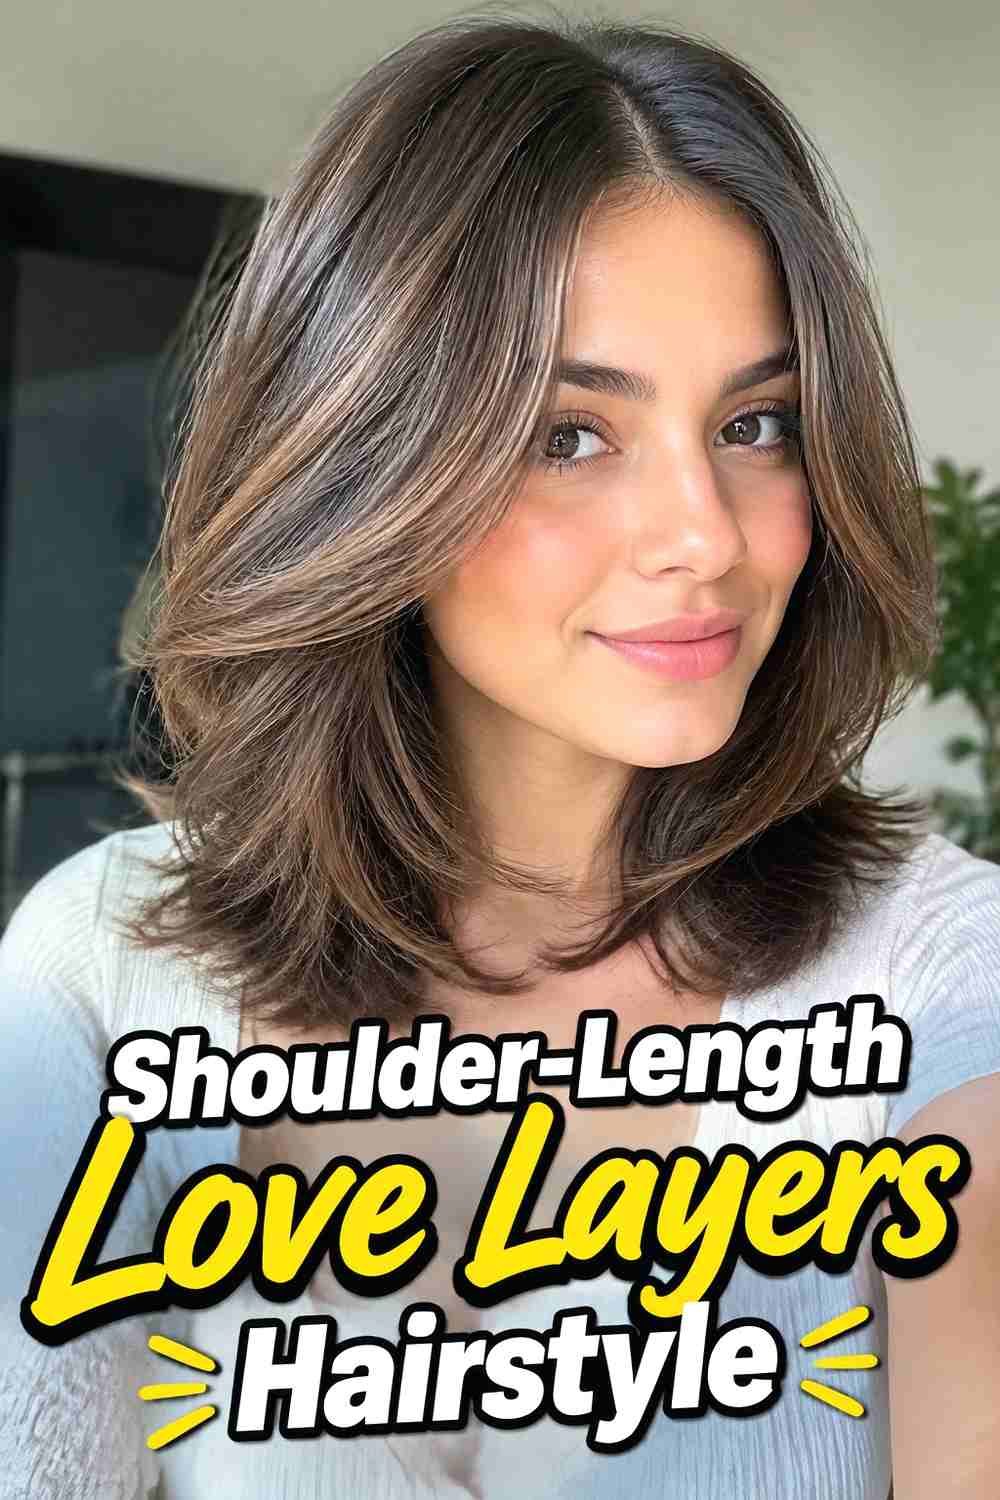
Shoulder-Length Love Layers Hairstyle compresses the romantic layered shape into a shorter, more practical silhouette. Because there is less length to create the full heart effect, the layers should be placed carefully around the jaw and upper shoulder area so they curve outward without turning into a shag. The perimeter can stay slightly blunt to preserve fullness, especially on fine or medium-density hair. This version is a strong option for anyone who wants movement but does not want hair extending far down the back. A medium round brush can create a soft bend through the sides, while a touch of root lift helps maintain the rounded upper shape that defines the look.
Why It Works
The shorter length makes the layered movement easy to see while keeping the haircut relatively compact. A stronger baseline prevents the lower edge from becoming overly feathered.
Best For
Consider this version if you want the spirit of Love Layers without maintaining very long hair. It can also make regular blow-drying quicker simply because there is less overall length to style.
10. Extra Long Feathered Love Layers Hairstyle
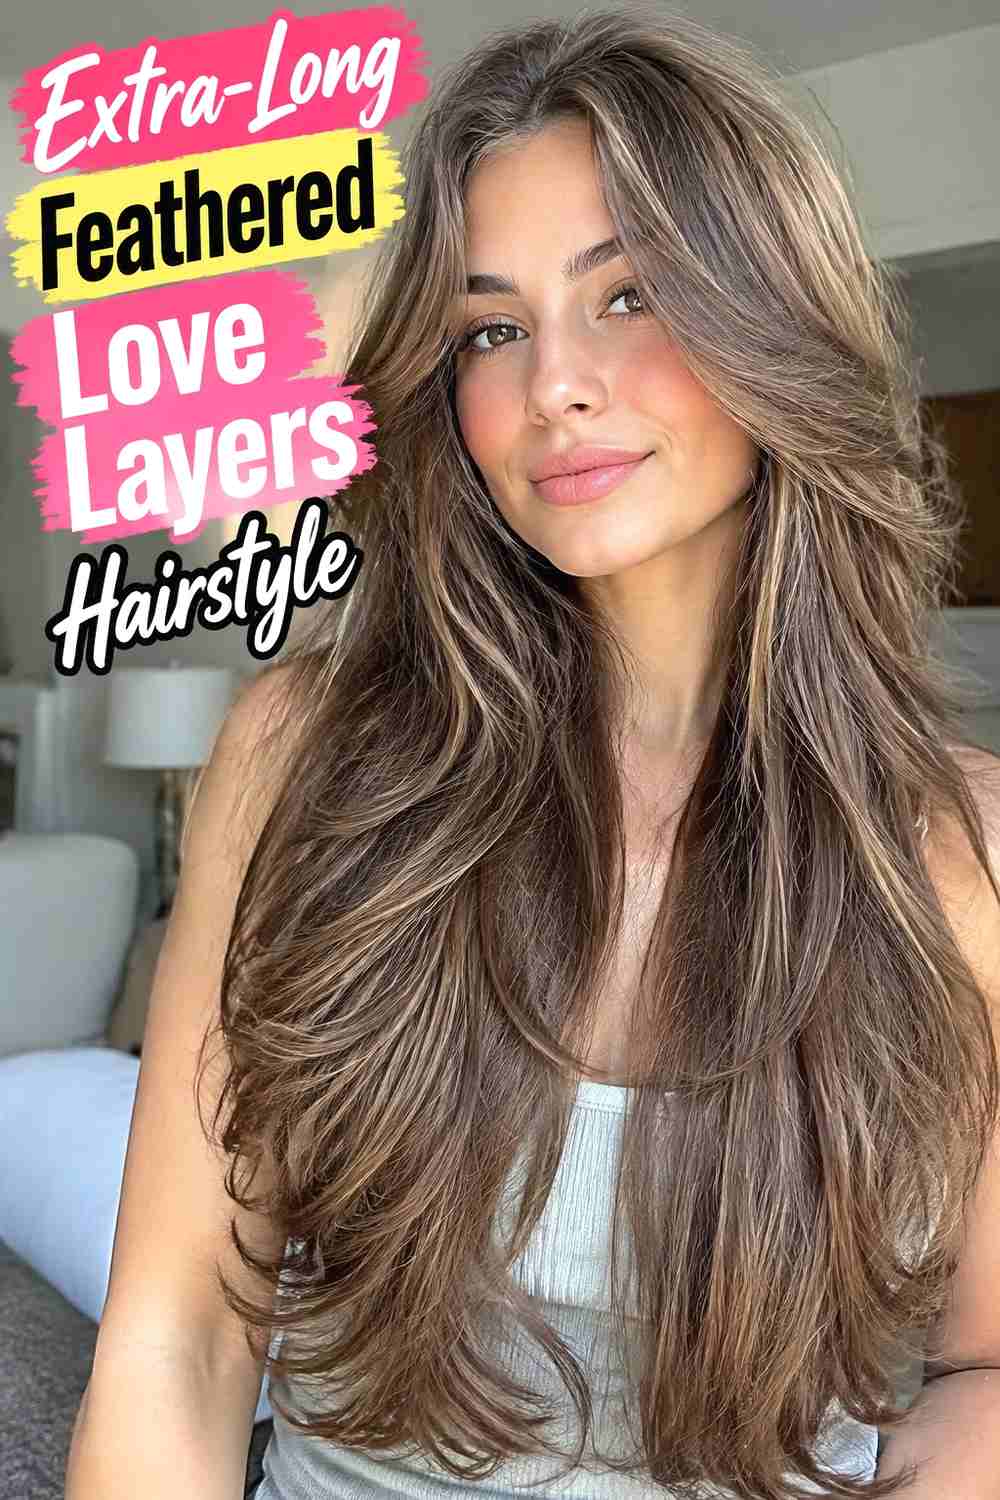
Extra-Long Feathered Love Layers Hairstyle keeps maximum length while using long, airy layering to prevent the hair from feeling heavy. The face-framing sections begin below the chin, then continue into feathered layers that open away from the face and blend through the mid-back lengths. This version is especially effective on thick or dense hair that can support internal movement without losing too much weight at the ends. The feathered finish looks polished with a blowout, but it can also soften into natural waves between styling days. Ask for gradual transitions and restrained thinning near the perimeter so the haircut still looks substantial from the back rather than stringy or over-layered.
Hair Type & Length
Long, dense hair provides the most room for multiple connected layers. If the hair is fine, fewer feathered sections can preserve density while still creating movement around the face.
Wear & Maintenance
Long layers usually retain their general shape as they grow, but the front framing can lose definition first. Periodic trims help restore the curved outline and keep the ends looking intentional.
11. Curly Love Layers Hairstyle
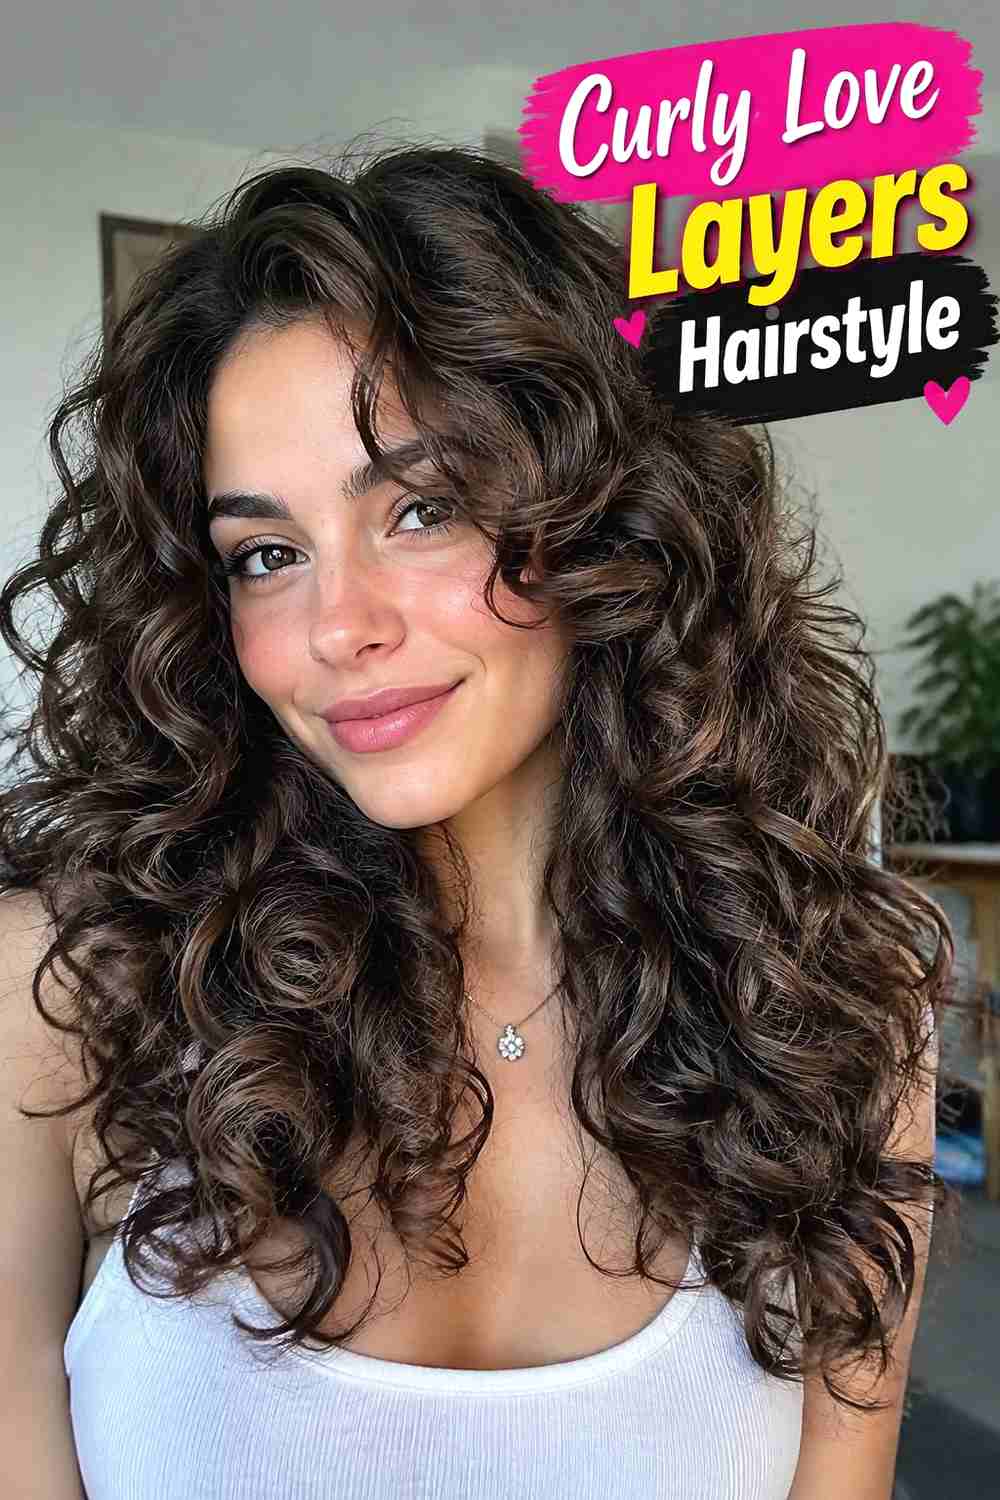
Curly Love Layers Hairstyle adapts the heart-shaped concept to natural curls by using graduated length instead of forcing every section into the same curve. Shorter face-framing curls can begin below the chin, while longer layers distribute volume through the sides and keep the bottom from becoming overly wide. The exact placement should follow curl shrinkage, density, and the way the hair naturally groups, so a dry or curl-aware cutting approach can be helpful. This version can create lively movement without sacrificing overall length when the layers stay connected. Style with a lightweight curl product, diffuse on lower heat if desired, and avoid brushing dry curls if you want to preserve definition and natural separation.
Best For
This interpretation is useful for naturally curly hair that already has volume and needs more intentional distribution through the lengths. Layer placement should be personalized to the curl pattern rather than copied from straight hair.
Pro Tip
Discuss shrinkage before the shortest face-framing curl is cut. A section that looks below the chin while stretched can sit noticeably higher once it returns to its natural curl pattern.
12. Flipped End Love Layers Hairstyle
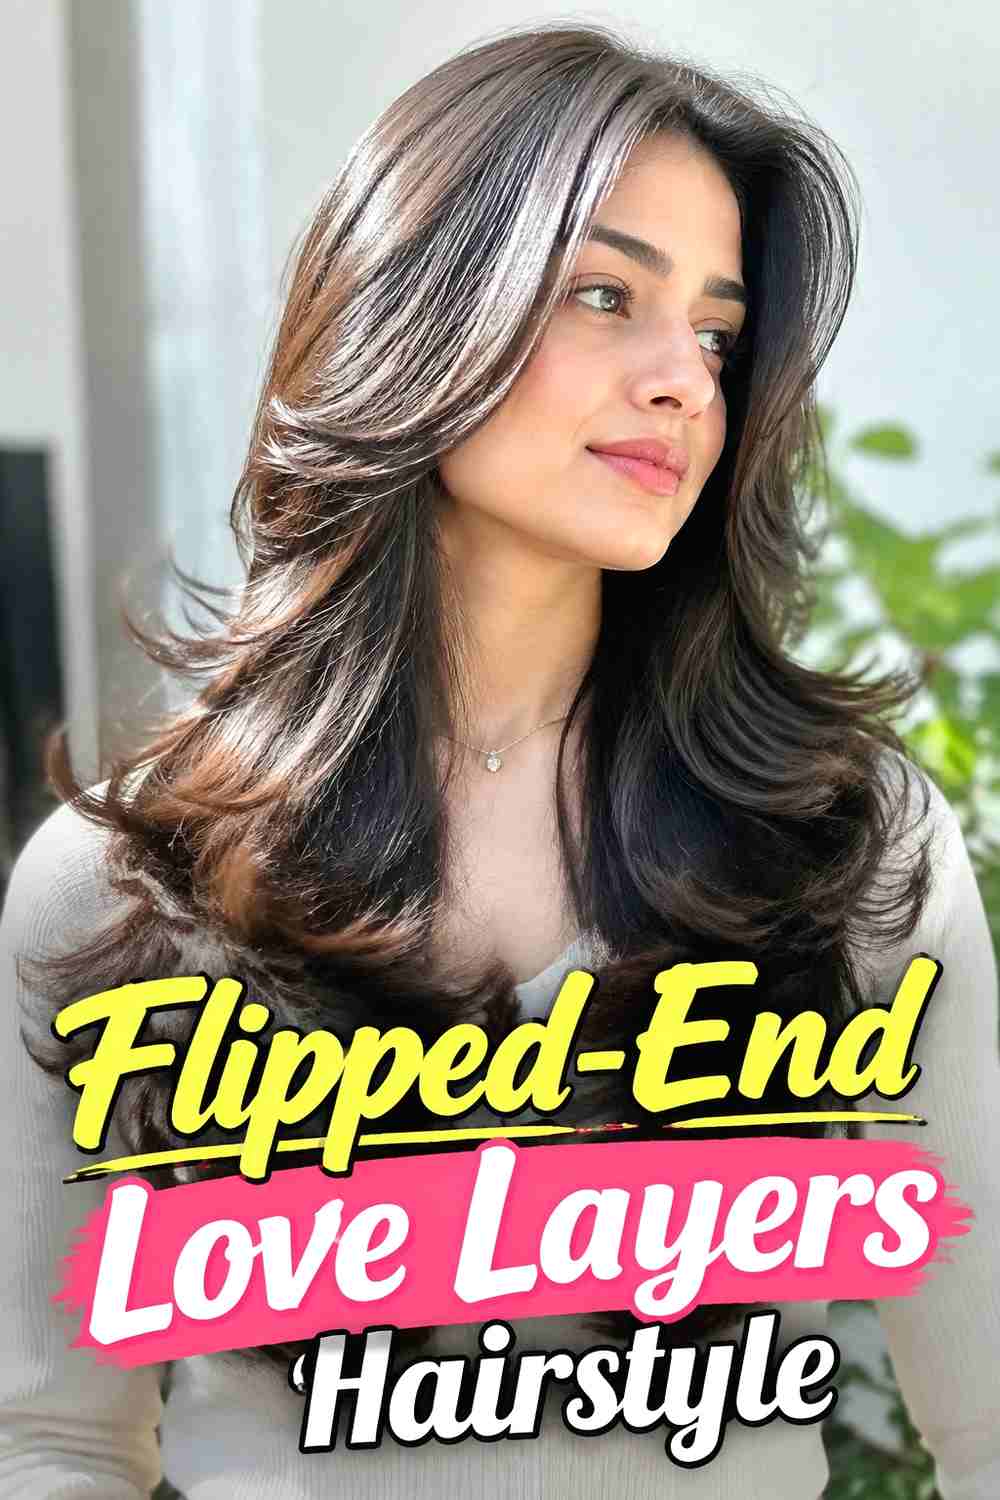
Flipped-End Love Layers Hairstyle gives the romantic cut a distinctly retro finish by turning the ends outward instead of leaving them tucked or softly waved. The long layers still begin below the chin and create the curved Love Layers silhouette, but the flipped tips add extra movement along the shoulders and lower lengths. This works particularly well on straight-to-wavy hair that holds a bend and on medium density that can show the layered shape without looking bulky. Use a round brush or large iron to direct only the ends away from the face, keeping the roots and mid-lengths smooth. A light finishing spray can help the flips last while preserving softness and movement.
Styling Notes
Concentrate the outward bend on the final few inches rather than curling every layer. This keeps the silhouette sleek through the middle while giving the ends their distinctive kick.
Wear & Maintenance
The flipped finish may relax during the day on very straight or heavy hair. Lightweight hold is preferable to stiff spray because Love Layers should still have visible movement.
How to Choose the Right Look
Start with your current length and density. Long, thick hair offers the most room for dramatic heart-shaped layering, feathering, and blowout volume, while finer hair often benefits from fewer layers and a fuller bottom edge. If you want a lower-styling option, Soft Wavy, Sleek Straight, or Center-Part Love Layers can work with relatively simple finishing once the cut is shaped well.
Next, decide how much attention you want around the face. Curtain bangs and wispy fringe create the strongest front detail but usually need more frequent styling and trimming. Side-part and classic versions keep the face frame longer and easier to grow out. For maximum volume, choose the blowout variation; for natural texture, adapt the layer placement to waves or curls rather than forcing the hair into a smooth shape.
Finally, think about finish. Flipped ends feel playful and retro, feathered layers look airy and expansive, while a sleek finish makes the actual haircut lines more visible. Bring reference images showing both the front and back so your stylist can see the layer placement, perimeter weight, and amount of volume you prefer.
Final Thoughts
Love Layers work best when the haircut feels connected rather than heavily chopped. The signature below-the-chin framing, upper volume, and gradually narrowing silhouette can be adjusted for different lengths and textures without losing the romantic shape. Choose the version that fits your natural density and realistic styling routine, then personalize the fringe, part, or finish to make it feel like your own.
FAQs
1. What is a Love Layers haircut?
Love Layers is a layered haircut built around a soft heart-shaped silhouette. The main face-framing layers typically begin below the chin, with more lift toward the top and gradually narrower movement toward the ends.
2. Are Love Layers suitable for fine hair?
They can be, but fine hair generally benefits from fewer layers and a stronger perimeter. Removing too much weight can make the ends appear sparse, so the amount of layering should be adjusted to density.
3. Do Love Layers require a blowout?
No. A blowout emphasizes the curved shape, but the cut can also be worn straight, softly waved, or adapted to curls. The best styling method depends on your natural texture and desired finish.
4. Can Love Layers work on shoulder-length hair?
Yes, although the heart-shaped effect will be more compact. Strategic face framing and a fuller perimeter can create a recognizable Love Layers silhouette without requiring very long hair.
5. What should I ask for at the salon?
Bring clear reference photos and ask for long, connected face-framing layers with the shortest main pieces placed around or below the chin, plus gradual movement through the lengths. Discuss density, shrinkage, and how much weight you want to keep at the ends.
Save your favorite Love Layers Hairstyle ideas, share them for salon inspiration, and explore more layered haircut looks for your next refresh.