16 Double Dutch Bun Hairstyle Ideas
Two raised Dutch braids meeting polished or softly textured buns create a striking mix of secure structure, visible detail, and versatile styling possibilities.
Double Dutch bun hairstyles usually begin with a center part and two inside-out braids running along opposite sides of the head. From there, the braids can feed into one shared bun, two separate buns, a low nape knot, or a higher crown placement. Changing the braid tension, bun texture, accessories, and finish gives the basic construction very different personalities.
For believable results, each braid should follow the scalp naturally and connect physically to its bun or ponytail base. Buns also need realistic density, secure-looking pinning, and a clear tie point rather than appearing detached from the head. Hair length, texture, density, and layering will influence how large and structured each variation can realistically be.
Quick List
- Classic Double Dutch Bun Hairstyle
- Low Double Dutch Bun Hairstyle
- High Double Dutch Bun Hairstyle
- Double Dutch Space Bun Hairstyle
- Nape Double Dutch Bun Hairstyle
- Messy Double Dutch Bun Hairstyle
- Sleek Double Dutch Bun Hairstyle
- Twisted Double Dutch Bun Hairstyle
- Wrapped Double Dutch Bun Hairstyle
- Curly Double Dutch Bun Hairstyle
- Side Double Dutch Bun Hairstyle
- Pearl Pin Double Dutch Bun Hairstyle
- Floral Double Dutch Bun Hairstyle
- Wedding Double Dutch Bun Hairstyle
- Festival Double Dutch Bun Hairstyle
- Soft Romantic Double Dutch Bun Hairstyle
1. Classic Double Dutch Bun Hairstyle
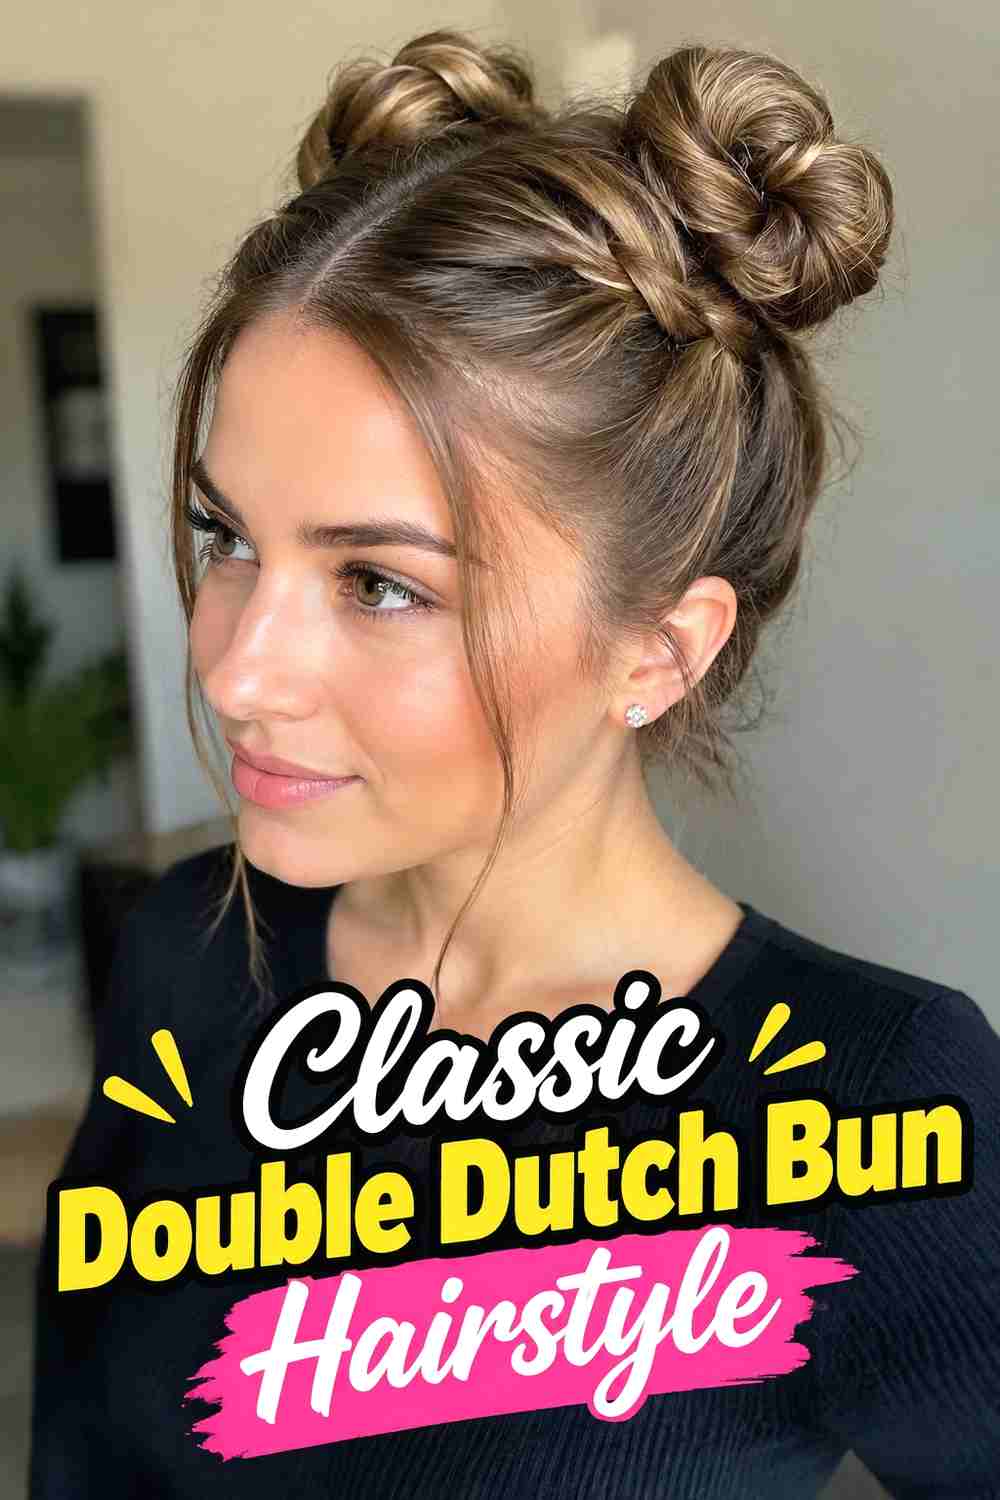
The classic version starts with a clean center part and two evenly sized Dutch braids traveling from the front hairline toward the back. Once both braids reach the desired meeting point, the remaining lengths are gathered into one compact bun. This construction keeps the raised braid pattern visible while giving the hairstyle a tidy, secure finish. Medium to long hair is easiest to work with because there is enough length to build both braids and still form a substantial knot. Keep braid tension consistent on both sides, secure the gathered hair before creating the bun, and use hidden pins inside the coil. Slightly loosening the outer braid loops afterward can soften the look without weakening its structure.
Styling Notes
Match the section size on both sides as closely as possible. Small differences are natural, but balanced braids make the shared bun look more centered and intentional.
2. Low Double Dutch Bun Hairstyle
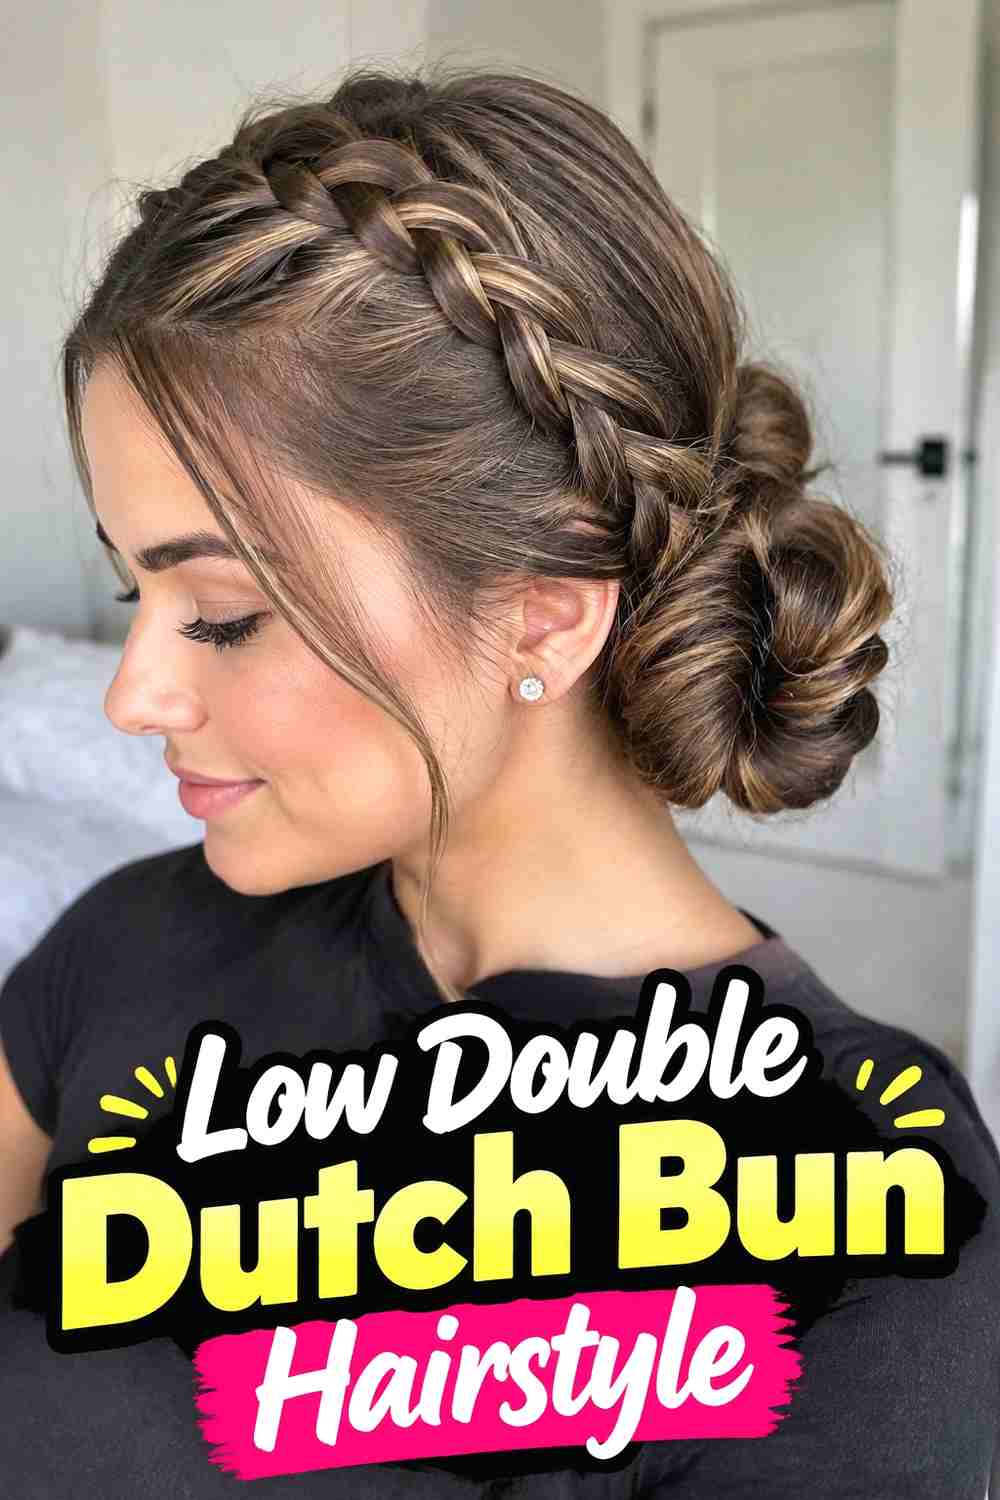
A low double Dutch bun keeps the two braids close to the scalp until they reach the lower back of the head, where they merge into a bun near the nape. The placement gives the hairstyle a softer, more understated silhouette than a crown-level knot. It works especially well with medium-long hair because the remaining length can be folded into a compact bun without excessive bulk. Keep the braids firm enough to maintain their raised shape, then gather both tails and loose sections into a low ponytail before forming the knot. A little softness around the outer braid edges can make the style feel less sporty while preserving the clear double-braid pattern.
Best For
Choose this version for daytime events, dinners, or occasions where you want visible braid detail without the height of a top bun.
3. High Double Dutch Bun Hairstyle
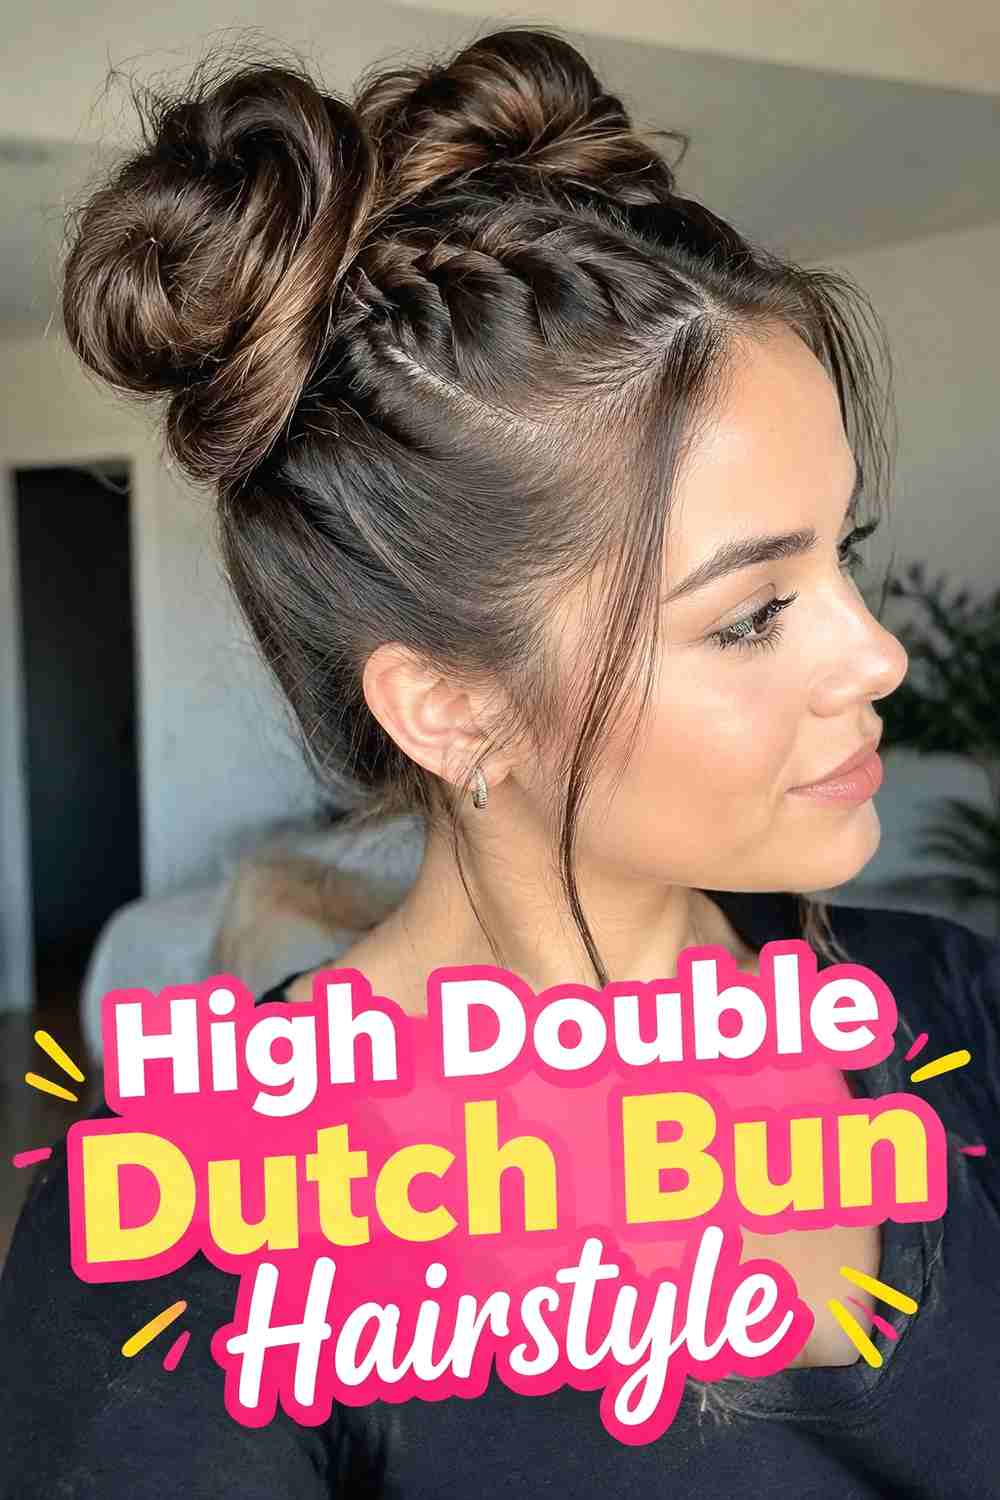
A high double Dutch bun sends the braids upward toward the crown, creating a lifted silhouette with a stronger visual impact. The two Dutch braids can begin at the forehead or nape depending on the design, but both should finish at one secure high ponytail base. After tying the gathered hair, twist or coil the remaining length into a bun directly above the attachment point. Medium to long hair works best because it provides enough length for the braids and a balanced knot. Avoid making the ponytail excessively tight; structural pins can support the bun without relying on uncomfortable scalp tension. The finished look should feel energetic, clean, and securely connected.
Wear & Maintenance
Reinforce the bun with pins inserted into the dense inner sections. A stable high bun depends more on pin placement than on pulling the ponytail extremely tight.
4. Double Dutch Space Bun Hairstyle
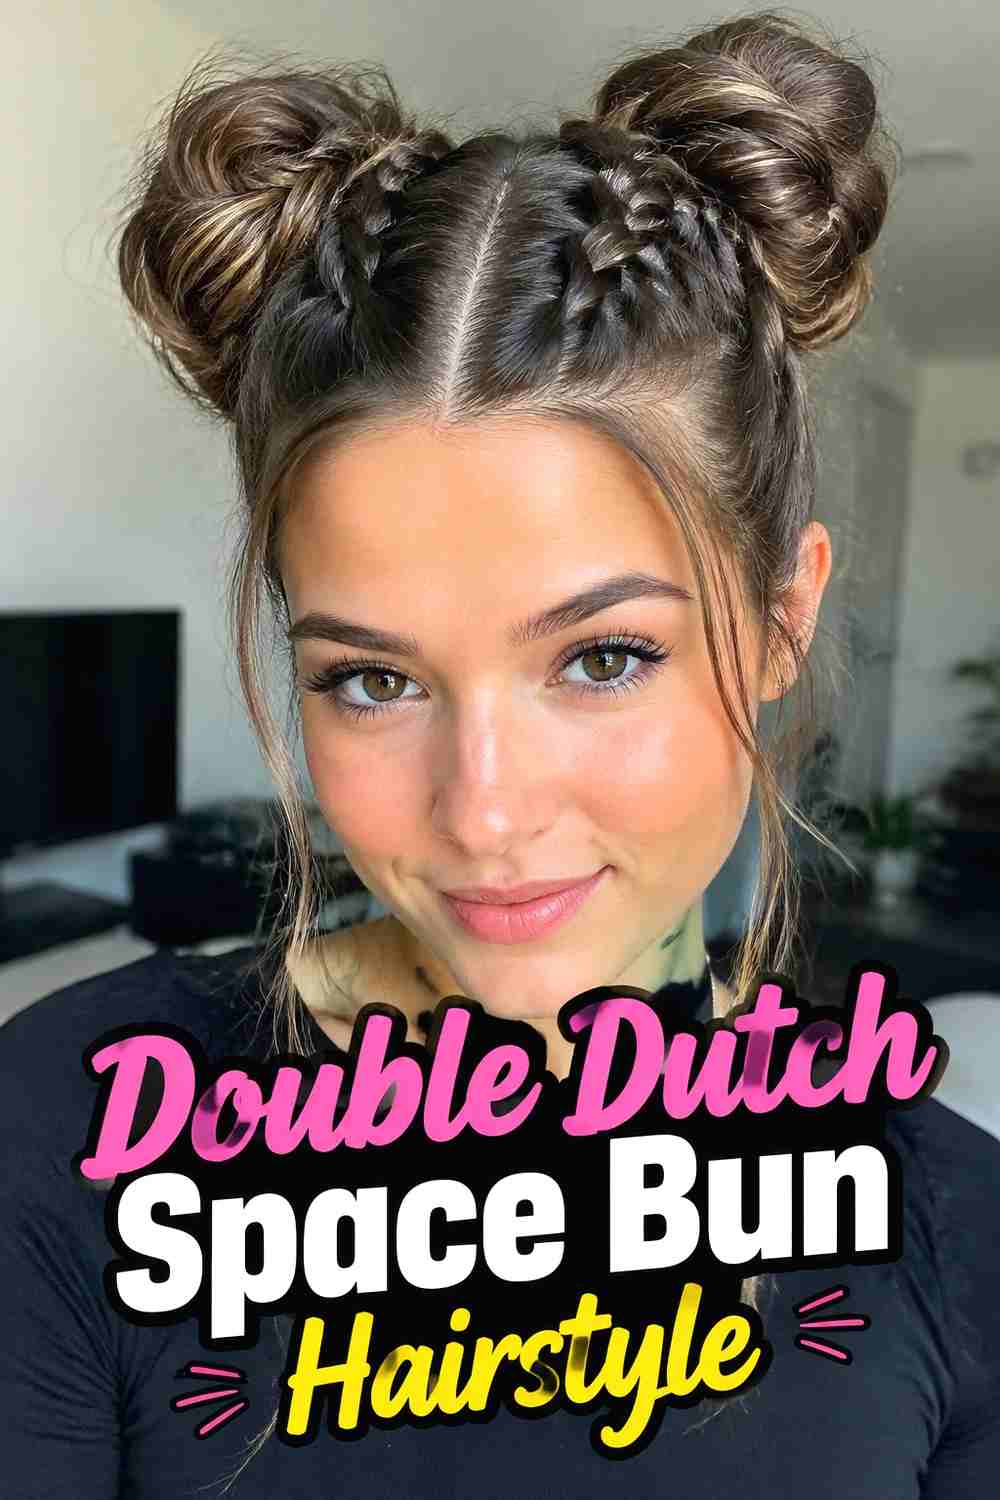
This playful variation keeps the two Dutch braids separate and finishes each one in its own bun. A clean center part creates symmetry, while each braid travels toward a matching base positioned near the crown or upper back of the head. Once the braids reach their endpoints, secure each side independently before wrapping the remaining lengths into two buns. Keeping the buns similar in size makes the hairstyle feel balanced, though slight natural differences are expected. This look works particularly well on medium-long or long hair and can be worn sleek or softly textured. Avoid oversized buns that seem disconnected from the amount of hair feeding into each side.
Hair Type & Length
Medium-long and long hair give each braid enough length to form a visible bun. Fine hair usually creates smaller space buns, while dense hair naturally produces fuller ones.
5. Nape Double Dutch Bun Hairstyle
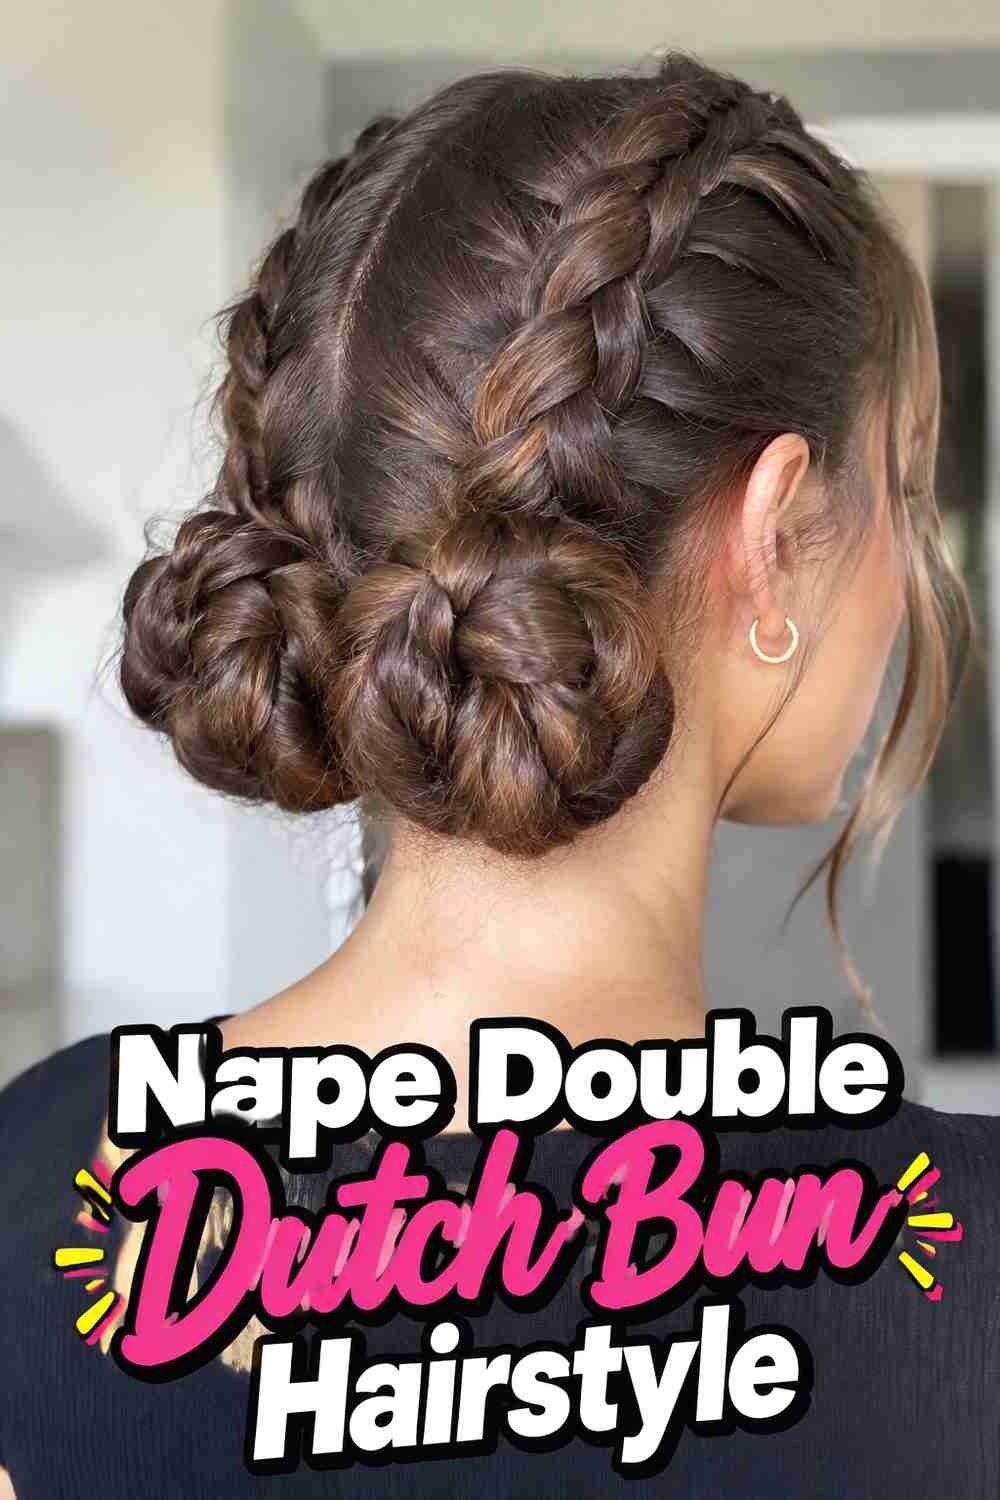
The nape version keeps the entire style low and compact. Two Dutch braids follow the head downward, meeting just above the neckline before joining into a small knot. Because the bun sits close to the neck, the overall shape feels practical and polished without looking overly formal. This placement can also be comfortable for medium-length hair that does not have enough extra length for a large crown bun. Secure the braid tails together first, then fold or twist the remaining hair into a low knot and pin the ends underneath. Keep crown volume restrained so the visual focus stays on the symmetrical braid paths leading into the nape.
Why It Works
The low meeting point emphasizes the full length of both Dutch braids, allowing the woven structure to remain visible from the front hairline to the bun.
6. Messy Double Dutch Bun Hairstyle
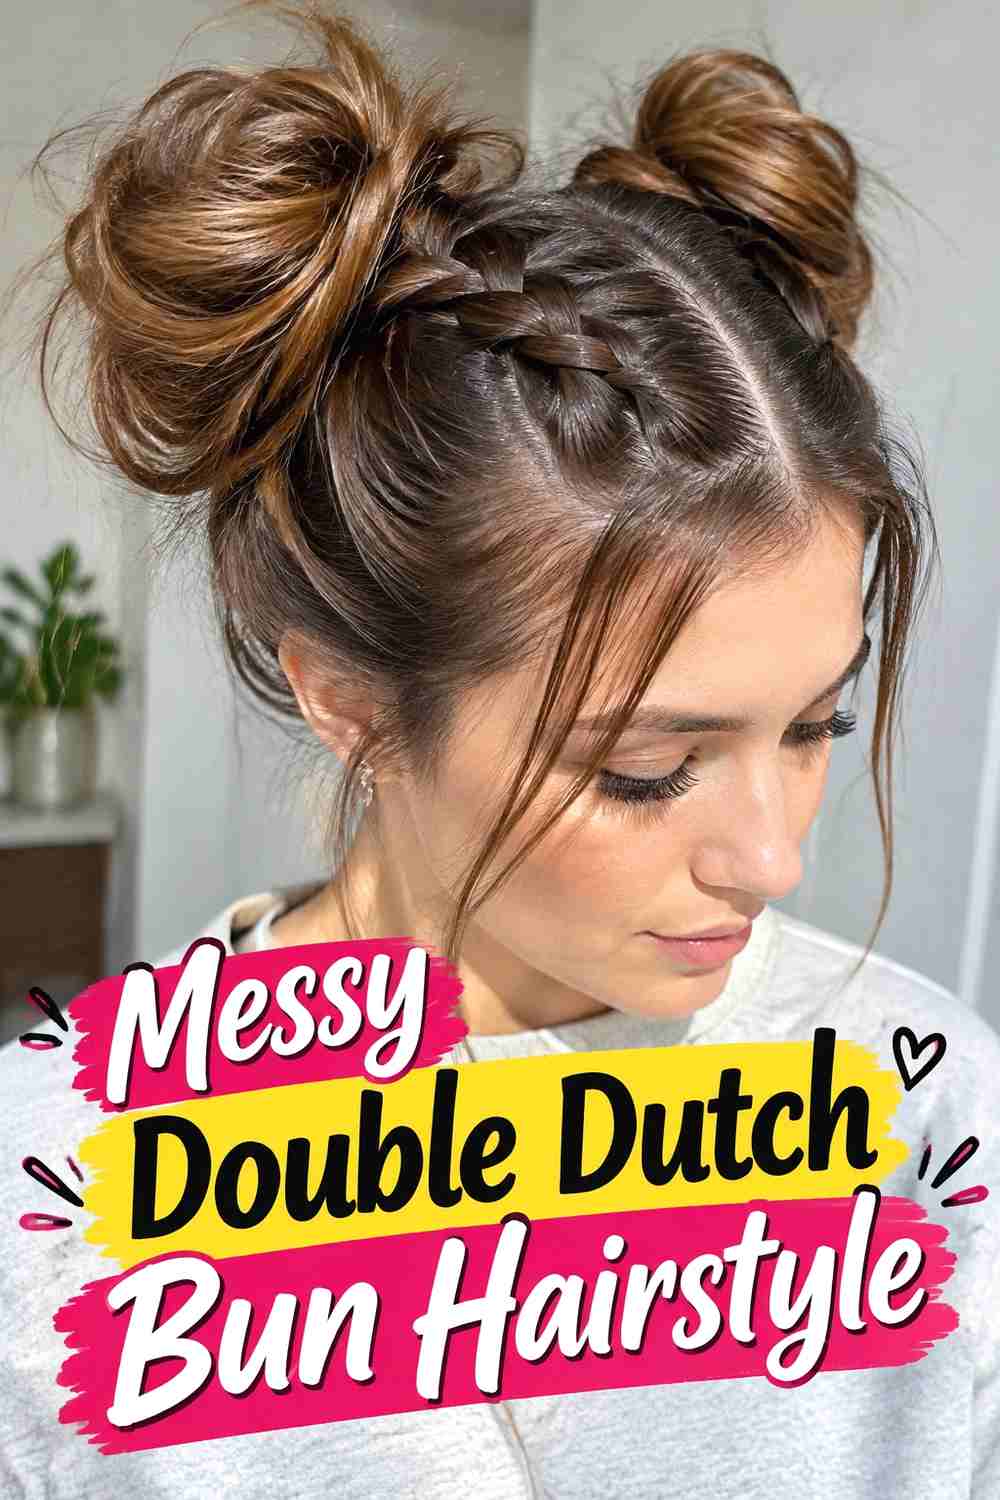
The messy version softens the precision of double Dutch braids with loosened loops, gentle crown texture, and an intentionally relaxed bun. Begin with two secure braids and a stable ponytail or tie point before creating the knot. Once the bun is pinned, widen selected braid sections and pull small pieces loose around the hairline or crown. The key is to make the surface look undone without compromising the hidden structure. Lightly waved or textured hair is especially useful because natural bends help create fullness around the bun. Keep the loose pieces controlled and avoid releasing too much hair from the braid itself, which can make the woven pattern lose definition.
Styling Notes
Build the secure hairstyle first and create the messy texture second. This keeps the braids and bun stable while allowing the outer finish to look softer.
7. Sleek Double Dutch Bun Hairstyle
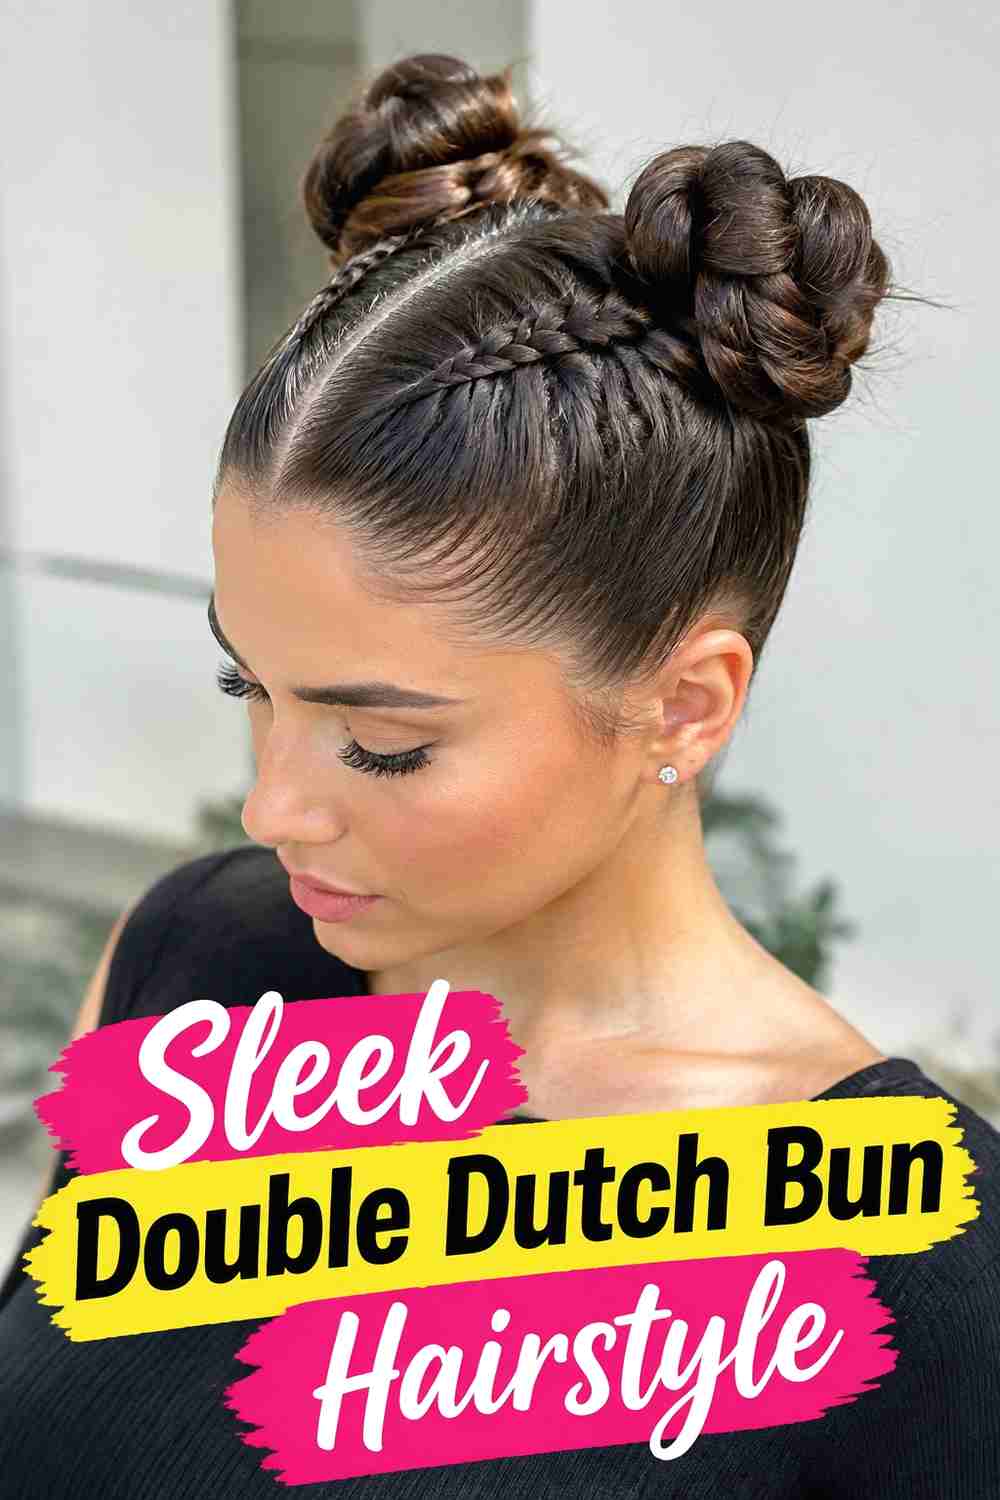
A sleek double Dutch bun emphasizes crisp parting, smooth sections, and tightly controlled braid paths. The two raised braids remain clearly defined from the hairline to the bun, with minimal flyaways around the crown. This style looks particularly striking on smoothed hair because the woven detail contrasts with the polished surrounding surface. Use a small amount of styling product while braiding to keep sections neat, then gather the braid tails into a compact bun at the back. Finish with light shine rather than heavy oil so individual strands remain visible. The bun itself should be firmly anchored and proportionate to the amount of hair, with the ends tucked naturally underneath.
Pro Tip
Use product gradually while braiding instead of coating the entire head first. This provides control without making the braid sections slippery or overly shiny.
8. Twisted Double Dutch Bun Hairstyle
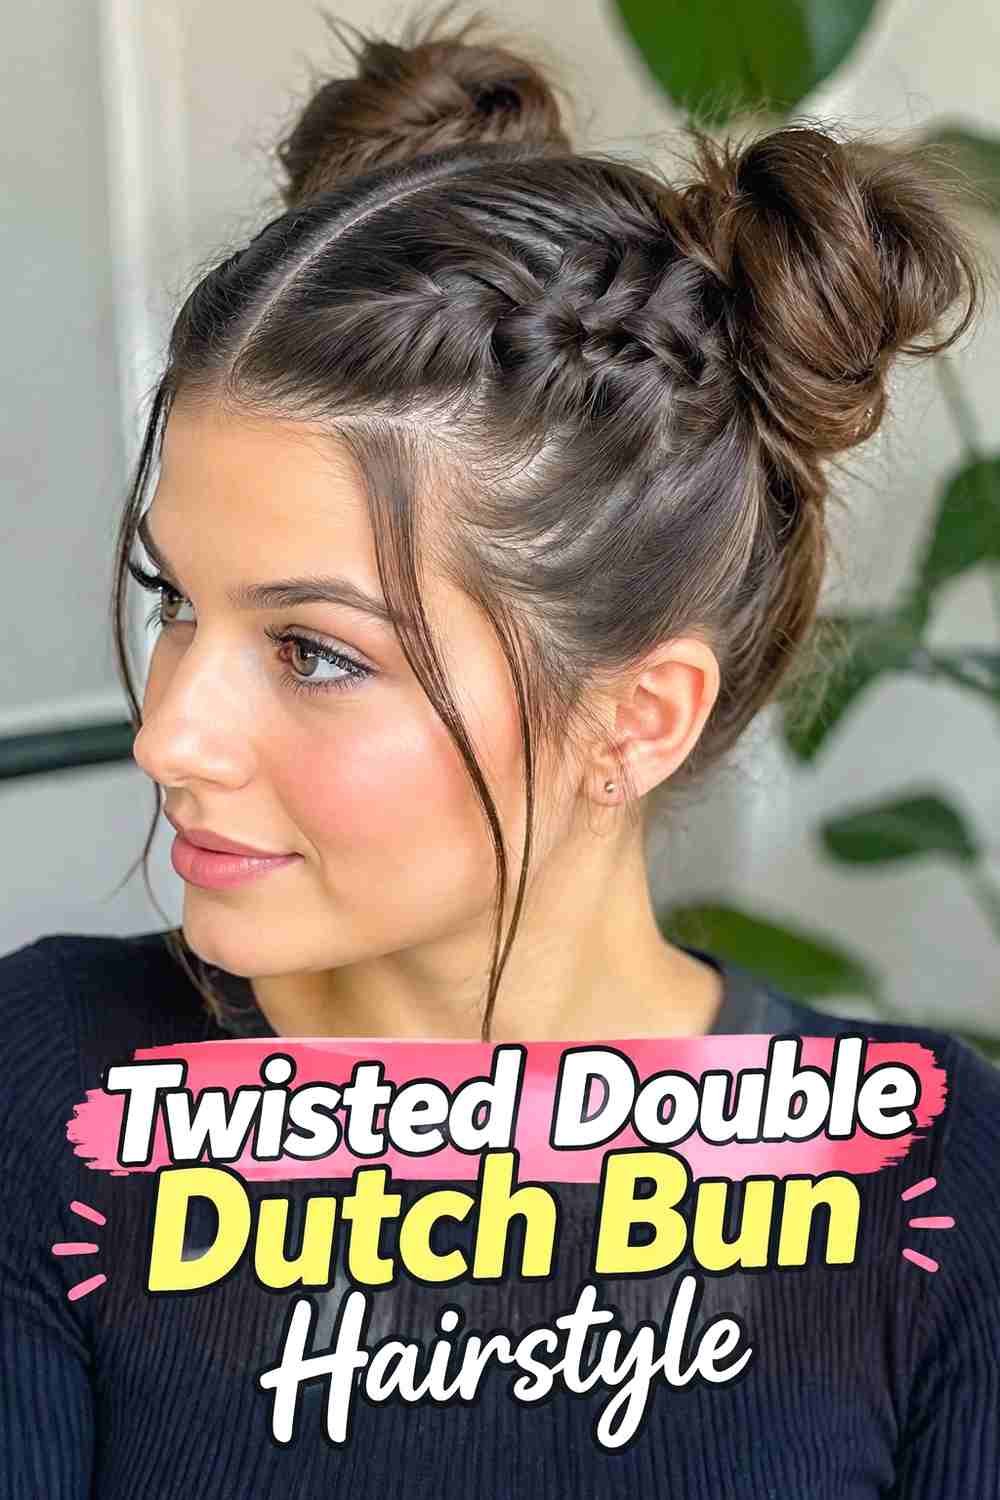
The twisted version adds texture to the bun after the double Dutch braids are complete. Once both braids reach the back, gather the remaining lengths into a ponytail and divide that ponytail into two sections. Twist each section separately, then wrap them around the base to form a bun with visible ridges. This contrast works well because the raised braids lead naturally into another textured element rather than a smooth coil. Longer hair offers more room for the twists to remain visible, though medium lengths can create a smaller version. Pin each twisted section as you wrap it rather than waiting until the end, which helps the finished bun stay secure.
Why It Works
Repeating texture in both the Dutch braids and twisted bun creates a cohesive design while still giving the back of the hairstyle a distinct focal detail.
9. Wrapped Double Dutch Bun Hairstyle
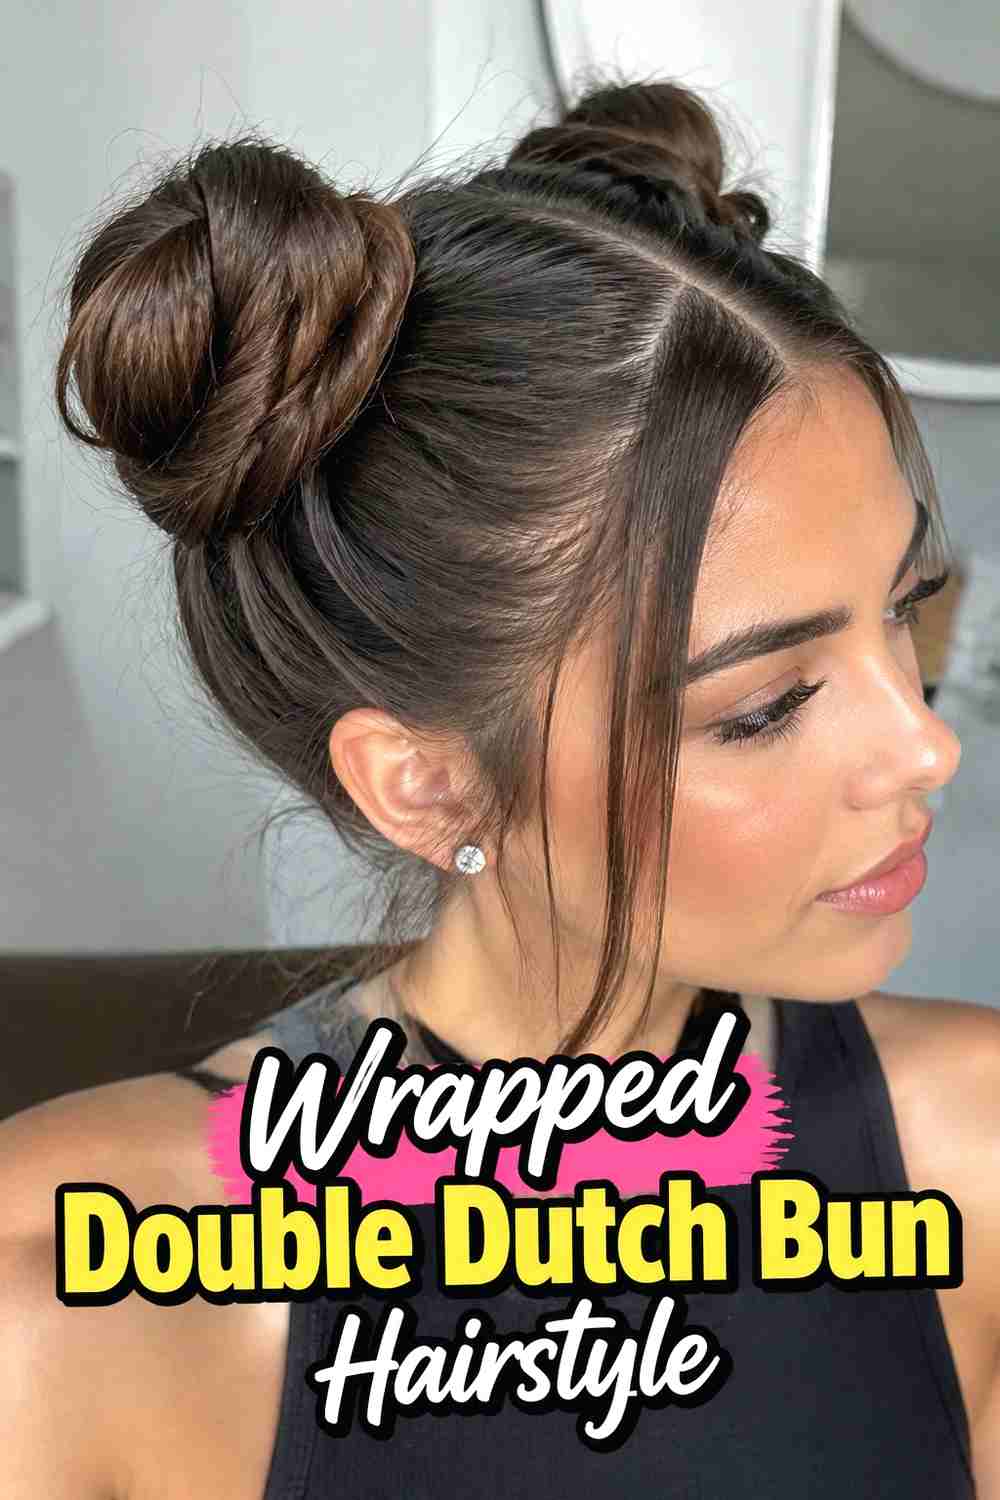
A wrapped double Dutch bun uses the braid tails themselves to create or decorate the final knot. After completing two Dutch braids, bring the tails together at the back and wrap them around a secure ponytail base or around each other. This keeps the woven texture visible even inside the bun rather than allowing it to disappear completely. Long hair is particularly useful because the braided lengths have enough reach to circle the base cleanly. Pin the wraps in stages so the braid pattern stays exposed where possible. Keep the overall bun compact enough that it feels supported by the hair feeding into it rather than oversized or artificially added.
Hair Type & Length
Longer hair gives you the most flexibility for wrapping braided tails around the base. Medium-length hair can create a tighter, smaller version with fewer rotations.
10. Curly Double Dutch Bun Hairstyle
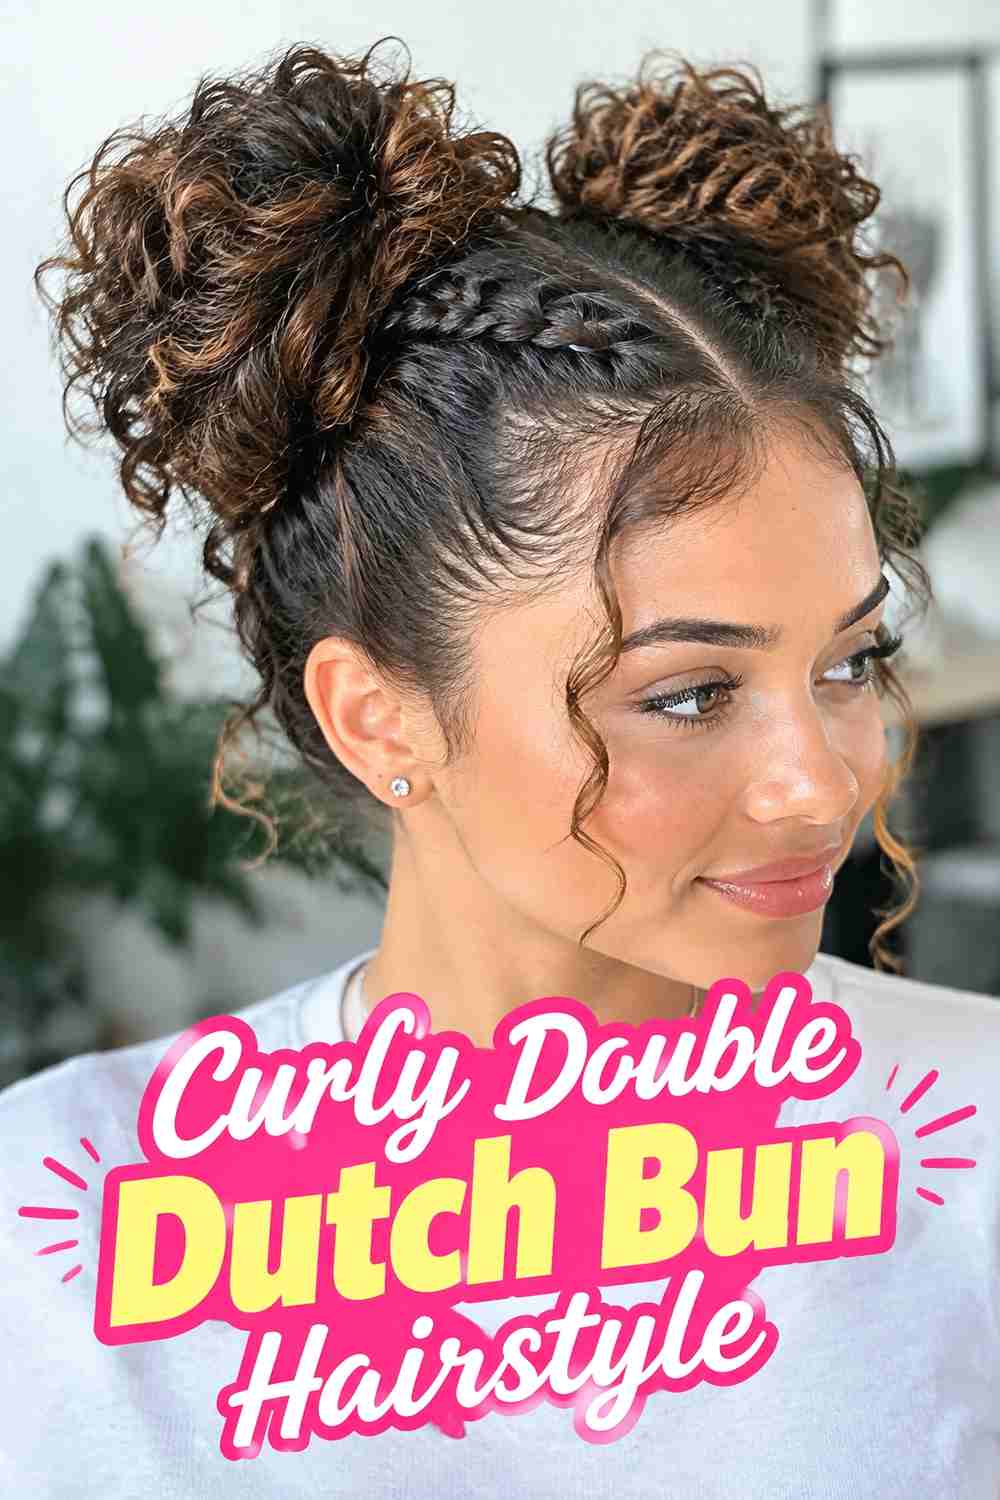
Curly texture adds natural dimension to double Dutch braids and can make the finished bun appear fuller without heavy backcombing. Rather than smoothing every curl completely straight, use section sizes that allow some natural texture to remain visible between the woven pieces. After both braids reach the chosen base, gather the remaining curls gently and pin them into a rounded or softly irregular bun. A few curls near the hairline can remain free if they fall naturally, helping the style feel soft rather than rigid. The exact braid width and bun fullness will vary with curl pattern and density, so focus on secure construction instead of forcing every side to look perfectly identical.
Styling Notes
Gather curls with your hands when possible and use comfortable braid tension. Over-brushing can stretch the natural texture and make the style harder to balance.
11. Side Double Dutch Bun Hairstyle
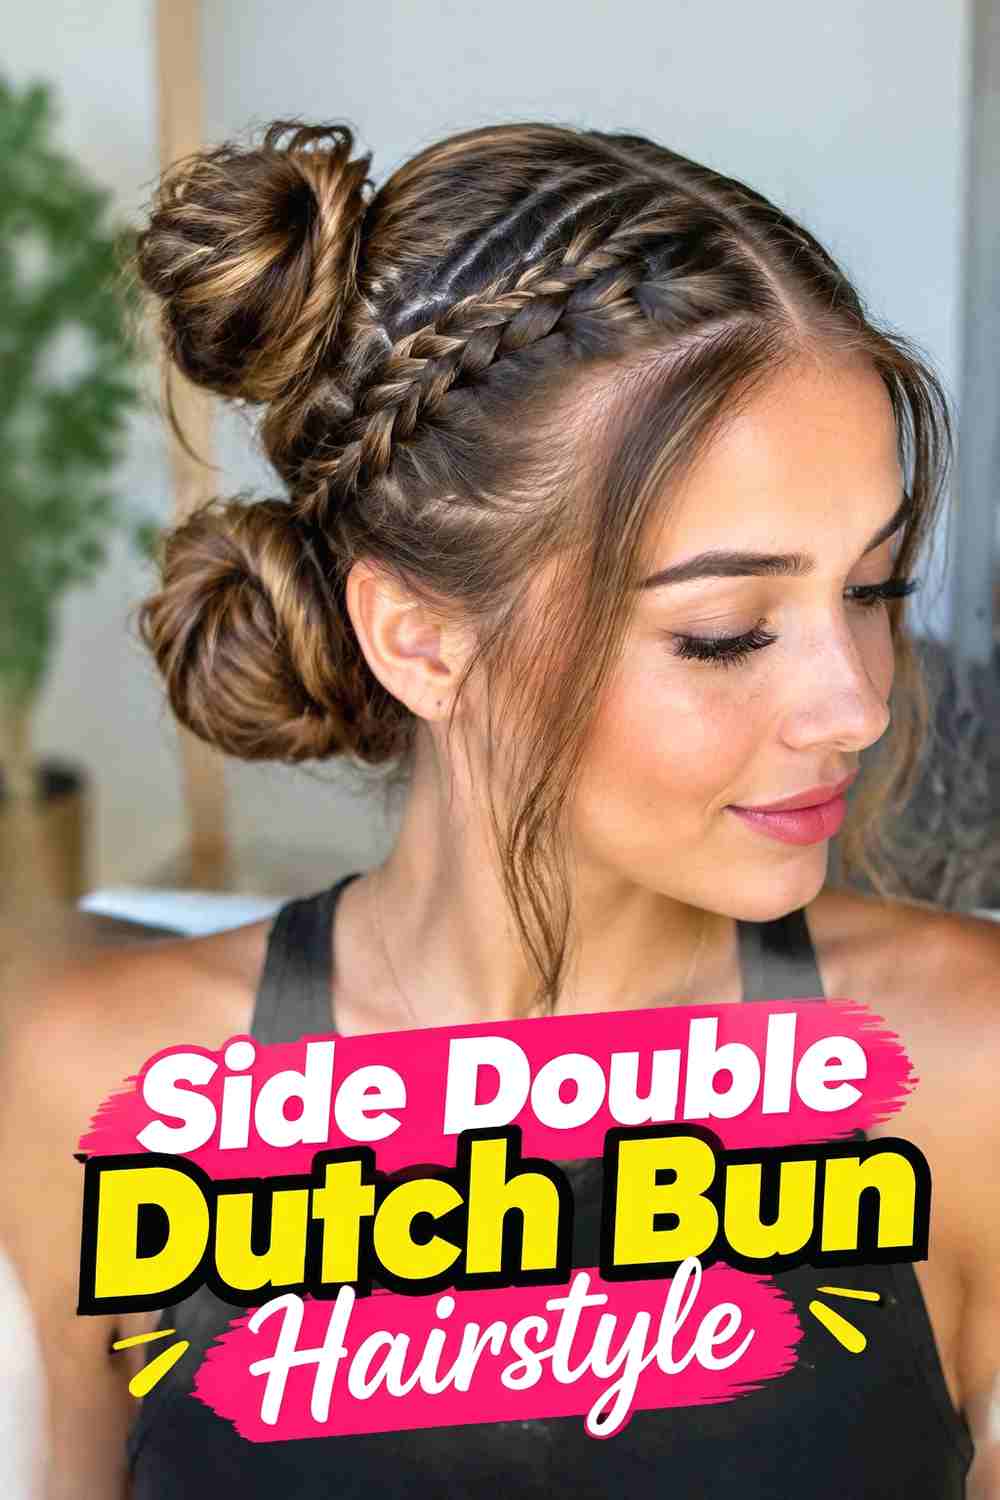
A side double Dutch bun redirects both braids toward an off-center knot rather than letting them meet directly in the middle. One braid may travel farther across the back while the other takes a shorter route, creating deliberate asymmetry. The final bun can sit just behind one ear or lower toward one side of the nape. Planning the endpoint before braiding is important so both paths remain believable and feed naturally into the same base. Once the hair is gathered, create a compact bun and pin it close to the head. Softening the braid loops slightly can prevent the asymmetrical construction from feeling too rigid or overly formal.
Best For
This variation works well when you want the structure of double Dutch braids with a less symmetrical, more fashion-forward finish at the back.
12. Pearl Pin Double Dutch Bun Hairstyle
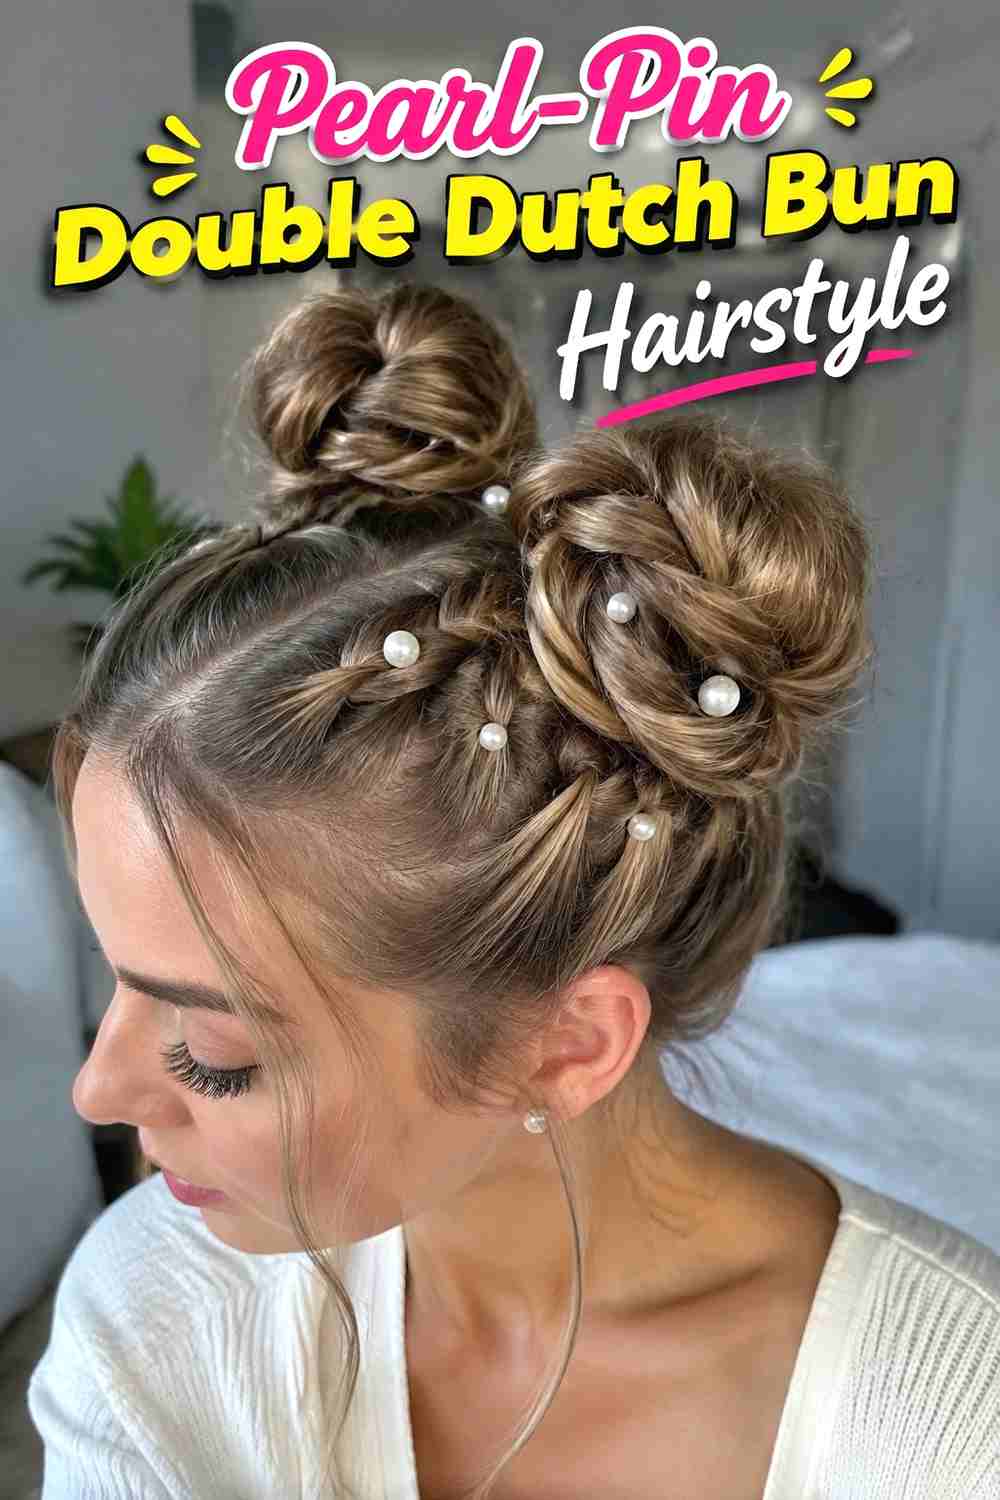
Pearl pins bring a refined decorative touch to double Dutch braids without altering their basic construction. Complete the braids and bun first using ordinary elastics and hidden pins, then add a few pearl-topped pins along the outer braid edges or around the bun. Keeping the pearls spaced apart allows the woven pattern to remain visible and prevents the hairstyle from looking crowded. A low or mid-height bun provides an especially good canvas because the accessories can frame the meeting point of the braids. The decorative pins should not carry the weight of the knot; the hairstyle needs to be fully secure before any pearl accents are inserted.
Pro Tip
Place pearl pins only after checking the finished hairstyle from several angles. This helps you decorate open areas without covering the strongest braid detail.
13. Floral Double Dutch Bun Hairstyle
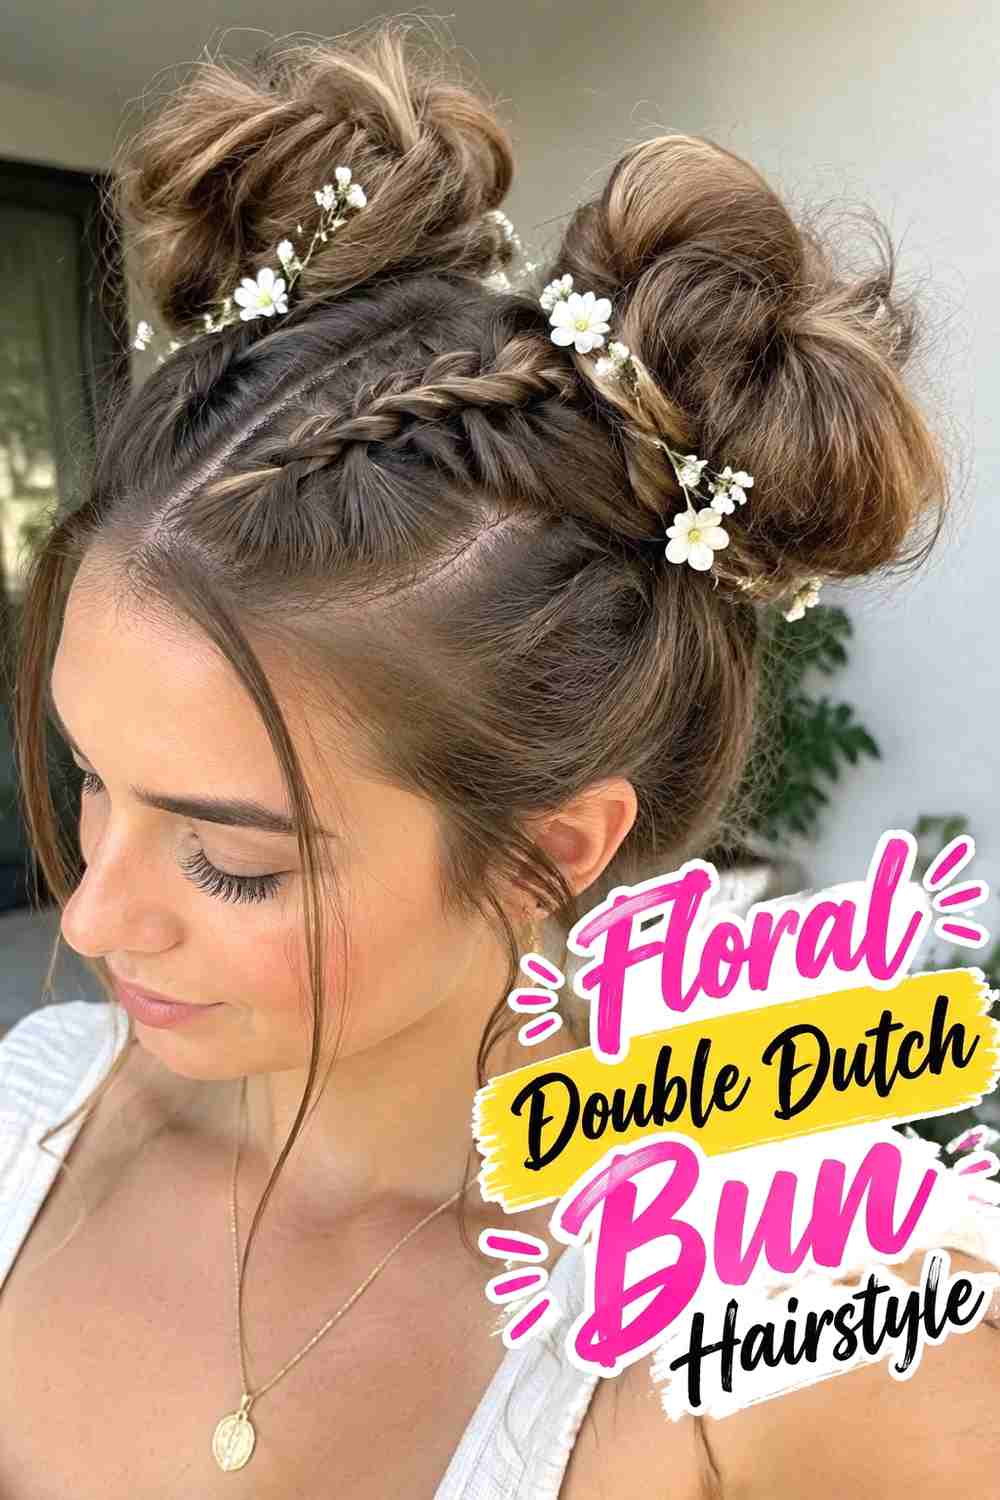
Small floral accents give the double Dutch bun a soft, garden-inspired finish that works beautifully for outdoor celebrations or romantic events. Build the hairstyle completely first, using two stable braids and a securely pinned bun. Then add a few tiny flowers or floral pins where the braids meet the knot or along one outer edge. Keeping the placement selective preserves the visibility of the double Dutch structure. Softened braid loops and gentle face-framing pieces can make the flowers feel more integrated, especially when the bun itself has a slightly textured finish. Avoid heavy floral clusters that pull on the braids or overwhelm the natural proportions of the hairstyle.
Wear & Maintenance
Use lightweight floral accessories and anchor them independently. The bun and braids should remain stable even if a flower needs to be adjusted or removed.
14. Wedding Double Dutch Bun Hairstyle
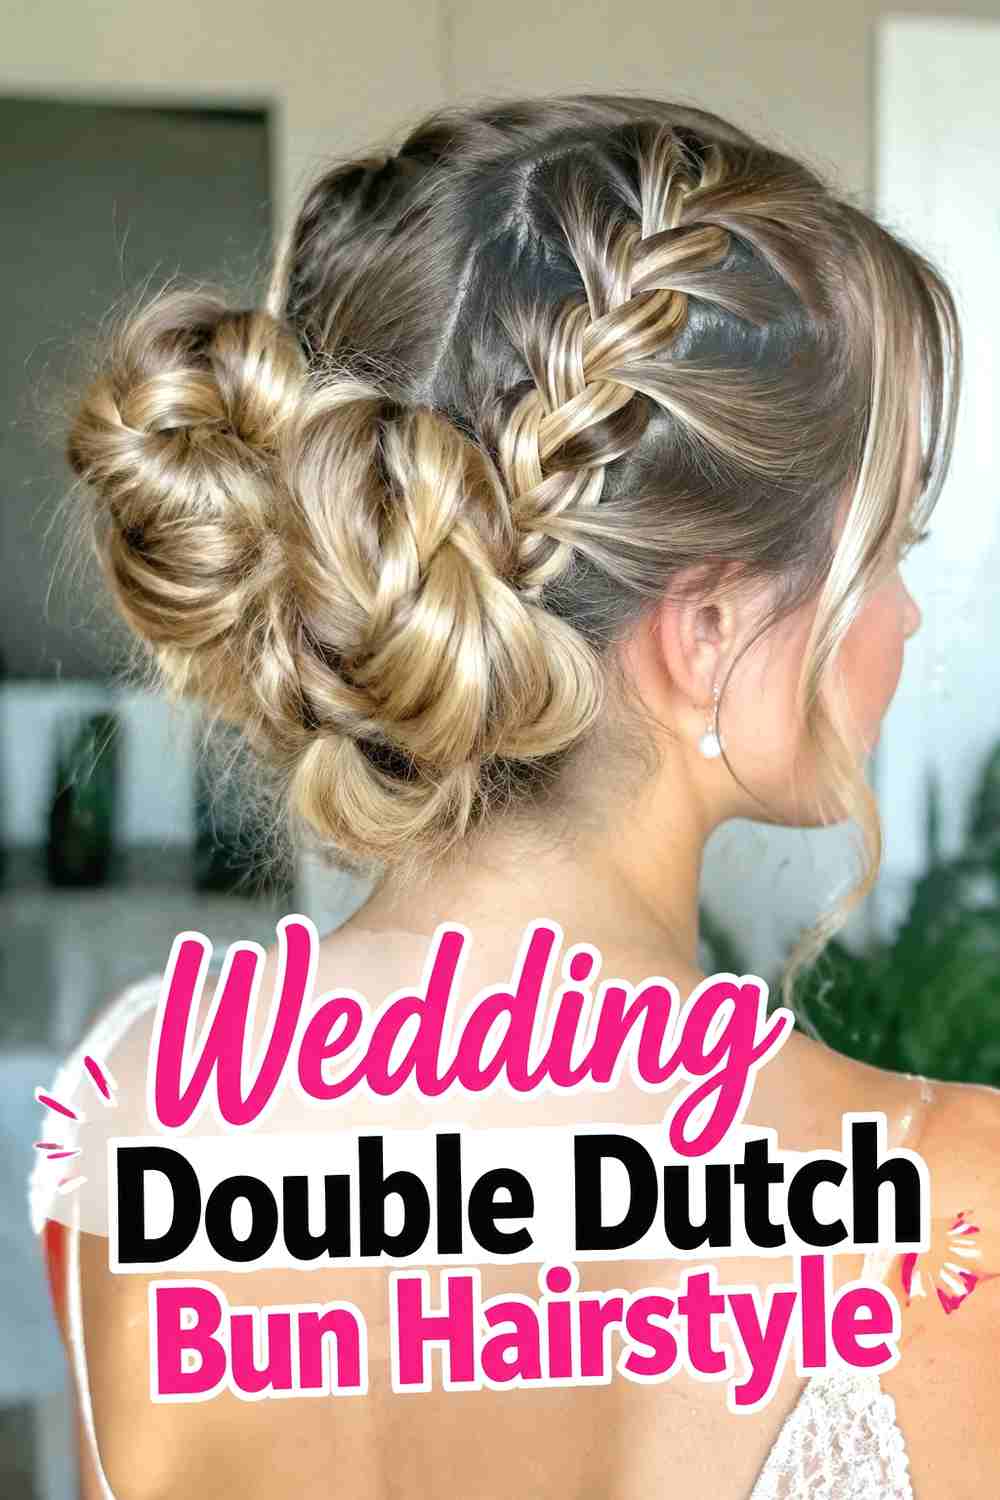
A wedding double Dutch bun combines secure braiding with a polished updo that can hold through photos, movement, and a long event. Two balanced braids can feed into a low or mid-height bun, leaving the neckline clear for veils, jewelry, or detailed dress backs. Keep the braid tension comfortable and build the bun on a firm base before adding any pearls, combs, or floral pieces. Soft face-framing strands can relax the look, but they should remain secondary to the braided structure. Flexible hairspray helps manage flyaways without creating a hard surface. The final style should look refined from every angle while remaining comfortable enough to wear for several hours.
Wear & Maintenance
Test veil and accessory placement in advance. Decorative pieces should be removable without loosening the structural pins that hold the bun itself.
15. Festival Double Dutch Bun Hairstyle
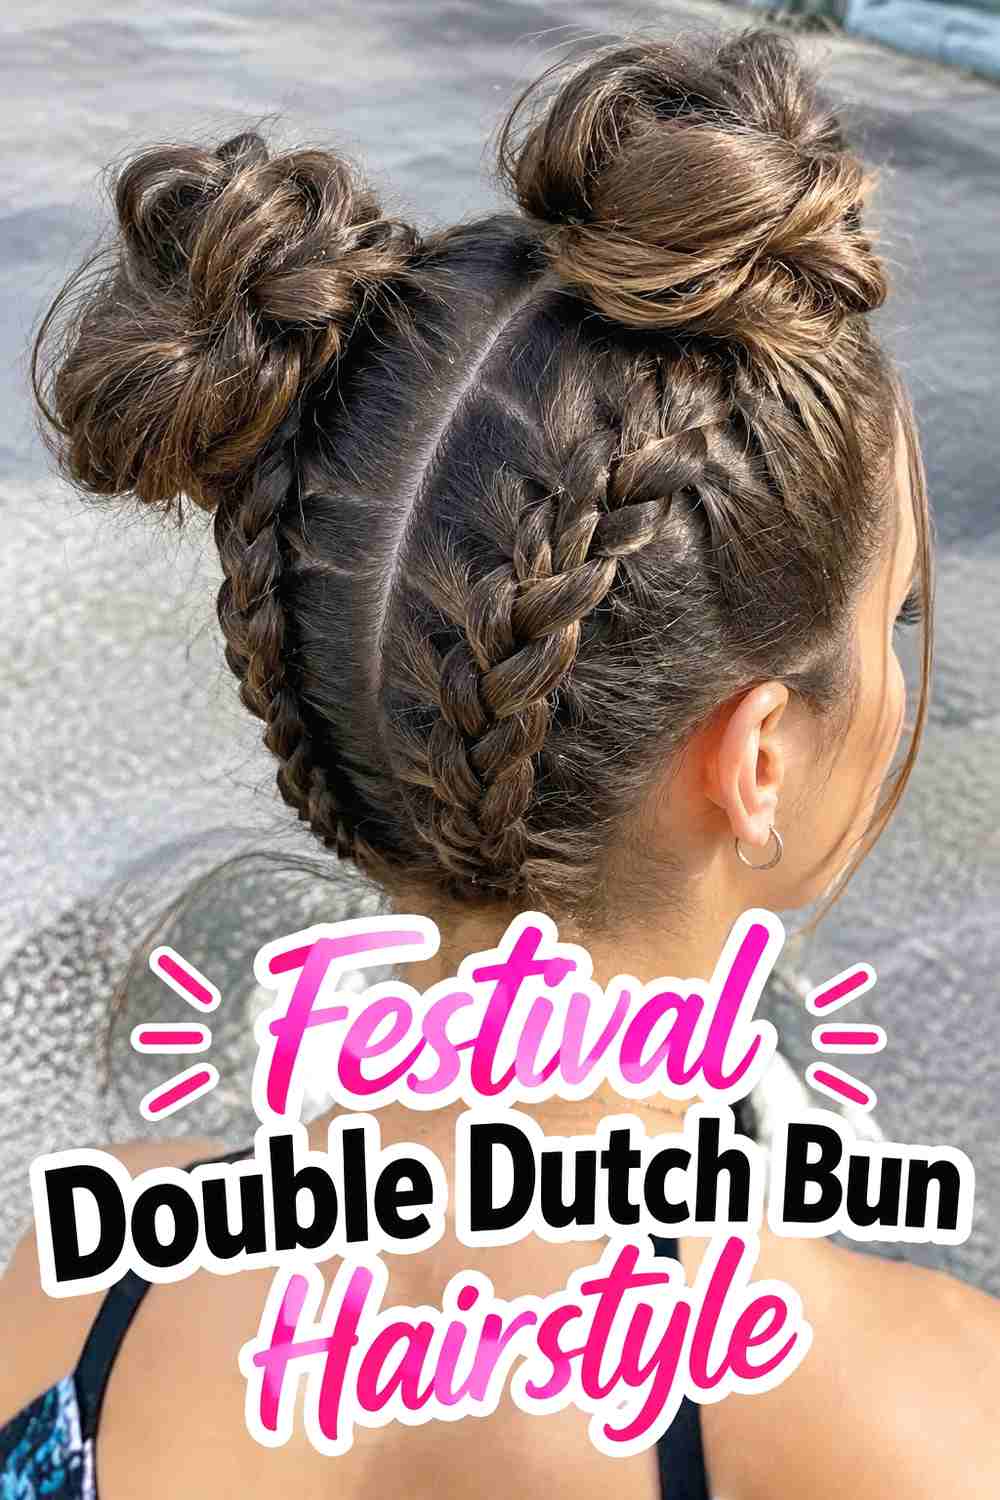
The festival version keeps the secure foundation of double Dutch braids but adds more playful texture and accessories. The braids can finish in one bun or two smaller buns, depending on the desired shape. Small rings, colored cords, ribbons, or a few metallic accents can be introduced after the braids are complete, while the outer loops may be loosened slightly for extra volume. Keep accessories lightweight and spaced apart so they do not pull on individual braid sections. A few natural flyaways can support the relaxed mood, but the tie points should remain secure enough for extended wear. The result should feel expressive without becoming overloaded with competing details.
Best For
This version suits concerts, festivals, and casual events where secure braids are practical but you still want a more decorative, personalized finish.
16. Soft Romantic Double Dutch Bun Hairstyle
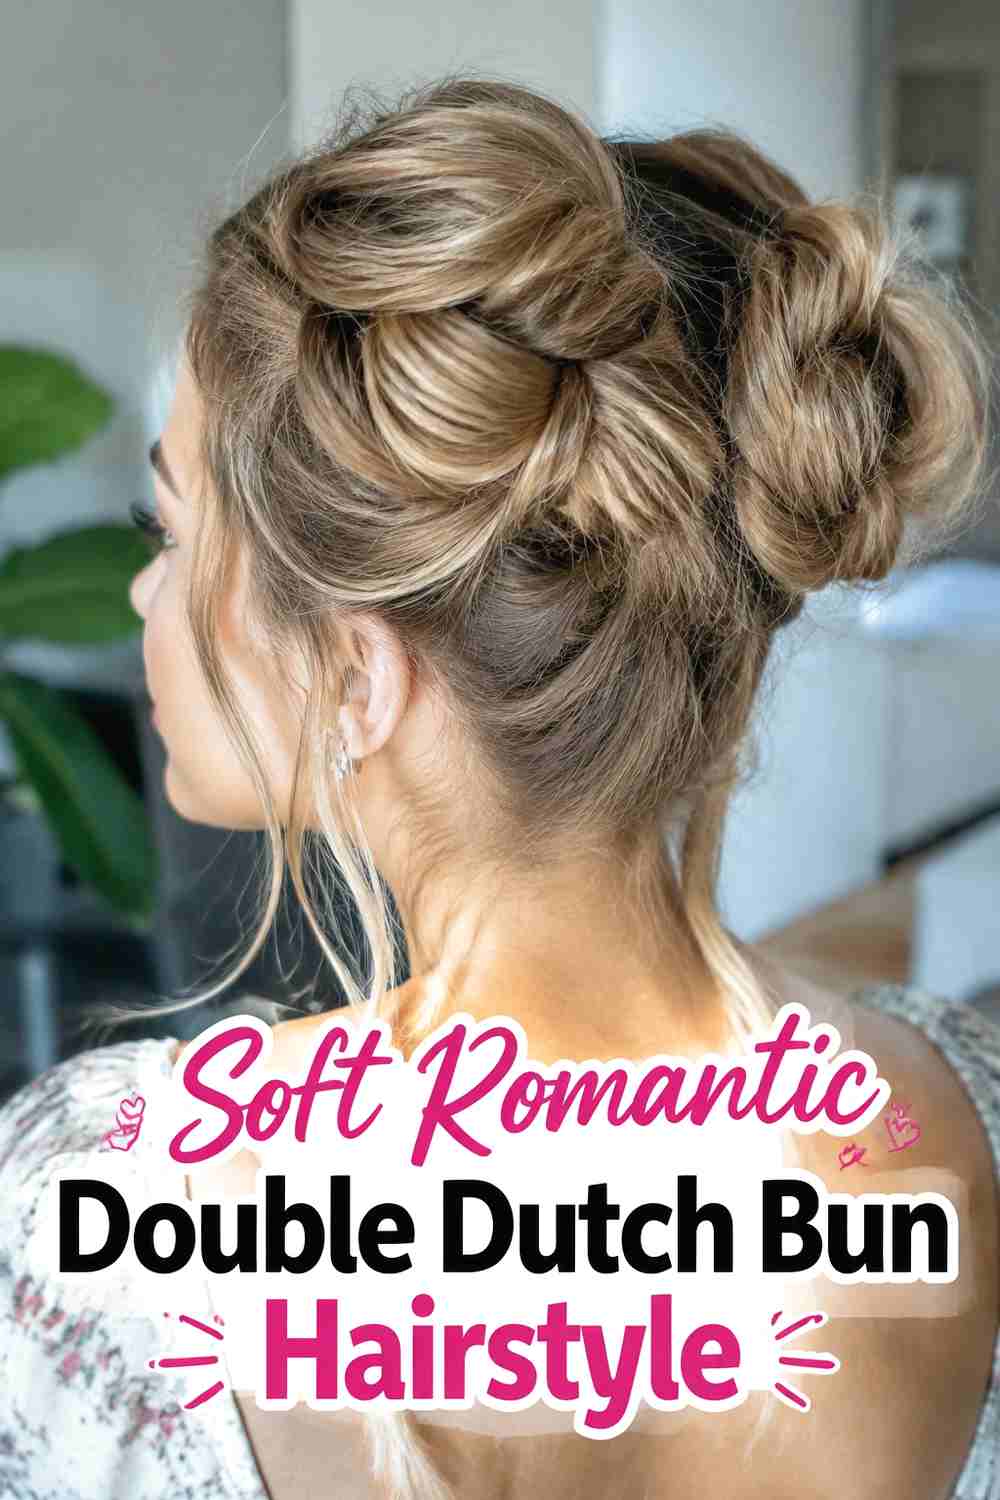
The romantic version softens the symmetrical braids with gentle crown volume, lightly widened loops, and a relaxed low or mid-height bun. Leave a few narrow face-framing pieces free before braiding, then work with moderate tension so both Dutch braids remain visible without looking overly tight. At the back, gather the remaining lengths into a softly textured knot rather than a perfectly smooth coil. Once everything is securely pinned, loosen a few braid sections and adjust the crown with your fingertips. Light waves through the loose front pieces can complete the effect. The style should feel graceful and touchable while preserving the clear double-braid construction that makes the look distinctive.
Why It Works
The structured braids keep the updo defined, while softened edges, loose face framing, and a textured bun prevent the overall result from feeling severe.
How to Choose the Right Look
Start with length and density. Medium-long hair works well for compact low, nape, and sleek buns, while longer hair gives you more flexibility for wrapped, twisted, high, and space-bun variations. Dense hair naturally creates fuller knots, whereas fine hair usually looks most balanced with smaller buns that match the amount of hair feeding into them.
Next, choose the bun placement. Low and nape buns feel understated, high buns create more lift, and double space buns give the style a playful edge. For a softer finish, loosen the braid edges only after the hairstyle is secure.
Texture and occasion matter too. Curly and messy versions celebrate natural movement, while sleek styling emphasizes the woven structure. Pearls, flowers, and wedding accessories can add polish, but they should always remain decorative rather than structural.
Final Thoughts
Double Dutch bun hairstyles combine the visual detail of two raised braids with the practicality of securely gathered hair. The most convincing versions keep each braid naturally connected to its bun, use comfortable tension, and match the bun size to the hair’s real density. From sleek nape knots to playful space buns and romantic wedding styles, small changes in placement, texture, and accessories can completely shift the mood.
FAQs
1. What is a double Dutch bun hairstyle?
It typically uses two Dutch braids, usually separated by a center part, that feed into one or two buns. The braid sections cross underneath, creating a raised woven pattern.
2. How long does hair need to be for double Dutch buns?
Medium-long hair is usually easiest because there needs to be enough length for the braids and a bun. Longer hair gives more options for wrapped or fuller knots.
3. How do I keep double Dutch buns secure?
Maintain consistent braid tension, secure each meeting point with an elastic when needed, and use pins through the dense inner sections of the bun rather than only the outer surface.
4. Can curly hair work in double Dutch buns?
Yes. Curly texture can create natural volume in both the braids and bun. Use comfortable tension and section sizes that preserve some of the curl pattern.
5. Can double Dutch buns work for weddings?
Yes. Low, romantic, pearl-accented, and floral double Dutch buns can all work for weddings when the structural braids and bun are secured before accessories are added.
Save your favorite double Dutch bun hairstyle ideas, share them with someone planning a braided updo, and explore more hairstyle inspiration for your next look.