12 High-Shine S-Waves Hairstyle Ideas
Glossy, sculpted, and effortlessly polished, these high-shine S-waves bring smooth movement and reflective finish to bobs, lobs, and longer lengths. High-shine S-waves are all about controlled curves, smooth surface texture, and light-catching definition. Depending on the part, length, and amount of volume, the same basic wave pattern can feel softly glamorous, sharply editorial, or unmistakably Old Hollywood. As you compare these looks, pay attention to where the first bend begins, how closely the waves sit against the head, and whether the finish is sleek or softly voluminous. Hair density, length, heat-styling technique, and product weight can all change the final effect, so the most successful version is one that balances shine with believable movement. Hairstyle_GPT_Knowledge_PRO_V6_…
Quick List
- Classic Deep Side Part S Waves Hairstyle
- Center Part Glassy S Waves Hairstyle
- Old Hollywood High Shine S Waves Hairstyle
- Long Espresso S Waves Hairstyle
- Shoulder Length Sculpted S Waves Hairstyle
- High Shine S Wave Bob Hairstyle
- Tucked Behind The Ear S Waves Hairstyle
- Wet Root High Shine S Waves Hairstyle
- Soft Volume S Waves Hairstyle
- Sleek Face Framing S Waves Hairstyle
- Polished Ends S Waves Hairstyle
- Red Carpet High Shine S Waves Hairstyle
1. Classic Deep Side Part S Waves Hairstyle
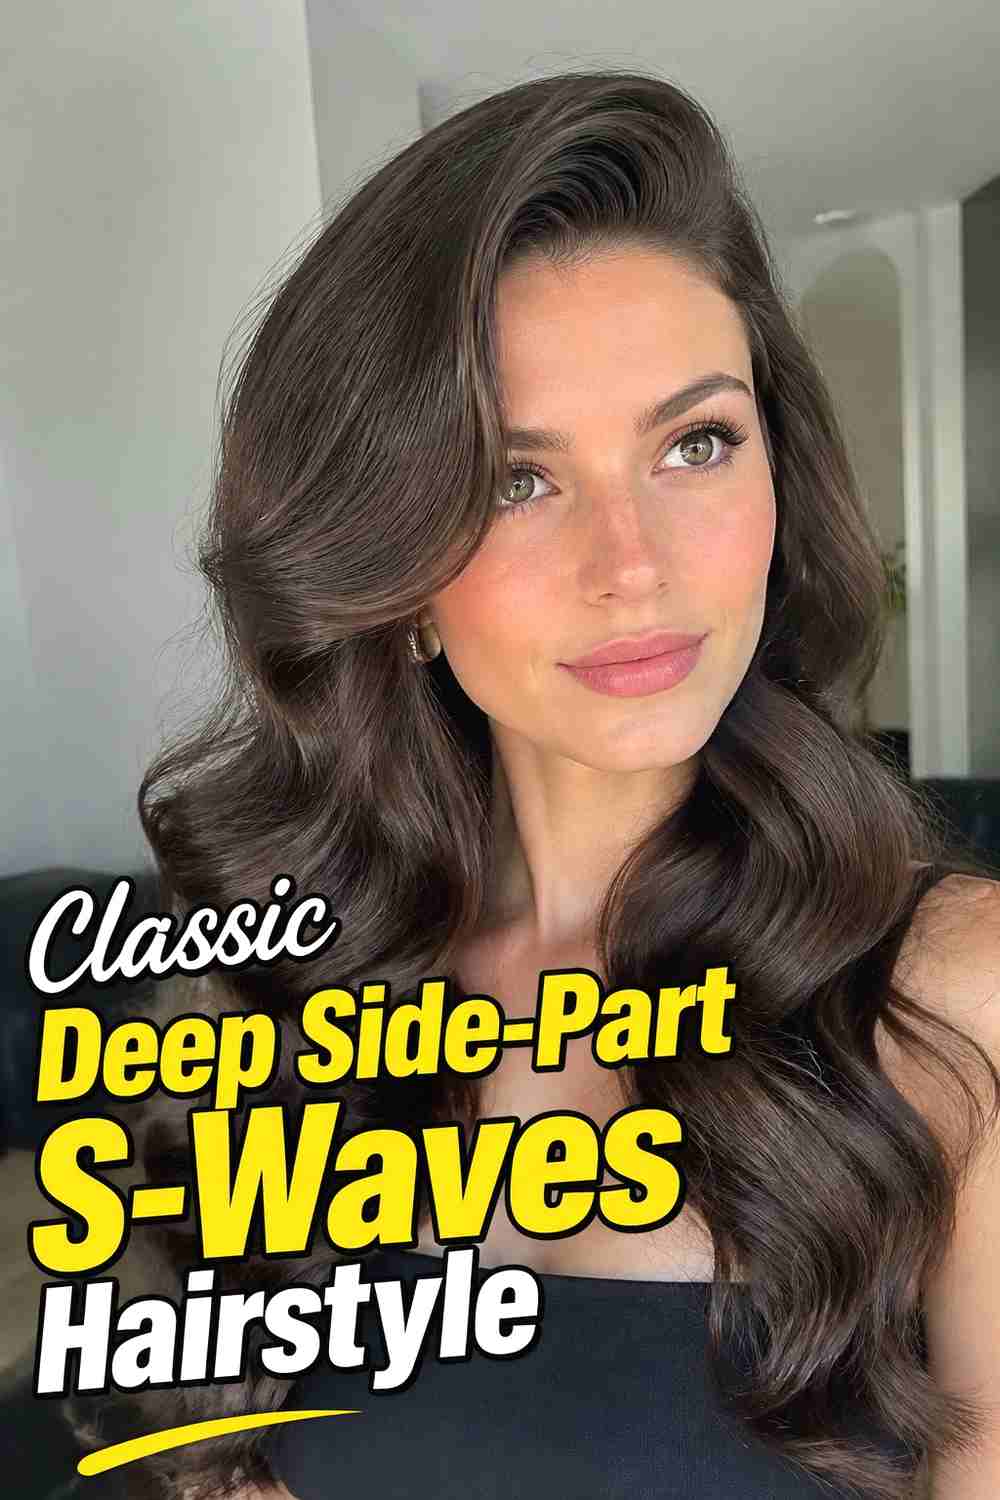
This version creates the most recognizable S-wave silhouette: a deep side part feeding into smooth, glossy bends that sit close to the head before opening into soft movement through the lengths. The finish looks especially polished on medium to long hair, where the repeated curves have room to read clearly. It suits anyone who wants a controlled, glamorous shape without the puffiness of a traditional curl set. Use a smoothing product before heat styling, then form the waves in one consistent direction and brush them together. A light shine mist can enhance reflection, but keep the roots clean and flexible so the style stays modern rather than stiff.
Styling Notes
Let every heated section cool before brushing. Once the waves merge, use your fingers or sectioning clips to reinforce the deepest ridges instead of repeatedly running a brush through the finished pattern.
2. Center Part Glassy S Waves Hairstyle
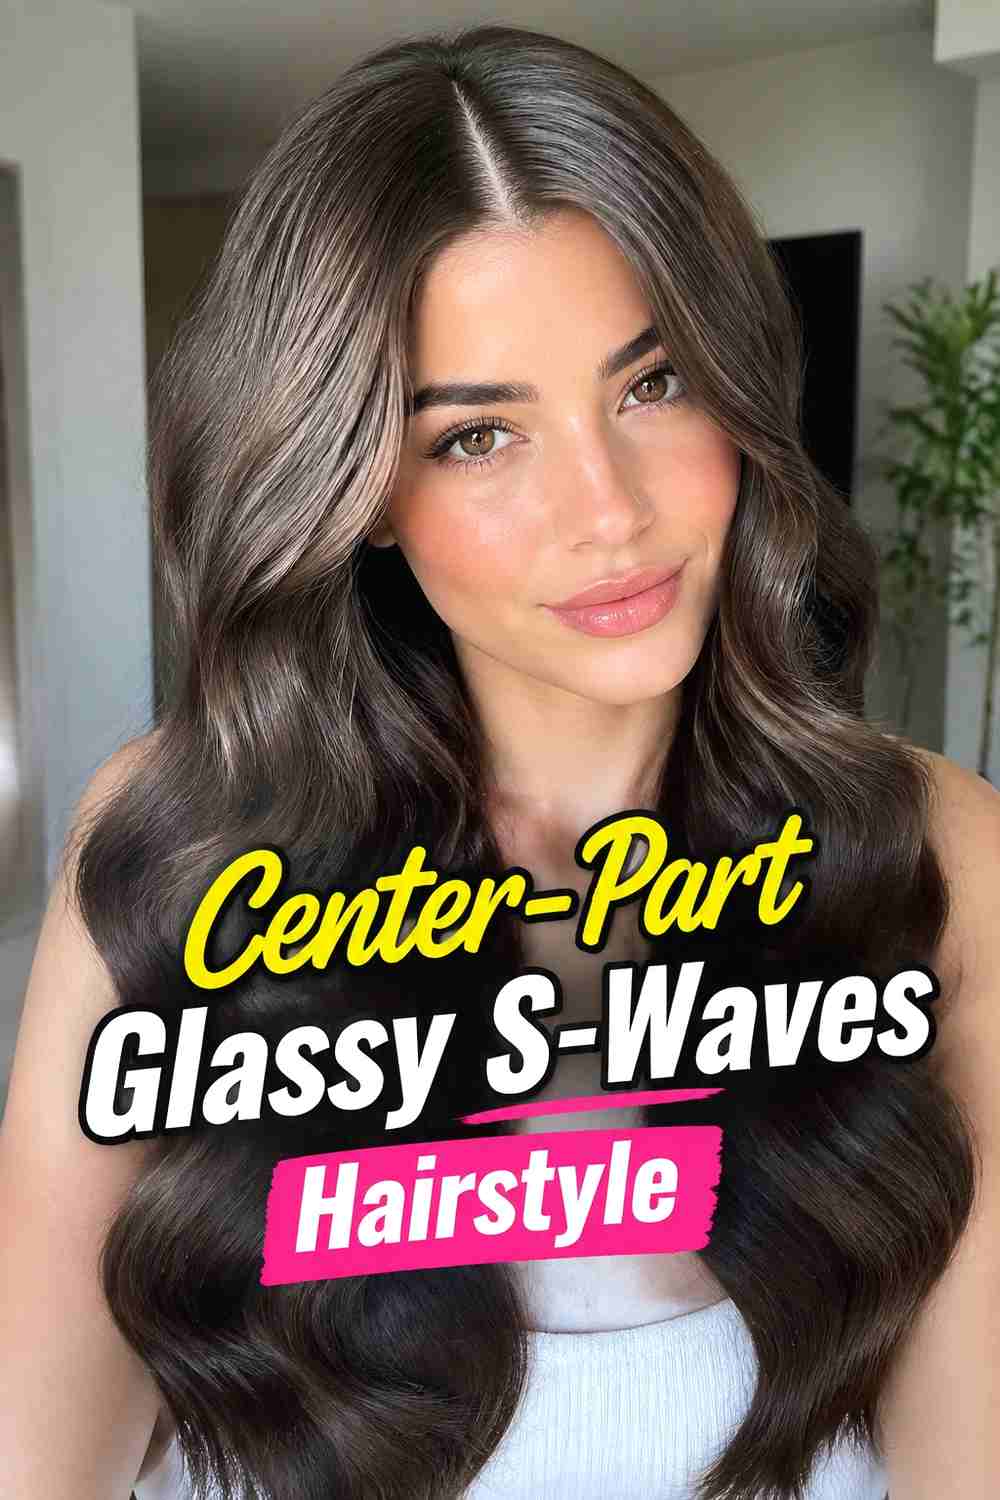
A center part gives high-shine S-waves a sleek, symmetrical feel that looks clean from every angle. The wave pattern starts just below the cheekbones, leaving the crown smooth and reflective while the lengths curve into broad, glassy bends. This works beautifully on straight, wavy, or stretched hair that can hold a polished finish without excessive bulk at the roots. For the strongest shape, create matching bends on both sides and let them cool fully before softening them with a wide paddle brush. Finish with a small amount of serum through the mid-lengths and ends, avoiding too much product near the scalp so the shine looks luminous rather than oily.
Pro Tip
Check both sides from the front before adding finishing spray. Small differences in bend placement become more noticeable with a center part, so adjust the waves while the hair is still flexible.
3. Old Hollywood High Shine S Waves Hairstyle
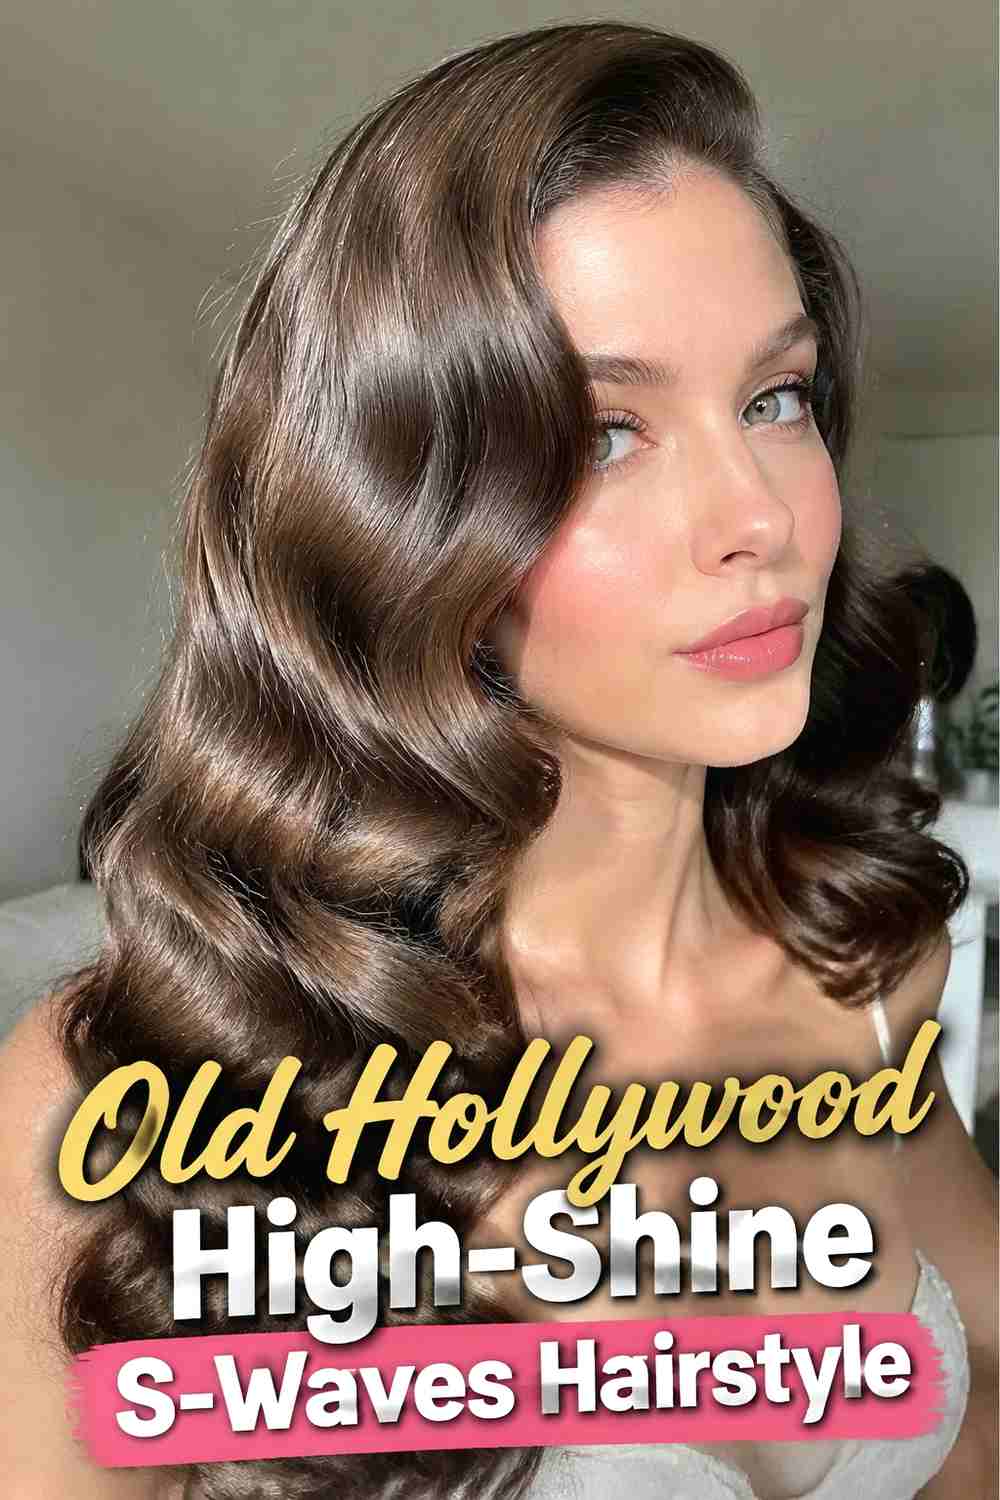
Old Hollywood S-waves lean into classic glamour with a dramatic side sweep, deep sculpted ridges, and a mirror-like finish. The front section is usually shaped away from the face, then blended into continuous waves that fall in one polished direction. Medium to long hair gives this style the most room to develop its signature sweeping pattern, though a long bob can also carry the look beautifully. The key is consistency: curl each section in the same direction, allow the set to cool, then brush until the separate curls merge into one smooth wave. A flexible finishing spray helps preserve the ridge definition while keeping the hair touchable and camera-ready.
Wear & Maintenance
This style benefits from minimal touching once the final ridges are placed. For an evening event, carry a small comb and light finishing spray rather than adding extra serum, which can gradually weigh the waves down.
4. Long Espresso S Waves Hairstyle
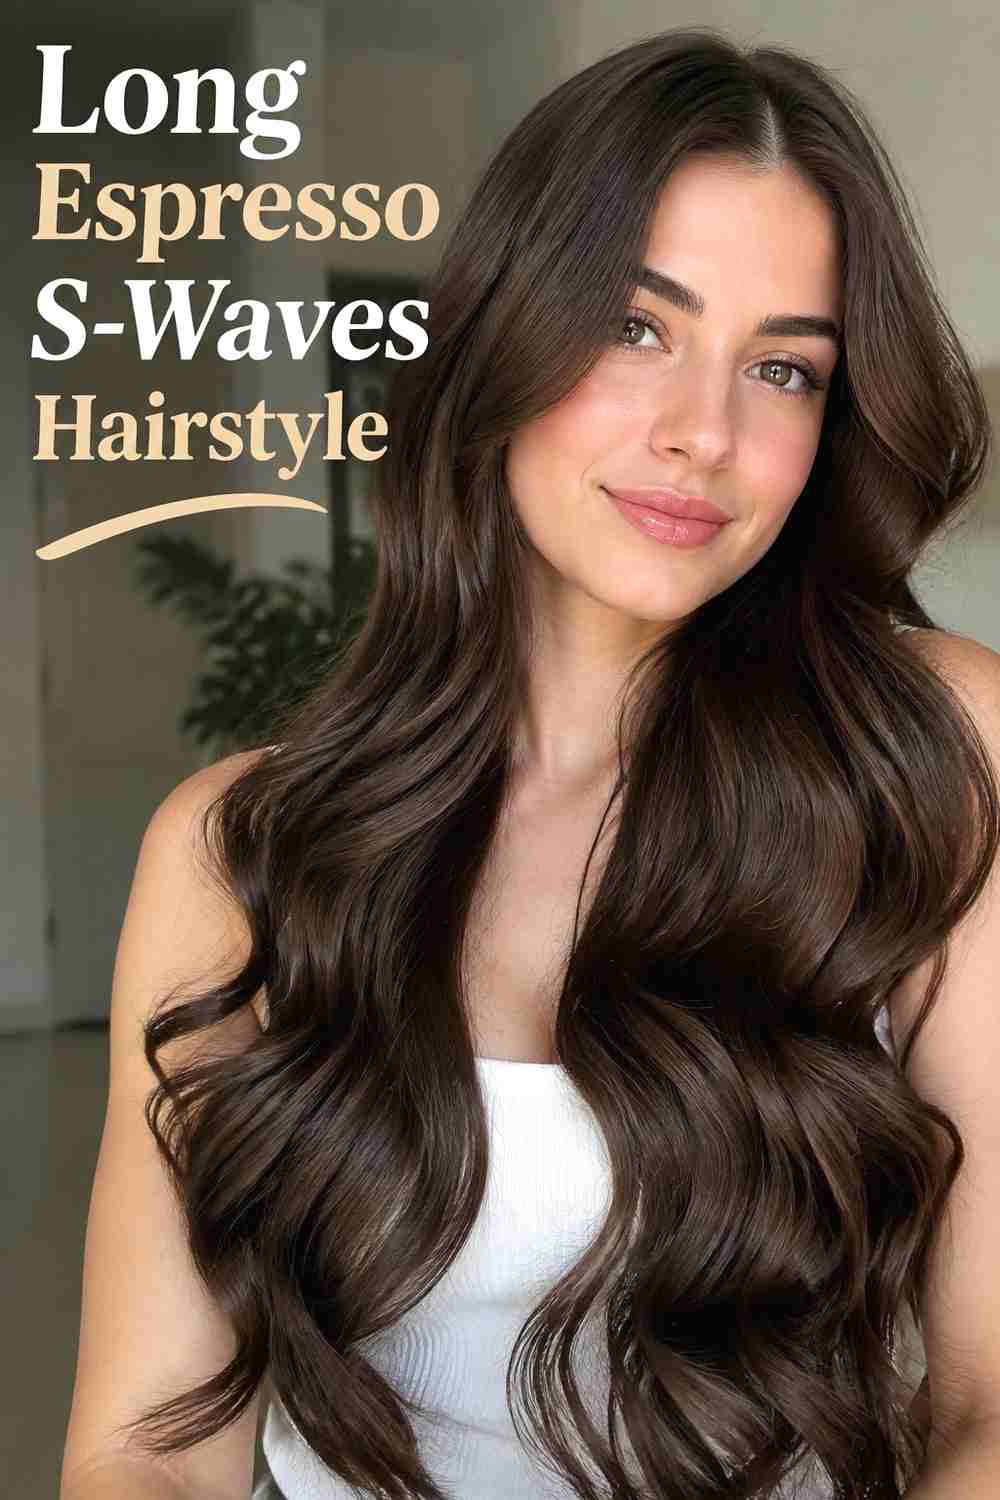
Deep espresso color makes high-shine S-waves look especially dimensional because the smooth curves catch light in narrow reflective ribbons. On long hair, the wave pattern can stay broad and fluid rather than overly curled, creating a luxurious finish with plenty of movement through the lower lengths. This style is a strong choice for naturally dark brunette hair or deeper color tones where gloss is a major part of the visual effect. Focus heat styling from the mid-lengths downward, keeping the crown sleek and controlled. Once the waves are brushed into shape, smooth a tiny amount of lightweight oil over the surface to emphasize shine without collapsing the wave structure.
Why It Works
Dark, even-toned hair makes highlights from natural or artificial light especially visible across each bend. Broad waves create multiple reflective surfaces while allowing the long lengths to retain natural movement.
5. Shoulder Length Sculpted S Waves Hairstyle
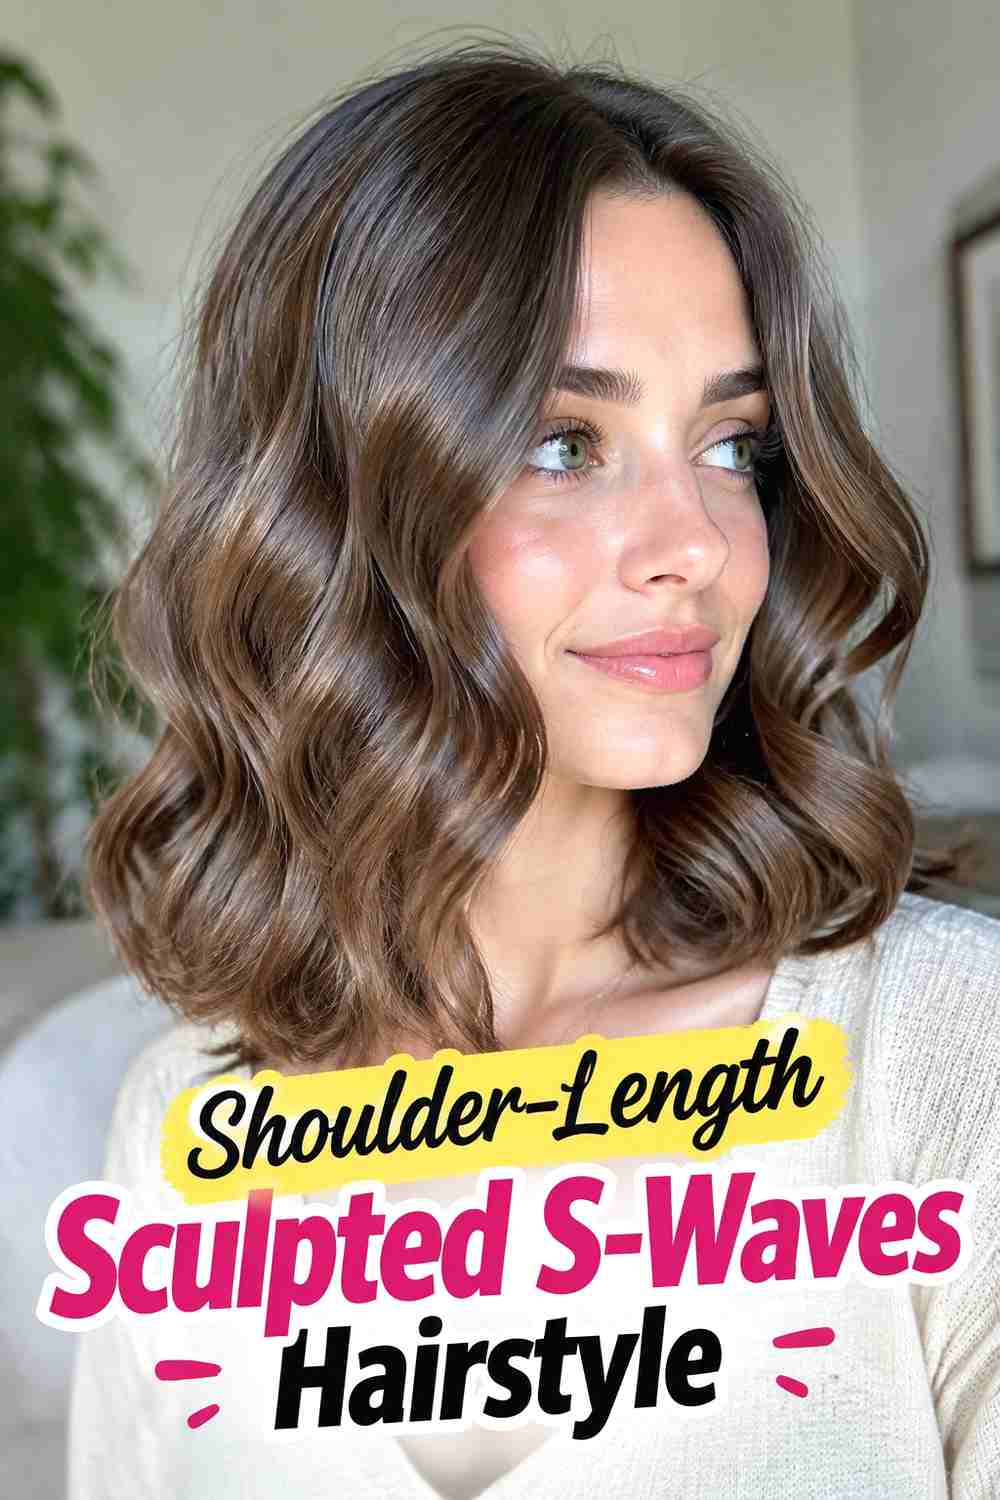
At shoulder length, sculpted S-waves feel neat, intentional, and easy to see because the bends sit close together without disappearing into extra length. The silhouette works particularly well on a lob, where one or two strong curves can frame the face before the ends turn softly under or outward. Hair with medium density usually holds this shape well, while finer hair may benefit from a light mousse for extra memory. Shape each section with consistent tension, then use clips to hold the ridges in place as the hair cools. Once released, gently brush the surface and define the deepest bends with your fingers rather than overworking the entire style.
Hair Type & Length
A shoulder-skimming lob gives the S-pattern enough space to develop without requiring numerous repetitions. Fine hair may need lightweight hold, while dense hair often looks better when styled in smaller, controlled sections.
6. High Shine S Wave Bob Hairstyle
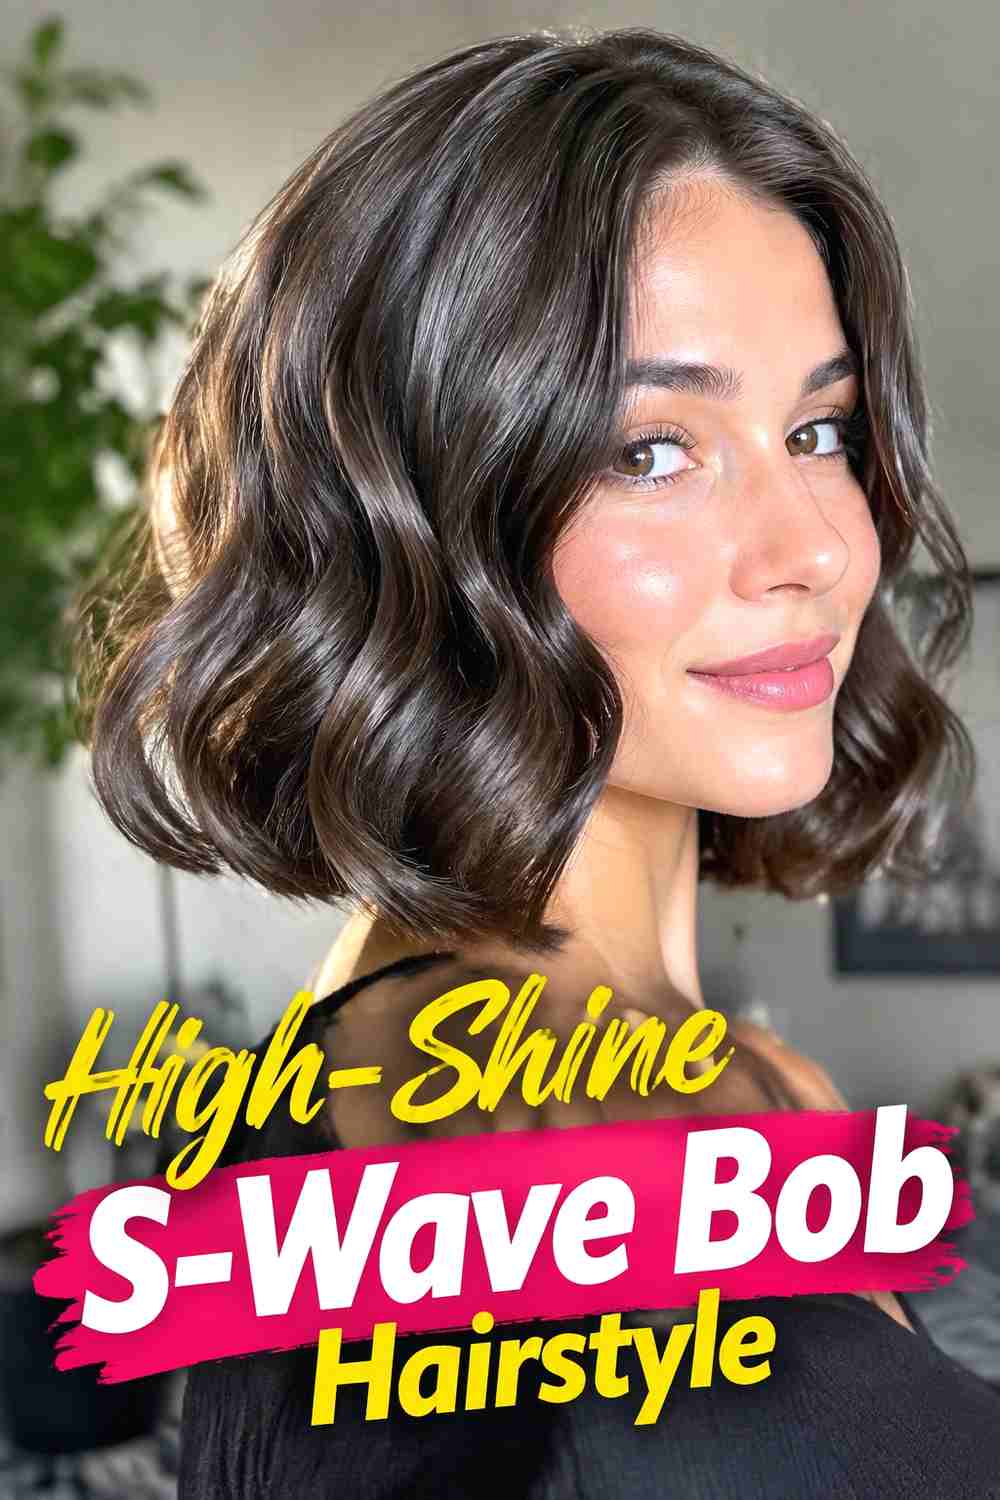
A glossy S-wave bob combines a sharp short silhouette with smooth, sculpted movement. The wave pattern adds dimension without taking away from the clean bob outline, making it a polished option for chin-length to jaw-length hair. A slightly off-center or deep side part can help the curves feel more deliberate, especially when one side is tucked neatly behind the ear. Because shorter hair can spring up quickly, use a larger iron or flat-iron bending technique rather than creating tight curls. Brush the finished shape into broad waves, then use a light finishing spray for hold. Keep the ends controlled so the bob still reads crisp instead of fluffy.
Styling Notes
Work with wider bends rather than small curls. On a short bob, even one strong ridge around the cheek and a second near the jaw can create a convincing S-wave shape without making the haircut look shorter.
7. Tucked Behind The Ear S Waves Hairstyle
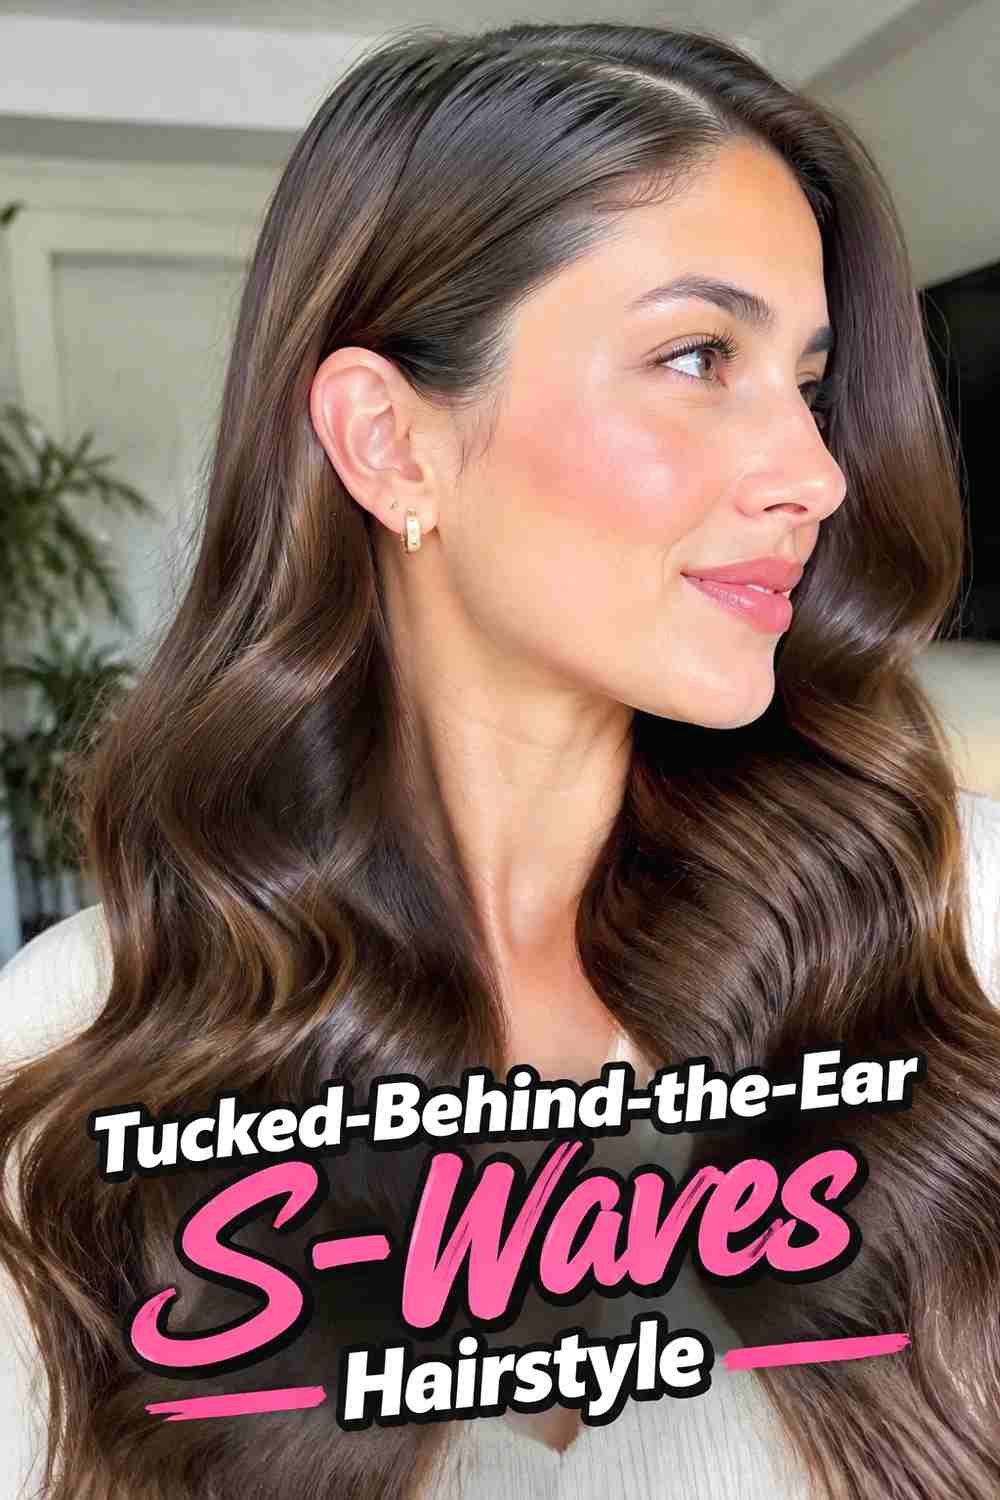
Tucking one side behind the ear gives glossy S-waves an asymmetrical, editorial finish while keeping the hairstyle wearable. The exposed side looks sleek and streamlined, while the opposite side carries the stronger wave pattern around the cheek and shoulder. This detail works especially well on lobs and longer hair because there is enough length for the S-shape to remain visible after the tuck. Smooth the tucked section with a small amount of styling cream and secure it discreetly if needed. On the fuller side, keep the waves soft but clearly defined. A polished hairline and controlled flyaways make the contrast between sleekness and movement feel intentional.
Best For
Choose this variation when you want to showcase earrings, a neckline, or a stronger side profile. It also offers an easy way to make symmetrical waves look more directional without changing the underlying set.
8. Wet Root High Shine S Waves Hairstyle
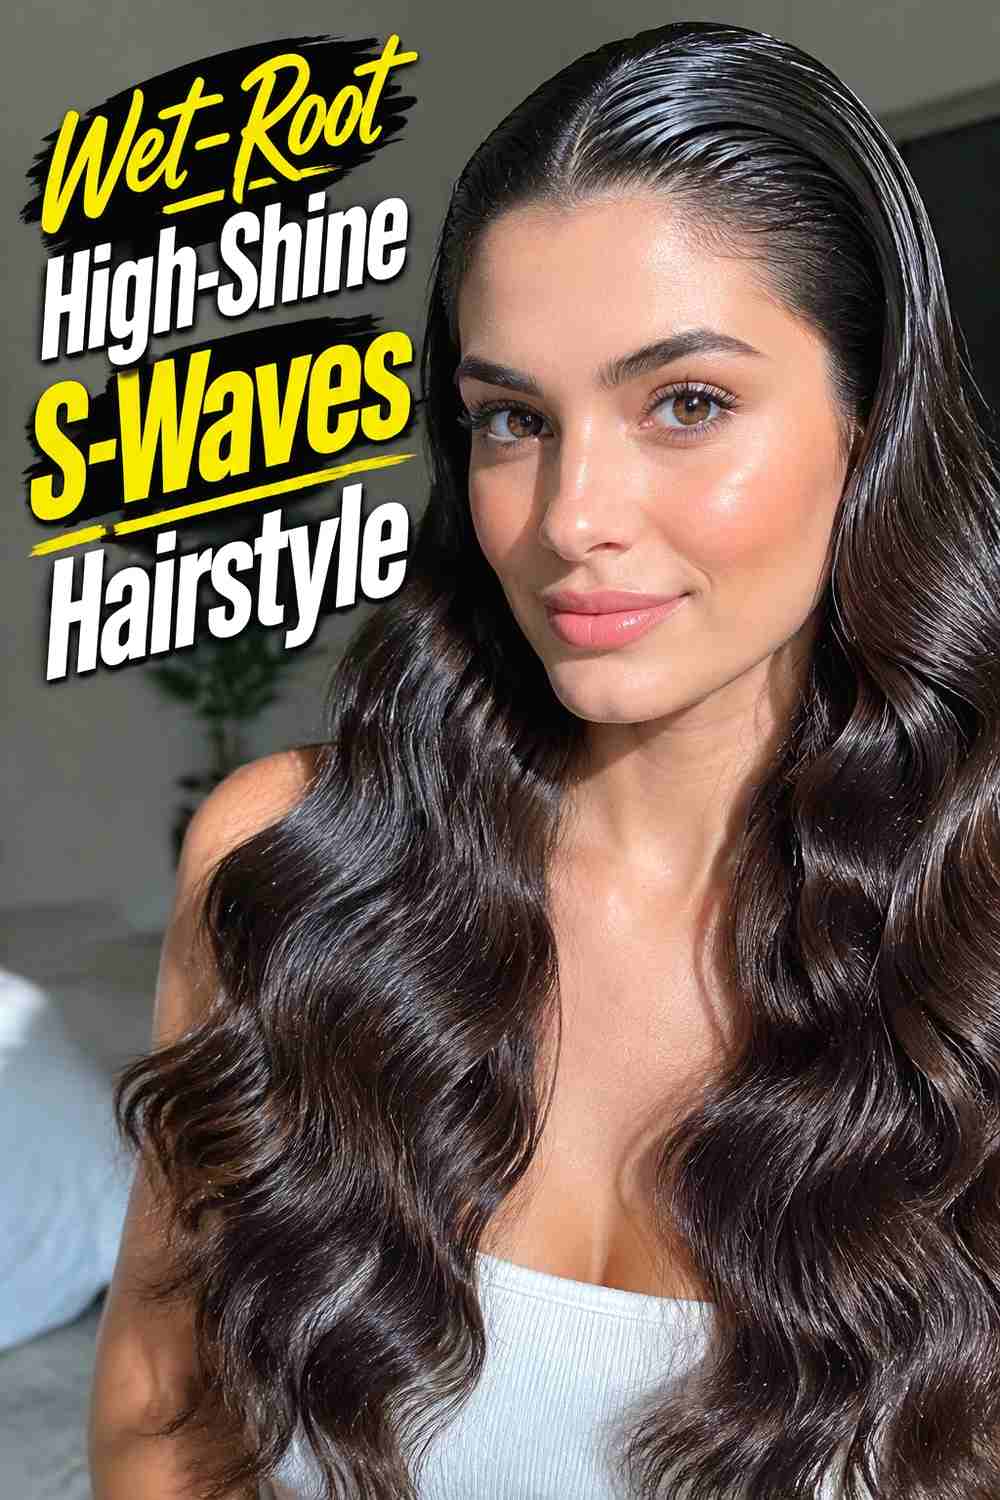
Wet-look roots create a sharper, fashion-forward version of high-shine S-waves. The crown and first few inches are slicked smooth with controlled gloss, then the hair transitions into softer sculpted bends through the mid-lengths and ends. This contrast is especially striking on medium to long hair and works best when the wet effect is concentrated at the roots rather than coating the entire style. Use a flexible gel or glossing cream sparingly, combing it into place before shaping the lower sections. Keep the lengths touchable and separated so they still look like real hair. The result should feel sleek and reflective, not saturated or crunchy.
Pro Tip
Apply wet-look product gradually. It is easier to add more gloss at the roots than to remove excess product after the waves have been shaped, and a lighter application preserves natural strand detail.
9. Soft Volume S Waves Hairstyle
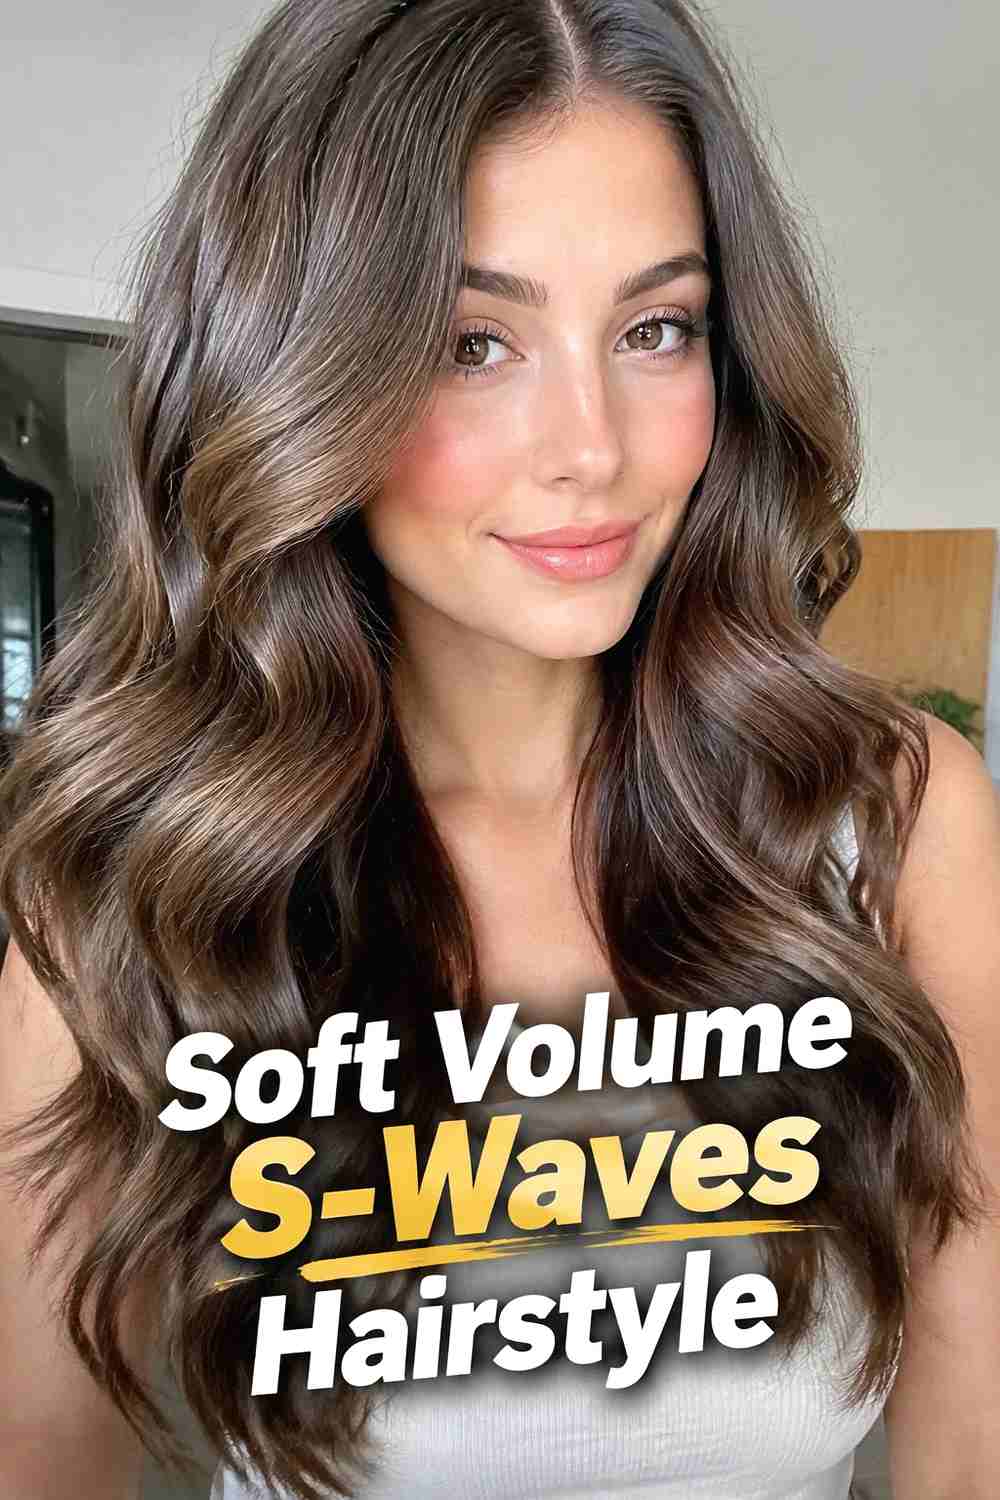
Soft-volume S-waves keep the polished shine of a sculpted set but add a little lift through the crown and sides. Instead of pressing every ridge close to the head, the bends are brushed outward for a fuller, more airy silhouette. This variation is useful for medium and long hair that benefits from movement without losing a smooth finish. Start with a volumizing mousse at the roots, then create uniform waves through the lengths. Once cooled, brush gently with a soft-bristle brush and use your hands to place the curves. Keep shine concentrated on the surface and ends so the extra volume still looks glossy, light, and natural rather than heavily coated.
Hair Type & Length
Medium-density and longer hair can carry the expanded silhouette particularly well. Very fine hair may benefit from root support, while very dense hair may need less brushing to prevent the shape from becoming wider than intended.
10. Sleek Face Framing S Waves Hairstyle
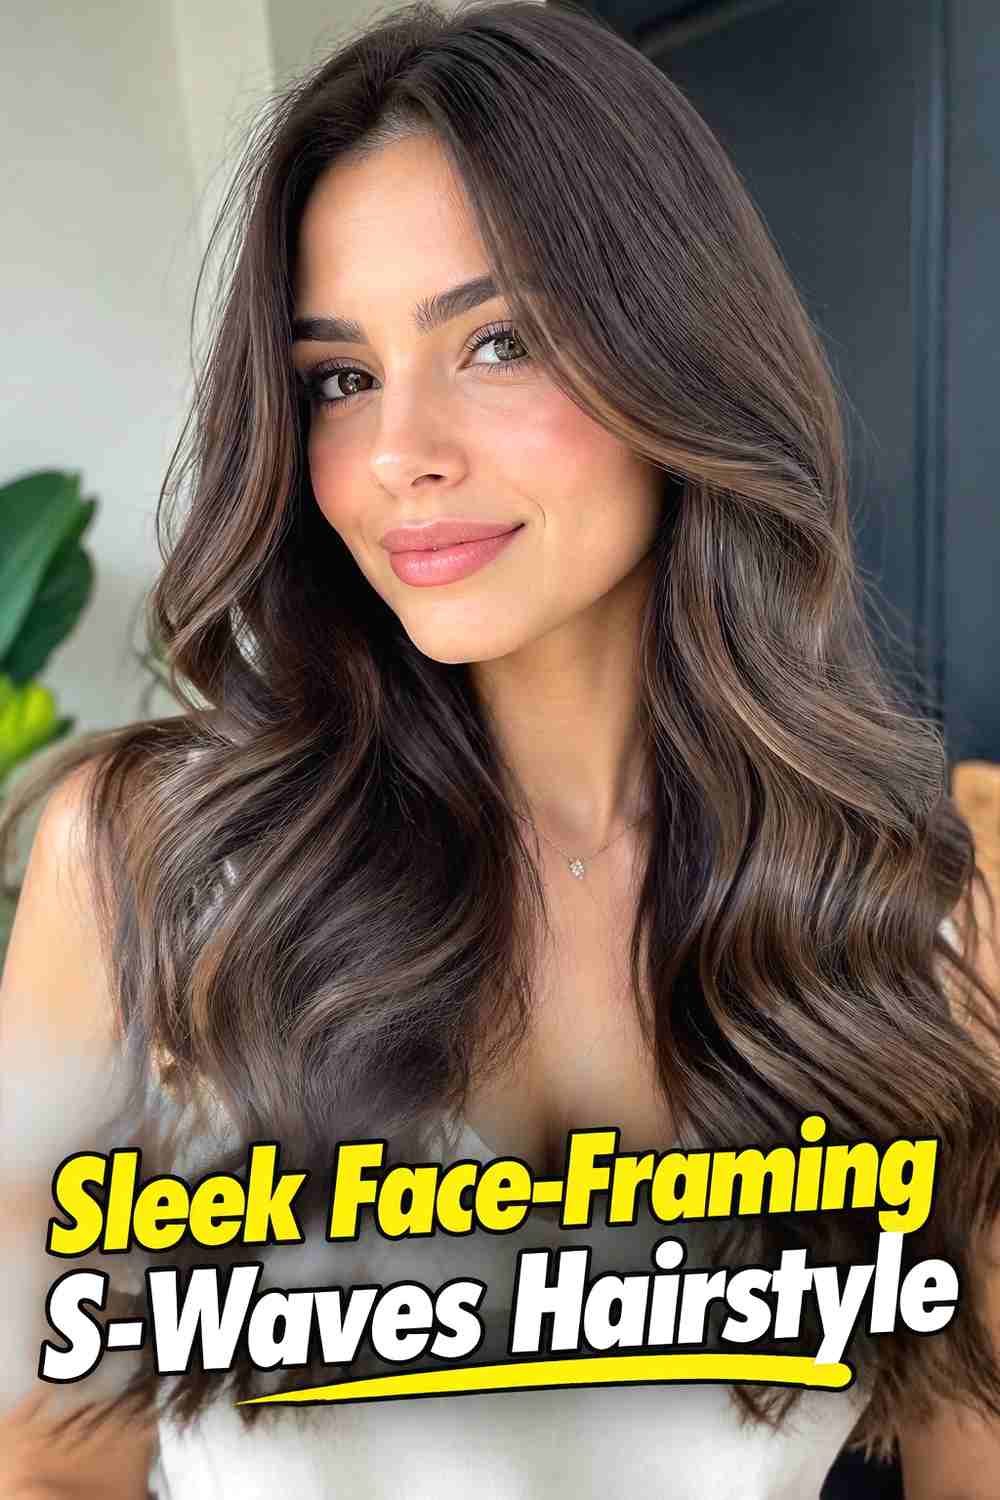
Face-framing S-waves put the strongest bends around the eyes, cheekbones, and jawline while keeping the rest of the hair sleek and controlled. The result feels polished without requiring a heavily waved finish from roots to ends. This is a versatile choice for a lob or longer cut, especially when the front layers are long enough to form a visible curve. Use a flat iron or large barrel to direct the first bend away from the face, then reverse the next bend to create the S-shape. Brush only enough to soften tool marks. A small amount of serum on the front pieces helps the reflective contour stand out.
Styling Notes
Decide where you want the most visible ridge before using heat. Starting the first curve near the cheek gives a different effect from starting near the temple, so placement matters as much as wave size.
11. Polished Ends S Waves Hairstyle
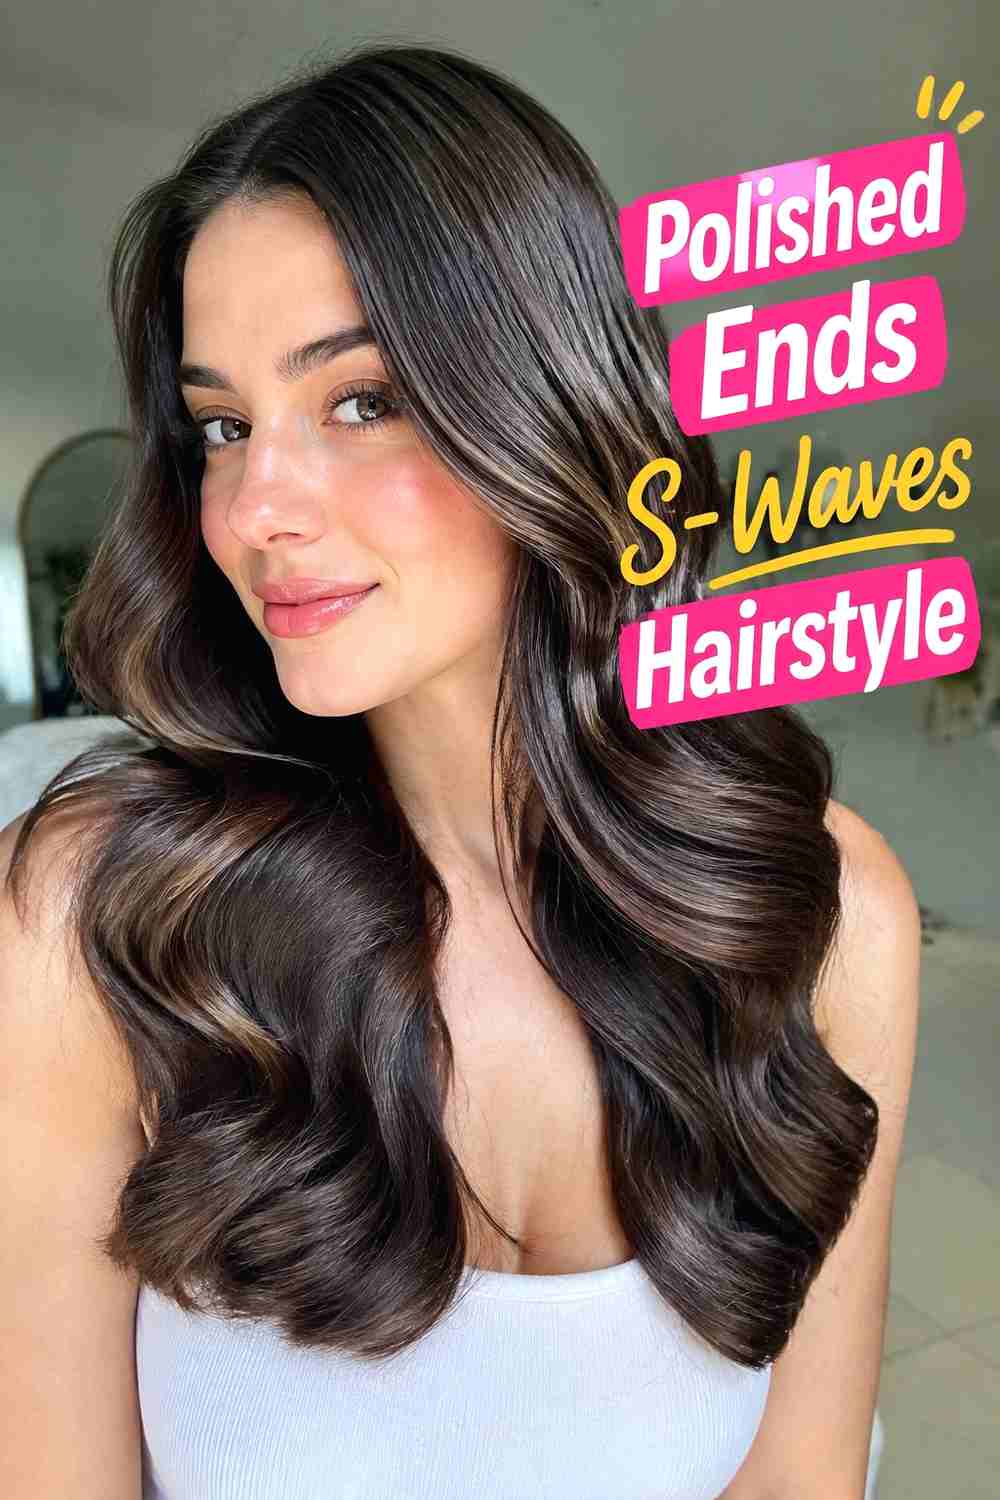
This variation keeps the upper half of the hair smooth and relatively straight, then introduces polished S-waves toward the lower lengths for a clean, refined finish. It is especially flattering on long layers or blunt medium-length cuts because the ends gain movement without making the whole style feel overly styled. The wave pattern can be broad and loose, with the final bend directing the ends inward or slightly away from the face. Concentrate heat styling below the cheek or shoulder level, depending on length. Finish with a lightweight shine spray and comb through gently. Keeping the top sleek makes the shaped ends look deliberate and helps the shine read clearly.
Wear & Maintenance
Because the roots remain relatively untouched, this version is easier to refresh than a fully sculpted set. Re-form only the lower bends that have relaxed and avoid repeatedly applying heat to sections that still hold their shape.
12. Red Carpet High Shine S Waves Hairstyle
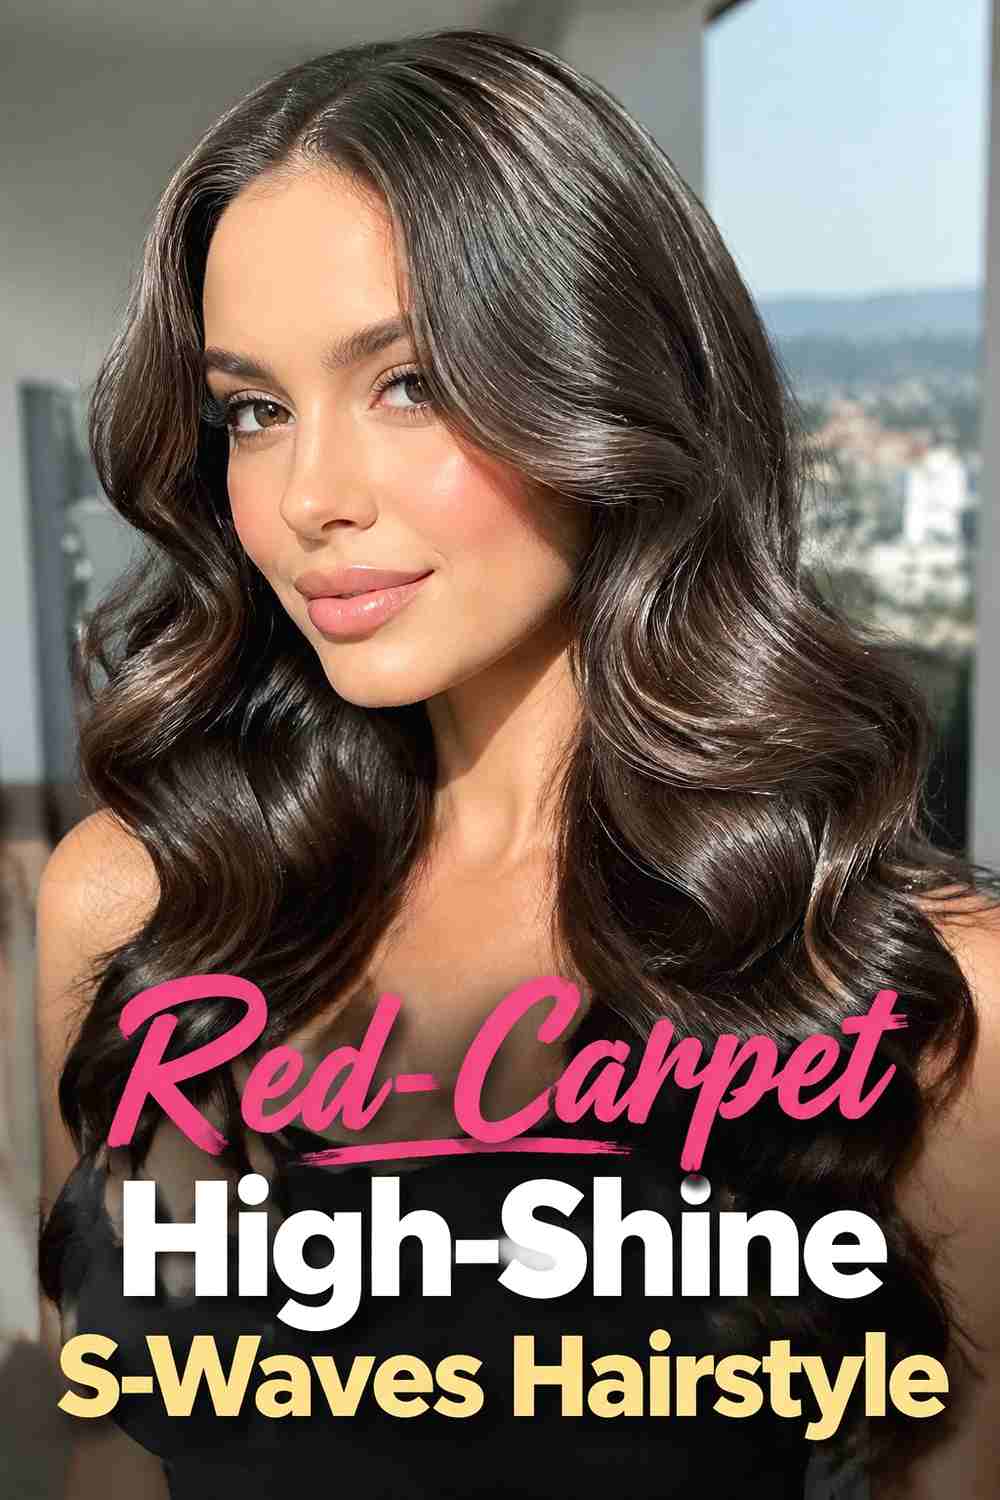
Red-carpet S-waves combine dramatic polish, controlled volume, and deep reflective ridges for a finish that photographs beautifully. The style usually includes a defined part, smooth crown, and uninterrupted wave pattern through the lengths, with enough softness to move naturally. Medium to long hair provides the easiest canvas, although extensions can add length or density when professionally blended. Build the set in consistent sections, let it cool completely, then brush the curls together until the wave pattern appears. Refine individual ridges with clips or your fingers and use flexible hold rather than hard lacquer. The goal is luxurious structure with visible strand detail, natural movement, and high shine.
Best For
This is the most event-focused option in the collection and suits occasions where the hairstyle needs to look polished from multiple angles. Allow extra styling time for cooling, brushing, ridge placement, and final refinement.
How to Choose the Right Look
Start with your length. Bob and lob cuts naturally suit compact, sculpted waves, while long hair gives you room for wider curves and more flowing movement. If you want the easiest everyday interpretation, concentrate the wave pattern around the face or ends rather than setting the entire head. Next, consider texture and density. Fine hair may need lightweight mousse or flexible hold before styling, while dense hair can benefit from smaller sections and controlled brushing. Naturally curly or coily hair can also be styled into polished S-waves when desired, but the preparation and smoothing method will depend on the starting texture and preferred amount of heat. For maximum shine, avoid simply adding more product. Smooth preparation, consistent heat styling, clean wave placement, and a small amount of serum or shine spray generally create a more believable reflective finish. Choose Old Hollywood or red-carpet waves for stronger glamour, wet-root waves for a sharper editorial mood, and soft-volume or polished-end waves for a more relaxed finish.
Final Thoughts
High-shine S-waves can shift from sleek and minimal to full vintage glamour simply by changing the part, wave depth, volume, and finish. Pick the version that works with your current length and styling routine, then focus on smooth preparation and consistent bends rather than excessive product. The best result should look glossy and intentional while still showing natural strands and movement.
FAQs
1. Can S-waves work on short hair?
Yes. Chin-length bobs and lobs can hold beautiful S-waves, but larger, broader bends usually work better than tight curls because they preserve the haircut’s shape.
2. How do you make S-waves look shiny without making hair greasy?
Start with smooth, well-prepared hair and apply serum or shine spray sparingly to the mid-lengths and surface. Concentrating too much oil at the roots can make a polished finish look heavy.
3. What styling tools work best for S-waves?
A large-barrel curling iron, curling wand, or flat iron can all work. The most important factor is creating bends in a consistent direction and allowing them to cool before brushing them together.
4. How can I help S-waves hold longer?
Use lightweight styling support before heat, let each section cool completely, and finish with flexible-hold spray. Avoid repeatedly brushing or touching the waves after their final shape has been established.
5. Can naturally curly or coily hair be styled into high-shine S-waves?
Yes. Curly and coily textures can be shaped into S-waves, though achieving a very smooth sculpted finish may involve stretching or smoothing the hair first. Choose a method that suits your texture and preferred heat routine. Save your favorite high-shine S-waves and explore more hairstyle inspiration whenever you’re ready for your next polished look.