13 Messy Nape Knot Hairstyle Ideas
Softly undone and gathered low at the neck, these messy nape knots combine effortless texture with secure, wearable structure for beautifully relaxed updos.
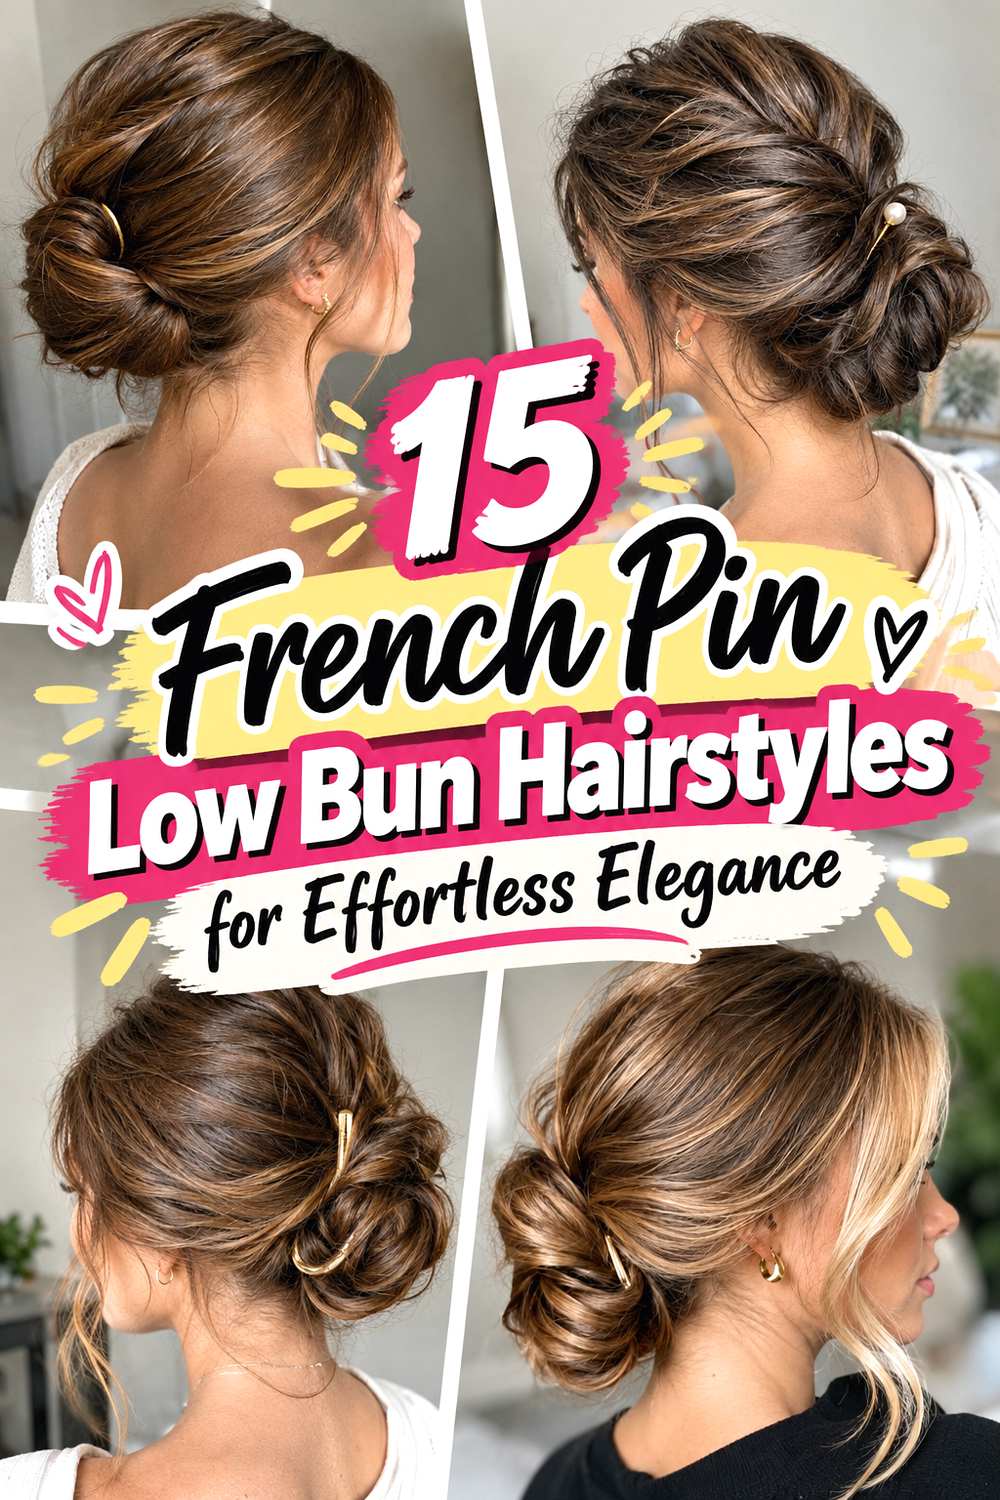
A messy nape knot sits close to the base of the neck, where twists, loops, and pinned sections create a compact low updo. Unlike a polished bun, the surface is intentionally softer, with visible texture, gentle volume, and a few controlled flyaways or loose pieces that keep the style from feeling rigid.
The most believable versions still need realistic construction: the knot should connect naturally to the gathered hair, pins should support the hidden structure, and loosened sections should look intentional rather than unstable. As you compare these ideas, consider your length, natural texture, layering, crown volume, desired hold, and whether you want a casual or event-ready finish.
Quick List
- Classic Messy Nape Knot Hairstyle
- Soft Twisted Messy Nape Knot Hairstyle
- Loose Side Part Messy Nape Knot Hairstyle
- Center Part Messy Nape Knot Hairstyle
- Face Framing Messy Nape Knot Hairstyle
- Wavy Messy Nape Knot Hairstyle
- Curly Texture Messy Nape Knot Hairstyle
- Braided Messy Nape Knot Hairstyle
- Low Loop Messy Nape Knot Hairstyle
- Textured Volume Messy Nape Knot Hairstyle
- Pearl Pin Messy Nape Knot Hairstyle
- Wedding Messy Nape Knot Hairstyle
- Minimalist Messy Nape Knot Hairstyle
1. Classic Messy Nape Knot Hairstyle
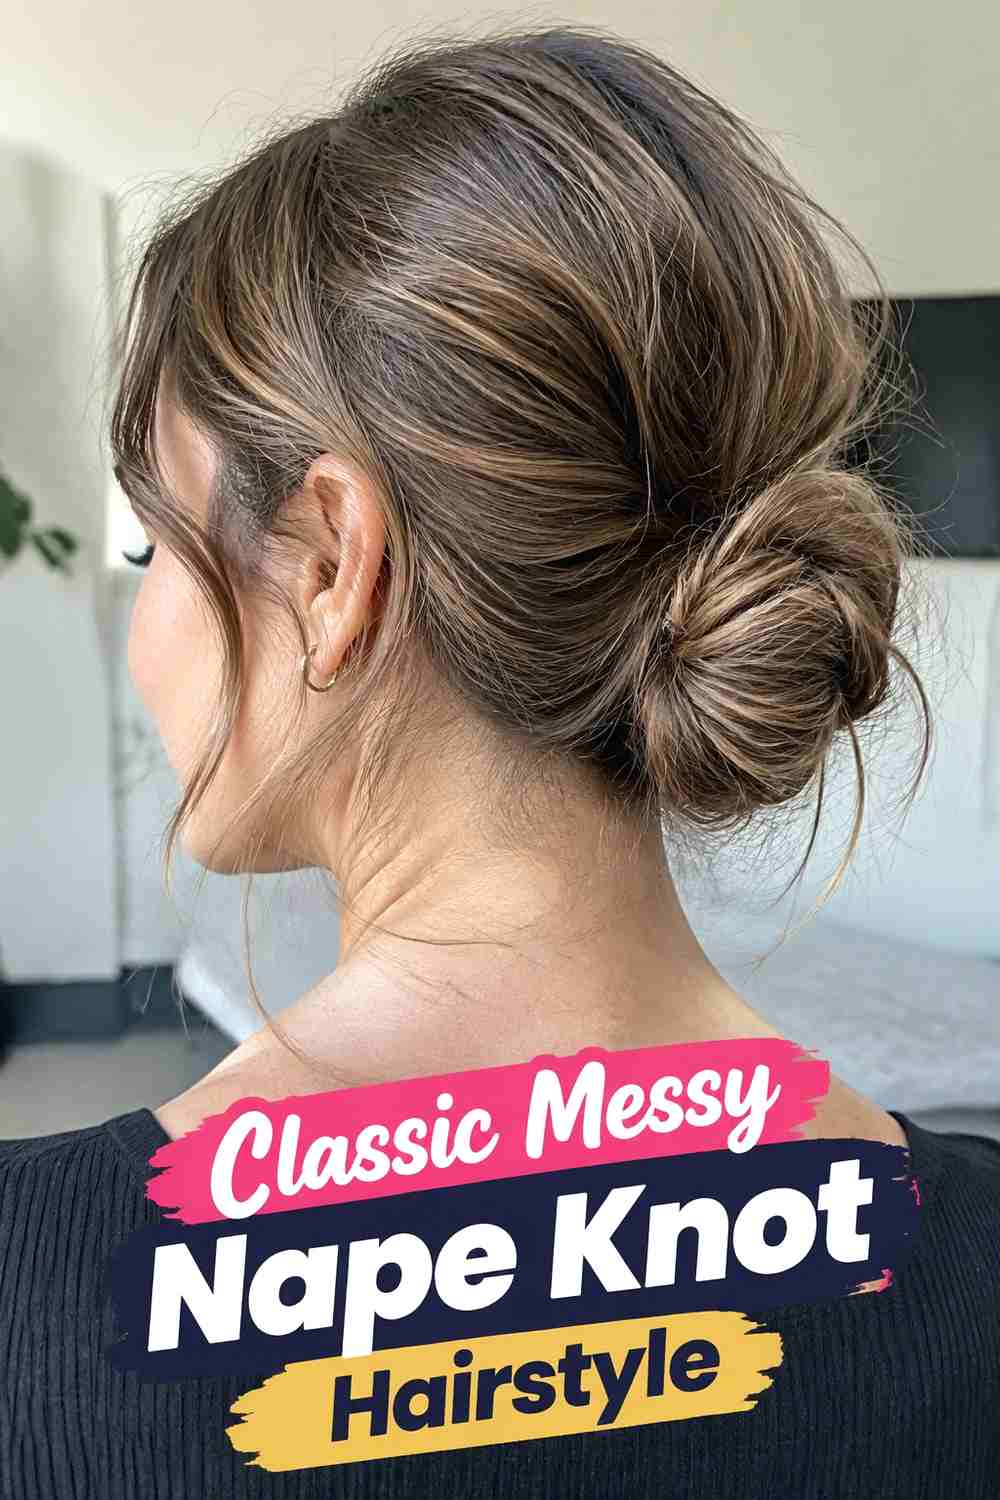
The classic messy nape knot keeps the shape simple: hair is gathered low, twisted loosely, and pinned into a compact knot just above the neckline. The crown stays softly lifted rather than slick, while a few wispy strands around the temples keep the finish relaxed. Medium to long hair works best because there is enough length to fold and tuck securely without creating an oversized bun. Start with a low ponytail or loosely gathered base, twist the length, then coil and pin it close to the head. Once secure, gently loosen selected sections around the crown and knot. The finished style should feel soft and imperfect while still staying comfortably anchored.
Styling Notes
Secure the knot before loosening the outer texture. Pulling sections apart too early can weaken the base and make the updo feel unstable.
2. Soft Twisted Messy Nape Knot Hairstyle
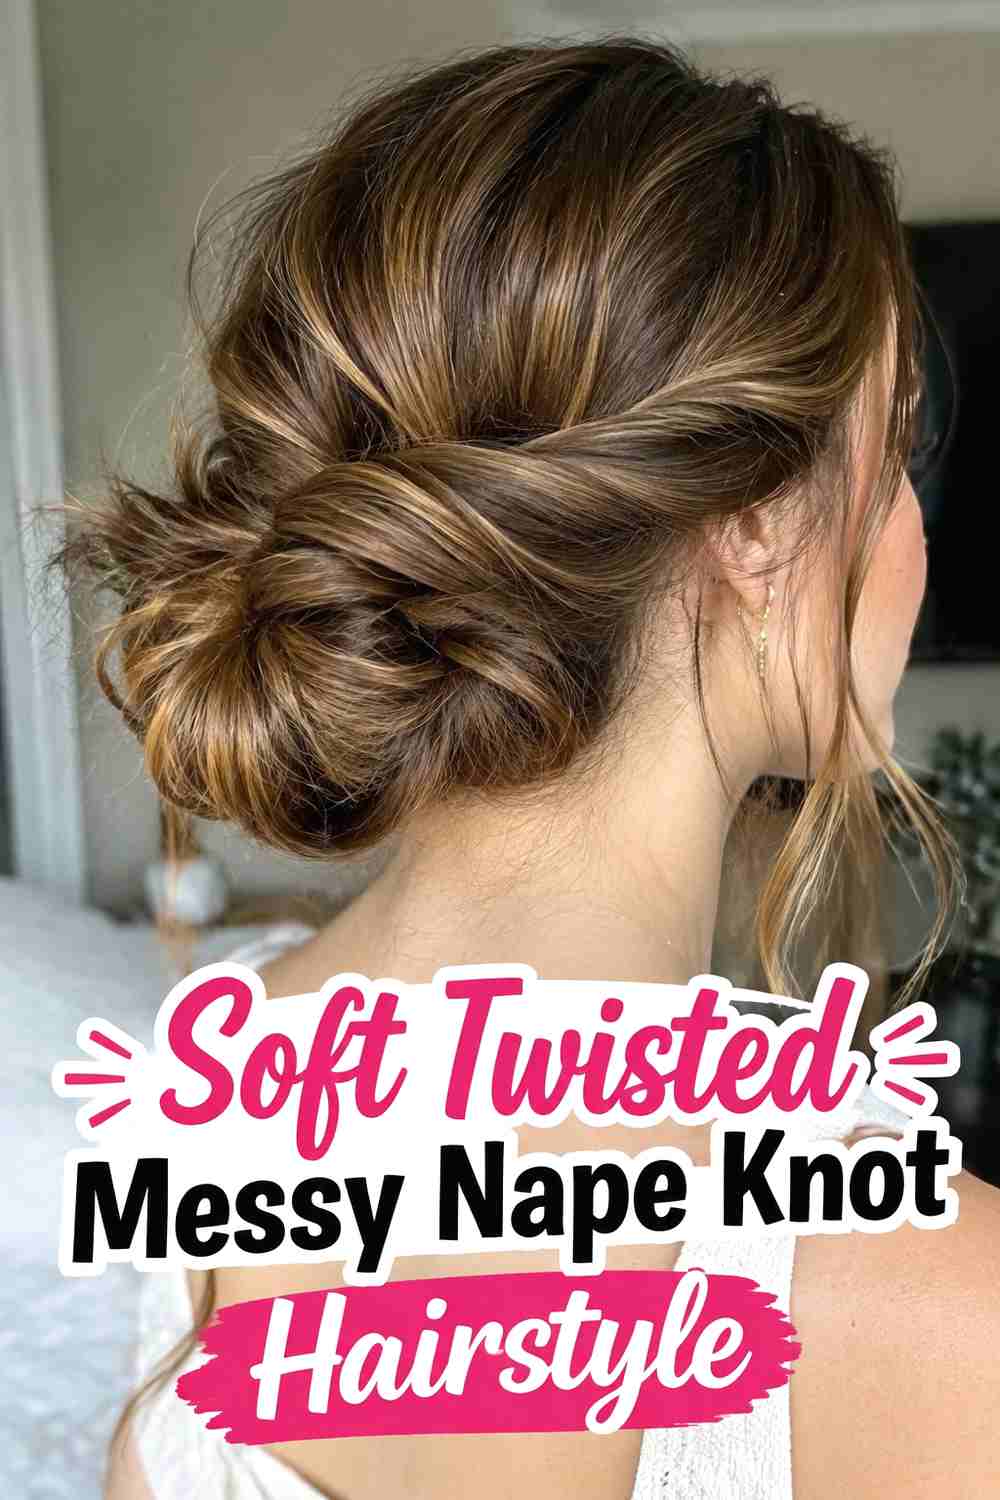
This version uses visible twists to give the low knot extra dimension. Instead of gathering all the hair at once, divide the lengths into two or more soft sections, twist them loosely, then overlap and pin them near the nape. The slight separation between twists creates a fuller, more detailed shape without making the updo look formal. It works especially well on layered or lightly wavy hair because natural texture helps the sections hold together. Keep the crown relaxed and allow a few short pieces to escape naturally. Once the twists are pinned securely, use your fingertips to widen small areas and soften the overall silhouette without pulling the structure apart.
Why It Works
Separate twists create texture throughout the knot, giving the updo visual depth even when the finished shape remains low and compact.
3. Loose Side Part Messy Nape Knot Hairstyle
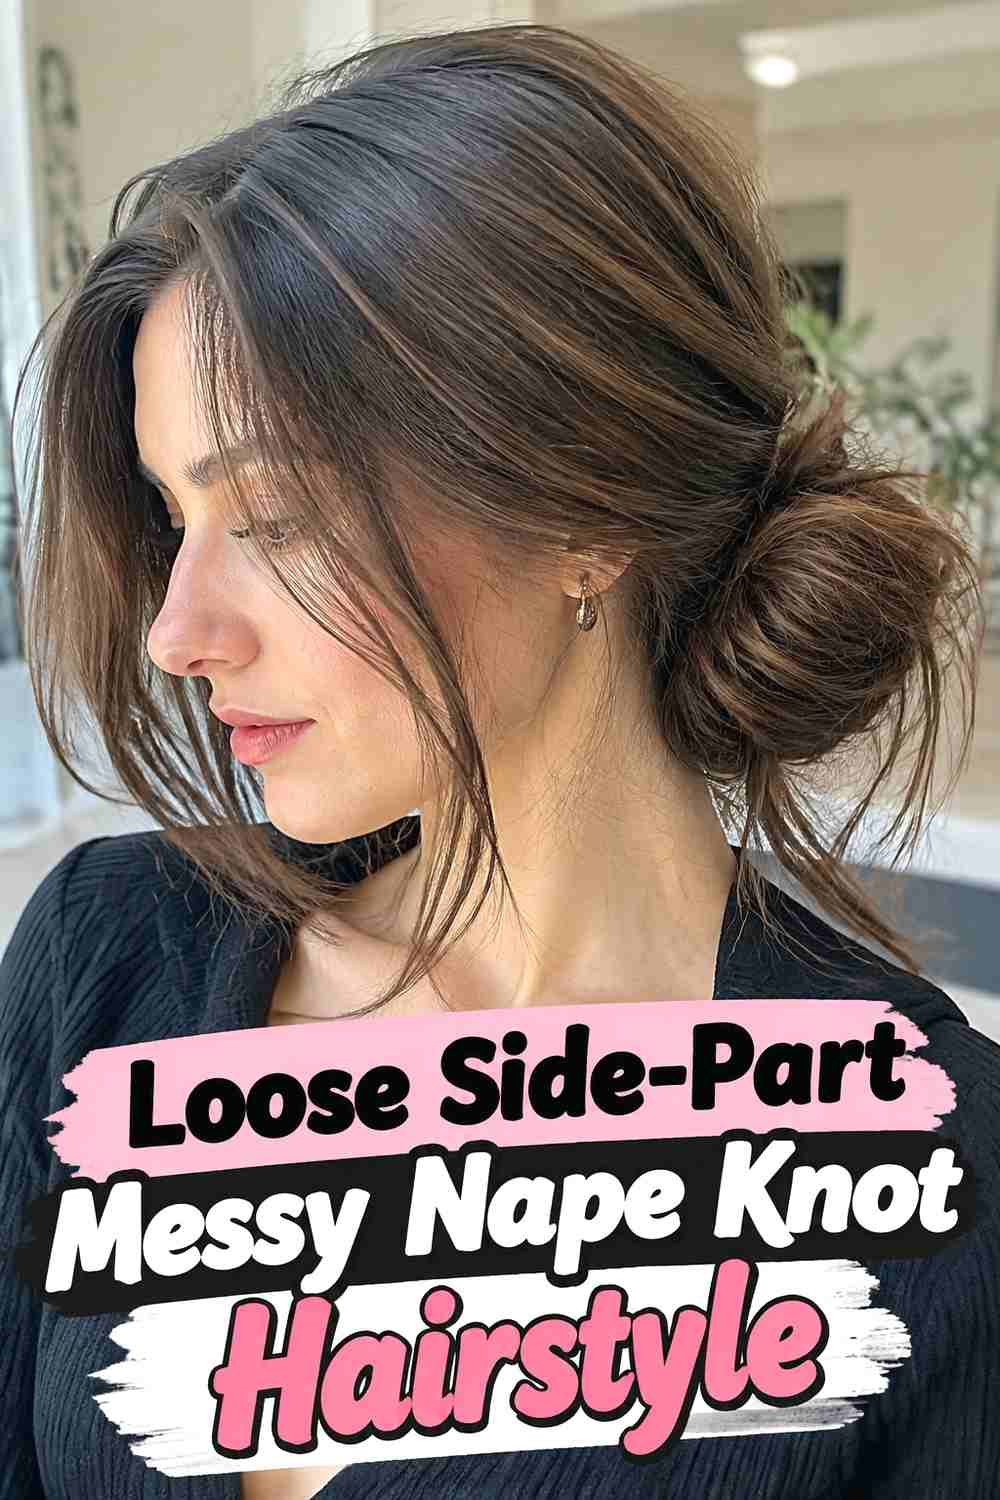
A loose side part adds gentle direction to the front while keeping the nape knot relaxed. The heavier side can sweep softly across the forehead or temple before blending into the gathered hair, while the opposite side stays lighter and more open. This works beautifully when you want a messy updo that still looks intentional from the front. Create the part first, leave a little volume around the crown, then gather the lengths loosely at the nape. Twist them into a small knot and secure with hidden pins. Pull out one or two fine face-framing pieces if desired, but avoid releasing too much hair around the sides or the low shape may lose definition.
Best For
This version suits dinners, casual events, or everyday styling when a center part feels too structured but a fully swept-back front feels too severe.
4. Center Part Messy Nape Knot Hairstyle
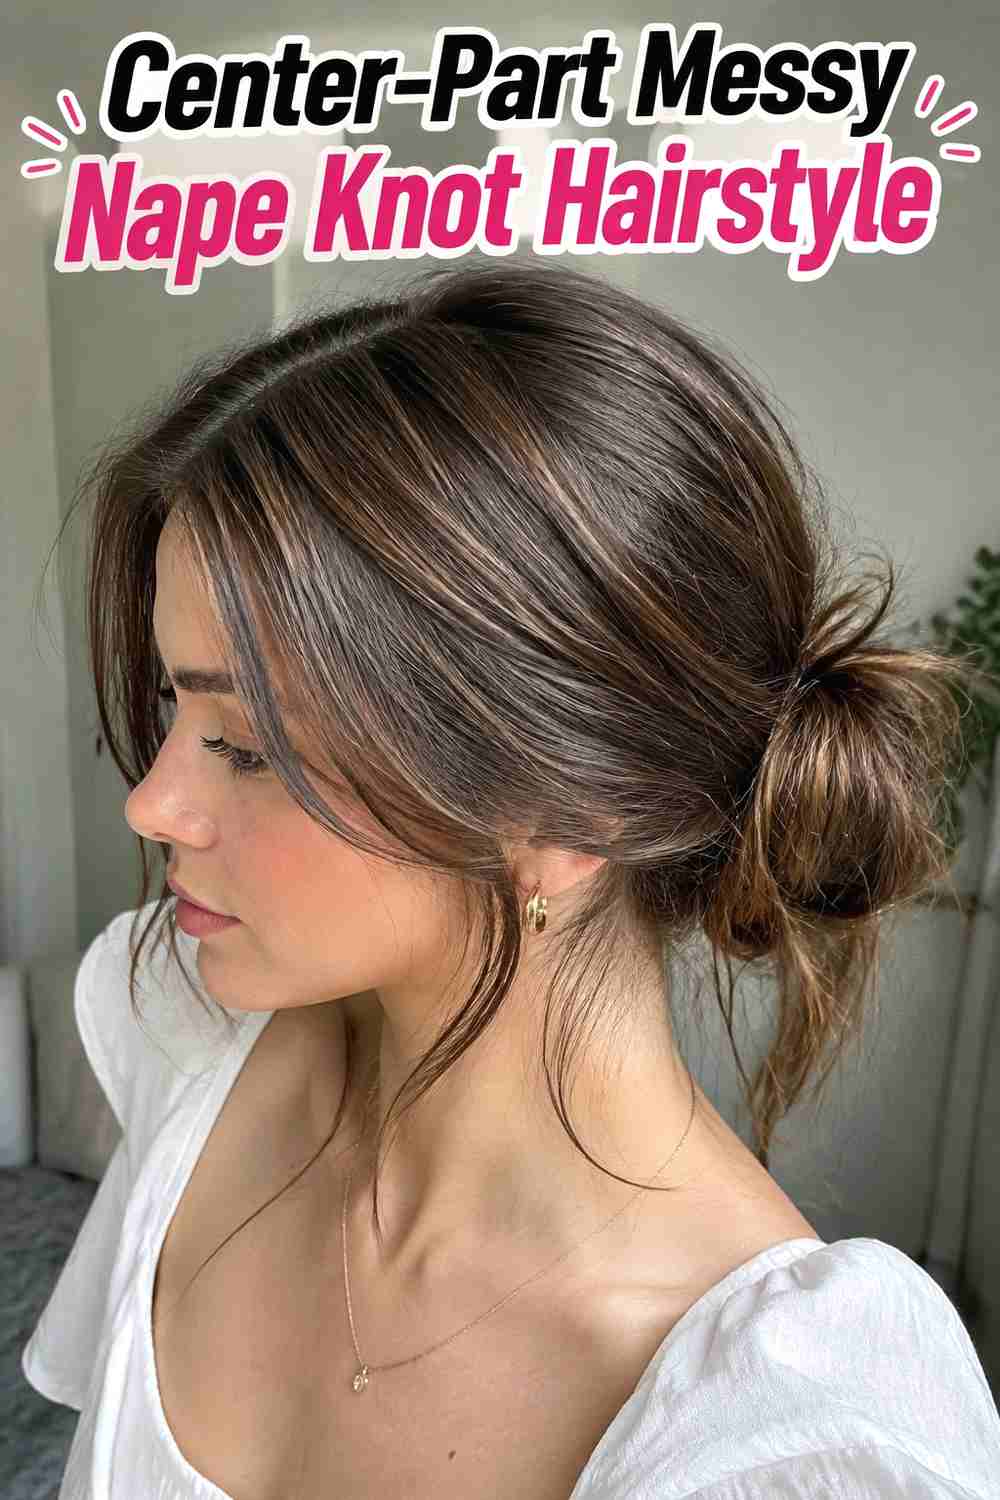
A center part gives the messy nape knot a balanced front while the relaxed texture prevents the style from looking overly precise. The hair can sit softly around both temples before meeting at the back in a loosely twisted knot. Long face-framing layers work especially well because they can remain partially free and blend naturally into the undone finish. Establish the part while the hair is smooth, then gather the rest with light tension rather than pulling tightly. Create the knot low at the neckline and pin from several directions for support. Gently loosen the crown afterward so the top retains softness. The result should feel symmetrical at the front but intentionally imperfect at the back.
Styling Notes
Keep the part crisp enough to remain visible, but avoid flattening the hair on either side. Slight fullness helps balance the soft texture of the knot.
5. Face Framing Messy Nape Knot Hairstyle
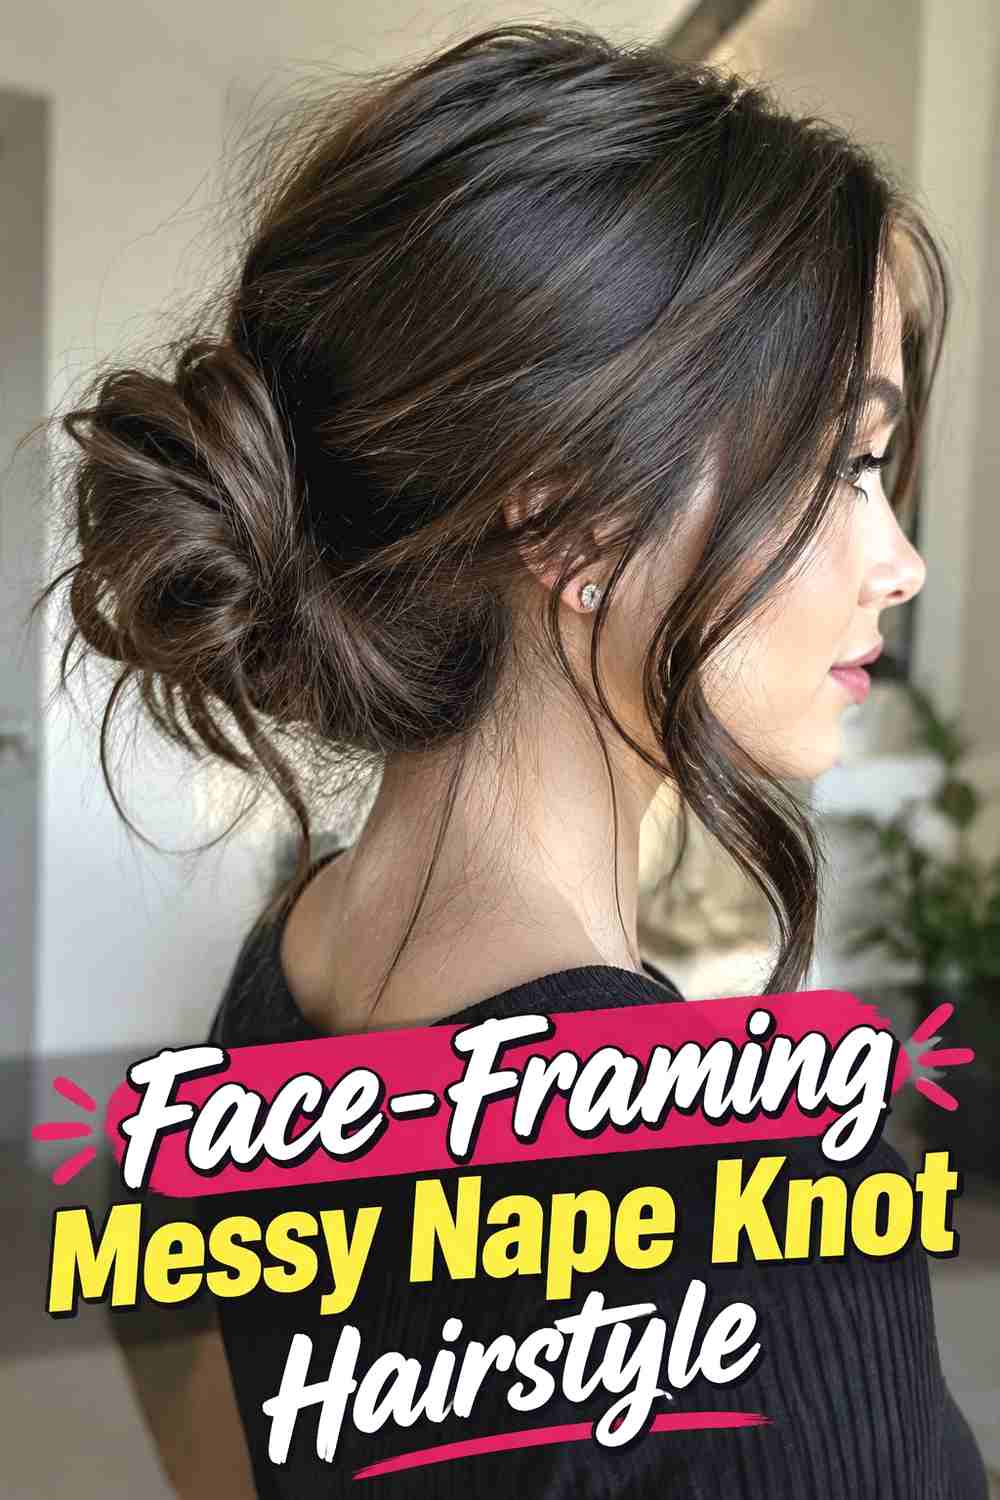
Face-framing pieces are the main feature of this soft nape knot. Before gathering the hair, leave out a few narrow sections near the temples or cheekbones, then build the knot low at the back with the remaining length. Those loose pieces can stay mostly straight, carry natural bends, or be softly curved away from the face. The knot itself should remain relaxed but secure, with visible texture rather than a perfectly smooth surface. This variation works especially well on layered cuts because shorter front pieces naturally fall free without needing to be pulled out afterward. Keep the face-framing strands lightweight so they soften the hairstyle without overwhelming the clean low silhouette.
Best For
Choose this look when you want an updo that feels romantic and approachable rather than slick or formal, especially with open necklines or statement earrings.
6. Wavy Messy Nape Knot Hairstyle
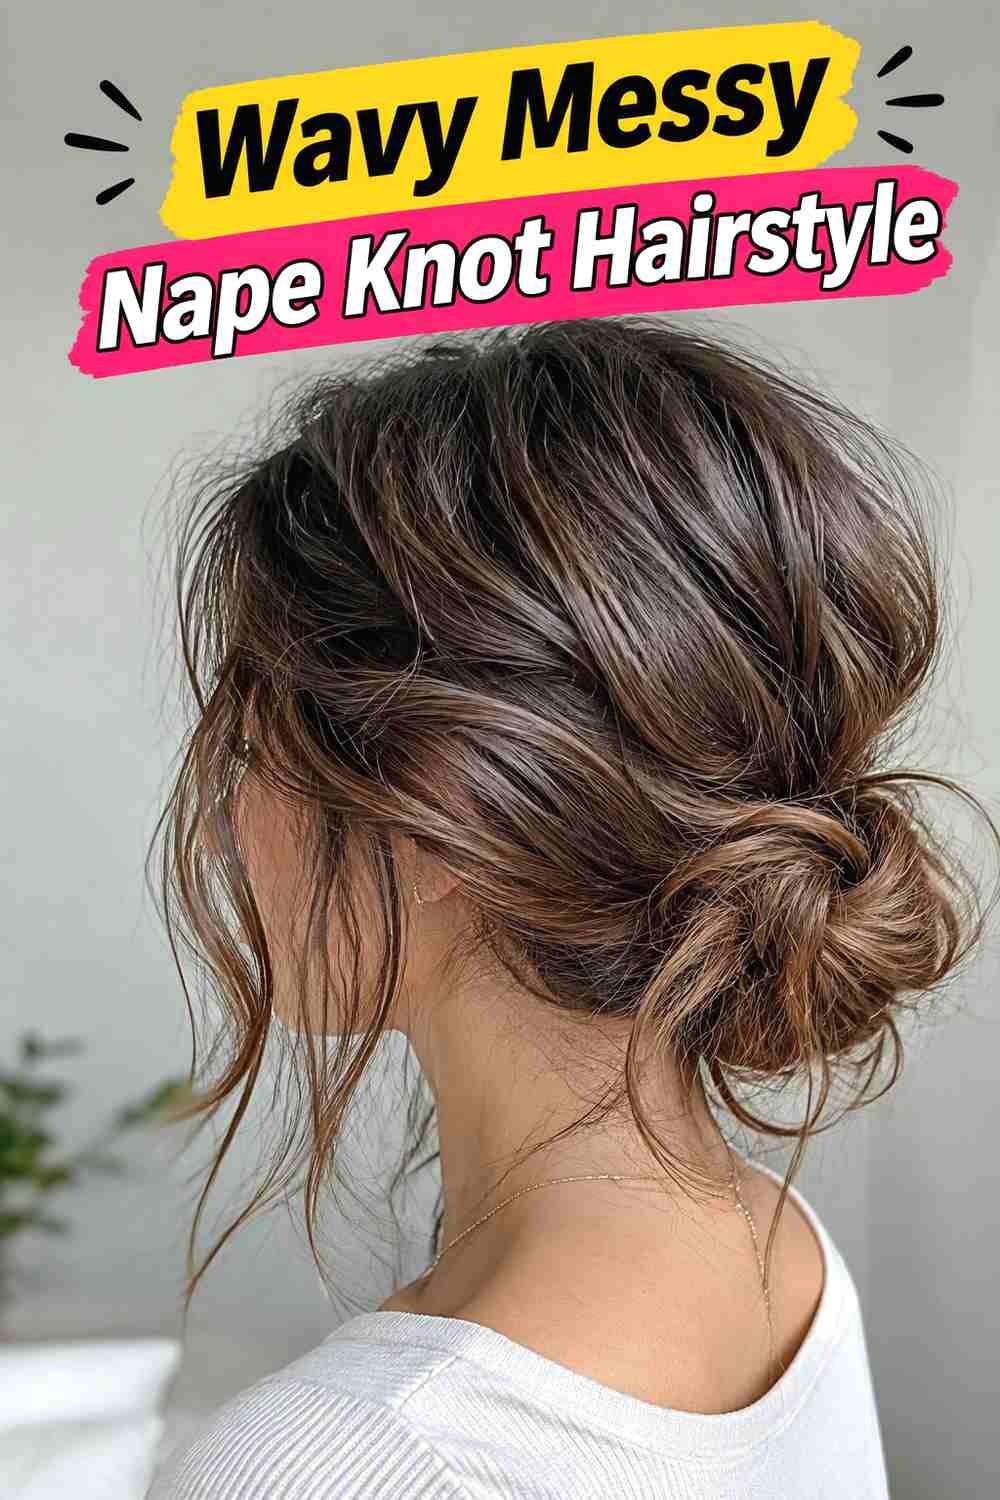
Pre-styled waves make a messy nape knot look fuller and more dimensional before the updo is even formed. Loose bends create natural ridges across the crown, sides, and knot, reducing the need for heavy teasing or texturizing products. Start by creating broad waves or working with naturally wavy hair, then gather the lengths gently so the pattern remains visible. Twist the hair loosely at the nape, fold it into a knot, and pin the structure securely. Once stable, pull small sections outward to highlight the wave texture. Avoid brushing everything smooth before pinning, since that would remove the softness that gives this version its relaxed, romantic character.
Hair Type & Length
Naturally wavy and medium-to-long hair works especially well, but straight hair can achieve the effect with loose pre-styling before the knot is built.
7. Curly Texture Messy Nape Knot Hairstyle
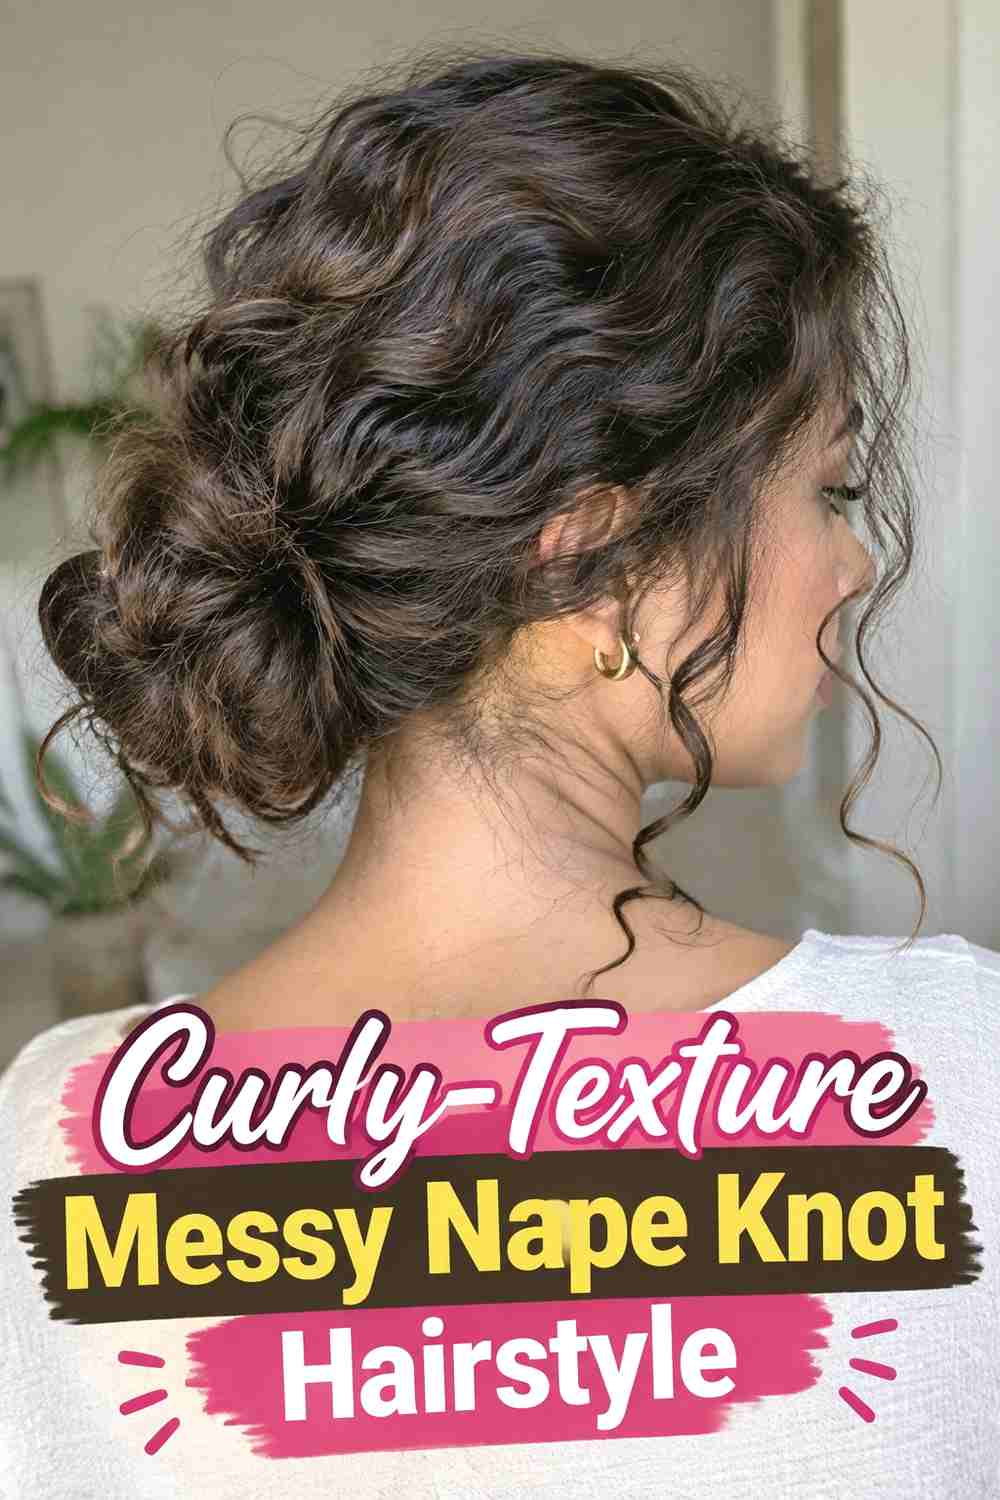
Curly texture brings natural volume and detail to a low nape knot, allowing individual curls and coils to remain visible throughout the updo. Instead of smoothing everything into a uniform surface, preserve some of the existing pattern while gathering the hair low. Fold or twist sections into the knot gradually, pinning each piece so the shape remains secure without compressing all the texture. A few curls around the hairline can stay free for softness if they fall naturally. This style can be adapted to different curl patterns and densities, so the final knot may look compact or fuller depending on the hair. The goal is controlled structure with visible natural texture, not forced smoothness.
Pro Tip
Work with the curl pattern instead of repeatedly brushing it out. Pinning sections individually can preserve definition while still building a secure low knot.
8. Braided Messy Nape Knot Hairstyle
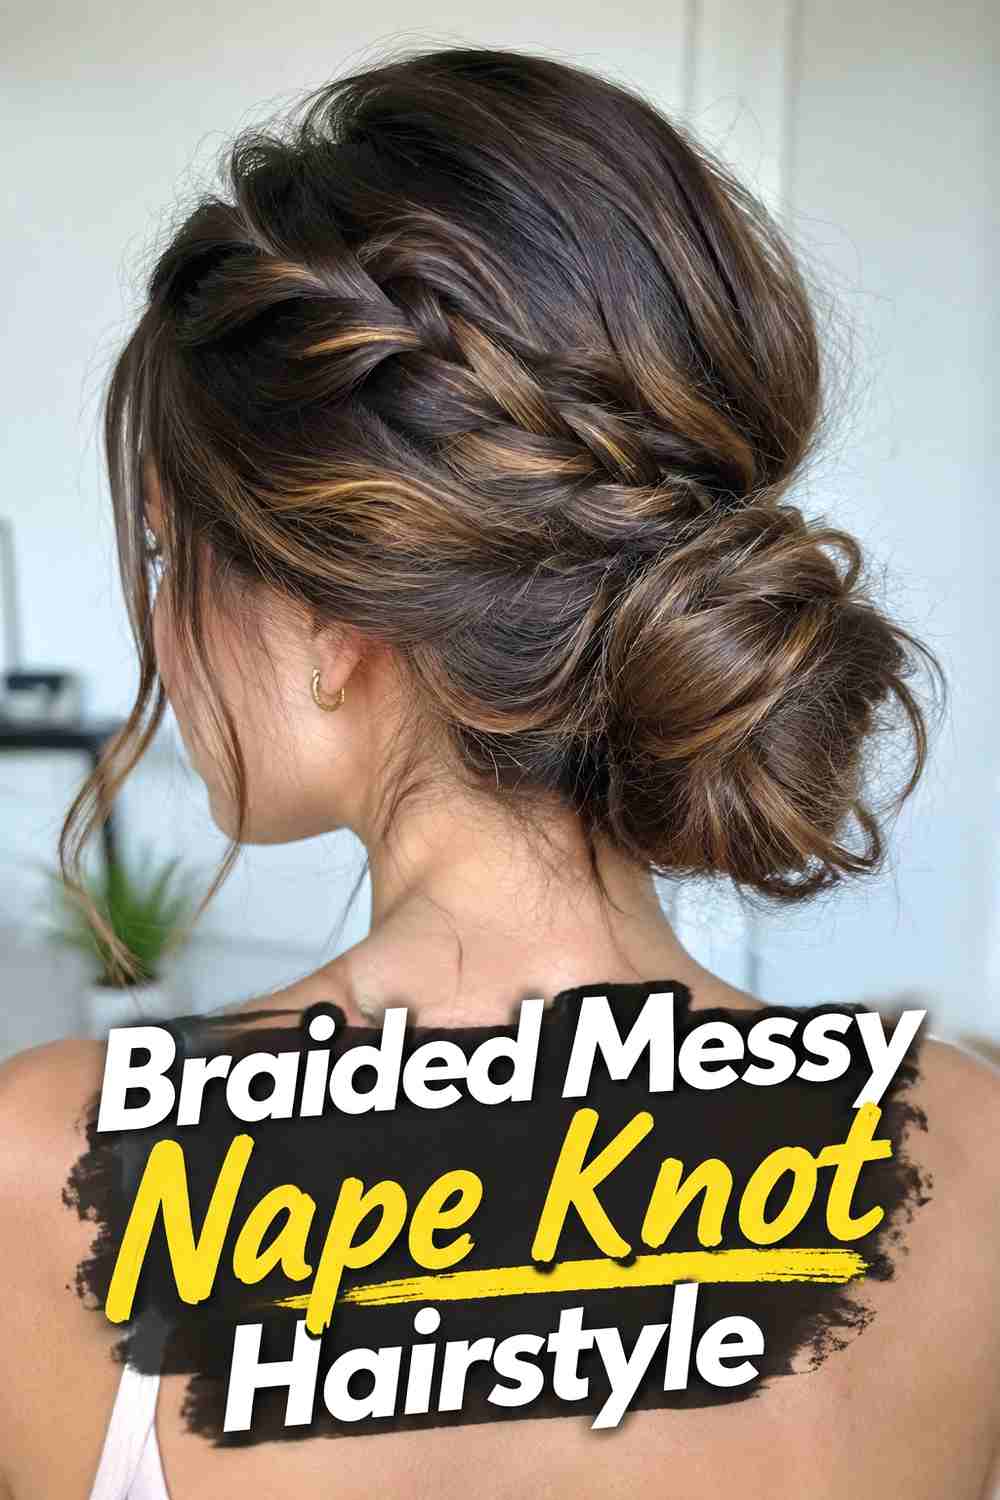
A braid adds structure to the messy nape knot while keeping the finished updo relaxed. Create a loose braid from a low ponytail or incorporate one braided section into the gathered hair, then wrap or fold it near the nape. Gently widening the braid before pinning can make the knot look fuller without requiring extra hair. Leave the crown softly textured and allow a few fine pieces around the face to remain free. The braided pattern should stay visible in parts of the knot instead of disappearing completely under the pins. This version works especially well on medium-long and long hair, where there is enough length for the braid to fold naturally into a compact shape.
Styling Notes
Secure the braid with a small elastic before wrapping it. This keeps the woven structure intact while you shape and pin the low knot.
9. Low Loop Messy Nape Knot Hairstyle
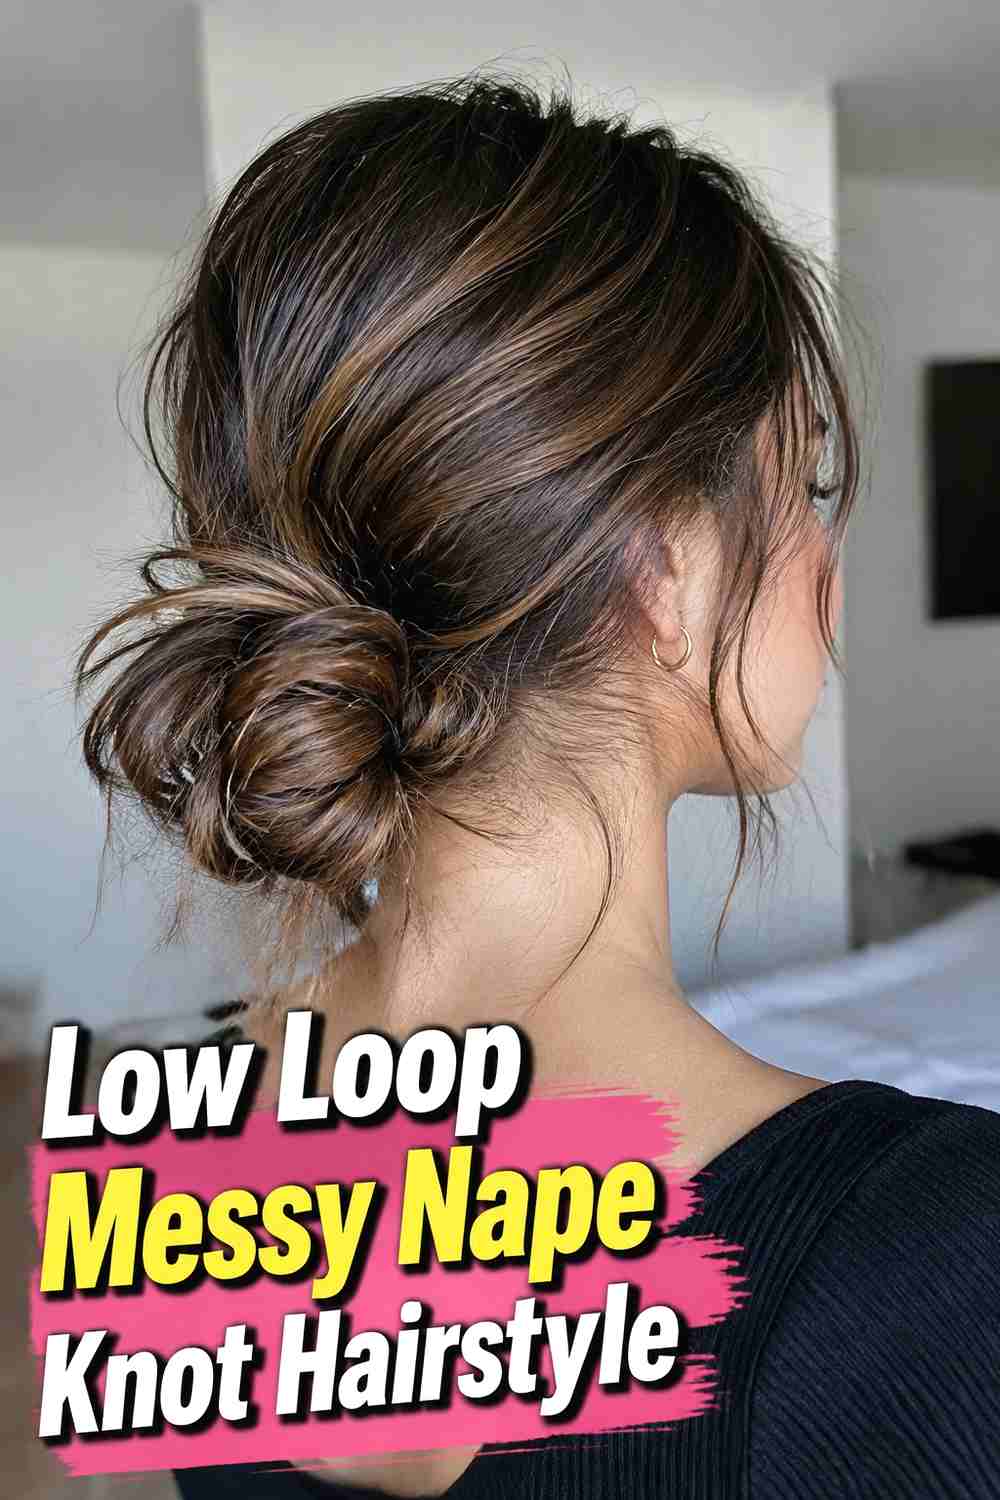
The low loop version creates a softer alternative to a tightly coiled knot. Hair is gathered near the nape, folded into a loop, and pinned so the ends tuck underneath or blend into the base. Leaving the loop slightly uneven gives it the relaxed character of a messy updo while keeping the overall silhouette clean. This style is especially practical for medium-length hair because it does not require enough length for multiple wraps around the base. Keep the crown softly lifted, smooth only obvious bumps, and pull a few small pieces loose after the structure is secured. The final loop should sit close to the neckline rather than projecting far away from the head.
Wear & Maintenance
Because the shape depends on a folded loop, place pins through both the loop and the base for better support instead of pinning only the loose outer edge.
10. Textured Volume Messy Nape Knot Hairstyle
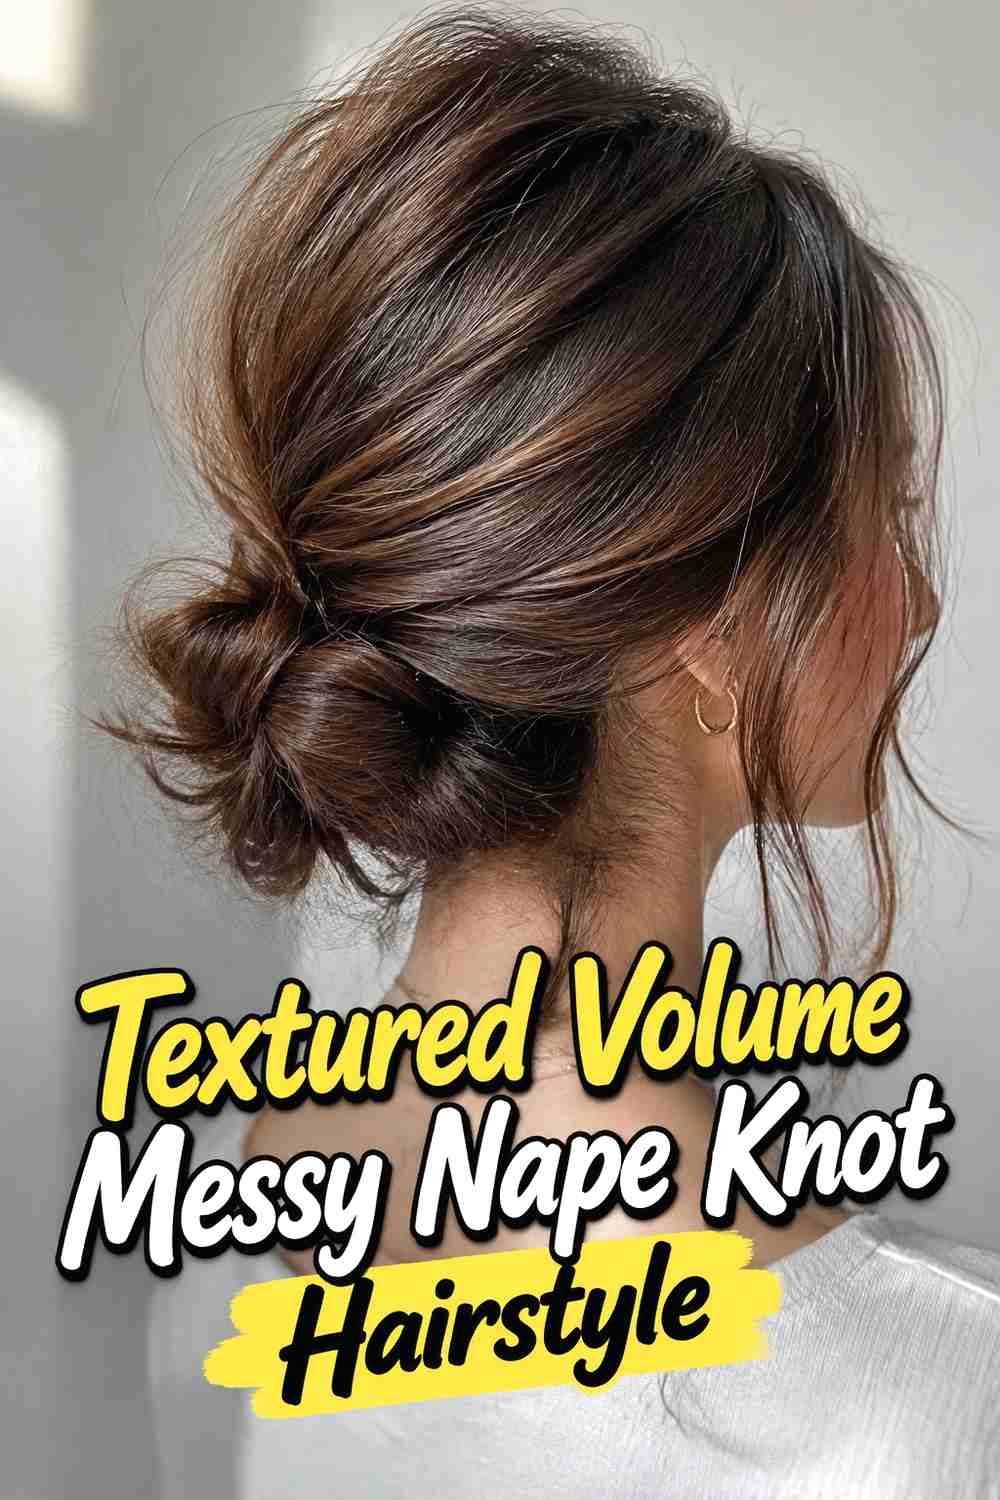
This variation adds extra fullness through the crown and knot while still keeping the updo low. Light texturizing product or gentle backcombing beneath the visible surface can create lift before the hair is gathered, while the lengths are folded into a broader nape knot. The key is to keep the volume airy rather than exaggerated. Smooth only the topmost layer so the texture underneath remains useful for grip, then build the knot with moderate tension and secure it from several angles. Once pinned, loosen a few areas around the crown and outer edge of the knot. The finished result should feel plush and relaxed without becoming oversized or unstable.
Hair Type & Length
Fine hair may benefit from lightweight texture spray, while naturally dense hair can often create this fuller silhouette without additional teasing.
11. Pearl Pin Messy Nape Knot Hairstyle
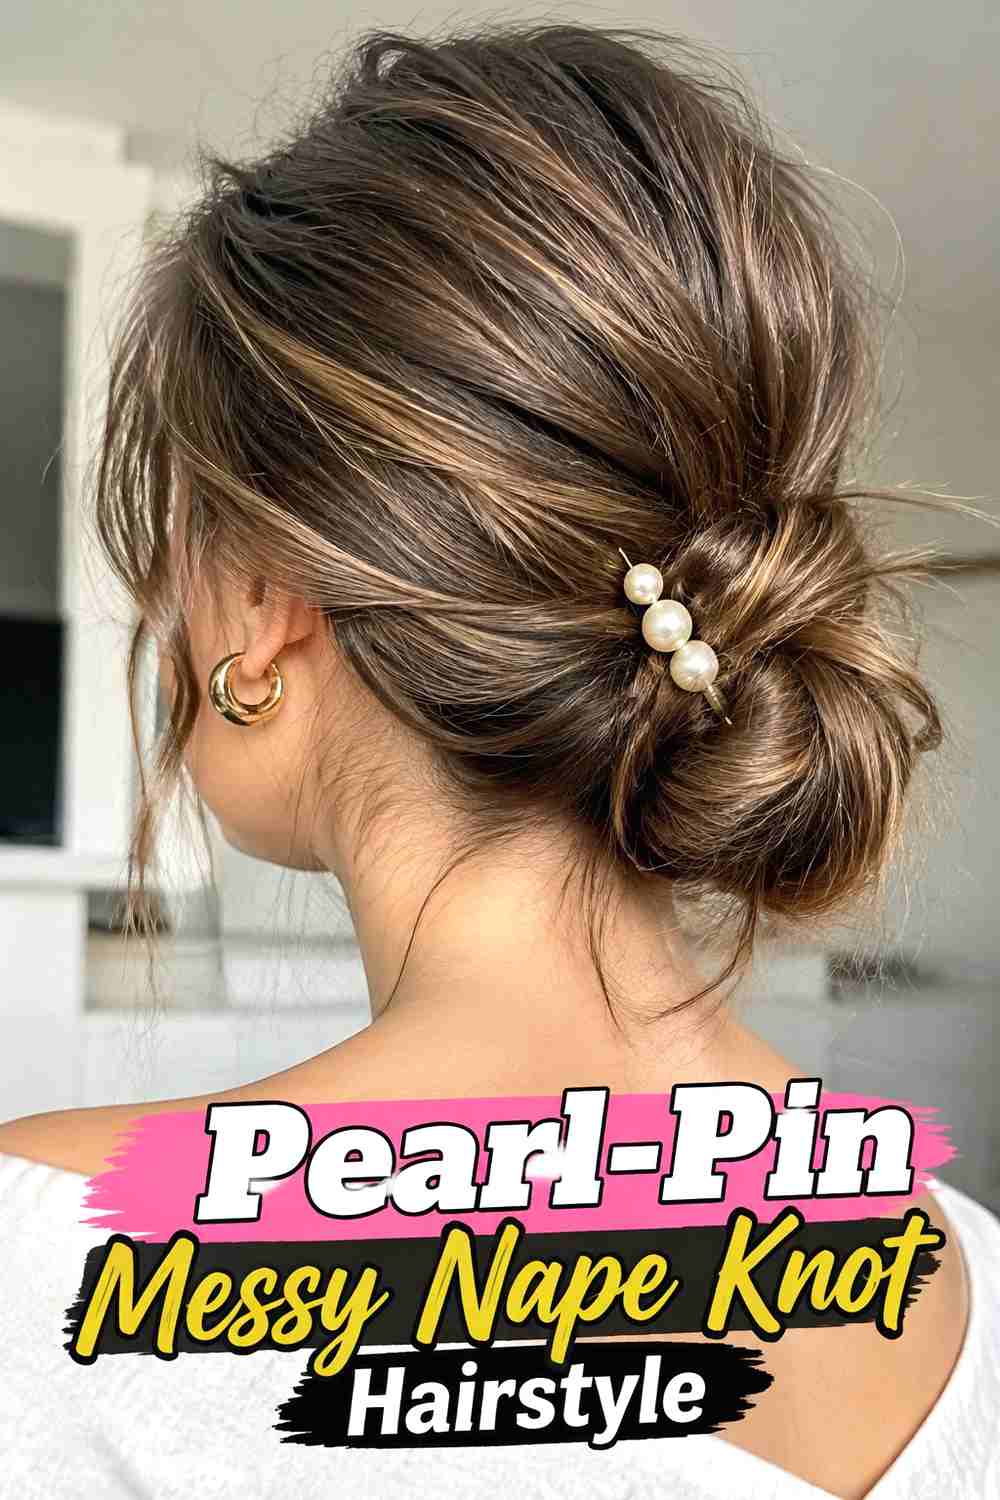
Pearl pins add a delicate decorative finish to a relaxed nape knot without changing its soft construction. Build the knot first using ordinary hidden pins, leaving the crown and sides slightly loose for texture. Once the updo is secure, place a few pearl-topped pins along one edge of the knot or scattered lightly through the textured sections. Keeping the accessories minimal allows the undone shape to remain visible instead of turning into a heavily embellished updo. This works particularly well for engagement parties, dinners, bridesmaids, or other occasions where you want a subtle dressy detail. The pearls should decorate the hairstyle rather than function as the primary support.
Pro Tip
Use structural pins first and decorative pearl pins last. That way, the accessories can be adjusted without loosening the knot itself.
12. Wedding Messy Nape Knot Hairstyle
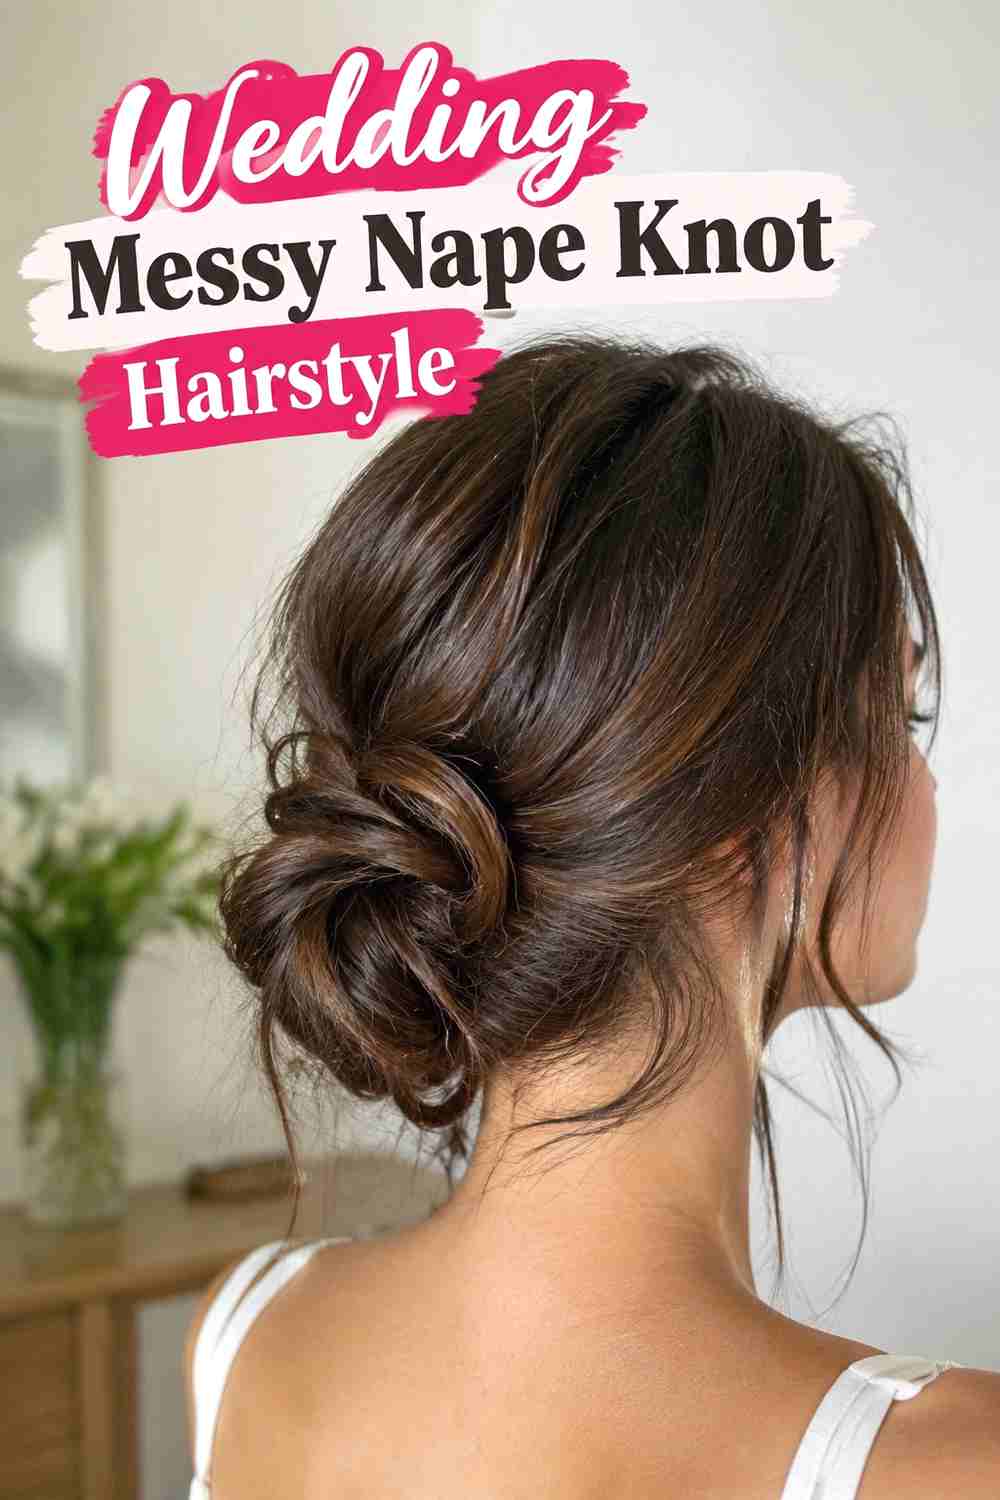
A wedding messy nape knot combines soft texture with enough internal structure to stay secure through photos, movement, and a long event. The knot sits low at the neckline, while gentle crown volume and loose face-framing pieces keep the finish romantic. Small pearls, floral pins, or a comb can be added if they complement the veil or jewelry, but the updo should remain structurally sound without them. Create the knot with hidden pins from several directions and test the shape from the front, sides, and back. Flexible hairspray can control flyaways while preserving movement. Comfort is especially important, so avoid relying on excessive tension to keep the style in place.
Wear & Maintenance
Test veil or accessory placement in advance. The knot should remain secure even if a decorative piece is removed or repositioned later in the day.
13. Minimalist Messy Nape Knot Hairstyle
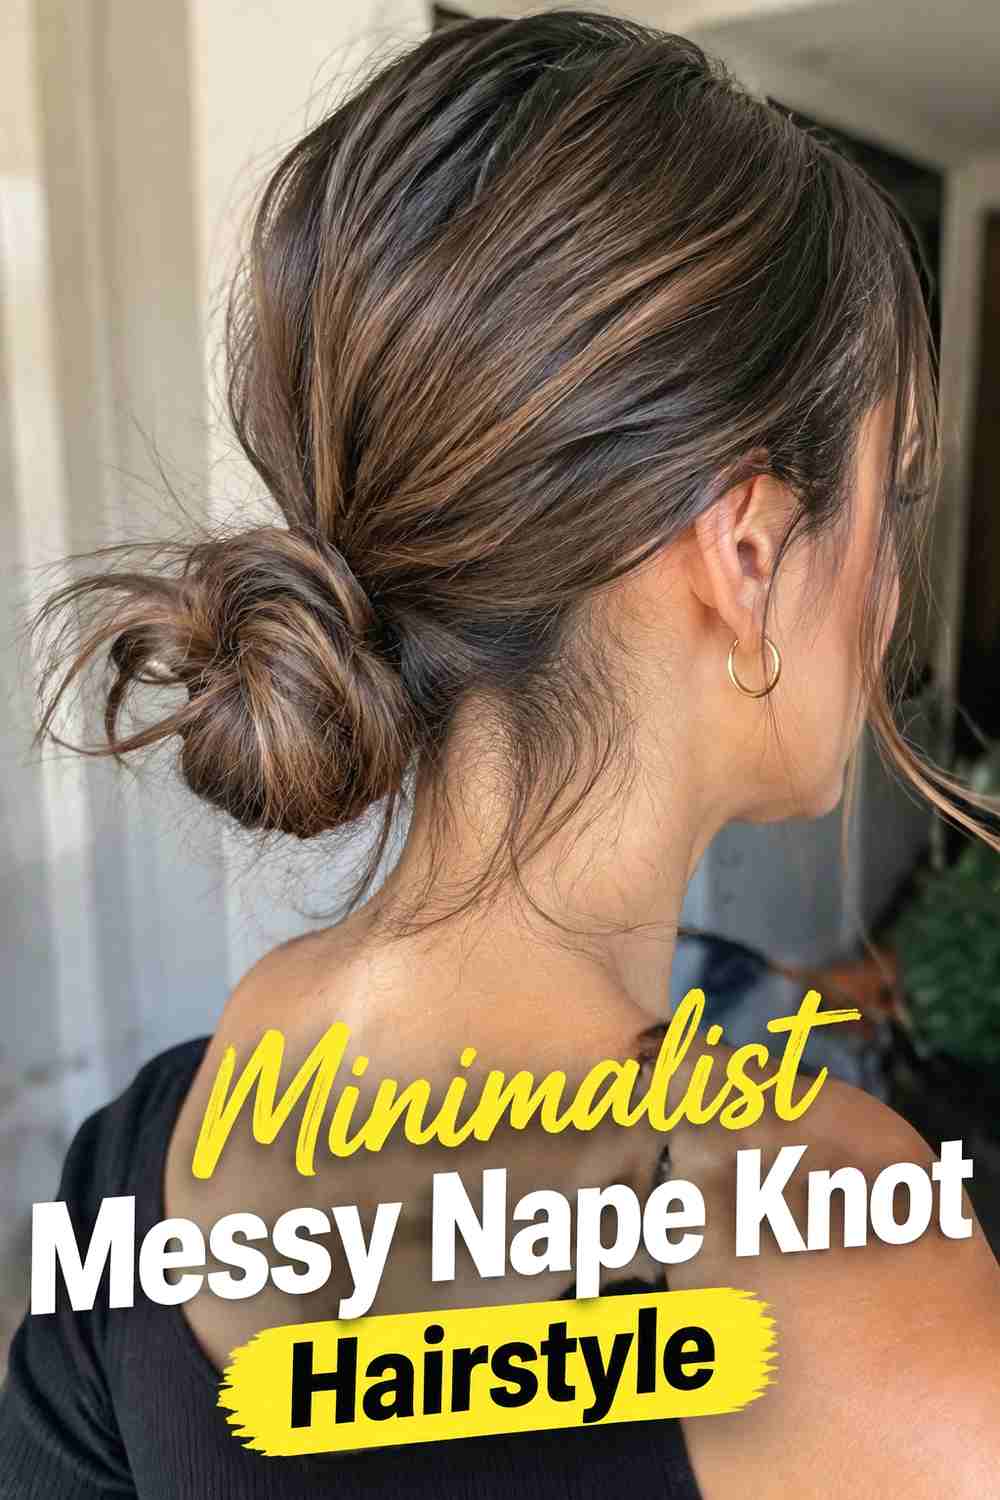
The minimalist version keeps the messy nape knot simple and understated, using a clean low shape with just enough looseness to avoid looking overly polished. There are no decorative accessories, dramatic tendrils, or exaggerated crown volume. Instead, a few natural flyaways, soft bends, and slightly uneven folds provide the texture. Gather the hair with light tension, twist or fold it into a compact knot at the nape, then hide the pins underneath the outer sections. Loosen only a few small areas after the style is secure. This approach works well for workdays, casual dinners, or anyone who wants an easy low updo that still feels intentionally styled.
Why It Works
Removing extra details keeps attention on the soft knot shape and natural texture, making the hairstyle versatile enough for both everyday wear and understated events.
How to Choose the Right Look
Start with your natural texture and length. Medium-length hair works especially well with low loops and compact knots, while longer hair gives you more flexibility for twists, braids, and fuller constructions. Naturally wavy or curly hair can provide built-in texture, while very smooth hair may benefit from a light texturizing product before pinning.
Next, decide how undone you want the finish to feel. Center-part and minimalist knots stay relatively controlled, while face-framing, wavy, and textured-volume versions create more visible softness. If you are styling for a wedding or formal event, secure the inner structure first and add decorative pins only afterward.
Comfort also matters. A messy nape knot should stay low and secure without relying on excessive pulling. Hidden pins, light tension, and strategic sectioning usually create a more wearable result than simply making the base tighter.
Final Thoughts
Messy nape knots work because they balance relaxed texture with a secure low foundation. Keep the knot close to the neckline, loosen only selected sections, and let a little natural texture remain visible. Whether you prefer a braid, soft waves, face-framing pieces, or a minimalist finish, the strongest version should look intentionally undone rather than unfinished.
FAQs
1. How do I keep a messy nape knot from falling out?
Build a secure low base first, then use hidden pins from several directions. Create the messy effect only after the knot is firmly anchored.
2. Can medium-length hair work for a messy nape knot?
Yes. Medium hair is especially suitable for low loops and compact knots because it can fold neatly without creating excessive bulk.
3. Should I curl my hair before making a messy nape knot?
You do not have to, but loose waves can add grip, volume, and visible texture. Naturally wavy or curly hair may already have enough movement.
4. How many face-framing pieces should I leave out?
Usually a few narrow sections are enough. Too many loose pieces can make the hairstyle lose its low, defined silhouette.
5. Can a messy nape knot work for a wedding?
Yes. A securely pinned nape knot can be adapted for weddings with soft face framing, subtle volume, pearl pins, flowers, or other understated accessories.
Save your favorite messy nape knot hairstyle ideas, share them with someone planning a soft updo, and explore more relaxed hairstyle inspiration for your next look.